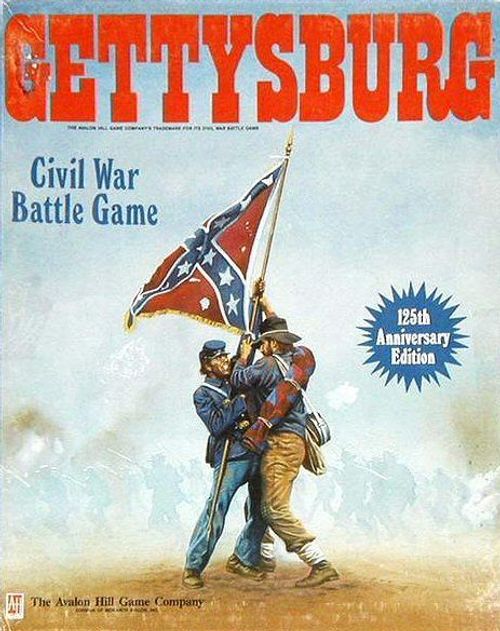
Gettysburg (125th Anniversary Edition)
Gettysburg (125th Anniversary Edition) Rulebook
Table of Contents
Table of Contents
Preface
This is a revamp of the Avalon Hill Game Company 1988 game Gettysburg (Smithsonian edition). All text and graphics is new in this edition. The rules have been rewritten to hopefully be more accessible than the original rules. For example, the optional rules have been integrated into the main text so that it is easier to find them at the relevant time in the flow of the game.
The original game used large, rectangular counters for ground units and smaller, square counters headquarters, which is hard to deal with in a Print'n'Play version. Hence, all counters have the same size. The original game used graphical representations for units, while this version uses standard NATO symbology.
Some illustrations have been added to hopefully clear up the rules, and inconsistencies in the original rules have been resolved, including common questions. For example, in the original rules, road movement was not explicitly prohibited into enemy ZOC, but the examples suggested as much. Hence, in these rules road movement is not possible in enemy ZOC, in line with other games in the American History series. The rules are cross-referenced. As rules have been restructured, including the optional rules, the text is more verbose and with some repetitions here and there, but the relevant information should be easier to find. Also corrections made in the official errata has been Incorporated.
§1 Components
The game consists of
- A board with a map of the area around Gettysburg.
- 28 and 56 counters representing the Confederate and Union units, respectively, involved in the conflict.
- Some markers for game dynamics.
- Three sets of each two Orders of Battle (OOB) charts. These record the starting units and later reinforcements.
- These rules.
In addition, each player should have a 10-sided dice to resolve die-rolls.
§1.1 The board
The map on the board shows the conflict area around Gettysburg. Superimposed on the map are hexagon fields (hexes) meant to capture movement of troops. Each hex is labelled with grid coordinates.
Each hex has an associated terrain, as summarised in Table 1. Natural terrain are
- Clear — Mostly open terrain (fields, small forests).
- Woods — Dense vegetation, such as forests. Manoeuvring in these areas is limited, and therefore provides some cover for defending troops.
- Hill — Higher ground which provide a defensive position.
- Rocky hill — Regions hills or higher elevation, with a rocky ground, and thus limited manoeuvrability. These provide defensive advantages. All rules that apply to hills also applies to rocky hills, though the converse is not true. Thus, a rocky hill is a hill with additional limitations. Artillery units (regular and horse artillery) may never enter a hex which is both a rocky hill and a woods hex (hexes E6 and F5). This applies to regular movement as well as advances or retreats (§11, 13.6, and 13.3).
- Stream — Another natural feature of the map are the stream hex-sides. These represent waterways which limits manoeuvrability.
A hex is considered woods, hill, or a rocky hill if it contains any amount of that terrain. A hex can contain more than one type of terrain. See also Figure 1.
Non-natural features of the map are
- Gettysburg — The only major settlement on the map. This is dense buildings and roads.
- Roads — Roads that connect hexes. Moving along a road provides easier and faster travel. When a unit moves along a road (see §1.1 Table 1 footnotes), the reduced cost applies.
- Railroad — Rail road tracks, even if not entirely finished, provides an open area of the units to move easier through.
Table 1: Movement and combat effects chart. Defence (DF) combat factor modifiers depend on hex occupied by defender. Modifiers are per unit and are cumulative. The '+' MF costs are cumulative and are in addition to other costs.
| Terrain | MF | DF | LOS |
|---|---|---|---|
| Clear | 1 | – | Yes |
| Woods | +1 | +1‡ | No |
| Hill | – | +2‡ | No |
| Rocky hill | +1† | +2‡ | No |
| Stream | +1** | – | – |
| Road | ½¶ | – | – |
| Railroad | ½¶ |
An entry of "–" for MF or LOS means MF cost and LOS is as for other terrain in the hex. ** Stream crossing costs +1 MF in addition to other terrain cost. A road crossing nullifies this additional cost. † An artillery unit may not enter a hex that has both hill and woods terrain. ‡ Defensive bonus only applies if no attacker attacks from a connected hex of the same terrain. ¶ The reduced cost of moving along a road, railway, or through Gettysburg, only applies if the hex-side moved over is perforated by the road, railroad, or leads to Gettysburg. Other terrain is ignored.
§1.2 The units
The vast majority of counters in the game represent various regular units, such as infantry, artillery, and cavalry. Other units represent headquarters, or commanding officers and their support personnel. Finally, a set of counters are used for book-keeping.
The counters are colour coded according to the nationality or command structure to which they belong. The colours are
- Confederate States of America units of the Army of North Virginia, or simply "Confederate" units.
- United States of America units of the Army of the Potomac, or shorter "Union" units.
§1.2.1 Regular units
The elements printed on a regular unit are:
- Type — The kind of unit. The unit types are:
- Infantry. Soldiers mainly travelling by foot and equipped with small arms.
- Artillery. Batteries of heavy guns, or cannons, firing shells.
- Horse artillery. Like regular artillery but drawn and transported by horse drag, and thus with higher mobility.
- Cavalry. Soldiers on horseback with small arms, including swords and sometimes lances.
- Set up — This field specifies the hex on the map the unit appears, either initially or later as reinforcements.
- CF (Combat factor) — This represents the unit's fighting ability, both offensive and defensive. The higher the number the stronger the unit. Generally, there is a difference in CF between the full- and reduced-strength sides of a unit.
- MF (Movement factor) — The manoeuvrability of the unit. The larger the number, the more mobility of the unit.
- Range — Artillery units only, and only if the optional Indirect fire rule is in use. The number of hexes an artillery unit can fire, not including the source hex, but including the target hex. Thus a range of 2 means at 1 intermediate hex.
- Echelon — The size of the unit. There are three different sizes of units in the game, representing the hierarchy of the factions.
- Division. Some units, in particular specialised units, are organised as smaller formations and thus come under the command of a division headquarter.
The 'At Start' units start the game on the board, while other units become available at later stages.
Note that the Confederate faction has no "At-start" units, nor any reinforcements on the first turn of the 1st July. This means that the Union faction will be the only faction taking any actions in that first turn.
For the scenarios that start on the 2nd of July or later, there are also slots for previously eliminated units. This is important when calculating the final victory points of the game.
The face-up side of a unit shows its full-strength status, while the face-down side shows its reduced-strength status. The reduced-strength side is identified by a lighter background. A unit is flipped to its reduced-strength side as a consequence of a step loss (§13.4). If a unit is blank on its back-side then it is considered eliminated and is removed from the map.
In the following the rules often use a short hand notation to designate units. This short hand consist of the command of the unit (us for Union units and cs Confederate units), the unit commander name, parent formation identifier, and the unit type (i: infantry, a: (horse) artillery, c: cavalry, hq: headquarters) and echelon (a: army, c: corps, d: division, bde: brigade, bn: battalion). For example, the United States of America Barnes infantry division, 5th corps may be written us barnes/5 id.
§1.2.2 Headquarter units
These units represents a field commander (general) and support personnel.
Headquarter units carry mostly the same elements as regular units, except they have a single CF of "*". This indicates that a headquarter unit cannot attack or defend on its own. The echelons of headquarters are
- Army. There is only one such unit for either faction: One representing General R.E. Lee as commander of the North Virginia Army, and one representing General Meade commanding the Potomac Army.
- Corps. Organisational unit that controls one or more divisions of troops and smaller, typically supporting, formations.
- Division. Some units, in particular specialised units, are organised as smaller formations and thus come under the command of a division headquarter.
The organisational structure of the Army of North Virginia and the Army of the Potomac are laid out on their respective charts. Control & Command: if this optional rule is in effect, then the placement of a unit in the hierarchy matters. See also §8.
§1.3 Markers
There are three markers in the game. These are
- Game turn — Use this marker on the turn track on the board to keep track of the time in the game. Flip the counter to the faction which is in turn at any given point (§4).
- Initiative (optional) — Use this marker to keep track of who has the initiative, by flipping it to the appropriate side. Place the marker, if the optional rule is used, on the OOB of the faction that currently holds the initiative.
- Reorganisation (optional) — Each faction has two of these markers which they may place on reduced-strength units during a night turn, to indicate that the units are being reorganised to come back to full-strength.
§1.4 Orders of Battle
There are three sets of Order of Battle (OOB), one for each of the starting times of the three scenarios. Each set consist of an OOB for the Union and Confederate faction. One set, marked "Jul 1" is used when starting the game on the 1st of July, the one marked "Jul 2" is used if the game is started on the 2nd of July, and finally the last set marked "Jul 3" is used when starting the game on the 3rd of July.
On the OOBs are printed all the units used in a scenario ordered by turn and location of appearance of each unit.
§1.5 Dice
In addition to the materials provided, at least one, preferably two, 10-sided dice are needed. These are used to resolve various situations in the game, such as battles.
Many available 10-sided dice are numbered from 0 to 9. In that case, a roll of '0' must be read as a '10'. That is, random rolls of a dice takes values from 1 to 10.
§2 Optional rules
There are 4 optional rules that the factions may agree to use. The optional rules are, sorted according to main effect,
- Initiative — Allows the faction that holds the initiative to re-roll one combat, after which the initiative passes on to the other faction.
- Control & Command — Field commanders only provide units under their command bonuses. That is, a field commander can not command any friendly unit outside its command structure.
- Indirect fire — Artillery units may perform offensive and defensive indirect fire. That is, an artillery unit need not be adjacent to an enemy unit to attack it, and it can provide supportive fire to other defending units.
- Reorganisation — During night turns, each faction may designate at most 2 reduced-strength units for reorganisation, so as to restore them to full-strength. Also, any headquarter unit previously eliminated may be reinstated as long as any of its subordinate units are on the board.
The Reorganisation optional rule must be used with the Control & Command optional rule.
§3 Setting up
The two factions should decide the scenario (§15), and on the optional rules to be used, if any (§2).
Both factions then place all units on their respective OOB, including possibly eliminated units.
Initiative — If the Initiative optional rule is in force, place the initiative marker on the OOB that has a slot for it, depending on the selected scenario (§15).
Reorganisation — If this optional rule is in use, then each faction should place their reorganisation counters somewhere on their OOB.
Each faction then places its 'At-start' units on the map according to hex printed on the OOB. Finally, place the 'game turn' marker on the first slot in the turn track on the board.
§4 Turn sequence
The game runs over 8, 16, or 24 turns, depending on the scenario chosen. Each turn corresponds to a two hours, and is sub-divided into an Confederate and Union turn. Since the Confederate faction is the aggressor in this conflict, then it goes first.
If the game starts on the 1st of July, then the Confederate faction will have no units available until the 08-10 turn. Thus, on the first turn of the game, only the Union faction can perform movement.
Note that every 8th turn is a night turn. Some special rules applies to these turns (§10).
The following section, after a few definitions, expands upon these phases in detail.
Table 2: Turn sequence. The Confederate faction goes first and goes through its movement and combat phases in the given order. Then the Union faction goes through its phases. Once both factions have completed their turn, the turn is over and the game progresses to the next turn.
| Confederate turn | Union turn |
|---|---|
| Movement | Movement |
| Artillery (Indirect fire only) | Artillery (Indirect fire only) |
| Combat | Combat |
§5 Control & Command
This section is only relevant if the Control & Command optional rule is in use.
The command and control structure of the two armies is printed on the OOB charts. Units higher up in the organisation tree have command over units further down the tree. For example cs r.e.lee/nv hqa has command of all confederate units, while us sykes/5 hqc commands only the 5th corps consisting of us ayres, crawford, barnes/5 id and us margin/5 abrd.
The Union army consist of a lot of corps, and to ease the command, it was structured into 3 wings (Sedgewick's Squadron, Slocum's Wing, and Reynolds' Wing) each grouping several corps. In addition, since General Meade could not get to the battle before the 2nd of July, General Hancock (us hancock/2 hqc) had the command of all Union formations on the 1st of July for that entire day only.
Thus, a subordinate unit can, when the Control & Command optional rule is in effect, only glean benefits from a headquarter if that headquarter is in their chain of command. For example, since cs ewell/2 hqc is not in the chain of command of cs pender/3 id, the latter unit may never receive any benefits from the former headquarters unit.
§6 Zone of Control
An important concept is Zone of Control (ZOC). All regular units, i.e., not headquarters, exert a zone of control in the six hexes surrounding the unit. ZOC does extend over stream hex sides and into or out of Gettysburg.
This zone reflects a unit's ability to scout and fire into its surroundings. ZOC affects how units may manoeuvre in the board and which enemy units may be attacked (§11.1.3 and 13). Enemy ZOC is sometimes abbreviated EZOC.
A unit in an enemy unit's ZOC is said to be engaged with the enemy. To engage an enemy unit a unit must spend 1 MF (see also §11.1.1). A unit must stop movement when entering enemy ZOC. A unit may disengage from any enemy unit by leaving enemy ZOC completely, and only then may it reengage.
§7 Stacking
At the end of the movement and combat phases at most one regular unit may occupy a hex, unless a friendly headquarter unit is also in the hex (§11 and 13). Headquarters may not end movement in the same hex as another headquarter.
If a friendly headquarter unit is in a hex, then up to two regular units may occupy the same hex at the end of the two phases.
Control & Command — When in effect, only regular units that are under the command of the headquarter unit may stack in the same hex as the headquarter unit. Which headquarter units command which regular units is described in §5. Units not under the command of a headquarter unit may not stack with that headquarter unit.
Friendly units may temporarily violate stacking limitations during the movement and combat phases when moving through a friendly stack of units.
Units of opposing sides may never occupy the same hex, even temporarily.
As a sole headquarter does not exert ZOC, it means that an enemy unit may move past or even over it. The headquarter unit is then immediately eliminated and the enemy unit may move on.
If, at the end of any movement or combat phases, including opponents' movement or combat phases, the stacking limitations are not observed, the controlling faction must eliminate units until the requirements are met (§13.5). The controlling faction may freely choose which units to eliminate.
§8 Control
A hex, of any terrain, is controlled by the faction that last had a unit in or passing through it. Control of hexes, in particular objective hexes, is relevant for victory points (§14).
§9 Range and line-of-sight
This section is only relevant if the Indirect fire optional rule is in use.
Artillery units (regular and horse artillery) have a range over which it may either attack or provide defensive fire (§1.2.1, 12, and 13.1.1). All artillery units have a range of 2, meaning it can reach enemy units up to 2 hexes (one intermittent hex) away.
To utilise indirect fire, for both attacks and defence, an artillery unit must be able to trace a line-of-sight (LOS), which
- is no longer than the unit's range (2 hexes) from its hex to the target hex,
- from any point in the source hex to any point in the target hex, and
- must not be blocked by blocking terrain or friendly or enemy units in the intermediate hex (not source nor target hexes).
- If the artillery unit is itself in a hill or rocky hill hex, then intermediate hill or rocky hill hexes are not blocking LOS.
Another way to say this is that LOS is blocked if all intermittent hexes contain blocking terrain or other units. Blocking terrain is listed in Table 1 and are woods, hills, and Gettysburg. Any amount of terrain in a hex matters when tracing LOS, as it is for movement. Any friendly or enemy unit likewise blocks terrain, including headquarter units.
Indirect fire, either for attack or defence, cannot be utilised against enemy units that are adjacent to the artillery unit.
§10 Night turns
Turns 8, 16, and 24 are night turns, and last from 20:00 in the evening to 06:00 the next morning. During these turns, factions must withdraw (disengage) units from enemy ZOC, if at all possible. Units may move as normal, but may not enter enemy ZOC. Combat is resolved between units that cannot disengage from enemy ZOC.
Reorganisation — If this optional rule is used, then additional operations are available to the factions. These operations are only available during night turns. The operations are replacement and reorganisation of reduced units (§11.3 and 11.4).
§11 Movement phase
In a faction's movement phase a number of operations may take place, some of them depending on the use of optional rules. The relevant faction may move its units and receive reinforcements (§11.1 and 11.2), and, if the relevant optional rules are used, reorganise units and replace eliminated HQs (§11.4 and 11.3).
§11.1 Movement
In a faction's movement phase, the faction may move as many or as few units, in any order, as it pleases. A unit is moved from hex to adjacent hex, in any direction, within the limitations described below.
Regular units of opposing sides may never occupy the same hex, not even temporarily.
Stacking limitations must be observed by the end of the movement phase (§7). During the movement phase, however, they may be violated. If the stacking limitations are violated at the end of the movement phase, then the controlling faction must eliminate units until the limitations are observed (§13.5).
§11.1.1 Enemy ZOC
When a unit enters enemy ZOC, it must expend 1 MF in addition to the terrain cost of the hex moved into.
Road, rail, and town movement cannot be utilised when moving into an enemy ZOC. A unit entering a hex in enemy ZOC must thus pay the full MF cost for the terrain of the hex and an additional +1 MF for entering enemy ZOC.
When a unit engages an enemy unit it must break out of column formation into a combat formation, which nullifies the benefit of roads, railways, and towns.
A unit may leave enemy ZOC only if it leaves entirely. That is, to move out of enemy ZOC, the first hex entered cannot be in enemy ZOC, whether from the same or different enemy unit. A unit that disengages from the enemy unit may reengage again in the same movement phase. The unit may reengage a different enemy unit or even the unit it previously disengaged from, possibly in a different hex.
Thus a unit may not move from enemy ZOC to enemy ZOC.
§11.1.2 Enemy headquarter units
A regular unit may move through an enemy headquarter unit or past so that the ground unit's ZOC contains the enemy headquarters. In that case, the enemy headquarters is eliminated immediately and the regular unit may move on.
A unit may not move into a hex occupied by an enemy unit. Since a headquarters does not exert ZOC, it will not eliminate enemy headquarter units by moving past it.
§11.1.3 Movement allowance
Each unit has a movement factor (MF, §1.2.1). This is its base movement. A regular unit may gain +1 MF if it performs its entire movement together with a friendly headquarter unit. That is, the headquarter unit must occupy the same hex as the regular unit at the point where the regular unit starts moving, and when the regular unit stops, it must still be with the headquarter unit without interruption.
Control & Command — A regular unit may only gain +1 MF if moving with a headquarters which is in the regular unit's chain of command (§8).
A unit may spend up to and including the number of available movement factors during a single turn, possibly with a +1 MF bonus. Movement factors cannot be transferred between units nor can they be saved for later turns. If a unit does not have enough MF to enter a hex, it cannot enter that hex.
The cost of moving a unit from one hex to another depends on the terrain of the entered hexes, and is summarised in Table 1.
- Clear — It costs 1 MF for a unit to enter a clear hex.
- Hill — It costs 1 MF for a unit to enter a hill hex.
- Woods — It costs an additional +1 MF to enter a hex with any woods terrain in it.
- Rocky hill — It costs an additional +1 MF to enter a hex with any rocky hill terrain in it. Artillery units (horse or no horse) may not enter a hex that contains both rocky hill and woods terrain.
- Stream crossing — To cross a river hex-side costs an additional 1 MF to the regular cost of the entered hex.
- Road — If a unit moves along a road, that is moves from hex to hex over hex sides perforated by a road, then the movement cost is ½ MF. That is, to move 2 hexes cost 1 MF, 3 hexes 2 MF, 4 hexes 2 MF, and so on. The underlying terrain (woods, hills, rocky hills, nor stream hex sides), has no effect. Road movement cannot be used when entering enemy ZOC (§11.1.1).
- Railroad — Same as a road.
- Gettysburg — Same as a road.
- Enemy ZOC — To move into enemy ZOC costs an additional 1 MF (§6).
A hex that contains any amount of terrain (woods, hill, rocky hill) is considered to be of that terrain. A hex may contain more than one type of terrain, and the MF cost to enter is cumulative of all terrain in the hex. The only exception is when a unit utilises road movement, i.e., moves from hex to hex via a road or railway, in which case the reduced ½ MF cost is paid.
Example (movement): us wadsworth/1 id moves with us reynolds/1 hqc for its entire movement, and has 5+1=6 MF to spend.
- From D3 to F4: each hex moved into are woods hexes and thus costs 2 MF each to enter.
- From D3 to O6, again accompanied by
us reynolds/1 hqc: this movement utilises road movement in each step, and thus each hex costs ½ MF to enter. - From D3 to G1: the move into E3 is road movement (½ MF). To move into F3 costs 2 MF due to the woods terrain. The units again use road movement to move to F1 at a cost of ½ MF. The final move into G1 costs 3 MF: 1 MF for hill, 1 MF for woods, and finally 1 MF to enter enemy ZOC.
- From D3 to H2: the first three hexes are traversed at ½ MF each. The final woods hex (H2) is in enemy ZOC and road movement cannot be used. Thus the final move costs 3 MF, for a total of 4½ MF, which
us wadsworth/1 idcould manage on its own without theus reynolds/1 hqcescort.
§11.1.4 Exiting the board
A unit may be moved off-map from an edge hex by expending 1 MF. A unit moved off-map may not enter the map again.
A unit that voluntarily moves off-map is considered withdrawn from the battle and does not count toward the opponent's victory points (§14). However, if a unit is moved off-map as a consequence of a retreat it is considered eliminated and does count toward the opponent's victory points (§13.3 and 14).
§11.2 Reinforcements
New troops arrive on the board as detailed on each faction's OOB. A unit may arrive, at the earliest, on the turn indicated there, and arrive in the movement phase of the faction.
Printed under the units is a hex coordinate of where the units arrive. Multiple units, possibly exceeding stacking limitations (§7), can arrive in a single turn. Since stacking limitations are not in effect during movement, there is no limitation on how many units may arrive in a single hex.
A unit may not arrive in a hex occupied by an enemy unit nor in a hex in enemy ZOC (§6). A unit may arrive in a hex occupied by friendly units as long as it does not violate the stacking limitations at the end of the movement phase (§7).
If a unit cannot arrive in the hex due to enemy units or ZOC, then the unit may arrive in the hex closest to the hex. Alternatively, a unit's entry can be voluntarily delayed to a later turn.
A reinforcement unit must pay the movement cost of the first hex entered (§11.1.3). If a road exits the board in the hex entered, then the arriving unit may use road movement. The newly arrived unit may keep moving after the initial hex assuming it has the MFs to do so.
§11.3 Replacement of headquarters
This section is only relevant if the Reorganisation optional rule is in use.
During night turns (turns 8, 16, and 24), and only during these turns, a faction may replace any previously eliminated headquarter unit if, and only if, there are currently subordinate regular units of that headquarter unit on the map. The subordinate units of a headquarter unit can be found on the command charts (§5).
Historically, General Reynolds (us reynolds/1 hqc) was killed on the 1st of July, and General Sickles (us sickles/3 hqc) was injured on the 2nd of July. The Union faction may therefore replace us reynolds/1 hqc with us newton/1 hqc on turn 9, and us sickles/3 hqc with us birney/3 hqc on turn 17, as shown on the Union OOBs.
Replacement headquarter units must be placed at the start of the movement phase, and appear together with any unit under its command.
If there are no subordinate units of a headquarter unit on the map, then the headquarter unit remains eliminated.
§11.4 Reorganisation of reduced units
This section is only relevant if the Reorganisation optional rule is in use.
During night turns (turns 8, 16, and 24), and only during these turns, a faction may try to restore up to two previously reduced regular units.
To be eligible for reorganisation during a night turn, a unit must
- be in its reduced-strength state (§1.2.1), i.e., with its back-side facing up,
- not have moved during this turn, and
- not find itself in enemy ZOC.
A faction can place a reorganisation marker on at most two such units per night turn. If, for any reason, a unit marked with a reorganisation marker, during the entire following day (this night turn and the following 7 day turns), is
- moved, otherwise, or
- participate in combat, either as an attacker or defender, or, if the Indirect fire optional rule is in use, perform or is a target of indirect bombardment, including defensive indirect support,
then the marker must be removed immediately.
If, at the start of the next night turn, a unit still has a reorganisation marker, then
- the unit is flipped to its full-strength side (§1.2.1), and
- the marker is removed. This unit then immediately becomes available to the faction to possibly be placed on other reduced units during that night turn.
The restored unit can move and participate in combat on the night turn it is restored.
A reorganisation marker is placed on a reduced infantry division during the first night turn (turn 8). During that turn, and through to turn 15, that unit does not participate in combat, nor is it moved. At the start of the second night turn (turn 16), the unit is flipped to its full-strength side and the marker removed. The infantry division may move and attack during turn 16.
If the same unit was attacked sometime during turn 8 up to and including turn 15, or, for the Union faction during the Confederate 16th turn's combat phase, then the marker would be removed, and it will not be restored to full strength at the start of turn 16.
§12 Indirect fire bombardment
This section is only relevant if the Indirect fire optional rule is in use.
Indirect fire attacks (bombardments) must be resolved before resolving any regular combats between adjacent units.
For an artillery unit to perform bombardments, it
- must not be engaged with enemy units (in enemy ZOC),
- must have line-of-sight (LOS, see §9) to its target, and
- can only attack other artillery units, and the targets cannot be engaged in normal combat (§6).
Multiple artillery units may attack a single hex, and multiple hexes can be attacked as one if the attacker has LOS to all attacked hexes. A single artillery unit may only do indirect bombardment once per turn. Two artillery units in the same hex, with a headquarters unit, can perform two separate bombardments on two separate hexes or group of hexes.
The combat factors (CF) of all artillery units participating in a bombardment is added up, as are the CF and relevant terrain modifiers of the defending units. Relevant terrain modifiers are defensive bonuses from woods, towns, hill, and rocky hill terrain.
The battle is then resolved as regular battles, except AR, A1, and A2 results are ignored, and D2 is treated as D1, and the defender does not retreat (§13.2).
The attacking faction may resolve bombardments in any order. A bombardment combat must be fully resolved before moving on to the next combat.
Example (indirect fire): the Union faction is the attacker. The faction may bombard cs alexander/1 abrd with us muhlenburg 12 ar, and then have the regular units attack cs pickett/1 id. In that case, the cs alexander/1 abrd may not provide defensive indirect fire support to cs pickett/1 id when attacked. Note that us muhlenburg/1 abrd is not obliged to participate in any combat, as it is not in enemy ZOC.
§13 Combat phase
Combat between units of opposing sides must take place between units that are in adjacent hexes. Another way to say that is that combat must happen when defending units, i.e., units belonging to the faction not in turn, are in the ZOC of attacking units. Units of the faction in turn are likewise forced to conduct combat if in enemy ZOC.
That is, a unit which is adjacent to one or more enemy units (or engaged) must attack the enemy.
The faction in turn is free to allocate units to attacks as long as
- Each unit may only attack once per turn.
- Multiple units from multiple adjacent hexes may attack the same hex, but all units must be adjacent to the attacked hex. An exception to this is the case of indirect artillery fire, if that optional rule is used. See also §12.
- Multiple units in multiple hexes may be attacked by one or more units from one or more hexes, as long as all attacking units are adjacent to all defending units.
- All units, defending or attacking, in the same hex must participate in the same combat.
- Defending units may only be attacked once per turn.
- Headquarter units cannot attack on their own and does not contribute to either offensive or defensive strength of a combat.
- All Union units, except
us huntington/ar abrd, must be attacked as they are in Confederate ZOC.
The faction in turn then resolves all combats in any desired order.
In some cases the outcome may affect how the outcome of one battle affects another battle's resolution. For example if a defending unit is forced to retreat, but cannot because the attacker has occupied all possible retreat routes as a result of previous battles. It is therefore a good idea to assess the situation and come with a strategic plan for resolving combat.
Example (division of combat): the Confederate faction has decided on 3 battles: cs jenkins/c cbrd (1 CF) versus us mcgilvery/ar abrd (1+1=2 CF) and us ayres/5 id (3+2=5 CF), for a combat difference of 1 − 2 − 5 = −6 ∆CF. cs heth/3 id (5 CF), cs pender/3 id (2 CF), and cs mcintosh/3 abrd (2 CF) versus us martin/5 abrd (1 CF) and us crawford/5 id (2 CF) for a 5+2+2−1−2=6 ∆CF. Note, the defending units do not receive modifiers since some attacks are in a connected hill hex. cs hood/1 id (6 CF) and cs mclaws/1 id (5 CF) versus us barnes/5 id (2 CF), and the reduced us hays/2 id (2+2=4 CF). The total 5+6=11 AF is capped at 10, and the final combat is 10−2−4=4 ∆CF.
§13.1 Combat factors and modifiers
When resolving a combat, the current up-ward facing units' CF values are used (§1.2). The attacking faction adds up all attacking units' CF and the defending faction adds up the CF of all the defending units. These are the base offensive (AF) and defensive (DF) CFs.
Then, the terrain of the defending units is inspected and relevant modifiers, as given in the Terrain Effect Chart (Table 1), are applied.
In some cases, defensive modifiers depend on whether any attacker are in a hex connected by the same terrain as the defending units. Woods, hills, and rocky hill hexes are connected to an adjacent hex if that terrain is present on both sides of the dividing hex side. Thus, what matters for combat is the hex-side(s) attacked over.
- Clear — No modifiers.
- Woods — Defending regular units receive a +1 DF modifier, if no attacker is attacking from a connected hex.
- Hill or Rocky hill — Defending regular units receive a +2 DF modifier, if no attacker is attacking from a connected hill or rocky hill hex.
- Town — Defending units in Gettysburg receive a +1 DF modifier.
Example (connected terrain): hexes F3 and G3 are connected both as woods and has a hill. However, F3 is only connected to F2 via woods, as is H2 and H3. Thus, if a unit in F3 is attacked from F2, that defending unit would receive a +2 DF modifier for the hill. Had the attack come from G3, then the defending unit would get no benefits. G3 and G2 are not connected by any terrain, which means a defending unit in G3 attacked from G2 would receive both a modifier for the woods (+1 DF) and the hill (+2 DF) for a total +3 DF modifier.
Note that hill and rocky hill hexes are interchangeable for combat modifier purposes.
Note that these modifiers are per defending stack of units, and are cumulative. Thus, if 2 units are defending from woods hexes, then the total DF is modified by +1 DF.
Example (combat factors): in both examples, us barlow/11 id (2 CF) attacks cs anderson/3 id (5 CF). Left: cs anderson/3 id is in a woods hex (K8) which is not connected to the hex (K9) from which the attack comes. Thus, cs anderson/3 id receives a +1 DF for a total of 6 DF. Right: the attacked hex (I8) is connected via woods to the hex (I9) from which the attack is conducted, and thus cs anderson/3 id receives no DF modifier and has a total of 5 DF.
The terrain modifiers are added to the respective base AF and DF to obtain the total AF and DF. Any AF or DF larger than 10 is then capped to 10, and any AF or DF smaller than 0 is treated as 0.
§13.1.1 Defensive indirect fire
This section is only relevant if the Indirect fire optional rule is in use.
A defending artillery unit that
- is not itself engaged in combat, i.e., not in enemy ZOC,
- has not itself been bombarded by indirect bombardment (§12), and
- has line-of-sight (LOS, see §9) to at least one attacking unit,
may provide defensive indirect fire in a single combat. An artillery unit may only provide defensive indirect fire to one and only one combat per turn. Multiple defending artillery units may provide defensive indirect fire to a single combat, as long as they meet the above requirements.
The defending faction adds the combat factors (CF) of artillery units that provide defensive indirect fire to the combat's defensive (DF) CF. Artillery units that provide defensive indirect fire do not receive any terrain bonus.
§13.2 Combat resolution
Each side then rolls a 10-sided dice (d10) and adds the die roll to their respective total AF and DF. This is then the final die roll modified AF and DF which ranges between 1 and 20.
Initiative — If this optional rule is in effect, then the faction that holds the initiative marker may decide to play the initiative. If the initiative marker is played, then both die rolls are immediately discarded and both factions re-roll their combat rolls. These new rolls are then binding and are used for the combat resolution. The initiative marker is then handed over to the other faction which may then use it in any later combat, including other combats this turn. The initiative marker can be played during any combat, but at most once per combat. A faction is never required to play the initiative marker.
To resolve the combat, the attacking faction subtracts the final die-roll modified DF from the final die-roll modified AF to get the combat factor difference ∆CF. Mathematically this can be written
∆CF = (AF + d10) − (DF + d10).
The combat difference takes values between −19 and +19. The result is then looked up in the Combat Resolution Table (CRT, Table 4) to get the result of the combat.
If the CF difference is
- zero or less (∆CF ≤ 0), then the defending units win the combat, and the attacker must retreat (AR, §13.3). Indirect fire: during an indirect fire bombardment (§12) this result is ignored.
- smaller or equal to −3 (∆CF ≤ −3), then the attacking units take one step loss (A1, §13.4), and must retreat (AR, §13.3). Indirect fire: during an indirect fire bombardment this result is ignored (§12).
- smaller or equal to −6 (∆CF ≤ −6), then the attacking units take an additional step loss (A2, §13.4), for a total of two step losses, and must retreat (AR, §13.3). Indirect fire: during an indirect fire bombardment this result is ignored (§12).
- 1 or greater (∆CF ≥ 1), then the attacking units win the battle, and defending units must retreat (DR, §13.3). Indirect fire: treat as D1 in case of an indirect fire bombardment (§12).
- 3 or greater (∆CF ≥ 3), then the defender takes one step loss (D1, §13.4), and must retreat (DR, §13.3). Indirect fire: in case of an indirect fire bombardment (§12), defending units do not retreat.
- 6 or greater (∆CF ≥ 6), then the defender takes an additional step loss for a total of two step losses (D2, §13.4), and must retreat remaining units (DR, §13.3). Indirect fire: in case of an indirect fire bombardment (§12), defending units do not retreat.
Table 4: Combat resolution table. A CF difference of 0 or less is a defender win, while a CF difference larger than 0 is an attacker win.
| CF difference (∆CF) | Result |
|---|---|
| ≤ −6 | A2, AR — attacker takes two step losses and retreats |
| −5 to −3 | A1, AR — attacker takes one step loss and retreats |
| −2 to 0 | AR — attacker retreats |
| +1 to +2 | DR — defender retreats |
| +3 to +5 | D1, DR — defender takes one step loss and retreats |
| ≥ +6 | D2, DR — defender takes two step losses and retreats |
Key: A1 = attacker one step loss and AR; A2 = attacker two step loss and AR; AR = attacker retreats at least one hex; DR = defender retreats at least one hex; D1 = defender one step loss and DR; D2 = defender two step loss and DR.
Headquarter units do not directly suffer the same results as other attacking or defending units. If, however, all the losing faction's units are eliminated, then so are any headquarter units in the same hexes as the eliminated units. Also, when units are required to retreat, then headquarter units must retreat with the other retreating units in its hex.
Example (movement & combat): on the 1st of July, at 08:00 (Turn 2), cs pegram/3 abrd and cs heth/3 id moves into engage us buford/1c hqd, us devin/1 cbrd, and us gamble/1 cbrd that have taken up a defensive position at McPherson's woods (hex P3, hill and woods). Since the Union units occupy the same hex, they must be attacked in a single combat. As they occupy a hill and woods hex, their total comes to 1+1+1+2=5 DF. The confederate units' total comes to 2+5=7 AF, and thus 2 ∆CF.
On a die-roll difference of less than −2 (e.g., die rolls 1 and 3 for the Confederate and Union factions, respectively), then cs pegram/3 abrd must retreat to Q2, R2, or R3 (P2 is not possible since it is in enemy ZOC), and cs heth/3 id must retreat to Q5, R4, or R3 (P4 is in enemy ZOC). Note that both units cannot retreat to R3 since that would violate stacking limitations. On a die roll difference of −1 or larger (e.g., die rolls 6 and 7), the Union units must retreat to O3 or O4 (P2 and P4 are in enemy ZOC). All Union units must retreat to the same hex, including the headquarter unit. If the Union units are retreated, then one of the Confederate units may advance into P3. Both units cannot advance since that would violate stacking limitations.
§13.3 Retreat
If the defender suffered a DR, D1, or D2 result, then all defending units must be retreated at least one hex by the defending faction, following the procedure below. Likewise, if the attacker suffered an AR, A1, or A2 result, then all attacking units must be retreated at least one hex by the attacking faction.
- Units must be retreated the least number of hexes, but at minimum one hex.
- Retreating units must retreat to a hex not in enemy ZOC (§6). Only if this is not possible may the retreating units retreat into a hex in enemy ZOC.
- Units cannot retreat into a hex occupied by enemy units.
- Units can retreat through enemy ZOC, but only if there are no other viable retreat routes.
- Units that occupied the same hex during the combat must all retreat to the same hex.
- If retreating units cannot retreat to a hex because it would violate stacking limitations, then the retreating units must be retreated further until stacking limitations are observed (§7).
- If there is no viable retreat route except off the board, for example because the units are surrounded by enemy units, then the units must either stay in the hex and take a further step loss (§13.4), or retreat off-map. If the units are retreated off the map edge, then the unit is considered eliminated and counts towards the opposing faction's victory points (§14).
- If there is no viable retreat route, for example because the defending units are surrounded by enemy units, then the retreating units stay in their original hex but take an additional step loss to any other step loss incurred in the battle (§13.4).
If there are any headquarter units in the same hexes as other retreating regular units, then those units must retreat with the regular units.
Indirect fire — Artillery units providing defensive indirect fire do not retreat under any circumstances.
See also Figures 14 and 15 for examples.
§13.4 Losses
When a combat result (or some other rule) calls for a step loss, the controlling faction must decide which unit will absorb that reduction (casualties in case of combat).
In D1 and D2 combat results, the defending faction chooses how to distribute the casualties, while the attacking faction chooses in case of A1 and A2 combat results.
The controlling faction is free to choose among the affected regular units, not headquarter units, as long as the choice does not cause stacking limitations to be violated (§7). The controlling faction may choose to let one or more units absorb multiple step losses, e.g., A2 or D2 combat results.
A unit absorbs a step loss by flipping it from its full-strength side to its reduced-strength side (§1.2.1). If the unit is already at its reduced-strength side when it suffers a step loss, it is eliminated instead. A two-sided unit that suffers two step losses is therefore eliminated. Likewise, if the back-side of the unit counter is empty, then the unit is eliminated when suffering a step loss.
See also Figures 14 and 15 for examples.
Headquarter units cannot absorb step losses. If all regular units in a hex are eliminated as a consequence of combat (step losses or impossible retreats), then any headquarter units in that hex are also eliminated.
Indirect fire — Artillery units providing defensive indirect fire cannot absorb step losses under any circumstances.
§13.5 Elimination
When a unit has no more steps to lose, it is automatically eliminated when absorbing another step loss.
Step losses accumulate over turns. That is, to eliminate a two-step unit, both step losses do not need to occur in the same turn. Such a unit could have suffered one step loss in a previous turn, and then be eliminated by a second step loss in a subsequent turn.
When a unit is eliminated, through step losses or other means, it is
- immediately removed from the map, and
- placed off to the side in an eliminated unit pile. Since these units count towards the opponent's victory points, the faction may decide that it is the opponent that keeps track of eliminated units.
If all regular units in a hex are eliminated, then so are any headquarter units in the same hex as the eliminated regular units.
§13.6 Advance after combat
If the defending units are retreated or the attacked hexes otherwise left vacant (§13.3), then any attacking units that partook in the combat may immediately advance into the hexes attacked and left vacant by the retreated defending units.
It is up to the attacking faction which and how many of the eligible units are moved into the vacant hex, as long as the stacking limitations are not violated (§7). Note, however, that the stacking limitations can be temporarily broken in an advance, as long as they are observed at the end of the combat phase.
Attacking units can advance after combat even if that would mean passing through enemy ZOC (§6). It costs no MFs to advance after combat.
See also Figures 14 and 15 for examples.
Defending units may not advance after combat, even if an AR, A1 or A2 result would vacate a hex from whence the attack came.
Indirect fire — Artillery units that perform indirect fire bombardment may not advance after combat (§12).
§14 Victory points
After the last turn of the chosen scenario (§15), the total number of victory points (VP) for either faction is calculated. For a given faction, the number of VPs are determined from the casualties of the opposing side, the number of reduced-strength units the opposing side has on the map, and objectives controlled (§8). The different sources of VPs are summarised in Table 5.
Table 5: Victory points.
| Source | VP |
|---|---|
| Enemy units eliminated | Full-strength CF |
| Enemy units flipped to reduced strength | 1 |
| Objective hex controlled | value of the objective |
The victory points from enemy casualties are awarded as follows.
- For every opposing unit eliminated, of any size, is worth its full-strength combat factor (CF, see §1.2.1) in VPs.
- Every opposing reduced strength regular unit still on the map counts for 1 VP.
In the 2nd of July OOB, the Union faction has already suffered some losses, and the Confederate faction therefore starts out the game with a number of casualty victory points:
Union casualties (start of 2nd of July scenario)
| Unit | VP |
|---|---|
us robinson/1 id (eliminated) | 2 VP |
us barlow/11 id (eliminated) | 2 VP |
us schurz/11 id (eliminated) | 2 VP |
us doubleday/1 id (reduced) | 1 VP |
us wadsworth/1 id (reduced) | 1 VP |
us wainwright/1 abrd (reduced) | 1 VP |
| Total | 9 VP |
Both factions earn objective VPs based on the hexes controlled (§8). The hexes worth VPs are marked with a red dot with the number of VPs printed inside. The objective hexes are listed in Table 6.
Table 6: Objective hexes.
| Hex | Name | VPs |
|---|---|---|
| F6 | Little Round Top | 5 |
| I11 | — | 3 |
| K6 | — | 1 |
| K7 | — | 1 |
| L6 | Cementery Hill | 1 |
| L7 | — | 1 |
| M7 | — | 1 |
| M9 | Culp's Hill | 3 |
Sudden death — Factions may decide to use the victory conditions of Table 5's sudden death conditions. That is, if the Confederate faction has at least twice the VP of the Union faction at the end of the 1st of July (end of turn 8), or 15 VP more at the end of the 2nd of July (end of turn 16) then the Confederate faction wins a sudden death victory.
Table 7: Victory conditions. The scenario's end turn dictates the victory conditions of the scenario.
| End day | Confederate faction wins if… |
|---|---|
| Jul 1 | Confederate VP ≥ 2 × Union VP |
| Jul 2 | Confederate VP ≥ Union VP + 15 VP |
| Jul 3 | Confederate VP > Union VP |
As printed in the source document, the table above gives the 1st-of-July condition as "Confederate VP ≥ 2 × Union VP," while the accompanying caption text states it as "the Confederate faction must have at least 3 times more victory points than the Union" — this discrepancy exists in the source and is preserved here rather than silently resolved. Conversely, the Union faction wins if the Confederate faction does not win. On the 2nd of July, the Confederate faction wins if it has at least 15 VP more than the Union faction. Finally, whichever faction has the most VP at the end of the 3rd of July wins (they tie if their VPs are equal).
§15 Scenarios
Below are the three possible scenarios. It is recommended to start with the first scenario (§15.1), and if the players are inexperienced in playing historical wargames, probably without any optional rules. The scenarios generally increase in complexity. The scenarios have different victory conditions based on the end turn of the scenario. These victory conditions are summarised in Table 7.
Note the eliminated units in the scenarios. These must be considered when calculating victory points (§14).
Initiative — The Confederate faction initially holds the initiative marker in all scenarios.
§15.1 First day
This scenario plays out the first day of the battle.
- OOB: Jul 1
- Last turn: Jul 1, night
- Notes: The Confederate faction has no units on the map to start with, and does not receive reinforcements until 08:00 (Turn 2). Thus, the Union faction is the only faction that can do anything during the first turn.
§15.2 Second day
This scenario plays out the second day of the battle, starting from the historical situation at that time.
- OOB: Jul 2
- Last turn: Jul 2, night
- Notes: The Union faction has suffered losses at the start of the scenario. Some units on both sides have suffered step losses.
§15.3 Third day
This scenario plays out the third, and final, day of the battle, starting from the historical situation at that time.
- OOB: Jul 3
- Last turn: Jul 3, night
- Notes: The Union faction has suffered losses at the start of the scenario. Some units on both sides have suffered step losses.
§15.4 Full battle
This simulates the full 3 days of the battle.
- OOB: Jul 1 (Consider having US 3rd Corps arrive at A8 on turns 7 and 8.)
- Last turn: Jul 3, night
- Notes: The Confederate faction has no units on the map to start with, and does not receive reinforcements until 08:00 (Turn 2). Thus, the Union faction is the only faction that can do anything during the first turn.
§15.5 Other options
The factions may decide on other options, such as starting on the 1st of July and ending on the night turn of the 2nd of July, or starting on the 2nd and ending on the 3rd. In those cases, the factions should start with the OOBs corresponding to the start date, and use the victory conditions corresponding to the end date.
Component notes
- The game includes three sets of Order of Battle (OOB) charts — one each for starting the game on the 1st, 2nd, or 3rd of July — printed with the units ordered by the turn and hex at which they appear (§1.4).
- The command and control structure of both armies (used only with the Control & Command optional rule) is printed on reference charts: the Army of North Virginia is organised under General R.E. Lee with corps commanded by Longstreet, Ewell, and Hill, plus Stuart's cavalry corps; the Army of the Potomac is organised under General Meade (with General Hancock in overall command on the 1st of July only) into three wings — Reynolds' Wing, Slocum's Wing, and Sedgewick's Squadron — with a separate cavalry corps under Pleasonton (§5).
- A combat outcome probability table is also provided as a player aid, giving the percentage chance of each CRT result band (A2/A1/AR/DR/D1/D2, and the combined "attacker takes a loss," "attacker retreats," "defender takes a loss," and "defender retreats" probabilities) for every ∆CF value from −10 to +10, derived from the triangular distribution of the difference of two d10 rolls.