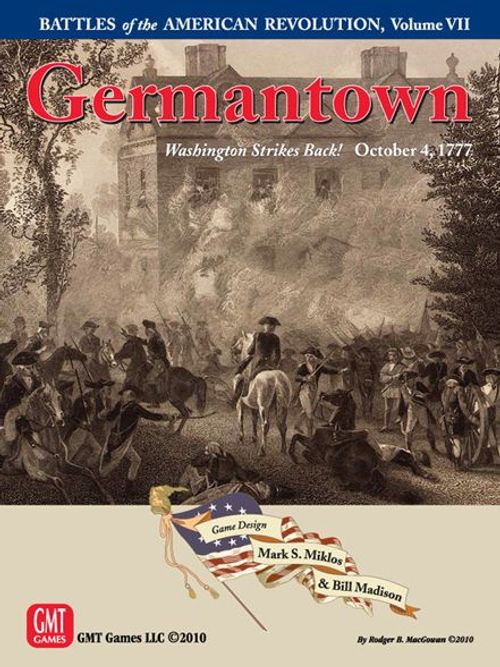
Germantown
Germantown Rulebook
Table of Contents
Table of Contents
- Part One: Series Rulebook
- 1. Introduction
- 2. Components
- 3. Terminology
- 4. How To Win
- 5. Sequence of Play Outline
- 6. Initiative
- 7. Stacking
- 8. Zones of Control
- 9. Movement
- 10. Rifle Fire
- 11. Defensive Artillery Fire
- 12. Close Combat
- 13. Combat Results
- 14. Leaders
- 15. The Rally Phase and Unit Morale
- 16. Army Morale
- Expanded Sequence of Play
- Part Two: Germantown Exclusive Rulebook
- Germantown Combat Units
- I. Prepare for Play
- II. How to Win
- III. Special Rules
- IV. Special Units
- Historical Summary
- Germantown Orders of Battle
- Germantown Countersheet Manifest
- Sequence of Play
Part One: Series Rulebook
Battles of the American Revolution — Series Rulebook. Game Design by Mark S. Miklos. Version: 2026.
1. Introduction
This Series Rulebook provides the baseline rule set that applies to all volumes in GMT's Battles of the American Revolution series. Individual volumes contain Exclusive Rules applicable to that volume only. In cases where a volume's Exclusive Rules conflict with the Series Rules, the Exclusive Rules take precedence.
2. Components
See each volume's specific rules for the list of components included in each game.
2.1 Counters
Unit Color Codes: Units from different nationalities each have their own unique color for easy identification. In some volumes units have shaded stripes across the top to denote which type of unit they are, or their Movement Allowance may be highlighted to identify belonging to a specific formation or that specific rules apply to those units.
2.2 Units and Leaders
Some units are "two-step" units. The front side is their full strength side; the reverse (reduced) side generally has a lower strength point and unit morale value. Units that only have one side are "one-step" units and are eliminated if they suffer a step loss.
The full strength side of all units contains their unit name, setup hex or turn of entry, unit morale, strength points, and movement allowance.
All leader counters list the leader name, setup hex or turn of entry, rank, Close Combat DRM, leadership DRM, and movement allowance.
2.3 The Die
Games include 10-sided dice that are used to resolve certain game functions. The 0 is treated as a 0 (not a 10).
2.4 Game Scale
Unit Scale: Each strength point of troops equals approximately 100 men. Each artillery strength point equals two cannon. See Exclusive Rules for exceptions.
Map Scale: Each hex is approximately 200 yards from hexside to hexside.
Time Scale: Each turn represents approximately one hour. For volumes with "strategic" turns, those represent one or more days each.
3. Terminology
3.1 Key Terms
Army Morale (AM): The numeric value that represents a side's will to fight. Driving the opponent's Army Morale to zero represents demoralization of that army and taking the field of battle. This results in Substantial Victory in most game scenarios. (See Series Rule 16.3)
Combat Unit: Any type of infantry, cavalry, or artillery unit. Leaders and markers are not combat units.
First Fire Marker: Indicates rifle units that have not yet performed their first Fire Combat.
Die Roll Modifier (DRM): An event or situation which causes a die roll to be adjusted.
Dragoons/Cavalry: The terms "dragoons" and "cavalry" found throughout the BoAR series are used interchangeably.
Highest Ranking Leader: The Leader that must be in command if two or more leaders are present during Close Combat. Leader seniority is listed in all Exclusive Rules.
Note: If more than one leader is present, any leader may be selected by the owning player to satisfy a casualty requirement.
Into Fieldworks: An attack across a fieldworks hexside from outside the hex which contains the fieldworks symbol (see Terrain Keys in volumes with fieldworks).
Light Infantry: Light Infantry units are designated by the symbol 'LT' on the counter.
Line of Sight (LOS): The ability of combat units to see each other across intervening hexes.
Militia: Militia is often (but not always) a lower quality unit consisting of volunteers without proper military training. The identification of Militia counters is specified in each game's Exclusive Rules.
Movement Points (MPs): Used to regulate how far a unit can move in one game turn.
Out of Fieldworks: An attack or ZOC which crosses a fieldworks hexside from the hex which contains the fieldworks symbol (see Terrain Keys in volumes with fieldworks).
Parade Order: A combat unit is in Parade Order if it is not disrupted or shattered.
Phasing Player: The player whose player turn it is, and is therefore moving units or assigning Close Combats. The other player is considered the non-phasing player.
Rally on Me Marker: These markers are placed on stacks containing both Disrupted/Shattered and Parade Order combat units as a reminder to make morale checks in the Rally Phase.
Rifle Unit: A light infantry or infantry unit which is armed with rifles.
Design Note: Rifles permitted units to fire over greater distances than units solely armed with muskets.
There are two types of rifle units:
- Those designated by a white "R" in a black circle. These units afford their opponent a DRM if they participate in Close Combat (this is a benefit to the opponent).
- Those designated by a black "R" in a white circle. These units do not afford their opponent a DRM if they participate in Close Combat (i.e., there is no benefit to the opponent).
Musket/Rifle Unit: These units represent mixed musket/rifle formations. These units do not afford their opponent a DRM if they participate in combat (i.e., there is no benefit to the opponent). The SP values on the counter are read as Close Combat/Rifle Fire, with each value applied in the corresponding turn phase.
Example: The values on the unit shown are read as a Close Combat Factor of 2 and Ranged Fire Combat value of 1, and four movement points.
Strategic Movement (Strat Move): When units trace their movement only along roads (some Exclusive Rules may also specify tracks, paths, etc.) and do not start nor move adjacent to enemy combat units, they may move up to twice their printed movement allowance. Normal Movement cannot be combined with Strategic Movement in the same phase.
Strength Points (SPs): The combat strength of a unit. Used for stacking, artillery/rifle fire and Close Combat.
Surrounded: When enemy units or their ZOC occupy all six hexes adjacent to a unit.
Important: For this rule only, friendly units negate enemy ZOC in their hex.
Up Slope: Attack across a slope hexside into the hex which contains the solid line portion of the slope symbol. Movement is affected in both directions across a slope hexside (See Terrain Keys and Player Aid Cards for each volume).
Victory Points (VPs): Used to determine which side has won the battle. VPs are gained by eliminating and capturing enemy steps, units and leaders, by capturing and/or holding terrain objectives, and by choosing to influence certain game actions.
Zone of Control (ZOC): The ability of a unit to exert influence over an adjacent hex.
4. How To Win
There are three victory levels: Decisive, Substantial, and Marginal.
Decisive Victory: Conditions for Decisive victory are described in each volume's Exclusive Rules.
Substantial Victory: Baseline conditions for Substantial victories are described in rule 16.3, however some Exclusive Rules modify the threshold for Substantial victories.
Marginal Victory: Conditions for Marginal victories are described in Exclusive Rules.
Note: In some volumes one or both sides may not be able to score a Marginal victory.
VP Clarifications:
- A 2-step unit that is eliminated is worth 2 VPs whereas a 2-step unit that is captured is worth only 1 VP. In other words, captured units are worth 1 VP regardless of whether they have one or two steps. Eliminating a unit will destroy its organizational staffing. This is more effort than providing the replacements which must be expended to return the unit to fighting capacity.
- 2-step units that begin the game on their reduced side only count as 1 VP if eliminated.
- Shattered units on the board at the end of the game are worth ½ VP.
5. Sequence of Play Outline
Each game turn consists of two player turns. During the initiative segment, players determine which player executes their player turn first. Each player turn consists of several phases that must be executed in sequence. A more detailed version can be found in the Expanded Sequence of Play on the back page.
A. Initiative Segment
Determine which player has the Initiative this turn.
B. Initiative Player Turn
- Flip the game turn marker to indicate the correct player turn
- Movement phase
- Rally phase
- Defensive Artillery Fire phase
- Rifle Fire phase (simultaneous)
- Close Combat phase
- Move the game turn marker to the bottom half of the game turn and flip it over
C. Second Player Turn
- Movement phase
- Rally phase
- Defensive Artillery Fire phase
- Rifle Fire phase (simultaneous)
- Close Combat phase
D. End-of-Turn Segment
- Check for Automatic Victory
- If it is the last game turn of the scenario, determine a winner
- If additional game turns remain, advance the game turn marker to the top half of the next turn.
6. Initiative
6.1 General Rule
Initiative for a turn is determined by each player rolling a die and adding their Army Morale Initiative DRM (found on the Army Morale Track). The higher modified roll wins the initiative for that game turn.
6.2 Ties
If the modified die rolls result in a tie, both players roll again using the same modifiers (including any modifiers if Momentum Chits were used).
Note: See Exclusive Rules for exceptions.
6.3 Momentum
Momentum chits may be used to modify the initiative die roll. The player who had initiative on the previous game turn must decide how many Momentum Chits to spend first (see 12.62).
7. Stacking
7.1 Stacking Limit
Each hex may contain up to six friendly SPs of combat units other than artillery plus one friendly artillery unit (regardless of its SPs). Leaders and markers do not count for stacking purposes. Exclusive Rules may contain further restrictions and/or exceptions to stacking.
7.2 Stacking during Movement and Retreat
Stacking limits apply at all times, including during movement and retreat. A unit may never move or retreat through a hex in excess of stacking limits (Exception: see 9.1 and 13.23).
7.3 Overstacking Penalty
If units are found to be overstacked at any time, the owning player must immediately eliminate enough steps to meet the stacking limit.
Important: All step losses taken impact Army Morale and Victory Points as if they were lost in combat.
7.4 Intelligence
7.41 General: Both sides may examine all stacks of friendly and enemy units at all times.
7.42 Limited Intelligence: Some Exclusive Rules limit one or both players from freely examining enemy stacks. In those cases, use the rules below unless additionally modified by the Exclusive Rules.
A player under Limited Intelligence restrictions may not examine enemy stacks until either:
- During fire combat, in which case the player can examine a specific stack to choose a target.
Note: The player must commit to conducting Fire Combat against a specific hex and only then can they examine the units therein to determine which will be the target. The player must fire on the selected hex once the stack has been examined.
- During the Close Combat Phase a stack can be examined to determine combat odds, however once a stack is examined that hex must be attacked.
Note: The enemy stack can only be examined after it has been designated for Close Combat attack (see 12.21).
7.43 Limited Intelligence Penalty
Each time a player examines an enemy stack except in the situations noted in 7.42 above, they suffer an immediate –1 AM adjustment.
8. Zones of Control
8.1 General Rules
All Parade Order combat units exert a ZOC into all six adjacent hexes. A unit loses its ZOC while it is disrupted or shattered. The ZOC is restored if the unit rallies to Parade Order.
Note: ZOCs do extend across Ford and non-Ford Creek hexsides. Exception: A ZOC extends out of, but not into, light forest/orchard, heavy forest, and fieldworks hexsides. See exclusive rules for additional exceptions.
8.2 Negating ZOCs
A combat unit negates an enemy ZOC in its hex for the purpose of the surrounded Close Combat modifier. It does not negate an enemy ZOC in its hex for retreat purposes (13.22).
8.3 Effects of ZOC on Movement
8.31 A unit that enters a hex in an enemy ZOC must stop and end all movement for the turn.
Important: In addition, it costs +1 MP to enter or exit an enemy rifle unit's ZOC.
8.32 A unit which begins in an enemy ZOC may move directly into another enemy ZOC but may move no further. If the first hex entered does not contain an enemy ZOC, the unit may continue moving up to its full movement allowance unless it again enters an enemy ZOC, which ends its movement.
Example: Unit A's ZOC does not extend into the Plantation House or the Heavy Woods. Unit B's ZOC extends out of, but not into the Lt Woods hexes.
9. Movement
9.1 Reinforcements
9.11 Placement: At the beginning of their side's Movement Phase on the game turn of arrival, reinforcements are placed according to the entry hex printed on the unit or turn track, or as specified in the Exclusive Rules.
Reinforcements may be placed in their entry hex in excess of stacking limits; however they must conform to stacking limits by the end of the movement phase.
Reinforcements may always be voluntarily delayed until a later game turn unless the Exclusive Rules for that game prohibit it.
9.12 Movement: Placement on the unit's entry hex costs no MPs. Reinforcements may move their full movement allowance and use strategic movement during their turn of entry unless prohibited by Exclusive Rules.
9.2 General Rules
During the movement phase the phasing player may move all, some, or none of their units. Units expend Movement Points (MPs) to enter adjacent (contiguous) hexes up to the Movement Allowance printed on the unit's counter.
Units pay MPs for each hex entered based on the terrain in that hex (See the Terrain Effects Chart for each individual volume in the series).
Because stacking rules are in force at all times (see 7.2) each individual unit must complete its movement before another unit may move. Units are never required to move (Exception: see 12.2 and 13.3).
MPs cannot be saved from one turn to another nor transferred to another unit. A unit may never expend more MPs than its movement allowance.
Note: A unit may always move one hex as long as no movement restrictions (e.g., prohibited terrain) or Exclusive Rules are broken. See 13.4 and Exclusive Rules for exceptions.
9.3 Movement Restrictions
The following movement restrictions apply:
- Shattered units may not move (see 13.4).
- Disrupted units may only move 1 hex per turn. If adjacent to enemy units they must attempt to move away from as many as possible (see 13.3).
- Pinned units may move only if they do not end the movement phase adjacent to any enemy units and the phasing player reduces his Army Morale (see 9.6 & 13.1, Pin).
- A unit may never enter an enemy occupied hex or prohibited terrain.
- A unit may never move through a hex in excess of stacking limits (see 7.2).
9.4 Effects of Terrain on Movement
The MP cost of entering hexes and crossing hexsides are cumulative. Exceptions: Up Slope/Creek and Down Slope/Creek hexsides are each treated as a distinct combined terrain type as indicated on Volume specific Terrain Effects Charts, which may contain additional terrain anomalies.
Note: Roads nullify terrain costs for movement purposes only. Other terrain in a road hex still impact combat, ZOC, etc. normally, unless otherwise indicated in the Exclusive Rules.
9.5 Strategic Movement
Units using Strategic Movement may move up to twice their printed Movement Allowance as long as they start in and remain on terrain types which allow for Strategic Movement. See Exclusive Rules and Terrain Effects Chart for which terrain types qualify for strategic movement (typically roads).
Important: Units using strategic movement may not begin adjacent or move adjacent to enemy units at any point during their move.
9.6 Removing Pin Markers
After all movement is complete, remove pinned markers from all units on both sides which are not adjacent to enemy units (see 13.1, Pin). The phasing player must reduce his Army Morale by one for each pinned combat that is broken.
10. Rifle Fire
10.1 General Rules
During the Rifle Fire Phase, both players may fire their rifle unit(s). Rifle Fire is voluntary. No unit is ever required to fire. No unit may fire more than once per phase.
10.2 Selecting a Target
The phasing player must select his target unit(s) before the non-phasing player selects his. If a unit chooses to fire, it must select an adjacent target combat unit. No unit may be the target of more than one Rifle Fire per phase. If more than one rifle unit fires at a target unit, the number of SPs firing is combined.
10.3 Procedure
STEP 1: The firing player cross-references his firing SPs on the 'adjacent' column of the Ranged Fire To Hit Table to determine the 'To Hit' number.
STEP 2: The player rolls a die. The result is modified by all applicable DRMs given in the Ranged Fire Combat DRM Table. The modified die roll is compared to the 'To Hit' number. If it is equal to or greater than the 'To Hit' number, a hit is scored.
STEP 3: If a hit is scored, a second (unmodified) die roll is made on the Rifle Fire Damage Table to determine the result. Only the target combat unit will be affected by the result. Ignore any reference to other units in the hex (Exception: 13.1, Leader Casualty). After applying the results, make any Army Morale adjustments that are required.
Both die rolls must be against the same target and only one hit will result in a damage die roll. If both die rolls hit, ignore the second hit.
Design Note: The Jaeger companies performed a tactic known as Strassefeuer ("street fire") in which groups of up to 25 men would advance in open order on the exposed flank of an enemy, in five files of five men each. The first man in each file would fire and countermarch to the left to gain the rear of his file and reload. The next man in each file would then fire and countermarch in like fashion. This would continue while the formation was steadily advancing, thus each volley would be delivered several paces closer to the enemy than the previous one. The effect could be devastating, particularly when directed at point-blank range.
Example: The two American units conduct Rifle Fire on the British Guards unit. The SPs of the two rifle units must be combined. Assuming no terrain modifiers, the 'To Hit' number is ≥ 6 with one die, but the two rifle units have not yet fired this game and so receive a +1 DRM First Fire Bonus. The American player rolls a 5 which scores a hit. He then consults the Fire Damage Table and rolls again. He rolls a '4' which results in an R (Retreat) for the Guards unit.
10.4 Simultaneous Fire
Rifle Fire is considered simultaneous. Results, including Army Morale adjustments, are applied at the same time after both sides have fired. The non-phasing player must execute any retreats before the phasing player.
10.5 First Fire Bonus
Rifle units firing for the first time in the game receive a +1 "First Fire" DRM on the To-Hit Table. They do not get the first fire bonus if they are combining fire with other units that have already conducted their first fire. In either case, indicate the units that have fired by removing their "First Fire" markers.
Note: If multiple units are firing together and none have fired previously the first fire bonus is only +1; the first fire bonus is not cumulative.
All firing units lose their first fire bonus for future fire combats even if their fire has no effect.
Important: A rifle unit also loses its first fire bonus if it participates in Close Combat in any game turn before conducting fire combat.
10.6 First Fire Markers
First Fire markers should be placed on top of or below Rifle units at game or scenario start (players should agree on which method to use to prevent confusion), and are removed after the unit's first fire combat.
Note: If players choose not to use First Fire markers they should track which units have fired on paper or electronically.
10.7 German Jaeger Rifles
The German Jaegers may make two die rolls against their 'To Hit' number if both of these conditions exist:
- They are in Covered Terrain, which is defined as heavy woods, light woods or orchard.
- There is an open flank as defined in the Turn Flank requirements (see 12.53).
11. Defensive Artillery Fire
11.1 General Rules
During the Defensive Artillery Fire phase, the non-phasing player may fire any of his artillery. Defensive Artillery Fire is voluntary-no unit is ever required to fire. No unit may fire more than once per phase.
11.2 Selecting a Target
If an artillery unit chooses to fire, it must target a combat unit that is within range and Line of Sight (LOS). See Exclusive Rules for exceptions as some volumes contain artillery types that do not need LOS to fire.
No unit may be the target of more than one defensive artillery fire per phase. Multiple artillery units can combine their SPs to fire at a target. The number of SPs is totaled and the range of the unit farthest from the target is used to determine the "To Hit" number. The range for artillery units is three hexes (see Exclusive Rules for exceptions). Calculate range from the firing unit to the target, counting the target's hex but not the firing unit's hex.
Design Note: Although extreme ranges were possible for field artillery (3 and 6 pounders), it was the standard practice of the day to fire at 600-800 yards, and often much closer.
11.3 Procedure
STEP 1: The firing player cross-references the number of SPs firing with the range to target on the Ranged Fire To Hit Table to determine the "To Hit" number.
STEP 2: The player rolls a die, which is modified by all applicable DRMs on the Ranged Fire To Hit Table. The modified roll is compared to the "To Hit" number. If it is equal or greater than the "To Hit" number, a hit is scored.
STEP 3: If a hit is scored, a second die roll is made on the Artillery Fire Damage Table to determine the result. Only the target combat unit will be affected by the result. Ignore any reference to other units in the hex. (Exception: 13.1 Leader Casualty) After applying the results, make any Army Morale adjustments that are required.
11.4 Line of Sight
11.41 For artillery units to fire beyond an adjacent hex, they must be able to see it. In game terms, the artillery unit must be able to trace a clear Line of Sight to the target unit. LOS is always clear when firing at an adjacent unit. LOS is traced from the center of the firing hex to the center of the target hex. For purposes of LOS, slope hexsides combined with runs, creeks or rivers are considered slope hexsides.
11.42 BLOCKING TERRAIN: Forest, light forest, and slope/hill hexes are always blocking terrain. See Exclusive Rules for specific terrain types that may affect LOS in various volumes.
Any hex that contains combat units, whether friendly or enemy, also blocks LOS (See Exclusive Rules for exceptions).
LOS can always be traced into blocking terrain or hexes containing combat units, but never through it (Exception: 11.43, Case C).
11.43 UP SLOPE: Determination of LOS depends upon whether or not both the firing unit and the target unit are in 'up slope' positions to each other. A unit is in an 'up slope' position if the LOS traced from the other unit crosses an up slope hexside as it enters the target hex.
Note: The direction of the slope graphic is normally "down" in the direction of the uneven lines pointing outward—these point "down". The higher level side of the graphic is the side that is flush.
A. Neither unit is 'up slope': The LOS is blocked if it passes through any blocking terrain hex. In addition, the LOS is blocked if it crosses any slope hexside which is not part of the firing or target unit's hexes.
B. One unit is 'up slope': The LOS is blocked if it passes through any blocking terrain hex. With one unit 'up slope', a LOS may be traced through a slope hexside which is part of the 'up-slope' unit's hex.
C. Both units are 'up slope': The LOS between these units is always clear. Ignore blocking terrain.
Note: See the LOS visual example for other specific situations.
11.44 HEX SPINES: If a LOS runs exactly along a hexside, it is blocked only if both hexes adjacent to the hexside contain blocking terrain and/or combat units.
12. Close Combat
12.1 General Rules
12.11 ATTACKER/DEFENDER: The phasing player is considered the Attacker, while the non-phasing player is the Defender.
12.12 WHO MUST ATTACK: Close Combat is mandatory for all friendly combat units (except artillery units) which are adjacent to enemy units. This includes any units which retreated from Fire Combat and are now adjacent to enemy units. Exception: Rifle units are never required to attack. See Exclusive rules for additional exceptions.
12.13 WHO MUST BE ATTACKED: All enemy units which are adjacent to friendly units must be attacked. Exception: See 12.14 Diversion.
12.14 DIVERSION: During each Close Combat phase, the phasing player may designate one hex as receiving a Diversion. The Attacker does not attack these defending units, but the Attacker's units that created the Diversion must attack some other enemy units.
All attacking units which are adjacent to the defending units receiving the Diversion are penalized by having the odds in the Close Combat(s) in which they are involved shifted one column to the left (for example, 2-1 is reduced to 3-2).
Important: If the newly shifted odds are less than 1-3, the Close Combat die roll modifier is –2 instead of the normal –1 modifier for less than 1-3 odds.
12.15 MULTI-HEX COMBAT RESTRICTIONS:
- Each unit, attacking or defending, may only be involved in one Close Combat per player turn.
- Attacking units stacked in a single hex may combine in a single attack or attack different units.
- All defending units in a single hex must be attacked together in a single Close Combat.
- Each Close Combat must involve either one attacking hex or one defending hex only.
Example: Attackers A, B and C have moved next to Defenders X, Y and Z. During Close Combat, Defenders Y and Z must be attacked together. However, Attackers B and C need not attack the same hex, though all units shown must be involved in a combat. The attacking player decides to have C attack X, while A and B combine in a single Close Combat against Y and Z.
12.2 Procedure
12.21 DESIGNATE ATTACKS: The phasing player must announce all Close Combats before resolving any of them. The phasing player designates which friendly units are attacking and which enemy units are being attacked.
12.22 REMOVE PIN MARKERS: After the phasing player has announced all Close Combats, the players remove the 'Pin' markers from all units on the board (See 13.1, Pin).
12.23 COMBAT SEQUENCE: Each Close Combat is resolved separately in any order that the Attacker chooses. For each, follow the procedure given below:
STEP 1, DETERMINE ODDS RATIO: The players total the non-artillery SPs of all their units involved in this Close Combat. The Attacker compares his SP total to that of the Defender. The ratio of Attacking SPs to Defending SPs is rounded off in favor of the Defender to a set of odds given on the Close Combat Table.
Example: 5 SPs attacking 4 SPs is 1:1, but 4 SPs attacking 5 SPs is 1:2.
See 12.3 if all defending units are artillery.
STEP 2, DETERMINE LEAD UNITS: Each side, starting with the Attacker, must choose one unit to be its lead unit. The lead unit must be a Parade Order unit if one is available in the hex. Artillery units may not be chosen as lead units. This unit's morale, as modified by Army Morale, will be used as a DRM for the Close Combat. Also, if there is an adverse combat result, the lead unit will be the first unit to absorb the result (Exception: See 13.1 regarding capture results).
Note: The Exclusive Rules for each game may specify other units that cannot be the lead unit in Close Combat.
LEAD UNITS AND PROHIBITED TERRAIN: Units cannot be chosen as lead units if they would be required to advance after combat into prohibited terrain. If all attacking units are doing so into prohibited terrain then one unit can be selected as the lead unit, however it will not be allowed to advance after combat if the defending hex is vacated.
PRE-COMBAT WITHDRAWAL: After the attacker declares the lead unit the defender may declare a Cavalry or Indian Withdrawal (see 12.4).
Note: Step 2 above requires the attacker to declare the lead unit first, ensuring a combat unit is identified that will have to advance should the defender choose to withdraw.
STEP 3, DETERMINE DRMs: Before rolling the die, the players check the Close Combat DRM Chart to see what additional adjustments will be made to that die roll.
Important: Militia defending with non-militia artillery would not be considered an all-militia force even though the artillery does not participate in Close Combat nor serve as the lead unit.
Design Note: Each Close Combat takes into account factors other than the sheer numbers involved. These factors are integrated as adjustments to the resolution die roll.
STEP 4, SELECT AND RESOLVE TACTICS: Each side secretly chooses one of their available tactics by placing the Tactics Cards face down in front of them. The two Tactics Cards are revealed simultaneously, and cross-referenced on the Tactics Card (or the Tactics Matrix on the Player Aid Card), to determine if there is any DRM.
No Combat (NC): If one or both players chose the Withdraw tactic, and the result indicated on the Tactics Matrix is No Combat, the side playing the Withdraw tactic must retreat all units one hex. Withdrawing units do not have to retreat to the same hex. Exception: Artillery in the attacker's hex never retreats if the attacker played Withdraw. If both sides chose Withdraw, the defender retreats first. Skip to Step 9.
Note: See rule 12.53 for conditions that allow play of the Withdraw tactic.
STEP 5, RESOLVE CLOSE COMBAT: Close Combat is resolved by rolling a die, applying any DRMs, and cross-referencing it with the Odds Ratio on the Close Combat Table. The results to the left of the slash apply to the Attacker. The results to the right of the slash apply to the Defender.
STEP 6, MOMENTUM DECISION: The player holding the fewest Momentum Chits (the Defender in the case of a tie) may choose to spend one to return to the Resolve Close Combat step and re-roll the die. If this player declines to use momentum, the other player may choose to expend a Momentum Chit to return to the Resolve Close Combat step and re-roll the die. Multiple Momentum Chits may be spent by one or both sides in each Close Combat, but only one may be spent each time this step is reached (that is, there must be a re-roll of the Close Combat die between Momentum Chit expenditures).
Design Note: This sequence is an attempt to ensure that the player entering a battle with the most momentum has the best chance to be the last player to call for a re-roll.
STEP 7, APPLY CLOSE COMBAT RESULTS: The Close Combat results are applied before proceeding to the next Close Combat (see 13.1 for explanations of results). When both players are required to retreat, the Defender must retreat before the Attacker. After applying the results, make any Army Morale adjustments which are required.
STEP 8, GAIN/LOSE MOMENTUM: See sections 12.63 and 12.64 for ways Momentum is gained or lost. Exclusive Rules may provide additional ways Momentum is gained or lost.
STEP 9, ADVANCE AFTER COMBAT: If the defender's hex becomes vacant, the attacker must advance with at least the lead unit if it did not retreat. Other units which participated may advance up to the stacking limit, including units which had to take a morale check and passed it. Artillery units may never advance. The defender may never advance after combat.
12.3 Artillery in Close Combat
Artillery SPs never count for Close Combat.
12.31 Artillery Defending Alone: If the only defending units are artillery they are captured without conducting an actual Close Combat.
12.32 Artillery Capture Procedure:
- The attacker must first identify the lead unit. By rule, this must be an eligible combat unit (See 12.23, Step 2). If a unit cannot be a Lead Unit, it cannot capture artillery in this manner.
- Skip to Step 9, Advance after Combat.
- As the Lead Unit advances into the hex, the defending artillery unit is placed in the Captured box and Army Morale adjustments are made.
Important: This rule is never superseded by Exclusive Rules, such as fieldworks in some games, where attackers are not required to advance. Without exception, a unit MUST advance into the artillery unit's hex in order to capture it.
12.4 Pre-Combat Withdrawal
Pre-combat withdrawal is available to the defender in Close Combat under the following circumstances:
- If all the defending units in a Close Combat are Parade Order dragoons and none of the attacking units are dragoons, the Defender has the option to announce a Cavalry Withdrawal after the attacker has declared his lead unit but before the attacker resolves the Close Combat.
- If all the defending units in a Close Combat are Parade Order Indian units located in any type of woods, and none of the attacking units are Indians or light infantry, the defender has the option to announce an Indian Withdrawal after the attacker has declared his lead unit but before the attacker resolves the Close Combat.
- Pinned defending dragoons or Indians may choose Withdrawal if they break the pin at a cost of –1 Army Morale (see 9.6 and 13.1, Pin)
Note: Exclusive Rules may list other terrain types in which Indian units may conduct Indian Withdrawal, and units other than Indians that may use Indian Withdrawal.
12.41 Procedure
Instead of resolving the Close Combat normally, the dragoons or Indians retreat three hexes, regardless of terrain costs, following retreat priorities to a hex not adjacent to an enemy unit. Mark the unit(s) with a Cavalry or Indian Withdrawal marker and go straight to step 9 of the Close Combat procedure.
Note: The attacker's lead unit, at a minimum, must advance into the vacated hex.
12.42 Effects
Dragoons or Indians marked with their pertinent Withdrawal marker:
- Retain their ZOC
- May not move or attack
- Defend normally
- May not choose Withdrawal again while under a Withdrawal marker
12.43 Removal
Withdrawal markers are automatically removed from friendly units during the owning player's next Rally phase.
12.5 Tactics Cards
12.51 At the beginning of the game, each player takes one set of Tactics Cards. During every Close Combat, each player will secretly select one eligible Tactics Card to influence the battle. Once both players have made their selections, the cards are simultaneously revealed.
12.52 Reading Tactics Cards
Every Tactics Card lists the eight tactics, grouped by their ability to be used: Basic tactics are shaded in yellow, those requiring a leader to be stacked with or adjacent to a unit(s) in the Close Combat are shaded in light green, and those requiring a leader and an open flank are shaded in a darker green.
For the Tactics Card selected, players consult the appropriate column (attacker or defender) and read down that column to find the DRM associated with each tactic that can be played by their opponent.
Example: Shown below are the Tactics Cards played in a combat; the attacker has selected "Attack en Echelon" and the defender "Skirmish". Reading down the attack column to "Skirmish" on the Attack en Echelon card shows a –1 DRM for the combat. The defender sees the same result by reading down the defend column to "Attack en Echelon" on the Skirmish card.
Example: No open flank exists between unit A and units 1 & 2 but it does exist between unit A and unit 3.
12.53 Tactics Card Use Restriction: The following requirements must be met before a Tactics Card is eligible to be selected in each Close Combat.
Skirmish, Attack en Echelon and Stand Fast: May be used in all combats.
Withdraw: An all-infantry force may not choose this tactic in clear, field, or crops terrain if the opposing force contains dragoons. Additionally, a unit must have a clear retreat path in order to play Withdraw.
Frontal Assault & Commit Reserve: A Leader must be stacked with or adjacent to at least one unit involved in this Close Combat; the unit does not have to be the lead unit. See Exclusive Rules for exceptions.
Turn Flank & Refuse Flank: All of these conditions must exist in order to select either card:
- There must be an unoccupied hex that is simultaneously adjacent to one attacking and one defending hex participating in the current Close Combat, regardless of the total number of hexes involved.
- The unoccupied hex cannot be prohibited terrain for the selecting side's lead unit per the Terrain Effects Chart.
- A friendly Leader must be stacked with or adjacent to at least one unit involved in the current Close Combat (this unit does not have to be the lead unit).
- See Exclusive Rules for additional restrictions.
12.54 One Leader can meet the eligibility requirements for Tactics Card use for all units with which it is stacked or to which it is adjacent.
Important: Exclusive Rules may identify leaders and "demi-leaders" (See 14.4) who are restricted in their ability to command in Close Combat.
12.55 If one player plays an illegal Tactics Card, their opponent receives a modifier of one in their favor (+1 for attacker or –1 for the defender). If both players play illegal Tactics Cards, the Tactics modifier is 0.
Tactical Matrix
| Defender \ Attacker | Skirmish | Attack en Echelon | Stand Fast | Withdraw | Frontal Assault (leader) | Commit Reserve (leader) | Turn Flank (leader + open flank) | Refuse Flank (leader + open flank) |
|---|---|---|---|---|---|---|---|---|
| Skirmish | 0 | –1 | +1 | NC | +2 | –1 | –1 | 0 |
| Attack en Echelon | +1 | 0 | –1 | –1 | 0 | 0 | +1 | –1 |
| Stand Fast | –1 | +1 | 0 | NC | –1 | –1 | +2 | 0 |
| Withdraw | NC | +1 | NC | NC | +2 | 0 | 0 | NC |
| Frontal Assault | –2 | 0 | +1 | –2 | 0 | +1 | +1 | 0 |
| Commit Reserve | +1 | 0 | +1 | 0 | –1 | 0 | –1 | –1 |
| Turn Flank | +1 | –1 | –2 | 0 | –1 | +1 | 0 | +2 |
| Refuse Flank | 0 | +1 | 0 | NC | 0 | +1 | –2 | 0 |
NC = No Combat.
12.6 Momentum
12.61 There is a pool of five back-printed Momentum Chits. Players accumulate momentum during the game as a result of Close Combat. Exclusive Rules will list which side (if any) begins with Momentum.
12.62 Spending Momentum: Momentum chits are normally used in one of the three ways listed below.
Note: Some Exclusive Rules list other ways to spend Momentum.
- CLOSE COMBAT: Each chit spent allows the re-roll of one Close Combat resolution die roll. More than one Momentum Chit may be used in one Close Combat (see 12.23, step 6).
- INITIATIVE:
- For each Momentum Chit spent before the initiative die is rolled, a player may add two (+2) to their initiative die roll. The player who had initiative on the previous game turn must decide how many Momentum Chits to spend first (see 6.3).
- A player may spend three Momentum Chits before the initiative die rolls to dictate player order for the current game turn.
Note: This means a player could spend three Momentum Chits to compel their opponent to take the initiative for that game turn.
When a Momentum Chit is used, it is returned to the pool and can be accumulated again later.
12.63 Gaining Momentum:
- The Defender gains one Momentum Chit during the Gain Momentum step whenever the final modified Close Combat die roll is less than or equal to –1.
- The Attacker gains one Momentum Chit during the Gain Momentum step whenever the final modified Close Combat die roll is greater than or equal to 10.
If a player is entitled to receive a Momentum Chit but there are none available in the pool, the opposing player must return one Momentum Chit to the pool instead. If the opposing player does not have a Momentum Chit, there is no further effect.
Note: See Army Morale Adjustment chart for additional cases.
Exclusive Rules may list additional ways Momentum Chits are gained.
12.64 Surrendering Momentum: If a unit with a printed unit morale of +2 is captured while it is at full strength, the owning player must return one Momentum Chit to the pool. If the player does not have a Momentum Chit, the opposing player is entitled to take a Momentum Chit from the pool. If there are no Momentum Chits in the pool, there is no further effect.
Exclusive Rules may list additional ways Momentum Chits are lost.
Close Combat Table
| Die Roll | 1-3 | 1-2 | 1-1 | 3-2 | 2-1 | 3-1 | 4-1 |
|---|---|---|---|---|---|---|---|
| –2 | 2/- | AC/- | AC/- | AC/- | AC/- | 1*/- | D/- |
| –1 | AC/- | 1*/- | 1*/- | 1*/- | 1*/- | D/- | D/- |
| 0 | 1*/- | 1/- | 1/- | 1/- | 1/- | D/- | R/- |
| 1 | 1/- | D/- | D/- | D/- | D/- | R/- | R/- |
| 2 | 1/- | D/- | D/- | D/- | R/- | R/- | PIN |
| 3 | D/- | D/- | R/- | R/- | PIN | PIN | R/R |
| 4 | D/- | R/- | R/- | PIN | R/R | R/R | -/R |
| 5 | R/- | PIN | PIN | R/R | -/R | -/R | -/D |
| 6 | PIN | R/R | R/R | -/R | -/R | -/D | -/D |
| 7 | R/R | -/R | -/R | -/D | -/D | -/D | -/1 |
| 8 | -/R | -/R | -/D | -/D | -/D | -/1 | -/1* |
| 9 | -/R | -/D | -/D | -/1 | -/1 | -/1* | -/DC |
| 10 | -/D | -/D | -/1 | -/1* | -/1* | -/DC | -/AC |
| 11 | -/D | -/1* | -/1* | -/DC | -/AC | -/AC | -/2 |
Notes:
- Odds of less than 1-3 are resolved as 1-3 with a –1 DRM (–2 DRM if Diversion is used).
- Odds of greater than 4-1 are resolved as 4-1.
- Shift the Odds on Close Combats where any attacking units are adjacent to Diversion defending units 1 column to the left (i.e., 2-1 becomes 3-2).
- Die rolls less than –2 are treated as –2. Die rolls greater than 11 are treated as 11.
Combat Results: - No Effect; AM Army Morale Loss; R Retreat; D Disruption; 1 One Step Loss; 2 Two Step Loss; DC Captured, Defender's Choice; AC Captured, Attacker's Choice; PIN Pinned; * Leader Casualty. Results to the left of the slash apply to the Attacker; those to the right apply to the Defender.
13. Combat Results
In the following rules, the 'affected unit' is the lead unit in a Close Combat, or the target unit for Fire Combat. In Fire Combat, other friendly combat units in the hex are never affected, but leaders may be.
13.1 Explanation of Results
"-" No effect.
"AM" Army Morale Loss: The affected player must reduce his Army Morale marker by one.
"R" Retreat: The owning player retreats the affected unit one hex (see 13.2). The other friendly units in the Close Combat, and the Defender's artillery (only if the Defender suffers the "R" - and never the Attacker's artillery even if the Attacker suffers an "R"), must make a morale check; if they fail, they must retreat one hex also. When both sides must retreat, the defender retreats and makes morale checks first. See Exclusive Rules for exceptions to mandatory retreat.
"D" Disruption: The owning player retreats the affected unit three hexes (see 13.3) and places a disruption marker on the unit. The other friendly units in the Close Combat, and the Defender's artillery (but not the Attacker's artillery), must make a morale check; if they fail, they must retreat one hex.
- If the affected unit was already disrupted, it is now shattered. The affected unit must still retreat three hexes.
- If the affected unit was already shattered, it is eliminated and placed in the eliminated box.
"1" One-Step Loss: The affected unit loses one step. If the unit is a full-strength two-step unit, it is flipped over and remains in the hex; otherwise, the unit is placed in the eliminated box. The other friendly units in the Close Combat, and the Defender's artillery (but not the Attacker's artillery), must make a morale check; if they fail, they must retreat one hex.
Design Note: Because it is considered to be covering the retreat of the other units, the unit that takes the loss never retreats.
"2" Two-Step Loss: The affected unit is eliminated and placed in the eliminated box. If the affected unit was only a one-step unit or was a reduced two-step unit, a second unit must take a one-step loss; if there is no other unit in the hex, the second step loss is ignored. The other friendly units in the Close Combat, and the Defender's artillery (only if the Defender suffers the "R" - and never the Attacker's artillery even if the Attacker suffers an "R"), must make a morale check; if they fail, they must retreat one hex also.
Important: The Army Morale impact of this result (+1/–2) occurs even if there is only one step to lose.
"DC" Captured, Defender's Choice: One combat unit of the Defender's choice is captured (if the printed unit morale is +2, see 12.64). The unit does not have to be the lead unit, neither does it have to be at full strength. The other defending units, including defending artillery, must pass a morale check. If they pass, they must retreat one hex; if they fail, they suffer a "D" result (retreat three hexes and become disrupted).
"AC" Captured, Attacker's Choice: One participating combat unit of the Attacker's choice on the affected side is captured; place the unit in the captured box (if the printed unit morale is +2, see also 12.64). This unit does not have to be the lead unit nor does it have to be at full strength. The other friendly units in the Close Combat (including all the Defender's artillery) must make a morale check; if they pass, they must retreat one hex; if they fail, they suffer a "D" result (retreat three hexes and become disrupted).
"PIN" Pinned: Participating combat units remain engaged. All disrupted and shattered units on both sides are captured. The defender, followed by the attacker, places these units in the captured box and makes Army Morale adjustments. A pinned marker is then placed on all hexes involved in this Close Combat. If no defending combat units remain after these Disrupted/Shattered captures occur, PIN markers are not placed on any units and the attacker must advance with at least the Lead Unit per 12.2, Step 9 (defending leaders would be captured in this case).
Once Pinned markers are placed, the next phasing player must either:
A. Attack with all their pinned units, and attack all defending units marked as pinned during this player turn (additional units may stack and/or attack with the pinned units);
OR:
B. Move all friendly pinned units so that they are not adjacent to any enemy units; and do not move any other friendly units adjacent to the enemy pinned units; and reduce Army Morale by one (9.6).
Note: In Case B above, one Army Morale point is spent for each individual PIN result that is removed in this way. In case B above a leader cannot leave a pin hex without triggering an Army Morale penalty.
Note: Pinned defending units may not receive a diversion. This is an exception to 12.14.
'Pin' markers are removed from all friendly and enemy units either at the end of the movement phase, with an Army Morale Penalty (see 9.6), or after all Close Combats are assigned (see 12.22). See Exclusive Rules for Pin exceptions.
For Pin examples, see the Pinned Unit Cases table below.
Pinned Unit Cases
| Case | The Pinned Unit(s) are | Pinned Against | Then |
|---|---|---|---|
| 1 | One or more units in a single hex | A single hex | All Pinned units must attack the pinned hex. Other units may join the combat. |
| 2 | In multiple hexes | A single hex | All Pinned units must attack the pinned hex. Other units may join the combat. |
| 3 | A single unit | Multiple hexes | The unit must attack all hexes it is Pinned to OR: if additional units attack all Pinned hexes, the Pinned unit may attack any of the hexes it is pinned against; if additional units attack some Pinned hexes the Pinned unit must attack all remaining hexes it is pinned to. |
| 4 | More than one unit in a single hex | Multiple hexes | The units must, in some combination, attack all hexes pinned to OR: if additional units attack all Pinned hexes, the Pinned units may attack any of the hexes it is pinned against. |
Note: See Exclusive Rules for exceptions to these cases.
"*" Leader casualty: The owning player removes one Leader and places it in the eliminated box. The Leader chosen need not be the one in command. This is the only result from artillery or rifle fire that may affect other units in the hex. If no leader is present, ignore both the result and the Army Morale adjustment due to Leader casualty.
13.2 Retreat
13.21 RETREAT GUIDELINES: If possible, a unit must retreat into a hex which is not adjacent to an enemy unit and in a direction specified by each game's Exclusive Rules. Refer to those Exclusive Rules to determine the required direction.
13.22 RESTRICTIONS: Units may not retreat:
- Into an enemy occupied hex
- Into an enemy ZOC, even if friendly units already occupy the hex
- Into prohibited terrain
- Off the map
- In violation of stacking limits (Exception: see 13.23).
Important: A unit may retreat in a direction not specified in the Exclusive Rules if no other path exists, only if that path does not violate any of the conditions of 13.22.
13.23 RETREAT AND CAPTURE: Any unit that cannot retreat the full distance because of restrictions is captured instead; this includes retreats caused by Rifle Fire or Artillery Fire. The unit is removed and placed in the captured box.
Exception: If a two-step unit would be captured for failure to retreat due to stacking limit violations, the owning player may choose to take a step loss and retreat, provided that the reduced-strength unit would not violate stacking limits in the hex into which it retreats. The Army Morale adjustments of suffering a '1' result are applied if the unit is reduced in this manner. (The player may still choose to have the unit captured instead of taking a step loss.)
13.24 COMBAT AND PREVIOUSLY RETREATED UNITS: If a unit retreats from a Close Combat into a hex which has not yet had its Close Combat resolved, it may not contribute any strength to that Close Combat, nor may it be selected as the lead unit. If its side suffers any result other than "No Combat", the previously retreated unit must make a morale check. If it passes, it must retreat one hex; if it fails, it suffers a "D" result (see 13.3, Disruption).
Note: Units which retreat as a result of Fire Combat must still attack adjacent units (See 12.12).
13.25 LEADER RETREATS: Any Leader may freely retreat along with any friendly retreating units with which it is stacked. Leaders are never required to retreat.
13.26 ARTILLERY RETREATS: Artillery units retreat like other units. Artillery units are not captured automatically if they end the Apply Close Combat Results Step adjacent to enemy combat units. Artillery capture occurs during Advance After Combat, and only if the defending artillery unit was alone in the hex when the Lead Unit was determined (see 12.32).
Note: Attacking artillery never retreats.
13.3 Disruption
Disrupted units: Must retreat three hexes and end three hexes from its starting hex, counting by the shortest distance, or else be captured. The end hex may not be adjacent to an enemy unit if there is any hex which is also three hexes from the starting hex and not adjacent to an enemy unit. The prohibition against retreating into enemy ZOCs applies (see 13.22).
- May only move one hex per turn, and may not move adjacent to an enemy unit. If a disrupted unit begins a movement phase adjacent to an enemy unit(s), it must use its one hex move to move away (i.e., no longer adjacent) from all enemy units if possible; if not, then it must move away from as many enemy units as possible.
- May not attack; artillery and rifle units may not fire.
Important: If the unit ends its Combat Phase adjacent to a Parade Order enemy combat unit and it is not stacked with a friendly Parade Order combat unit, it suffers an additional "D" result, and becomes shattered. If it cannot retreat three hexes it is captured per 13.23.
- Defend with only half of their SPs (fractions rounded up)
- Have no ZOC
- Are shattered, if they receive an additional "D" result
- Are captured if they receive a 'PIN' result
- May not attempt to Rally in the Rally Phase if in the ZOC of any enemy combat unit.
13.4 Shattered
Shattered units:
- When initially shattered, retreat three hexes per 13.3
- May not move (even at the minimum one-hex rate)
- May not attack; artillery and rifle units may not fire
- Defend with 1 SP (regardless of their actual SP ratings), and may not receive any terrain DRMs
- Have no ZOC
- Are eliminated, if they receive an additional "D" result (place such units in the eliminated box)
- Are captured, if they receive a PIN result
- Are captured, if they end any Close Combat phase adjacent to enemy units, and are not stacked with friendly Parade Order units; remove the units and place them in the captured box.
- May not attempt to Rally in the Rally Phase if in the ZOC of any enemy combat unit.
- Shattered units on the board at the end of the game are worth ½ VP.
13.5 Morale Checks
When a Morale Check is required, a die is rolled and the value is added to the unit's modified morale. If the result is 5 or greater, the unit passes the morale check. If the result is 4 or less, the unit fails the morale check.
MORALE CHECK MODIFIERS: Apply the following modifiers to the Morale Check die roll:
+1 Defending units attacked solely across unbreached fieldwork hexsides including forts, redoubts, stockades, revetments, earthworks, flechettes or any other type of fortified hexside specifically depicted in the game.
+? Leadership DRM (see 14.23)
See Exclusive Rules for volume specific Morale Check modifiers and situations.
14. Leaders
14.1 Stacking Leaders
Any number of friendly Leaders may stack in a hex, however only the highest ranking leader (See Exclusive Rules for leader seniority) is "in command." Place the Leader in command on top of the friendly units.
Important: See Exclusive Rules for limitations on which units each leader is able to command. Leaders must be in command in order to perform any of the functions described below.
14.2 Using Leaders
14.21 CLOSE COMBAT DRM: A Leader in command and stacked with any units participating in Close Combat modifies the die roll with his Close Combat DRM. When attacking, the rating is added to the die roll; when defending, it is subtracted. The leader does not need to be stacked with all attacking units in order to use this DRM.
Important: The most senior leader—who is deemed to be in command during the combat—is the only leader who may apply his combat DRM to the combat, regardless of how many other leaders may be present among the participating hexes.
14.22 TACTICS CARDS: In-command leaders stacked with or adjacent to units of its side in Close Combat allow for the play of additional Tactics Cards (see 12.53). See each game's Exclusive Rules for exceptions.
14.23 LEADERSHIP DRM: During all morale checks and rally attempts, the Leader in command may add his Leadership DRM to all combat units in his hex.
Leadership Ability Table
| Leadership Function | Same Hex | Adjacent Range | Usage |
|---|---|---|---|
| Close Combat DRM | Yes | No, unless the leader's hex is involved in the same CC | Can only be applied to one Close Combat per combat phase. |
| Tactics Card Usage | Yes | Yes | Applies to all CC to which the leader is adjacent |
| Leadership DRM | Yes | Yes for George Washington only, otherwise No | Applies to each unit's roll |
14.3 Affecting Leaders
14.31 Leaders are only affected directly in combat by an "*" result. Leaders are never disrupted. If stacked with units which retreat or suffer disruption, the leader may either retreat with them or remain in place.
Important: Any leader in the affected combat can be chosen for the casualty result, not just the highest ranking leader.
14.32 If the "" resulted from Fire Combat, a leader stacked with the targeted unit will suffer the loss. If the "" resulted from Close Combat, any leader stacked with units participating in that specific Close Combat will suffer the loss. Therefore, if a leader only provided additional Tactics Cards due to adjacency, that leader is not eligible to satisfy a loss result.
14.33 Leaders alone in a hex are captured immediately if Parade Order or Disrupted enemy combat units enter their hex. This capture can occur either during the movement phase or as a result of advance after combat. If the Leader is captured during enemy movement, the capturing unit does not have to stop or expend additional movement points.
14.4 Demi-Leaders
Some non-leader units allow Tactics Cards to be played for themselves or other units stacked with or adjacent to them. These units are specified by a 5-point gold star on their counters and explained fully in each game's Exclusive Rules.
15. The Rally Phase and Unit Morale
15.1 The Rally Phase
During the Rally Phase, the phasing player's disrupted or shattered units that are not in an enemy ZOC may attempt to Rally. A unit attempts to Rally by making a Morale Check (13.5). A Leader in command may modify the Rally attempt of any units in the same hex by adding his Leadership DRM (14.23). A Leader is not required in order to make a Rally attempt.
15.2 Rally Effects
A disrupted unit that passes its Morale Check is restored to Parade Order. If it fails its morale check, it remains disrupted. A shattered unit that passes its Morale Check becomes disrupted. If it fails its Morale Check, it remains shattered.
15.3 Unit Morale
15.31 BASE MORALE: A unit's base morale is printed on the unit. The base morale on the reduced side of a unit is usually one less than on the full-strength side.
15.32 MODIFIED MORALE: A unit's modified morale is the unit's base morale plus the unit's army morale modifier (see 16.2). A lead unit's modified morale is used as a DRM for Close Combat (see 12.2).
15.33 Rally on Me: "Rally on Me" markers should be placed on top of stacks containing both Parade Order and Disrupted/Shattered units as a reminder to make morale checks in the Rally Phase.
16. Army Morale
Design Note: In this period of warfare, battles were decided less often by inflicting overwhelming losses than by destroying the opponent's will to resist. The Army Morale Track measures the tenacity and will to fight of a player's entire force. The success or failure of the individual units throughout the course of play will have a cumulative effect upon the overall status of each player's army. Conversely, the overall morale status of a player's army influences the ability of individual units to perform to maximum effect.
16.1 Adjusting Morale
Army Morale may need to be adjusted each time one of the following occurs (see Exclusive Rules and Player Aid Cards in each volume for additional cases):
- A Fire or Close Combat result is other than 'no effect'.
- A unit rallies (+1)
- A Leader casualty (see Exclusive Rules)
- PIN markers are removed in the Movement Phase (see 9.6).
16.2 Army Morale Levels
16.21 HIGH MORALE: If an army is considered at High Morale the Initiative DRM for that army is +1. All units in a High Morale army use their printed unit morale ratings.
16.22 FATIGUED: If an army is Fatigued, the Initiative DRM for that army is 0. All units in a Fatigued army have their unit morale ratings reduced by 1.
16.23 WAVERING: If an army is Wavering, the Initiative DRM for that army is –1. All units in a Wavering army have their unit morale rating reduced by 2.
Note: If the Army's Morale changes between High, Fatigued or Wavering during the resolution of a Fire Combat or Close Combat, resolve any resulting morale checks using the Army Morale level that was in effect at the beginning of that Combat. The new Army Morale level is used for any Combats which are still to be resolved in that Combat Phase.
16.3 Demoralized and Substantial Victories
If an Army's Morale falls to 0, it is considered Demoralized. The game ends immediately, and the opposing player wins a Substantial Victory.
Expanded Sequence of Play
A. Initiative Segment (See Rule 6.0)
- Each player rolls one die and modifies it by the Army Morale DRM to determine who has the Initiative this turn.
B. Initiative Player Turn
-
Flip the game-turn marker to indicate the correct player turn.
-
MOVEMENT PHASE (9.0)
- Place reinforcements if any (9.11).
- Disrupted units may only move one hex (13.3).
- Shattered units may not move (13.4).
- Pinned units may move only if they do not end their move adjacent to an enemy unit and the phasing player reduces his Army Morale (9.3).
- Units may conduct Strategic Movement (9.5).
-
RALLY PHASE (15.0)
- Make a Morale Check (13.5) for each friendly Disrupted (13.3) or Shattered (13.4) unit that is not in the ZOC of an enemy combat unit.
- A modified die roll ≥ 5 Rallies the unit (+1 AM).
- Shattered units that Rally become Disrupted, Disrupted units that Rally become Parade Order.
See Exclusive Rules for other game functions that may be performed in the Rally Phase.
-
DEFENSIVE ARTILLERY FIRE PHASE (11.0)
The non-phasing player may fire any or all of his artillery units.
STEP 1: Determine "To Hit" number (cross reference artillery SPs with the range to the target on the Ranged Fire To-Hit Table).
STEP 2: Roll a die. If the modified die roll is equal to or greater than the "To Hit" number, a hit is scored.
STEP 3: If a hit is scored, a second unmodified die roll is made on the Artillery Fire Damage Table to determine the result. After applying the results, make any Army Morale adjustments that are required (16.1).
-
RIFLE FIRE PHASE (10.0)
- Both players may conduct Rifle Fire with their Rifle units.
- Fire is considered simultaneous (10.4).
STEP 1: Determine "To Hit" number (cross reference Rifle SPs with the "adjacent" column on the Ranged Fire To-Hit Table) (10.3).
STEP 2: Roll a die. If the modified die roll is equal to or greater than the "To Hit" number, a hit is scored (10.3).
STEP 3: If a hit is scored, a second (unmodified) die roll is made on the Rifle Fire Damage Table. Make any Army Morale adjustments that are required (16.1).
-
CLOSE COMBAT PHASE (12.0)
A. Designate all attacks (12.21). The phasing player must attack with all his units that are adjacent to enemy units, and all adjacent enemy units must be attacked. Exceptions: Artillery and rifle units (12.12), Diversions (12.14).
B. Remove Pin markers from all units (12.22).
C. Conduct all designated Close Combats.
CLOSE COMBAT SEQUENCE (12.23):
STEP 1: Determine Odds Ratio.
STEP 2: Determine Lead Units.
- After the attacker declares its lead unit, defender may choose Pre-Combat Withdrawal (12.4).
C. Second Player Turn
Same as above, except ignore B1 and B7.
D. End-of-Turn Segment
- Check for Automatic Victory (see Exclusive Rules).
- If it is the last game turn of the scenario, determine a winner.
- Advance the game-turn marker to the top half of the next game turn.
Part Two: Germantown Exclusive Rulebook
Germantown — Living Rules, November 2010. Game Design by Mark Miklos & Bill Madison.
Germantown Combat Units
BRITISH Player
Tan with red stripe: British Regulars
Tan with yellow stripe: Provincials
Tan with green stripe: Hessians
AMERICAN Player
Light blue with dark blue stripe: Continentals
Light blue with light blue stripe: Continentals (Greene's Wing)
Light blue with no stripe: Patriot Militia
Most but not all American combat units feature a white letter designation. This indicates formations as follows:
- A = Armstrong's Brigade
- C = Conway's Brigade
- G = Greene's Division
- M = McDougall's Brigade
- Mx = Maxwell's Brigade
- N = Nash's Brigade
- S = Sullivan's Division
- Sm = Smallwood's Division
- St = Stephen's Division
- W = Wayne's Division
I. Prepare for Play
1.1 Fortified Hexes & Hexsides
- The Chew House (hex 3313) is considered a fortified hex (see rule 3.10 & Terrain Effects Chart).
- Fieldworks are located along hexsides 3724-3624, "Ewald's Barricade" & hexsides 3907-3908, "Luken's Mill Flechette" (see Terrain Effects Chart).
1.2 Initiative
- Turns 1-3: American followed by British
- Turns 4-10: Random Player Order
1.3 Game Length
The game begins at 5:20 AM (Turn 1) and ends at 2:20 PM (Turn 10) unless either side achieves automatic victory.
1.4 Army Morale
British: 14, American: 13
1.5 Momentum
The American player starts with 1 Momentum Chit.
1.6 At-Start Set Up
- All units with 4-digit at-start location numbers are placed on the board in the corresponding hexes.
- Units with turn of entry designations are placed on the Game Turn Track as reinforcements.
1.7 Sequence of Play
- Initiative Determination (beginning Turn 4)
- Fog Check (Turns 4-6 only)
- Fog is automatically "dense" on Turns 1-3 and weather is automatically clear on Turns 7-10.
- Move Stephen's Formation (beginning on Turn 2, American Player Only)
- Consult Stephen's Movement Table for random direction.
- Friendly Fire Check (beginning on Turn 4, American Player Only)
- Friendly Fire can only occur once in the game. Afterward, this step is skipped in the Sequence of Play.
- Movement Phase
- Reinforcements
- Rally Phase
- Panic Recovery
- Defensive Artillery Fire Phase (non-phasing player)
- Includes off-board militia bombardment during clear weather
- Rifle Fire Phase (simultaneous)
- Close Combat Phase
- Advance Game Turn Marker
II. How to Win
2.1 Decisive
2.1.1 British Decisive Victory:
Case (1): Eliminate or capture 17 or more SPs of non-militia non-artillery combat units, including SPs lost among reduced units still on the board.
Case (2): If Washington is a casualty, the number of SPs required for Decisive Victory is reduced to 12.
Note: When counting lost SPs for Decisive Victory purposes, Panicked units that retreated off the board are counted although they do not count for VPs when calculating Marginal Victory.
2.1.2 American Decisive:
Case (1): American Army does not panic; Occupy British entry hex "B" (hex 4617) with a combat unit other then artillery at the end of any game turn without any British combat units adjacent.
Case (2): American Army Panics; Occupy or be the last to have occupied the Chew House (hex 3313) and occupy Market Square (hex 3915) with combat units other then artillery at the end of any game turn without any British combat units adjacent.
2.2 Substantial
Same as Series Rules.
2.3 Marginal
- American Marginal Victory = 2 or more American VP margin.
- British Marginal = 2 or more British VP margin.
- Any other outcome is considered a draw.
2.4 Objective Hexes and Leader Casualties
2.4.1 Chew House: (hex 3313) is worth 1 VP to the British player if he occupies it at the end of the game.
2.4.2 Market Square: (hex 3915) is worth 1 VP to the American player if he occupies it at the end of the game.
2.4.3 Leader Casualties: See Leader Summary Table on Player Aid Card.
III. Special Rules
3.1 Fog
- Turns 1-3, fog is automatically "Dense."
- Turns 4-6, American player rolls on the Fog Table (see map).
- Turns 7-10, weather is automatically "Clear."
3.1.1 Effects of Dense Fog:
- Maximum artillery range is reduced to one hex (adjacent).
- Movement is normal along roads, lanes, and trails.
- Strategic Movement along roads and lanes is permitted according to Series Rule 9.52.
- Movement is reduced by 1 MP if any portion of a unit's movement is off of road, lane or trail.
- –1 DRM to Friendly Fire Check (American only).
3.1.2 Effects of Moderate Fog:
- Maximum artillery range is reduced to 2 hexes.
- –1 DRM to Friendly Fire Check (American only).
3.2 Stephen's Shame
Design Note: Major General Stephen was drunk on duty and later court-martialed and cashiered for his role in the American defeat at Germantown.
3.2.1 Movement Procedure
Stephen's movement precedes the regular American movement phase.
- Beginning on Turn 2, the American player rolls on Stephen's Movement Table (located on the map) to determine the mandatory direction the units in Stephen's Division will move.
Important Correction: On Stephen's Movement Table, a die roll result of 7 in the Turn 5+ column was omitted. When rolling 7, units must move north (N). Players should edit the Table accordingly.
- Units in Stephen's Division must move their full movement allowance, if possible.
Exception: General Stephen must always end Stephen's Movement Phase stacked with at least one of his infantry units.
Exception: Units in Stephen's Division that intend to have combat with adjacent enemy units may remain in place.
- If any of Stephen's units marches off the board due to the random direction assigned by the Stephen's Movement Table, those units may not re-enter play.
Reduce American Army Morale by 1 the first time this occurs. This reduction in Army Morale is a one-time event.
- On Turns 2, 3 and 4 a directional die roll of 9 will yield a "No Restriction" result. In such a case the American player may not voluntarily march Stephen's units off the board. Voluntarily abandoning the field of play is prohibited.
3.2.1.2 Strategic Movement: Units in Stephen's Division that begin on a road or lane and are not adjacent to enemy combat units must use Strategic Movement if the first hex entered along the road or lane conforms to the direction mandated by the directional die roll. In such a case, move the units as far along the road or lane as possible, even if the road/lane turns away from the original die roll direction.
Clarification: If a unit begins on a road or lane, and if the direction rolled is other than that of the road or lane, then the unit must leave the road or lane and set out across county.
- If an intersection or a fork in the road occurs while Stephen's units are using Strategic Movement, those units must turn as closely as possible in the direction determined by the original directional die roll. If two or more directions are equally valid, the American player may choose the one he prefers.
- If Stephen's units are using Strategic Movement and the road or lane ends or if the road or lane is blocked by adjacent enemy units, Stephen's units end their movement according to Series Rule 9.52.
Extended Example of Stephen's Movement: Assume the 4th VA Brigade starts on hex 3304 on game turn 5.
Die Roll 0-1: The brigade must move south. Because the Lime Kiln Rd continues south from hex 3304, the brigade must use Strategic Movement. Hex 3405 is an intersection but the Lime Kiln Rd continues south into hex 3505 and so that direction must be chosen. Hex 3806 is also an intersection. Of the three directions available, hex 3807 (southwest) conforms most closely to the original mandatory direction (south) and must be chosen. Assuming no enemy units are adjacent to the road, the brigade will end up in hex 3907. It could not continue into hex 3908 because the Luken's Mill flechette is an enemy fieldwork which requires an American unit to pay +1 MP to cross.
Die Roll 2-5: The brigade must move southwest. It will end movement in hex 3307, having paid +1 MP to cross Mill Creek at hexside 3306-3307.
Die Roll 6: The brigade must move northwest. It will end movement in hex 3006, having paid 1½ MPs each to pass through the heavy woods in hexes 3205 and 3105.
Die Roll 7: The brigade must move north. This means the brigade must use Strategic Movement and will march off the board passing through entry hex A. The American player must immediately reduce American Army Morale by 1.
Die Roll 8: The brigade must move northeast. It will end in hex 3300.
Die Roll 9: The brigade must move southeast. It will end movement in hex 3603, having paid +1 MP to cross Saw Mill Creek at hexside 3503-3603.
3.2.2 Friendly Fire Procedure
Beginning on Turn 4, whenever units in Stephen's Division end their movement stacked with or adjacent to units from other formations, there is the possibility of a Friendly Fire incident occurring.
- Place a Friendly Fire marker on every unit from Stephen's Division that is adjacent to or stacked with a unit from another American formation; also place Friendly Fire markers on those American units that are adjacent to one or more units from Stephen's Division.
Exception: Artillery and units without formation designations neither trigger nor receive Friendly Fire.
Note: Players are not limited by the counter mix when placing Friendly Fire markers. If more markers are needed use any suitable means.
- Units roll individually on the Friendly Fire Table (see map) to determine if an incident occurs. The American player may resolve potential Friendly Fire in any order he wishes.
- If the result is "No Effect," remove the Friendly Fire marker.
- As soon as the first unit experiences Friendly Fire, flip its Friendly Fire marker to the "Panic" side and remove all remaining Friendly Fire markers. Friendly Fire can only occur once in the game.
Reduce American Army Morale by 1 the moment that Friendly Fire occurs. This reduction in Army Morale is a one-time event.
- Every unit stacked with or adjacent to the unit in panic is now also marked with a Panic marker, as are all units adjacent to those units, including artillery but excluding units without formation designations.
Note: Players are not limited by the counter mix when placing Panic and Friendly Fire markers. If more markers are needed use any suitable means.
3.2.3 Effects of Panic
- Units in panic immediately retreat 4 hexes northwest, if possible, following all other retreat rules as normal.
- Units in panic that retreat off the board may not re-enter play (see 2.1 for effects on British Decisive Victory conditions).
Reduce American Army Morale by 1 the first time this occurs. This reduction in Army Morale is a one-time event.
- Panicked units have no ZOC and may not move, fire or attack, but may defend at ½-strength (round up).
3.2.3.1 Recovery From Panic:
-
Panicked units may attempt to recover by performing a morale check beginning on the Rally Phase of their next player turn.
-
Apply a –1 DRM to the rally die roll in addition to normal modifiers.
- If a panicked unit passes the morale check it is considered recovered. Remove the Panic marker.
Important Note: Units that recover from panic do not gain Army Morale points.
- If a panicked unit fails the morale check it remains panicked and immediately retreats another 4 hexes toward the northwest, if possible.
3.3 Initial British Movement Restrictions
- Turn 1: Only British & Hessian units on or north of hex row 34xx can move.
- Turn 2: Units released on Turn 1 and all remaining Hessian units may move.
- Turn 3: All of the British player's units may move.
3.4 Reinforcements
- Arriving units enter at no cost and may move normally, including the use of Strategic Movement.
- If enemy units or their ZOCs occupy an entry hex, reinforcements may enter at the nearest unblocked hex paying normal terrain costs to do so. If more than one such hex is available, the owning player may choose.
3.4.1 American Reinforcements:
Enter on Turn 2 at hex 2800, labeled "A-1."
Important Note: These American reinforcements cannot be voluntarily withheld. This is an exception to Series Rule 9.61.
3.4.1.2 American Variable Reinforcements:
Beginning on Turn 7, the American player rolls to see if Smallwood's Militia enters play. The die is rolled during the American player's Movement Phase. Consult the Game Turn Track and roll the number shown. Note, the turn-of-entry designation for these units is in parenthesis as a reminder that they have variable entry.
- If successful, Smallwood's units enter at hex 3800, labeled "A-2."
- If unsuccessful, advance Smallwood's units along the turn track and roll again in the following turn.
3.4.2 British Reinforcements:
Enter on Turn 5 at hex 4617, labeled "B."
3.5 American Militia Bombardment Zone
The presence of American militia artillery across the Schuylkill River, off the map and out of play, has been abstracted as follows:
- During clear weather turns only the Americans may fire "off board" artillery at enemy combat units occupying the American Militia Bombardment Zone. This zone is identified by a dashed red line (see map).
- Fire is conducted during the Defensive Artillery Fire Phase. SPs firing are assumed to be 1 and range is assumed to be 3 regardless of the target hex.
Note: Line of Sight does not apply, but all other fire modifiers do. This is an exception to Series Rule 11.41.
3.6 American Surprise
To reflect surprise, units belonging to the American Vanguard receive a +1 DRM in Close Combat on Turn 1 only.
Note: These units have their MPs highlighted in a yellow box for ease of identification.
3.7 Wayne's Fury
Whenever a unit in Wayne's Division is the lead unit in an attack against British Light Infantry, and Wayne is stacked with that unit, the attacking Americans receive a +1 DRM in Close Combat.
Design Note: Wayne's troops were eager to exact revenge upon the British Light Infantry for its role in the Paoli Massacre.
3.8 Retreat Priorities
- American units must retreat north, northwest or west if possible.
- British units must retreat south, southeast or east if possible.
3.9 Leaders
3.9.1 American
Any American leaders may command any American units, unless specified below.
Washington: Washington has the ability to project his Leadership DRM into adjacent hexes.
- This is an Exception to Series Rule 14.23.
- His Leadership DRM is +4 when stacked and +1 when adjacent to friendly combat units.
- When adjacent, his +1 Leadership DRM is cumulative with any Leadership DRM provided by a leader in command in the adjacent hex.
Armstrong: Armstrong can only command American militia.
Design Note: Although Armstrong held a Continental Commission as Brigadier General, he is restricted to the command of militia in this game.
Matthews: Matthews can only command the 9th VA.
3.9.1.1 American Seniority:
- Major Generals: Sullivan followed by Stephen and Greene.
- Brigadier Generals: Maxwell followed by Wayne and Muhlenberg.
3.9.2 British
Any British or Hessian leaders may command any British, Provincial or Hessian units unless specified below.
Musgrave: Musgrave can only command the 40th Foot.
3.9.2.1 British Seniority:
Major Generals: Cornwallis followed by Agnew, Grey and Grant.
Design Note: Grey's rank of Major General was a brevet rank, awarded in 6/76, while Grant's rank dated from 1/77. Grey was superior to Grant locally, but would not be considered his superior throughout the British military establishment. Grey's brevet rank became permanent in 1778.
3.9.3 Demi-leader
Ewald: Ewald is a demi-leader when alone or when stacked with Hessian units.
- He allows for the play of advanced tactics without normal use restrictions (see Series Rule 12.52).
- Ewald loses his demi-leader capability while stacked with non-Hessian units or while participating in a multi-hex attack.
- His status as a demi-leader is indicated by the 5-pointed gold star on the counter.
3.10 Chew House
The Chew House is a fortified hex with the following effects.
3.10.1 Movement: Cavalry & artillery may move through but may not end movement in the hex.
- ZOC extends out of but not into the hex.
- Retreat by cavalry or artillery into the hex is prohibited.
3.10.2 Morale Check: Units in the hex receive +1 DRM to morale check die rolls.
3.10.3 Fire Combat: Enemy units suffer –3 DRM when firing at units in the hex.
3.10.4 Close Combat: Enemy units suffer –2 DRM when attacking units in the hex.
- Units in the hex are not required to attack adjacent enemy units. Exception: Pinned units must attack.
- Diversions may be used normally.
- Units in the hex may not select "Turn Flank" or "Attack en Echelon" tactics.
- Units in the hex may ignore "Retreat" results from fire or close combat. In this case, other units normally required to make morale checks may ignore them.
- Disruption, step-loss and capture results are treated normally.
- Advance after combat out of the hex is optional.
3.10.5 Victory Points: 1 VP is awarded to the British player only at the end of the game if he occupies or was the last to occupy the hex.
IV. Special Units
4.1 PA State Foot & 5th Pennsylvania
- These are mixed musket/rifle regiments with two SP values separated by a backslash.
- The SP values are interpreted as Close Combat / Rifle Fire, and each value is applied in the corresponding phase.
Note: When either of these units receives a step loss, the Close Combat value on the back of the counter is reduced but the Rifle Fire value is not.
4.2 PA Rifle Regt, PA State Foot & 5th Pennsylvania
- These rifle-armed regiments do not suffer the normal –1 DRM for rifle units in Close Combat.
- Their rifle designation is shown as a black "R" in a white circle rather then the standard white "R" in a black circle for ease of identification.
4.3 American Vanguard
- Doyle's Rifle Company, Spencer's Regiment, Conway's Brigade, Conway's Brigade Artillery and Moylan's Horse belong to the American Vanguard.
- The Vanguard is entitled to a surprise attack benefit on Turn 1 only (see 3.6).
- The Vanguard has its MPs highlighted in a yellow box for ease of identification.
Historical Summary
The Battle of Germantown
By Bill Madison. Edited by Mark S. Miklos.
After their successes at Brandywine and Paoli the British advanced upon Philadelphia relatively unmolested. On the night of 22 September 1777 the British forded the Schuylkill River, and the next day marched to Norrington. When news of the British advance reached Philadelphia the city was gripped by panic; Congress fled, the city was stripped of anything the British could use, known patriots fled from their homes, cattle in the surrounding countryside were driven off and wagon loads of clothing and forage were carted out of the city.
On the 25th General Howe marched to Germantown, outside of Philadelphia, and bivouacked 9,000 troops there. The following day Lord Cornwallis entered the American capital with an additional 3,000 men. They paraded through the streets and were enthusiastically welcomed by the local Loyalists. The sight of Loyalists in Philadelphia was as welcome to General Howe as the sight of his red-coated troops was to the Tories. According to Sir William, "Through the whole march of the army, from the Head of Elk to Philadelphia, the male inhabitants, fit to bear arms (a very few excepted) had deserted their dwellings, and I had great reason to believe, were in arms against us. The Quakers were the only people against whom I entertained no suspicion."
Cornwallis quickly set to work on fortifications, setting up batteries to defend the riverfront from the Pennsylvania State Navy, which patrolled the Delaware. The Royal Navy had entered the lower Delaware and awaited the army's help to reduce American river defenses.
By the end of September General Washington's army numbered 11,000 men, thus slightly outnumbering the British bivouacked at Germantown; Washington determined to make a surprise attack during the predawn hours of October 4. Howe had chosen to rely on his patrols, perhaps being overconfident that no attack was possible. As a result he had failed to fortify his position. Washington's ambitious plan called for four columns to make a long, coordinated march at night in order to conduct simultaneous surprise attacks at first light on these unfortified British positions.
On the far right, Major General Armstrong with the Pennsylvania Militia was to turn the British left flank near the Schuylkill River. Sullivan's 3rd and Stirling's 5th Divisions would advance along Germantown Road accompanied by General Washington. The main attack would be made on the left by Greene's and Stephen's Divisions, who were to march upon the Germantown marketplace and force the British right wing. On the extreme left, Brigadier-General Smallwood's Maryland Militia and Brigadier-General Forman's New Jersey Militia would advance down the Old York Road, and get into the rear of the British right wing.
The timing of Washington's plan had allowed for two hours of rest for each column upon reaching their pre-attack positions. Unfortunately, the plan fell apart from the outset, as all the columns were late in reaching their appointed positions. A thick fog that night made the approach march difficult, though it also disguised the advance. Early on the morning of October 4 the British 1st Light Infantry captured an American scout and learned of the impending attack, but—incredibly—this information was not relayed.
At about 5.30am the 6th Pennsylvania Regiment, at the forefront of Sullivan's column, reached the community of Mount Airy on a rise of high ground known as Mount Pleasant and engaged the pickets of the 2nd Light Infantry. The Lights formed to counterattack, thinking it a small patrol, but Conway's Brigade and Sullivan's and Wayne's Divisions formed their line and forced the pickets to retreat. The heavy musketry stabbing through the fog and smoke convinced the Lights that this was a significant force. Their whole battalion was forced to fall back from its position along with the accompanying Royal Artillerymen who were also obliged to drag away their two 6-pounders, but not before one of their round shot went sailing over Conway's Brigade and mortally wounded Brigadier-General Nash, commander of the North Carolina Brigade.
General Howe, now aware of the attack, galloped toward the sound of gunfire and was astonished to see his Light Infantry in full retreat. A hail of grapeshot from the Americans soon convinced him of the seriousness of the situation. At about this time, Armstrong's Pennsylvania Militia arrived on the British left. The Hessian Jaegers positioned there had been warned the previous day of a possible attack and in the early hours one of their patrols discovered Armstrong's advance. Captain Ewald positioned his Jaegers on the heights overlooking a defile, and at barricades thrown up over a bridge spanning Wissahicken Creek, and waited. Armstrong attacked with the full force of his division, but the Jaegers held throughout the entire engagement.
The Chew House
At about 6.15am the 2nd Light Infantry were continuing to fall back towards the Chew House where the 40th Foot was stationed. The accompanying artillerymen were forced to abandon their guns, cutting the drag ropes so that they could not easily be moved if captured. The 40th formed their line to support the retreating Light Infantry, until the news that Wayne's Division were in their camp, outflanking them, obliged Colonel Musgrave to order the 40th to retreat in their turn. Acting decisively, however, Musgrave first ordered about 120 of his men to hold the Chew House, the imposing stone-built country house of the wealthy Benjamin Chew. This substantial example of Georgian architecture was quickly turned into a fortress. Doors and windows were barricaded with furniture and most of the little garrison manned firing positions in the upper windows and those of the semi-basement. Lieutenant William Harris' detachment guarded the ground floor with fixed bayonets.
The defenders fired upon Sullivan's and Wayne's Divisions as they passed, but these units sensibly did not stop to engage. When General Washington arrived with Stirling's Division, however, the house attracted more attention. Upon the advice of Brigadier-General Henry Knox, the commander of Washington's artillery, Washington ordered an attack. Four cannon opened fire at about 7am, first upon the northwest corner and then directly upon the front. The doors and windows were quickly blown in, but after half an hour the guns had proved too light to breach the solid stone structure, and Washington ordered the house taken by storm. Maxwell's New Jersey Brigade formed to the west of the house and the North Carolina Brigade to its north, opening a steady fire. The 3rd New Jersey Regiment made a valiant assault, but each attempt was beaten back by the defenders with mounting losses.
At about this time, Greene's Division arrived and drove in the pickets of the 1st Light Infantry forcing them back onto the main British body. Stephen's Division inclined to their right towards Abington Road and became separated from Greene in the fog. Meanwhile, the British were preparing a counter-attack. The 5th and 55th Foot were ordered to support the 40th; but the order was countermanded upon the arrival of Greene's Division, and these units were drawn off to protect the British right flank, followed by the 15th and 37th Regiments.
Woodford's 3rd Virginia Brigade of Stephen's Division, following the sound of gunfire, approached the Chew House from the east; they halted, and opened fire with the brigade's four artillery pieces. The house was now taking fire from three sides. Further south, at about 7.30am Anthony Wayne became apprehensive about these sounds of heavy fighting in his rear. Having lost contact in the fog with Sullivan's Division to his right, he feared the worst; his division broke off their attack, and counter-marched towards the sound of cannon fire. They approached the Chew House from the south, completing its encirclement. Stephen was advancing with Scott's 4th Virginia Brigade when they encountered one of Wayne's counter-marching brigades. Mistaking them for British, the Virginians opened fire; in the fog and smoke the Pennsylvanians were equally confused, and the two brigades blindly traded volleys for some minutes.
On the British far right, the New Jersey and Maryland Militia were sighted by the Queen's Rangers on the Old York Road. The 27th and 28th Foot and the Foot Guards were brought up in support of the Loyalist unit, forming a line of battle.
The American Withdrawal
At around 8am significant elements of the American line began to run out of ammunition. Wayne's men were the first to break off their attack, followed by Greene's and Sullivan's units. With no other option available, General Washington ordered the American center to withdraw. Major-General Grant engaged Greene's Division with the 37th, 5th, and 15th Regiments; and by exploiting the gap in the line left by Stephen's Division, the British broke the American left. In the ensuing retreat the 9th Virginia Regiment, which had penetrated all the way to Market Square, was captured en masse. The British Right Division under Grant advanced in pursuit of the New Jersey and Maryland Militia and Greene's and Stephen's retreating divisions, pursuing them as far as Whitemarsh Church.
Lord Cornwallis, having galloped north from Philadelphia, took command of the British center and advanced into Germantown against Sullivan's Division. Lieutenant-General von Knyphausen, commanding the left, held his line in place. As Cornwallis approached the outskirts of Germantown his 17th and 44th Regiments were ordered to drive the Americans out of the town. These two regiments preceded the British movement against the retreating American center; and when the 44th arrived at the gates of the Chew House, its 40th Foot defenders sallied out and joined in the pursuit. During this advance down the streets of Germantown, Brigadier-General James Agnew was fatally shot by a civilian.
Cornwallis continued his pursuit as far as Chestnut Hill, where the British Grenadier battalions arrived after a forced march from Philadelphia. They threw themselves across Wissahicken Creek to protect their flank, and Cornwallis continued cautiously toward Whitemarsh. At 10am the British skirmished with the American rearguard, but were unable to come up with the main force. After a ten mile pursuit, Cornwallis retired to Germantown.
Rather than pursue Washington's army in a game of cat and mouse, General Howe pulled his forces back into Philadelphia. Plans were already underway for a chain of redoubts between the Delaware and Schuylkill rivers to defend the northern end of the city and alterations were made to the camp in Germantown to prevent a future attack.
Despite the loss of the battle, Washington was applauded by friend and foe alike for his sheer audacity in launching an attack against the British camp. The French, then considering entering the war as an American ally, were much impressed by this display of resolve.
With the conclusion of the Battle of Germantown the British Army were masters of Philadelphia. General Howe expected that possession of Philadelphia would be a significant blow to the Patriot cause and the morale of its supporters. But whereas he had set out to capture the capital city of the rebellious colonies and had done so, he did not capture the leaders of the rebellion. The Continental Congress left Philadelphia before the occupation of the city and governed, as it were, just as effectively from other locations. More importantly, General Howe had failed to bring George Washington and the Continental Army to heel in a decisive defeat. That army continued to survive and became an even more cohesive fighting force after its long winter at Valley Forge, ensuring that the rebellion would continue.
Sources:
- The Philadelphia Campaign: Volume One: Brandywine and the Fall of Philadelphia by Thomas J. McGuire
- The Philadelphia Campaign: Volume Two: Germantown and the Roads to Valley Forge by Thomas J. McGuire
- The Philadelphia Campaign: June 1777-July 1778 by David G. Martin
- The Philadelphia Campaign, 1777-1778 (Modern War Studies) by Stephen R. Taaffe
- The Drillmaster of Valley Forge: The Baron de Steuben and the Making of the American Army by Paul Douglas Lockhart
Germantown Orders of Battle
Battle of Germantown — October 4th, 1777
BRITISH FORCES
General William Howe – commanding
Center Division – Major General Charles Lord Cornwallis
- 16th "Queens Light" Dragoons
- 2nd Battalion Light Infantry
- 1st & 2nd Grenadier Battalions
- 3rd Brigade – Major General Charles "No Flint" Grey
- 17th Foot
- 44th Foot
- 3rd Brigade Artillery
- 4th Brigade – Brigadier General James Agnew
- 33rd Foot
- 46th Foot
- 64th Foot
- 4th Brigade Artillery
- 40th Foot (from 2nd Brigade)
- Leib Regiment (from Hessian Brigade)
- Leib Regiment Artillery
- Corp Reserve Artillery Batteries (deployed with British pickets)
Right Division – Major General James Grant
- Queens Loyalist Rangers
- 1st Battalion Light Infantry
- 1st & 2nd Guards Battalions
- 1st Brigade
- 4th Foot, "Kings Own"
- 28th Foot
- 49th Foot
- 1st Brigade Artillery
- 2nd Brigade – Major General James Grant
- 5th Foot
- 27th Foot, "Enniskillings"
- 55th Foot
- 2nd Brigade Artillery
- Hessian Brigade – Major General Johann Stirn
- Chasseurs
- Von Linsing Grenadier Battalion
- Mirbach Regiment
- 15th Foot (from 3rd Brigade)
- 37th Foot (from 4th Brigade)
Left Division – Lt. General von Knyphausen
- Jaegers
- Von Minnigerade Grenadier Battalion
- Von Donop Regiment
- Von Donop Regiment Artillery
CONTINENTAL ARMY
General George Washington – commanding
Center Column – General George Washington
3rd Division – Major General John Sullivan
- 1st Maryland Brigade
- 1st Maryland
- 3rd Maryland
- 5th Maryland
- 6th Maryland
- Delaware Blues
- 1st Maryland Brigade Artillery
- 2nd Maryland Brigade
- 2nd Maryland
- 4th Maryland
- Smith's Rifle Company
- German Battalion
- Hazen's Regiment, "Congress' Own"
- 2nd Maryland Brigade Artillery
4th Division – Brigadier General Anthony Wayne
- 1st Pennsylvania Brigade
- 1st Pennsylvania, "Pennsylvania Rifle Regiment"
- 7th Pennsylvania
- 10th Pennsylvania
- Hartley's Regiment
- 1st Pennsylvania Brigade Artillery
- 2nd Pennsylvania Brigade
- 4th Pennsylvania
- 5th Pennsylvania
- 8th Pennsylvania
- 11th Pennsylvania, "Old Eleventh"
- 2nd Pennsylvania Brigade Artillery
5th Division – Major General William Alexander; Lord Stirling
- 3rd Pennsylvania Brigade
- 3rd Pennsylvania
- 6th Pennsylvania
- 9th Pennsylvania
- 12th Pennsylvania
- Spencer's Regiment
- 3rd Pennsylvania Brigade Artillery
- New Jersey Brigade
- 1st New Jersey
- 3rd New Jersey
- New Jersey Brigade Artillery
- North Carolina Brigade
- 1st thru 8th North Carolina Regiments
- North Carolina Brigade Artillery
Left Column – Major General Nathanael Greene
1st Division – Major General Nathaniel Greene
- 1st Virginia Brigade
- 1st Virginia
- 5th Virginia
- 9th Virginia
- 13th Virginia, "West Augusta"
- 1st Virginia Brigade Artillery
- 2nd Virginia Brigade
- 2nd Virginia
- 10th Virginia
- 14th Virginia
- Pennsylvania State Foot
- 2nd Virginia Brigade Artillery
2nd Division – Major General Adam Stephen
- 3rd Virginia Brigade
- 3rd Virginia
- 7th Virginia
- 11th Virginia
- 15th Virginia
- 3rd Virginia Brigade Artillery
- 4th Virginia Brigade
- 4th Virginia
- 8th Virginia, "German Regiment"
- 12th Virginia
- Grayson's Regiment
- Patton's Regiment
- 4th Virginia Brigade Artillery
- McDougal's Brigade
- 4th Connecticut
- 5th Connecticut
- 8th Connecticut
- McDougal's Brigade Artillery
Left Militia Column – Brigadier General Smallwood's Division
- Maryland Brigade
- New Jersey Brigade
- 8th Chester County (PA) Regiment
Right Militia Column – Brigadier General Potter's Division
- Armstrong's Pennsylvania Brigade
- Levies from Philadelphia, Cumberland, York, Lancaster, Bucks & Berks counties.
- Philadelphia Associators
- Potter's Artillery
- Irvine's Pennsylvania Brigade
Cavalry
- Schott's Independent Dragoon Company
- Bland's Horse
- Moylan's Horse
- McLane's Delaware Horse
Independent Unit
- Doyle's Rifle Company
Germantown Countersheet Manifest
The counter sheet includes 7 replacement counters for Volume II in the Battles of the American Revolution series: The Battle of Brandywine.
- Grenadier Guards: This unit replaces the 1st Foot Guards and has also been modified to include grenadier-style headgear.
The following units have all received corrections to their uniform specs:
- Bland's Horse
- Spencer
- Old Eleventh
- Hartley
- 7th Pennsylvania
- Lady Washington's Horse
Sequence of Play
germantown * 1777
- Initiative Determination (Beginning Turn 4)
- Fog Check (Turns 4-6 Only)
- Fog is automatically "dense" on Turns 1-3 and weather is automatically clear on Turns 7-10.
- Move Stephen's Formation (Beginning on Turn 2, American Player Only)
- Consult Stephen's Movement Table for random direction.
- Friendly Fire Check (Beginning on Turn 4, American Player Only)
- Friendly Fire can only occur once in the game. Afterward, this step is skipped in the Sequence of Play.
- Movement Phase
- Reinforcements
- Rally Phase
- Panic Recovery
- Defensive Artillery Fire Phase (non-phasing player)
- Includes off-board militia bombardment during clear weather
- Rifle Fire Phase (simultaneous)
- Close Combat Phase
- Advance Game Turn Marker