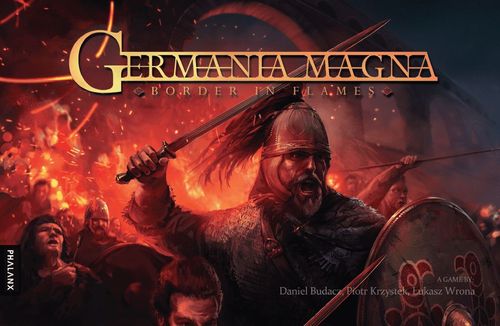
Germania Magna: Border in Flames
Germania Magna: Border in Flames Rulebook
Table of Contents
Table of Contents
How to Use This Book
The Rules section familiarizes players with the basic rules of Germania Magna. The Glossary provides an alphabetical list of definitions and explanations of important terms, phrases, and situations. It is not necessary to read the entire Glossary; it is an aid to resolve questions as they occur during play or while reading the Rules. The book also contains an extended example of a game round.
Components
- 8 Chieftain Cards
- 15 Roman Cards
- 93 Tribal Cards
- 15 Province Cards
- 2 Dice
- 4 Glory Boards (1 in each color)
- 8 Glory Markers (2 in each color)
- 40 Loot counters
- 4 Player Reference Cards
Glory Point table printed on the Player Reference Cards (see Clash Phase, sub-phase 4a).
Province Card
- Military Strength - value which must be exceeded to win a Clash in this Province.
- Ability - modifies Horde deployment, Clash resolution, effects of victory or defeat.
- Roman Cards icon - the number of icons shows the number of Roman Cards that must be attached to a Province.
- Loot - the amount of Loot every participant of this Clash receives after victory.
Roman Card
- Military Strength - added to the Military Strength of the Province Card to which this Roman unit is attached.
- Unit Type - a unit is one of 5 types: light infantry, heavy infantry, light cavalry, heavy cavalry, or war machines.
- Ability - modifies Clashes, e.g. it may restrict Clash participants, may make it harder to win, or may compensate for losses after a victory.
- Loot - additional Loot which every participant of this Clash receives after victory.
- Flavor Text - usually a quote from an ancient source, with no practical game effect.
Chieftain Card
- Initiative - determines the player order in each Round.
- Ability - the card's special effect, which can be constant, triggered or activated.
- Flavor Text
- Tribal Affiliation - the tribe (faction) to which the card belongs.
Tribal Card
- Cost - The cost to play the card from one's hand, expressed in units of Loot.
- Ability - the card's special effect.
- Military Strength - added to help win a Clash.
- Unit Survivability - the first (white) die is used after a victorious Clash; the second (red) die is used after a defeat.
- Flavor Text
- Type - determines many of the general rules regarding when and how a card may be played. There are 4 types of Tribal Cards: Tribal Unit, Attachment, Strategy, and Tactic.
- Unit Type - Each Tribal Unit is one of 5 types: light infantry, heavy infantry, light cavalry, heavy cavalry, or war machines.
Other components
- Glory Board - used to track a player's current Glory Points.
- Glory Markers - show a player's current Glory Points. Each player has two markers, one for the tens digit and one for the units digit. Both markers are placed on a player's Glory Board.
- Loot counters - the game currency, which comes in several denominations (players can change coins). The numbers depicted on coins are Roman Numerals: N=0 (latin nulla - nothing), I=1, II=2, III=3, IV=4, V=5, X=10.
Rules
Rules Triumvirate
- If a card's text directly contradicts rule text, the text on the card takes precedence.
- Unless otherwise specified, fractional values are always rounded up after all modifiers have been applied.
- If an effect applies to a player meeting a condition, then all players who meet the condition receive the full effect.
Example: 3 players participate in the same Clash (Province Military Strength 20), and the 2 strongest have equal-sized hordes, so both receive 11 Glory Points (6 for the third player).
Example 2: A clash is won in Lugdunensis Senonia, and more than one player ties for the fewest Glory Points, so all those players with the fewest Glory Points benefit from the Victory condition.
Victory
The winner is the player who has the most Glory Points at the end of the Round in which there are six or more Province Cards in the Province Discard Pile.
Setup
- Adjusting for player count:
- In a game with 2 players, remove from the Province Deck all Province Cards that have a base Military Strength of 25.
- In a game with 4 players, remove from the Province Deck all Province Cards that have a base Military Strength of 5.
- Choose colors. Each player takes his own Glory Board and two Glory Point markers.
- Prepare the shared (common) Tribal Deck (recommended for the first games). Take the following cards from the Tribal Cards and form the Tribal Deck: 15 Warband, 9 Warriors, 4 Horsemen, 3 Chieftan Comites, 2 Dismounted Comites, 3 Allied Alan Cavalry, 1 Frameae, 1 Fulcum, 1 Cuneus, 1 Passage through the Rhine, 2 Foederati Defectors, 2 Ambush, 2 Fog, 2 Roman Counterattack, 2 Heavy Rains, 1 German Phalanx, 2 Weaponsmithing, 2 The Promise of Spoils, 1 Call to War, 2 Predictions, 1 Sacerdotes Civitatis, 2 Hunnic Raid, 2 Victory in Single Combat, 1 Roman Valetudinarium, 2 Romanization, 2 Punitive Expedition (68 cards in total). Remove the extra Tribal Cards from the game (you may need them, if using the option of Deck Construction).
- Draw starting hands. Shuffle the shared Tribal Deck (or individual player decks, if using the option of Deck Construction). Each player draws five Tribal Cards from the Tribal Deck (shared, or their own personal deck). After all players draw their cards, each player may take one mulligan if he does not like his starting hand - to do so, he reshuffles his hand back into his deck and draws a new one. He must accept his second hand.
- Collect starting Loot. Place all the Loot tokens within easy reach of all players. Each player takes five units of Loot.
- Set Province Cards. Shuffle the Province Deck face-down and place 1 Province Card, face up, between the players. Shuffle the Roman Deck, face-down. Place a number of Roman Cards equal to the Roman Card value printed on the Province Card face-down underneath it. Put the remaining cards within the reach of all players.
- Put the shuffled Chieftain Deck face-down, within the reach of all players.
- Make some room for the Province Discard Pile and the Tribal Discard Pile, next to the appropriate decks.
Gameplay
The game consists of a series of Rounds, which each follow the same scheme. Each Round has 4 Phases.
Phases of each Round:
- Preparation Phase
- Supply Phase
- Deployment Phase
- Clash Phase
1. Preparation Phase
Each player draws one Chieftain Card and places it face up on the table in front of him. The Chieftain Initiative value determines each player's Initiative in this Round. Players will do various actions in descending Initiative order, starting from the highest Initiative value. Moreover, a player can use his Chieftain's Abilities during this Round.
One Province Card - or two if there aren't any in play - is placed on the table, and Roman Cards are drawn and placed face-down underneath each Province Card with fewer cards than its Roman Card value, until all Province cards have at least as many Roman Cards as their printed value. If the number of Roman Cards already attached to a Province is equal to or higher than the Roman Card value printed on the Province, then it receives no new Roman Cards.
No more than 3 Province Cards can be in play at any given time during the game. If a fourth Province Card is to be placed into the game, the player whose Chieftain has the highest Initiative chooses one of the three existing Provinces and moves it to the Province Discard Pile. Any Roman Cards attached to this province are discarded and shuffled back into the Roman Deck.
2. Supply Phase
Players draw, in descending Initiative order (starting from the highest value): a) 4 units of Loot or b) 2 Tribal Cards or c) 2 units of Loot and 1 Tribal Card
3. Deployment Phase
Deployment is a series of action rounds which continues until all players have passed. In each round, players take turns in descending Initiative order. A player's turn must be one of the following Actions: a) play one Tribal Card from his hand; b) Pass.
Playing a Tribal Card. The player must spend Loot equal to the card's cost. Each player may play any number of Tribal Cards during the whole Deployment Phase, but only one per player turn. (Exception: Tactics are freely playable.) Tribal Cards that may be played only during a player's turn are:
a) Tribal Unit - when this card is deployed, it must be placed near the chosen Province Card on the side of the player whose turn it is; this unit creates his Horde. If more than one unit is assigned by the same player to the Province, each unit deployed subsequently must be placed partially on the previous unit, creating a stack and increasing the number of cards in the already existing Horde. All units in the stack must be visible to all players. Unless otherwise stated, abilities of Tribal Units affect cards only in the Province in which they are deployed.
b) Attachment - when this card is deployed, it must be attached to an already existing Horde belonging to the same player. Deployed Attachments are part of a Horde, but if a Horde consists only of Attachments, then it is destroyed. Unless otherwise stated, abilities of Attachments affect only the Horde to which they are attached.
c) Strategy - These cards are never attached to a province. When a player plays a Strategy Tribal Card, its cost is paid, its ability is resolved, and the card is then discarded to the Tribal discard pile.
Passing. A player who does not want to, or is unable to play any Tribal Cards, passes. From that moment, the player can only pass on their turn; they cannot play any more Tribal Unit, Attachment or Strategy Cards in this Deployment Phase.
Deployment ends after all players pass.
Tactic Tribal Cards and Card Abilities. Tactics are special Tribal Cards, some of which may be played at any moment, others when the specified triggering condition occurs. They are often played as a response to another player's Action, e.g. to cancel the effect of a card played by an opponent. Playing a Tactic card never counts as an Action, and a player may play any number of them during a Round. If several people play Tactics, resolve them in the order they are played. If it is unclear in what order they were played, resolve the tie by having higher initiative play earlier. This also applies to the use of triggered or activated Card Abilities.
Example: Call to War may be played at any moment during the Round. Predictions may be played immediately after a non-Tribal Unit card has been played, but before its effect has been resolved. The triggering condition for Victory in single combat may occur only when players receive Glory Points after a victorious Clash in the Clash Phase.
(Cards shown: Call to War - Tactic: Until the end of this phase, exchange control of your chieftain with another player's chieftain. Predictions - Tactic: Negate a non-tribal unit card that has just been played. Victory in Single Combat - Tactic: After a victorious clash, two target players who participated must exchange all Glory Points they gain in it.)
4. Clash Phase
A Clash must be resolved in each Province containing at least one Horde. If there's more than one Clash, the player with the highest Initiative chooses the order in which they are resolved. Each Clash is fully resolved before resolving the next one. After a Clash begins, all Roman Cards assigned to the Province are turned face up.
Each Clash is resolved in the following Sub-phases:
1. Determining victory or defeat. A Clash involves beating the Military Strength of a Province Card (which ranges from 5 to 25) with the help of the Tribal Cards played by the player in the Deployment Phase. Each player calculates the Military Strength of his Horde along with any modifications resulting from abilities of other Tribal, Chieftain, Province, Roman Cards etc. The total Military Strength of all Hordes is added up. Then to the Province's Military Strength is added the Military Strength of all Roman Cards assigned to the Province and any modifications from abilities of other cards. If the Military Strength of the players is less than or equal to that of the Province Card, the Clash is lost. The players win if their strength is greater.
IMPORTANT! Some Provinces have constant or triggered abilities. Unless otherwise stated, those abilities affect only Hordes, Players and Clashes related to this Province.
Things to consider when resolving the Clash:
- Military Strength of all Tribal Units modified by other Tribal Cards and Chieftain's Abilities of all players taking part in the Clash. Any modifiers provided by Province Card ability.
- Military Strength of the Province Card and Roman Cards attached to the province. Any modifiers provided by Province Card ability.
a) After a VICTORIOUS Clash
2a. If a Province has a Victory ability, it must be triggered now, or in the proper following sub-phase if its text requires that. Tactics played in any sub-phase may influence the effect of the Province ability (e.g. by changing the amount of Glory Points or Military Strength of any player). Example: the ability Raetia Secunda is triggered in this Sub-phase, while Germania Prima is triggered when players receive Loot.
3a. Distribute Loot to all participants. Each player who took part in the Clash receives an amount of Loot equal to the value printed on the Province Card. The Loot of the defeated Roman Cards is added to this amount, which may be further modified by Chieftain's Abilities and the Province's Victory condition.
4a. Distribute Glory Points to all participants. Each participant receives Glory Points. Each player's award depends on their relative contribution to the Military Strength, with more points awarded to players who contributed more military strength. The total number of Glory Points distributed after a victorious battle is equal to the Base Military Strength of the Province Card (see the Glory Point table and Rules Triumvirate).
Glory Point table (Province base Military Strength; players listed from strongest Horde to weakest):
| Participating players | Military Strength 5 | 10 | 15 | 20 | 25 |
|---|---|---|---|---|---|
| 1 player | 5 | 10 | 15 | 20 | 25 |
| 2 players | 4 | 1 | 7 | 3 | 10 | 5 | 13 | 7 | 16 | 9 |
| 3 players | 3 | 2 | 0 | 6 | 3 | 1 | 8 | 5 | 2 | 11 | 6 | 3 | 13 | 8 | 4 |
| 4 players | - | 4 | 3 | 2 | 1 | 7 | 4 | 3 | 1 | 9 | 6 | 4 | 1 | 11 | 7 | 5 | 2 |
5a. Checking for Casualties. Each participant must check for loss of Tribal Units. For each Tribal Unit, roll a 6-sided die and compare the result with the Unit Survivability value. A die result greater than or equal to the left (white) die succeeds. Failure means that the Tribal Unit is destroyed and must be put in the Tribal Discard Pile. Success means that the Tribal Unit returns to its owner's hand and may be played in the next Round. Players may check their losses in sequence according to Initiative, but all tests are considered as taking place at the same time.
6a. All Attachments are destroyed and must be put into the Tribal Discard Pile.
7a. The Province Card is removed from play and placed in the Province Discard Pile, while all the Roman Cards attached to this Province are shuffled back into the Roman Deck.
b) After a LOST Clash
2b. If a Province has a Defeat ability, it must be triggered now, or in the proper following Sub-phase if its text requires that. Tactics played in any sub-phase may influence the effect of the Province ability.
Example: The ability Raetia Secunda is triggered in this Sub-phase, while Germania Prima is triggered when players test their losses.
3b. Checking for Casualties. Each participant must check for loss of Tribal Units. Players follow the same procedure as in the case of victory, except that the die roll must be greater than or equal to the right (red) die of their Unit Survivability value to survive.
4b. All Attachments are destroyed and must be put into the Tribal Discard Pile.
5b. The Province Card remains in the game, while all the Roman Cards attached to it are shuffled back into the Roman Deck (It will receive new ones in the next Preparation Phase).
End of the Round
After all Clashes are resolved, all Chieftain Cards are shuffled back into the Chieftain deck and the Round ends. If there are six or more Province Cards in the Province Discard Pile, the game ends, and the player with the most Glory Points wins.
Quick Reference (summary card)
- Setup: Each Player chooses 1 Glory Board with Markers, draws 5 Tribal Cards, takes 5 Loot. Place 1 Province Card with proper number of Roman Cards.
- Round - Preparation: Each player draws one Chieftain Card. Place 1 or 2 Province Cards. Attach Roman Cards to Provinces.
- Supply: In Initiative order, each Player draws: 4 units of Loot, or 2 Tribal Cards, or 2 units of Loot and 1 Tribal Card.
- Deployment: In Initiative order, players do a series of turns (play one Tribal Card or Pass) until all Players Pass.
- Clash: Resolve Clash in each Province containing a Horde. If Victory, distribute Loot and Glory. Always check for Casualties, destroy Attachments, shuffle Roman Cards back into Roman deck. If Victory, discard Province Card.
- Round End: Shuffle Chieftain Cards back into Chieftain deck.
- Game End: If there are six or more Province Cards in the Province Discard Pile, the game ends.
Glossary
Action - During a player's turn in the Deployment phase, a player can do one of these actions:
- play one non-Tactic Tribal Card from his hand,
- pass.
Activated Ability - see Card Ability
Attach - Roman Cards are attached to a Province and Attachment Tribal Cards are attached to Hordes.
Attachment - A type of Tribal Card which may be attached to a player's Horde to modify or influence other cards. An Attachment is part of a Horde, but a Horde must have at least one Unit; it cannot be made only of Attachments.
Base Military Strength - The Military Strength value that is printed on a card.
Card Ability - Text on a card explains its special effect on the game. Some abilities may affect only some cards (usually a single card or cards in the same Province, controlled by a single player, or of a certain type); some may affect all cards that are in the game. All card abilities fall into one of the following categories:
- Constant Ability - It lasts from the moment a card enters play and remains active until a card leaves play. Example: Cuneus.
- Activated Ability - It must be activated by a player (usually the card's controller). Some abilities may be activated only by paying a price (Example: Horsemen); some are activated for free, but may have restrictions (Example: Genseric may be used only once per Round). An ability that may be activated once per Round, Phase or Turn may be activated again each time the card's controller changes.
- Triggered Ability - It is automatically activated when a certain event occurs or a set of conditions is met. Example: Province Victory and Defeat abilities.
Chieftain Deck - A communal deck of Chieftain Cards. At the beginning of a new Round, each player draws one Chieftain Card from this deck. At the end of each Round, the Chieftain Cards are shuffled back into this deck.
Chieftain Card - They are used to determine Initiative, i.e. the player order. Each Chieftain Card also has an Ability. A player can never have more than one Chieftain Card.
Clash - Occurs when players' hordes invade a Roman province. See Clash Phase.
Constant Ability - See Card Ability.
Controller - Usually a card's owner controls the card, but sometimes another player can control a card (e.g., due to Call to War). See also Owner.
Deploy - To play a Tribal Unit or Attachment in the Deployment Phase.
Destroy - A card is destroyed when it's targeted by an effect with keyword destroy. Tribal Units that don't pass their casualty check after a Clash are destroyed. Roman Cards and Attachment Tribal Cards are destroyed after a Clash. When a Tribal Card or Province is destroyed, it is placed face-up on top of the Tribal or Province discard pile. Chieftain or Roman Cards are shuffled back into the Chieftain or Roman deck. See also Sacrifice.
Discard Pile - There are two types of discard piles:
- Tribal Discard Pile - All discarded Tribal Cards go here. Strategy and Tactics go here once they have been resolved, and Tribal Units and Attachments go here when they have been sacrificed, destroyed or otherwise removed from the game. If players are playing with one shared Tribal Deck, then there's only one shared Tribal Discard Pile. If there are multiple Tribal Decks, then each has its own Discard Pile.
- Province Discard Pile - Each Province goes here once it leaves play or is discarded from the Province Deck. The game ends after a Round in which the Province Discard Pile has at least 6 cards.
Glory Points - At game end, these determine the winner. Players earn Glory Points after victorious Clashes, as well as after playing some Tribal Cards, or using some Chieftain Abilities.
Horde - All of a player's Tribal Cards (Attachments and at least one Unit) in a given Province.
Initiative - Each Chieftain has an initiative value, which determines the player order.
Look - Sometimes a player may look at cards; they are not obliged to show those cards to the other players. After looking the player returns the cards to their original location, or elsewhere, depending on the specific instructions.
Loot - Game currency, usually used to pay for playing Tribal Cards and Activating Abilities. The numbers depicted on coins are Roman Numerals: N = 0 (latin nulla - nothing), I = 1, II = 2, III = 3, IV = 4, V = 5, X = 10.
Mulligan - After all players draw their starting hand, any players may declare a mulligan to redraw. Each such player reshuffles his Tribal Cards into his deck (or the common deck) and draws the exact same number of cards. Players must keep their second hand. If multiple players declare a mulligan, do it in a random order.
Owner - A Tribal card's owner is the player whose deck held the card at the start of the game. If playing with a shared Tribal Deck, then cards have no owner: control and ownership are equivalent. Chieftain, Province and Roman Cards have no owner. See also Controller.
Phase - Each Round is divided into four phases: Preparation, Supply, Deployment, and Clash. See also Round and Turn.
Playing a card - To take a card from one's hand, pay its cost in Loot, and resolve its effect or place it in a game location.
Province Deck - A deck from which Province Cards are drawn. Each Province Card which leaves play goes to the Province Discard Pile.
Roman Deck - A deck from which Roman Cards are drawn. Each Roman Card that leaves play is shuffled back into the Roman Deck.
Round - The game is divided into a number of Rounds. Each Round is divided into four phases. See also Phase and Turn.
Sacrifice - When a player is instructed to sacrifice a card, he must choose and remove a card in play that he controls and that matches the requirements of the sacrifice. The sacrificed card is removed to the Discard Pile. Important: The sacrificed card is not considered destroyed, and a destroyed card is not sacrificed. Example: If a player prevents the card from being sacrificed or destroys it instead, the sacrifice is not considered to have been made. See also Destroy.
Search - When permitted to search, a player may look at each card in the specified area without revealing those cards to his opponents. If a player finds a card that meets the eligibility requirements, he may add that card to the game area indicated by the instructions on the search effect. If the searched card is of a specified type, the player must reveal the card he chose to his opponents to verify that the card is eligible. Unless otherwise stated, each deck (not discard pile) that was searched must then be shuffled.
Sub-phase - Some Phases are divided into a number of sub-phases. See also Phase.
Negate - Card that was negated does not comes into play, all its effects are canceled and the negated card must be put into proper discard pile. If a non-Tactic card was negated during the deployment phase, a player is considered to have performed his action, and can't perform another action during this turn. If a card ability is negated, it doesn't get resolved and none of its effects occur.
Strategy - A type of Tribal Card. Strategy may be played only as action during a player's Turn in the Deployment Phase.
Tactic - A type of Tribal Card which may be played at any moment, or when the specified triggering condition occurs.
Target - This keyword specifies what must be chosen as the subject or recipient of an effect. (Typically a card, deck, or player.)
Tribal Deck - A deck from which Tribal Cards are drawn. Players may use a shared (common) Tribal Deck or construct their own individual Tribal Decks according to the Deck Construction rules. See also Discard Pile.
Tribal Unit - A type of Tribal Card. A Tribal Unit usually may be played only during a player's Turn in the Deployment Phase. It must be assigned to a Province as part of that player's Horde.
Triggered Ability - See Card Ability.
Turn - The Deployment Phase is a series of action rounds, in each of which players take a turn (in player order by decreasing player initiative) to do one action, until all players have passed.
Unit Survivability - A unit's chance of surviving a Clash. It has two values, symbolized by dice:
- the left (white) die is used after a victorious Clash,
- the right (red) die is used after a lost Clash.
If the die roll is greater than or equal to the printed value, then the Unit survives; otherwise it is destroyed.
Example of a Game Turn
We suggest using your own cards and tokens while reading the text below to copy each move of our virtual players for better understanding of the game mechanics.
The players are using a single shared Tribal Deck. After the setup - in which the first Province Card (Germania Secunda) has been put into play along with 2 defending Roman Cards - the Preparations Phase starts. Each player randomly receives one Chieftain Card, which sets the Initiative for this Round:
1. Preparation Phase
- Julia's Chieftain Card: Chnodomar (Initiative: 8)
- Alexander's Chieftain Card: Merobaudes (Initiative: 6)
- Marcus's Chieftain Card: Gundahar (Initiative: 3)
- Octavia's Chieftain Card: Genseric (Initiative: 2)
Chieftain abilities used in the example:
- Chnodomar: In a victorious clash, you receive 3 additional Glory Points.
- Gundahar: Each of your hordes has 3 added to its total Military Strength.
- Genseric: Once per round you may search your tribal deck and discard pile for a Warband card and put it in your hand. Each of your Warband units has its Military Strength increased by 1.
- Merobaudes: In a victorious clash, you draw 2 cards from your tribal deck.
To the one Province Card already lying on the table (Germania Secunda), a second one is added (Lugdunensis Secunda) along with 1 face-down Roman Card.
2. Supply Phase
Julia, as the first player, decides to draw 2 Tribal Cards (so she has 7 Tribal Cards [TC] and 5 Loot [L]), and then Alexander draws 4 units of Loot (so he has 5TC and 9L). Marcus and Octavia, in turn, each draw 1 Tribal Card and 2 units of Loot (both have 6TC and 7L).
3. Deployment Phase
First round of turns:
- Julia is the first to play a card - she deploys a Warband (Tribal Unit) in the Province Lugdunensis Secunda. (She now has 6TC/5L)
- Alexander spends 1 Loot to deploy Warriors in this same Province. (4TC/8L)
- Marcus spends 2 Loot to deploy Chieftain Comites to Germania Secunda. (5TC/5L)
- The last to take her turn, Octavia uses the Ability of her Chieftain Card, Genseric, which allows her to search for Warband (Tribal Unit) in the Tribal Deck. This Ability is not an Action, so Octavia then performs an Action, deploying a Warband to Germania Secunda. (6TC/7L)
Second round of turns:
- Julia adds another Warband to her Horde in Lugdunensis Secunda. (5TC/5L)
- Alexander plays an Attachment Card - Fulcum. He must deploy this card with his Warriors in Lugdunensis Secunda; his Horde there now consists of 2 Tribal Cards. (3TC/6L)
- Marcus adds a Warband to Germania Secunda. (4TC/5L)
- Octavia adds Warband to Lugdunensis Secunda. (5TC/7L)
Thus, after two action rounds, Octavia was the only player who acted in both Provinces and has two Hordes (one in each Province).
Third round of turns:
- Julia plays Punitive Expedition and takes 2 Loot from Alexander, adding them to her total. Punitive Expedition is a Strategy Card, so it is put onto the discard pile after it is resolved. (4TC/7L)
- Alexander deploys a Warband in Germania Secunda. Now he has a Horde in each Province. (2TC/4L)
- Marcus adds Horsemen to his Horde in Germania Secunda. (3TC/3L)
- Octavia plays Promise of Spoils and chooses Alexander's Warriors as the target of this Strategy Card. Alexander, however, negates her Action by playing Predictions, which is a Tactic and can be played as a response when the triggering condition appears, so Alexander maintains control over his Tribal Unit. (4TC/5L)
Fourth round of turns:
- Julia deploys Horsemen in Lugdunensis Secunda. (3TC/5L)
- Alexander deploys Warriors in Lugdunensis Secunda. (0TC/2L)
- Marcus plays Weaponsmithing and searches the Tribal Deck for 2 Warband cards. He must show both cards to the other players to verify that they are eligible to be found by this search condition. (4TC/1L)
- Octavia deploys Warriors in Germania Secunda. (3TC/4L)
Fifth round of turns:
- Julia deploys Allied Alan Cavalry in Germania Secunda. Smart move - although she won't receive any Loot, deploying this Tribal Unit doesn't cost anything either, and will allow her to have some share when Glory Points will be distributed after the almost certain victory. (2TC/5L)
- Alexander passes. He won't be able to perform any more Actions (i.e. playing non-Tactic Tribal Cards) in this Deployment Phase, but he is still able to use Card Abilities. (0TC/2L)
- Marcus deploys a Warband in Lugdunensis Secunda. (3TC/1L)
- Octavia passes. (3TC/4L)
Sixth round of turns: Only Julia and Marcus can do actions in this round, because Alexander and Octavia passed.
- Although she still has 2 cards and many Loot tokens, Julia passes. (2TC/5L)
- Marcus was just waiting for this opportunity. Now that he knows Julia won't be able to deploy more Tribal Units, he plays Ambush and chooses as the target her Horde in Lugdunensis Secunda (Ambush: Choose a horde; its controller immediately checks for unit losses as if after a victorious clash). Instead of risking heavy losses, Julia decides to activate Horsemen's Ability. They must be sacrificed, but this will prevent other, more fragile Units, from having to check for survival. (2TC/0L)
Seventh round of turns:
- Marcus deploys Warband in Lugdunensis Secunda, because he wants to make sure that the Clash will still be won, now that Julia sacrificed her Horsemen. (1TC/0L)
Eighth round of turns:
- Marcus has only one card but no Loot tokens left, so he passes, and the Deployment Phase ends.
4. Clash Phase
Julia, as the player with the highest Initiative value, chooses the order to resolve Clashes. She decides to first resolve the Clash in Lugdunensis Secunda.
First Sub-phase:
- The Roman Card attached to the Province is turned face up. The revealed card is Cataphracts. Their ability affects each Tribal Heavy Infantry in this Province. The Province itself also has a special ability which affects not only Tribal Units, but also all Roman Cards, and because Cataphracts are Heavy Cavalry, their Military Strength is also reduced by 1. The total Military Strength of Lugdunensis Secunda is 18 (15 is the base Military Strength of the Province + 4 from Cataphracts - 1 to Cataphracts' Military Strength due to the Province ability).
- Now players sum up the Military Strength of all Hordes in this Province. Their total strength is 24 including all modifiers (Julia has 4; Alexander 10; Marcus 7; Octavia 3), which is more than enough to beat the Romans, so the clash is victorious.
- After the Clash is won, before Loot is distributed, Alexander's Chieftain ability is triggered. He draws 2 Tribal Cards.
Second Sub-phase: Because all players participated in this Clash, each of them takes 5 Loot (3 provided by the Province Card + 2 provided by Cataphracts).
Third Sub-phase: Glory Points are distributed among players. The base Military Strength of Lugdunensis Secunda is 15, so Octavia earns 1 Glory Point (her horde is the weakest), Julia earns 3, but she gets an additional 3 thanks to her Chieftain's ability (total 6), Marcus gets 4, and Alexander 7.
Fourth Sub-phase:
- Now players must test their losses. The battle was won, so they will compare a dice roll result with the left (white) die on each Unit's Survivability value. Julia, Marcus and Octavia each lose 1 Warband, Alexander loses 1 Warriors. All those cards must be put onto their Tribal Discard Pile, the same as Fulcum, which is an Attachment (all Attachments are discarded after a Clash).
After this sub-phase, Lugdunensis Secunda is put into the Province Discard Pile and Cataphracts are shuffled back into the Roman Deck.
SECOND CLASH:
First Sub-phase:
- The province's two Roman Cards are turned face up - one is Comitatenses Legion, the other is Bribery. The latter may complicate matters for our players, but fortunately for them Octavia has in her hand Sacradotes Civitas Tactic, and she plays it to destroy the Bribery card, which is shuffled back into the Roman Deck. After this the total Roman Military Strength is 13.
- The total Military Strength of all players' Hordes is 26 (Julia has 4; Alexander 2; Marcus 14; Octavia 6), which is almost twice as much as needed to win the Clash.
- The Province Victory condition must now be triggered, but before that Octavia plays the Call to War Tactic and exchanges control of her Chieftain card with Julia. Because no other Tactics were played, the Province ability is triggered, and Octavia, who now has the highest Initiative, may be the first one to choose 1 Warband from the discard pile. Alexander and Marcus do the same. There's no Warband card left in the discard pile for Julia, who now has the lowest initiative. She may, however, activate the ability of her new Chieftain and search the Tribal Deck for a single Warband card. Although this ability was already activated this turn by Octavia, it is possible to do it once more, each time the controller of the card changes.
Second Sub-phase: Each player - besides Julia, who deployed Allied Alan Cavalry - receive 4 Loot (2 are provided by the Province + 2 by Comitatenses Legion).
Third Sub-phase: Glory Points are distributed among players. Due to the fact that Octavia no longer controls the Chieftain Merobaudes, the total strength of her horde dropped by 1. Despite this, she still has more Military Strength than Julia and her Horde remains the second strongest in this Province. Marcus should receive 4 Glory Points, Octavia 6 (she gets +3 due to her Chieftain ability), Julia 2, and Alexander 1. However, before those points are distributed among players, Julia plays the card Victory in Single Combat, and takes all 6 Glory Points from Octavia (including those provided by the Chieftain), while Octavia receives 2 points instead.
Fourth Sub-phase: After Glory Points are distributed, players must check for Unit losses. Then Lugdunensis Secunda is put onto the Province Discard Pile and Comitatenses Legion is shuffled back into the Roman Deck, this Round ends, and players proceed to the Preparation Phase of the next Round.
Deck Construction (Optional Rule)
The core set allows players to use one shared (common) Tribal Deck. However, we plan to release expansion sets. Those sets will introduce new Tribal Decks as well as additional cards for already available tribes and will also contain advanced rules for deck construction. But even now each player may use a personal Tribal Deck constructed from cards included in one or more core sets.
If the player wishes to construct his own Tribal Deck, he should follow the rules of deck construction. His deck then includes:
- at least 10 and no more than 20 [red outlined warrior icon], no more than 15 [solid red warrior icon], no more than 10 [green outlined warrior icon], no more than 5 [solid green warrior icon]
- up to 3 copies each of any non-Tribal Unit Card.
- a minimum of 60 total cards.
A deck constructed according to the above rules may be used as a shared deck for all players or may be used in a game in which each player has his own Tribal Deck.
Below, you will find ready deck lists which may be used to build your own decks. These are only suggestions; feel free to replace cards and customize your own decks as you see fit.
Swarm Deck
If you prefer simple effective solutions, we recommend this deck centered around tribal units of all types, with some strategies, tactics and attachments that will improve your horde even further.
Deck list: 20 Warband, 3 Dismounted Comites, 10 Horsemen, 3 Allied Alan Cavalry, 2 Chieftan Comites, 9 Warriors, 3 Weaponsmithing, 3 Fulcum, 2 Predictions, 2 Roman Valetudinarium, 1 Passage Through the Rhine, 1 German Phalanx, 1 Cuneus
Control Deck
If you like to create an impression that your horde is the weakest and then turn the game upside down with your cleverness and well played cards, then this deck is perfect for you. We suggest this build for those who have some experience in playing Germania Magna or other card games which allow a deck focused on game control.
Deck list: 14 Warband, 9 Warriors, 5 Horsemen, 4 Chieftan Comites, 1 Allied Alan Cavalry, 3 Punitive Expedition, 3 Victory in Single Combat, 3 Predictions, 3 The Promise of Spoils, 2 Sacerdotes Civitatis, 2 Framae, 2 Call to War, 2 Roman Counterattack, 2 Fog, 3 Foederati Defectors, 2 Ambush
Chieftain Deck in Constructed
In this mode, each player uses his own Chieftain Deck. Each Chieftain deck must have 8 different Chieftain Cards.
Tip: If you are playing your first game with your own Chieftain deck, or don't want to spend too much time on planning the order of the cards, then you may just shuffle your Chieftain deck instead of intentionally ordering it.
Before the game begins, each player secretly decides the order of the cards in his Chieftain Deck. In the Preparation Phase of each Round, each player draws the top Chieftain Card from his Chieftain Deck and places it face up on the table in front of him - this Chieftain is the main Chieftain and he can use his Ability.
If one or more players have a Chieftain with the same Initiative value, they must resolve the Initiative tie. To do so, the tied players each draw another card from their Chieftain Deck and add its Initiative value to the Initiative of their main Chieftain. The player with the highest total is the first of the tying players. If they are still tied, then they draw the next card, and so on. All the chieftain cards that were drawn to resolve the tie are places under the main Chieftain to mark his current Initiative, and their abilities may not be used. A player with a higher initiative Chieftain always goes before a player with a lower initiative Chieftain. The total sum of several Chieftains is used only for breaking ties with players whose main (first) Chieftains are equal.
Example: Julia and Alexander both draw Chnodomar. Marcus and Octavia both draw Merobaudes. Julia and Alexander must resolve their tie, so they both draw a new card - each draws Hermeric, so they must draw another card. Now Julia draws Merobaudes and Alexander draws Gabinus. So Julia will be the first player, and Alexander will be second. They both put their additional Chieftain cards under their Chnodomar card so that only their initiative values are visible. Marcus and Octavia must also resolve their tie. They each draw a Chieftain card. Marcus draws Marcian and Octavia draws Hermeric. Marcus will be third and Octavia will be fourth player.
If a player would have to draw a card, but his Chieftain Deck contains no more cards, then the player must randomly shuffle his discarded Chieftains to make a new Chieftain deck.
Historical Outline
The game Germania Magna is set in Late Antiquity (4th-5th century AD), when the Roman Empire was beset by powerful enemies who were increasingly pressing in on its borders. The Roman Empire was no longer the same state it had been centuries earlier when it was winning new territories and expanding its borders across three major continents. Its society, economy, army and political system had undergone considerable changes over time, which many believe began the process of decline and collapse. Was this the case in reality? And how did these changes come about?
Managing a state that stretched from the Atlantic coast to the Euphrates would not be easy even today, with our enormous technological advances, let alone in antiquity. It's easiest to picture this from examples. The famous public transport system that the Romans created impressed the ancients, as it enabled them to cover 40 to 60 miles per day - an extraordinary achievement. But in practice, this meant that transmitting information from Rome to Egypt by land took more than two months. Transporting raw materials was even more difficult, and the price of wheat doubled for every 50 miles of road it had to cover. It's therefore not surprising that, despite all the efforts, such a vast state could not have been very well managed.
This state of affairs enabled ambitious individuals who wanted to seize power on the edge of the empire. These people easily won the support of province residents who did not feel strong ties to the capital, and of soldiers under their command, and then they usurped the emperor's power. These usurpations were already happening in the 1st and 2nd centuries - the year 69 was called the year of four emperors - but fortunately for Rome, this did not destabilize the state for long. The situation deteriorated dramatically in the 3rd century. In the years 235-285, there were 21 emperors in total, many of them ruling simultaneously, and most of their lives ended suddenly and tragically. It also happened that these usurpers did not try to take power over the entire state, but would break off a particular territory from the empire. For example, in the years 260-269, Marcus Cassianius Postumus took up self-government in Gaul, later adding Spain and Britain to form the so-called Imperium Galliarum.
Neighbors of the empire meticulously took advantage of the internal unrest. The Germans broke the defense on the Rhine, ravaged Gaul, and went all the way to northern Italy and Spain. The situation on the Danube was no better. The Sarmatians and the Goths inflicted a painful defeat on the Romans at the Battle of Abrittus (251 AD), where Traianus Decius died - the first emperor in Rome's history to be killed on the battlefield. Farther to the east, the powerful Persian state was revived under the leadership of the Sassanid Dynasty, and seemingly peaceful Africa was plagued by burdensome raids of nomads.
The crisis of the third century was averted by Diocletian (284-305 AD), who initiated reforms that would define the character of the empire in the 4th century. The old system of the Principate in which the emperor was the first among equal citizens, was replaced by a Dominate, in which he became an absolute ruler. Old institutions became less important in the new imperial administration, which is best evidenced by the fact that the Senate fell de facto to the rank of city council of Rome, which, in turn, lost its leading position to cities like Trier and Ravenna. Diocletian also recognized that one person would not be able to effectively manage such a large state, so he divided power among four emperors (tetrarchy): two in the rank of Augustus, and two acting as (lower ranked) Caesars, all of whom were to rule for a predetermined period of time. The provinces of the empire were divided into smaller units, so as not to constitute a solid support base for ambitious governors who wanted to usurp power. The emperor also attempted to improve the economic situation, but, despite initiatives such as monetary reform and the introduction of maximum prices, his efforts did not bring about the expected results.
And what about the army? Since the beginning of the 1st century AD, legions were elite "shock troops", and there were usually 30 legions (more or less, depending on the period), each numbering around 5000 soldiers organized into 10 cohorts. They were stationed along the borders and used as a spearhead of the Roman Army in each great offensive or punitive expedition. In the 3rd century, as the barbarian tribes began to push harder and further, it became clear that current doctrine and organization of units were insufficient to stop them. The Legions were too few in number, but at the same time they consisted of too many soldiers to be effective and mobile enough to counter the enemy on every front. At first, they were divided into many subunits, called vexillationes, which were no more than a few cohorts strong and able to react against many different threats. So, theoretically, legions were still 5000 men strong, but in practice they were divided into smaller units spread across many war theaters.
The above solution was still insufficient, so first Diocletian and later his successor Constantine I introduced very important and inevitable reforms. They replaced the previous army structure with a new model. The army was divided into two branches. The first of these were limitanei (from Latin limes, i.e. border) - stationary troops garrisoned at the borders of the empire which were to receive and withstand the initial enemy onslaught or repel smaller raids. The second one was comitatenses - mobile well-armed and trained units organized into small legions (1000-1500 men strong), which were able to support limitanei in defensive deployment or could be used as an assault force operating in enemy territory. Infantry units were supported by various types of cavalry, often of foreign origins, like heavily armed cataphracts or horse archers, or even by mobile and stationary artillery, like carroballistas or onagers. The Praetorian guard, whose soldiers had more in common with corrupted kingmakers than defenders of the emperor, was disbanded and replaced by a new palace guard - Scholae Palatinae. Rome had constant problems with fresh recruits, which is why apart from citizens, there were plenty of barbarians serving under tribal chieftains in allied units known as foederati. At the beginning of the 5th century, the Roman army could have numbered from 300 000 to more than 600 000 soldiers.
The main opponents of the Romans on the Rhine and upper Danube were the Germanic Franks and Alemanni. The latter were especially noteworthy. They formed a loose federation of tribes - including Suebi, Marcomanni and Quadi - inhabiting the area between the Rhine, Main and Danube, and their name probably derives from the German Alle Manner, i.e. all men. These people were united by the vision of an easier way to gain loot, in which larger groups had a much better chance of defeating the enemy. Each tribe had its own king, but there was no dynasty ruling over all of them, and each chief competed with the others for the title of lifelong leader of the tribes, which one could earn by achieving glory on the battlefield and winning loot for one's subjects.
The first documented Alemanni raid took place in 213 AD, and ended in defeat, but in subsequent centuries the attacks were repeated and intensified. In the course of continuous fighting, the Germans adopted many of the Romans' tactics and weaponry. During a campaign, each chief was accompanied not only by a multitude of troops and mounted warriors, but also by a companion guard (comites), which most often would fight on horseback, but also sometimes - as at the Battle of Argentoratum (357 AD) - stood to fight on foot.
Although one of the main sources of income were plundering expeditions organized on the territory of Rome, the Germans also maintained active trade contacts with the empire. Thanks to this, the tribes' wealth gradually increased and they also adopted part of Rome's cultural heritage, which consequently led them to establish the foundations of feudalism on the Rhine.
In our game, we tried to take into account important aspects of history, clothing, weapons, tactics, culture and beliefs. References to all of these elements can be found on the playing cards. The Roman Provinces have an established military strength, which symbolizes the limitanei units, to which are attached cards simulating the engagement of comitatenses formations. Players direct the actions of leaders who have West Germanic, Greek or Latin names, of the sort that Suebi and Franks really had. Warriors on the cards carry equipment modeled on artifacts found in graves and battlefields; their tactics and ranks, as seen on the cuneus (wedge) or fulcum (shield wall) cards, were in fact used in fights; even the seemingly fantastic cards referring to omens and superstitions were inspired by records preserved in the writings of ancient authors - Tacitus or Ammianus Marcellinus. All the quotations on the cards were taken from ancient works and served as an inspiration in designing those cards and their effects.