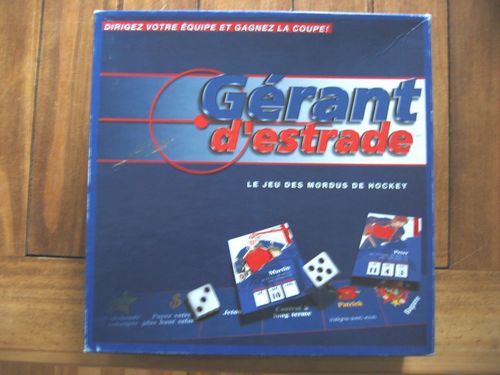
Gerant d'Estrade
Gerant d'Estrade Rulebook
Table of Contents
Table of Contents
Goal of the Game
Each manager (person who plays the game) must build the best team of 7 players in order to win the Gérant d'Estrade Cup.
How the Game Works
A Gérant d'Estrade game takes place in two places: on the game board and the match calendar. The managers advance their pawn and try to improve their team on the game board. Hockey season games are played from the calendar.
You play a series of matches after each round of dice (a round of dice means that each manager rolled the two dice once). For match series, you will see on the calendar that a black box numbers each match series. You must therefore always alternate between the game board and the calendar: a dice round, a series of matches, a second round of dice, a second series of matches, etc. until the end of the calendar.
The Dice
The Gérant d'Estrade game contains six dice:
- Two normal dice (black, numbered from 1 to 6) that you use to advance your pawn on the game board.
- Four colored dice numbered from 0 to 3. These dice are used during matches, confrontations and fights.
It is your differential which determines the color of the die you will roll.
Calendar
At the start of the game, you must choose the calendar corresponding to the number of managers. So you have calendars with 3, 4 or 5 teams. The teams are numbered, on the calendar, by a number ranging from 1 to 5, depending on the number of teams.
At the start of the game, each of the managers chooses a number. He writes the name of his team (Boston, Montreal, Vancouver, etc.) next to this number everywhere on the calendar.
This calendar represents the progress of the hockey season that you will play. When the matches start, you just have to follow the schedule. The regular season includes a number of matches determined by the number of managers, and therefore the number of teams. For example, if you are four managers, you take the calendar with 4 teams: each of the teams will play a total of nine games.
Player Cards
These are the players who make up the teams. You will see that these players have offensive, defensive and hardiness ratings. The higher the odds, the better the player. It is from these odds that you will be able to establish your differential during matches, confrontations and fights.
These players also have a position, a salary and a draft round.
Getting Ready for the Draft
Before starting the draft, each manager receives a sum of $ 10 million. This sum will be used to pay the wages of the drafted players.
You must then classify the players by draft round. This draft round is indicated in the red stripe to the right of the player cards. There are seven rounds and five players available per round. Players with the mention free agent will not be drafted.
Each manager then rolls the dice to find out their selection rank during the draft. Note that the selection ranks are reversed on each round. That is to say that the manager who has drafted first in the first round will have the last choice in the second round.
Example:
- First round: managers #1, #2, #3, #4, #5.
- Second round: managers #5, #4, #3, #2, #1.
- Third round: managers #1, #2, #3, #4, #5. etc.
Start of the Draft
You first lay down the five players ranked in the first round in the middle of the game board. Then you start the draft and each manager, according to his selection rank, chooses a player and pays his salary to the bank.
If you are only three or four managers to participate in the game, one or more player cards will not be drawn. You put these players back in the game box, they are eliminated from the game.
You then continue this way from the second to the seventh and final round of draft. Do not forget to eliminate from the game all players not drafted.
Game Rules
Team Totals for a Match
Before playing a match, each manager adds the offense and defense of his three (3) best forwards, his two (2) best defenders and his goalkeeper's defense.
Example: Here are the players of the two teams competing.
# 1 Boston
| Name | Position | off. | def. |
|---|---|---|---|
| Saku | forward (F) | 8 | 2 |
| Yannick | forward (F) | 4 | 1 |
| Chris | forward (F) | 5 | 2 |
| Scott | defender (D) | 3 | 5 |
| Patrice | defender (D) | 3 | 3 |
| Tommy | goalkeeper (G) | - | 7 |
| Yves (reserve) | plumber (R) |
# 2 Montréal
| Name | Position | off. | def. |
|---|---|---|---|
| Joe | forward (F) | 9 | 2 |
| Donald | forward (F) | 5 | 3 |
| Matthew | forward (F) | 3 | 4 |
| Ed | defender (D) | 3 | 6 |
| Adam | defender (D) | 2 | 5 |
| Jim | goalkeeper (G) | - | 9 |
| Gino (reserve) | plumber (R) |
Since you only count the three (3) best forwards, the two (2) best defenders and the goalkeeper, the managers will leave Yves and Gino aside for the match. They will not add up their offense and defense scores.
Note that reserve can play both in front and in defense. On the other hand, a forward cannot play defense, nor a defender at the front.
Team # 1. Boston. By adding the odds of its three (3) best forwards, its two (2) best defenders and its goalkeeper, this team obtains:
- 23 on offense ( 8 + 4 + 5 + 3 + 3 )
- 20 on defense ( 2 + 1 + 2 + 5 + 8 + 7 ) (as printed; see Note 1 at the end of this file)
Team # 2. Montréal. By adding the odds of its three (3) best forwards, its two (2) best defenders and its goalkeeper, this team obtains:
- 22 on offense ( 9 + 5 + 3 + 3 + 2 )
- 29 on defense ( 2 + 3 + 4 + 6 + 5 + 9 )
Both teams enter their odds in the spaces reserved on the match calendar.
Differentials and Dice Colour
Team # 1 takes their offense (23) and subtracts their opponent's defense (29).
- 23 – 29 = -6
- We put this differential of -6 on the calendar (see example below).
Team # 2 takes their offense (22), and subtracts their opponent's defense, team # 1 (20).
- 22 – 20 = 2
- We write this differential of +2 in the bubble on the calendar.
Team # 1, because of their differential of -6, will roll the white die (see match card). Team # 2, because of their differential of +2, will roll the blue die (see match card).
The match card gives the die colour for each differential:
| Differential (match card) | Die |
|---|---|
| -5 to -20 | White |
| -4 to +2 | Blue |
| +3 to +8 | Green |
| +9 to +20 | Red |
Playing the Match
Each team takes turns rolling their dice three times, once per period. The total goals are scored after each period.
If the match is tied after three periods, each manager rolls an overtime die. Whoever obtains the highest score wins. If the score is still equal, the match is declared tie.
For the final, the team that finished first during the season receives two (2) bonus points on their offense and defense scores. These bonuses are listed on the calendar. The winner of the final is declared the grand winner of the Gérant d'Estrade Cup.
After Each Game
- The manager who wins the game wins 2 points in the standings, receives a million ($ 1,000,000) and 1 token.
- The manager who loses the game does not gain points in the ranking and receives seven hundred thousand ($ 700,000).
- In the event of a tie, each manager wins 1 point in the standings and receives nine hundred thousand ($ 900,000).
Before Rolling the Dice
It is during the dice round that the managers can improve their team. It is always the manager having the dice in hand who can:
- buy 1 token (see Token in Tiles Explanation)
- use his tokens to provoke a confrontation, take a free agent or a long-term contract
- discuss transactions with other managers
Note that all these operations must be done before the manager rolls the dice. Once the manager has rolled the dice, there is nothing he can do to improve his team. On the other hand, in their turn of dice, the other managers can offer him transactions or attack him in a confrontation.
Trade Rules
All transactions between managers must involve players playing in the same position. Because each team must always have seven players: three (3) forwards, two (2) defenders, one (1) reserve and one (1) goalkeeper.
You cannot exchange a player for money. It must always be one (1) player against one (1), or two (2) against two (2), or three (3) against three (3), etc. We can however offer money or chips in addition to the players.
It is the player who will roll the dice during the dice round who can complete a transaction. When he is chatting with another manager, no other manager can intervene in the discussions.
You cannot make a transaction during the draft or when you play the matches.
Financial Problems
If a manager has no more money to pay his debts, he must first sell his tokens. If he does not have a token, he must put a player up for auction. That is to say, he chooses a player from his team and places him in the center of the game board.
Each manager, starting with the one on his left, can then make him an offer in exchange for the player put auction. The managers must then offer a player playing in the same position. But they can also add tokens and money. The manager who needs money then chooses the offer that suits him (see Star Player Asks for a Trade and follow the same process).
Coach's Tips
- Remember that the goalkeeper is arguably the most important player on a hockey team. In addition to improving your defense, it protects you against attacks (confrontations) from other managers. If you have an excellent goalkeeper, the other managers will hesitate before confronting you. Which will allow you to keep your best players.
- It is also essential to have a good scorer in order to be able to win your confrontations and thus improve your team. With a player with a high offensive rating, you can, during your confrontations, beat the opposing goalkeepers and thus take the best players from your opponents.
- Have your best players sign long-term contracts. But choose the right ones. Beware of star players, they are capricious and can ask to be exchanged. You will then be obliged to do so even if they have a long-term contract.
- It is important to have a good reserve player (plombier). As he can play both as forward and in defense, he can help out if you have injuries.
- Beware of good players with a low robustness rating, they can get injured. Be clever and keep a less good player in your team but with a low robustness rating. Why? Because it is he who will be injured if you arrive on an injury square. Your best players will therefore always be available for matches.
- Keep a good enforcer in reserve (robustness rating) to protect your star players. If, unfortunately, you arrive on a fight square, you would be able to win your fight and thus you would avoid losing a good player.
- Remember that the strategy tokens will allow you to win. Make good use of them.
Tiles Explanation
The board squares are explained below. Each entry gives the tile's rules followed by the short summary printed on the tile (where the tile has one).
Free Agent (Agent Libre)
Free agents are players who are not drafted and who therefore do not belong to any team.
At the start of the game, six (6) players have the free agent inscription in the red band on the player cards. You must place these players in the middle of the game board.
You can take a free agent when your pawn arrives on a free agent space. But each time you take a free agent, you have to throw a player from your team in the center of the game board. This player becomes a free agent. The two (2) players must evolve in the same position.
Your team must always consist of seven (7) players: three (3) forwards, two (2) defenders, one (1) goalkeeper and one (1) enforcer. (As printed; see Note 3 at the end of this file.)
There must always be six (6) free agent players. At the start of the game, these are the best players. At the end of the game, these are the worst!
When you take a free agent, you have to pay his salary and also pay the salary of the player on your team that you fire (and who thus becomes a free agent).
Tile summary: If desired, take a free player. Pay his salary. Throw a player at the free agent market and pay his salary.
Long-Term Contract (Contrat à Long Terme)
The long-term contract tile allows a manager to sign a long-term contract with one of his players. This long-term contract will prevent another manager from taking this player following a fight or a confrontation. Also, this player will not be able to leave your team if another manager arrives on the box aligns with you.
To sign a long-term contract, you must pay the bank the salary of the player to whom you want to give this contract. But beware, this player, if he is a star player, can ask to be exchanged.
A maximum of ten (10) long-term contracts are available for all teams. When you take out a long-term contract, attach a paperclip to the card of the player you want to protect.
Tile summary: Protect one of your players from exchanges (confrontation, brawl, aligns up with you). Costs player's salary and can be lost as a result of renegotiation.
Confrontation (Shootout)
The manager who falls on this tile sends his best offensive player in a confrontation against the goalkeeper of the manager of his choice.
You will see on the game board a space reserved for confrontations and fights. The manager who provokes the confrontation (the one who has arrived on the square or who uses his chips) takes the player from his team who has the highest offensive rating. He places this player in one of the rectangles on the game board. He chooses the manager he wants to confront and the latter places his goalkeeper in the other rectangle.
You then calculate your differentials before starting the confrontation. To calculate your differentials, you need to distinguish between the player's offense and the goalie's defense. You then roll the dice that match your differential (see matching odds) and the manager who gets the highest total wins the showdown.
Example: the manager #1 arrives on the confrontation box. He chooses to face the manager #2. Manager #1 takes the player from his team with the highest offensive rating: Peter [11]. He places this player on the board of play in one of the spaces for confrontations-battles.
The manager #2 takes his goalkeeper: Jim [9]. He places it in the other space reserved for confrontations-battles.
Each manager calculates the differential of his player.
- Manager #1: his player's odds [11] less odds of the opposing goalkeeper [9] - differential of 2 [11 - 9].
- Manager #2: odds of his goalkeeper [9] minus odds of the opposing player [11] - differential of -2 [9 - 11].
Because of his differential of 2, the manager #1 will throw a normal dice and the green dice. Because of his -2 differential, the manager #2 will only roll a normal dice. (See confrontation-battle card printed on the game board.)
In the example above, suppose that manager #1 rolls a 4 (normal die) and a 2 (green die): his total score is 6.
As for manager #2, suppose he rolls a 5 (normal dice). His total is 5. Manager #1 therefore wins the confrontation and he can choose the player of his choice from the team of manager #2. In exchange for this player, he must give a player from his team (the one of his choice) to manager #2. Note that the 2 players must evolve at the same position. Note also that you cannot take a player with a long-term contract.
Tile summary: Manager who is on the confrontation box or who uses his chips wins .... He takes the player of his choice from the team of the manager confronted and gives him in exchange a player who plays at the same position. Manager who is on the confrontation box or who uses his tokens loses…. He must give the other manager $ 300,000. Both teams remain intact. In case of a tie … No changes.
Fight (Bagarre)
Avoid the fight tile since the manager who arrives on this tile risks losing a good player if he loses the fight.
This tile is similar to the confrontation box except that we compare robustness rather than offensive and defensive. The manager who arrives on the tile chooses which manager he wants to face. Each manager then places his most robust player in the spaces reserved for confrontations-fights.
You then calculate your differentials by comparing the robustness rating of the 2 players. You then roll the dice that correspond to your differential. The manager who obtains the highest score wins the fight. (See confrontation and follow the same course.)
Tile summary: Manager who is on the fight box wins or draws: no change. Manager who is on the fight box loses: the manager who beat him takes the player of his choice and gives him in exchange a player who plays in the same position.
Contract Renegotiation (Renégociation de Contrat)
You lose a long-term contract if you have one. If you have several, you lose the one of your choice.
Signs With You (S'aligne avec vous)
If desired, you can take the named player by paying his salary to the manager to which he belongs. If the player is a free agent, you must pay his salary to the bank. You must also place on the free agent market a player from your team playing in the same position as the acquired player. You must also pay his salary at the bank.
The manager who has just lost his player may (since he has only six (6) players left) take a free agent playing in the same position as the lost player. He must pay the salary of his new player.
A player who has signed a long-term contract cannot line up with another team.
Tile summary: If desired, take the named player. Pay his salary to the manager who owns it, or to the league if he is a free agent. Throw one of your players (playing at the same position) to the free agents and pay his salary.
Token (Jeton)
The manager whose pawn stops on this space receives a strategy token. The token tiles allow you to establish your manager strategy. You earn a strategy token each time you win. You can also buy them for 2 million and sell them at the bank for 1 million.
You can use these tokens before rolling the dice. It is always the one who rolls the dice during the dice round who decides, before drawing, whether or not to use his chips. He can then buy one if he wants. You cannot buy more than one token per dice round.
For two tokens, you can cause a confrontation. But be careful, because if the manager you want to confront also has two tokens in hand, he can use them to refuse the confrontation. Rather than spending your two tokens, you can also wait until you have three to take a free long-term contract, or four to take a free agent free of charge.
N.B.
- You can only use your chips when it's your turn to roll the dice.
- You can only use or buy a token before rolling the dice, after it is too late. Same thing if you want to buy one.
- You can, during the same dice round: buy a token then use it immediately to provoke a confrontation, take a long-term contract or an agent.
Tile summary: 2 tokens: To provoke a confrontation. Refuse a confrontation. 3 tokens: Take a free long-term contract. 4 tokens: Take a free agent free of charge.
Star Player Asks for a Trade (Étoile Demande à Être Échangée)
If you have one or more star players, you must exchange the one of your choice (even if he has a long-term contract). Each manager, from left to right, then gives you one (only one) trade proposal and choose the one that suits you.
P.S. The managers can only offer one player, who plays in the same position, but a sum of money and/or tokens can complete the offer.
Tile summary: Your star player of your choice must be traded. Each manager, from left to right, makes an offer and you accept the one of your choice (a player, + can complete the offer: money + token).
Injury (Blessure)
Of the seven players on your team, the player with the lowest robustness rating is injured for the next set of games. You must replace it with your plumber. This player is still part of your team and counts in the seven players in your roster. He can only replay after the next set of games. (The words "set of games" are missing from the English layout at this point; restored from the French original, which reads "après la prochaine série de matchs". See Note 4.)
If the player gets injured before the last set of games, he will be injured for the playoffs.
If two or more players have the lowest strength rating on your team, you can choose which one will be injured.
Tile summary: Your weakest player cannot play the next set of games.
Notes on This Transcription
These notes record where the community text contains printed errors or gaps. The text above is transcribed as published except where a note says otherwise.
- Boston defense sum. The printed working "( 2 + 1 + 2 + 5 + 8 + 7 )" adds to 25, not the printed total of 20. The "8" appears to be the two defenders' defense combined (5 + 3). The printed total of 20 matches 2 + 1 + 2 + 5 + 3 + 7, which is the figure the example uses. Transcribed as printed.
- Confrontation and fight dice. The differential-to-die table for confrontations and fights is on the "confrontation-battle" card printed on the game board, which is not part of the supplied source. That table is therefore not transcribed. The only differential-to-die table in the source is the match card table above, which applies to matches. The confrontation example gives a +2 differential a green die, while the match card table places +2 in the blue band.
- Free agent tile. The English tile text lists "one (1) enforcer" in the seven-player roster. The French original lists "un (1) plombier" (reserve), which is consistent with the Trade Rules and the Coach's Tips. Transcribed as printed.
- Injury tile. The English layout omits "set of games" after "He can only replay after the next". The words are restored from the French original ("après la prochaine série de matchs").
- Terminology. The source uses "token" and "chip" interchangeably for the strategy token (French "jeton"). Both are transcribed as printed.
- Dropped material. The French originals and the blank score sheets in the source set are not transcribed beyond the match card die table. The calendar and score sheet are layout forms, not rules text.