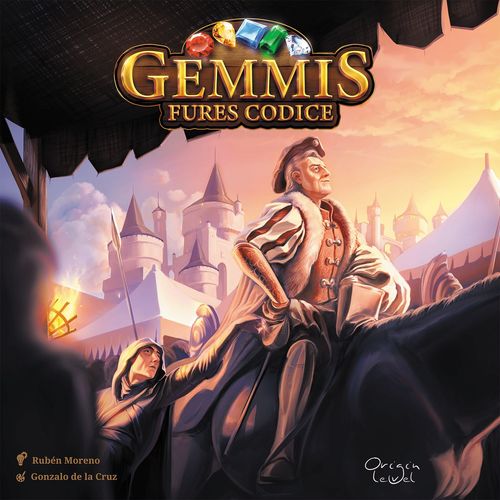
GEMMiS: Fures Codice
GEMMiS: Fures Codice Rulebook
Table of Contents
Table of Contents
- General information
- Content
- Setting up the game
- Board distribution
- How to play (family mode)
- Main objective of the game (Combinations)
- Points and Combinations
- Some examples of combinations
- Multiple colors combination (big combinations)
- The joker (making bigger combinations)
- Some examples of NO valid combinations
- The player's turn (sequence)
- The sack got empty
- Small gems from the main board corners
- The end of the game
- The winner of the game
- Advanced mode
- Alguazil mini-expansion
General information
GEMMiS: Fures Codice is a competitive game for two players with a duration around 20 - 40 minutes.
The game is still pending to get an official "PEGI" rating, but after testing it at multiple game conventions, festivals, private testing sessions, fairs... we can establish the age of 7+ as a good starting point for the game so far.
Content
Base game:
- 1 main board
- 1 initial setup card
- 1 scoring reference card
- 70 plastic chips
- 1 sack
- 5 small plastic gems
1 Alguazil mini-expansion:
- 2 plastic chips
- 2 mini boards
Author's note: The idea is to add the Alguazil mini-expansion as a stretch goal during the crowdfunding campaign with no extra cost from the backers.
Setting up the game
- Allocate the initial gems (plastic chips) exactly like it is shown on the initial setup reference card. Important, keep in mind to use only gems without any number printed on it.
- We put all the remaining gems (plastic chips) into the sack and we properly shuffle it.
- From the set of the 5 small gems, each player picks the color that will represent them along the scoring track around the main board, allocating the picked one on the position number 0. (In the example, one player has chosen the red one and the other player the blue one. Both allocate the gems on the cell number 0.)
- The remaining three small gems will be randomly allocated on the cells number 25, 50 and 75 respectively.
- We randomly decide which player will be the first one and the game will be ready for beginning.
- The first player will open the market, which means, to pick random gems from the sack until fill all the nine empty allocations, in the middle of the main board.
Board distribution
Imagine the players have picked the red and blue colors respectively for representing them on the score track during the game. The main board would be divided into 3 areas:
- Red player zone (two rows of six gems)
- Common area: the main market street (a row of nine gems)
- Blue player zone (two rows of six gems)
How to play (family mode)
Author's note: I encourage you to play GEMMiS at least once using family mode, before going for the advanced mode, even if you are an experienced board gamer. It will help you get a feel for the game and better understand the differences with advanced mode.
Main objective of the game (Combinations)
A player only can score points triggering Combinations. A player gets a combination when three or more gems of the same type (shape/color) are adjacent and horizontally aligned in the player zone. A player cannot trigger a combination in the opponent's zone, either in the common area.
Points and Combinations
Reference for the equivalence between the type of combination and points it gives to the player who triggered it (Puncta Gemmarum):
| Gems in combination | Points |
|---|---|
| 3 | 1 |
| 4 | 2 |
| 5 | 5 |
| 6 | 8 |
| 7 | 12 |
| 8 | 16 |
| 9 | 20 |
| 10 | 25 |
| 11 | 32 |
| 12 | 40 |
The smaller combination a player can trigger is the one that involves three gems of the same color and it will give 1 point to the player who triggers it.
The biggest combination a player can trigger is the one that involves twelve gems (all the gems in the player zone) and it will give 40 points to the player who triggers it. Later in this document we will explain how a player could get a combination of that size.
Important: Once a player gets a combination, it is mandatory to trigger it. Check the "Triggering a combination" section later in this document to see how/when a combination must be triggered. In other words, a player cannot keep a combination from one turn to another in order to try to get a bigger combination in coming turns (exception, check the "The joker (making bigger combination)" section later in this document).
The points obtained when triggering a combination are counted in real time at the precise moment the combination is triggered, moving the small gem on the point track around the main board, the total amount of points just gotten.
Apart from the points a player can get directly when triggering a combination, if any of the gems involved in the combination has a value printed on it, the player will add the value to the points obtained from the combination too.
Check the examples of combinations below for checking how to calculate the total amount of points for a combination.
Author's note: If it is your first time playing GEMMiS: Fures Codice, I recommend not getting obsessed with the idea of triggering the biggest combinations. It does not guarantee you are going to win the game. Biggest combinations usually required several turns, and meanwhile your opponent could be triggering smaller combinations but fast enough to not let you complete yours before the game ends. Said that, feel free to follow the strategy you wish.
Some examples of combinations
Combination of 3 gems. This is the smaller combination we can make. It gives 1 point to the player who triggers it. But, in this specific example, the combination gives 3 extra points because of the gem on the right. So, the player gets a total of 4 points = 1 point (combination of 3) + 3 points (value of gem).
Combination of 4 gems. In this example, the player got a combination of 4 gems. It gives 2 points to the player who triggers it. But, in this specific example, the combination gives 2 extra points because of the two gems on the left. So, the player gets a total of 4 points = 2 points (combination of 4) + 2 points (values of gems).
Combination of 5 gems. In this example, the player got a combination of 5 gems. It gives 5 points to the player who triggers it. But, in this specific example, the combination gives 1 extra point because of the gem on the right. So, the player gets a total of 6 points = 5 points (combination of 5) + 1 point (value of gems).
Combinations of 6 gems. Here we have two examples about how we could make combinations of 6 gems. So, we could have the six of these in the same line, or, we could have three of the gems in one line and the other three in the other.
In the second example, it is not necessary to get the three on the top directly connected to the three at the bottom. So, we could have the three on the top at the most left in the line, and the three on the bottom at the most right in the line, and it would be a valid combination of 6 as well. The most important thing here is, to get both at the same time no matter the horizontal positions in each line.
Multiple colors combination (big combinations)
One of the first questions that come to our mind at this moment is: "How can we make big combinations?" To answer this question, we need to explain to you what a combination made of multiple colors is:
Your first thought, looking at the example (two groups of 5 gems of different colors, one in each line), could be that there are two combinations of 5 gems each. But, if you are able to get this configuration on your player zone at the same moment, it becomes a combination of 10 gems, even if it involves gems of different types/colors.
So instead of getting points from 2 combinations of 5 gems each, you would get the points from a combination of 10 gems. For this specific example, you would get a total of 28 points = 25 points (combination of 10 gems) + 3 points (gem values).
The joker (making bigger combinations)
As said before, once a player gets a combination, it is mandatory to trigger it, so a player cannot keep a combination from one turn to another in order to try to get a bigger combination in coming turns. Here is where the joker plays an important role for helping us out to get a bigger combination.
The player that has one (or more) joker in the player zone, during the triggering combination phase (see "Triggering a Combination" section later in this document), can decide the color of the joker. So, if we take a look at the example (a joker next to two amber gems), the player can decide that the joker is amber, making a combination of 3 gems in this case, or, decide that the joker is not amber, in order to keep these gems to try to get a bigger combination in coming turns.
In the next example, the player could decide that the joker is not red, making only a combination of 3 white gems, or, decide that the joker is red, and get a multiple colors (white/red) combination of 6 gems instead.
As a last example about how useful the jokers could be, the example shows a situation in which the player would have four options: making a combination of 6 gems (white/green), making a combination of 9 gems (white/red/green), making a combination of 9 gems (white/green/amber) or making a combination of 12 gems (white/red/green/amber).
Some examples of NO valid combinations
Example 1: This is not a combination of 4 green gems, combinations require a minimum of three gems of the same color horizontally adjacent only, so, in this case, we cannot use the green gem on the top line for making a combination of 4 gems. It is a combination of 3 gems instead.
Example 2: For the same reason from above, this is not a combination of 4 green gems.
Example 3: Again, and for the same reason as in the previous two examples. This is not a combination of 5 green gems, this is a combination of 3 gems.
Last example: three (or more) gems of the same color horizontally adjacent in the main street of the market, is not a combination, so no player can trigger it as a combination for gaining points. A player only can trigger a combination in the player zone, not even in the opponent's zone.
The player's turn (sequence)
- Switch a gem a. Got a combination b. Did not get a combination
- Triggering a combination
- Filling empty locations on the player zone a. Making decisions
- Moving the main street of the market
- Filling empty locations on the main street of the market
- Cascade combination
(The draft gives no further text for these steps.)
The sack got empty
If at any moment of the game, the sack gets out of gems inside, we refill the sack with all the gems we already have used previously in combinations. We shuffle the sack properly and we continue the game in a normal way.
Small gems from the main board corners
(Heading only in the draft; no text.)
The end of the game
(Heading only in the draft; no text.)
Small gems at the last turn
(Heading only in the draft; no text.)
The winner of the game
After resolving the last turn, the player with more points wins the game.
In case of a tie, the player that owns less small gems (from the main board corners), used or not during the game, will be the winner.
Advanced mode
Author's note: I encourage you to play GEMMiS at least once using family mode, before going for the advanced mode, even if you are an experienced board gamer. It will help you get a feel for the game and better understand the differences with advanced mode. Advanced mode is all about reducing randomness in favor of strategy.
The advanced mode only has two differences with respect to the family mode:
-
In order to trigger a combination in cascade in the same turn, the combination in cascade must be bigger than the last one in the same turn. Otherwise, your turn ends and it is the turn of your opponent. In other words, if you just triggered a combination that involved 7 gems, in order to be able to trigger a new combination in the same turn after refilling the board with gems, this new combination must involve a minimum of 8 gems or more.
Remember that the first thing you always do at the beginning of your turn is to switch two connected gems, saying so, when you recover the turn, you may upgrade the combination you just left prepared, in the previous turn, before triggering it.
Keep in mind that the above limitation only affects combinations in cascade. So, when you recover a new turn after the opponent's one, the limitation from above does not apply, and your first combination can be any of the regular ones, no matter your last type of combination in your previous turn.
-
Once the game is over, all the remaining gems with printed values in your zone will penalize you. You have to add all the values in your zone and subtract the result from your final score.
After the subtraction, we compare the recalculated final score, and the player with more points wins the game.
Alguazil mini-expansion
The Alguazil mini-expansion can be used in both family and advanced mode.
The mini-expansion allows more interactions between the players.
Both players begin the game with an alert level thermometer and a plastic chip that represents the Alguazil. Each player places the alert level thermometer in their player zone.
Both players begin the game with their Alguazil alert at the lowest value (bottom of the thermometer).
Any time your opponent triggers a combination, the alert level of your Alguazil goes up one level. Once the alert level of an Alguazil reaches the top in the alert level thermometer, this will be available for the player who owns him. This player can use any of the three following skills from the Alguazil:
- Interrupt a combination from the opponent.
- Clean the main street of the market.
- Change the direction of the market after the opponent chooses it.
You can check more in detail all the three Alguazil skills later in this document section.
Alert level thermometer: the highest alert level is "available"; the levels below it are "not available yet"; the lowest alert level is "not available".
Once the player uses the Alguazil, the alert level of this descends to the lower one.
An Alguazil can be canceled by the opponent's Alguazil if both are available, if this happens, both Alguazils alert levels descend to the lower one.
Once the market is closed (see "Ending the game" section), the Alguazil cannot be used any more during the current game, even if it was already available.
Alguazil skills in deep
Interrupt a combination from the opponent
Anytime the player with the turn is going to trigger a combination, the opponent can interrupt it. The combination will remain in the player zone for the next turn.
Be aware that the first thing a player always does at the beginning of the turn is to switch two connected gems, so, like happens in the advanced mode, when the player recovers the turn, the interrupted combination may be upgraded before triggering it.
Clean the main street of the market
Any time the main street is totally filled (no empty locations), any player with the Alguazil available (highest alert level) can use it for clearing totally the main street of the market, following the steps:
-
Put beside the board all the gems that are currently in the main street of the market.
-
Refill the main street of the market with random gems from the sack.
Special case: If the sack gets empty while refilling the main street of the market, we put back into the sack all the gems we already have used previously in combinations, except the gems we just put beside the board in the previous step. Then, we shuffle and we continue refilling the main street of the market.
-
Once the main street is totally filled, we return to the sack, the gems we put beside the board on the first step.
Change the direction of the market after the player chooses one
Once the player with the turn announces the direction the market is going to move. The opponent can change the direction of it.