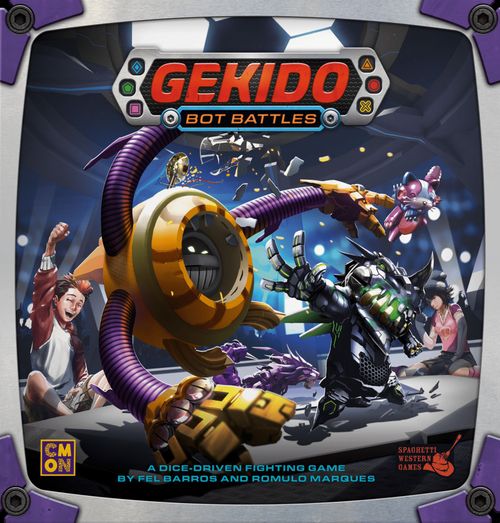
Gekido: Bot Battles
Gekido: Bot Battles Rulebook
Table of Contents
Table of Contents
Game Components
- 6 Pre-Painted Bots: Slicer, Pytron, V-REX, M3-0W, Tetsubot, Overclock
- 9 Arena Tiles
- 6 Command Dice
- 28 Structure Dice
- 18 Target Lock Tokens
- 6 Bot Control Panels
- 46 Tech Cards
Setting Up the Game
Each player chooses a Bot and takes the matching Control Panel. Place the number of Structure dice shown on the matching spaces on the Control Panel, with the number 6 showing on each die.
Place the central Arena tile in the middle of the table. (The central tile is always the same.) Shuffle the other Arena tiles and place them around the central tile randomly, creating a 3 x 3 grid. Note that the corner tiles must be placed in the corners, as shown in the example.
Choose a starting player at random. Each player, in clockwise order, then places their Bot on any Arena tile except the central tile.
Shuffle the Tech Cards and create a facedown draw pile near the board.
Give each player one Target Lock token for each of the other Bots in the game. For example, if you are playing with V-REX, Pytron, Overclock, and Tetsubot, the V-REX player takes one each of Pytron, Overclock, and Tetsubot's Target Lock tokens. The Pytron player takes one each of V-REX, Overclock, and Tetsubot's Target Lock tokens, and so on. All Target Lock tokens start the game with the Ready side facing up.
Playing the Game
Gekido is played over a series of turns, beginning with the starting player and rotating clockwise. Players control their Bots in the Arena, trying to destroy the other Bots so that they emerge victorious.
Player Turns
Your turn is divided into three phases:
- First Movement Phase
- Attack Phase
- Second Movement Phase
1 - First Movement Phase
During this phase, you may move your Bot one tile in any direction (diagonally or orthogonally).
At the end of the First Movement Phase, your Bot must be adjacent to at least one Bot to which your Target Lock is on the "Ready" side. You must move in this phase if your Bot is not adjacent to another Bot.
Example: Tetsubot can move up or to the center of the Arena. It cannot move to the right because it would not end up adjacent to another Bot.
2 - Attack Phase
During this phase, you must attack one enemy Bot, following these three steps:
Step 1: Acquire Target
You can only attack a Bot that is adjacent to your Bot (diagonally or orthogonally) and only if your matching Target Lock token shows the "Ready" side.
Choose which Bot you want to attack and flip the matching Target Lock token to the "Loading" side.
Important: You cannot attack a Bot if its Target Lock token already shows the "Loading" side!
Example: V-REX chooses to attack M3-0W. They flip their M3-0W's Target Lock token to the "Loading" side. They won't be able to attack M3-0W again until after they have attacked all of the other Bots.
If all of your Target Lock tokens now show the "Loading" side, flip them all back over to the "Ready" side after you attack. If it is completely impossible during your First Movement Phase to move your Bot adjacent to a Bot for which you have a "Ready" Target Lock, you may target a Bot with a "Loading" Target Lock instead. You still need to flip one "Ready" Target Lock token, even one of a different Bot.
Target Lock
At the beginning of the game, each player takes a Target Lock token for each of the other Bots in the Arena. Your Target Lock tokens indicate which Bots you can attack:
- If a Target Lock token shows the "Ready" side, you may attack that Bot. If you do, you must flip the token to the "Loading" side.
- If a Target Lock token shows the "Loading" side, you may not target that Bot. You cannot flip the token back over to the "Ready" side until all of your Target Lock tokens are "Loading."
This means that you will have to attack all of the other Bots in the arena before you can attack any of them again!
Step 2: Create Attack Command
Once you have chosen a target for your Bot to attack, you must create an Attack Command using five Command Dice.
You may roll the dice up to three times to try to create a specific combination of dice symbols. The more difficult the combination, the more damage your Bot can inflict, but there is also a greater risk that your Bot will malfunction!
While you are creating your Attack Command, after each of your three die rolls you may use either one Tech card, one Power or one Arena tile effect.
After your third roll, calculate the amount of damage inflicted on the Bots.
Creating an Attack Command
When your Bot attacks, you must create an Attack Command:
- You may roll the Command Dice up to three times.
- After the first roll you must declare which Attack Command you are attempting to create.
- You then Lock dice with symbols that match the Attack Command.
- After each roll, you may use an Arena tile effect, a Power or a Tech card.
- Success! After your third roll, if your Attack Command is complete, you inflict damage to the target Bot equal to that Command's first number.
- Malfunction! If you cannot complete the Attack Command with three rolls, your Bot suffers damage equal to that Command's second number.
Bot Symbol
Each Bot has one of the six Command symbols displayed next to its name.
This is that Bot's symbol and it affects a couple of things:
- A Bot cannot use its symbol as part of a "Five Different" Attack Command.
- Some Tech cards refer to the Bot's symbol for modifying dice.
Using the Command Dice
First, roll five Command Dice. Using the symbols you rolled as a guide, you must now choose one Attack Command that you want to try to complete. The Attack Commands available are listed on your Bot Control Panel, and are explained below (The Attack Commands).
Then, Lock as many of the dice you rolled as you wish on the spaces of your chosen Attack Command. You must lock at least one die on the chosen Attack Command.
Important: Once a die is Locked into an Attack Command, it cannot be altered or removed until the attack is finished!
Important: You cannot change your choice of Attack Command after your first roll, even if you want to!
After placing any chosen dice on your Control Panel, reroll the dice that you didn't Lock from the first roll. Then, you have a third and final roll (after a second roll in the same way).
Example: Slicer's controller, Phillip, rolled the 5 dice. He decides to go for the Four of a Kind. He takes the two matching dice and sets them on the Four of a Kind spaces of his Control Panel. In order to complete his Attack Command, he'll need 2 more of that symbol. Phillip rolls the other 3 dice and gets one more matching die. He adds it to the other two dice on his Control Panel. He'll only get one more chance to get that last symbol! Phillip makes his last roll with the 1 die remaining and gets the symbol! He did it! He places the fourth die in his Four of a Kind space and can now proceed to the damage step.
When Phillip made his final roll, he ended up with a total of 5 matching symbols. He would love to switch from Four of a Kind to Five of a Kind, but since he chose Four of a Kind after his first roll, he can't change it later! Similarly, if he failed to get 4 after his last roll, he could not switch to Three of a Kind to avoid a malfunction.
Playing Hint: Between rolls of the dice, you'll have a chance to use Tech Cards, Powers or Arena tile effects. See the Special Effects sections below.
The Attack Commands
There are six different Attack Commands that your Bot can execute:
- Two Pairs: A Pair is any two dice showing the same symbol. Your Two Pairs have to feature different symbols.
- Three of a Kind: Any three dice showing the same symbol.
- Full House: A Three of a Kind combined with a Pair.
- Four of a Kind: Any four dice showing the same symbol.
- Five Different: All five dice showing different symbols. Important! Because of Bot safety protocols, a Five Different command cannot use the symbol that matches the one on your Bot Control Panel.
- Five of a Kind: All five dice showing the same symbol.
Step 3: Attack!
When you are done rolling the dice, it's time to figure out if the attack was successful:
If you completed the Attack Command: Your attack succeeds! You deal damage to the target Bot equal to the first number next to your Attack Command.
The amount of damage inflicted may be modified by Tech Cards, Powers or Arena tile effects (see Special Effects below).
After inflicting damage, you may push the target Bot. If you decide to do so, first you move your Bot into the target Bot's tile. Then, the controller of the target Bot must move it onto any adjacent empty Arena tile. Remember that if you push your target and move into its tile, you cannot move on the Second Movement Phase this turn.
Example: Phillip's Attack Command was successful, so the target Bot suffers 8 damage.
If you did not complete the Attack Command, your Bot suffers a malfunction! Your Bot suffers damage equal to the second number next to your Attack Command. You cannot push the target Bot.
Important: Tech Cards, Powers or Arena tile effects that modify an Attack's damage do not modify the damage you take for a malfunction.
Example: Phillip wasn't able to get all 4 he needed. His Slicer malfunctions and suffers 4 damage.
Damaging a Bot
- First, apply damage to any Armor dice the Bot might have.
- Remaining damage is applied to Structure dice.
- If a Structure die is reduced below 1, remove it from the Bot. That Bot gains the bonus unlocked.
Gaining Tech Cards
Executing the simpler Attack Commands allow your Bot to prepare some surprises for later in the battle in the form of Tech Cards. If you successfully complete the Two Pairs Command, you get to draw two Tech Cards. If you complete the Three of a Kind Command, you get to draw one Tech Card. Completing any of the other Attack Commands does not give you any Tech Cards.
Keep your Tech Cards hidden from the other players. These cards are further explained below (Tech Cards).
Dealing Damage to a Bot
Each Bot has a column of Structure dice that shows how much damage it can take before it is destroyed.
When your Bot is damaged, reduce the value of the topmost Structure die by the amount of damage your Bot has taken. If you take enough damage to reduce the value on the die below 1, remove that die and apply any leftover damage to the next die below it.
Example: Earlier in the game, Mary's Overclock was attacked and suffered 4 damage. It just got hit again, this time for 3 damage. The first 2 damage is enough to force Mary to remove her first Structure die. The last point of damage reduces her next Structure die from 6 to 5.
Structure Bonuses
The more damage a Gekido Bot takes, the more fiercely it fights. Lost Structure dice unlock powerful bonuses that vary from Bot to Bot. Whenever you are forced to remove a Structure die from your Control Panel, your Bot receives all the bonuses listed next to the now-empty Structure space.
The bonuses you may unlock are:
- 1 Card: Draw a Tech card and add it to your hand.
- 1 Upgrade: Permanently increase your Bot's attack or defense by 1.
- 1 Armor: Add 1 Armor die to your Bot.
- 1 Power: Unlock one of your Bot's unused Powers.
- 1 Charge: Add 1 Charge to one of your unlocked Powers (up to its listed maximum.)
All of these bonuses are further explained under Special Effects below.
Example: V-REX just lost its first Structure die, which unlocks an Upgrade bonus. The Structure die is placed in the Upgrade space of the Control Panel. Since V-REX is an offensive Bot, it will deal +1 damage each time it damages another Bot for the rest of the game.
Arena Tile Effects
Each Arena tile has a different effect on Bot attacks.
- When you attack, you may use the effect of the tile your Bot is on once during your Attack Phase.
- When your Bot is attacked, you may use the effect of the tile your Bot is on once during each attack.
Arena tile effects can alter the Command Dice or modify the amount of damage inflicted on a Bot.
Attackers cannot use an Arena tile effect in conjunction with a Tech card or Power. The Arena tile effects are explained in detail below.
Example: Slicer is on a tile that allows it to Flip a Die. During his Create Attack Command Step, Phillip can flip one of his dice, letting him change it to the indicated symbol. His attack on Pytron succeeds and he would normally inflict 6 damage, but Pytron is on a tile that reads +2 Defense, so it only suffers 4 damage.
3 - Second Movement Phase
During this phase, you may move your Bot one tile in any direction (diagonally or orthogonally), but only if you did not move your Bot this turn.
If you move your Bot in this phase, you are not required to end your move adjacent to another Bot.
End of the Turn
After your Second Movement Phase is complete, your turn is over.
If your Bot is on the central Arena tile at the end of your turn, you may activate that tile and receive its special effect: You get to draw three Tech Cards, choose one to keep and discard the other two. But, as long as your Bot is on the central Arena tile, it suffers a -2 penalty to its defense, which means that you take 2 additional damage each time your Bot is damaged by an attack!
Bot Annihilation
If your Bot loses its last Structure die, it is destroyed! Remove your Bot from the Arena. You are now out of the game. Remove all Target Locks corresponding to the destroyed Bot from the game.
If the last damage was caused by an opponent, they draw a Tech card as a reward.
The game ends when there is only one Bot left in the Arena. That Bot is the winner!
Special Effects
Upgrades
Upgrades are passive abilities that remain in effect for the rest of the game. Upgrades can get stronger if your Bot gets another Upgrade.
Attack - The Attack Upgrade increases the damage dealt by the Bot each time it attacks. When the Bot first unlocks this ability, a die showing 1 is placed in the box, increasing the Bot's damage by 1. When the Bot gains another Upgrade, increase the value on the die by 1, thus increasing the damage done by the Bot. The maximum Upgrade value is 5.
Example: V-REX has received an Upgrade, giving it +1 damage when it attacks. Later, it receives a second Upgrade, so the die is turned to the number 2. From now on, V-REX inflicts +2 damage when it attacks.
Defense - The Defense Upgrade works similarly to the Attack Upgrade. However, it increases the Bot's Defense, thus reducing the damage dealt to the Bot by the number on the die in its Upgrade box. The maximum Upgrade value for Defense is 5.
Powers
A Power is a new trick that your Bot can learn. Powers can be used after each of your three dice rolls when you are creating an Attack Command.
A Power cannot be used at the same time as a Tech card or Arena tile effect, but they can each be used after a different roll in the same Attack phase.
Unlike Upgrades, Powers need to be activated each time they're used. The Bot will have a specific number of charges available to use for each of its Powers. Once depleted, a Power cannot be used again for the rest of the game.
When you unlock your first Power, take the Structure die and place it on the space next to the Power you want. Each Power shows a specific number over a lightning symbol, indicating how many Charges it should start with. Place the die with that number facing up.
Each time you use a Power, change the die next to it, decreasing the Charges by one to indicate its usage. When you use a Power's last Charge (i.e. the Power's die was showing '1'), flip the die to show the red 6 result. This face indicates that this power has been completely depleted, and cannot be gained again for the remainder of the game.
Example: V-REX just gained the 'Flip a Die' Power, with 3 charges. When it attacks, V-REX's controller may decide to spend a charge to Flip 1 die before Locking it in an Attack Command.
These are the effects of the different Powers the Bots may have:
- Flip a Die: The Bot's controller may choose one of their Command dice and flip it to its opposite side.
- Switch Attack: The Bot's controller may change their chosen Attack Command, moving the locked dice to the new Command (unwanted dice may be discarded, but not rerolled).
- Roll an Extra Die: The Bot's controller may roll an extra Command Die.
- Extra Reroll: The Bot's controller may roll their Command Dice up to four times, instead of three.
- Opponent Rerolls a Die: The targeted Bot's controller may force the attacker to reroll a Command Die during their Create Attack Command step.
- One Die = Any Die: The Bot's controller may change one of their Command Dice's result to any other result.
- Force Reroll: The targeted Bot's controller may force the attacker to reroll all the Command Dice they just rolled.
- Damage +3 / Heals 2: This Bot's attack this turn deals 3 more damage, and it regains 2 Structure.
- Draw 5, Keep 2: At the start of their turn, the Bot's controller may draw 5 Tech cards and keep 2 of them in hand. Discard the rest.
- Prevent 4 Damage: This Bot's controller may prevent up to 4 damage to their Bot, no matter what the source of the damage.
Extra Charges
When a Structure Bonus grants you an extra Charge, choose one of your unlocked Powers and increase its die by 1, thus gaining an extra use of this Power.
Extra Charges cannot be applied to a Power that's already on its maximum number of Charges (as indicated on its die slot), to a Power that hasn't been unlocked yet (a Power with no die), to a Power that's already been depleted (its die shows the red 6) or to an Upgrade.
Armor
Armor protects your Bot from damage. Like Upgrades, Armor is a passive ability, but it doesn't always last for the rest of the game.
When you gain an Armor die, roll that die and place it on an empty Armor space on your Control Panel with the result showing. The next time your Bot takes damage, you must reduce your Armor die instead of your Structure dice following the normal procedure. When your Armor dice are gone, your Bot will continue to suffer damage to its Structure dice as normal.
Example: M3-0W has just gained an Armor die. Its controller rolls the die and gets a 4. The next 4 damage M3-0W suffers will be applied to the Armor die instead of its Structure dice. If the next attack did 5 damage to M3-0W, the Armor die would be removed and it would lose 1 Structure.
Tech Cards
You can earn Tech Cards by completing Two Pair or Three of a Kind Attack Commands, as explained above. Each Tech Card can be used only once and gives your Bot a special temporary bonus.
Tech cards can only be played by the Attacker or the Defender. Players not involved in an attack cannot play Tech cards.
Red Attacker Tech Cards can be played after each of your three dice rolls when you are creating an Attack Command (but only one per roll and never in conjunction with a Power or Arena tile effect.)
Green Defender Tech Cards can only be played by the player being targeted by an attack. In this case, more than one card can be played at the same time.
Gray Tech Cards can be played by either the Attacker or the Defender. However, the Attacker is still limited to using only one Tech card (or Power, or Arena tile effect) each time they roll the dice.
Some Tech Cards can only be played at certain times, as explained on the card. In all cases, the defender always has the option to play cards first.
Each Bot can only hold a limited amount of Tech Cards at a time. This hand limit is shown on your Bot Control Panel. If you draw a Tech Card that brings your hand above this limit, you must immediately discard down to your hand limit.
Arena Tile Effects
Energy Station: A Bot on this tile may flip one of its Command dice to its opposing side.
High Ground: A Bot on this tile gets -2 Attack and +2 Defense. That means all its attacks deal 2 less damage, but any damage it takes is also reduced by 2.
Laser Turret: A Bot on this tile gets +2 Attack and -2 Defense. That means all its attacks deal 2 extra damage, but any damage it takes is increased by 2.
Hot Grill: A Bot on this tile gets an extra reroll of their Command dice in their Create Attack Command step, letting them roll their dice up to four times.
The Center: A Bot that finishes its turn on the central tile may draw 3 Tech Cards and keep 1 of them in hand. A Bot on this tile has -2 Defense.
Gekido Duel
(2-player variant)
If you want the fast-paced cutthroat experience of Gekido in an even faster and easier-to-learn version, you can try Gekido Duel with two players.
Simply flip your Bot Control Panel over to the Duel side. In this game mode, you will only use 4 arena tiles to form a random 2x2 grid (do not use the central tile). In Duel mode, no Tech cards or Target Lock tokens are used. All other rules remain the same. The two players alternate turns until one Bot runs out of Structure Dice. The other Bot is the winner!
Gekido Duel usually plays in about 10 to 15 minutes, so it's perfect as an introduction to the game or when playing with a younger opponent!
Engineer's Notes
"Before the action starts and everyone's eyes are drawn to the main arena floor, let's take a second and talk to the Bots' designing engineers..."
V-REX: I built the V-REX program to be loyal and protective. What I got was much more. Sure, he's a little grumpy now and again, but he will always stick by you. If any threat gets close, CHOMP go those jaws! Not much can take what I built them to dish out. In combat, he is a powerhouse on offense, inflicts a lot of damage, and can take a modest amount of punishment. That's why he's a winner!
Slicer: What what I was thinking when I put a 6.7 tHz power supply in the processor suite for Slicer? Total badassery, that's what! She is one mean and nasty little swords-bot. For all the speed and strength that supply gives her, it's worth replacing popped breakers and fried conduits. Slicer is a dedicated fighter in combat, deadly with her sword, and able to withstand moderate damage in order to use them.
Tetsubot: Building Tetsubot almost bankrupted me. The kinds of shielding, redundancies, and forcefield suite I put into it were beyond hard to come by. I tried to keep him from getting damaged by teaching the Code of when and when not to fight, but even Bushido 2.0 has its limits. When in combat, Tetsubot shrugs off most damage when hit and can withstand the most punishment of any bot anywhere.
Overclock: When my sister first made him, Overclock was the meanest, hottest-running Bot around. After my upgrades, he dedicates his program to always keeping two hands protecting the others and trying to keep his internal temp as even as he can. Once a robo-barbarian, now I get him to win by "playing it fair." Though he doesn't hit very hard, Overclock makes the most out of his dauntless defense and thick, hard to damage, chassis.
Pytron: With Pytron, I originally wanted to make a scary little tech-drone that looked mean and computed even meaner. A few coding tweaks and he is so much more! Wireless hack nodes and static pulses make him quite tricky - to deal with and to program successfully! He is a schemer in combat, using luck and manipulation to get around its weak basic attacks and a somewhat thin body shell.
M3-0W: Go ahead, make fun. I brought a cute Bot to the arena. Looks can be deceiving, though. Actually, I made a polymer alloy kitty cat that broadcasts infectious worm code that manipulates other devices nearby. What she lacks in combat efficiency and defensibility, M3-0W makes up for with technical tricks and sheer likeability. She has to be cunningly smart in combat because she doesn't hit hard and I hate the smell of repair epoxy!
Rules Summary
Setup
- Each player gets: Their Bot's miniature and Control Panel, one Target Lock token for each opponent Bot.
- Each player places their Structure Dice on their Control Panel.
- Build Arena with a 3x3 grid of tiles and place each Bot in a different corner.
Player Turn
- First Movement Phase.
- Attack Phase.
- Second Movement Phase (if your Bot hasn't moved this Turn.)
Movement Phase
- The Bot may move to an empty adjacent tile (including diagonally.)
- At the end of the First Movement Phase, your Bot must be adjacent to at least one Bot to which your Target Lock is Ready.
- You may only move in the Second Movement Phase if you haven't moved this turn. You're not required to end adjacent to another Bot in the Second Movement Phase.
Attack Phase
Step 1: Acquire Target. You can only attack an adjacent Bot (including diagonally.) Flip its Target Lock token to its Loading side.
Step 2: Create Attack Command. Roll the 5 Programming Dice. Choose an Attack Command and lock at least one Die on it. Perform up to 2 additional rolls, locking the matching Dice. You can't change your choice of Attack Command after your first roll.
Step 3: Attack! If successful, deal first listed damage to the target Bot (may move into the target's tile, with the opponent moving into an empty adjacent tile.) If failed, deal second listed damage to your Bot.
Remember
After each roll and reroll, you may use one Tech card OR one Special Ability OR an Arena Tile effect.
Taking Damage
Each point of damage taken is reduced from the target Bot's Structure Dice, starting from the topmost Structure Die.
When a Structure Die would be reduced from 1 to 0, the Die is removed instead, unlocking all bonuses listed next to it.
Errata (V1.0 - May 2017)
Separate errata sheet published by the publisher (GKD001 Errata). It applies to the Bot Control Panels.
- Bot Control Panel, Pytron: Where you read "Upgrade" read "Card" instead.
- Bot Control Panel, Duel Mode, Pytron: It has no Upgrade option, only Power.
- Bot Control Panel, Duel Mode, M3-0W: It has no Upgrade option, only Power.