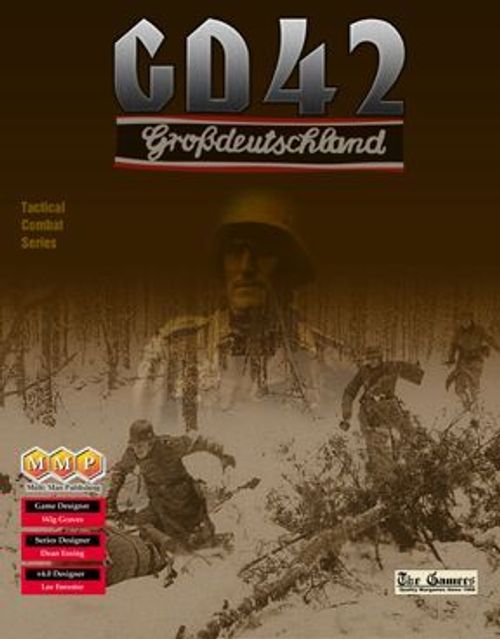
GD '42: Grossdeutschland
GD '42: Grossdeutschland Rulebook
Table of Contents
Table of Contents
1.0 General Special Rules
1.1 Snow
During the Command Phase of each full hour turn the Soviet player rolls two dice and compares the result to the snow number shown on the Day Record Track. If the number rolled is equal to or greater than the snow number, the weather is snow. On snow turns, apply the following:
- Use the snow movement cost (in parentheses) on the Terrain Effects Chart.
- Maximum visibility is 3 hexes.
- Apply a -2 column shift on the Artillery Adjustment Table.
1.2 Terrain Notes
1.2a Steep Slope. Steep Slopes can affect lines of sight between non-adjacent units. A Steep Slope symbol (shown on the Terrain Effects Chart) blocks LOS to and from units which are down hill of, and adjacent to, this symbol.
Steep Slopes also affect movement, as shown on the Terrain Effects Chart.
1.2b Intermediate Contours. Contour lines are marked on the map every 10 meters. Dashed lines do not affect movement but are used to determine elevation.
1.2c Bridges/Fords. Non-Infantry units may only cross the Luchessa at bridges and fords. For bridges the following rules apply:
-
Each Action Phase, the German player may destroy one bridge that he has held since the beginning of the game and has not yet been destroyed. Mark it using one of the bridge markers provided. A player can control a bridge by occupying both hexes with a unit. It remains in his control until the opposing player fulfills the same conditions.
-
The Soviet player may repair bridges, but may only accumulate "Bridge Repair Time" (BRT) on one bridge at a time. To repair a bridge, the Soviet player must occupy both hexes connecting the bridge with Infantry units. To accumulate BRT, the units must spend their entire Action Phase in their respective bridge hexes, and may not be attacked on the Fire Table on the 1 column or greater. At the end of a Soviet Action Phase, if 8 hours have accumulated, the bridge is repaired. If the Soviet player begins accumulating BRT on another bridge, or if a German Infantry unit occupies either bridge hex, the BRT on that bridge is reset to zero, and the Soviets will have to start all over again.
1.3 Consolidation
During the Command Phase of any night turn, both players may consolidate the losses of any platoons, MG units or multi-step Vehicle units that are stacked with or adjacent to each other. Such units must be from the same battalion, be the same type and may not be Suppressed or Paralyzed. Units not assigned to a battalion may not consolidate. Simply remove any number of steps desired from one unit and add them to another. Any units eliminated in this fashion do NOT count towards Battalion Morale.
1.4 Command and Control
1.4a German Command Prep. The German Command Prep Rating is 2 for the entire game.
1.4b Soviet Command Prep. The Soviet Command Prep Rating is 7 or 5 for Attack and Movement Op Sheets (based on the formation as shown in 1.4g) and 3 for any type of defensive mission. The Soviets always use a rating of 5 for Reserve activation. Ignore all "Size" and "Staff" modifiers for Soviet Op Sheets.
1.4c German Higher Intent. The Germans are to stop the Soviet attack in the Luchessa Valley.
1.4d Soviet Higher Intent. The Soviets are to break through the German lines and cut the main Olenino-Smolensk road.
1.4e Initial Orders. In all scenarios, players may draw up Op Sheets of their choice before play begins. Such Op Sheets can also be drawn up for reinforcements. All such Op Sheets are implemented before play begins. If the player waits until the game begins to issue Op Sheets to reinforcements, those reinforcements are handled according to series rule 6.13e.
1.4f Night Attack Restrictions. Both sides suffered from the rigors of the winter weather and found it necessary to halt operations at night. The following rule, however, also reflects the uncertainty of when operations would cease.
Starting with the 1700 turn, each side rolls one die during the Command Phase and compares it to their halt number shown on the Turn Record Chart. If the result is equal to or less than their halt number, all of that side's active Attack Op Sheets immediately fail. Vehicle units become unassigned and must execute their failure instructions normally. All other units must either immediately implement a Hasty Defense, creating one if necessary, or execute failure instructions, at the owner's option. Any new Op Sheets created must adhere to the Soviet command restrictions (1.4g). In addition, the player may not roll to implement any Attack Op Sheet before the 0300 turn though weighted turns accrue normally.
1.4g Soviet Command Restrictions. Soviet Op Sheets are further restricted as follows:
- The Soviet player is limited in the number and content of his Op Sheets. A maximum of six implemented (and six unimplemented) Op Sheets are allowed organized as follows:
| Sheet | Prep | Must include: |
|---|---|---|
| 1 | 7 | 1319 Rifle |
| 2 | 7 | 114 Rifle |
| 3 | 5 | 1 Gd Tk/49 Tk* |
| 4 | 5 | 1 Mech |
| 5 | 5 | 3 Mech |
| 6 | 5 | 10 Mech |
*One Motorized Battalion may be attached to 1 Gd Tk/49 Tk from 1, 3 or 10 Mech.
Units from 39 Tk and 35 AT Regiment may be freely attached to any Op Sheet.
-
Soviet Op Sheets may not use Preliminary Instructions or Alternates (TCS 6.14a and 6.14c) though they may use Reserves.
-
The Soviet player may not accumulate any weighted turns for an Attack Op Sheet, nor roll to implement it if any unit on that Op Sheet is currently on an implemented Attack Op Sheet. Additionally, in order to gain weighted turns or roll for implementation, all units on an unimplemented Attack Op Sheet must be off map or be able to trace a line no longer than 5 hexes to a primary or secondary road that leads to the west map edge and is free of enemy units on or within 1 hex of the line and road at all points.
-
At the time they are implemented, Soviet Attack Op Sheets must entail the capture of ONE (and only one) German controlled VP Village. Any reserves implemented must be used within this goal.
Design Note: The Soviet Command was not capable of conducting and planning successive operations at this time and Field Commanders were not rewarded for their initiative and were content to report the taking of any assigned objectives and then wait for new orders.
1.5 Set Up and Reinforcement Notes
1.5a Order of Set Up. The Soviet player always sets up first. He must draw up his Op Sheets and any pre-planned Barrages before the German player sets up. The German player sets up and draws up his Op Sheets after the Soviet player has set up.
The Soviet player always has the initiative in the first Action Phase.
1.5b Set Up Codes.
-
Losses: unit losses are designated in parentheses (#) and steps of the type indicated may be removed in any manner desired. The Infantry designation includes SMG but not MG units. Units which are eliminated in this process do NOT count towards Battalion or Vehicle Morale. Players may assign step losses in any manner desired within the given formation (this supersedes TCS rule 27.1e).
-
Sub-units: in some instances only a portion of a unit is called for and the appropriate components are designated in brackets, [#].
-
Battalion/Vehicle Morale: all formations have a Battalion or Vehicle Morale of 0 at the start of each scenario.
1.5c Reinforcements. In a campaign game, both sides receive reinforcements per their respective Order of Arrival Table. Once received, units may enter on that or any subsequent turn through the entry area indicated on the map (this supersedes TCS rule 27.2b). Thus, reinforcements can be delayed, but they cannot shift to a different entry area. Note: Soviet units entering at entry area SW enter with only 1/3 of their Movement Points (or 1 Vehicle impulse) remaining.
1.5d Artillery Ammunition. Each scenario lists the artillery ammunition available at start. Both sides receive ammunition at the start of the 0300 turn each day.
1.5e Minefields. Minefields may only be utilized by the German player and may not be placed in a bridge hex. During any point in his Action Phase, the Soviet player may remove any minefields that are not within 10 hexes of a German unit. Some minefields may be available at the beginning of a scenario: if so, they will be indicated in the scenario set-up instructions. Minefields given in a scenario must be placed w/i 3 hexes of a unit to which they are assigned and must adhere to all normal set-up restrictions (i.e. they may not be set up in hexes where German units may not set-up). A maximum of 15 minefield markers can be on the map at one time. The German player may, during the Command Phase, remove any minefield markers he wishes.
2.0 German Special Rules
2.1 Artillery
The following batteries may be available to the German player (see scenario rules and Reinforcement Table):
| Battery | Guns |
|---|---|
| 4-II-GD | 105mm |
| 5-II-GD | 105mm |
| 6-II-GD | 150mm |
| 7-III-GD | 150mm |
| 8-III-GD | 150mm |
| 9-III-GD | 105mm |
| 12-III-186 | 150mm |
| 4-I-120 | 105mm |
| 5-II-120 | 105mm |
| 6-II-120 | 105mm |
| 3-II-253 | 105mm |
| 7-II-253 | 105mm |
| 2-I-74 | 105mm |
2.1a Target Reference Points. The German player can substitute Target Reference Points (TRPs) when determining the distance between the spotter and the target hex for the Adjustment Table. Missions using this technique still need a regular spotter with a clear LOS to the target and TRP hexes as the use of TRPs merely makes a mission more accurate.
2.1b On-Map Artillery. The Germans start with on-map batteries and may optionally move several reinforcing batteries on map to bolster the German antitank defenses. Off-map batteries are maintained in the NE and SE Off-Map Artillery holding boxes on the German Morale Chart and enter and exit through the corresponding map edges.
During the German Action Phase, on-map artillery adjacent to the NE or SE map edges may exit the map into the appropriate box. Starting the next turn the artillery is available for missions. Similarly, artillery units which did not fire during the Aircraft & Artillery Phase may move on map and be placed in an entry hex of the appropriate map edge. Beginning on the next turn they may move normally.
In order to fire a Battalion Fire with on-map artillery, all firing units must be within a 5 hex radius of a common hex chosen by the German player.
2.2 Air Power
Several times during the game the Reinforcement Table lists air units that become available to the German player. A single die is rolled to determine the total number of sorties of each type. The German player may use these sorties at a maximum rate of one per turn during subsequent clear/daylight turns. Any unused sorties are lost as soon as the weather turns to Snow or Dusk arrives.
2.3 German Movement Restrictions
The Corps level Pioneer and Construction Battalions (Pio.632 and Bau.22) worked throughout the battle to keep the main road open to supply traffic (i.e. free of snow). They were also ordered to protect the main road bridge across the Luchessa and were thus available for action if needed. These units must remain within 20 hexes of entry area SE until any of them is attacked on the Fire Table. At that point these units are freed of this restriction and may operate normally.
2.4 Replacements
In addition to the many Alarm units that were organized and sent to the front lines, the GD Division was also able to send a number of replacements to the line companies. During each 0300 turn the German player rolls two dice and receives that number of replacement steps. These may be added to any GD Infantry or MG unit on the map.
In addition, roll one die and halve the result rounding up. This number of Vehicle steps may be brought back into play from the dead pile. Add or place such steps or units within 5 hexes of a Vehicle unit from its Vehicle Morale formation, but not within 8 hexes of any enemy unit. Formations with no Vehicle steps remaining may not receive vehicle replacements.
2.5 German Radio Interception
Throughout most of the war, lower level Soviet Field Commands practiced only rudimentary forms of radio discipline and the Germans were able to intercept Soviet radio traffic whenever the proper equipment and personnel were available. In the Luchessa Valley, the 9th Army had just such a unit which provided excellent data to the Großdeutschland Division. Any time a Soviet Attack Op Sheet is implemented (including pre-game), the Soviet player must inform the German player of the name of the German controlled VP Village that is the objective of the Op Sheet. He need not reveal the units or the routes being taken.
Note: 1.4e allows the Soviet player to start the game with a full set of implemented Op Sheets, including those for the major formations that arrive as reinforcements. This fact can be used to deceive the German player as to the objectives of the initial Soviet attacks. Also, by implementing new Op Sheets for reinforcements (before or after they arrive) the misinformation can be continued.
3.0 Soviet Special Rules
3.1 Artillery
The following battalions may be available to the Soviet player (see scenario rules and Reinforcement Table). Note: reinforcement Artillery Battalions become available when any battalion of the formation they are attached to enters play:
| Battalion | Guns | Attached to |
|---|---|---|
| 1-695 Art | 76mm | 1319th Regt. |
| 1-376 How | 122mm | - |
| 2-376 How | 122mm | - |
| 461 Art | 76mm | 1st Mech Bde |
| 463 Art | 76mm | 3rd Mech Bde |
| 464 Art | 76mm | 10th Mech Bde |
| 1-405 Gd | BM-13 | - |
| 2-405 Gd | BM-13 | - |
3.1a Battalion Fires. All Soviet artillery fires are conducted as Battalion Fire Missions and each point of Ammo represents a Battalion Fire. When firing Smoke, each mission still generates only one Level 2 Smoke marker and each Illumination mission generates only one Illumination marker.
3.1b Fast Fire. The Soviets may only utilize Fast Fire for pre-planned barrages (see 3.1e).
3.1c Katyusha Rockets. The Soviet player has two Batteries of Katyusha launchers (405th Guard Mortar Battalion) and each barrage has an attack radius of 5 hexes with a fire factor of 16. When rolling against Point Targets add a -1 modifier. The rockets may only fire pre-planned barrages (see 3.1e). As they are Rocket Artillery, Katyushas may not use Continuous or Fast Fire (TCS 18.6c).
3.1d Spotters. Control of Soviet indirect fire was limited by the general lack of radios and the resulting heavy reliance on field telephones. As such, Soviet Indirect Fire is restricted by the following:
-
Brigade and regimental artillery must utilize spotters from the unit to which they are attached (see 3.1). Exception: units of the 1st Guard Tank Brigade and the 49th Tank Brigade may spot for the 461st, 463rd or 464th Artillery Battalions.
-
The 376th Howitzer Regiment and 405th Guard Mortar Battalion (Katyushas) can only fire using pre-planned barrages (3.1e).
3.1e Pre-planned Barrages. The Soviet player may utilize pre-planned artillery barrages in order to mass the fire of his artillery. This method of fire is the only way in which the Katyusha or Fast Fire rules may be used.
Pre-planned missions may be plotted for any turn desired at the start of each scenario, including the first turn. However, new missions may not be scheduled to arrive for at least six hours after the last turn of execution. No artillery working on a pre-planned mission may fire in any other way. Plotting requires the player to record the firing unit, mission start time, initial target hex, and Fast Fire option. The duration of pre-plotted missions can be one, two or three turns but is determined when the mission is planned and may not be changed. Artillery with a pre-plotted mission pending may not fire other (regular) missions until after the pre-plotted mission is completed. Pre-plotted missions may not be cancelled. Missions may be plotted regardless of ammunition supply but barrages will cease the moment that there is insufficient ammunition to conduct fire. Pre-planned barrages may be HE or Continuous Fire missions as desired by the Soviet player, but this is also determined when the mission is planned.
Pre-planned Fire Missions are conducted during the Air & Artillery Phase as listed in the TCS 4.0 rules. Spotting is not required but all fire must roll for scatter. Roll a single die for direction and then another die for distance:
| Roll | Scatter |
|---|---|
| 1 | No scatter |
| 2–3 | 1 hex |
| 4–5 | 2 hexes |
| 6 | 3 hexes |
Rockets scatter per TCS rule 18.6c, rolling a die for direction and a die for distance.
To determine the mission adjustment, roll another single die: 1-3 is a Good Shoot, 4-6 is a Bad Shoot.
3.2 Soviet Mortars
All Soviet Mortar units may only fire at targets that they themselves can spot or that can be spotted from any hex adjacent to the Mortar unit (spotters from the actual Mortar unit going out and giving hand signals). No other type of Mortar spotting is allowed.
3.3 Air Power
At several times during the game the Reinforcement Table lists air units that become available to the Soviet player. A single die is rolled to determine the total number of sorties. The Soviet player may use these sorties at a maximum rate of one per turn during subsequent clear/daylight turns. Any unused sorties are lost as soon as the weather turns to snow or dusk arrives.
3.4 Soviet Tank Restrictions
Several operational limits are imposed on Soviet tanks due to their general lack of flexibility (primarily their lack of communications equipment).
3.4a Fire Restriction. Soviet vehicles cannot combine to make a single SFA or PFA unless stacked in the same hex.
3.4b Impulses. Soviet vehicles may not execute Fire Impulses and Movement Impulses in the same Action Phase. They may only conduct one kind of Impulse a turn.
3.5 Soviet Tanks as Carriers
The 1319th Rifle Regiment and 114th Rifle Brigade may not utilize Vehicles as Carriers (TCS 24.1e).
3.6 Soviet Commissars
Soviet Infantry and MG units that receive a Suppression result may choose to lose a step (one per stack) and ignore the suppression. This option may only be used once in a single phase for a given stack. Note: this can be useful in breaching minefields...
3.7 The Soviet Southern Flank
The Soviet 238th Rifle Division located south of the 3rd Mech Corps was very slow in matching the eastward movements of the attack. For this reason the Soviet player must keep the 3rd Mechanized Brigade south of the Luchessa at all times and the 10th Mechanized Brigade may not cross the river west of N33.01.
3.8 Replacements
Each day on the 0300 turn during the Command Phase the Soviet player rolls three dice and receives that number of steps as replacements (actually stragglers and reorganized troops.) These may be added to any Infantry or MG unit.
Also roll one die for recovered vehicles: that number of Vehicle steps may be added to any multi-step vehicle counters (i.e. tanks) with step losses.
4.0 Scenarios
The first three scenarios represent the initial Soviet attack and are great stand-alone games while also training players how to conduct the initial assault for the Campaign Game.
The Campaign Games can be started on Nov. 29-Dec. 1 and ended on any day up to Dec. 4. To determine a winner, the Soviet player adds up his Victory Points from the map at the end of the 1600 turn and compares this total to the Victory levels below.
Victory Levels:
| Day | German Mjr | German Mnr | Drw | Soviet Mnr | Soviet Mjr |
|---|---|---|---|---|---|
| 29 Nov | 0-2 | 3-4 | 5 | 6-7 | 8+ |
| 30 Nov | 0-4 | 5-6 | 7 | 8-10 | 11+ |
| 1 Dec | 0-10 | 11-14 | 15 | 16-19 | 20+ |
| 2 Dec | 0-13 | 14-17 | 18 | 19-22 | 23+ |
| 3 Dec | 0-15 | 16-19 | 20 | 21-24 | 25+ |
| 4 Dec | 0-15 | 16-19 | 20 | 21-26 | 27+ |
Bold numbers denote historical results.
Victory Shifts:
Shift one in favor of the Germans for:
- 75+ Soviet Vehicle steps eliminated (replaced steps do not count).
Shift one in favor of the Soviets for:
- each brigade or regiment exited off the NE/SE map edge that has at least 25 Infantry steps remaining.
Village Limits: Named villages consist of all adjacent hexes that contain Protective Terrain Village symbols (white hex border).
Holding Terrain Features: To "hold" or "control" a terrain feature the player must completely clear the feature of enemy units and then move through any portion of the feature. For Soviet control, a road connection (using primary or secondary roads) must also exist to a Soviet entry area that is free of enemy units on or within one hex of the road. Bridge status does not affect this connection (i.e. bridges can be blown along the road connection).
Map Limits: all map references are inclusive.
4.1 The Center Gives Ground
This scenario covers the first Soviet thrust to the Bogoroditskoe Bridge and the tenacious German defense that stopped them short of the objective.
First Turn: 0700, 29 Nov Last Turn: 1500, 29 Nov (23 turns) Map Area: West Map north of xx.16
Soviet Information:
Set up:
on or west of line W15.24–W15.28:
- 1Gd TB
on or west of W09.xx, south of the Luchessa River:
- 49 TB
entering per the Reinforcement Table:
- 3 MB [2 Co, 16 TR + 452 Mot]
Artillery:
- 463 Art (no pre-plot)
- 1-405 Rkt (w/barrage pre-plot)
- 1-376 How (w/barrage pre-plot)
Ammunition:
- 76mm: 15xHE, 5xSmk, 1xIll
- 122mm: 3xHE
- Katyusha: 3xBarrages
Orders:
- Take Vasil'tsova.
German Information:
Set up:
on or north/east of line W16.29–W20.27–W20.23 (but south of the Luchessa River):
- II Bn, Gr.R.GD
- 16 Co, Gr.R.GD [2x20mm]
- 18 Co, Gr.R.GD [2xMarder]
- 19 Co, Gr.R.GD
- 1Co, Pz Jg GD
- 4 Minefields
on or east of line W20.23–W20.17:
- 1 Co, Pio GD
- 3 Co, Pz Jg GD [3x50mm]
- 2 Minefields
w/i 4 of W32.26:
- 2 Co, Pi .GD
on or N/E of the line W25.41–W38.34:
- 3 Co, Pz Jg GD [3x50mm]
- 1 Co, Flak GD
enter at W40.40 on 1200 turn:
- 1 Co, Gr.R.GD
- 4 Co, Gr.R.GD [2xMG, 1xMtr]
Travino Bridge: Blown
Artillery:
- 7-III-GD
- 8-III-GD
- 9-III-GD
- 4-II-120
- 6-II-120
Ammunition:
- 105mm: 15xHE, 5xSmk, 1xIll
- 150mm: 10xHE, 5xSmk
Orders:
- Prepared Defense.
Victory Determination:
The player that has units in both hexes of the Bogoroditskoe Bridge is the winner. [Historical draw]
4.2 Attack in the South
This scenario covers the defense of the Karskaya strongpoint.
First Turn: 0700, 29 Nov Last Turn: 1200, 29 Nov (16 turns) Map Area: West Map south of xx.17
Soviet Information:
Set up:
w/i 2 of W02.14:
- 3 MB [1 Co, 16 TR + 451 Mot]
entering per Reinforcement Table:
- 3 MB [3 Co, 16 TR + 453 Mot] (Note: These units only have 1/3 their normal movement allowance the turn they enter; vehicles can use only 1 Vehicle Impulse).
Artillery:
- 463 Art (no pre-plot)
- 2-405 Rkt (w/ barrage pre-plot)
- 2-376 How (w/ barrage pre-plot)
Ammunition:
- 76mm: 15xHE, 5xSmk, 1xIll
- 122mm: 3xHE
- Katyusha: 3xBarrages
Orders:
- Take Karskaya.
German Information:
Set up:
on or southeast of line W09.15–W02.04, w/i 10 of Karskaya:
- III Bn, Gr.R.216
- S.A.186
- 3 Co, Pio.186
- 4 Minefields
on or east of the line W20.16–W20.05:
- II Bn, GrR.252
Artillery:
- 5-II-120
- 12-III-186
Ammunition:
- 105mm: 15xHE, 5xSmk, 1xIll
- 150mm: 10xHE, 5xSmk
Orders:
- Prepared Defense.
Victory Determination:
To win the Soviets must hold all hexes of Karskaya. The Germans win by holding at least 4 hexes in Karskaya. [Historical draw]
4.3 First Assault
This scenario combines scenarios 4.1 and 4.2 into a nice 1-map scenario depicting the first day of combat.
First Turn: 0700, 29 Nov Last Turn: 1600, 29 Nov (24 turns) Map Area: West Map
Soviet Information:
Set up:
- combine 4.1 and 4.2
Reinforcements:
As per Scenarios 4.1 and 4.2.
Artillery:
- 463 Art (no pre-plot)
- 1-405 Rkt (w/barrage pre-plot)
- 2-405 Rkt (w/barrage pre-plot)
- 1-376 How (w/barrage pre-plot)
- 2-376 How (w/barrage pre-plot)
Ammunition:
- 76mm: 30xHE, 10xSmk, 2xIll
- 122mm: 6xHE
- Katyusha: 6xBarrages
Orders:
- Take Vasil'tsova and Karskaya.
German Information:
Set up:
As per Scenarios 4.1 and 4.2.
Artillery:
- 7-III-GD
- 8-III-GD
- 9-III-GD
- 4-II-120
- 5-II-120
- 6-II-120
- 12-III-186
Ammunition:
- 105mm: 30xHE, 10xSmk, 2xIll
- 150mm: 20xHE, 10xSmk
Orders:
- Prepared Defense.
Victory Determination:
As per 4.0 (Nov. 29) Victory Level Table. In addition, the German player receives 3 additional Victory Points if he controls both sides of the Bogoroditskoe Bridge [Historical draw].
4.4 Campaign Start - 29 November
This scenario provides the information needed to start the Luchessa Valley campaign on 29 Nov.
First Turn: 0700, 29 Nov Last Turn: Variable Map Area: All
Soviet Information:
Set up:
- combine 4.1 and 4.2
Reinforcements:
As per German and Soviet Order of Arrival table (ignore scenario reinforcements from 4.1 and 4.2).
German Information:
Set up:
- combine 4.1 and 4.2 and add:
north of River, west of W18.xx:
- Jagd.Bn 110
- 4 Minefields
w/i Belikovo [W28.51]:
- 2 Co, Pio.186
w/i 5 of N10.11:
- I Bn, Gr.R.GD
- 17 Co, Gr.R.GD
- 18 Co, Gr.R.GD [2xMarder]
w/i Vaskovo [N35.39]:
- 16 Co, Gr.R.GD [1x20mm]
Artillery:
- 7-III-GD: N13.14
- 8-III-GD: N57.28
- 9-III-GD: N11.14
- 12-III-186: S04.01
- 4-II-120: W12.37
- 5-II-120: W32.03
- 6-II-120: W35.43
Orders:
- Prepared Defense
Victory Determination:
per 4.0
4.5 The River Line Holds
This scenario covers the repeated Soviet attempts to break through between the River and the forest along the main road.
First Turn: 0700, 30 Nov Last Turn: 1100, 30 Nov (13 turns) Map Area: West Map north of xx.30
Soviet Information:
Set up:
south of the Luchessa River:
- 1Gd TB (-9xT-34s, -12xInf)
- 49 TB (-9xT-34s, -8xInf)
- 1 MB [1 Co, 14 TR + 445 Mot]
- 1 Bn, 35AT
Artillery:
- 461 Art (w/ barrage pre-plot)
- 1-405 Rkt (w/ barrage pre-plot)
- 1-376 How (w/ barrage pre-plot)
Ammunition:
- 76mm: 10xHE, 5xSmk, 1xIll
- 122mm: 3xHE
- Katyusha: 3xBarrages
Orders:
- Take Vasil'tsova/Bogoroditskoe.
German Information:
Set up:
north of Luchessa River from W18.32–W31.38:
- II Bn, Gr.R.GD less 10 Co (-24xInf, -6xMG)
north/east of River from W32.37–W37.31:
- Pio.GD (-6xInf)
- 3 Co, Pz.Jg.GD [2x50mm]
- 19 Co, Gr.R.GD
- 1 Co, Fla.GD [2x20mm]
Bogoroditskoe Bridge: Blown
Artillery:
- 7-III-GD
- 8-III-GD
- 9-III-GD
- 4-II-120
- 6-II-120
Ammunition:
- 105mm: 40xHE, 10xSmk, 1xIll
- 150mm: 10xHE
Orders:
- Prepared Defense.
Victory Determination:
The player that holds both Bogoroditskoe and the bridge is the winner. [Historical draw]
4.6 Southern Flank is Turned
This scenario covers the attempt by the I/GD to establish a formal front line in the south. Ultimately they would be fighting to simply hold the River crossings.
First Turn: 0700, 30 Nov Last Turn: 1500, 30 Nov (25 turns) Map Area: West Map south of xx.30 and South Map (all)
Soviet Information:
Set up:
w/i 3 of W22.22:
- 3 MB [2 Co, 16 TR + 452 Mot] (-4xT-34s, -18xInf, -2xMG)
w/i 5 of Goncharova:
- 3 MB [1 & 3 Co, 16 TR + 451 & 453 Mot] (-4xT-34, -6xT-70, -27xInf, -2xMG)
- 2 Bn, 35AT
Artillery:
- 463 Art (w/ barrage pre-plot)
- 2-405 Rkt (w/ barrage pre-plot)
- 2-376 How (w/ barrage pre-plot)
Ammunition:
- 76mm: 20xHE, 5xSmk, 1xIll
- 122mm: 3xHE
- Katyusha: 3xBarrages
Orders:
- Take Smolkovo (N and S)
German Information:
Set up:
north of Luchessa River from W38.30–S04.26:
- II Bn, Gr.R.252 (-3xInf)
w/i 1 of S08.26:
- 17 Co, Gr.R.GD
- 3 Co, Pz.Jg.GD [1x50mm]
on or east of the line S08.08–S08.25:
- I Bn, Gr.R.GD (-3xInf)
- 18 Co, Gr.R.GD [2xMarder]
- 1 Co, Fla.GD [2x88mm]
on or east of the line S06.00–S06.08:
- III Bn, Gr.R.216 (-12xInf, -2xMG)
- 3 Co, Pio.186 (-4xInf)
Reinforcements: 30 Nov German and Soviet air reinforcements as well as German SE reinforcements are available for this scenario.
Artillery:
- 7-III-GD
- 8-III-GD
- 9-III-GD
Ammunition:
- 105mm: 30xHE, 10xSmk, 1xIll
- 150mm: 10xHE
Orders:
- Prepared Defense.
Victory Determination:
The Soviet must hold Osinovka and Smolkovo (N and S) and have one unit in Gorovatka. The Germans must hold Gorovatka and there must be no Soviet tanks east of the Korenevka stream (runs off map at S28.00). [Historical German Victory]
4.7 Campaign Start - 30 November
This scenario provides the information needed to start the Luchessa Valley campaign on 30 Nov.
First Turn: 0700, 30 Nov Last Turn: Variable Map Area: All
Soviet Information:
Set up:
- combine as 4.5 and 4.6 and add:
w/i 2 of Starukhi and/or Anosovo:
- 185 Rifle
Bogoroditskoe Bridge: 5 hours have been accumulated.
Artillery:
- 461 Art (w/ barrage pre-plot)
- 463 Art (w/ barrage pre-plot)
- 1-405 Rkt (w/ barrage pre-plot)
- 2-405 Rkt (w/ barrage pre-plot)
- 1-376 How (w/ barrage pre-plot)
- 2-376 How (w/ barrage pre-plot)
Ammunition:
- 76mm: 30xHE, 10xSmk, 2xIll
- 122mm: 6xHE
- Katyusha: 6xBarrages
Orders:
- 185 Rifle - Hasty Defense
German Information:
Set up:
- combine 4.5 and 4.6 and add:
north of River, west of W18.32:
- Jagd.110 (-6xInf)
- 2 Co, Pio.186 (-3xInf)
w/i Belikovo:
- 1 Co, Pio.110
w/i 5 of Vaskovo:
- 16 Co, Gr.R.GD [1x20mm]
w/i 15 of entry area SE:
- Pio.632 and Bau.22
Artillery:
- 7-III-GD: N13.14
- 8-III-GD: N57.28
- 9-III-GD: N11.14
- 4-II-120: W12.37
- 6-II-120: W35.43
Travino Bridge: Blown
Orders:
- Hasty Defense.
Victory Determination:
per 4.0
4.8 Storm Across the Luchessa
The Soviet steamroller finally gets moving and threatens a breakthrough.
First Turn: 0700, 1 Dec Last Turn: 1600, 1 Dec (26 turns) Map Area: All - except the area on the South Map that is south of the Luchessa River and east of S11.xx.
Soviet Information:
Set up:
south of Luchessa River west of W23.xx or on road west of Starukhi:
- 185 Rifle (-18xInf, -3xMG)
south of Luchessa River west of S06.xx:
- 1Gd TB (-12xT-34s, -18xInf)
- 49 TB (-12xT-34s, -12xInf)
- 1 MB [1 & 2 Co, 14 TR + 445 & 446 Mot] (-6xT-34, -30xInf, -4xMG)
- 1 Bn, 35AT (-3xAT)
Bogoroditskoe Bridge: Repaired
Artillery:
- 1-695 Art (w/ barrage pre-plot)
- 461 Art (w/ barrage pre-plot)
- 1-405 Rkt (w/ barrage pre-plot)
- 1-376 How (w/ barrage pre-plot)
Ammunition:
- 76mm: 24xHE, 6xSmk, 1xIll
- 122mm: 6xHE
- Katyusha: 3xBarrages
Orders:
- 185 Rifle - take Travino
- 1Gd TB/49 TB/1 MB - take Vasil'tsova.
German Information:
Set up:
north of Luchessa River west of W18.xx:
- Jagd.110 (-15xInf)
- 2 Co, Pio.186 (-6xInf)
- 1 Co, Pio.110 (-2xInf)
north of Luchessa River from W18.xx–W31.xx:
- II Bn, Gr.R.GD less 10 Co (-30xInf, -10xMG)
north of Luchessa River from W32.xx–W37.xx:
- Pio.GD (-12xInf)
- 19 Co, Gr.R.GD
- 1 Co, Fla.GD [2x20mm]
- 7 Co, Fla.49 [2x88mm]
north of Luchessa River from W38.30–S04.26:
- II Bn, Gr.R.252 (-6xInf, -2xMG)
- 3 Co, Pz.Jg.GD [2x50mm]
w/i 1 of S08.26:
- 17 Co, Gr.R.GD
- 3 Co, Pz.Jg.GD [1x50mm]
on or east of the line S08.08–S08.25:
- I Bn, Gr.R.GD (-3xInf)
- 18 Co, Gr.R.GD [2xMarder]
- 1 Co, Fla.GD [2x88mm]
w/i 5 of S06.29:
- 7 Co, Fla.49 [2x88mm]
at N06.06:
- 16 Co, Gr.R.GD [1x20mm]
Reinforcements: NE reinforcements for 1 Dec 1200 and 1420 are received.
Travino Bridge: Blown Smolkovo Bridge: Blown
Artillery:
- 7-III-GD
- 8-III-GD
- 9-III-GD
- 4-II-120
- 6-II-120
Ammunition:
- 105mm: 120xHE, 25xSmk, 10xIll
- 150mm: 50xHE, 10xSmk
Orders:
- Prepared Defense.
Victory Determination:
The Soviets must hold Travino, Voronino, Boevka, Lapkovo, Bolshie Merkushi, and the forest around N08.05. [Historical Soviet Victory]
4.9 Halted in the South
The Soviet 3rd Mech Brigade finally runs out of steam south of the Luchessa River.
First Turn: 0700, 1 Dec Last Turn: 1600, 1 Dec (26 turns) Map Area: South Map south of the Luchessa River.
Soviet Information:
Set up:
w/i 3 of S14.20:
- 10 MB [1 Co, 17 TR + 454 Mot]
- 39 TR
w/i 3 of S14.05:
- 3 MB [all] (-10xT-34, -8xT-70, -81xInf, -9xMG)
- 2 Bn, 35AT (-3xAT)
Artillery:
- 463 Art (w/barrage pre-plot)
- 2-405 Rkt (w/ barrage pre-plot)
- 2-376 How (w/ barrage pre-plot)
Ammunition:
- 76mm: 20xHE, 5xSmk, 1xIll
- 122mm: 3xHE
- Katyusha: 3xBarrages
Orders:
- take Gorovatka and Shernosekovo
German Information:
Set up:
w/i 3 of Gorovatka and/or Shernosekovo:
- I Bn, Gr.R.GD less 5 Co (-18xInf, -6xMG)
- 18 Co, Gr.R.GD [2xMarders]
- 4 Co, Fla.GD [4xSdKfz.6/2]
w/i 3 of Korenevka:
- III Bn, Gr.R.216 (-18xInf, -3xMG)
- 4 Co, Fla.GD [2xSdKfz.6/2]
w/i Bols. Boryantino and/or Galichkina:
- MP.GD
w/i forest at S39.10:
- I Bn, Gr.R.252
w/i 2 of Khudulikha:
- 4 Co, S.A.253
- 5 Co, Fla.GD
Reinforcements: All SE and air reinforcements for 1 Dec 1200 - 1320 are received.
Artillery:
- 4-II-GD
- 5-II-GD
- 6-II-GD
- 7-III-253
Ammunition:
- 105mm: 120xHE, 25xSmk, 10xIll
- 150mm: 50xHE, 10xSmk
Orders:
- Prepared Defense.
Victory Determination:
The Soviets must hold Gorovatka, Shernosekovo, Novaia Boyarshchina, Martinovo, and Korenevka. [Historical German Victory]
4.10 Campaign Start – 1 December
This scenario provides the information needed to start the Luchessa Valley campaign on 1 Dec.
First Turn: 0700, 1 Dec Last Turn: Variable Map Area: All
Soviet Information:
Set up:
- combine 4.8 and 4.9.
German Information:
Set up:
- combine 4.8 and 4.9 and add:
w/i Gordeevo, Krivusha, and Aleksandrovka:
- Pio.632/Bau.22
Artillery:
- 4-II-GD: w/i Khudulikha
- 5-II-GD: N15.13
- 6-II-GD: w/i Khudulikha
- 7-III-GD: N15.11
- 8-III-GD: N57.28
- 9-III-GD: N14.16
- 4-II-120: W18.42
- 6-II-120: W35.43
- 7-III-253: N42.15
Victory Determination:
per 4.0
Designer's Notes
1942 was a fateful year for the Großdeutschland Division as they were nearly destroyed twice; once as a regiment in February and again as a division in December. I wanted GD'42 to take place after the reorganization into a division and the actions in the Rzhev Salient—some of the most important in which the GD would be involved. A quick glance at the map shows that the Soviets are attacking from west to east and this underscores the seriousness of the situation.
The assembly of this game was a real pleasure primarily due to the complete nature of the Großdeutschland's war time records. The level of detail in the Division's War Diary is staggering:
(1) Detailed narrative accounts from the various German units involved in the battle.
(2) Extensive heavy weapons counts and unit arrival times (including all units assigned to the division from the various sources).
(3) Reports from a 9th Army Radio Intercept detachment in the area including transcripts of Soviet communications, all of which were transmitted in the clear.
(4) Detailed Soviet Order of Battle based on prisoner interrogations.
(5) An excellent set of maps (coming on the heels of GD'41 where I had a great deal of map acquisition troubles, this was a great relief).
The records from 9th Army, XXIII Corps, and the other infantry divisions were also consulted and David M. Glantz provided significant data from Soviet sources. Map data was corrected using the excellent Luftwaffe aerial photo coverage of the area (over 50 aerial photographs of the map area were taken both before and after the battle and the foxholes around Tarkhovo and Bogoroditskoe are clearly visible). There were times when information overload occurred (but this is preferable to the other extreme) and each new source seemed to generate OB changes...some major.
For special rules, most of the ground work for the Soviet Campaign had been completed for Black Wednesday and GD'41 and only required a little fine tuning for GD'42. Terrain and the weather had a profound effect on the battle and the rules were constructed to reflect this (the temperature had been hovering around -5°C and there was a layer of snow on the ground but the rivers and streams had yet to freeze).
The Soviet Command rules are not nearly as debilitating as they will seem initially. The intent is to keep the Soviets from pushing all their units across the map as one giant action. The rules provide two options for use 1) medium sized (brigade) attacks followed by periods of inactivity or 2) continuous attacks conducted in a piecemeal fashion (battalion groups). Play without these rules if you want to end a campaign game in a hurry.
The Soviet OB is fairly straightforward and the units were close to full strength (many having been formed in September, 1942). The 3rd Mech Corps had been slow to form, however, and the Mech Brigades did not conform to the latest Soviet TO&E. Also, losses from the fighting of 25-27 November have been removed, most notably by reducing the initial strength of the 1319th Rifle Regiment and by the exclusion of the 10th Tank Battalion of the 1st Gd Tank Brigade. The German OB on the other hand is a clear indication of the emergency situation. Units are drawn from six different divisions and a great many rear area troop sources, including HQ personnel, Supply personnel, MPs (Military Police), and AT gunners without guns.
The full battle game is a long one and for this reason a large number of scenarios are included. All will provide a great deal of excitement.
Historical Notes
The Großdeutschland in 1942
As 1942 opened, the Infantry Regiment Großdeutschland was holding ground NE of Orel. The situation was stable and the battalions were able to refit and recover some of the losses from the December 1941 battles near Tula.
In late January, the regiment found itself in action as the Soviets attempted to infiltrate the Oka River positions. The Regiment was involved in almost constant attacks and counterattacks and by 30 January losses had been so heavy that III Battalion was disbanded. By 19 February, I and II Battalions had been merged into a single rifle battalion and only the heavy weapons battalion remained as originally organized.
The first reinforcements arrived on 28 February but not before the rifle battalion was reduced to a mere 3 officers and 30 men. The situation at the front remained relatively stable throughout March and finally on 9 April the regiment was relieved and most of the men received home leave in Germany.
Reorganizing as a Division
The GD was pulled from the line to be reorganized as a division. Formally they would be designated as the Großdeutschland Motorized Infantry Division but the actual organization would be a special one, a precursor to those later designated as Panzergrenadier.
Like a standard Motorized Division, the GD was organized with two fully motorized Infantry Regiments. These were initially designated as GD1 and GD2 but were later changed to the Grenadier and Fusilier Regiments respectively. The personnel from the old Regiment formed the basis for GD1 while GD2 was raised from new personnel. This was done to maintain the unit integrity of the original regiment but would later cause friction between these units.
The original Assault Gun Company was expanded to the strength of a battalion as was the original Motorcycle Company. Two old friends of the Regiment were also involved in the reorganization. The 43rd Sturmpioneer Battalion (which had been with the GD in France) was redesignated as the Division's Pioneer Battalion and the 400th Artillery Battalion (attached to the GD for most of 1941) was incorporated into the newly formed Artillery Regiment. Further new additions included Panzer, Panzerjäger, and Flak Battalions.
In all, the Division was well stocked with the latest weapons (particularly the MG42 machine gun) and was provided with enough replacements to bring it up to full strength.
The Spring Offensive
In late May the new GD Division was standing ready near Kursk, assigned to the 48th Pz Corps of 4th Pz Army. Action for the Division began on 28 June after the German infantry had penetrated the Soviet front and the mobile units were released into the breach.
During the summer offensive to the Don River and Voronezh the GD was involved in a number of small skirmishes but the speed of the pursuit prevented the formation of a firm Soviet defensive line. In July the Division moved south clearing the west bank of the Don as they went. From 20 July to 1 August they operated in the Rostov area clearing pockets of resistance.
Return to Army Group Center
During this time, things had begun to heat up in the 9th Army area in front of Moscow and a 'Fire Brigade' was needed. On 15 August the Division entrained and moved north to Smolensk where they remained in 9th Army reserve until 10 September.
The first real test for the Division came just south of Rzhev when they were ordered to counterattack the Soviets as they closed in on the main supply road. The GD did not perform well in what they called the Gostischka Valley. Coordination between units (especially between the two Infantry Regiments) was particularly poor as was communications with the artillery. Many hard lessons were learned.
The battles continued around Rzhev and parts of the Division were shuffled from one hot spot to another until 9 October. Casualties had been heavy and a rest was needed. The Division was moved west of Rzhev to the area of Olenino and contingency plans were drawn up for the support of the infantry divisions located in that area.
As the signs of winter (and a renewed Soviet offensive) approached, the GD prepared as best they could. A Ski Battalion was formed and winter clothing was issued. In early November units of the Division were scattered over 110km of the front in order to provide reserves for local commanders.
The Rzhev Salient
The 150 km wide, 100 km deep Rzhev salient had been formed during the first Soviet winter offensive as the Germans fell back from the gates of Moscow and the Soviets rushed to encircle them. The German 9th and 3rd Pz Armies fought throughout the summer of 1942 to retain their positions and to clear out the Russians that infested the rear area. The salient was basically defined in the west by the Olenino-Bely-Smolensk Road and in the east by the Rzhev-Sychevka-Vyazma Railroad (see map –p.15). In November 1942, the 9th Army was composed of four Panzer, three Motorized, and twenty Infantry Divisions.
Operation Mars
Operation Mars was planned and supervised by Marshal Zhukov and considerable debate exists as to which operation (Mars or Uranus at Stalingrad) was intended to be the main Soviet effort for the winter of 1942/1943. Later described as a diversion to draw German attention away from Stalingrad, Operation Mars actually included forces who's strengths exceeded that of their counterparts in Uranus. Clearly they were at least equal in importance.
Soviet plans called for massive assaults against the flanks of the 9th Army by the Kalinin and Western Fronts with a follow up operation to encircle the 3rd Panzer Army at Vyazma. West Front would attack just south of Rzhev with 20th Army (supported by two Tank Corps) while Kalinin Front would attack with 22nd Army (supported by one Mech Corps) in the Luchessa Valley and with 41st Army (supported by an additional Mech Corps) just south of Bely. Additional attacks would be made against the tip of the salient to tie down German reserves and yet another major effort would be conducted by 3rd Shock Army against German positions to the west at Velikie Luki.
The offensive began on 25 November and thus followed the start of Uranus by three days. The attacks by the West Front at Rzhev were repeatedly repulsed by the German 78th Infantry and 5th and 9th Panzer Divisions. Soviet losses were appalling. In the Luchessa Valley (described in detail below) the German defenses were severely strained but the Soviets were never able to break through the collection of units lead by the Großdeutschland Division.
South of Bely the Soviet 6th "Stalin" Rifle and reinforced 1st Mech Corps demonstrated great ability. Here a 10 km hole was ripped open in the defenses of the German 246th Infantry Division and the Soviets exploited to a depth of over 20 km. The northern shoulder was contained by the 1st and 12th Panzer Divisions and the Fusilier Regiment GD. The hastily assembled 30th Panzer Corps (composed of 19th and 20th Panzer Divisions and the SS Cavalry Division) was able to do the same in the south and eventually forced the Soviet 41st Army to withdraw.
Most of the mobile units involved in Operation Mars were committed before the Rifle Divisions had penetrated the German lines and this resulted in their piecemeal destruction. Through this effort, Zhukov learned valuable lessons that would significantly contribute to the success of future Soviet offensives.
The Luchessa Valley
The German defense in the Luchessa Valley was the responsibility of the 216th Grenadier Regiment of the 86th Infantry Division. The regiment covered a front of over 7 km located about 5 km due west of the GD'42 map. To hold this line the regiment was composed of two battalion (with a total of six companies) and three batteries of artillery (less than one company for every kilometer (8 hexes) of front). The only unit in reserve in the area was an anti-partisan detachment of the 110th Infantry Division (roughly two companies strong).
The Soviets conducted company strength probes of the German lines in the early morning hours of 24 November but by 0900 the front was quiet. In the early afternoon the 9th Army ordered the first units of the GD to move from Olenino to Gusevo to act as OKH Reserve in the Luchessa Valley. What prompted this decision is unknown but this action was the first step that would doom the Soviet efforts.
The main Soviet attack began at dawn on 25 November after a one hour artillery barrage. The sector of the Gr.R.216 was attacked by two regiments of the 238th Rifle Division supported by tanks of the 49th Tank Brigade. The German strongpoints held throughout most of the day but by nightfall a 2 km gap had been formed in the center of the regiment. The Soviets halted for the night. By midnight, II/Gr.R.GD and Pio.GD had arrived at Travino and were immediately attached to Gr.R.216.
The Soviets renewed their attacks on 26 November and by early morning had forced another gap between III/Gr.R.216 and I/Gr.R.167 to the south. Moving through the gaps the Soviets tanks of 1st Guard and 49th Tank Brigades probed to the east while the infantry surrounded the III/Gr.R.216. The tank exploitation was not pushed very hard and was easily halted by counterattacks of I/Gr.R.216 and II/Gr.R.GD. After dark the III/Gr.R.216 was able to slip away and a new line was formed.
The line was held throughout 27 Nov as the Soviets concentrated against the I/Gr.R.167 to the south. This battalion was pushed south and the dent in the line was widened to 6 km. At dusk the decision was reached to pull the German line back to Griva (6 hexes SW of Dunino) - Travino - Starukhi - Ladishino - Karskaya. Also at this time, the GD Infantry Division was placed in command of the Luchessa Valley sector and additional GD units began moving to the area.
The Germans were successful in breaking contact with their foe and Soviet efforts on 28 November consisted of probes designed to locate the German forces. In the first of these actions the Germans virtually destroyed the Ski Battalion of the 185th Rifle Division as they approached Starukhi at dawn. After this it was noon before signs of further attack preparations were observed and when the attacks came they were small and easily repulsed. One factor that worked to keep the Soviets off balance throughout 28 November was the local counterattacks launched by I/Gr.R.216 from the area of Griva. Also beginning on 28 November, a German radio intercept unit was set up and information about Soviet plans and actions found their way directly to the GD Division Staff.
At this point, Soviet Command realized that the Rifle Divisions had failed in their efforts to force a breakthrough. With patience running thin the decision was made to commit the 3rd Mech Corps into the meat grinder.
The GD Fights for Survival
The German command was split into two Kampfgruppen located north and south of the Luchessa River: KG Lindemann with I/Gr.R.216 at Griva and Jagd.110 at Travino and KG Lorenz with II/Gr.R.GD, two companies of Pio.GD, and one company of Gr.R.252 (110.ID) in the area east of Starukhi. Also nominally attached to KG Lorenz (but in effect isolated) was the III/Gr.R.216 located at Karskaya. An antitank line composed of available AT and Flak guns was also set up from Voronino to Merkushi and KG Köhler (I/Gr.R.GD) was moved into Vaskovo in reserve.
The attack of the 3rd Mech Corps (including over 200 tanks) was initiated in a formation that was basically two brigades wide and two brigades deep. The combined 1st Guard and 49th Tank Brigades, followed by 1st Mech, was to attack down the main road, cross the Luchessa River at Bogoroditskoe, and push to cut the main road at Gusevo. The 3rd Mech, followed by the 10th Mech, was to parallel the left wing and clear the south bank of the Luchessa River ultimately reaching the main road where it crossed the river. Follow-up forces consisted of the 114th Rifle Brigade and the 1319th Rifle Regiment supported by the 39th Independent Tank Regiment.
The attack against II/Gr.R.GD was initiated at 0800 hours on 29 November and the defenses were breached by 1125. The German 50mm AT guns were virtually powerless against the mass of Soviet T-34's and most were simply overrun. Fearing the worst, the bridge at Bogoroditskoe was prepared for demolition and a detachment was sent to guard the bridge at Smolkovo. By 1200 the Germans were in full retreat to the river where a new line was formed with I/Gr.R.GD behind the steep river bank (by 1420 the II/Gr.R.GD was down to 80 men with three LMGs and three 50mm AT guns). The Soviets were slow to follow-up with infantry and it was 1815 before they worked their way to the bridge forcing the Germans to destroy it.
In the south the Soviets attacked the III/Gr.R.216 with two battalions of the 3rd Mech Brigade while a third covered the flank of the Tank Brigades. Karskaya was held for the better part of the day but the Germans were finally forced out due to low ammunition supplies (the III/Gr.R.216 again escaped encirclement). Follow up was slow but the 3rd Mech was able to take Goncharova and disperse two German artillery batteries in the area.
Throughout the day all available troops in the rear area were sent to the front including a number of Alarm units. Except for occasional artillery fires, the Soviets were content to rest for the night and their tanks pulled back for resupply. During the night concern for the southern flank resulted in the movement of the I/Gr.R.GD into the area of Smolkovo.
The Soviet attacks on 30 November began at 0540, again after a sustained artillery bombardment. Their infantry was initially successful in capturing Bogoroditskoe but a counterattack by Pio.GD forced them out. A new bridge was completed about 0930 but since the tanks had been sent to the rear to wait, it was early afternoon before they began their crossing. New attacks developed late in the day but these were stopped through the combined effects of the artillery and flak guns.
Attacks south of the Luchessa were light and easily repulsed throughout most of the day. At 1510, however, the Soviets attacked in force taking the villages of Smolkovo and the forests to the east. The I/Gr.R.GD and III/Gr.R.216 barely avoided encirclement before retreating to Gorovatka.
The Germans continued to feed troops into the battle and by dark actually felt that they had absorbed most of the Soviet offensive capability. They were so confident that orders went out for a general counterattack to begin on 1 December...orders that would never be executed.
On 1 December, the Soviets started the day with major attacks along the entire front. Infantry crossed the river at Starukhi and took the Travino heights while tanks (carrying infantry) crossed at Bogoroditskoe and push into the forests at points 236.9 and 241.3. In the south the German defenders were also severely tested. By dusk the German line was formed as follows: KG Lindemann holding Griva, Dunino, and Belikovo but isolated from the main line; KG Lorenz blocking the main road at Lomov-Vereista; KG Köhler at Vereista, Kutsovlevo, and Gordeevo; KG Huch (I/Gr.R.252) in the forests near Krivusha and Khudulikha. In the south the Soviets were dangerously close to the main supply road.
The Final Soviet Push
During the night of 1-2 December the Soviets concentrated in the bridgehead north of the Luchessa River. This included the 1319th Regt at Travino facing NW, the 1st Mech, 1st Guard Tank, 49th Guard Tank Brigades astride the main road, and the 10th Mech Brigade located near Misyulkino. Fortunately for the Germans only the 3rd Mech Brigade remained in the south.
The Soviet attacks on both 2 and 3 December were concentrated at Kotenitsi in an attempt to outflank the German road block and open the way to Gusevo. Fighting was extremely fierce and these attacks cost both sides heavy casualties. With additional German units continuing to arrive the front finally stabilized on 4 December.
Aftermath
The GD would remain in the Luchessa Valley through the end of 1942 and would finally concentrate there as a division. Attacks and counter attacks would continue but the Soviet 3rd Mech Corps was wrecked and had to be withdrawn and rebuilt. The performance of the entire Großdeutschland Division throughout the winter battles in the 9th Army area was exemplary and General Model (commander of 9th Army) showed his appreciation by transferring one officer, one NCO, and one enlisted man from each of the divisions under his command to help the Großdeutschland rebuild.
Hitler, however, had also taken a personal interest in the Luchessa Valley battle and was very unhappy that the GD had been forced to give ground (seems no one bothered to tell him that only three battalions of the Division had been present). For the alleged disaster a scapegoat had to be found and the Division Operations Officer (Major von Hobe) was replaced, an act that did not sit well with the fighting troops.
Players' Notes
German
The first thing to remember as the German player is not to panic. Yes, there are a lot of Soviet tanks, yes you are sorely outnumbered. But your forces are much more flexible, both in terms of a better Command Prep rating as well as no limitations on Op Sheets. The Soviets must have a Victory Point village as the objective of each Op Sheet, so the Soviet player can't pull too many 'cute maneuvers' on you.
Above all, you must preserve your forces an not get caught in exchanges with the Soviets. Soviet attacks will be more like haymakers than jabs—you should think in terms of avoiding blows rather than leaning into them. Consider defending victory point villages indirectly, hold them on flanks or guarding the obvious attack routes rather than digging in the actual village itself and waiting to get pounded. If you can maintain a very high attrition rate, the Soviets will run out of tanks and once their formations are weakened, they will be much less able to impose their will upon you.
As much as possible, keep your tanks dug-in in good terrain, at least until initial contact. Defensive bonuses, along with your first shot advantage (since your tanks will not be spotted) may give you a decisive local engagement. But as mentioned, you must be ready to withdraw quickly if you become heavily outnumbered.
Don't forget to consider reverse slope defense. You can park your dug-in tanks 3 or 4 hexes off a ridge and deal out a lot of damage to Soviet tanks as they come over the hill.
- Keep a reserve of artillery ammunition
- Use your intelligence ability to challenge the Soviet player's compliance with the requirements of section 1.4g.
- Take care regarding minefield placement
- Trade space for time but take care as the map contains several bottlenecks that should not be given up too easily.
- Place the 88's with care to maximize fields of fire and limit vulnerability.
- Reserves, reserves, reserves...!!!
- Play during snow turns will be significantly different from that during clear turns. Players are advised to develop their own tactics for this.
- Understand the Soviet Op Sheet restrictions. Sometimes you will want a full brigade attacking on an Op Sheet, at other times you may want to keep a battalion unassigned and accumulating turns toward a follow-up attack.
- Do not waste the 114th Rifle as they may be your only reserves to defend your gains.
- Watch your losses VERY carefully; once you get behind in the attrition curve, German flexibility will be your undoing.
Soviet
Don't fall into the temptation of gloating over your riches. You have a strong initial force, but it can be shocking how quickly it can become eroded once you actually engage the Germans. The last thing you want to do is a frontal assault, channeling your troops into narrow kill zones where German artillery will pound them to shreds. The art of maneuver is your key to victory.
The German player can mass great strength, but not everywhere. Your goal is to create Op Sheets that achieve your goals but avoid colliding directly into the Germans. Carefully consider flanking attacks, envelopments and attack routes that protect you from German artillery and achieve overwhelming local superiority for your forces at the point of contact. Because you can't dance like the Germans, you must plan carefully and remember to economize your use of force. You cannot endure endless losses. The campaign game is a long one, and tanks you lose the first day will be sorely missed for the rest of the game.
Patience is also a virtue for the Soviet player. The days are short, German resistance stubborn, and you may feel like you are not accomplishing much. But if you can manage to achieve a good exchange ratio while plodding on from one VP village to the next, things will probably be looking good for you at the end of the game.
In sum, make each Op Sheet count. Attack your goals indirectly whenever possible. Spread the Germans out and achieve local superiority, which will either punish the Germans for sticking around or force them to withdraw (also a good thing).
Bibliography
Books:
Glantz & House. When Titans Clashed. University Press of Kansas, 1995.
Grossmann, Horst. Rshew, Eckpfeiler der Ostfront. Germany: Podzun Verlag, 1962.
Haupt, Werner. Heeresgruppe Mitte, 1941-1945. Dorheim: Verlag Hans-Henning Podzum, 1968.
Philippi, A. and Heim, F. Der Feldzug Gegen Sowjetrussland. Stuttgart: Kohlhammer Verlag, 1962.
Poirier, Robert G. and Conner, Albert Z. The Red Army Order of Battle in the Great Patriotic War. Navato, CA: Presidio, 1985.
Sharp, Charles C. Soviet Order of Battle World War II, Vol II and III. US: G.F.Nafziger, 1995
Spaeter, Helmuth. The History of the Panzer Korps Grossdeutschland, Vol 1. Canada: Fedorowicz, 1992.
Zaloga, Steven J. and Grandsen, James. Soviet Tanks and Combat Vehicles of World War Two. London: Arms and Armory Press, 1984.
Kriegstagebuch des Oberkommandos der Wehrmacht. Frankfurt: B & G Verlag, 1963.
Battle for Moscow, The 1942 Soviet General Staff Study. Washington: Pergamon-Brassey's.
Battle for Stalingrad, The 1943 Soviet General Staff Study. Washington: Pergamon-Brassey's.
U.S. Army Handbooks/Pamphlets:
Handbook on U.S.S.R. Military Forces [TM 30-430].
Handbook on German Military Forces [TM 30-451].
Russian Combat Methods in WWII [DA 20-230].
Small Unit Actions during the German Campaign in Russia [DA 20-269].
Office of the Chief of Military History (OCMH) Manuscripts:
In Snow and Mud: 31 Days of Attack under Seydlitz [MS # C-034].
Experience Gained in Combat with Russian Infantry [MS # C-058].
The Fighting Qualities of the Russian Soldier [MS # D-036].
The Russian Command in World War II [MS # P-079].
Der Gegenangriff des XXX.A.K. Gegen den Feindeinbruch bei Beloj im Nov/Dez 1942 [MS # P-143b (VIII)]
National Archives Microfilm (Captured German Records):
T-78, Roll 642: OKH/FHO Ic, Russische Kriegsgliederrungen.
T-311, Roll 97: AG North Ic, Feindbeurteilungen.
T-312, Rolls 303, 304: 9th Army. Ic, Tätigkeitsbericht.
T-314, Rolls 685, 686: XXIII Corps. Ia, Kriegstagebuch (KTB).
T-314, Roll 985: XLI Pz.Corps. Ia, Kriegstagebuch (KTB).
T-315, Roll 1138: 86th I.D. Ia, Kriegstagebuch (KTB).
T-315, Roll 1178: 95th I.D. Ia, Kriegstagebuch (KTB).
T-315, Roll 1257: 110th I.D. Ia, Kriegstagebuch (KTB).
T-315, Roll 1759: 253rd I.D. Ia, Kriegstagebuch (KTB).
T-315, Rolls 2283, 2284, 2288, and 2289: Grossdeutschland I.D. Ia/Ic, Kriegstagebuch (KTB).
Maps/Aerial Photos:
Army Map Service. Russia (1:250,000) Sheet NO-36-11 Zapadnaya Dvina. Nov 1957.
German Records. Russia (1:50,000) Sheet O-36-139 Olenino. Jul 1942.
German Records. Aerial Photos, 1942/1943.
Order of Battle
German KG.Hoernlein
Großdeutschland Infantry Division (part)
Grenadier Regiment GD
- I Battalion (9xInf, 9xMG, 6xMtr, 2xIG, 2xAT)
- II Battalion (9xInf, 9xMG, 6xMtr, 2xIG, 2xAT)
- IV Battalion (1xInf, 3xAA, 4xMarder, 2xIG)
Pioneer Battalion GD (6xInf) StuG Battalion GD (9xStuG-III) Panzer Battalion GD (4xPz-IVf2) Panzerjäger Battalion GD (6xMarder, 6xAT) Ski Battalion GD (1xSki.Inf) Flak Battalion GD (4xAA, 8xSd-kfz.6/2) Alarm Units (8xInf) Artillery Regiment GD (6xBatteries)
86th Infantry Division (part)
Grenadier Regiment 184
- III Battalion (9xInf, 5xMG, 3xMtr)
Grenadier Regiment 216
- III Battalion (6xInf, 3xMG, 2xMtr)
Schnelle Battalion 186 (2xAT) Pioneer Battalion 186 (5xInf) Artillery Regiment 186 (1xBattery)
95th Infantry Division (part)
Grenadier Regiment 278
- III Battalion (9xInf, 6xMG, 3xMtr, 4xAT)
110th Infantry Division (part)
Grenadier Regiment 252
- I Battalion (9xInf, 5xMG, 2xMtr)
- II Battalion (3xInf, 2xMG, 1xMtr)
- Regimental Troops (2xIG, 6xAT)
Partisan-Jagd Battalion 110 (2xSki.Inf, 4xInf, 1xMtr, 1xAT) Pioneer Battalion 110 (1xInf) Artillery Regiment 120 (3xBatteries)
253rd Infantry Division (part)
Grenadier Regiment 473
- II Battalion (9xInf, 5xMG, 2xMtr)
- Regimental Troops (2xIG, 2xAT)
Schnelle Abteilung 253 (6xAT) Ski Battalion 253 (1xSki.Inf) Alarm Units (3xInf) Artillery Regiment 253 (2xBatteries)
2nd Panzer Division (part)
Kradschützen Battalion 2 (2xInf, 2xMG, 1xMtr, 4xAT) Panzer Artillery Regiment 74 (1xBattery)
XXIII Korps and AOK.9
Alarm Units (2xInf, 5xAT) Army Flak Battalion 49 (4xAA) Luftwaffe Flak Battalion II/4 (10xAA) Pioneer Battalion 632 (9xInf, 2xAT) POW Bau Battalion 22 (1xInf)
Soviet 22th Army (part)
185th Rifle Division (part)
1319th Rifle Regiment
- 1st Battalion (6xInf, 3xMG)
- 2nd Battalion (6xInf, 3xMG)
- 3rd Battalion (6xInf, 3xMG)
- AT Co (3xAT)
- Cannon Co (3xIG)
- Mtr Co (4xMtr)
695th Artillery Regiment
114th Rifle Brigade
- 1st Battalion (9xInf)
- 2nd Battalion (9xInf)
- 3rd Battalion (9xInf)
- MG Co (3xMG)
- Mtr Co (3xMtr)
- AT Battalion (3xAT)
39th Separate Tank Regiment (10xKV-1, 5xT-70)
376th Howitzer Regiment
3rd Mechanized Corps
1st Guard Tank Brigade
- 253rd Tank Battalion (21xT-34, 3xT-60)
- 9th Guard Motorized Battalion (6xInf, 2xMtr, 2xAT)
49th Tank Brigade
- 49th Tank Battalion (21xT-34, 3xT-60)
- 49th Motorized Battalion (4xInf, 2xMtr, 2xAT)
1st Mechanized Brigade
- 14th Tank Regiment (18xT-34, 14xT-70)
- 445th Motorized Battalion (9xInf, 3xMG, 1xMtr)
- 446th Motorized Battalion (9xInf, 3xMG, 1xMtr)
- 447th Motorized Battalion (9xInf, 3xMG, 1xMtr)
- 461st Artillery Battalion
3rd Mechanized Brigade
- 16th Tank Regiment (16xT-34, 13xT-70)
- 451st Motorized Battalion (9xInf, 3xMG, 1xMtr)
- 452nd Motorized Battalion (9xInf, 3xMG, 1xMtr)
- 453rd Motorized Battalion (9xInf, 3xMG, 1xMtr)
- 463rd Artillery Battalion
10th Mechanized Brigade
- 17th Tank Regiment (16xT-34, 12xT-70)
- 454th Motorized Battalion (9xInf, 3xMG, 1xMtr)
- 455th Motorized Battalion (9xInf, 3xMG, 1xMtr)
- 456th Motorized Battalion (9xInf, 3xMG, 1xMtr)
- 464th Artillery Battalion
35th Anti-Tank Regiment
- 1st Battalion (12xAT)
- 2nd Battalion (12xAT)
405th Guard Mortar Battalion
Town List
The following list gives the location of all towns. Points for victory towns are also given, with the date of capture.
| Village | Location | VPs | Captured |
|---|---|---|---|
| Aleksandrovka | N57.16 | 3 | |
| Anosovo | W8.30 | ||
| Belikovo | W28.51 | 1 | 12/2 |
| Boevka | W36.45 | ||
| Bogdashkino | S46.07 | ||
| Bogoroditskoe | W37.35 | ||
| Bolshie Merkushi | S13.29 | 2 | 12/1 |
| Bolshoe Boryantino | S34.01 | ||
| Dunino | W3.44 | 2 | 12/3 |
| Galichkina | S25.08 | 1 | 12/1 |
| Glukhovo | N51.11 | ||
| Goncharova | W24.07 | 1 | 11/29 |
| Gordeevo | N47.07 | 2 | |
| Gorovatka | S24.26 | 2 | 12/1 |
| Gusevo | N57.31 | 3 | |
| Karskaya | W5.07 | 2 | 11/29 |
| Khoroshevo | N56.19 | ||
| Khudulikha | S60.19 | 2 | |
| Korenevka | S27.12 | ||
| Kotenitsi | N22.08 | ||
| Krivusha | S58.33 | ||
| Kutsovlevo | N35.05 | ||
| Ladishino | W10.16 | ||
| Lapkovo | N5.12 | ||
| Lomov | N12.23 | ||
| Malenkie Merkushi | S16.31 | ||
| Martinovo | S34.31 | ||
| Misyulkin | S26.34 | ||
| Motkino | N23.27 | ||
| Nikolskoe |
Pronunciation Guide
For those who don't speak Russian, here is a pronunciation guide for the place names found on the map. It is not always completely correct, but it will get you close.
A few pointers:
- a = ah like at the doctor's office, never as in hat
- e = as in bet
- o = as in mow
- uh = unstressed vowel, like duh
- i = as in bit
- ee = as in me
- oo = as in moo
- y = as in yes
- kh = as in German Buch, usually pronounced as a velar fricative (like clearing your throat), but like a strong 'h' sound if followed by ee.
- zh = as in pleasure
The stressed syllable has the vowel sound in caps in the English transliteration. Where you put the word stress matters in Russian. An 'o' sound before a stressed syllable is pronounced 'a' as you will see.
These aren't perfect but should get you closer to the correct pronunciation than would otherwise be the case.
| Village | Pronunciation |
|---|---|
| Aleksandrovka | uhlekSANdruhfkuh |
| Anosovo | aNOsuhvuh |
| Belikovo | BYELeekuhvuh |
| Boevka | BOyefkuh |
| Bogdashkino | bagDASHkeenuh |
| Bogoroditskoe | buhgaROditskuhyuh |
| Bolshie Merkushi | balSHEEye myerKOOshee |
| Bolshoe Boryantino | balSHOye barYANteenuh |
| Dunino | DOOneenuh |
| Galichkina | gaLEECHkeenuh |
| Glukhovo | GLOOkhuhvuh |
| Goncharova | guhnchaROvuh |
| Gordeevo | gardYEyivuh |
| Gorovatka | guhraVATkuh |
| Gusevo | GOOsivuh |
| Karskaya | KARskuhyuh |
| Khoroshevo | khaROshivuh |
| Khudulikha | khooDOOleekhuh |
| Korenevka | kuhriNYEFkuh |
| Kotenitsi | kuhteNEETsee |
| Krivusha | kreeVOOshuh |
| Kutsovlevo | kootsafLYEvuh |
| Ladishino | laDEEsheenuh |
| Lapkovo | lapKOvuh |
| Lomov | LOmuhf |
| Luchessa | looCHESuh |
| Malenkie Merkushi | MALenkiye merKOOshee |
| Martinovo | marTEEnuhvuh |
| Misyulkin | miSYOOLkin |
| Motkino | MOTkeenuh |
| Nikolskoe | neeKOLskuhyuh |
| Nostryanka | naSTRYANkuh |
| Novaya Boyarshchina | NOvuhyuh baYARsheenuh |
| Noviki | NOveekee |
| Nyui | NYOOee |
| Osinovka | aSEEnuhfkuh |
| Pelyukhovka | pelyooKHOFkuh |
| Pochinok | paCHEEnuhk |
German Order of Arrival
| Date | Time | Unit | Area |
|---|---|---|---|
| 29 Nov | Start | Ammo: 105mm (70 HE, 10 Smk, 2 Illum); 150mm (20 HE) | |
| 1300 | Pio.632/Bau.22 (10xInf, 2xAT) | SE | |
| 1500 | 1 Co, Pio.110 (1xInf) | N | |
| 30 Nov | 0300 | Ammo: 105mm (100 HE, 20 Smk, 2 Illum); 150mm (40 HE) | |
| 1200 | 1D6 x Ju-87, 1D6 x Ju-88 | Air | |
| 1340 | 4 Co, 5 Co. Fla.GD (4xAA, 8xSdkfz.6/2) | SE | |
| 1500 | II-GD Arty (3xBtty) | NE | |
| 1600 | 49.Fla (2x88mm) | NE | |
| 2200 | S.A.253 (6xAT) | SE | |
| 2300 | MP.GD (3xAlarm) | SE | |
| 1 Dec | 0100 | 49.Fla (2x88mm) | NE |
| 0200 | I Bn, Gr.R.252 (9xInf, 5xMG, 2xMtr) | SE | |
| 0300 | Ammo: 105mm (250 HE, 40 Smk, 20 Smk); 150mm (100 HE, 20 Smk) | ||
| 0500 | 7-II-253 Art | SE | |
| 1200 | 1D6 x Ju-87 | Air | |
| 1320 | 14 Co, Gr.R.252 (2x50mm) | SE | |
| 1420 | AOK.9 (5xAT) | NE | |
| 1600 | Supply.XXIII (1xInf) | NE | |
| 1700 | 14 Co, Gr.R.252 (2x75mm) | SE | |
| 1700 | 3-II-253 Art | SE | |
| 1700 | Ski.253 (1xInf) | NE | |
| 1800 | 2 Co, StuG.GD (4xStuG III) | SE | |
| 1800 | HQ.XXIII (1xAlarm) | NE | |
| 1900 | HQ.GD (1xAlarm) | NE | |
| 1900 | Supply.GD (3xAlarm) | NE | |
| 1900 |
Soviet Order of Arrival
| Date | Time | Unit | Area |
|---|---|---|---|
| 29 Nov | Start | Ammo: 76mm (30 HE, 10 Smk, 2 Illum); 122mm (6 HE), Rocket (6 HE) | |
| 0700 | 3 MB (2 Co, 16 TR + 452 Mot) | NW | |
| 0700 | 3 MB (3 Co, 16 TR + 453 Mot) | SW* | |
| 1500 | 1 MB (1 Co, 14 TR + 445 Mot) | NW | |
| 1500 | 1 Bn 35 AT | NW | |
| 1500 | 2 Bn 35 AT | SW* | |
| 1600 | 185th Rifle | NW | |
| 30 Nov | 0300 | Ammo: 76mm (40 HE, 10 Smk, 2 Illum); 122mm (10 HE), Rocket (8 HE) | |
| 1200 | 1D6 x IL-2 | Air | |
| 1900 | 10 MB (1 Co, 17 TR + 454 Mot) | SW* | |
| 1900 | 39 Tk Regt | NW | |
| 1 Dec | 0100 | 1 MB (2 Co, 14 TR + 446 Mot) | NW |
| 0300 | Ammo: 76mm (40 HE, 10 Smk, 2 Illum); 122mm (10 HE), Rocket (8 HE) | ||
| 1000 | 1 MB (3 Co, 14 TR + 447 Mot) | NW | |
| 1200 | 10 MB (2 Co, 17 TR + 455 Mot) | SW* | |
| 1200 | 1D6 x IL-2 | Air | |
| 2 Dec | 0300 | Ammo: 76mm (40 HE, 10 Smk, 2 Illum); 122mm (10 HE), Rocket (8 HE) | |
| 0600 | 10 MB (3 Co, 17 TR + 456 Mot) | SW* | |
| 1200 | 114 Rifle | NW | |
| 3 Dec | 0300 | Ammo: 76mm (40 HE, 10 Smk, 2 Illum); 122mm (10 HE), Rocket (8 HE) | |
| 1200 | 1D6 x IL-2 | Air | |
| 4 Dec | 0300 | Ammo: 76mm (40 HE, 10 Smk, 2 Illum); 122mm (10 HE), Rocket (8 HE) | |
| 0800 | 1D6 x IL-2 | Air | |
| 1200 | 1D6 x IL-2 | Air |
* - see 1.5c
Soviet Artillery Ammunition
Ammunition received in Campaign Scenarios 4.4, 4.7, 4.10 at 0300 through Dec. 04.
| Scenario | 76mm HE | 76mm Sm | 76mm Ill | 122mm HE | Katy |
|---|---|---|---|---|---|
| 4.1, 4.2 | 15 | 5 | 1 | 3 | 3 |
| 4.3, 4.4, 4.7 | 30 | 10 | 2 | 6 | 6 |
| 4.5 | 10 | 5 | 1 | 3 | 3 |
| 4.6, 4.9 | 20 | 5 | 1 | 3 | 3 |
| 4.8 | 24 | 6 | 1 | 6 | 3 |
| Reinf (0300*) | 40 | 10 | 2 | 10 | 8 |
Soviet Pre-Planned Barrage Scatter (1D6)
| Roll | Scatter |
|---|---|
| 1 | No Scatter |
| 2-3 | 1 Hex |
| 4-5 | 2 Hexes |
| 6 | 3 Hexes |