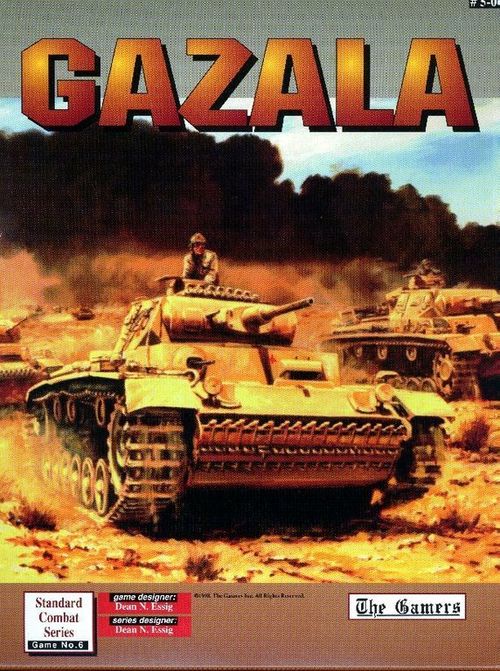
Gazala
Gazala Rulebook
Table of Contents
Table of Contents
- 0.0 Preliminary Info and Special Game Rules
- 1.0 Sequence of Play
- 2.0 Zones of Control
- 3.0 Movement
- 4.0 Stacking
- 5.0 Reinforcements, Replacements, and Withdrawals
- 6.0 Overrun Combat
- 7.0 Combat
- 8.0 Step Losses
- 9.0 Retreats
- 10.0 Advance After Combat
- 11.0 Exploitation
- 12.0 Supply
- 13.0 Hex Control
- 14.0 Special and Optional Rules
- 15.0 Scenarios
- 16.0 Counter Manifest and Order of Battle
- 17.0 Gazala Designer's Notes
- 18.0 SCS Designer's Notes
- 19.0 Credits
0.0 Preliminary Info and Special Game Rules
0.1 Introduction
The Standard Combat Series games enable both experienced and beginning players to enjoy simple to play and quick to learn games. These games attempt to bring out common wargame themes, terms, and techniques.
0.2 About Version 1.8
These rules contain known errata and new clarifications since the publishing of v1.7.
0.3 How To Learn Rules
Games are meant to be enjoyable pastimes, not tedious tests. In order to learn this game, begin by lightly reading the rules and thumbing through the game's component parts. Don't memorize anything. Punch out a few units from both sides and set them up on the map in any desired fashion. Now, with the rules in hand, follow the Sequence of Play, rereading as needed. Once you are moving along with your game and rarely have to look things up, set up the real game, and give it a try. By this time the terminology should be well under control and you will be able to play any SCS game with little additional effort.
0.4 The Components
A. A Complete Copy of Gazala Includes:
- 1 x Box
- 1 x SCS Series Rulebook (v1.6)
- 1 x Game Specific Rulebook
- 2 x Dice (one red, one white)
- 2 x 22" x 34" Maps
- 2 x 280-counter countersheet
- 1 x Registration Card
B. Assorted Advertising Flyers
C. If you are missing something, contact us. If you have something extra, Merry Christmas!
0.4.1 The Map
0.4.1.1 The Hex Numbering System
The numbering system identifies individual hexes on the map. If the game uses more than one map, letters identify the map in question. A hex number pertaining to a given map will begin with that map's letter, as in A10.10. The digits before the decimal point indicate the hex row, reading along the map's horizontal dimension from left to right. The digits after the decimal identify the exact hex along the given hex row, reading along the vertical dimension from bottom to top. Not all hexes have printed numbers, but the numbering applies to all of them. Each fifth hex (xx.05, xx.10, xx.15) has a printed hex number to create gridlines. For example, to find hex 29.17, follow the gridline for xx.15 until you find the 29.xx hex row, then count two hexes to 29.17.
0.4.1.2 Map Edge Hexes
Only hexes with at least half the hex showing are playable.
0.4.1.3 Off-Map Movement
Off map movement is prohibited. Units are eliminated if they move off the map unless the game/scenario allows it.
0.4.1.4 Charts and Tables
The map may include various charts and tables to facilitate game play. These are sometimes found on separate player aid cards. The Turn Record Track (TRT) provides a place to keep an accurate record of the current turn. Place the Turn Marker there to show the current turn. Advance it one box each time both sides have completed their player-turns.
0.4.1.5 Map Errata
After quite a bit of searching (i.e. comparing conflicting sources), I decided (too late) that hex A28.05 should, indeed, be an Allied minefield hex.
0.4.1.6 The Entrenchments Around Tobruk
A. The old Tobruk entrenchments still exist, but are in disrepair. They consist only of those hexes making up the ring around Tobruk.
B. Most entrenchment hexes also contain an AT Ditch. (While the AT Ditch graphic wanders a bit, it is treated as being located in its associated Entrenchment hex). Any unit in an AT Ditch hex attacks at half strength. This limits forays out of such hexes for both Commonwealth as well as Axis units.
0.4.1.7 Minefields
Minefields affect their entire hex according to the following:
A. A unit can move into a minefield only in the regular Movement Phase at a cost of its full movement allowance (MA). This applies on Turn 1 when the Axis has bonus movement amounts.
B. To move into a minefield, a unit must begin that phase adjacent to it.
C. When a unit begins a friendly regular Movement Phase in a minefield, it can exit the minefield and move normally.
D. Supply trace cannot be made through an unbreached minefield.
E. The combat effects of a minefield apply to both sides.
F. Overruns cannot be conducted into minefield hexes. This restriction is not negated by roads.
G. The other combat effects (attacker multiplier and Barrage Table shift) only affect units within minefields. Units in a minefield hex attack at half strength but defend normally against ground attack.
H. Roads and tracks that are not in an enemy zone of control (EZOC) negate minefield movement effects for the owning side (as determined by the minefield's color). In all other ways, minefields affect both sides equally.
I. A stack that retreats into a minefield hex must take one step loss (per stack, not per unit). This could be in addition to losses generated by retreating into an EZOC, and is not negated by breaches or roads.
0.4.1.8 Minefield Breaches
A. Only Headquarters (HQs) can breach minefield hexes. Move the HQ into the minefield hex normally. The minefield is breached as long as the HQ is in the minefield hex.
B. Supply trace is allowed through a breached minefield hex and units can cross such a hex with all minefield movement effects totally negated.
C. Combat effects in a breach hex remain normal.
0.4.2 The Playing Pieces
Each game includes one or more counter sheets. There are two main types of counters: units and markers. The units represent the military formations that took part in the battle. The markers are used for record keeping or to note the status of units.
0.4.3 The Rules
Every Gamers' Brand game contains separate Series and Game rulebooks. The Series rulebook contains the rules generally applicable to all the games in the series. The Game rulebook gives the details needed for a specific game, including any special rules, scenarios, and set up information. If the Game rules contradict the Series rules, the Game rules take precedence.
0.4.4 Abbreviations
| Abbr | Explanation |
|---|---|
| AP | Air Point |
| CRT | Combat Results Table |
| DG | Disorganized |
| EZOC | Enemy Zone of Control |
| HQ | Headquarters |
| MA | Movement Allowance |
| MP | Movement Point |
| OOS | Out of Supply |
| RM | Reserve Marker |
| TEC | Terrain Effects Chart |
| TRT | Turn Record Track |
| VP | Victory Point |
0.4.5 Setup Notes
Aside from any special notes in the game rules concerning setup, the following are always true:
A. w/i # means to set up a given unit within the stated number of hexes (#) of the hex listed, inclusive. Example: w/i 4 means a unit could setup in any hex that is four or less hexes from the hex given.
B. Units may not start overstacked, but may be stacked up to the limit.
C. Units generally start at full strength and in supply.
D. When the word inclusive follows set up boundaries, it means that units may set up anywhere within the given zone including on the boundary lines.
E. The player moving second sets up first.
0.4.6 Cumulative Effects
A. In all cases where a unit is subject to multiple modifiers, the effects are cumulative. A unit halved for terrain and halved for supply in a combat is quartered overall.
B. Retain fractions created by this process until after applying all modifiers, then use the Standard Rounding Rule.
0.4.7 Standard Rounding Rule
A. Round fractions: .01 to .49 down, .50 to .99 up.
B. Retain fractions until final application.
Example: Three units with attack strengths of 2.5, 3.25, and 4.125 (total 9.875) attack one unit with a defense strength of 2.125. The odds are 9.875 to 2.125 or 4.65 to 1. Apply the standard rounding rule, yielding a 5:1 attack.
0.4.8 Fog of War
A. Neither side cannot examine units in an enemy stack except when calculating the odds for a declared attack. However, the opposing side can observe the stack's top unit, including looking under any marker(s) that may be covering this top unit.
B. Once an attack is announced, the attacker cannot cancel it.
0.5 Specific Game: Background
A. Gazala presents the pivotal battle west of Tobruk in the Spring of 1942. Rommel's Axis army forced the Commonwealth 8th Army to abandon its prepared positions and captured Tobruk. The 8th Army began a retreat which ended with a new army commander (Montgomery) and a final stand near a railway station called El Alamein. This was a major Axis victory.
B. Owners of the earlier SCS game Crusader will note many similarities between the two games. This was done intentionally to speed player transition between the two games. However, Crusader veterans will need to read these rules carefully because they differ from Crusader in a number of important points.
0.6 Scale
A. Each turn represents 1 day.
B. Each hex is 1.25 miles.
C. Units range in size from battalion to regiment.
0.7 Counter Ownership
| Commonwealth | Color | Nationality |
|---|---|---|
| Reddish Brown | South Africa | |
| Brown | Britain | |
| Dark Brown | India | |
| Blue | Free France | |
| Purple | Yugoslavia |
| Axis | Color | Nationality |
|---|---|---|
| Teal | Italy | |
| Dark Mustard | Germany | |
| Light Blue | Luftwaffe |
0.8 Units
0.8.1 Unit Types
Unit type symbols (printed as icons on the counters): Infantry; Armor/Panzer; Machine Gun; Reconnaissance; Engineer; Mech Infantry/Panzergrenadier; Assault Engineer; Armored Car; Commando; Artillery; Paratroop; Coastal Artillery; Antitank; Mountain Artillery; Support Weapons; Antiair; Headquarters; Korück*.
* Kommandant Rückwärtiges Armeegebiet, meaning "Commandant Army Rear Area," a formation usually tasked with security and anti-partisan duties, an infantry-type unit.
0.8.2 Unit Characteristics
Only those units marked with the yellow exploitation box/stripe are Exploitation-Capable. Exploitation-Capable units may move during their Exploitation Phase, but may only move in their Reaction Phase if they are also in Reserve.
0.8.3 Sample Units
Sample counters (Infantry, Artillery, Tank) are illustrated in the printed rules and are not reproduced here.
0.8.4 Unit Sizes (printed as 0.8.45)
| Symbol | Size |
|---|---|
| XXXX | Army |
| XXX | Corps |
| XX | Division |
| X | Brigade |
| II | Battalion |
| I | Company/Battery |
0.8.5 Markers
Markers are illustrated on the printed counters: Flags; Out of Supply (OOS); Turn; Disorganized Marker; Attack Supply; Air Point; Reserve Marker; Supply Unit; Armored Supply Unit.
1.0 Sequence of Play
A. A game-turn is a sequence of steps, the order of which is the sequence of play (SOP). Each turn consists of two player turns. Each player-turn consists of a set sequence. Both players play through their player-turn to finish a game-turn.
B. At the end of the game-turn, advance the Turn Marker and begin the process again. Players must follow the SOP strictly in the order given. The game rulebook identifies who is the first and second Player.
C. Going forward, when the term "turn" is used by itself, it means game-turn.
D. The SOP is:
- Pre-Turn: Air Point Determination Phase (both sides)
- Axis Player Turn a. Remove any Axis Attack Supply Markers b. Reinforcement Supply Roll c. Movement and Reinforcement Phase d. Barrage Phase e. Allied Defensive Barrage Phase f. Combat Phase g. Supply Phase h. Allied Reaction Movement Phase i. Exploitation Phase j. DG Marker Removal
- Allied Player Turn a. Remove any Allied Attack Supply Markers b. Reinforcement Supply Roll c. Movement and Reinforcement Phase d. Barrage Phase e. Axis Reaction Barrage Phase f. Axis Reaction Movement Phase g. Combat Phase h. Supply Phase i. Exploitation Phase j. DG Marker Removal
- Turn End Phase: Turn Marker Advance
Design Note: The asymmetrical player turns are designed to bring out the different quality and behavior of the two opposing armies.
2.0 Zones of Control
2.1 In General
A. A Zone of Control (ZOCs) represents a unit's ability to inhibit enemy movement around it. The ZOCs of enemy units are called enemy ZOCs (EZOCs). Friendly ZOCs have no effect on friendly units.
B. Only units with a printed Attack Strength of 1 or more have ZOCs.
C. A unit's ZOC consists of hexes adjacent to it that it could move into during regular movement. Thus, if a unit cannot move into a hex, it does not have a ZOC into that hex. In the example to the right, the river blocks the unit's ZOC except at the bridge.
2.2 ZOC Effects
A. Units pay +2 Movement Points (MPs) to enter a hex containing an EZOC. Given the MPs, units can move directly from EZOC to EZOC and can move into and exit any number of EZOCs.
B. Units that begin a phase in an EZOC cannot overrun in that phase.
C. Units that begin the Exploitation Phase in an EZOC cannot move.
D. A unit can attack only those units in its ZOC.
E. Remove one step from a stack that retreats into an EZOC. Retreating stacks lose one step total, not one step per unit. Do this for each EZOC hex retreated into.
F. EZOCs do not inhibit advance after combat (10.0).
G. EZOCs block supply lines (12.1.D).
H. Multiple EZOCs give no additional effect.
I. Friendly units have no effect on EZOCs, other than they negate EZOCs in their hexes for supply purposes.
J. A hex can have friendly ZOCs and EZOCs simultaneously.
Example: This example shows the MP costs involved in moving units. The numbers in the circles show the accumulation of MPs expended as a unit enters various hexes. The MP cost to enter each hex is taken from the Terrain Effects Chart (TEC). Unit 6 is moving in the gap between units 7 and 2. It costs 1 MP to enter the first open terrain hex, 2 MPs to enter the second hex (1 for open terrain and +1 to cross the stream), 3 MPs to enter hex 24.17 (1 for open and +2 to enter an EZOC), and 2 MPs to enter the woods hex 25.18. At this point Unit 6 could continue on to hex 26.17 but decides to stay in the safety of the woods. Unit 6 could not continue on to hex 26.18 because it has an MA of 9 and it would cost two more MPs to enter hex 26.18, but it has only 1 MP remaining.
Unit 1 spends 3 MPs to enter hex 26.16 (1 for open and +2 to enter an EZOC). It only costs ½ MP to enter 26.17 and another ½ MP to enter 26.18 because Unit 1 is using the road. Although Unit 1 has 1 MP remaining upon reaching 26.18, it does not move further.
3.0 Movement
During the Movement Phase, the phasing side can move as many or as few of its units as desired. Each unit can be moved as far as desired within each unit's MA and any other applicable restrictions.
Procedure:
A. The phasing side moves units individually or as stacks, keeping track of their remaining MA by expending MPs.
B. Units must follow a contiguous path through the hex grid.
C. Units can move in any direction or series of directions.
D. The movement of one unit (or stack) must be completed before starting to move another.
3.1 How to Move Units
3.1.1 In General
A. The phasing side can move all, some, or none of its units.
B. A unit cannot expend more MPs in a single phase than its MA (Exception: 3.1.2).
C. Calculate movement using MPs. Each hex or hexside feature costs a number of MPs specified by the TEC. Keep a running total of the number of MPs each unit expends while it moves.
3.1.2 Minimum Movement
A. A unit with an MA greater than 0 may always move one hex, regardless of the MP cost involved. Such movement cannot be through or into prohibited terrain nor can it be used to perform an overrun.
B. MA modifications, such as from supply, and EZOCs have no effect on a unit's ability to use this rule, although units that begin the Exploitation Phase in an EZOC still cannot move.
3.2 Terrain Effects on Movement
A. Each hex and hexside feature costs MPs. A unit must pay the total MP cost required to enter a hex before entering that hex (Exception: 3.1.2).
B. Units may use roads (or road-like features such as railroads, trails, tracks, or bridges) only when following a continuous path along the road to enter a given hex. Such units pay the road movement cost and ignore the MP costs of the hex entered or hexside crossed.
C. A hexside feature crossed that is not negated by a road adds its cost to that of the hex.
D. Units cannot enter or cross prohibited terrain unless negated by roads.
E. If a hex contains multiple terrain types, use the terrain type with the highest MP cost unless moving along a road.
F. All bridges, including RR bridges, may be used to cross rivers.
3.3 Restrictions on Movement
A. Each unit's MA is independent, and one unit's expenditures does not affect other units. B. A unit cannot save unused MPs nor transfer them to another unit. C. Units cannot enter enemy-occupied hexes. D. Only friendly units move during a friendly phase, though combat can force enemy units to retreat. E. The map edge is a hard boundary. Destroy units that cross it and count them for victory purposes, unless the game/scenario allows otherwise.
4.0 Stacking
A. Stacking occurs when a hex contains more than one unit.
B. Game markers do not count toward the stacking limit.
C. The stacking limit applies at the end of the Movement, Combat, and Exploitation Phases, at the instant of overrun, and at the end of an advance after combat. Enforce the Stacking Limit at these times. Eliminate the owning side's choice of excess units found at those times. Temporary overstacking is allowed at other times.
D. In the overrun case, count both overrunning units and any units which just happen to be in the hex.
E. Reinforcements can overstack initially, but these stacks must break up by that phase's end.
4.1 Overstacking
A. If units are stacked in violation of the limit, eliminate any excess stacking found in any hex (owning side's choice of units).
B. In the case of overstacking at the moment of overrun, simply put the moving units back into their starting hex and redo their move. Do not eliminate any.
C. Units which are overstacked after retreating due to a combat result (overrun or regular combat) do not have to eliminate any excess units until the end of the next friendly Movement Phase.
4.2 Stacking Order
The owning side can arrange its stacks as desired as long as the top unit in every stack has an Attack Strength (not defense only) greater than zero, if such a unit exists in the stack.
4.3 Stacking Limit
Up to three units (not steps) can stack in one hex. HQs count as units. Nationality differences within a side, Supply Units and all game markers do not matter for stacking.
5.0 Reinforcements, Replacements, and Withdrawals
5.1 Reinforcements
A. Reinforcements are units that enter after play begins.
B. Place reinforcements into their entry hexes at the beginning of their entry turn's Movement Phase. Place them into the hex containing the entry area designation. If several hexes are given, they may be split up.
C. Reinforcements must enter on their designated turn.
D. Reinforcements can overstack on placement provided they split up during that phase.
E. Reinforcement placement does not cost MPs.
F. Reinforcements can use their full MA in their first phase.
G. EZOCs have no effect on reinforcement placement.
H. Do not place reinforcements into hexes containing enemy units. If enemy units block a reinforcement's entry hexes, the reinforcements arrive in any hex at or within ten hexes along the map edge. Blocking includes surrounding map-edge entry hexes in such a way that will result in overstacking losses to the reinforcements. If entry occurs on the map (that is, not on an edge) and the hex is blocked, the units enter anywhere at or within five hexes of the intended hex.
5.2 Reconstitution
A. When a unit is destroyed, roll one die for it. Place the unit as a reinforcement the number of turns in the future on the TRT equal to its roll. On a 1, the unit dies permanently and does not reconstitute.
B. Units whose rolls place them after the game's end never return.
C. Units return via any friendly Entry Area.
D. Units whose full strength is only one step and units with a zero MA never reconstitute. They always die permanently when killed.
E. Units always return reduced.
F. Do not roll when an HQ is destroyed, it reenters play the next turn (at reduced strength). HQs, therefore, do not follow the normal reconstitution procedure and are never permanently killed.
G. In some scenarios, units might be listed as Dead for Reconstitution. Set these units up on the TRT by rolling one die for each and placing the unit on the turn that many away from the last "pre-game" turn (so that the scenario's first turn would be the result of a die roll of one). For this purpose, a roll of one means one, not dead. Any units not listed in the setup or this dead list are permanently dead.
5.3 Emergency Reinforcements
A. Each side has emergency reinforcement units. At the beginning of any friendly player turn, the phasing side can declare an emergency, and specify the units being released. The units arrive the following turn.
B. Total the attack strength, barrage strength, or supply throw range (as appropriate) for the units released. Divide the total by 10 and round normally. The result is the number of victory points (VPs) the units cost. The minimum cost is 1 VP.
C. The Axis has a single Reinforcement Group.
D. The Commonwealth has two such groups. The first Emergency Group must be entirely deployed before releasing any unit(s) of the second group.
E. Either side may release all, some, or none of its remaining units on any turn.
6.0 Overrun Combat
A. Overrun Combat is combined movement and combat.
B. Units can conduct an overrun at a cost of 2 MPs.
C. Overruns can occur during the Movement or Exploitation Phases.
D. To overrun as a stack, units must begin movement stacked.
E. Units that begin the phase in an EZOC cannot overrun.
F. Units that overrun can stack (adjacent to the target hex) with units that are not overrunning. That hex's stacking total must be within the stacking limit.
G. Adverse combat results only affect the units actually engaged in the overrun.
6.1 Procedure
A. Move a unit or stack adjacent to the target hex, paying this adjacent hex's terrain cost and any EZOC costs. The units then expend 2 MPs for the overrun.
B. Calculate the odds and roll the dice, applying the results from the Combat Results Table (CRT) as in any combat.
C. If all defending units vacate the target hex, the overrunning units must enter it.
D. Resolve overruns like regular combat (7.0), but they occur during the Movement Phase immediately after announcing them.
E. The attacking units do not enter the defender's hex. The attacking and defending stacks remain in adjacent hexes.
F. Only a single stack can overrun a single defending hex.
G. Units can overrun only those target hexes that would cost them 2 MPs or fewer to enter in regular movement. For this rule, use the target hex's terrain cost only, ignoring EZOCs.
6.2 Restrictions on Overruns
A. Only units allowed to move in the Exploitation Phase can overrun during that phase.
B. An attacking stack can overrun only once per phase.
C. A given target hex can be overrun only once per phase, but units in that hex can be overrun again should they retreat to another hex.
D. Units can overrun during the Movement Phase and attack normally during the Combat Phase. (Properly managed, a unit can attack up to three times in a turn.)
E. Supply status has no effect on a unit's ability to overrun, although being out of supply may reduce a unit's MA and Attack Strength.
F. Units cannot use roads (and road-like features) to execute overruns. Units can use a road to get to the hex adjacent to the overrun target, but cannot use the road to lessen the cost of the target hex to allow overrun.
G. Units (overrunning and stationary combined) cannot overstack in the overrun.
H. All game-specific modifiers (APs, combined arms modifiers, etc.) apply to overruns like regular combat.
6.3 Overrun Results
A. Overrunning attackers can advance after combat, but regardless of the result, the overrun ends their regular movement.
B. The attacking units must enter (or traverse) the defender's hex if it becomes vacant during an overrun.
C. Apply any retreat results the attacker receives in an overrun.
Overrun Example: Units 5 and 6 are able to overrun because Unit 14 does not exert an EZOC. It does not have a printed Attack Strength of 1 or more. Units 5 and 6 can overrun Unit 14 but instead move to overrun Unit 7. They can do this by moving together as a stack to hex 11.08 and declaring an overrun. The numbers in the circles show the accumulation of MPs expended by the units in each hex. They spend 5 MPs for hex 11.08 because it costs 1 MP to enter the hex, 2 MPs to enter Unit 7's EZOC, and 2 more MPs to execute the overrun. Assuming no modifiers, the odds of the overrun attack would be 14:3 rounding off to 5:1.
Units 5 and 6 cannot overrun Unit 7 from hex 10.07 because the stacking limit for this example is 6 steps per hex, and Units 5, 6 and 1 would have a combined total of 7 steps (6.2.G).
Although Unit 8 can move into hex 9.08, it may not overrun Unit 7 because road-like features such as the bridge cannot be used to negate the river during an overrun (6.2.F).
Unit 8 can also move to hex 9.06, but it cannot overrun Unit 2 because the MP cost to enter 9.05 in regular movement would be 3 MPs (2 for the woods +1 for the stream) which is greater than the 2-MP limit for overruns (6.1.G).
If Unit 8 waits until after Units 5 and 6 have left hex 11.06, it could overrun Unit 14 from there for a total cost of 4 MPs, as there is no EZOC for Unit 14.
7.0 Combat
A. Combat is the act of attacking one hex.
B. A unit may conduct combat against any enemy-occupied hex in its ZOC.
C. Other than overruns, combat occurs only in the Combat Phase.
D. No unit is ever forced to attack. Units must defend if attacked.
E. Units within a stack cannot be attacked separately. Stacks always defend together.
F. Units from more than one hex can engage in the attack on a single hex, but only one hex can be the defender.
G. The phasing side may execute attacks in any desired order.
H. Attacks are announced and resolved one at a time. There is no need to announce all attacks in advance.
I. To announce an attack, the phasing side reveals all units involved in the attack, then the defender reveals the defending units. This may be modified by the Fog of War Rule (0.4.8).
7.1 Procedure
A. In games where the defender can respond in some way before the attack is resolved (such as allotting APs), the attacker initially needs only reveal the number of units attacking from each hex before the defender responds.
B. Compute the basic odds of the combat, then apply any odds modifiers.
C. Determine the combat's odds.
D. The attacker rolls two dice to find the result. Both sides apply it as listed below.
7.2 Combat Results
A. The CRT gives results that affect the attacker (A), the defender (D), or both.
B. The possible results are:
-
- Number of steps lost
- R# - Number of hexes to be retreated
C. Implement the result immediately, with the defender implementing its result first.
D. After implementing the result, proceed to other combats.
Example: A result of A1R1 means the attacker loses one step (strongest unit) and all attacking units retreat one hex.
7.3 Restrictions on Combat
A. Unit are not required to attack.
B. Units may not divide their strength between more than one combat. Units in the same stack may attack different hexes, but no single unit can contribute to more than one attack.
C. Any number of units can attack in a single attack, and attacks can be made from any direction or set of directions.
D. Attack all units in a hex as a single defense strength. The defender cannot withhold units in a hex from a combat.
E. Units can attack or be attacked only once per Combat Phase.
F. Units that retreat to another yet to be attacked hex do not participate in that combat. Only the original units in the hex defend. However, any and all adverse combat results apply to the entire stack.
G. Units which overrun are eligible to attack in the regular Combat Phase as well.
H. Units with a printed attack strength of zero can participate in an attack with other non-zero units. While they add nothing in the way of attack strength, such units can help absorb step losses and may advance after combat.
I. Units without an actual printed attack strength (such as barrage, supply range, or defense only) cannot participate in an attack.
7.4 Terrain Effects on Combat
7.4.1 In General
A. Combat into or across certain terrain types, as listed on the TEC, is prohibited.
B. Units cannot attack into terrain they might not otherwise be able to move into from their current hex.
C. Generally, terrain modifies attacking and defending combat strengths as a multiplier. Alternatively, terrain could shift the final combat odds column instead of affecting the actual strength of the units.
D. If a hex has more than one terrain type, all are cumulative for defense.
E. Terrain affects only those units that are subject to a condition. (This generally applies to units attacking from different hexes.)
F. Usually, only the terrain of the defender's hex and the hexsides between the attackers and the defender affect combat.
7.4.2 Escarpments
No combat is allowed across escarpment hexsides except for hexsides containing both an escarpment and a road or track. In such cases, the attacker attacks at one-fourth strength. This applies in both directions.
7.5 Mandatory Retreats
Retreats called for by the CRT cannot be exchanged for step losses.
7.6 Odds Determination
A. To determine the combat odds, divide the total modified attack strength with the total modified defense Strength.
B. Apply the Standard Rounding Rule (0.4.7) to the result and express it as a ratio: attacker to defender.
C. For all combats with rounded odds worse than the lowest column, apply an automatic result of A1.
D. All combats with rounded odds greater than the highest column are resolved using the highest column.
Design Note: The implications of the standard rounding rule on odds should be clear: this is different from the usual rule to round in favor of the defender.
Examples: 3:4 is 1:1, 5:2 is 3:1, 9:6 is 2:1, and 11 to 8 is 1:1.
7.7 Combat Example
Four friendly units (3, 4, 6, and 8) attack Units 7 and 14. The total attack strength is 18 and the defense strength is 4, making the odds 5:1. Two dice are rolled on the CRT for a result of D2R2. Units 7 and 14 have two steps each. The defender takes one step from each of its units, then retreats the units two hexes.
At this point, the two units have retreated into Unit 1's ZOC and the defender chooses to eliminate Unit 7 to satisfy the step loss required for retreating into an EZOC. Unit 3 advanced after combat to hold the original combat hex. It can go no further because it is not exploitation-capable. Unit 6, however, is and has advanced the full two hexes allowed by the combat result. In the ensuing Exploitation Phase, Unit 6 will be eligible to move because Unit 14 does not have an EZOC. If Unit 6 had advanced into a hex which did contain an EZOC, it would lose the ability to use the Exploitation Phase.
In a second example, Units 8, 6, and 4 are attacking Unit 7. Unit 3 cannot attack because of the river, and units 4 and 6 are quartered because they are attacking across a bridge giving them a total attack strength of 2.5. Unit 8 has its full attack strength of 3, bringing the attacker total to 5.5. The defender is worth 6 because its defense strength is doubled due to being in a woods hex. The odds are 5.5 to 6 or 1:1. In a fit of misfortune, the attacker rolls a 2 for an A2R1 result. The attacking units lose two steps and retreat to the two hexes marked R ending the combat. Even though unit 6 contributed only 1.75 points to the attack, the first step loss must come from it because it has the highest printed attack strength. The other step loss can come from either Unit 4 or 8. The defender cannot advance after combat.
8.0 Step Losses
All units have one or two steps, as noted on the counter.
8.1 In General
A. Steps allow a unit to take damage in increments. The side displayed shows a unit's current strength. Most units have a full and a reduced strength side.
- Full strength units that take a step loss are flipped over and become reduced strength.
- Reduced strength units that take a step loss are destroyed (see also Reconstitution, 5.4).
B. Artillery units have only one-step, even though they are printed on both sides. Their reverse side is used to show their mode, not to indicate a step loss (14.3.1).
8.2 Procedure
A. When a result calls for a step loss, the first step lost must be from the side's strongest unit, the one with the highest printed attack strength (for the attacker) or highest printed defense strength (for the defender).
B. All units in a particular combat must absorb one step loss before any absorbs a second step loss.
C. Within the above restrictions, the owner is free to distribute step losses among its units as desired, provided they were actually involved in the combat.
D. Step losses beyond the absorption capacity of the participating units are ignored.
9.0 Retreats
9.1 In General
A. Retreats are given as the number of hexes the affected units must retreat. All of a side's units in a combat must retreat that number of hexes.
B. Units can only retreat into or through hexes that the units could move through during movement. Units which cannot retreat or continue their retreat for this reason must lose one step per retreat hex the stack cannot do. The owner selects the unit or units that take these losses. This is one step from the stack, not per unit, for each hex not retreated.
C. Retreat is always given in hexes, not MPs. Unless prohibited terrain prevents retreat, terrain has no effect on the retreat's length.
D. A retreating unit or stack that enters a hex containing an EZOC loses one step. This loss is in addition to the combat result itself. A retreating stack loses only one step total per EZOC hex entered. The owning side chooses the unit to lose this step. Friendly units do not negate an EZOC for this purpose.
E. Retreating units can stay together as a stack or retreat using separate paths.
F. Units with a zero MA are destroyed if forced to retreat.
9.2 Retreat Path
A. The owner retreats its own units.
B. Each retreat path hex must be farther away from the unit's original hex than the last.
Example: The second hex retreated is two hexes away from the combat hex.
C. If possible, the unit must retreat toward a supply source.
D. When determining a retreat path, a unit may avoid EZOCs even if doing so does not move it toward a supply source.
9.3 No Retreat Option
A. When the CRT calls for one or more retreat hexes, the owner can opt to convert any retreat amount into step losses, on a one step per one hex basis. Therefore, if the defender suffers an R3 result, it may opt for any of the following:
- Retreat 3, no step loss;
- Retreat 2, one step loss;
- Retreat 1, two step losses; or
- No retreat, three step losses.
B. The owner can choose any combination of retreat hexes and step losses to fulfill the retreat result, provided the total equals the table's retreat result. Again, step losses affect single units, retreat hexes affect the entire force involved in the combat.
10.0 Advance After Combat
A. When an attack causes the defender's hex to become vacant, the attacker may occupy the hex. The attacker chooses which units, if any, to advance with.
B. Any unit involved in the combat may advance. Units are eligible if they contributed at least a zero attack strength to the combat.
C. If the defender retreats farther than one hex, only exploitation-capable units can advance as many hexes as the defender's retreat result.
D. The defender's original hex must be the first advance hex.
E. After the first hex, advancing units can go anywhere except for hexes containing enemy units or prohibited terrain.
F. Advancing units can split up or remain together.
G. Advancing units ignore EZOCs.
H. The stacking limit must be observed at the end of any advance.
I. If the combat destroys the defender leaving an unfulfilled retreat result, the attacker can advance the retreat result's number of hexes.
J. Calculate advances by the number of hexes, not MPs.
K. The defender cannot advance after combat.
L. Attacking units must advance into (or through) the defender's hex if it becomes vacant during an overrun attack.
11.0 Exploitation
A. The Exploitation Phase allows friendly exploitation-capable units to move up to their full MA. They may also conduct overrun attacks during this phase.
B. Generally, only units with a yellow box around their unit values are exploitation-capable.
C. A unit in an EZOC at the beginning of the Exploitation Phase cannot move or overrun in that phase.
D. Units which are not exploitation-capable (or are not otherwise permitted to operate during the Exploitation Phase) do not have a minimum movement per 3.1.2.
12.0 Supply
SCS games simulate supply in an abstract trace manner.
12.1 Tracing Supply Lines
A. During the Supply Phase, the phasing side checks each of its units (including HQs) independently to determine if a supply line trace exists. If a trace is not possible, such units are out of supply (OOS). Mark them with an Out of Supply marker.
B. In a later Supply Phase, if a supply line trace exists for such units, remove the Out of Supply marker.
C. During the friendly Supply Phase, all HQs must trace a supply line to a Supply Source. HQs able to do so can give trace supply to any friendly unit within its Supply Range.
D. The supply line must be free of enemy units and their ZOCs, though friendly units negate EZOCs for tracing both back from the HQ and forward to units.
E. After a successful trace, units are in supply until the next Supply Phase regardless of changing circumstances. Conversely, OOS units must wait until (at least) the next Supply Phase to qualify as being in supply.
12.2 Supply Sources
Friendly supply sources are:
A. Commonwealth: Entry Hexes D, E and both Tobruk hexes
B. Axis: Entry Hexes A, B and C
12.3 Out of Supply Effects
A. OOS units:
- May not attack.
- Defend at half strength.
- Lose half of their MA.
- May not execute Exploitation Movement.
B. Artillery units that are OOS cannot conduct Barrage Attacks.
12.4 Supply Line Trace Example
Shown here is the supply line trace available to our heroes (Units 3, 6, and 8). To be in supply, there must be a supply trace between the good guys and supply source B. The possible trace is marked by the dotted line. Units 6 and 8 negate the EZOCs in their hexes for supply purposes allowing Unit 3 to trace. Likewise, Unit 8 negates an EZOC for Unit 6 (2.2.G). If the bridge or either Unit 6 or 8 were not present, Unit 3 would be out of supply and marked with an Out of Supply marker.
12.5 HQ Supply
HQs are supplied if they can trace from any friendly supply source. This path can be any length, but must be along roads (or tracks) for Commonwealth HQs; Axis HQs do not suffer this limitation.
12.5.1 Supply Range
Each HQ unit has a Supply Range indicated on its counter in parentheses. A unit is in supply if a friendly supplied HQ can trace to a hex adjacent to the unit (of any terrain), using the HQ's range in MPs modified normally for terrain. Trace is blocked if any hex (including the final adjacent hex) contains a non-negated EZOC.
12.5.2 HQ Assignment Limitations
The following applies to both Trace and Attack Supply:
A. Axis units can trace to any Axis HQ.
B. All units of a CW Brigade must trace to a single CW HQ. Units not assigned to a brigade can trace to any CW HQ.
12.5.3 Supply Source Isolation and Capture
A. Supply sources provide no supply to the enemy if captured. If recaptured by the originally owning side, the source again provides supply to it.
B. If the enemy occupies or moves adjacent to a friendly supply source hex, pick any map edge road/track hex along the same map edge to replace it.
12.5.4 Attrition
A. Roll one die for each hex found to be OOS in consecutive Supply Phases (i.e., it was OOS in the previous turn's Supply Phase and found to be so again).
- On a 1, destroy one step in the stack.
- On a 2-6, there is no effect.
B. Make one roll per hex, each turn the hex is found to be out of supply.
C. If a step loss is called for, the owner can choose any step desired in hex. The unit reconstitutes normally.
D. Unit type, nationality, or situation do not matter for this die roll.
12.5.5 Supply Units
A. Both sides have supply units, used for Attack Supply and (in hard times) for trace supply. They move like any other unit, and can be put into Reserve.
B. Supply units can move and be used in the same phase.
C. Supply units cannot take step losses and cannot retreat.
D. If their hex is occupied by enemy units, roll one die: 1-4 the supply unit is destroyed, 5-6 it is captured.
E. Captured supply units cannot move the turn they are captured.
12.5.6 Supply Units and HQ Trace Supply
A. If an HQ cannot trace to a supply source, but can trace (10 MPs or less) to a supply unit, the supply unit can be used as a supply source.
B. Only one HQ can make use of a given supply unit. Once the unit provides supply in this manner, remove it from play.
C. Supply units themselves cannot be used as a replacement for unit supply: an HQ is always required.
12.5.7 Attack Supply
A. Only units in Attack Supply can make attacks, overruns, and barrages. Exception: Commonwealth artillery can fire Defensive Fire without having Attack Supply.
B. Expend one supply unit at or within 10 MPs of an HQ to provide Attack Supply. This can be done during any friendly phase and there is no requirement to trace to the supply unit by road/track.
C. Pay for Axis Attack Supply by division for divisional units or an HQ for independent units. If a division is split among several HQs, it will take as many supply units as there are splits to pay for the entire division.
D. Pay Allied Attack Supply by brigade or for an HQ (to pay for units without a brigade affiliation). The Commonwealth has Brigade markers to mark the Attack Supply status of each brigade.
E. In either case, an HQ is required to make Attack Supply payment. It cannot be done directly to the units.
F. Once paid, Attack Supply lasts until the next friendly Attack Supply Marker Removal Phase and the supplied units can do any number of combats and/or barrages during that time.
Exception: The KStA Pz KG and LRDG are always in Attack Supply, no need to expend supply units.
12.5.8 Units Without Attack Supply
These units cannot barrage (with the CW exception), attack, or overrun. They defend and move normally.
12.5.9 New Supply Units
Each side rolls one die on its Supply Table at the beginning of its Movement and Reinforcement Phase. The resulting number of supply units enters as reinforcements that turn.
12.5.10 Axis Armored Supply Units
A. When the Axis enters new supply units (from a roll on its Supply Table), it may choose to bring up to two of them on as Armored Supply Units.
B. There is a limit of two such units in play at once, so the Axis must use the ones already in play before entering any others.
C. Armored Supply Units function like regular Supply Units with the following exceptions:
- They move faster.
- They are exploitation-capable without any Reserve requirements.
13.0 Hex Control
A. Control of a hex is often important for determining victory or other game functions.
B. A side gains control of a hex by having one of its units occupy or pass through the hex.
C. A ZOC is not sufficient to gain control of a hex.
D. Hex control can change back and forth during the course of a game.
14.0 Special and Optional Rules
14.1 Headquarters
A. HQs serve two functions: they supply friendly units and shift combat odds.
B. Only one HQ per side can participate in a combat:
- A defending HQ must be in the defender's hex;
- An attacking HQ must be stacked with at least one attacking unit.
- Shift the odds one column in the owning side's favor. If both sides use HQs, the shifts cancel out.
- Only HQs participating in a combat in this manner can advance after combat.
C. See Special HQ Reconstitution rule (5.2.F).
14.2 Disorganized Units
A. Units become DG only as a Barrage Table result. When the Barrage Table gives a DG or numeric result, mark all units in the target hex with a DG Marker.
B. Non-DG units can move through or stack with DG units with no effect.
14.2.1 Effects of DG
A. DG Units have their attack, barrage, and defense strengths halved. Their MA is also halved.
B. DG units cannot conduct overruns.
C. DG units do not exert a ZOC.
D. DG units lose their exploitation capability. Remove any Reserve Marker (RM) in a stack that become DG.
E. DG has no effect on supply ranges or HQ combat effects (other than their actual combat strength).
F. There is no additional effect for multiple DG results.
14.2.2 Recovery of DG
A. During the Clean Up Phase, the phasing side removes all DG markers from its units.
B. OOS units recover normally.
14.3 Artillery and Barrage Combat
14.3.1 Artillery Modes
A. Most artillery units have two modes (as shown by the counter's side facing up). One mode is better for firing, while the other is better for moving. Depending on the counter's values, units in either mode can do both functions — it will just be better at one function than the other.
B. Artillery modes may change only during the unit's regular Movement Phase before it expends any MPs.
C. Artillery units with only one side have only one mode.
14.3.2 Barrage Strength
A. Artillery units have their barrage strength on their counter in parentheses. Use this strength only in Barrage Attacks. It can never be added to ground attacks.
B. Artillery units have a six-hex range.
C. There is no line of sight requirement, though having a friendly unit adjacent to the target helps.
D. Resolve barrage attacks in the player's respective Barrage Phases.
E. Artillery units defend using their printed defense strength.
14.3.3 Restrictions
A. An artillery unit cannot conduct more than one barrage attack per phase and cannot split its fires.
B. There is a limit of one barrage attack per hex per phase.
C. Any number of artillery and air points (APs) can engage in a single Barrage.
D. Artillery cannot barrage unless properly supplied, but properly supplied artillery can barrage in every available phase.
14.3.4 Barrage Table
A. Resolve barrage attacks against enemy hexes on the Barrage Table.
B. he possible results of a barrage are: No Result, Disorganized (DG), and step loss.
C. A step loss automatically DGs the target stack.
D. Apply only the shifts listed under the Barrage Table and those part of the TEC.
E. Only the target's terrain affects the barrage. Terrain has no effect on the ability of a unit to qualify as adjacent for modification purposes.
F. Resolve Barrages shifted off either end of the Barrage Table on the last available column.
14.3.5 No Advance After Barrage
Units cannot advance into hexes that no longer contain enemy units due to a Barrage result.
14.3.6 Applying Step Losses
A. When the Barrage Table calls for a step loss, the owner can select any unit in the stack to take the losses.
B. The selected unit need not be the strongest and the defender is not required to distribute the losses.
C. After exacting losses, mark the remaining units DG.
14.3.7 Supply Requirement
A. Only Axis artillery units in Attack Supply can conduct Barrage Attacks.
B. Any supplied (i.e., not OOS) CW Artillery unit can fire in its Defensive Barrage Phase (with no Attack Supply requirement). In other phases, CW artillery must have Attack Supply just like the Axis in order to barrage.
14.4 Airpower
14.4.1 Receiving Air Points
A. Each side receives one or more APs each turn.
B. Roll a die during the Air Point Determination Phase, applying the current turn's DRM (printed in the current turn's box on the TRT). The result is the number of air points available to that side.
Optional: For a much more variable game, roll two dice instead of one for each side.
C. APs are available for that turn only and cannot be saved from turn to turn. They can be used in any of a number of different phases in each turn, but each air point can only be used once.
D. Use of APs does not involve or require supply unit expenditure.
14.4.2 Effects
A. Each AP expended shifts a combat (regular or overrun) one column in the owner's favor.
B. Declare APs used at the moment of use. Any number of the available APs may be used to affect a single combat.
C. The defender identifies any use of APs before the attacker does so and before determining the odds.
D. APs can affect attacks and defenses. Subtract the defender's from the attacker's and shift the final odds column by the remainder: left if negative, right if positive.
E. Shifts beyond the table's available columns have no additional effect; use the last available table column.
F. APs can be used in any phase containing regular or overrun combats.
14.4.3 Air Point Barrage
A. APs can attack alone or with artillery during any friendly Barrage Phase.
B. More than one AP can affect a single barrage.
C. Each AP provides five barrage points.
14.5 Reserves
A. Reserves can be used to allow flexibility to both armies. Units, stacks of units, or entire formations can be placed into Reserve by placing a RM on the unit (or stack, or HQ) at the beginning of the friendly Movement and Reinforcement Phases.
B. While in Reserve, units cannot move or overrun during the Movement and Reinforcement Phases, nor can they attack in the regular Combat Phase.
C. They can however use their full MA, with overruns, during a friendly Exploitation or Reaction Phase. Once a unit in Reserve has been committed in this way, remove its RM.
D. EZOCs do not restrict the access of these units to these additional phases, as would be the case with a non-Reserve exploitation-capable unit in an EZOC.
E. Exploitation-capable units get their normal access to the Exploitation Phase, but do not get a free pass to the Reaction Phases unless in Reserve.
F. Reserve units defend at half strength and suffer a +2 column shift on the Barrage Table. They do not lose their Reserve Status automatically if attacked or barraged (regardless of the result). However, at the instant of combat or barrage, units can voluntarily give up their Reserve Status and defend normally (or avoid the shifts).
G. There is no limit on the number of units that can be placed into Reserve.
14.6 Rommel
A. The Rommel Leader counter does not count for stacking, has no combat value, cannot be taken as a step loss (he never dies), is never DG, and never OOS.
B. Rommel affects all Axis units in the same manner.
14.6.1 Movement
A. Rommel can move in one of two ways in any Axis Movement Phase.
- He can be carried by any unit he begins the phase stacked with.
- He can move freely to any hex on the map containing an Axis unit. If he moves this way ignore all terrain effects and enemy units; he buzzes from his initial hex to the chosen ending hex. If this movement type is chosen, he cannot move with any units nor can he apply his combat shift to Overrun Combats, though he affects regular combats normally.
B. Regardless of the method chosen, Rommel can only move once per phase.
14.6.2 Combat Effect (printed as 14.3.2)
A. If Rommel is in a hex involved in combat, he shifts the combat odds one column in the Axis side's favor (right in attacks, left in defenses). This can be done in regular as well as Overrun combats.
- In overrun combat (as the attacker) Rommel must begin the phase stacked with all the units attacking in the overrun and must move along with them during their movement.
- In regular attacks, Rommel need only be stacked with any unit participating in the combat.
B. Rommel may advance or retreat after combat with any unit he is stacked with.
C. Rommel has no effect on barrages.
14.6.3 Destruction of All Units in Rommel's Stack (printed as 14.3.3)
A. Rommel must always end a phase stacked with any other Axis unit.
B. If his stack is destroyed during combat, displace Rommel to any other Axis stack.
14.6.4 Exploitation and Reaction Effects (printed as 14.3.4)
A. Units beginning an Exploitation or Reaction Phase stacked with Rommel may automatically use that phase. They do not have to be exploitation-capable or in Reserve.
B. Rommel does not need to move with units he activates in this way and can use either of his movement forms to move during that same phase (affecting overruns as restricted above during the regular Movement Phase).
C. Rommel himself can always move in the Exploitation and Reaction Phases, regardless of his circumstances.
D. Units stacked with Rommel can only move during the Exploitation Phase if they are not in an EZOC at the beginning of the phase.
14.7 KG Hecker
A. KG Hecker is awaiting off-map for a potential amphibious landing east of Tobruk. On any turn, the Axis can announce the landing. Place Hecker in any coastal hex east of B50.10 (inclusive) as the first action in the Axis Movement Phase.
B. The unit cannot move in the turn it lands.
C. It can exist without supply for two turns before it must follow the normal rules. This applies to combat as well as trace supply concerns (during that time it is in Attack Supply).
D. After that, Hecker is subject to normal trace requirements as well as normal Attack Supply requirements.
E. If the Axis chooses to set KG Hecker up on the map (as opposed to the Special Reserve Box), none of the above applies and the unit is just another Axis unit. This decision is irreversible.
14.8 Desert Navigation (Optional)
In the featureless desert, navigation must be done using deduced reckoning (by compass and distance). The complex maneuvers wargamers take for granted are impossible to execute in the open desert with large formations without having the result of total chaos.
14.8.1 Straight Line Movement
A. When a unit begins movement (until it stops, or changes direction per 14.5.2), it must move in a straight line through one of the starting hex's hexsides.
B. The direction the unit was travelling the last phase it moved has no effect on the direction the player can choose to move it in a later phase, but it must move in a straight line until it either stops for the phase or changes direction per these rules.
14.8.2 Changing Direction
A unit can only change its initial heading one way during its movement per 14.8.3.
14.8.3 Landmarks
A. A moving units can free itself from the straight line requirements if it follows a terrain feature or enemy units. A terrain feature here is any item from the TEC printed on the map except for VP hexes.
- To use the enemy or a hexside feature, the moving unit must be adjacent to it.
- To use any other feature, the moving unit must be in the hex with the feature.
- Friendly units cannot be used for this purpose.
B. If the moving unit or stack is in the appropriate hex, it can reorient as desired and do so in every such hex it enters.
C. Once the unit or stack leaves such features behind, it must continue in straight line movement given the direction it left the last feature hex it was in.
14.8.4 Advance after Combat and Retreat Effects
These rules have no effect on advance after combat or retreats.
14.8.5 Directions for Straight Line Movement
A. All six basic directions are available for straight line movement, but so too are those additional 6 "cross-grain" directions.
B. Units moving cross-grain can select either to start zig-zagging right or left first, provided the alternation between left and right is maintained.
15.0 Scenarios
15.1 General Scenario Information
15.1.1 Setup Information
A. When the notation 5 Inf Division (12 Rgt) is given, set up the 12th Regiment of the 5th Infantry Division (and no other 5th Infantry Division unit).
B. When there are several units listed for a parent, if there is no more than one unit for each type, the units are separated by commas. If any type has multiple units (such as infantry battalions), the types are separated by semicolons, and units of the same type are separated by commas, with the unit type before the units.
C. No unit can set up in Reserve. To enter Reserve, each side must wait for its first friendly Movement Phase.
15.1.2 Friendly Entry Hexes
A. Commonwealth: Hexes D and E and either Tobruk hex.
B. Axis: Hexes A, B, and C.
15.1.3 Abbreviations
| Abbr | Explanation |
|---|---|
| ASU | Armored Supply Units |
| Btry | Battery/Batteries |
| Comm | Commando |
| Cstl | Coastal |
| MF/MFH | Minefield/Minefield Hex |
| R | (subscript) Reduced |
| SU | Supply Units |
15.1.2 Victory Points (second "15.1.2" in the printed source)
15.1.2.1 Victory Point Hexes
There are 15 VP hexes on the map. The last side to move a unit through a VP hex controls it.
15.1.2.2 Emergency Reinforcements
VPs are expended to bring on emergency reinforcements and are subtracted from that side's total.
15.1.2.3 Determining the Winner
Total each side's VPs, subtract the Axis total from the Commonwealth total and compare to the following:
| VP Differential | Victory Level |
|---|---|
| ≥ 4 | CW Major |
| 2 to 3 | CW Minor |
| -1 to 1 | Draw |
| -2 to -3 | Axis Minor |
| ≤ -4 | Axis Major |
15.2 Turn 1 Special Rules
A. On Turn 1, the normal time scale has been changed to show the Axis attack's beginning and the Allied surprise.
B. Axis units move double their normal MA during the regular Axis Movement Phase. (There are no changes to any other Axis movement phases).
C. Even with the double move, Axis Artillery can still only change mode once.
D. Air points and the Allied player-turn are not affected by this rule.
15.3 The Fall of Bir Hacheim
This is a tiny scenario and a good solitaire workout. It is a rush to beat the clock for the Axis to take out the remainder of the Free French. Good Luck, it is a tough fight! The situation has been simplified somewhat to make for a quick scenario. For example the reinforcement of the attack by the 15th Pz and the effort of the 7th Motorized Bde to disrupt it have been omitted.
15.3.1 Special Rules
A. There is no reconstitution nor reinforcements, including emergency reinforcements.
B. The Free French are never in Attack Supply (and are out of trace supply as well) and may not receive support from APs.
C. The Free French may not move outside of the minefields surrounding Bir Hacheim.
D. Axis units are always in Attack Supply.
E. The Axis receives 2 APs per turn.
F. The scenario continues until the last Free French unit is destroyed (the length of time it takes determines the winner).
15.3.2 General Information
First Turn: Turn 10 Last Turn: When last Allied unit is destroyed. Maps: A only First Player: Axis First to Deploy: Allied
15.3.3 Commonwealth Forces
| Location | Units |
|---|---|
| Inside the minefield surrounding A17.04 | 1 FF Inf Bde (1 FF Bde HQ; 22 NA Arm Car Co; Inf Bns: 2 Leg, 3 Leg, 1 Mar, 2 Oub, 1 Pac; 2/1 Fld Arty Bn) (All Out of Supply) |
15.3.4 Axis Forces
| Location | Units |
|---|---|
| w/i 2 outside Bir Hacheim Minefield from A20.02 westward to A16.04 | Trieste Mtr Div (Trieste HQ; 8 Brs Arm Car Bn; 11 Med Arm Bn; Inf Bns: I/65, II/65, I/66, II/66; Wpn Bns: W/65, W/66; 52 Eng Bn; Arty Bns: I/21, II/21, III/21, IV/21, V/21, 131, 147), 20 It Corps (34 Eng Bn, 141 Arty Bn) |
| w/i 2 outside Bir Hacheim Minefield from A20.02 eastward to A16.04 | 90 Le Mtr Div (90 Le HQ; 580 Auf Recon Bn; PG Bns: I/288, II/288; Inf Bns: I/155, II/155; 900 Pio Bn), KG Hecker Comm Bn |
15.3.5 Victory
Game Ends on Turn:
| Game Ends on Turn | Victory Level |
|---|---|
| ≤ 14 | Much Better Performance |
| 15 | Better Performance |
| 16 | Historical Result |
| 17 | Slightly Worse Performance |
| 18+ | Worse Performance |
15.4 The Battles of the Cauldron and Knightsbridge
A. This scenario is the major armored action of the entire Battle of Gazala. It opens with the British Counter attack and is a simple swirling slugfest. Enjoy!
B. One simplification has been made: the 15th Pz Division has been removed from play. Historically, just after launching a counterattack to the southeastern edge of the play area, it was diverted south to assist the reduction of Bir Hacheim. Then it followed with Trieste and the 90 Le Division striking northeast from Bir Hacheim toward El Adem. To keep this scenario under control, this series of actions have been omitted.
15.4.1 Special Rules
A. There is no reconstitution nor reinforcements, including emergency reinforcements.
B. Determine AP availability normally.
C. The Allies receive two supply units and the Axis receives one supply unit on the play area edge each turn.
D. There is no Axis player-turn on Turn 10. The SOP resumes normally on Turn 11.
E. Use the victory conditions in 15.4.5.
15.4.2 General Information
First Turn: Turn 10 Last Turn: Turn 18 Maps: Both: area between Axx.15 to Bxx.20 to 43.xx to 27.xx (inclusive) First Player: Allied First to Deploy: Axis
15.4.3 Axis Forces
| Location | Units |
|---|---|
| w/i 2 of A36.08 | Brescia Inf Div (Brescia HQ; Inf Bns: I/19, II/19, III/19, I/20, II/20, III/20; Wpn Bns: W/19, W/20; Arty Bns: I/1 Cel, II/1 Cel, III/1 Cel, IV/1 Cel; V/1 Cel AT Bn; 27 Eng Bn) |
| w/i 1 of A32.14 | 10 It Corps (10 It Corps HQ; 10 Eng Bn; Inf Bns: 28/9 Brs, 30/9 Brs; 31 Assault Eng Bn; Arty Bns: I/16, II/16, III/16, IV/16), 4 x SU |
| w/i 2 of A31.07 | 20 It Corps (20 It Corps HQ), Pavia Inf Div (Pavia HQ; Inf Bns: I/27, II/27, III/27, I/28, II/28, III/28; Wpn Bns: W/27, W/28; Arty Bns: I/26, II/26; 17 Eng Bn) |
| w/i 5 of A34.04 | Rommel, PzGp Army HQ, KStA Recon KG; Ariete Arm Div (Ariete HQ; 3 Nizz Arm Car Bn; Inf Bns: 8 Med, 9 Med, 10 Med Arm Bn, 3/8 Brs, 5/8 Brs, 12/8 Brs; 552 AG Bn, 32 Assault Eng Bn, AT Bns: 5, 501; Arty Bns: II/24, I/132, II/132, III/132); DAK Corps HQ, 1/1/18, 2/1/18, 3/1/18, 1/1/33, 2/1/33, 3/1/33 AA Btry; 21 Pz Div (21 Pz HQ, 3 Auf Recon Bn, I/5, II/5 Pz Bn, II/104, III/104 PG Bn, W/104 Wpn Bn, 200 Pio Assault Eng Bn, 39 PJ AT Bn, I/155, II/155, III/155 Arty Bn); 2 x SU, 2 x ASU |
15.4.4 Commonwealth Forces
| Location | Units |
|---|---|
| A40.06 | 69 Inf Bde (6 GH Inf Bn) |
| A41.05 | 69 Inf Bde (7 GH Inf Bn) with either 50 Inf Div (50 Div HQ, 7 Med Arty Bn), 3 x SU |
| w/i 2 of B35.30 | 5 Ind Div (5 Ind Div HQ), 201 Gd Bde (Inf Bns: 3 Cldstrm, 2 SG, 9 Rifle; 2 RHA Arty Bn), 7 x SU |
| w/i 1 of B32.29 | 22 Arm Bde (Arm Bns: 2 Hus, 3 Yeo; 50 Rec Inf Bn; 107 RHA Arty Bn), 9 Ind Inf Bde (Inf Bns: 3/9 Jat, 2 Yorks, 3/12 Frt; 4 Fld Arty Bn) |
| w/i 1 of B39.28 | 2 Arm Bde (Arm Bns: 9 Lncr, 10 Hus, Queens; 1 Rifle Inf Bn, AA Bn, 11 RHA Arty Bn) |
| w/i 1 of B39.33 | 21 Ind Inf Bde (Inf Bns: 1 DCLI, 2/8 Gurk, 4/13 Frt; 157 Fld Arty Bn) |
| w/i 1 of B33.32 | 10 Ind Inf Bde (Inf Bns: 2 HLI, 2/4 Gurk, 4/10 BL 2 Cam-a, 2 Cam-b; 260 AT Bn; 28 Fld Arty Bn) |
| w/i 1 of B31.32 | 7 Arm Div (7 Arm Div HQ; AT Bns: 15, 102; KDG; 4 SA Arm Car Bn), 1 Arm Div (1 Arm Div HQ, Royals Arm Car Bn, C/12 Lcr Arm Car Co), 6 SA Arm Car Bn, 7 x SU |
| B35.21 | 4 Arm Bde (5 RTR Arm Bn, 1 KRRC Inf Bn) |
15.4.5 Victory
Total the Attack Strength (ignore Barrage Strength and HQ Range) of all enemy units each side has killed (ignore step losses of units still on the map). The side with the larger total wins.
15.5 The Full Campaign
This scenario is the whole Battle of Gazala. It begins with the special 26/27 May turn and ends after the collapse of the CW line (just before the fall of Tobruk).
15.5.1 General Information
First Turn: Turn 1 Last Turn: Turn 24 Maps: All First Player: Axis First To Deploy: Commonwealth
15.5.2 Commonwealth Forces
15.5.2.1 Initial Deployment
| Location | Units |
|---|---|
| w/i 3 of A55.15 | 3 SA Inf Bde (Inf Bns: 1 LtH, 1 Rand, 1 RDLI), 1 x SU |
| w/i 3 of A53.14 | 2 SA Inf Bde (Inf Bns: 1 CH, 1 NR, 1/2 Fld), 1 x SU |
| w/i 3 of A49.16 | 1 SA Inf Bde (Inf Bns: 1 Duke, 1 RNC, 1 TS), 1 x SU |
| A53.12 and/or with any of the above | 1 SA Inf Div (1 SA Div HQ; 3 SA Arm Car Bn; 2 Botha Inf Bn; Pres Steyn MG Bn; 1 SA AA Bn; 1 SA AT Bn; Arty Bns: 4 Fld, 5 Fld, 7 Fld) |
| w/i 1 of A48.08 | 1 SA Inf Div [7 RTR, 42 RTR Arm Bn (Brit)], 50 Inf Div (4 RTR Arm Bn) |
| w/i 1 of A45.13 | 151 Inf Bde (Inf Bns: 6 DLI, 8 DLI, 9 DLI; 74 Fld Arty Bn), 1 x SU |
| w/i 1 of A44.10 | 69 Inf Bde (Inf Bns: 7 GH, 5 Yorks; 124 Fld Arty Bn), 1 x SU |
| A42.07 | 69 Inf Bde (6 GH Inf Bn) |
| w/i 3 of A33.06 | 150 Inf Bde (Inf Bns: 4 GH, 5 GH, 4 Yorks; 72 Fld Arty Bn), 1 x SU |
| w/i 5 of any British MFH between A29.06 to A46.14 (inclusive) |
15.5.2.2 Emergency Reinforcement Group
| Units |
|---|
| 8 Army HQ; 10 Ind Div HQ; 1 RNF MG Bn; Dencol Comm Bn; 13 DCO Arm Car Bn; 5 Ind Inf Bde (Inf Bns: 3/10 Bal, 1/4 Esx, 4/6 Raj); 10 Ind Inf Bde (Inf Bns: 2 HLI, 2/4 Gurk, 4/10 BL; 260 AT Bn; 28 Fld Arty Bn); 4 Ind Div HQ; 1 Arm Div (B/12 Lncr Arm Car Co); LRDG Comm Bn; 2 RAF Arm Car Co |
15.5.2.3 Emergency Reinforcement Group 2
4 Ind Div (Yugo Inf Bn, 57 AT Bn); 11 Ind Inf Bde (Inf Bns: 2/5 Mah, 2/7 Gurk; 25 Fld Arty Bn); 2 FF Inf Bde (Arm Car Cos: 21 NA, 23 NA; Inf Bns: 1 Leg, 3 Leg, 1 Mar, 4 Mar)
15.5.2.4 Reinforcements
| Turn | Area | Units |
|---|---|---|
| 5 | D | 21 Ind Inf Bde (Inf Bns: 1 DCLI, 2/8 Gurk, 4/13 Frt; 157 Fld Arty Bn) |
| 12 | D | 20 Ind Inf Bde (Inf Bns: 1/6 Raj, 3/18 Gurk, 1 SW; 97 Fld Arty Bn) |
| 13 | D | 25 Ind Inf Bde (Inf Bns: 1 Kings, 3/5 Mah, 2/11 Sikh; X Ind AT Bn) |
15.5.3 Axis Forces
15.5.3.1 Initial Deployment
| Location | Units |
|---|---|
| w/i 3 of A61.24 | 15 Shu Bde (Inf Bns: 15 Shu HQ, I/200, II/200, I/361, II/361; W/361 Wpn Bn, 361 Arty Bn) |
| w/i 3 of A53.23 | Sabratha Inf Div (Sabratha HQ, I/85, II/85, I/86, II/86 Inf Bn, W/85, W/86 Wpn Bn, I/3 Cel, II/3 Cel, III/3 Cel Arty Bn) |
| w/i 3 of A49.23 | Trento Inf Div (Trento HQ, I/61, II/61, III/61, I/62, II/62, III/62 Inf Bn, W/61, W/62 Wpn Bn, I/46, II/46, III/46, IV/46 Arty Bn, 51 Eng Bn) |
| A53.24 and/or with Sabratha or Trento Divs | 21 It Corps (21 It Corps HQ; 56 Eng Bn; Inf Bns: 10/7 Brs, 11/7 Brs) |
| w/i 3 of A42.23 | Brescia Inf Div (Brescia HQ; Inf Bns: I/19, II/19, III/19, I/20, II/20, III/20; Wpn Bns: W/19, W/20; Arty Bns: I/1 Cel, II/1 Cel, III/1 Cel, IV/1 Cel; V/1 Cel AT Bn; 27 Eng Bn) |
| w/i 3 of A36.17 | Pavia Inf Div (Pavia HQ; Inf Bns: I/27, II/27, III/27, I/28, II/28, III/28; Wpn Bns: W/27, W/28; Arty Bns: I/26, II/26; 17 Eng Bn) |
| A43.24 and/or with Brescia or Pavia Divs | 10 It Corps (10 It Corps HQ; 10 Eng Bn; Inf Bns: 28/9 Brs, 30/9 Brs; 31 Assault Eng Bn; Arty Bns: I/16, II/16, III/16, IV/16) |
| w/i 5 of A31.15 | Trieste Mtr Div (Trieste HQ; 8 Brs Arm Car Bn; 11 Med Arm Bn; Inf Bns: I/65, II/65, I/66, II/66; Wpn Bns: W/65, W/66; 52 Eng Bn; Arty Bns: I/21, II/21, III/21, IV/21, V/21, 131, 147) |
15.5.3.2 Emergency Reserve Reinforcements
556 Kor Bn; Lehr Para Bn; Mtn Arty Btrys: 362, 363, 364; Cstl Arty Btrys: 4/772, 4/149; Cstl Arty Bns: 523, 528, 529, 532; 902 Hvy Arty Btry; Hvy Arty Bns: II/115, 408; 33 It Arty Bn; 52 It Arty Btry
15.5.3.3 In Special Reserve
(or with any of the above): KG Hecker Comm Bn
15.5.3.4 Reinforcements
| Turn | Area | Units |
|---|---|---|
| 13 | B or C | 6 AT Bn, I/40 Inf Bn |
| 24 | A, B, or C | 51 Med Arm Bn, 21/12 Brs, 23/12 Brs, 36/12 Brs Inf Bn, Ind Arty Bat |
15.6 The Main Event: 5 June Campaign Start
This scenario allows players to begin with the historically developed situation. Both the battles of Bir Hacheim and the Cauldron are set up to begin, but the opening end runs run its course. Players may find this a convenient place to begin the campaign — nothing critical has been decided, but many opening moves have already been done for them.
15.6.1 General Information
First Turn: Turn 10 Last Turn: Turn 24 Maps in Play: All First Player: Allies First to Deploy: Axis
15.6.2 Special Rule
There is no Axis player-turn on Turn 10. The SOP resumes normally on Turn 11.
15.6.3 Axis Forces
15.6.3.1 Initial Deployment
| Location | Units |
|---|---|
| w/i 3 of A62.17 | 15 Shu Bde (15 Shu HQ; Inf Bns: I/200, II/200, I/361, II/361; W/361 Wpn Bn; 361 Arty Bn), 1 x SU |
| w/i 2 of A53.18 | Sabratha Inf Div (Sabratha HQ; Inf Bns: I/85, II/85, I/86, II/86; Wpn Bns: W/85, W/86; Arty Bns: I/3 Cel, II/3 Cel, III/3 Cel) |
| w/i 3 of A50.20 | Trento Inf Div (Trento HQ, I/61, II/61, III/61, I/62, II/62, III/62 Inf Bn, W/61, W/62 Wpn Bn, I/46, II/46, III/46, IV/46 Arty Bn, 51 Eng Bn) |
| w/i 2 of A53.24 | 21 It Corps (21 It Corps HQ, 56 Eng Bn, Inf Bns: 10/7 Brs, 11/7 Brs), 2 x SU |
| w/i 2 of A36.08 | Brescia Inf Div (Brescia HQ; Inf Bns: I/19, II/19, III/19, I/20, II/20, III/20; Wpn Bns: W/19, W/20; Arty Bns: I/1 Cel, II/1 Cel, III/1 Cel, IV/1 Cel; V/1 Cel AT Bn; 27 Eng Bn) |
| w/i 1 of A32.14 | 10 It Corps (10 It Corps HQ; 10 Eng Bn; Inf Bns: 28/9 Brs, 30/9 Brs; 31 Assault Eng Bn; Arty Bns: I/16, II/16, III/16, IV/16), 4 SU |
| w/i 2 of A31.07 | 20 It Corps (20 It Corps HQ, 34 Eng Bn, 141 Arty Bn), Pavia Inf Div (Pavia HQ; Inf Bns: I/27, II/27, III/27, I/28, II/28, III/28; Wpn Bns: W/27, W/28; Arty Bns: I/26, II/26; 17 Eng Bn) |
| w/i 2 outside Bir Hacheim MF from A20.02 westward to A16.04 | Trieste Mtr Div (Trieste HQ; 8 Brs Arm Car Bn; 11 Med Arm Bn; Inf Bns: I/65, II/65, I/66, II/66; Wpn Bns: W/65, W/66; 52 Eng Bn; Arty Bns: I/21, II/21, III/21, IV/21, V/21, 131, 147), 2 x SU |
15.6.3.2 Emergency Reserve Reinforcements
556 Kor Bn, Lehr Para Bn; Mtn Arty Btrys: 362, 363, 364; Cstl Arty Btrys: 4/772, 4/149; Cstl Arty Bns 523, 528, 529, 532; 902 Hvy Arty Btry; Arty Bns II/115, 408 Hvy; 33 It Arty Bn; 52 It Arty Btry
15.6.3.3 Dead Units Available for Reconstitution
Ariete Arm Div (551 AG Bn), 15 Pz Div (II/8 Pz Bn, II/115 PG Bn)
15.6.3.4 Reinforcements
| Turn | Area | Units |
|---|---|---|
| 13 | B or C | 6 AT Bn, I/40 Inf Bn |
| 24 | A, B, or C | 51 Med Arm Bn; Inf Bns: 21/12 Brs, 23/12 Brs, 36/12 Brs; Ind Arty Btry |
15.6.4 Commonwealth Forces
15.6.4.1 Initial Deployment
| Location | Units |
|---|---|
| w/i 3 of A55.15 | 3 SA Inf Bde (Inf Bns: 1 LtH, 1 Rand, 1 RDLI), 1 x SU |
| w/i 3 of A53.14 | 2 SA Inf Bde (Inf Bns: 1 CH, 1 NR, 1/2 Fld), 1 x SU |
| w/i 3 of A49.16 | 1 SA Inf Bde (Inf Bns: 1 Duke, 1 RNC, 1 TS), 1 x SU |
| A53.12 and/or with any of the above | 1 SA Inf Div (1 SA Div HQ; 3 SA Arm Car Bn; 2 Botha Inf Bn; Pres Steyn MG Bn; 1 SA AA Bn; 1 SA AT Bn; Arty Bns: 4 Fld, 5 Fld, 7 Fld) |
| w/i 1 of A42.05 | 1 SA Inf Div [Arm Bns: 7 RTR, 42 RTR (Brit)], 50 Inf Div (4 RTR Arm Bn) |
| w/i 1 of A45.13 | 151 Inf Bde (Inf Bns: 6 DLI, 8 DLI, 9 DLI; 74 Fld Arty Bn), 1 x SU |
| w/i 1 of A44.10 | 69 Inf Bde (5 Yorks Inf Bn, 124 Fld Arty Bn) |
| A40.06 | 69 Inf Bde (6 GH Inf Bn) |
| A41.05 | 69 Inf Bde (7 GH Inf Bn) with either of the above British Bdes, 50 Inf Div (50 Div HQ, 7 Med Arty Bn), 3 x SU |
| A54.02 |
15.6.4.2 Emergency Reinforcement Group 1
The 10 Ind Bde units have been released for a cost of 1 VP.
| Units |
|---|
| 8 Army HQ; 10 Ind Div HQ; 1 RNF MG Bn; Dencol Comm Bn; 13 DCO Arm Car Bn; 5 Ind Inf Bde (Inf Bns: 3/10 Bal, 1/4 Esx, 4/6 Raj); 4 Ind Div HQ; 1 Arm Div (B/12 Lncr Arm Car Co); LRDG Comm Bn; 2 RAF Arm Car Co |
15.6.4.3 Emergency Reinforcement Group 2
4 Ind Div (Yugo Inf Bn, 57 AT Bn); 11 Ind Inf Bde (Inf Bns: 2/5 Mah, 2/7 Gurk; 25 Fld Arty Bn); 2 FF Inf Bde (Arm Car Cos: 21 NA, 23 NA; Inf Bns: 1 Leg, 3 Leg, 1 Mar, 4 Mar)
15.6.4.4 Dead Units Available for Reconstitution
50 Inf Div (65 AT Bn, 44 RTR Arm Bn); 4 Arm Bde (Arm Bns: 3 RTR, 8 Hus); 22 Arm Bde (4 Yeo Arm Bn); 150 Inf Bde (Inf Bns: 5 GH, 4 GH, 4 Yorks); 3 Ind Bde (Inf Bns: 11 Alb, 18 Kings); 1 FF Bde (CAC AT Bn)
15.6.4.5 Reinforcements
| Turn | Area | Units |
|---|---|---|
| 12 | D | 20 Ind Inf Bde (Inf Bns: 1/6 Raj, 3/18 Gurk, 1 SW; 97 Fld Arty Bn) |
| 13 | D | 25 Ind Inf Bde (Inf Bns: 1 Kings, 3/5 Mah, 2/11 Sikh; X Ind AT Bn) |
15.7 The British Collapse: 15 June 42
A. This scenario begins just after the 8th Army ordered the abandonment of the Gazala line. The 1 SA Division has left its works and is retreating along the Cstl road toward Bardia (no, it is not to stop to protect Tobruk). The 50th Inf Division has broken out overland and must circle the Bir Hacheim position to the south on its way to Bardia.
B. Here the players are set at cross purposes: The Axis wins by taking out Tobruk, the Allies win by withdrawing as much as possible. Historically, the withdrawal was accomplished and the fall of Tobruk occurred just after the end of the scenario with a net result of an Allied Win.
15.7.1 General Information
First Turn: Turn 20 Last Turn: Turn 24 Maps: All First Player: Axis First to Deploy: Allies
15.7.2 Special Rules
A. There is no reconstitution in this scenario. Thus, neither side has any dead units available for reconstitution.
B. Neither side has any emergency reserve reinforcements nor any regular reinforcements. So what both sides have at start is all they get.
C. Use the victory conditions in 15.7.5.
15.7.3 Commonwealth Forces
| Location | Units |
|---|---|
| w/i 2 of A27.12 | 50 Inf Div (50 Inf Div HQ, 7 Med Arty Co), 151 Inf Bde (Inf Bns: 6 DLI (R), 8 DLI (R), 9 DLI (R); 74 Fld Arty Bn), 69 Inf Bde (Inf Bns: 5 Yorks (R), 6 GH (R), 7 GH (R); 124 Fld Arty Bn), 1 x SU |
| w/i 1 of A56.05 | 1 SA Div (Pres Steyn MG Bn, 2 Botha Inf Bn), 3 SA Bde (Inf Bns: 1 LtH, 1 Rand, 1 RDLI) |
| w/i 2 of A52.04 | 1 SA Bde (Inf Bns: 1 TS, 1 Duke, 1 RNC), 2 SA Bde (Inf Bns: 1 CH, 1 NR, 1/2 Fld) |
| w/i 2 of B55.34 | 1 SA Div (4 Fld, 5 Fld, 7 Fld Arty Bn) |
| B52.35 | 1 SA Div (1 SA Div HQ, 1 SA AA Bn) |
| B49.35 | 1 SA Div (3 SA Arm Car Bn) |
| B49.33 | 1 SA Div (1 SA AT Bn) |
| B52.27 | Seacol-b Arm Recon Bn |
| B51.25 | Seacol-a Arm Recon Bn |
| w/i 1 of B50.26 | 22 Arm Bde (Inf Bns: 3 Yeo (R), 2 Hus Arm Bn (R), 50 Rec (R)) |
15.7.4 Axis Forces
| Location | Units |
|---|---|
| w/i 2 of A59.14 | 15 Shu Bde (15 Shu Bde HQ; Inf Bns: I/200, II/200; PG Bns: I/361, II/361; III/361 Wpn Bn, 361 Arty Bn), 1 x SU |
| w/i 3 of A53.16 | Sabratha Inf Div (Sabratha Inf Div HQ; Inf Bns: I/85, II/85, I/86, II/86; Wpn Bns: W/85, W/86; Arty Bns: I/3 Cel, II/3 Cel, III/3 Cel) |
| w/i 5 of A52.18 | 21 It Corps (21 It Corps HQ; Inf Bns: 10/7 Brs, 11/7 Brs; 56 Eng Bn), 3 x SU |
| w/i 3 of A50.17 | Trento Inf Div (Trento Div HQ; Inf Bns: I/61, II/61, III/61, I/62, II/62, III/62; Wpn Bns: W/61, W/62; 51 Eng Bn, Arty Bns: I/46, II/46, III/46, IV/46) |
| w/i 4 of A44.18 | Brescia Inf Div (Brescia Div HQ; Inf Bns: I/19, II/19, III/19, I/20, II/20, III/20; Wpn Bns: W/19, W/20; V/1 Cel AT Bn; 27 Engineer Bn; Arty Bns: I/1 Cel, II/1 Cel, III/1 Cel, IV/1 Cel) |
| w/i 2 of A34.15 | 10 It Corps (10 It Corps HQ; Inf Bns: 28/9 Brs, 30/9 Brs; 10 Eng Bn; 31 Assault Eng Bn; Arty Bns: I/16, II/16, III/16, IV/16), 4 x SU |
| w/i 5 of A34.07 | Pavia Inf Div (Pavia Div HQ; Inf Bns: I/27, II/27, III/27, I/28, II/28, III/28; Wpn Bns: W/27, W/28; 17 Eng Bns; Arty Bns: I/26, II/26), 2 x SU |
| A36.03 | 20 It Corps (20 It Corps HQ, 34 Eng Bn, 141 Arty Bn) |
15.7.5 Victory
A. The Axis wins if it controls both hexes of Tobruk.
B. The CW wins if it exits 35 or more units (any type or strength).
C. If both players fulfill their conditions or if neither does.
16.0 Counter Manifest and Order of Battle
16.1 Commonwealth Forces
16.1.1 Independent British Units
8 Arm HQ; 30 Corps HQ; 13 Corps HQ; Tobruk Fortress HQ; 1 RAF Arm Car Co; 2 RAF Arm Car Co; 13 DCO Arm Car Bn; 1 RNF MG Bn; Dencol Commando Bn; LRDG Commando Bn; X Coastal Arty Battery; 202 Coastal Arty Battery; 206 Coastal Arty Battery
16.1.2 Independent South Africans
CW Keep Inf Co; Seacol-a Arm Recon Bn; Seacol-b Arm Recon Bn; Stopcol Arm Recon Bn; 6 SA Arm Car Bn
16.1.3 1st South African Division
1 SA Inf Div HQ; 3 SA Arm Car Bn; Pres Steyn MG Bn; 2 Botha Inf Bn; 4 Fld Arty Bn; 5 Fld Arty Bn; 7 Fld Arty Bn; 1 SA AT Bn; 7 RTR Arm Bn (Brit); 42 RTR Arm Bn (Brit); 1 SA AA Bn
16.1.3.1 1st SA Inf Bde
1 TS Inf Bn; 1 Duke Inf Bn; 1 RNC Inf Bn
16.1.3.2 2nd SA Inf Bde
1 NR Inf Bn; 1 CH Inf Bn; 1/2 Fld Inf Bn
16.1.3.3 3rd SA Inf Bde
1 Rand Inf Bn; 1 LtH Inf Bn; 1 RDLI Inf Bn
16.1.4 2nd South African Division
2 SA Inf Div HQ; 7 SA Arm Car Bn; DMid MG Bn; 2 SA Arty Battery; 3 SA Arty Battery; 38 RTR Arm Bn (Dummy); 2 SA AT Bn; 67 Med Arty Bn (Brit); 68 Med Arty Bn (Brit); 2 SA AA Bn
16.1.4.1 4th SA Inf Bde
Kaff R Inf Bn; Umvoti Inf Bn; 2 RDLI Inf Bn
16.1.4.2 6th SA Inf Bde
1 Pol Inf Bn; 2 Pol Inf Bn; 2 TS Inf Bn
16.1.4.3 9th Ind Bde
2 Yorks Inf Bn; 3/9 Jat Inf Bn; 3/12 Frt Inf Bn; 4 Fld Arty Bn
16.1.5 50th British Inf Division
50 Inf Div HQ; 2 Ches MG Bn; 44 RTR Arm Bn; B/42 RTR Arm Co; 7 Med Arty Battery; 4 RTR Arm Bn; 65 AT Bn
16.1.5.1 69th Inf Bde
5 Yorks Inf Bn; 6 GH Inf Bn; 7 GH Inf Bn; 124 Fld Arty Bn
16.1.5.2 150th Inf Bde
4 Yorks Inf Bn; 4 GH Inf Bn; 5 GH Inf Bn; 72 Arty Bn
16.1.5.3 151th Inf Bde (as printed)
6 DLI Inf Bn; 8 DLI Inf Bn; 9 DLI Inf Bn; 74 Fld Arty Bn
16.1.6 1st British Arm Division
1 Arm Div HQ; C/12 Lcr Arm Car Co; B/12 Lcr Arm Car Co; Royals Arm Car Bn
16.1.6.1 2nd Arm Bde
Queens Arm Bn; 9 Lncr Arm Bn; 10 Hus Arm Bn; 1 Rifle Inf Bn; AA Bn; 11 RHA Arty Bn
16.1.6.2 22nd Arm Bde
2 Hus Arm Bn; 3 Yeo Arm Bde; 4 Yeo Arm Bde; 50 Rec Inf Bn; 107 RHA Arty Bn
16.1.6.3 201st Gd Bde
2 SG Inf Bn; 9 Rifle Inf Bn; 3 Cldstrm Inf Bn; 2 RHA Arty Bn
16.1.7 7th British Arm Division
7 Arm Div HQ; KDG Arm Car Bn; 4 SA Arm Car Bn; 102 AT Bn; 15 AA Bn
16.1.7.1 3rd Ind Inf Bde
2 Lncr Inf Bn; 18 Kings Inf Bn; 11 Alb Inf Bn; 2 Fld Arty Bn
16.1.7.2 4th Arm Bde
3 RTR Arm Bn; 8 Hus Arm Bn; 1 RHA Arty Bn; 5 RTR Arm Bn; 1 KRRC Inf Bn
16.1.7.3 7th Motorized Inf Bde
2 KRRC Inf Bn; 9 KRRC Inf Bn; 2 Rifle Inf Bn; 4 RHA Arty Bn
16.1.7.4 1st Free French Bde
1 FF Bde HQ; 2 Leg Inf Bn; 3 Leg Inf Bn; 1 Pac Inf Bn; 2 Oub Inf Bn; 1 Mar Inf Bn; 22 NA Arm Car Co; 2/1 Fld Arty Bn; BFM AA Bn; 1/1 Fld Arty Bn; CAC AT Bn
16.1.8 5th Indian Inf Division
5 Ind Div HQ
16.1.8.1 10th Ind Bde
2 HLI Inf Bn; 2/4 Gurk Inf Bn; 4/10 BL Inf Bn; 2 Cam-a Inf Bn; 2 Cam-b Inf Bn; 28 Fld Arty Bn; 260 AT Bn
16.1.8.2 29th Ind Bde
1 Wor Inf Bn; 1/5 Mah Inf Bn; 3/2 Pun Inf Bn; 3 Fld Arty Bn
16.1.9 4th Indian Inf Division
5 Ind Div HQ; Yugo Inf Bn; 57 AA Bn
16.1.9.1 5th Ind Bde
1/4 Esx Inf Bn; 3/10 Bal Inf Bn; 4/6 Raj Inf Bn
16.1.9.2 11th Ind Bde
2/5 Mah Inf Bn; 2/7 Gurk Inf Bn; 25 Fld Arty Bn
16.1.9.3 20th Ind Bde
1 SW Inf Bn; 1/6 Raj Inf Bn; 3/18 Gar Inf Bn; 97 Fld Arty Bn
16.1.10 10th Indian Inf Division
10 Ind Div HQ
16.1.10.1 2nd Free French Bde
1 Leg Inf Bn; 3 Mar Inf Bn; 4 Mar Inf Bn; 21 NA Arm Car Co; 23 NA Arm Car Co
16.1.10.2 21st Ind Bde
1 DCLI Inf Bn; 2/8 Gurk Inf Bn; 4/13 Frnt Inf Bn; 157 Fld Arty Bn
16.1.10.3 25th Ind Bde
1 Kings Inf Bn; 3/5 Mah Inf Bn; 2/11 Sikh Inf Bn; X Ind AT Bn
16.2 Axis Forces
16.2.1 Independent German Units
Rommel; PzGrp Army HQ; KStA Arm Recon KG; KG Hecker Commando Bn; 902 Hvy Arty Battery; 408 Hvy Arty Bn; II/115 Arty Bn; Lehr Para Inf Bn; 556 Kor Bn; 523 Coastal Arty Bn; 528 Coastal Arty Bn; 529 Coastal Arty Bn; 532 Coastal Arty Bn; 4/149 Coastal Arty Battery; 4/772 Coastal Arty Battery; 362 Mountain Arty Battery; 363 Mountain Arty Battery; 364 Mountain Arty Battery; 1/1/18 AA Battery; 2/1/18 AA Battery; 3/1/18 AA Battery; 1/1/33 AA Battery; 2/1/33 AA Battery; 3/1/33 AA Battery
16.2.2 Independent Italian Units
33 Arty Bn; 52 Arty Battery; 6 AT Bn; I/40 Inf Bn; 21/12 Brs Inf Bn; 23/12 Brs Inf Bn; 36/12 Brs Inf Bn; 51 Med Arm Bn; Ind Arty Battery
16.2.3 10th Italian Corps
10 It Corps HQ; 28/9 Brs Inf Bn; 30/9 Brs Inf Bn; I/16 Arty Bn; II/16 Arty Bn; III/16 Arty Bn; IV/16 Arty Bn; 31 Assault Engineer Bn; 10 Engineer Bn
16.2.3.1 Brescia Inf Division
Brescia Inf Div HQ; I/19 Inf Bn; II/19 Inf Bn; III/19 Inf Bn; W/19 Wpns Bn; I/20 Inf Bn; II/20 Inf Bn; III/20 Inf Bn; W/20 Wpns Bn; I/1 Cel Arty Bn; II/1 Cel Arty Bn; III/1 Cel Arty Bn; IV/1 Cel Arty Bn; V/1 Cel AT Bn; 27 Engineer Bn
16.2.3.2 Pavia Inf Division
Pavia Inf Div HQ; I/27 Inf Bn; II/27 Inf Bn; III/27 Inf Bn; W/27 Wpns Bn; I/28 Inf Bn; II/28 Inf Bn; III/28 Inf Bn; W/28 Wpns Bn; I/26 Arty Bn; II/26 Arty Bn
16.2.4 21st Italian Corps
21 It Corps HQ; 10/7 Brs Inf Bn; 11/7 Brs Inf Bn; 56 Engineer Bn
16.2.4.1 Trento Inf Division
Trento Inf Div HQ; I/61 Inf Bn; II/61 Inf Bn; III/61 Inf Bn; W/61 Wpns Bn; I/62 Inf Bn; II/62 Inf Bn; III/62 Inf Bn; W/62 Wpns Bn; I/46 Arty Bn; II/46 Arty Bn; III/46 Arty Bn; IV/46 Arty Bn; 51 Engineer Bn
16.2.4.2 Sabratha Inf Division
Sbrtha Inf Div HQ; I/85 Inf Bn; II/85 Inf Bn; W/85 Wpns Bn; I/86 Inf Bn; II/86 Inf Bn; W/86 Wpns Bn; I/3 Cel Arty Bn; II/3 Cel Arty Bn; III/3 Cel Arty Bn
16.2.4.3 15th Schützen Bde
15 Shu Bde HQ; I/200 Inf Bn; II/200 Inf Bn; I/361 Inf Bn; II/361 Inf Bn; W/361 Wpns Bn; 361 Arty Bn
16.2.5 20th Italian Corps
20 It Corps HQ; 141 Arty Bn; 34 Engineer Bn
16.2.5.1 Ariete Arm Division
Ariete Arm Div HQ; 3 Nizz Arm Car Bn; 8 Med Arm Bn; 9 Med Arm Bn; 10 Med Arm Bn; 3/8 Brs Inf Bn; 5/8 Brs Inf Bn; 12/8 Brs Inf Bn; 4 Lanc Arm Bn; 551 AG Bn; 552 AG Bn; I/132 Arty Bn; II/132 Arty Bn; III/132 Arty Bn; 5 AT Bn; 501 AT Bn; II/24 Arty Bn; 32 Assault Engineer Bn
16.2.5.2 Trieste Motorized Inf Division
Trieste Inf Div HQ; 11 Med Arm Bn; 8 Brs Arm Car Bn; I/65 Inf Bn; II/65 Inf Bn; W/65 Wpns Bn; I/66 Inf Bn; II/66 Inf Bn; W/66 Wpns Bn; I/21 Arty Bn; II/21 Arty Bn; III/21 Arty Bn; IV/21 Arty Bn; V/21 Arty Battery; 131 Arty Bn; 147 Arty Bn; 52 Engineer Bn
16.2.6 Deutsches Afrika Korps
DAK Corps HQ
16.2.6.1 15th Pz Division
15 Pz Div HQ; 33 Auf Arm Recon Bn; I/8 Pz Bn; II/8 Pz Bn; I/115 PG Bn; II/115 PG Bn; III/115 PG Bn; W/115 Wpns Bn; 33 PJ AT Bn; 33 Pio Assault Engineer Bn; I/33 Arty Bn; II/33 Arty Bn; III/33 Arty Bn
16.2.6.2 21st Pz Division
21 Pz Div HQ; 3 Auf Arm Recon Bn; I/5 Pz Bn; II/5 Pz Bn; I/104 PG Bn; II/104 PG Bn; III/104 PG Bn; W/104 Wpns Bn; 39 PJ AT Bn; I/155 Arty Bn; II/155 Arty Bn; III/155 Arty Bn
16.2.6.3 90th Le Motorized Inf Division
90 Le Div HQ; 580 Auf Arm Recon Bn; I/288 PG Bn; II/288 PG Bn; I/155 Inf Bn; II/155 Inf Bn; 900 Pio Assault Engineer Bn
17.0 Gazala Designer's Notes
Gazala is the second (and last) game in which I have endeavored to make use of the vast amount of information generated during the design of DAK to make straightforward SCS titles. (The first being Crusader.) The effort here was to make a second use of the research materials obtained at no small expense. My second objective was to make some of that data available to those who might not have the interest in diving in head first into a game as large as DAK. I hope you enjoy the results. The campaign in North Africa only generated a few major battles (as opposed to extended campaigns). The primary ones being Crusader, Gazala, and the three Alamein battles. Of these, only Crusader was a full-bore open field battle. Gazala was affected to a large extent by vast mine gardens, and certainly this only became a larger feature in the later Alamein battles. Mines add their own "feel" to a large battle (something you will see here) and the narrow terrain layout of the Alamein battlefields (especially when combined with mines!) led to an even more claustrophobic feel. For that reason, I chose Crusader and Gazala as the only battles worthy of this treatment.
Map research presented few problems, although I found numerous conflicting sources when it came to the layout of the minefields. Originally, I had a line of CW mines linking the Acroma Box with the coast. Not only did this only show up on a few source maps, but it had an amazing effect on play. The CW player used this second breakwater as part of a turtle strategy that was as effective as it was annoying. It soon became apparent that the importance of this line of mines was such that it didn't make any sense that it neither showed up on all the source maps, nor had a major effect on CW operations historically. Likewise, as a last minute change, the hole at A28.05 (which shows up very prominently on some maps) was deleted as errata. In this case, the CW used this hex to launch some unbelievably annoying raids into the Axis rear areas (an equal number of CW disasters resulted, so the tactic was a hit or miss), which caused both players to spend much more time and effort on this area than was historically reasonable. Lastly, some maps showed a east- west line of mines connecting strongpoints just north of the Sidra Ridge. This one was especially perplexing as it showed up on some reliable sources, but at the same time was crossed not once, but twice, by the entire DAK mobile group without so much as slowing down. I chose to omit this one.
Speaking of the minefields, a number of rules were tried to show their effects. Some of these ideas effectively turned them into three-hex deep features that marred the entire game. The situation you see here effectively models their effects of channeling attackers and forcing them to bunch up somewhat (A x ½ and Barrage Table Shift). Mines do there job by reducing the effectiveness of the attacker, not by increasing the strength of the defender (and to do both is just too much).
For the longest time, my playtesters and I struggled to make the Desert Navigation rules a standard part of the game. Numerous methods were tried and the results were mixed. Some seemed to work but were a pain to play, others just didn't seem to work at all. The "painful" ones were refined over and over in testing to make them more playable. In then end we had workable rules (the ones seen here as optional), but soon found that while they weren't all that difficult to play, they just didn't seem to add anything to the game to speak of. The situations where they actually affected the outcome of a movement were few and far between. At that point I made the whole section optional and redirected my testers into more useful work. I believe some of the more onerous rules may have actually been better (from a realistic standpoint), but nobody would want to play them more than once. In the end, I elected to punt.
The earliest versions of this game included such choices as Defense Posture and High Tempo Supply. (As a whole, the early versions of the game were much more complex and much testing went into reducing the dead weight of the game rules.) These choices, while reflecting real life matters, rapidly overwhelmed the players. (I got a few headaches myself trying to keep it straight.) Play time bogged down incredibly and players found their time being spent fighting the system rather than the enemy — not a good turn of events for any game. The distillation process continued without mercy until we got to the results you see here.
Crusader was used as a base for this game for obvious reasons, but I wanted to address the comments of some players of that game that it was too simple. The result was the overdone game I have just described. I think testing served its function of trimming fat from the game so that Gazala, while more complex than Crusader, hits that fine balance I was working toward. I hope you agree.
A number of players asked if Gazala would link to Crusader and, when told they wouldn't, expressed their disappointment with this. I'm not sure what these players are after. Both games are meant to be smaller and faster than the DAK alternative. Given the six months between the two battles and the interim campaign to the Marble Arch and back, I'm not sure if any physical linkage (so you can play both battles as part of a campaign) is really possible given the limitations of the SCS. And, if one wants a six map, 180-turn game covering that period, I would rather have players investing time in (and getting the rewards of depth from) DAK itself. Simply linking the map sets so that each battle would have "a bit" more maneuver room didn't seem worth it; the important area (and then some) of both battles were on the maps for each battle in turn. Finally, I had some scale differences I wanted to apply to Gazala (to bring out more detail) which made this impossible in the end anyway.
Gazala was one of the biggest design challenges I have ever faced and I have never devoted as much time to any other design of similar size. Many of the ideas I had coming into the project were destroyed along the way and fell under the treads as we advanced. The game was effectively redesigned a number of times and some testers (who only saw early versions) might not recognize the final game, but all will certainly see the evolutionary roots of the ideas in the final cut. Like no other project I've worked with before, this design exhibited "skittishness." What I mean by this is that each time I took it back into the shop for some (seemingly) minor correction, the resulting game played radically different. This tendency made it very difficult to determine any progression toward the desired goal. One of the things that made the game play like that (i.e. unpredictable) was the fact that until late in testing both sides got to roll two dice for Air Points each turn (still available as an option). Normally, this did not matter much, but every so often one side would get ten (or more) Air Points while the other got only two or so. These turns could dramatically alter the course of the battle (a bunch of low odds attacks shifted to max columns has a tendency of doing that). While this had the effect of "no two games are the same," it also made the Air Point roll critical to the game's outcome...much more so than I intended. The single die roll now standard makes this more subtle. While there will be the occasional turn with a 6 facing a 1, the odds of that are far less than the older 8 to 3 or worse possibilities. Such turns can still happen (though to a lesser degree), but they have become much more of a fluke, and multiple turns in a row of such events (as happened before) are very unlikely.
18.0 SCS Designer's Notes
This series was designed for two reasons. First, it was meant to offset our other series which, by an order of magnitude, are much more complicated than the SCS. Second, it was designed to be a basic – read FUN – game which can be played at times when the others seem like too much of a good thing. These games are made for the "break out the beer and pretzels, and here we go" type of evening. While none of our games are designed with the beginner as their raison d'être, the SCS was designed as something the beginner would be able to handle – as opposed to being devoured by.
I want to make the reasons behind a few things in this series known. First of all is our standard rounding rule. I have been forever pained by the "11 to 6? Oh, I'm so sorry, that's only a 1 to 1 attack." More importantly, watching players scrounge the map looking for a strength point or two to "make the odds break" is downright embarrassing. By making the "table break" happen at the ½ value, I hope to make players spend less time pre-calculating and more time just shooting from the hip. Its the shoot from the hip gun fight that is fun in wargaming, not the ravings of the accountant gone mad looking for each individual strength point. If your opponent starts to precalculate combats in this system (even after making it tougher on him), feel free to slap him silly! Sure, /she can start scrounging for enough points to make that last 0.5, but only if you let him/her dodge around the Fog of War rule!
These version 1.8 rules can be used directly with any of the games in the series. It reflects a continual process of refinement and correction which will make each of our series rules the best they can possibly be.
19.0 Credits
Omitted from this transcription: the credits section (Standard Combat Series and Gazala attribution) and the research/playtester acknowledgments in the designer's notes above are attribution, not rules.