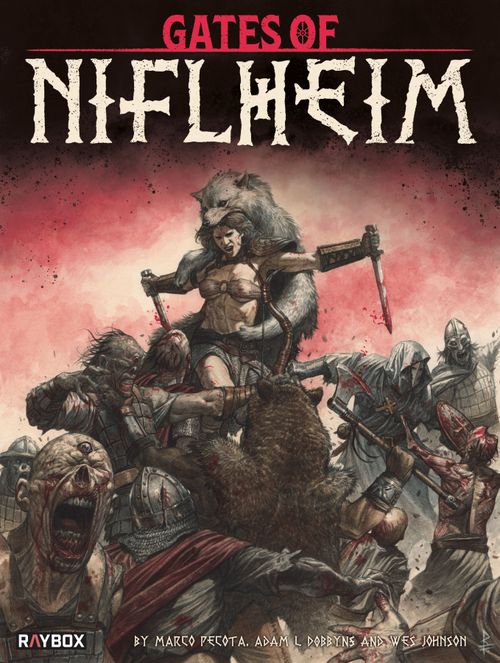
Gates of Niflheim
Gates of Niflheim Rulebook
Table of Contents
Table of Contents
Read Me First
Welcome to Niflheim. A crueler place you will not find. Which path will you follow?
The Gates of Niflheim is a miniatures solo/co-op campaign game of tactical combat set in a historical fantasy Viking age. The game plays out over a series of linked scenarios forming a campaign and ongoing story. Each previous scenario in the campaign affects the start of the next. This game takes several sittings to complete but you can save your progress easily.
As you play each scenario, your heroes will navigate the treacherous realm of Niflheim, coming closer to reaching their ultimate goal of vanquishing their vile foe Ullric Blackheart, the Shadow Jarl. Along the way, they will need to defeat swarms of draugr and recover essential clues, gear and magical devices. They will gain experience and unlock unique skills.
This manual is intended to help you learn to play the game by guiding you through the first 5 scenarios. Play the game as you read through the text.
The first 5 scenarios are meant to be played until thoroughly understood. If you failed the objective or are unsatisfied with the results, feel free to play them again. When you proceed beyond these first few, you will start to have choices as to which scenario you would like to play next. These decisions define the path you choose and can over the course of the campaign lead to several possible conclusions to the narrative story.
Open the Scenario Book to page 2: The High Seat
Contents
Components; Introduction; Scenario 1: The High Seat; Scenario 2: In The Mist; Scenario 3: Salvage; Scenario 4: Break In; Interim Scenarios; Scenario 5: Shield Brother; Additional Rules; Abbreviations.
Core Concepts
First, we'll cover the core concepts and rules that you'll need to know before you play the first scenario. These are common terms that are frequently referenced throughout the rules. They are explained now so as to make it easier to understand other rules.
In case you are playing with printed character sheets, when an instruction refers to "placing a marker on your character" you will instead update the character sheet using a pencil.
Conflicting Rules
If there is ever a contradiction of rules, the Scenario Book rules take precedence, followed by the Tome of Knowledge and lastly the Dux Disciplinam. If you are ever unsure, decide as a group.
Adjacency
Many rules in Gates of Niflheim use the term "adjacent". This term specifically refers to orthogonal adjacency (except where it explicitly states "diagonally adjacent"). For example, a draugr is adjacent to a hero if it is in one of the four squares to the immediate left, right, in front of, or behind the hero.
Dice Rolls
Gates of Niflheim is played using 12-sided dice (d12). Players may be required to roll one or more dice to resolve an action.
The number of dice required for a roll is abbreviated as Xd12, where "X" represents the number of 12-sided dice to be rolled. The result of each die is resolved separately.
When a rule refers to a natural roll, this refers to the die roll result before applying any Die Roll Modifiers.
Coin of Fate
Once per scenario, you may flip the Coin of Fate if you are not satisfied with the outcome of any die roll. If you flip heads, you may re-roll the die, if you flip tails, you must accept the result of the die roll.
Figures
When on a scenario map, whatever is used to represent a character, huskarl or undead is referred to as a figure -- whether it is a marker, standee, token, or miniature.
Game Structure
Over the course of the campaign, you will alternate between playing a scenario and performing an Interim stage. These Interim stages are played between the scenarios, giving your heroes a chance to recuperate and perform a little housekeeping.
Co-op Play
If you choose to play with a friend, the game starts with each player selecting one character. When you find other characters in the game, the players must decide who controls each character.
Huskarl
These are warriors that can accompany you in your party. They are less powerful than your characters but still very useful.
Heroes
You play as a party of characters and huskarls, collectively known as heroes.
Party
The Party section in each scenario specifies which heroes you can bring into the scenario. If it says Characters, you can only bring characters (those with character sheets). If the scenario says Heroes, you can bring both characters and huskarls of your choice into the scenario.
Undead
All of the monsters encountered in the Gates of Niflheim are collectively known as undead.
Set Up Play
With that out of the way, we can start preparing to play the first scenario.
Choose Your Character
Pick one character from those provided. Retrieve their figure and character dashboard. If you own the box version, also retrieve the character insert to assemble the dashboard.
Scenario 1: The High Seat
Party Control Sheet (PCS)
The Party Control Sheet (PCS) is designed to record your party's progress in the campaign. If you want to put the game away and save your progress, you will do that on this sheet.
Write your character's name in the first character slot. As you recruit new heroes, they will be added to this sheet as well.
Play Area
It is now time to set up your play area and scenario 1: The High Seat. The instructions on how to set up the scenario and any special rules are contained on the left-hand page. The map on which your heroes will traverse (and complete objectives) is on the right page.
These are instructions for setting up a solo game. If you are setting up for a co-op game, the only change you must make (for this scenario) is that you will have to place 2 characters on or adjacent to the square marked V.
Scenario Book Rules Layout
Here is a summary of the rules that you will find on the left page of a scenario:
A. Introduction text. This is a thematic introduction to the story of the scenario you are about to play. Read it now.
B. Forces. These are the figures used in the scenario. Any undead forces coloured orange should not be added to the undead Pool.
C. Setup. Details on where the figures and markers are placed on the scenario map. Unless otherwise specified, always place your hero figure(s) on or adjacent to the square(s) marked V.
D. Spawn. Specific rules for when and where an undead figure will spawn on the map.
E. Objective(s). The primary objective(s) that needs to be completed to finish the scenario. For scenario 1, the primary objective is to exit the map with a torch (O1) at the point marked by the green arrow, after rescuing the Jarl (J).
F. Secondary Objective(s). Optional objective(s) you can choose to complete. For this scenario, you may search the square marked O2 for supplies.
G. Special Rules. Any rules that apply to this particular scenario.
H. Exit. Read this after you have successfully completed the scenario. Follow its instructions. You will either be told what your next scenario is or that you may choose your next one.
I. Things to Remember. Useful information for helping you play the scenario. These appear for the first 5 scenarios.
J. Interim Stage. The details in this section are used in the Interim stage that follows each scenario.
K. Read an Entry #. At various points during a scenario, you may be instructed to read a numeric entry (#) -- you can find them in the Tome of Knowledge chapter Entry Numbers # on page 29. Please read only the designated entry and follow its instructions.
Setup
- Place your character dashboard below the Scenario Book.
- Insert a red peg in the hole above the "4" of your health track.
- Set aside 1 white peg and 8 black pegs, for future use.
- Grab your 12-sided dice.
- Place your hero figure on V.
- Place objective markers on O1 and O2.
- Place six draugr markers face down in the undead pool.
- Shuffle the undead markers in the undead pool. Then draw four of them, keeping them facedown, and place one on each square marked with a D.
- Place the round track marker on the first space of the round track. At the end of each round, you will advance it one square. When the round track marker would move off the end of the round track, it resets, moving back to the first space of the track.
- Designate an additional area next to the Scenario Book as your "discard area". You'll place the markers of eliminated undead here.
- If you are using standees or miniatures, designate a second area, away from the discard area, as your "in-play area". Undead markers will be placed here while those undead standees or miniatures are in play.
Playing a Scenario
The scenario is set! Let's get started. The game is played out over a series of rounds. Each round is comprised of the Initiative segment, where it is determined who will take the first turn, heroes or undead; then two Turn segments; and lastly, an End segment, where certain scenario effects may be triggered -- more on this later.
Each Turn segment is made up of a Start phase, an Action phase, and a Final phase. So, put all together, each round will have the following structure:
- Initiative segment
- Turn segments (hero turn and undead turn)
- I. Start phase
- II. Action phase
- III. Final phase
- End segment
Initiative Segment
Take two different coloured dice, choosing one colour for the heroes and one for the undead, and roll them together. Subtract 4 from the undead die roll and see which result is higher.
- The higher roll gains the initiative and chooses whether the heroes or the undead will take the first turn.
- If the undead win, they always choose to go first.
- In the event of a tie, roll again.
In the first round of scenario 1: The High Seat, let's assume the heroes win the initiative and will take the first turn.
Turn Segments
It's time to get your hero moving. Once you have completed the three phases in the hero turn, the undead will take their turn with the same three phases as the heroes. The round proceeds to the End segment after the Final phase of the second turn has been completed.
Start Phase
At the start of the hero turn, you would normally remove any Covering and Attacked markers from all characters. Since it is the first turn of the scenario, there are no markers to remove.
Action Phase
In this phase you will activate your hero by declaring their intent. The hero is either declared to stationary, walking, or running. Declaring the intent of the hero has multiple consequences: first, they provide an amount of Movement Points (MPs); second, they modify how much Movement Actions (MAs) cost; and third, they determine any Attack Modifiers that the hero might incur during their attack actions.
- Stationary: The hero gains 0 MP. Declaring stationary allows the hero to do one of the following:
- Gain a Cover marker.
- Perform an attack action (with a bonus) and place an Attacked marker beside the hero.
- Perform a special action and place an Attacked marker.
- Walking: The hero gains 3 MPs. Declaring walking allows the hero to spend the MPs for MAs and either:
- Gain a Cover marker.
- Perform an attack action (with no penalty) and place an Attacked marker beside the hero.
- Running: The hero gains 6 MPs. Declaring running allows the hero to spend the MPs for MAs and either:
- Gain a Cover marker.
- Perform an attack action (with a penalty) and place an Attacked marker beside the hero.
You might be wondering what those markers we placed were all about. The markers with numbers on them are Cover markers. They indicate that the hero may still take an attack action this round and the number indicates the penalty on that attack. There is no combat in this scenario, so we'll cover these in detail later on.
For this scenario, as the heroes do not have weapons to fight with yet, always place an Attacked marker beside the hero after performing any movement.
The Attacked marker indicates that the hero has used up their attack action or performed a special action instead, thus cannot perform an attack action.
During scenario 1, the available special actions are: Rescuing the Jarl (J) and, optionally, searching for supplies (O2).
Final Phase
There is nothing to do here on the first hero turn.
End Segment
After finishing both the hero turn and undead turn, advance the round marker on the round track once.
Terrain
There are three types of terrain in the game: clear, hindering, and obstructive.
- Clear terrain is the default state of a map square and has no impact on movement or combat.
- Hindering terrain (outlined in yellow) slows your movement and can provide cover.
- Obstructive terrain (outlined in red) blocks movement and can't be attacked through. Walls, closed doors, or any other visual solid barrier shown on the map are considered obstructive terrain. Terrain with a dotted red outline blocks movement but does not hinder Line of Sight (LOS).
Movement - Heroes
MPs are a resource your heroes will spend to move, open doors, and to take most other physical actions, all of which are collectively known as Movement Actions (MAs).
Sometimes a rule will show two different costs for a MA separated by a "/", e.g., 1 MP / 2 MPs. The cost before the slash is the cost if you declared stationary or walking as your hero's intent (normal MP cost), and the one after the slash is the cost if you declared running as your hero's intent (increased MP cost).
Details on the MAs:
- A hero may perform as many MAs as their MPs will allow, in any order.
- Heroes may not move through obstructive terrain.
- Hindering terrain has a penalty of 1 additional MP to move into or to pass through.
- Heroes may not move through a space occupied by another figure.
- Heroes may only move off the map at an exit point, marked with a green arrow. Assume that any off-map square moved into is an unoccupied, clear square that costs the normal 1 MP.
- To move diagonally, at least one of the adjacent squares being moved past must be unobstructed and unoccupied.
- If both squares are obstructed and/or occupied, diagonal movement is prohibited.
- If both squares are hindering terrain, the movement always incurs the additional movement cost of +1 MP.
- If two different movement costs exist, the player chooses which to pay.
Movement Actions (MA) - MP Cost
| Action | Normal | Increased |
|---|---|---|
| Change readied weapon(s) | 1 | 1 |
| Open or close a door* | 1 | 2 |
| Enter an adjacent square | 1 | 1 |
| Enter a diagonally adjacent square | 2 | 2 |
| Enter hindering terrain | +1 | +1 |
| Pick up gear / supplies** | 1 | 2 |
| Pass gear / supplies*** | 2 | 2 |
* To open or close a door, the hero must be adjacent to the door. ** To pick up gear/supplies, the hero must be on or adjacent to the square it is on. If multiple pieces of gear/supplies are present on the same square, any number of items among them may be picked up by a hero for 1 MP / 2 MPs. *** To pass gear/supplies between heroes, both heroes must be adjacent to each other. Only the hero initiating the pass pays the MPs.
Movement Examples
You declare your hero, Frida, as running, providing her 6 MPs. She moves diagonally, paying 2 MPs, then moves diagonally again and pays 3 MPs as she is moving into hindering terrain which costs +1 MP. All squares within a yellow border are hindering terrain so her next move of 1 square forward would cost another 2 MPs, but with only 1 MP remaining she cannot move further.
Frida wants to move to square A diagonally. She will be moving between the fire (which would inflict burn damage of 1 wound on her) and the rubble pile (hindering terrain). She chooses to take the penalty from the hindering terrain rather than get burned. This will cost her 3 MPs: 2 MP to move diagonally and 1 additional MP for the hindering terrain. If the rubble pile was obstructive terrain, she would be forced to take the damage penalty from the fire.
Frida declared walking, giving her 3 MPs. She moves diagonally first, costing 2 MPs, then she opens the door for 1 MP. If she was running, opening the door would cost her 2 MPs.
Special Actions
Special actions are only possible when specified by a scenario or skill. Searching always requires a special action.
So, any time a scenario mentions searching, your hero will need to declare stationary and will need to perform a special action.
- A hero who is performing a special action may not perform any movement or attack actions. Instead, they spend their entire activation performing the special action.
- The scenario will provide details on where (usually a designated map square) the special action is performed.
- The hero must be on or adjacent to the designated square to perform the special action.
- If a search results in an undead appearance, draw and place the undead marker on an unoccupied and unobstructed square closest to the searched square (players' choice).
- Once you performed a search action, you may immediately pick up any found items and rearrange your inventory at no MP cost.
Line of Sight
A Line of Sight (LOS) check establishes if there is an unblocked Line of Sight between two squares. You'll be using LOS to determine when to reveal an undead marker in a scenario. LOS will also be used in combat, but we'll cover that in scenario 2.
- To determine LOS, trace a straight line from the center of the figure's square to the center of the target's square.
- Any squares the line passes through are considered when checking if a LOS exists between the two figures.
- LOS is blocked by obstructive terrain (closed doors, walls, squares outlined in red, red lines etc.).
- If a LOS only hits the corner of a square, that square is not considered when checking LOS.
Example: Frida has a LOS to draugr A so that draugr is revealed. Draugr B is behind obstructive terrain, so it remains concealed. Her LOS to draugr C crosses the corner of obstructive terrain, but as it only hits the corner, her LOS is not blocked.
Undead
Undead are the main threat to your completion of your quest. You will be running from them very soon, so let's find out how they work.
Spawning
When the current round space on the round track shows a spawn location (as listed in the spawn section of the scenario), undead are spawned (placed on the map) in the Final phase of the undead turn. To spawn an undead, draw an undead marker from the undead pool and place it face-down on each matching spawn location on the map. If the spawn location is occupied, place the undead on the closest unoccupied and unobstructed square to the spawn point (players' choice).
In this scenario, the spawn section says, "Undead spawn on S." When the current round space on the round track (the third one in this case) contains an "S", draw and place a face-down undead marker on the square marked with an "S" on the map.
Revealing Undead
Do not look at the undead markers when you are placing them during setup or when spawning. You won't know the identity of the undead until your hero has LOS to it and it is revealed.
Undead markers are flipped, revealing the undead, as soon they are in a hero's LOS. This is done immediately, regardless of when it occurs (e.g., during spawning, undead/hero movement or a scenario effect). If you are using standees or miniatures, replace the revealed marker with the appropriate standee/miniature and place the undead marker into the in-play area.
Unrevealed undead are always treated as draugr for movement.
Activating Undead During the Undead Turn
During the undead turn, all present undead must be activated.
- Activate each undead, one at a time, starting with the one closest to a hero.
- If two undead are of equal distance to a hero, then the players choose.
- When stunned undead activate, remove their Stun marker. They do not move or attack this round.
Zone of Control (ZOC)
The four squares adjacent to an undead are its Zone of Control (ZOC).
If a hero moves into the ZOC of an undead, the following rules apply:
- The hero must immediately stop their movement (if the undead is not stunned).
- The hero may not perform any further MAs.
- The hero may still attack the undead and if the undead is stunned or killed as a result of the attack, that hero can continue taking MAs as normal.
Also:
- Stunned undead do not have a ZOC.
- If a hero is starting their turn in an undead's ZOC, they may move out of it normally -- the ZOC is only triggered by a hero moving into it.
- Heroes may not move diagonally between two squares that are covered by different ZOCs.
Movement - Undead
In this scenario, all undead have a Move value (MV) of 1.
Unless otherwise specified, all undead follow the movement rules listed below:
- A stunned undead cannot move. When a stunned undead would activate, remove its Stun marker instead.
- An undead will always move towards the closest hero (character or huskarl). The closest hero is the one the undead could reach (move adjacent to) in the fewest moves (regardless of any undead that are blocking the shortest path).
- Undead can move up to a number of squares equal to their Move value.
- Undead may not move into or through obstructive or hindering terrain, or squares with figures in them.
- Undead can move in any direction, including diagonally, which counts as using one move.
- An undead can only move diagonally if at least one of the adjacent squares it is moving past is unoccupied or clear.
- Undead will not move diagonally across the corner of a fire square.
- An undead will not move if already adjacent to a target.
For each move, determine the first option from the following list that the undead can complete successfully:
- Move adjacent to a target.
- Move diagonally adjacent to a target.
- Move towards the closest target, using the shortest path.
If there is more than one valid square the undead could move into, the players may choose which square the undead moves into.
If an undead cannot successfully complete any options from the list (because the relevant squares are all occupied by other undead or are inaccessible), then it does not move.
Example: Draugr #1 is closest to Frida, so is activated first. It moves to square A as that square is adjacent to the hero. Draugr #2 and #3 are both two moves away from Frida, so the player can choose their activation order. They choose to activate draugr #2 first; the draugr can't move diagonally to C as its path is blocked either by draugr #3 or by the hindering terrain. It also does not have enough movement to move diagonally in between both. So it doesn't move at all. Finally, draugr #3 is activated and moves to C.
Losing a Scenario
The players may lose a scenario in the following ways:
- Immediately when all heroes present in the scenario have been killed.
- You are certain that you can no longer achieve the current objectives of the scenario.
When you lose a scenario, you may retry it by restoring your game state to the beginning of the scenario. Remove any gained XP. Reset your Glory, the health value of your heroes, and the state of your supplies to the values at the beginning of the scenario. Shuffle any drawn Lost Memory Motes back into the pool (and remove their numbers from your PCS).
Complete Scenario 1
You are now armed with all the information you need to play to the end of scenario 1. Give it a try.
Finished Scenario 1
Have you escaped the clutches of the wandering draugr? If so, congratulations!
Read the Exit text and then:
- Feel free to replay this scenario as many times as you need, if you are unclear about any rules introduced.
- Otherwise, mark any final notes on your PCS, including writing "1" in the "Last Scenario Played" box.
- Then either put the game away for a later play or continue to scenario 2.
Scenario 2: In the Mist will introduce you to your first weapons and how to handle combat. Once you have mastered the art of war, it will be time to earn experience.
Scenario 2: In the Mist
Open the Scenario Book to page 4: In the Mist
Welcome to scenario 2: In the Mist! Follow the setup instruction steps -- they are nearly identical to the first scenario. In this scenario, you will be introduced to the combat rules, Experience points (XP), and more.
Gear Slots
As you acquire weapons and gear, place their markers in one of the four gear slots on your character dashboards. Your character may not carry more weapons and/or gear than they have slots for.
You can exchange or equip weapons from your gear slots to your Ready Weapon or Off Hand slots for 1 MP.
Supplies
When your character obtains supplies, track them in the three supply columns: Projectiles, Healing Salves, and Holy Water Phials.
Projectiles: In this scenario, you will be able to obtain 1 Projectile for later use. When you do, place a black peg in the bottom hole of the Projectiles track to indicate this.
Healing Salves: Healing Salves are used to heal your heroes' wounds. For every Healing Salve used by a hero, increase their health by one, up to the maximum. Healing Salves may only be used during the Interim stage (see page 26) unless specified otherwise.
Holy Water Phials: Holy Water Phials have multiple uses for different scenarios and they can be used to perform a phial attack as explained on page 22 in the next scenario.
Ready Weapon
A hero can only attack with a weapon that is readied.
When you pick up the sling and seax, place one of those markers in the Ready Weapon slot at the top of the hero's dashboard and the other in a gear slot. Remember that you can exchange your Ready Weapon with any other in a gear slot for 1 MP.
One-Handed Weapons
Some weapons are one-handed, so if you have two one-handed weapons, you may ready both.
- One-handed weapons have an asterisk (*) on their marker.
- To ready two weapons, both must have an asterisk.
- Place the weapon marker of the secondary weapon in the Off-Hand slot.
- Any attacks performed with a weapon in the Off-Hand slot have a penalty of -2 DRM to their die roll. More on that shortly.
Weapon Characteristics
Listed below are the characteristics of most of the weapons you will find in the game. Some of the terms mentioned in the descriptions have not been explained yet but will come to light as you read a little further on.
- Attack Dice (AD): The number of d12 to roll when attacking.
- Ranged Stun/Wound Values (R-S/W): Only use these values if the target is not adjacent to you. You must roll equal to or higher than these numbers on at least 1d12 to apply a stun or wound (respectively) to your target.
- H2H Stun/Wound Values (H2H-S/W): Only use these values if the target is adjacent to you. You must roll equal to or higher than these numbers on at least 1d12 to apply a stun or wound (respectively) to your target.
- Asterisk: Indicates a one-handed weapon. Two weapons of this type may be readied, if both show the asterisk (one in the Off-Hand slot).
- Range Modifier (RM): Gain a -1 DRM to your attack for every X squares your target is outside your Point-Blank Range, where X is the value listed here.
- Point-Blank Range (PBR): Any target within the indicated amount of squares is considered to be at Point-Blank Range.
- X (on the R-S/W values): An X signifies that this weapon has no Ranged combat capability (an H2H weapon; this weapon cannot be used for a Ranged attack).
- Dash (as a PBR): A dash means that the PBR is 1 (adjacent).
Attack Action
Any attack made by any figure can target any adjacent square. The facing of the figure does not matter.
All rules in this section pertain to heroes performing attacks. How undead attacks is covered in the Undead Attacks section (on p. 19).
While a hero is activated, they may use an attack action, choosing one of their readied weapons. The hero may use their attack before, after, or in between MAs. When using an attack action, you must perform the following steps in this order:
- Select a readied weapon. A weapon is readied if it is in either the Ready Weapon or Off Hand slot of the character dashboard. Huskarls have specific weapons assigned to them.
- Select an attack type: Ranged (R) or Hand-to-Hand (H2H).
- Resolve the attack.
- Place an Attacked marker next to the hero after it attacks to show they have attacked.
If a hero has an attack action and does not use it, place the appropriate Cover marker (see Action phase on page 10) next to the hero. This allows them to use their attack action later.
Hand to Hand (H2H) Weapons
The Hand-to-Hand Stun/Wound (H2H-S/W) value must always be used when an enemy is adjacent to the hero. They are listed in dark green on the marker.
- An unarmed hero (if they have no weapon readied) has an inherent H2H-S/W value of 10/12, representing their fists.
- Unless otherwise specified, the Point-Blank Range (PBR) of a weapon's H2H is 1.
On a weapon marker, the R-S/W value is used when not adjacent to a target; the H2H-S/W value is used when adjacent to a target.
Resolving an Attack
All attacks use the following core process. We'll explain each step and the terms used in those steps, in the following sections.
- Determine the target of the attack.
- Determine the range to the target.
- Calculate the Die Roll Modifiers (DRMs).
- Roll a number of d12 equal to the Attack Dice (AD) of the weapon being used.
- Apply the DRM to the result of the die roll.
- Resolve the outcome and any effects of the attack.
Determine the Target
A valid target is one which is within LOS and range of the weapon the attacker is using. Players may freely decide which target to attack.
Determine the Range
When performing an attack, determine the range by counting the number of squares from the attacking figure to the target figure, including the target's square, but not the attacking figure's square. When calculating range, any diagonals count as 2, as they do when spending MPs.
Example: The sling shown has a PBR of 4, thus you can attack with it without any range penalties up to 4 squares away. You can extend the range any amount of squares, but will suffer a penalty for attacking outside the PBR (see below).
Die Roll Modifiers (DRM)
Various factors may make it harder or easier to hit your target. This could be the type of attack used, the range to the target, or perhaps a figure is firing through hindering terrain. These circumstances create Die Roll Modifiers (DRMs).
- A negative DRM makes it harder to hit a target, while a positive DRM makes it easier.
- DRMs are cumulative and are applied to each AD rolled.
- It is possible for a figure to have enough DRMs to make a successful attack impossible.
- A hero may also have DRMs from character skills, for example, the skill "Preferred Weapon" usually grants a +1 DRM to all attacks with their preferred weapon.
- A character may receive DRMs from Glory and Corruption effects.
- There are three types of DRMs:
- Attack Modifiers (AMs)
- Line of Sight Attack Modifiers (LOS AMs)
- Range Modifiers (RMs)
Attack Modifiers (AM)
Attack Modifiers (AMs) can be found in the chart below.
| Action | DRM |
|---|---|
| Attacking a stunned undead | +3 |
| Hero declared stationary | +2 |
| Hero declared walking | 0 |
| Hero declared running | -2 |
| Hero has a stationary Cover marker | 0 |
| Hero has a walking Cover marker | -2 |
| Hero has a running Cover marker | -4 |
| Attacking Off Hand | -2 |
Line of Sight Attack Modifier (LOS AM)
Line of Sight Attack Modifiers (LOS AM) represent adjustments for intervening terrain and figures that hinder but do not block a figure's LOS to the target. The maximum total LOS AM that can be applied to an attack is -4 DRM.
- When an attack traces LOS through any portion of a square containing hindering terrain or a figure, a penalty is incurred for each hindering terrain square/figure in the LOS between the attacker and defender.
- If the attacking figure is in or adjacent to a hindering terrain square in their LOS, then that square does not cause a penalty.
Line of Sight Attack Modifiers (max -4)
| Situation | DRM |
|---|---|
| Attacking through a figure | -2 per figure |
| Attacking into or through hindering terrain (if not adjacent to it) | -2 per square |
Range Modifier (RM)
The accuracy of a weapon begins to drop when attacking targets outside of its PBR -- the further away the target is, the more difficult the shot. This varies by weapon type and is represented by the weapon's Range Modifier (RM).
When attacking a target outside of the PBR, add the RM to the PBR as many times as is required to reach the target. However, each time you add the RM to the PBR, apply a -1 DRM to the die roll.
Example: The RM of the sling is 3. This means you must apply a -1 DRM for every 3 squares the target is beyond the PBR. E.g., using the sling on a target at range 5-7, the DRM would be -1; at range 8-11, the DRM would be -2; and so on.
Rolling Attack Dice
Once the DRMs have been calculated, roll a number of d12 equal to the Attack Dice (AD) of the weapon.
The AD are rolled one at a time, applying all DRMs to each die rolled. All AD must be resolved, even if the target has already been eliminated.
The following rules apply to each die rolled:
- If you roll a natural 1, it is always a miss. If a projectile weapon was used for the attack, lose 1 projectile from your supplies.
- If you roll a natural 2, and there are one or more intervening figures in the LOS, the first intervening figure takes 1 wound.
- A modified roll equal to or over the weapon's Stun value (S) causes the target to be stunned.
- A modified roll equal to or over the weapon's Wound value (W) causes the target to be stunned and to take 1 wound.
- See Attack Effects for details on stunning and wounding an undead below.
Example: The sling shown has an AD value of 1, which means you roll 1d12 when attacking with it. Its R-S/W values are 7/10, meaning it will cause a stun on a 7+ or a wound on a roll of a 10+ (after DRMs are applied), if attacking a non-adjacent undead. Its H2H-S/W values are 9/11, meaning it will cause a stun on a 9+ or a wound on a roll of a 11+ (after DRMs are applied), if attacking an adjacent undead.
Attack Effects
A successful attack will either wound and/or stun an undead with the following effects:
- For each wound the undead has received, reduce the undead's health by 1. Place a wound marker next to their figure.
- In this scenario, all undead have a Health value (HV) of 1 so a single wound eliminates them.
- A wound to an undead always causes the undead to be stunned as well, unless an undead skill prevents this. This is pertinent as some undead have a HV of 2 or more.
- If an undead is stunned, place a black stunned marker beside it.
- An undead cannot be stunned more than once, so further stunned results are ignored.
Eliminated Undead
When an undead is killed, remove their figure from the map and place their marker into the discard area. They will be returned to the undead pool when the round track resets or when the undead pool runs out.
Attack Example - Part I - LOS
Frida has her sling at the ready and declared walking when she activated. She chooses to perform a Ranged attack and now must choose her target.
We can see that Frida cannot target draugr #4 as her LOS is blocked by obstructive terrain.
Next, let's look at draugr #3. Notice that Frida's LOS crosses the exact corner of the obstructive terrain, but corners do not count as blocking or hindering LOS, so she does have a LOS to the draugr. However, at range 6 (each diagonal square counts as 2 range) she would receive a -1 DRM making it more difficult for Frida to successfully attack that draugr.
She may also choose to target either draugr #1 or draugr #2. They are both at range 3.
If she chooses draugr #1, her attack crosses a hindering terrain square but since she is adjacent to it there is no LOS AM.
If she chooses draugr #2, her attack crosses 2 hindering terrain squares. The first is ignored since she is adjacent to it but the second hindering terrain square would inflict a -2 DRM, making it more difficult for Frida to successfully attack that draugr.
So, she chooses to attack draugr #1.
Attack Example - Part II - Stun and Wound Values
Now let's figure out what Frida needs to roll to stun or wound draugr #1:
We start with the weapon's R-S/W of 7 and 10. Next, we calculate all DRMs. Frida declared walking, so there is no AM for that. There is also no LOS AM as the only hindering terrain is adjacent, so it does not impose a penalty. The draugr is at range 3, which is within her weapon's PBR, so there is no RM either. So, a roll of 7+ would result in a stun and a roll of 10+ would inflict a wound, removing the draugr from play.
Let's also look at how it would play out if Frida chooses to attack draugr #2: The range is also 3 but the hindering terrain square imposes a -2 DRM. We apply the -2 to the die roll result, so a modified roll of 9+ would result in a stun and a modified roll of 12 would inflict a wound, removing the draugr from play.
Let's also go through the possibility if Frida chooses to attack draugr #3: There is no LOS AM, because LOS touching corners does not impose one, but the range to the square of the draugr is 6. The PBR of the sling is 4, so a RM is imposed. The sling has a RM of 3, which means per 3 squares beyond the PBR a -1 DRM is applied to the die roll result. A roll of 8+ would result in a stun and a 11+ would stun and wound.
Covering
In combat, you are often in a "wait-and-see" situation where you know there are enemies nearby, but you do not yet have a target to attack. Heroes train themselves to be ready for opportunities that present themselves. When an enemy approaches, heroes are able to react, before they are attacked by the undead. This is represented by the following rules:
- A figure that does not use its attack during its activation is considered covering. Place a Cover marker with the appropriate Attack Modifier next to the covering figure.
- Covering attacks may take place at any point during the round, including the undead turn.
- The covering attack uses the normal combat rules and restrictions (e.g., must have LOS to target and is restricted to the range of the weapon used).
- Once a covering figure attacks, it loses its covering status, and the Cover marker is replaced by an Attacked marker.
- Gaining a Locked marker causes a figure's covering status to be lost. In this case, replace the Cover marker with an Attacked marker. Likewise, a locked character does not gain a Cover marker at the end of their activation.
| Declared as | Cover modifier |
|---|---|
| Stationary | Covering +0 DRM |
| Walking | Covering -2 DRM |
| Running | Covering -4 DRM |
Example: Frida, with her Seax readied in a previous turn, elected to walk but not attack. Because she walked, a value 2 Cover marker is placed next to her. A draugr moves from around the corner, exposing itself. Frida elects to interrupt the draugr's turn and attack using her covering attack. The weapon's S/W value is 4/7 and the draugr is within her weapon's PBR of 1. You must subtract 2 from her natural die roll. She needs to roll a 6+ to stun or a 9+ to wound the draugr. After the attack, the Cover marker is replaced with an Attacked marker.
Undead Attacks
An undead will attack when activated adjacent to a hero. More powerful undead may sometimes attack after moving or have other options, but in this scenario, we'll only be dealing with draugr.
This pattern is only valid for Hand-to-Hand attacks. Individual rules for certain undead will supersede all general instruction on how undead attack. In later scenarios, you will face undead with Ranged attacks.
Locks and Wounds
When an undead attacks, it locks the target of its attack. Place a Locked marker between them. A locked figure cannot use MAs or attack until the lock is broken. In addition:
- When an undead which is locking a hero activates, it inflicts one wound to that hero.
- If an undead attacks a locked hero, independent of which undead is locking the hero, they inflict one wound on the locked hero.
- Undead make only one attack per turn (either to inflict a lock or to inflict a wound).
- When an undead is stunned or killed, any lock it had is broken.
- Undead can lock a hero that is in hindering terrain.
Locked Heroes
- A figure can only be locked by one undead at a time.
- When activated, a locked hero must immediately declare its movement intent (stationary, walking, or running) and then attempt to break out of the lock.
- To test whether they break the lock, use the H2H value of their readied weapon and perform a H2H attack, applying any relevant DRMs.
- This does not count as your attack and cannot stun or wound the undead.
- If they fail to break the lock, they cannot spend any Movement Points or attack and their activation ends.
- If you roll the Stun value of the readied weapon or more, return the Locked marker to the supply. The hero may perform MAs and an attack action as normal this round.
Experience Points (XP)
You will now start collecting Experience points (XP). Each draugr you eliminate grants you 1 XP. More dangerous undead that you will encounter later may give you additional XP per kill. For now though, you just gain 1 XP per slain undead.
Experience from kills is only gained on the first lap of the round track. A full list of actions that gain you XP can be found on page 23.
Recording Experience
XP is recorded on the character's dashboard using one black and one white peg. The black peg represents 10's and the white peg represents 1's.
For now, place the white peg in the hole marked "0". Every time you earn 1 XP, move it up the track by one. Once you earn your 10th XP place the black peg in the hole marked "1" and the white peg back into the "0" hole. If ever you have a number with matching digits, say 55, the black peg goes in the main track (in hole 5 in this case) and the white into the red hole (representing the duplicate number).
Interim Stage
After any scenario, you may use 1 Healing Salve to heal 1 wound from a hero. Each hero may be healed once.
There are some other things that can happen in the Interim stage such as sharing gear, changing Glory / Corruption levels, gaining Experience points (XP), or scenario specific instructions. Later, you are also able to play an Interim scenario to collect supplies.
Ready to Roll
You now know everything you need to proceed with playing scenario 2: In the Mist. Steel your nerves and head out. May the Fates be generous!
Remember the round structure!
- Initiative segment
- Turn segments
- End segment
When you've completed this scenario, don't forget to read the exit text and mark any notes on your PCS, including writing "2" in the Last Scenario Played box.
Scenario 3: Salvage and Scenario 4: Break In
Congratulations on completing scenario 2. Since you have a choice as to which scenario you would like to play next we have included rules in this section that you will use in both scenario 3: Salvage and scenario 4: Break In. Follow the setup instructions as you did in the first scenario. In both scenarios, you will be introduced to additional rules on attacking, switching weapons, new terrain and more.
Open the Scenario Book to page 6: Salvage or to page 8: Break In
New Rules for Scenarios 3 and 4
Preferred Weapon
Each character's preferred weapon(s) is listed in the character description found in the Tome of Knowledge chapter Character Sheets and Skills on page 64. The preferred weapons of Huskarls can be found in the Tome of Knowledge on page 10.
Dual Wielding Weapons
If a hero is holding the same weapon in each hand, they gain a +1 DRM when attacking with that weapon.
Projectile Weapons
The following weapons are considered to be using Projectiles (PRJ): Throwing Knives and all types of Bows.
Projectiles use the following rules:
- If a natural 1 is rolled while performing a Ranged attack with one of the weapons mentioned above, reduce your PRJ by one. This is done by moving the peg on your character dashboard 1 down on the projectiles track.
- The natural roll of 1 expends one PRJ only after the entire attack action is completed (e.g., if the first die rolled is a 1 and this reduces you to 0 PRJ, you still get to use the rest of the AD).
- A maximum of 1 PRJ can be lost per attack action, regardless of how many 1's are rolled.
- For weapons using PRJs, you cannot make an attack without at least 1 PRJ available.
Shields
- Any figure carrying a shield imposes a -1 DRM against any attack targeting the figure. This signifies the defensive capabilities of the shield.
- A shield offers a +1 DRM when attempting to break lock.
- If used in a successful attack, a shield pushes the target 1 orthogonally adjacent square away from the attacker. If no adjacent square is unoccupied and unobstructed, then the target is stunned instead.
Belt
On the character dashboard, the belt slot is a fourth gear slot that can accommodate a total of 3 one-handed weapons (denoted by the asterisk) and/or items with the keyword "small" (i.e., flask, scroll, torch etc.).
Huskarl
Huskarls are player-controlled warriors, represented by markers. They do not have a dashboard, but do gain XP. Record their information on the PCS. They activate and function identically to a hero with the following exceptions:
- They have a maximum health of 2.
- When they are wounded, track their health on the PCS.
- Wounded huskarls receive a -2 DRM when performing an attack and may not declare running as their intent.
- They can carry a total of 2 gear and/or weapons.
- They can carry up to 3 Healing Salves and 3 Holy Water Phials.
- They have unlimited projectiles, but cannot share them with the characters.
- A Gunnar's preferred weapons are an Axe and Sling, an Archer's a Short Bow and Seax, and a Shield Maiden's a Spear and Shield.
Locked Doors
- Locked doors are represented by purple doorways.
- How a locked door is opened, is usually specified in the special rules of the scenario.
- A hero can perform a special action to force a locked door open. Once forced open, it cannot be closed again.
Rescue a Prisoner
To rescue a figure on the map, perform a special action while adjacent to them. After your activation, they may immediately activate (unless otherwise specified by special rules).
Another Look at Range Modifiers
As another visual example for RMs, let's look at another example with the Throwing Knives weapon.
Remember, when attacking a target outside of the PBR, add the RM to the PBR as many times as is required to reach the target. Each time you do so, apply a -1 DRM to the die roll. The further away enemies are, the harder it is to stun or wound them.
Range Modifier Example: This diagram shows Frida, who is armed with Throwing Knives. The die roll results needed are shown at different ranges from her figure. Illustrated here are the Stun values of the Throwing Knives that need to be rolled on a modified die roll:
- 8 or higher up to range 4
- 9 or higher at range 5-6
- 10 or higher at range 7-8
- and so on...
The same rule would apply to the Wound value of 10. The Throwing Knives wound on a modified die roll of:
- 10 or higher up to range 4
- 11 or higher at range 5-6
- 12 or higher at range 7-8
- and so on...
Using a weapon with a RM of 2, you will apply a -1 DRM for the first square past the PBR and an additional -1 DRM for every additional 2 squares.
New Foes
Troll: Hideous fey creatures enthralled by the Shadow Jarl, trolls attack with brute strength and have extremely tough hides. These monsters shrug off any damage very easily.
Troll. HV: 2. MV: 1. Power: Armoured. This figure cannot receive a stun marker.
Bogmaðr: These vile undead have the ability to attack you from afar with deadly ranged weapons. Make sure to stay out of their sight or they will skewer you with arrows.
Bogmaðr. HV: 1. MV: 1. Power: Prowler.
- Always moves to keep or gain LOS to heroes.
- Can either use its Ranged attack or move, not both.
Power: Spectral Bow.
- This attack has 1 AD, a S/W of -/10, and an unlimited PBR.
- Attacks the closest hero in LOS and LOS AM do not apply to this attack.
- This attack cannot target through hindering terrain squares, but can target figures in hindering terrain squares.
- This attack will pass through squares containing other undead, but if the result of the attack roll is a natural 2, the closest undead shot through is hit instead of the target.
Phial Weapon Attacks (Area of Effect Weapons)
To perform a phial attack, you must have a Holy Water Phial available on your supplies track or a Greek Fire Phial. We are using the term "phial" to refer to all thrown burst weapons (e.g. potions). Phials are considered Area of Effect (AOE) weapons as they can attack multiple figures at the same time.
Attacking with a phial is split into three steps:
- First, select a target square you wish to throw the phial into. This target square does not need to be the closest undead.
- Then determine if the phial lands in the desired target square, or if it deviates from the target square.
- Once the final target square is determined, the phial bursts. Resolve an attack against surrounding figures to see if they are hit by the effect.
Throwing Phial Weapons
- Once a target square is chosen, the phial is thrown. To see if it lands on target, calculate a throw hit number (see below) and then roll 1d12. If your roll result is equal to or greater than the throw hit number, you land the phial in the target square, otherwise, it deviates.
- A player's base throw hit number is equal to the range of the target square. For example: If the target is 5 squares away, you need to roll 5 or more on 1d12.
- Eight is the maximum range a phial can be thrown.
- As per the normal range rules, range is determined by counting the number of squares from the attacking figure to the target square, including the target square, but not the attacking figure's square.
- All usual AMs and LOS AMs apply.
- Where the phial lands, either after a successful hit roll or after deviating, is the final target square.
A Holy Water Phial marker shows "AOE" and an S/W value, used when attacking all 9 squares of its AOE attack.
Phial Deviation
If a phial deviates, roll 1d12 to determine where it lands:
- On a roll of 1-8, shift the target square as indicated on the Phial Deviation chart.
- On a 9-12, the phial deviates 2 squares instead of 1. Roll the 1d12 again to determine in which direction. Re-roll results of 9-12.
- If the new target square is occupied by a wall, closed door or obstructive terrain, re-roll the Phial Deviation check from scratch from the original target square.
Phial Deviation Chart (the target square is in the centre of a 3x3 grid; the numbers are arranged around it):
| 8 (up-left) | 1 (up) | 2 (up-right) |
|---|---|---|
| 7 (left) | TARGET SQUARE | 3 (right) |
| 6 (down-left) | 5 (down) | 4 (down-right) |
Resolving a Phial Burst
The phial attacks all figures who are in the final target square and the surrounding 8 squares (9 squares in total). This is the AOE of the weapon.
- Resolve a separate attack against every figure within the 9 squares of the AOE.
- Phial attacks do not apply LOS AMs for hindering terrain.
- If the phial attack targets an unrevealed undead, reveal the undead so you can assess any impact to the AM and attack effects.
- A phial weapon shows no AD and instead has "AOE" in the top left corner, indicating it is an AOE weapon. Use 1 AD when resolving each attack against all affected figures.
Phial AOE Example: Killian successfully lands his Holy Water Phial next to the square with a draugr without deviation. He will roll to attack all of the draugr in the final target square and all 8 surrounding squares of the phial's final target square (in this case, there are 4 draugr). All targets are attacked with 1 AD at a S/W value of 6/9. Holy Water only affects undead (and Scathac) with its AOE attack, so Killian does not need to roll an attack against himself here (see Tome of Knowledge page 20).
Unlocking Skills with Experience (XP)
The skills available to your character are tracked on your character dashboard. Noted beside each row of skills is a number representing a level requirement and an XP cost. To unlock a skill, the character subtracts the indicated amount of XP from their total. Skills may not be unlocked until the cost can be paid in full, and only during the Interim stage.
You may unlock level 1 skills at any point. A level 2 skill may not be unlocked until the preceding level 1 skill in the same category has been unlocked. A level 3 skill may not be unlocked until the preceding level 2 skill in the same category has been unlocked. The unlocked skill is marked on the hero's character sheet or with a peg on their dashboard.
Once a skill is unlocked, the hero may immediately benefit from its effects. Consult the Tome of Knowledge chapter Character Sheets and Skills on page 64 for details on each character skill.
Experience Gain Chart
| Action | XP gained |
|---|---|
| Kill a draugr, bogmaðr, or troll | 1 |
| Kill Mardröm | 2 |
| Kill The Bishop or Sanngriðr | 2 |
| Kill Ullric Blackheart, the Shadow Jarl | 3 |
| Complete a scenario* | 1 |
| Complete all secondary objectives* | 1 |
* Only heroes who are present in the scenario can gain this XP.
Note: XP is always gained by the hero that deals the killing blow, even if a different hero had previously dealt it one or more wounds. No XP is gained for undead that are killed by scenario rules.
Fate Track - Glory / Corruption
Starting with scenario 3 and 4, you will use the Glory / Corruption Track which remains active for the rest of the campaign.
Your characters can gain Glory for feats of valour on the battlefield and lose it for failure, delving too deep into forbidden knowledge, or by utilizing certain skills. If you do not have enough Glory, then your character's Fate track will lead to Corruption.
As Corruption climbs, various negative effects, as shown on the Corruption side of the track, begin to affect the character, showing the disfavour of higher powers. Differing effects are cumulative but only the worst effect of the same type is applied.
- Each character's Corruption is tracked separately.
- Huskarls are not affected by Glory or Corruption and cannot gain either.
- Glory gained or lost after the scenario concludes takes effect in the Interim stage. Adjust your Fate track accordingly.
Glory and Corruption Chart
| Action | Amount of Glory gained or lost |
|---|---|
| Kill Mardröm | 1 |
| Kill The Bishop or Sanngriðr | 2 |
| Kill Ullric Blackheart, the Shadow Jarl | 3 |
| Complete a scenario* | 1 |
| A huskarl dies* | -3 |
| Fail to complete a secondary objective* | -1 |
| Perform a skill | Variable |
| Scenario specific | Variable |
* All characters present in the scenario gain / lose the Glory.
Note: Only characters present in the scenario can gain or lose Glory. Glory is always gained by the hero that deals the killing blow, even if a different hero had previously dealt it one or more wounds. No Glory is gained for undead that are killed by scenario rules.
Adjusting the Fate Track
Whenever you gain Glory, move your peg or marker up the Glory side of the Fate track. If your Glory is zero then no peg is inserted. If your Glory falls below zero, then move your peg or marker up the Corruption side of the Fate track for any Glory lost, and back down the Corruption track for any Glory gained.
There are benefits and consequences depending on where the status of your Fate track sits. These are listed in red alongside the appropriate position, take effect as soon as that position is reached, and lose effect as soon as the Glory / Corruption level drops.
Glory gained or lost after the scenario concludes will be recorded in the Interim stage. Adjust your Fate Track accordingly.
Skills
You may use Glory to power some of your skills. Whenever you use a skill with a number after the slash in the description, reduce your Glory by that amount. If you spend too much Glory, you can become corrupted. Even if you are corrupted, you can continue to use skills, increasing your Corruption level.
Journey Onward
You now know everything you need to proceed to playing scenario 3 and 4. Good luck.
When you complete your chosen scenario, don't forget to mark any notes on your PCS, including writing "3" or "4" in the Last Scenario Played box. Proceed to scenario 5: Shield Brother when you are ready.
Interim Scenarios
After the last scenario in the Interim stage, you have been instructed to play one of the Interim scenarios.
There are two different Interim scenarios; scenario 33: "Loot" and scenario 34: "For the Glory".
When you find that you are running low on supplies or that you have depleted your Glory, you can choose to play one of these two scenarios before proceeding to the next campaign scenario. They are normally optional and you must strike a balance between completing the main quest and insuring your party has enough supplies and Glory to proceed.
Record the amount of times you have played each Interim scenario on your PCS. The more you play each of these scenarios, the tougher they get. The scenario maps can be found in the Scenario Book on page 66 for Loot and on page 67 for For the Glory. All the rules and info are found in the Tome of Knowledge on page 60 for Loot and on page 62 for For the Glory.
For the first Interim scenario, you will be playing scenario 33: Loot. Assume a 1 is rolled for undead forces and you will be playing the Pillage variant (Mission type).
Open the Scenario Book to page 66: Loot
Note: scenario 34: For the Glory will be available to play as an Interim scenario after you completed scenario 6.
Once you have completed the Interim scenario, play scenario 5: Shield Brother next.
Scenario 5: Shield Brother
Welcome to scenario 5: Shield Brother. If you haven't played an Interim scenario yet, please refer to the instructions above and return here when you are ready to proceed with scenario 5.
Open the Scenario Book to page 10: Shield Brother
In this scenario, another character will be joining your party. The rest of the setup for this scenario will be similar to previous scenarios. However, this scenario will also introduce a new foe to fight, as well as additional rules on attacking, gear, movement, and the Interim stage.
New Rules for Scenario 5: Shield Brother
New Character
Add the new character to your PCS under your first character. Characters will always start with the same XP as your highest surviving character unless instructed otherwise.
Passing Gear
Characters may pass weapons, gear, and supplies to another adjacent character or huskarl at the cost of 2 MPs. Passed weapons can be readied immediately for free (potentially swapping out an already readied weapon). Only the character passing the gear spends the MPs.
Runestones
Runestones come in 4 varieties, and they can be outfitted to your weapons. Heroes can affix a runestone to a readied weapon, infusing the weapon with extra properties.
- A weapon can only be infused with a runestone during the Interim stage. Place the appropriate marker on your hero's weapon and from then on that weapon is empowered with the power of that runestone.
- A weapon may only have one runestone affixed, unless the weapon specifies that it has two runestone slots.
- A runestone may not be removed from a weapon once affixed.
- Runestones do not require gear slots.
Black - Earth: The target, when hit, is pushed 1 orthogonally adjacent square away from the attacker. If no adjacent square is unoccupied and unobstructed, then the target is stunned instead.
White - Air: Your hero may move 1 square after they inflicted a stun or wound to their target.
Blue - Water: If the target is stunned or wounded, an adjacent undead to the target, of the player's choice, is stunned.
Red - Fire: If you roll a modified roll equal to or over the weapon's Stun value (but below the weapon's Wound value), you may apply a wound instead of the stun (not applying an additional stun).
Setup
Moving forward, during the initial setup of a scenario, party members are placed on or adjacent to the square marked with a V. Some scenarios might have specific different setup rules so make sure to read the instructions carefully.
New Foe
Mardröm: A malicious and tortured entity that brings nightmares to the living and commands the forces of the Shadow Jarl.
Mardröm. HV: 2. MV: 2. Power: Coward. This figure will only move towards a hero if it is within 2 squares of that hero. Power: Leader of the Pack. All other undead with a MV of 1 gain +1 MV. While this figure is on the map, ignore the -4 on the undead's initiative roll.
Go Forth Warrior
You now have all the knowledge necessary to tackle scenario 5: Shield Brother.
The rest of the rules can be found listed in the Tome of Knowledge in alphabetical order. As scenarios require new rules for terrain, threats, and undead, you will be instructed to read them before play. This presents the rules in a manageable amount and only when you need to learn them.
Write your saga, hero, the mortal world is counting on you!
Additional Rules
Party Control Sheet
The Party Control Sheet (PCS) is designed to record your heroes' progress in the campaign, including notes and huskarl details, among other things. Additionally, if you want to put the game away and save your progress, you will do that on this sheet.
The PCS can be found in the Tome of Knowledge: Character Sheets and Skills.
When you add new characters to your party, record the chosen character's name in a free box. As they acquire gear, weapons, clues, and other items keep track of these in the appropriate sections.
Your Party
You cannot have more than 4 characters in your party.
When huskarls are found, they can join your party. You can have up to 4 huskarls in your party -- record their details in the slots provided.
Any extra characters or huskarls you find will aid you for the duration of the scenario in which they are found, but will leave to find their own way when the scenario ends.
Should a character or huskarl fall, record the unfortunate incident in the Party Notes section and remove them from the PCS. New recruits may then join your party to fill their vacancy.
Scenario Forces
After scenario 5: Shield Brother, each scenario's forces section will list the number of heroes for the scenario. You may pick up to this number of characters and huskarls from your party to play the scenario.
Weapons and Gear
Rules for all gear and weapons can be found in the Tome of Knowledge, Appendix 1: Armoury.
After the name of the piece of gear you will find its keyword, "zero-space" or "small". The keyword "zero-space" indicates that the item does not use up a gear slot and "small" means that the item can be placed in the belt.
Interim Stages and Interim Scenarios
We have mentioned the Interim stage before but here we will expand on it.
The Interim stage occurs after each scenario. It is when bookkeeping tasks are recorded on the PCS and Character Sheets. It is also when XP is spent, skills gained, healing is done, and an Interim scenario may be played.
What you must do in the Interim stages:
- Record the scenario you just played.
- Adjust your characters' XP and Glory / Corruption levels.
What you may do in the Interim stage:
- Rearrange weapons, gear, supplies, and other items between heroes.
- Once per Interim stage, each hero may heal one wound by using a Healing Salve.
- Inscribe runestones into readied weapons.
- Spend XP to gain new skills.
- Play one of the Interim scenarios: Loot or For the Glory.
Lost Memory Motes
To fall in Niflheim is to lose more than just flesh and blood. To be killed there is to be sundered and unmade. Your soul, your hopes, your dreams, and your memories will be torn from you and will join your blood on the ground, leaving you a husk, at best a mindless draugr in thrall the Shadow Jarl for all eternity.
Others have come before you, either to stop the Shadow Jarl, being called to serve him, or trying to steal a portion of his power for themselves. Only a handful have returned. Passing through Niflheim, you will find their disembodied memories and fragments of their very souls that have been torn from them as their bodies fell to steel and claw. These memories are of hope, glory, and despair!
Orphaned by the loss of their original hosts, the lost memory motes will join with you when you find them (or they find you). Once they are absorbed, you will recall them as if it was YOU who experienced them firsthand when the memory was made. Some will heal you, some will strengthen you, and some will harm you as they tear at the edges of your soul.
Once you pass the junction between realms you will need more than mere food and water to survive this place. Perhaps these motes can be a boon to you instead of your final fate...
Starting with scenario 6, upon exiting a scenario, one character must randomly draw a Lost Memory Mote from the Lost Memory Mote Pool.
The Pool initially contains 60 numbered Mote tokens. Once the Mote is drawn, read the corresponding numbered Lost Memory Motes Entry which can be found in the Tome of Knowledge on page 43.
Lost Memory Motes may only be found once. Note down the number of each one you find on your PCS. Once all Lost Memory Motes have been found, shuffle all of them back into the supply. They may now be found again.
You may find Lost Memory Motes in other ways during your quest to eradicate the Shadow Jarl.
Glory Cost of Skills Example
Most skills cost Glory to use -- how much is denoted after the slash in the description of the skill. You can use any skill as long as you can cover the cost by moving enough steps down on the Fate track. You can have a maximum of 10 Corruption.
Let's have a look at the Weapon Craft level 3 skill -- "Blade Flurry". After the title, it lists "/ 2" which means using the skill costs 2 Glory.
Let's assume that Frida currently has 1 Glory. Using the skill would remove the peg from the Glory track and would place a peg on the lowest space of the Corruption track. If she uses the skill again, her Corruption would increase to 3. A third use would put her at 5 Corruption and expose her to the penalty of -1MP.
Unlocking Huskarl Skills
Each huskarl can spend their XP like a character in the Interim stage, unlocking up to 2 skills on the PCS in their dedicated skill section.
Abbreviations
- AD = Attack Dice
- AM = Attack Modifier
- AOE = Area of Effect
- DRM = Die Roll Modifier
- H2H = Hand-to-Hand
- H2H-S/W = Hand-to-Hand Stun / Wound values
- HV = Health value
- LOS = Line of Sight
- LOS AM = Line of Sight Attack Modifier
- MA = Movement Action
- MP = Movement Point
- MV = Move value
- PBR = Point-Blank Range
- PCS = Party Control Sheet
- PRJ = Projectile
- R = Ranged
- RM = Range Modifier
- R-S/W = Ranged Stun / Wound values
- S = Stun value
- W = Wound value
- XP = Experience points
- ZOC = Zone of Control
-
- = One-Handed Weapon