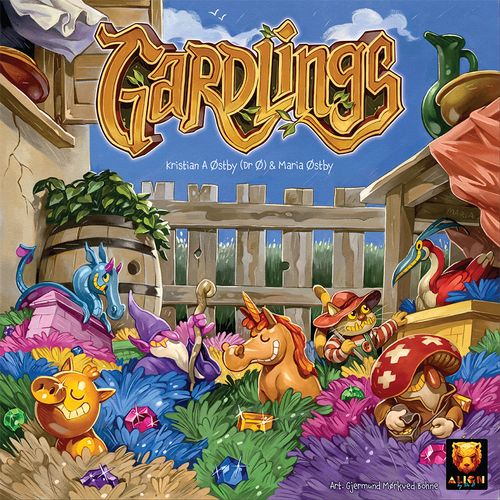
Gardlings
Gardlings Rulebook
Table of Contents
Table of Contents
Game Material
131 Gardlings tiles (22 lucky piglets, 23 green 4s, 23 blue 7s, 17 pink 10s, 15 gold 14s, 20 gnomes, 10 double gnomes, 1 victory tile), 5 cloth bags, 32 coins, 1 market board, 7 large mission tiles.
Note: You only need the 7 mission tiles if you are playing with the "Mission Tiles" mini-expansion. You can find more about that further on.
Setup
- Place the market board in the middle of the table.
- Sort the tiles by their backs and shuffle each kind well by itself. First divide the green 4 tiles into 2 roughly equal-sized stacks. Place these face up at the matching spaces on the market board. Do the same with the 7, 10, and 14 tiles.
- Place the black victory tile with the 17 side up to the right of the market board. If you want a longer game, turn the victory tile to the side with the 20.
- Place 1 coin next to each blue, pink, and gold stack. (Don't forget the stacks above the market board!) Place the remaining coins as a supply next to the market board.
- Place the lucky piglets face down in a stack to the left of the market board.
- Everyone takes a cloth bag and fills it with tiles as follows: 4 single gnomes, 2 double gnomes, 2 lucky piglets. (Draw the tiles at random.)
- The youngest person receives the start player marker and places it in front of them with the green side face up.
Note: This first explains the base game. The solo game, the expert variant, and the "Mission Tiles" mini-expansion can be found further back.
Game Flow
Every round of Gardlings takes place in 2 phases: Garden Building and Hiring Gardlings.
You play until, at the end of a round, someone can buy the victory tile. If nobody buys the victory tile, a new round is prepared.
Phase 1: Garden Building
This phase you all play simultaneously.
During garden building, everyone draws one tile after another from their bag and places it together to form their own garden. There is no turn order here — everyone places tiles into their own garden at the same time.
You simply place the first tile in front of you. Starting with the second tile, and for all that follow, you must follow the placement rules:
- You may not decline to place a tile.
- You may rotate the tile however you like before placing it.
- The tile must be placed face up, and adjoin your other tiles with at least one side, vertically or horizontally. The color of the tiles does not matter.
- On the edges of the tiles are gem halves as well as empty connections. Gem halves must always be matched to a same-colored gem. Empty connections must be placed against empty connections.
Some Gardlings (the small creatures on the tiles) have effects when placed or while they lie in your garden. The effects of the Gardlings are described under "Effects of the Gardlings."
Continue or Stop?
Before drawing each new tile, you can decide whether you want to draw another tile from your bag or whether you want to stop. You may also react to what others at the table do and perhaps draw another tile even though you had actually already stopped.
But be careful! If you draw too many gnomes from your bag, you trigger a gnome alarm in your garden.
Gnome Alarm! If you draw a tile from your bag that would bring the number of gnomes in your garden to 6 or more, you have a gnome alarm in your garden! You may no longer place the tile you just drew, and must stop garden building.
Place the tile face down in front of you as a reminder of the gnome alarm. The gnomes will steal a few of your gems...
Example: With this tile, Maria would have 6 gnomes in her garden. Gnome alarm! She may no longer place the tile, and may not draw any further tiles from her bag.
Should the rare case occur that you draw a tile and cannot place it anywhere, you must likewise stop garden building.
Phase 2: Hiring Gardlings
This phase takes place clockwise, one player after another.
As soon as everyone has finished Phase 1: Garden Building, everyone may hire exactly one Gardling. The person with the start player marker in front of them may begin. After that, play continues clockwise.
Count up all the complete gems in your garden. Each gem counts as 1 money, which is available to you for hiring this round.
If you triggered a gnome alarm during garden building, the gnomes steal 3 of your gems.
Example: Maria has gathered 7 gems in her garden. However, she triggered a gnome alarm. So she may go hiring with 4 money.
From this total, you may now buy exactly 1 tile. You may only buy the topmost tile of a stack. The costs for each stack are shown on the market board. If the tile is cheaper than your total, the rest is forfeited.
Coins: In this phase you may spend coins to be able to afford a more expensive tile. Each coin is worth 1 money. Unlike gems, coins do not expire. So you may also save coins for later rounds.
Lucky piglets: If you have less than 4 money and therefore cannot buy a tile (or you don't want to), you may take 1 lucky piglet from the left-hand stack and 1 coin.
Reward: At the start of the game, coins lie next to some of the stacks. If you buy the first tile of one of these stacks, you may also take the coin lying next to it as a reward.
Example: Maria still has 3 coins left over from the previous round. She can either buy one of the green 4 tiles, or spend 3 coins to buy a blue 7 tile. In that case she would also receive the coin lying next to it as a reward. Instead of buying, Maria can also take a lucky piglet and a coin if she wants.
Effects of the Gardlings
Some Gardlings (the small creatures on the tiles) have effects when placed or while they lie in your garden:
- Lucky piglets: If you have 3 or more lucky piglets placed in your garden, you immediately receive 1 coin from the supply.
- Gardeners: With 2 gardeners you may place a strong triple gem. This counts as 3 gems.
- Mushroom heads create gem connections. If both gems at the two ends of the white line are complete, you may also count the small bonus gem on it. Only the lower connection counts, since the gem at the top right is not complete. On these 3 tiles there are 5 gems in total.
- Birds of paradise lay shimmering, colorful eggs. They match any other gem color.
- Unicorns gallop around. You may move them at any time, even if you have already drawn other tiles, to a different spot in your garden (as long as you follow all placement rules and do not split your garden into multiple parts).
- Dragons make the gnomes afraid. If you have 3 or more dragons in your garden, you may ignore 1 gnome (so you only trigger a gnome alarm with the 7th gnome).
Winning the Game: Buying the Victory Tile
If you have (after any deduction from a gnome alarm) at least 17 gems in your garden (or 20 in a long game), you may buy the victory tile and win the game!
Attention: You may not use coins to buy the victory tile.
If several people can buy the victory tile in the same round, the person with the most gems in their garden that round wins. If there is also a tie there, whoever has more coins wins. If the number of coins is also equal, nobody may buy the victory tile, and a new round begins.
Preparing a New Round
Return the newly bought tile and all other tiles from your garden to your bag.
Whoever has the start player marker passes it to the next person clockwise. Then begin again with garden building.
Expert Variant
If you like, you can play with the following rule changes:
Setup
Turn the start player marker to the red side.
Gnome Alarm!
The gnomes become greedier. If you triggered a gnome alarm during garden building, the gnomes steal half of your gems (rounded down).
New: Ponds
If you have a gap in your garden (no matter how large it is) that is completely surrounded by tiles, you have built a pond! When hiring Gardlings, you receive 1 coin for each pond in your garden.
Lucky Piglets
The effect of the lucky piglets changes: If you have 3 or more lucky piglets in your garden, one of them mutates! After you have hired a Gardling, place 1 lucky piglet under a matching-colored stack on the market board. Then take a tile of the next more expensive color (beige → green, green → blue, blue → pink, pink → gold). Gold lucky piglets cannot mutate any further.
Mini-Expansion: Mission Tiles
Mission tiles can be combined with both the base game and the expert variant.
Setup
Shuffle the mission tiles, everyone takes 1 of them and places it in front of themselves. If you are playing with two or three people, everyone additionally places 1 mission tile between themselves and the person to their right.
The mission tile in front of you is the first tile in your garden. Each tile also gives you a new way to obtain gems.
Preparing a New Round
At the end of the round, you pass the mission tile you just used to the next person clockwise. In a game with two or three players, you first take the tile lying to your right. You place your old mission tile between yourself and the person to your left.
Effects of the Mission Tiles
- You receive the pictured number of gems if you have the respective shape lying anywhere in your garden. You may rotate and mirror the shape. You only get gems once, even if you build the shape multiple times.
- You receive 2 gems if you have 3 or more empty connections joined together in your garden.
- You receive 2 gems if you have 4 or more complete blue gems in your garden.
- You receive 3 gems if you have completely built around this tile.
- You may, once this round, at any time of your choosing, draw a second tile from your bag. Place the first tile you drew back into your bag afterward.
Solo Game
If you play alone, the game proceeds exactly as in the multiplayer variant. Here too, the goal is to buy the victory tile as quickly as possible. At the end of the solo game, simply look at how many tiles you needed in total (including the victory tile) and compare yourself with this table:
| Game to 17 points | Game to 20 points | Result |
|---|---|---|
| > 19 tiles | > 21 tiles | Try again! |
| 17-19 tiles | 19-21 tiles | Bronze |
| 14-16 tiles | 16-18 tiles | Silver |
| 13 or fewer tiles | 15 or fewer tiles | Gold |