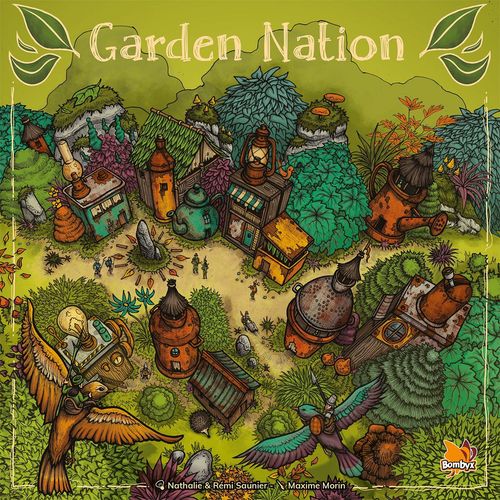
Garden Nation
Garden Nation Rulebook
Table of Contents
Table of Contents
Components
- 12 tiles (7 territories, 4 corners and 1 turn track) which form the main playing board once assembled
- 1 objectives board
- 45 objective cards: 21 common projects and 24 secret missions
- 80 building floor modules (20 of each color)
- 19 roofs
- 1 torticrane
- 4 personal player boards
- 9 bramble tokens (three different types of land: green grass, tall yellow grass, and red leaves)
- 16 ploy tokens
- 4 additional inhabitants tokens
- 4 70-victory-point tokens
- 4 population tokens
- 4 player tokens
- 4 score tokens
Game Setup
- Assemble the four corners of the board then randomly place the seven territory tiles to complete the puzzle: one in the center and the six others surrounding it in no particular order.
- Choose the side of the turn track according to the number of players (2/4 players or 3 players) and place it in its space on the board.
- Place the objectives board to the right of the main board. Shuffle the common projects and place the deck facedown on the objectives board. Reveal the top 4 common projects.
- Put the bramble tokens, the roofs, and the torticrane within reach of the players.
- Each player choses a player board, takes the tokens of their color and a number of floors based on the number of players:
- 2 players: 20 floors
- 3 players: 17 floors
- 4 players: 14 floors
- The first player is chosen at random (the yellow player in our example). They place their population token on number 38 of the population track on their player board. The other players place theirs on number 35.
- The first player places their player token on the first space of the turn track. The other players place theirs next to the turn track.
- All the score tokens are placed on the 0 space of the score track.
- Shuffle the secret missions to form a deck. Each player takes 4 secret missions and chooses 2 different ones. These are then placed in front of the player, hidden from view of the other players. The remaining cards are stored in the box.
Game Objective
The four exiled clans want to build a new city composed of different types of buildings in the seven territories of the garden. But there are hidden agendas within this common vision: each clan aspires to take over and get the most victory points. To do this, they will have to complete common projects and secret missions, but also take control of territories or even invade their opponents! The time of reckoning will come as soon as a clan has no more building floors in front of them with which to build.
Moving the Torticrane
The main board is formed from seven tiles, numbered 1-7, which represent territories. Each territory consists of seven areas (two green grass areas, two tall yellow grass areas, two red leaves areas, and one purple bramble area).
The area where the active player takes their action determines which territory the next action will be played on. To remember this, the active player moves the torticrane to the territory where the next action will take place.
If a player carries out their action on one of the center areas of any territory, the next action will take place in the central territory.
If a player carries out their action on one of the top right areas of any territory, the next action will take place in the top right territory of the main board.
It is possible that from one action to the next, the torticrane stays in the same territory.
Playing the Game
In Little People, the players don't always play in the same order: the active player chooses the next player from those who have not yet played their turn in the current round.
Each round has three phases:
- Player actions: Each player carries out 1 or 2 actions, depending on their position on the turn track. They can also complete common projects and/or use their ploys.
- Territory Control: In each territory, the player with the most floors gains inhabitants.
- Preparation for the next round: The last player of the round automatically becomes the first player of the following round.
Player Actions
The territory where the torticrane is located always determines where the player must carry out their action (see Actions, below). When it is a player's turn, they carry out a certain number of actions according to the number of symbols shown on the space of the turn track with their player token. After each action, they must move the torticrane according to the area where they carried out their action.
Every time a player carries out an action, they can also complete a common project (see Common Projects) and/or use one of their 4 ploy tokens (see Ploy Tokens).
Once all players have carried out their actions, they move on to the next phase, Territory Control.
Here is an example of a game round with four, three, and two players:
Four players
Player 1 (1 action)
- They carry out an action in the territory where the torticrane is located, then they move it to the territory where the next player must carry out their first action.
Note: The first player of the game carries out their action anywhere they want on the main board, then places the torticrane according to the area on which they played.
- They choose the next player from those who have not yet played, by placing that player's token on space 2 of the turn track.
Player 2 and player 3 (2 actions)
- They carry out a first action in the territory where the torticrane is located, then they move it to the territory where they must carry out their second action.
- They carry out their second action in the territory where the torticrane is located, then they move it to the territory where the following player must carry out their first action.
- They choose the next player from those who have not yet played, by placing that player's token on the next empty space of the turn track.
The last player of the round (2 actions)
- They carry out a first action in the territory where the torticrane is located, then they move it to the territory where they must carry out their second action.
- They carry out their second action in the territory where the torticrane is located, then they move it if necessary.
The game then moves on to the next phase, Territory Control.
Three players
The turn order principle is the same, but using the turn track on the 3-player side.
Two players
The players play one after the other. They use the turn track on the 2/4-player side. The first player places their player token on space 1 of the turn track; the second player places their token on space 2.
- Player 1 carries out an action in the territory where the torticrane is located, then they move it to the territory where the next player must carry out their first action. They then move their player token onto space 3 of the turn track.
- Player 2 carries out two actions, then moves their player token onto space 4 of the turn track.
- Player 1 and then player 2 play again before moving on to Territory Control.
Territory Control
When the last player has carried out their second action, the game moves on to the next phase, Territory Control.
The 7 territories are reviewed in ascending order. In each territory, the players count the number of floors of their color. The player with the most floors gains 2 inhabitants and moves forward 2 spaces on their population track. If players share this majority, they each gain 1 inhabitant on their population track.
Example: In territory 1, the green player has 3 floors and the red player only has 1. The green player has the majority; they gain 2 inhabitants and move forward 2 spaces on their population track.
Example: In territory 2, the red and blue players both have 2 floors. They share the majority so they each gain 1 inhabitant and move forward on their population track.
Population Track
The population track shows the number of inhabitants available to each player. The player moves their token as they send, gain, or recover inhabitants.
A player can have more than 40 inhabitants. When they reach 40, they place an additional inhabitants token in front of them and start again from square 1 on the track. To have 52 inhabitants, they have 12 inhabitants on the track + 40 represented by their additional inhabitants token.
A player can enter the red zone (below 10 inhabitants), but they cannot have less than 1 inhabitant: If they reach this square, they cannot send any more inhabitants until they have more again.
Preparation for the Next Round
The player on the last space of the turn track moves their player token to the first space; they then return the other players' tokens next to the track. Now, a new round begins.
Note: The last player carries out 3 consecutive actions, separated by the Territory Control phase (2 actions at the end of the round and 1 action at the start of the next round).
Actions
When it is their turn, a player has the choice between two actions: construct or abandon a building in the territory where the torticrane is located.
Construct a Building
The player places 1 of their floors in any area of the territory where the torticrane is located. But, they must also send a certain number of inhabitants to live in the building.
Note: A building is 1 or more floors in the same area.
Construct in an Empty Area
- The player moves their token on the population track down the same number of inhabitants as the number on the area they wish to construct in. So, to place a floor in an area of value 3, the player must move down 3 inhabitants on their population track.
- They place their floor in the chosen area.
A player can construct in a bramble area: There is one per territory. The player that constructs on it first chooses the type of land there for the rest of the game (green grass, tall yellow grass, or red leaves). All of these areas have a value of 5: The player moves down 5 inhabitants on their population track. Then, they choose the land type they want from the available bramble tokens and place it on the bramble area before placing their floor.
Note: Even if there is no longer a building on it later in the game, the bramble token remains in place.
Construct on an Existing Building
The player can add a floor to a building of their color, but they must send the necessary number of inhabitants to live there.
- They count the number of floors already constructed there.
- They calculate the number of inhabitants necessary: The value of the land + 1 inhabitant for each floor already constructed there.
- They move down on their population track.
- They place their floor on top of the existing floor(s).
There is no limit to the number of floors a building can have. A player cannot construct on top of another player's building.
Example: In a value 3 area, placing the 2nd floor requires 3 + 1 inhabitants; the 3rd floor requires 3 + 2...
The calculation in detail: Constructing the first floor required 3 inhabitants. Constructing the second floor required 4 inhabitants (3 for the land + 1 for the floor already constructed). So, the total number of inhabitants required for constructing this building of 2 floors was 7. By abandoning this building, the player increases their population by 7 x 2 = 14 inhabitants.
Abandon a Building
A player can abandon one of their buildings to recover the floors and inhabitants.
- The player takes the floors from the abandoned building back.
- They increase their population by the total number of inhabitants that were necessary to construct it x 2. There is a summary on each player board to help with the calculation.
Note: A player can abandon a building with a roof—the roof is returned to the reserve.
Example: A player had previously constructed a building of 2 floors in an area of value 3. The table shows that if they abandon this building, they increase their population by 14 inhabitants.
Impossible to Carry Out Any Action
It is possible that a player cannot carry out any action in the territory occupied by the torticrane. That is, they cannot construct (because there are no areas on which they can construct, they have no more floors, or they do not have enough inhabitants available) AND they cannot or do not want to abandon a building. In this case, they can play in the next territory in numerical order. If they cannot play in this territory either, they can play in the next one, and so on.
Note: If a player cannot play in territory 7, they can play in territory 1.
Objectives
There are two types of objectives: common projects and secret missions.
You must respect the land type indicated on the card to complete an objective. Each type of land is associated with an icon on the objectives to help those who suffer from color vision issues.
Some objectives must be carried out on several adjacent areas. These do not necessarily have to match the layout shown on the card; they can even be placed on 2 adjacent territories.
When there is a certain number of floors that must be constructed in order to complete an objective, it means the minimum number of floors. If a building has more than the required number of floors, it is still possible to complete the objective using that building.
Common Projects
These projects are available to all players and can award victory points during the game. A player can only complete one per action. They must do so at the moment when they place the required floor to complete the project.
To complete a common project, the player must carry out the following steps:
- They place a roof on the last floor they placed. The other buildings needed to complete the project, if any, do not receive a roof and remain open.
- They take the project and place it in front of them. The other players can no longer complete that project.
- They move forward on the score track the number of points indicated on the common project.
- They reveal a new common project. It is possible for them to complete it starting with their next action.
Important: You must not forget to place a roof on the building when a common project is completed. A building with a roof can no longer be used for common projects.
Example: The yellow player completes the "Terraced Houses" common project by constructing a second building in a green grass area. They place a roof on this building, which allows them to complete the project. That building is blocked.
Secret Missions
Each player has 2 secret missions, which they reveal to the other players and score only at the end of the game. The same building can count towards multiple secret missions.
Important: A building with a roof cannot be used for any secret mission except for the "Territory Control" mission.
Example: At the end of the game, a player reveals the "Observatory" and "Belfry" secret missions. They have successfully constructed 2 buildings with 4 floors and 1 building with 3 floors. This earns them 2 x 11 VP from the "Observatory" mission and 3 x 7 VP from the "Belfry" mission.
Roof
A roof is placed when a common project is completed. A building without a roof is open. A building with a roof is blocked:
- Additional floors cannot be added to it.
- It can no longer be used for any objective except the "Territory Control" secret missions.
- It can be abandoned: the roof is returned to the reserve.
- It can be invaded: the roof is returned to the reserve.
- The roof can be transferred.
Roof Transfer
Important: A roof transfer is not an action.
Making a roof transfer allows the active player to move the roof from one of their buildings to another of their buildings. The first building is then open again and the one with the roof is now blocked.
To do a roof transfer, the active player must:
- carry out an action in the same territory as the building with the roof they want to transfer.
- have an open building located on the same type of land, anywhere on the board.
- The player uses a ploy token and places it in the designated space on their player board.
- They move the roof onto the other building.
Note: The player must transfer a roof before carrying out their action.
Ploy Tokens
When it is their turn to play, a player can use 1 ploy token per action. If they have 2 actions in their turn, they may use a ploy token for each of their actions. The player can choose the same ploy several times. Once their 4 ploy tokens have been used, they cannot use any more ploys until the end of the game.
Strategic Movement
Important: A strategic movement is not an action.
Making a strategic movement allows the active player to avoid playing in the territory occupied by the torticrane. They have the choice between two other territories: the territory one number lower or higher. From territory 7, the move is to territory 1 and vice versa.
- The player uses a ploy token and places it in the designated space on their player board.
- They move the torticrane to the new territory where they choose to play.
Note: The player must use the strategic movement before carrying out their action.
Building Invasion
Important: Invasion is the only ploy that replaces the player's action.
Invasion allows the active player to take over another player's building without that player being able to refuse. To use this ploy, the active player must have the required number of inhabitants and play in the territory where they want to make their invasion. The torticrane will move based on the area where the invasion takes place.
- The player uses a ploy token and places it in the designated space on their player board.
- They reduce their population by the total number of inhabitants that were necessary to construct it x 2. There is a summary on each player board to help with the calculation (see Abandon a Building, above).
The player whose building is invaded increases their population by the same number of inhabitants by moving forward on their population track, and they take back their floors. If their building had a roof, the roof is returned to the reserve.
- The active player places an identical number of floors: if the invasion is made on a building with 2 floors, the new building must also have 2 floors.
Example: It is player 2's turn; they have 2 actions and must start in territory 5. For their first action, they use 1 ploy to use the strategic movement ploy (by spending 1 token) to play in territory 6 instead of 5. They abandon one of their buildings; this action sends the torticrane to territory 2. For their second action, they use 1 ploy to invade a building using the inhabitants they recovered with their first action.
End of the Game
The game ends when a player places their last floor, even if they retrieve another one before the end of their turn. The players finish the current round (Player Actions + Territory Control).
The players then move forward on the score track according to the victory points (VP) they earn from:
- their secret missions;
- their remaining population at the end of the game: depending on the position of their population token, they earn or lose points as shown below their population token. If the player has 40 inhabitants or more, they earn 10 victory points.
The player with the most victory points wins the game.
Note: If a player reaches the end of the score track, they take a 70 victory point token and start again from square 1.
Example: The blue player has 2 majorities for their "Territory Control" secret mission, and they have constructed 4 buildings with 2 floors for their "Market" mission. They earn 24 VP. During the game, they accumulated 20 VP, to which they add the additional points earned above: 12 + 12 + 8 + 20 = 52 VP. VICTORY!
Objectives in Detail
Reminder: When a number of floors is specified to complete an objective, it is the minimum number of floors. If a building has more than the required number of floors, it is still possible to complete the objective.
Common Projects
Reminder: A building with a roof can no longer be used for a common project.
Sacred Place | Infirmary | Fortress (value 4; 1 copy each) Construct a building with at least 2 floors on an area adjacent to an unoccupied area, respecting the indicated land types (1 copy each).
House | Herbalist | Prison (value 3; 1 copy each) Construct a building with at least 2 floors on the indicated land type in one of the 6 outside territories (1 copy each).
Terraced Houses | Forge | Outpost (value 3; 1 copy each) Construct 2 buildings with at least 1 floor on 2 adjacent areas of the indicated land type (1 copy each).
Sanctuary | Windmill | Bunker (value 5; 1 copy each) Construct 2 buildings, 1 with at least 2 floors and 1 with at least 1 floor, on 2 adjacent areas, respecting the indicated land type (1 copy each).
Apartments | Power Station | Radio Tower (value 7; 1 copy each) Construct a building with at least 3 floors on the indicated land type in the central territory (1 copy each).
Temple | Water Reservoir | Air Base (value 11; 1 copy each) Construct 3 buildings, 1 with at least 2 floors adjacent to 2 buildings with at least 1 floor respecting the indicated land types (1 copy each).
Secret Missions
Reminder: Buildings with a roof cannot be used to complete secret missions except for "Territory Control."
Cabaret | Post Office | Barracks (value 1; 2 copies each) At the end of the game, each floor the player has on the indicated type of land awards 1 VP. So, a player who has a building with 3 floors and a building with 2 floors constructed on the indicated land type earns 5 VP (2 copies each).
Sculpture | Market | Watchtower (value 3; 2 copies each) At the end of the game, each building the player has with at least 2 floors constructed on the indicated land type awards 3 VP (2 copies each).
Belfry (value 7; 2 copies) At the end of the game, each building the player has with at least 3 floors is worth 7 VP, regardless of the type of land. Only one belfry can be counted per territory (2 copies).
Observatory (value 11; 2 copies) At the end of the game, each building the player has with at least 4 floors awards 11 VP, regardless of the type of land. Only one observatory can be counted per territory (2 copies).
Territory Control (value 4 for one territory / 12 for both; 7 different copies, each indicating a different pair of territories) At the end of the game, having the most floors in one of the two territories indicated awards the player 4 VP. Having the most floors in both territories awards 12 VP. The majority must not be shared. Buildings with roofs count for the calculation of majorities (7 different copies).
Frida, the Torticrane
Several months ago, while exploring the garden, we found a note tucked into a plastic sleeve. A carefully written note by a child, "Frida, with mum and dad we have looked for you everywhere, but we haven't found you. I'm sad but we have to go to the new house. I hope that you'll make lots of new friends. Love always, Lily." For weeks we were on the lookout. Frida could have been a dog, a cat, a ferret…
One sunny morning, the ground shook under the old deckchair and the earth fell aside. Frida! A tortoise! As an engineer, I was quickly called to the site to see the damage to the houses. I remained motionless and tiny before this impressive mass. She turned her eyes towards me and suddenly it was as if I had found a long-lost friend. We quickly became inseparable.
It was much later that I had the idea of developing, with her agreement of course, a device to transform her into a torticrane to help construct our buildings. It took me three months of work and many tests to achieve the final result. Now Frida works with us; we feed her, play with her (the children love her) and she gets five weeks of holiday a year.
Malman, engineer of the Mecass clan.
The torticrane is built from salvaged human odds and ends: a lantern transformed into a cabin (it's a bit hot in the summer...), a metal ruler found near the bench, a bit rusty but still intact, small hessian bags of stones for counterweight, cogwheels found in an abandoned tool box in the garden shed, a closing hook from the shed door, and a colander that we brought with us during the Great Exodus.