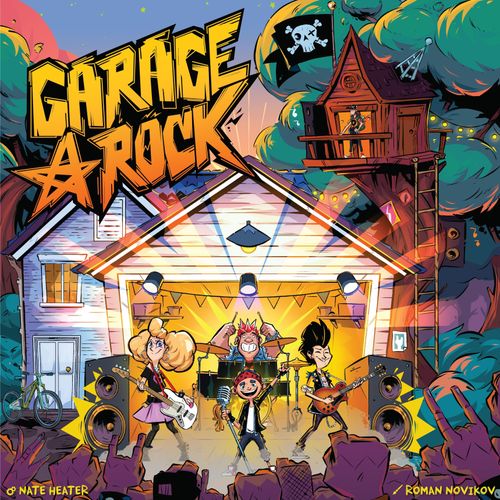
Garage Rock
Garage Rock Rulebook
Table of Contents
Table of Contents
- Tour of the Town
- General Components
- Player Components
- Main Board Setup
- Player Board Setup
- 2 Player Bot Deck Setup
- Turn Structure
- Step 1 (optional): Spend Motivation
- Step 2: Visit a Location
- Green Location Actions
- Blue Location Actions
- Yellow Location Actions
- Red Location Actions
- Step 3 (optional): Promote
- Play A Gig
- Pirate Radio Treehouse
- End of Turn Cleanup
- Rock Stars
- Rock Star Abilities
- Performance Cubes
- Battle of the Bands Showcase
- End Of The Game
- Alternate End Game Scoring
- 2 Player Rules
- Quick Reference
Tour of the Town
The Board represents the whole town and is broken up into 4 colored Locations: Green (Bottom Right), Blue (Bottom Left), Yellow (Top Left), and Red (Top Right), and then the Treehouse at the center of the board.
- Treehouse Radio Station. This is the Pirate Radio Treehouse, the heart of rock 'n' roll. This is where Johnny Law spins the tracks. Drop off your demo tape here.
- The Garage - Green Location. Where your band writes songs, practices, and perfects its Setlist.
- Zinko's Copy Shop - Blue Location. Make flyers and get your band's name out there.
- Shred Shack - Blue Location. Buy new instruments for your band.
- Just Rad Clothing - Yellow Location. Buy new outfits for your band members.
- Totally Inked Screen Printing - Yellow Location. Make Band Merch (T-shirts).
- Hit Factory Recording Studio - Red Location. Record your songs and make a Demo Tape.
- The Academy Music Lessons - Red Location. Get music lessons for your Band Members.
- Gigs. Each location has a Gig where your band plays to earn fans and money. Each Gig has specific song and skill requirements.
General Components
- 1 Game Board
- 1 Treehouse Radio Station
- 1 Calendar Token
- 1 Double-Sided Calendar Board
- Battle of the Bands: 1 Backdrop, 1 Stage Platform, 4 Stage Sides
- 29 Gig Cards
- 24 Song Tokens (8 Hit, 8 Rockin', and 8 Love Songs)
- 16 Talent Ribbon Tokens
- 16 Demo Tapes
- 16 Acrylic Instruments
- 12 Performance Cubes
- 4 Radio Cubes
- 1 Johnny Law Cube
- 20 Bot Cards
- 1 First Player VIP Lanyard
- 3 Construction Cones
- 1 Dry Erase Marker
- Money Tokens (10 x $5s, 25 x $1s)
Player Components
Components listed as printed for the full game (4 player):
- 4 Dual-layer Garage Player Boards
- 4 Performance Cube Volume Knobs
- 4 Motivation Volume Knobs
- 12 Skill Faders
- 4 Song Faders
- 4 Fan Markers
- 16 Band Tiles
- 24 Flyer Tokens
- 16 Popularity Markers
- 16 Band Members
- 16 Merch Tokens
- 16 Rockstar Ability Tokens
- 4 Bikes
- 16 Superfan Cubes
- 4 Player Aid Cards
- 6 Album Cards
Main Board Setup
Follow the below steps for setup of a standard 4 player game.
2-3 players: note the additional instructions marked with "2-3".
-
Place the Game Board in the center of your play area. In a 2 or 3 Player Game, add a Construction Cone Token to one Bike Rack location on each of the Blue, Yellow, and Red Locations.
-
Place the Treehouse Radio Station in the center of the Game Board. Rotate it so that each opening at the base of the trunk points towards a corner of the game board.
-
Find the two Dive Bar Gig Cards indicated with the Broken Heart icon on the back. Place the Rotten Roll Sushi Dive Bar Gig Card face up on the Green Gig Location Space, followed by the Soggy Spoon Yogurt Dive Bar Gig Card on the very top, also face up. These will be the only two Gig Cards at this location for the entire game.
-
Create the Gig Deck.
- Sort the Gig Cards into 5 piles based on Gig Level. The Gig Level is indicated on the back of the Gig Cards by counting the Star Icon. There are also 3 After Party cards, indicated by the Moon Icon.
- 6 Level 1 Gigs
- 6 Level 2 Gigs
- 6 Level 3 Gigs
- 6 Level 4 Gigs
- 3 After Party Gigs
- Shuffle each pile separately.
- From each Gig pile, randomly draw:
- 2-3 Player: 2 After Party Cards, 2 Level 4 Gig Cards, 2 Level 3 Gig Cards, 3 Level 2 Gig Cards, 3 Level 1 Gig Cards.
- 4 Player: 3 After Party Cards, 3 Level 4 Gig Cards, 3 Level 3 Gig Cards, 3 Level 2 Gig Cards, 4 Level 1 Gig Cards.
- Stack the cards face-down in the following order (top to bottom): Level 1 Gig Cards, Level 2 Gig Cards, Level 3 Gig Cards, Level 4 Gig Cards, After Party Gig Cards.
- Sort the Gig Cards into 5 piles based on Gig Level. The Gig Level is indicated on the back of the Gig Cards by counting the Star Icon. There are also 3 After Party cards, indicated by the Moon Icon.
Player Board Setup
Each player takes a Player Board, a Player Aid, and all matching color components and then does the following:
- Make sure you have the matching Band Member Tiles slotted into the correct positions and on the correct side facing up.
- From left to right: Bassist, Drummer, Singer, and Guitarist.
- All tiles need to have the non-upgraded side face up. The non-upgraded band tile side will match your Band Member art.
- Place your 4 Band Members so they are standing upright in the slots below their matching Band Member Tiles.
- Place the 3 Skill Faders into the Fader Tracks. Place 1 black Song Fader in the left most fader slot.
- Place the 2 Volume Knobs matching in the holes on the Mixing Board. Match the Knob type to the Mixing Board icon. Make sure both knobs are at the 0 value.
- Place your Bike upright on the Bike space as shown.
- Place the 4 Rock Star Abilities next to your board along with the 4 Super Fan Cubes next to the Rock Star Abilities.
- Place your Fan Heart Tracker on the 0 space of the Fan Track on the Main Board.
- Place your 4 Popularity Track Markers near the bottom of each of the four Popularity Tracks as shown, just off the Game Board.
- Shuffle the Album Cards and have each player draw one. Slot it underneath your player board in the indicated slot so you can see the song requirements.
- Choose 1 Song Token and place it in your Written Songs area of your player board. Be sure to keep the black side face-down for now.
- PRO TIP: Try and match the songs on the starting gig cards and/or your Album Card to see which song to start with!
- Take 1 Flyer Token and place it in the space as shown. Place your remaining flyers in the space shown at Zinko's Copy Shop.
- Place all 4 Merch Tokens of your player color at the space shown at Totally Inked Screenprinting shop.
- Take 1 Player Aid Card.
- The player who most recently went to a concert gets to wear the First Player All Access VIP Badge. Then players will receive the following. Take starting money based on player order:
- 1st player: $5
- 2nd player: $6
- 3rd player: $6
- 4th player: $7
- It's time to give your band its legendary name! Use the dry-erase marker to write your band name in the banner that's hanging above your Garage. Note: Only the banner has a dry-erase coating so it can be erased. Be EXTRA careful to stay within the banner lines, or you might mark the board itself.
2 Player Bot Deck Setup
To simulate a third player in a 2-player game, you will use the Band Bot. The Band Bot doesn't collect Fans, Money, or any resources. They only use Band Members, Flyer tokens in its player color, and the Band Bot Deck.
- Choose an unused player color and place its 4 Band Members nearby.
- Stack that color's Flyer Tokens next to the Band Members.
- Shuffle the Band Bot Deck and place it face down beside them.
See Band Bot Rules below.
"Name your band loud, name it proud, but don't color outside the lines, dude. That's not rock, that's just messy!"
Turn Structure
Garage Rock is played over a span of 4 summer months (June through September), totaling 16 weeks (June through August, totaling 12 weeks for a 2 or 3 player game). Starting with the first player, each player will take their turn in clockwise order, continuing until the end game is triggered.
On your turn, you will do one of the following turn options:
- Option A: Place A Band Member
- Step 1 (optional): Spend Motivation (see below).
- Step 2: Visit a Location (see page 12).
- Step 3 (optional): Promote (see page 22). This optional free action allows you to post a Flyer on the wall of a Gig Card, or hand Johnny Law your Demo Tape if he is in the same Colored Location where you perform your action.
- End of Turn Cleanup (see page 24): Check if any of your Band Members have been upgraded to Rock Star status. If so, select one Rock Star Ability for that member.
- Option B: Play A Gig
- When your Band is ready to play a gig, or if there are no more Band Members left to place, gather your Band and choose one of the four available gigs to perform.
- Step 1 (optional): Spend Motivation (see below). At the start of your turn, you may spend Motivation for one bonus (write a song, practice, or gain a skill upgrade). You may not unlock your bike when choosing to Play a Gig.
- Step 2: Resolve Gig Steps (see page 20). Instead of placing a Band Member, you may choose to Play a Gig. Resolve the Gig steps in full, found on page 20. There is no Promote step when playing a Gig.
- End of Turn Cleanup (see page 24): Check if any of your Band Members have been upgraded to Rock Star status. If so, select one Rock Star Ability for that member.
- After playing a Gig, on your next turn you must remove and replace the Gig card, returning any Merch or Flyers to the supply.
- Note: If another band plays (opens) at the Gig before your next turn, you must still perform the same cleanup steps at that time.
Step 1 (optional): Spend Motivation
Motivation is represented by the blue lightning bolt icon and is tracked on your Mixing Board volume knob with the matching Motivation symbol. On the right side of the Motivation Volume Knob, you will see the three motivation bonuses and the cost to activate them.
Step 1 of your turn is deciding whether to spend Motivation. You may spend Motivation to gain one bonus benefit: either unlock your bike, write a song/practice, or upgrade a skill. You may only choose one of these benefits per turn. Spending Motivation is optional, but it must be done before Step 2 (Placing a Band Member or Playing a Gig).
Keep in mind that you can't hold more than 6 Motivation, so if you're at the maximum and gain more, you'll lose any excess.
Activate Your Bike
Spend 1 Motivation to activate your Bike.
To use the Bike, place a Band Member on it and then place the Bike on an Action Space with an available Bike Rack. While using the Bike, you may perform both actions at the location instead of just one.
Bike Rules
- If there are no available Bike Racks, you may not activate the Bike.
- The player must have enough money to perform both actions when using the Bike.
- You must perform each of the Location Actions once; you cannot repeat the same action. This also applies to the Garage Green Action location.
- Once the Bike is placed at a Bike Rack on an Action Space, it is considered used until the Band Members are recalled by playing a gig. When you recall your Band Members, the Bike is returned to the Player Board and will be available for use on your next turn.
See the Bike example on page 15.
Write Song or Practice
Spend 3 Motivation to perform either the Write Song Action or the Practice Action. If you choose to Write Song, immediately take any Song Token of your choice and place it on the Written Songs area on your player board. If you choose to perform the Practice Action, move over the Song Tokens to the Setlist area depending on your Song Fader Value on the left side of the Mixing Board.
Upgrade One Free Skill
Spend 6 Motivation to upgrade any one free skill of your choice. Choose one skill and make the necessary adjustments to the specific Band Member and also increase the matching Skill Fader.
Example
It's Blue's turn. They currently have 6 Motivation stored on their Motivation Volume Knob and decide to spend all 6 to gain a free Skill Upgrade. Before Visiting a Location (Step 2), Blue chooses to upgrade their Drummer's Sound Skill by acquiring a new Drum Set. They spend all 6 Motivation, turning their Motivation Volume Knob down to 0. Blue then takes a Drum Set Token from the Shred Shack and places it on their Drummer Tile, covering the old drum set. Finally, Blue increases their Sound Skill Fader to Level 1.
Example
It's Yellow's turn. They currently have 4 Motivation saved on their Motivation Volume Knob and want to perform the Practice Songs action. Before Visiting a Location (Step 2) they spend 3 of their Motivation to Practice Songs. Their black Song Fader is currently at level 2, so they can move 2 Song Tokens over to their Setlist.
Step 2: Visit a Location
On Step 2 of your turn, place one Band Member from your Garage onto an open Action Space at any of the four Locations (Green, Blue, Yellow, or Red). Each Location has four Action Spaces. If you place a Band Member on a space with a Motivation or Money bonus, gain that bonus before resolving the action.
Band Member Placement Rules
- A Band Member may be placed on the Bike Rack Space without a bike. This space is considered to be available but the Band Member still can only take one action.
- You may place multiple Band Members at the same Location. If there is an available Action Space, you may place a Band Member there.
- You must be able to perform an action at the Location where you are placing a Band Member. If you do not have enough money to perform an action, you are not allowed to place a Band Member.
- If you do not have a Band Member to place, you must Play A Gig (see Play A Gig on page 19).
- If you place your Band Member on the money bonus space, you may use that money towards your action.
- If you place your Band Member on the Motivation bonus space, you may spend that Motivation at the beginning of your next turn. Spending Motivation is Step 1 of a player's turn (see Spend Motivation on page 10).
Green Location Actions
PRO TIP: The Green Location can get blocked quickly so make sure you get there early and often to perform the Practice Action. Don't forget you can always perform the Practice action by spending 3 Motivation before your action. This is a good way to get ready to play a gig if the Green Location is blocked.
There are two actions at the Garage. You can Write A Song or Practice.
Write A Song
Each band has the ability to write 6 total songs, 2 of each song type. There are 3 song types: Love Song, Hit Song, and Rockin' Song.
When your Band Member performs the Write A Song action, decide on a song type and then take the corresponding Song Token. Place the Song Token in one of the six available spaces in the Written Songs area on your Garage Player Board. This token now represents a song your band has written. Your band will keep all the songs it writes for the remainder of the game, but remember, you can only write a total of 6 songs.
Example
It is Orange's turn and they want to write a new song. Orange chooses to place their Guitar Player on the $2 Green Action Space and immediately gains $2. Then, Orange performs the Write Song action, takes the Hit Song token from the stack and places it on their Written Songs area on their Player Board.
Song Token Sides
The top side of a Song Token shows the song's type and indicates that your band has written the song. When flipped, the opposite side shows that the song has been recorded at the Recording Studio. This recorded side features a black background with the song type icon in the center. Understanding the difference between the two sides is important for earning extra fans at Gigs and completing your Album Card. (See Hit Factory Recording Studio Action on page 17 for details.)
"Time to write songs, practice and prep your setlist for your next big gig! Gigs will have certain song requirements in order to play as well as rewarding bands who play specific song types so try and play what the crowd wants to hear!"
Practice
When your Band Member performs the Practice action, you will choose the Song Tokens that you are practicing and move them over to the Setlist spaces. Thematically, your band is Practicing and selecting specific songs to prepare on your Setlist. These will be the songs that your band will be playing at a Gig. Your Setlist area can only hold at most 4 Song Tokens.
Moving Songs
When you Practice, you may move over a number of Song Tokens equal to the lowest level among your three Skill Faders. Use the black Song Fader to track this value: it represents both your lowest Skill level and how many Song Tokens you can move over. The number of songs you can move is shown by the Move Song icon on the left side of the black fader.
Once all 3 Skill Faders are at the same level, you will increase your Song Fader. The more skilled your band becomes, the more efficient your band is when performing the Practice action.
PRO TIP: Keep an eye on your Fader numbers! The black Song Fader tracks your Practice Song Value on the left side of the Mixing Board, while the white Skill Faders correspond to the white Skill numbers on the right side of the board.
Example
It is Blue's turn, and they choose the Practice action to move songs onto their Setlist in preparation for a Gig. They place their Bass Player on the available Green Action Space with the Bike Rack. Note: players may still cover the Bike Rack, but no bonus is gained when doing so. Blue resolves the Practice action by checking their black Song Fader, which is currently set to the Move 2 Songs level, as shown by the icon on the left side of the Mixing Board. Blue then moves 2 Song Tokens from their Written Songs area to their Setlist.
Written Songs
Once your band writes a song, it stays with your band for the rest of the game. The Song Token will move between the Written Songs area and your Setlist as you Practice and Play Gigs.
- When you Practice, you move Song Tokens from Written Songs to your Setlist.
- When you Play a Gig, those Song Tokens return to Written Songs (see Play A Gig on page 19).
Blue Location Actions
Zinko's Copy Shop
Visit Zinko's to make Flyers. The cost is 1 Flyer for $1 and 2 Flyers for $3. Take your player color's Flyer(s) and slot them into your Garage Player Board in the Flyer spot.
You will learn how to place a Flyer on a wall during the Promote Action section on page 22.
Shred Shack
Visit the Shred Shack to buy new instruments for your band. The cost is $4 for any instrument upgrade.
Increasing the Sound Skill steps:
- Place the newly purchased instrument on your matching Band Member Tile, covering the old instrument.
- Increase the Sound Skill Fader on your Mixing Board by 1.
Your band's Sound Skill value will play an important role when you Play A Gig (see the Play A Gig section on page 19).
Example
It is Orange's turn and they want to perform both actions at the Blue Location. Before doing so, they spend 1 Motivation to activate their Bike, which allows them to complete both actions at that Location. Orange places their Drummer on the Bike and moves both to the available Bike Rack in the Blue Action Spaces.
For the first action, Orange visits Zinko's Copy Shop and buys 2 Flyers for $3. The Flyers are placed on their Player Board in the Flyer spots.
For the second action, Orange heads to the Shred Shack to purchase a new Drumset. They pay $4, place the Drumset token on top of their old Drumset on the Player Board, and increase their Sound Skill Fader to level 1.
"New gear will help your band increase the Sound Skill. Don't forget, if you place your Singer, they will be buying a new Microphone. Match the instrument with the Band Member you placed at the Action Space. No swapping allowed - each band member sticks to their own gear!"
"Promoting your band with Flyers is super important to get your name out there! Flyers help your band gain immediate bonuses and gain additional Fans!"
Yellow Location Actions
Just Rad Clothing
Visit Just Rad Clothing to buy a new outfit at the cost of $3.
Increasing the Image Skill steps:
- Flip the Band Member Tile in your Garage Player Board that matches the Band Member you placed at the Location Action Space to the upgraded side. The upgraded side now shows a new outfit/look for that Band Member.
- The upgraded side of the tile shows the Image icon. (Note: this icon is not present in advance copies of the game.)
- Increase the Image Skill Fader on your Mixing Board by 1.
Your band's Image Skill value will play an important role when you Play A Gig (see the Play A Gig section on page 19).
Example
It's Blue's turn, and they choose to visit Just Rad Clothing to improve their Bass Player's Image Skill. They place their Bass Player on a Yellow Action space that includes a Motivation Bonus. Blue immediately gains 1 Motivation and increases their Motivation Volume Knob by 1. Next, Blue pays $3 and flips over the Bass Player's Band Member Tile on their Player Board to show the upgraded side. Then, they increase the Image Skill Fader by 1 level.
Because the lowest Skill Fader is now at level 2, Blue also raises the black Song Fader to match that level. As a result, when Blue takes the Practice action in the future, they'll be able to move up to 3 Songs to the Setlist (as indicated by the value "3" on the left side of the black Song Fader).
"Looking good is part of sounding great! New outfits boost your band's Image Skill, but keep in mind, each band member shops for themselves. If you place your Singer, they're the one picking out a fresh new look, not anyone else. Be sure to apply the Image Skill upgrade by flipping over the Band Member Tile of the same Band Member you placed on the Action Space."
Totally Inked Screen Printing
Note: this action is printed on the Red Location page spread, but the Tour of the Town names Totally Inked as the Yellow Location, and the example below places it there. It is kept under Yellow here.
Visit the Totally Inked Screen Printing Shop to make some Band Merch. The cost is $2 for 1 Band Merch and $5 for 2 Band Merch.
Band Merch is represented by the Band T-Shirt Token. Take your player color's Band Merch Token (T-Shirt) and slot it on your Garage Player Board in the Merch spot.
You will learn how to sell your Band Merch during the Play A Gig section on page 20.
Example
It's Pink's turn, and they place their Guitarist on the Yellow Action Space covering the Bike Rack. Since they're not using their Bike, they may only perform 1 action. They choose to visit Totally Inked Screen Printing and purchase 2 Band Merch for $5. The Merch is placed on the Merch space of their Player Board. Pink will be able to sell this Merch when they play a Gig later in the game.
"Fans want to buy your Band Merch at your Gigs. Selling your Merch gains you immediate bonuses of your choice."
Red Location Actions
Hit Factory Recording Studio
Visit the Hit Factory to record 1 or 2 songs and make a Demo Tape. You can record 1 Song for $3 or 2 Songs for $7.
Recording Songs Process:
- You must have an available song in order to record.
- You can choose any Song Token that is either in your Written Songs Area or a song from your Setlist that has not yet been recorded.
- Pay the recording cost for the chosen song.
- For each song recorded (maximum of 2 per action), take a Demo Tape token.
- Place each Demo Tape token into an open Demo Tape slot on your Garage Board. There are 3 slots, each tied to a Song Type. Place the token in the matching Song Type slot. If you record two songs of the same type, you may stack the Demo Tape tokens in that slot.
- Flip the chosen Song Token to its Recorded Song side (black background with the Song Type icon). A song can only be recorded one time.
"Want to get your tunes on the radio? Record your songs, make a Demo Tape and catch up with me so you can hand me your newest hit. I'll be sure to give it some air time on Pirate Radio to help you boost your Popularity and Fans!"
PRO TIP: Some Gig Cards reward Bands with extra Fans for performing a Recorded Song live. Recorded Songs also help you complete your Album Card and earn a Demo Tape, which you can give to Johnny Law to get your music played on Pirate Radio!
Example
It's Yellow's turn, and they want to visit the Hit Factory Recording Studio to record a Demo. They place their Guitar Player on the $1 Red Action Space, immediately gaining $1. Yellow chooses to record 2 Songs at a cost of $7. They flip over the 2 chosen Song Tokens to reveal the black Song Token icons, indicating they've been recorded. Next, Yellow takes 2 Demo Tape tokens and places them in the corresponding Demo Slots on their Player Board. Each Demo Tape token should be placed in the slot that matches the type of song that was recorded.
Album Cards
Each band begins the game with an Album Card that they are working to complete.
- To complete your Album, you must record all of the songs shown on your Album Card.
- Songs may be recorded in any order.
- You earn Fans immediately as you progress through your Album:
- After recording 3 of the 4 songs, gain 2 Fans.
- After recording the 4th song, gain 3 Fans.
- You are not required to record all 4 songs. Your band can still gain Fans after recording only 3.
- Once all 4 songs are recorded, your Album is finished. Remove it from the Tape Deck and flip it over to show the completed side.
The Academy Music Lessons
Visit The Academy to get music lessons for your Band Members. The cost for lessons is $2.
Increasing the Talent Skill steps:
- Take the Talent Ribbon Token and slot it on your Garage Player board below the Band Member that just completed the music lesson in the allotted space.
- Increase the Talent Skill Fader on your Mixing Board by 1.
It is very important to remember that when upgrading the Talent Skill, it is Band Member specific. If you place your Guitarist there, they will be getting guitar lessons only, not singing lessons or bass guitar lessons. So you can only slot the Talent Ribbon Token below the specific Band Member.
Example
It's Orange's turn and they send their Singer to The Academy to improve their Talent Skill. They place their Singer on the Red Action Space with a Motivation Bonus, immediately gaining 1 Motivation and increasing their Motivation Volume Knob by 1. Next, Orange pays $2 for the lesson. They take a Talent Ribbon Token and slot it beneath their Singer in the Ribbon Slot. Then, they raise their Talent Skill Fader by 1 level.
"Music Lessons will help your band increase the Talent Skill. Practice makes perfect!"
Step 3 (optional): Promote
On Step 3 of Placing a Band Member, you can take one optional free Promote Action after Visiting a Location (Step 2). There are two possible Promote actions. You can either Place a Flyer on the wall of a Gig Card or Hand Johnny Law a Demo Tape. You are not able to do both Promote actions, you can only choose one.
Note: You cannot take a Promote Action when you choose to Play a Gig.
Place a Flyer
If you have a Flyer, you may place it on any Gig Card Wall where you currently have a Band Member at that Gig Card Location. (Think of it this way: each Band Member who's taken an action is now carrying a Flyer in their pocket.) You may place 1 Flyer and gain the covered bonus immediately. You may place a Flyer immediately after buying Flyers at Zinko's Copy Shop.
Example
It's Pink's turn. They place their Guitarist on the Blue Action Spots to visit Zinko's and make some Flyers. By doing so, they cover a Motivation space and gain 1 Motivation. Next, they visit Zinko's and spend $3 to purchase 2 Flyers. During Step 3 of their turn, Pink has the option to Promote. They choose to use one of the Flyers they just bought. Currently, Pink has two Band Members in town: the Guitarist who just took an action, and their Drummer, who has been at the Yellow Location since a previous turn. Pink can place the Flyer at either the Blue Gig or the Yellow Gig. They choose to promote at the Yellow Gig: Spin City, covering the 2 Motivation bonus space and immediately gaining 2 Motivation.
Hand Johnny Law A Demo Tape
If you perform an action at a location where Johnny Law is present and you have a Demo Tape, you may use your optional Promote action to hand the tape to Johnny. Return the Demo Tape token back to the supply. Johnny will play your track over the airwaves of Pirate Radio. You will drop 3 Radio Cubes along with the Johnny Law Cube into the Treehouse and then increase your Popularity Tokens accordingly. (See the next section Pirate Radio Treehouse on page 23.)
Handing out your Demo Tape Rules:
- You may only hand Johnny Law a Demo Tape if your current action is performed at the same Location where Johnny is present. (Think of it this way: the Band Member performing the action is the one holding the Demo Tape. If Johnny isn't at that Location, you cannot give him a Demo, even if another Band Member is already there from a previous turn.)
- You may only give Johnny one Demo Tape per turn.
- If Johnny is at the Red Location and you record a new Demo at the Hit Factory Recording Studio, you may hand him that freshly recorded Demo immediately afterward as your Promote action.
- When you give Johnny a Demo, return the Demo Tape token to the supply. It is not kept on your board after being handed to him.
PRO TIP: Giving Johnny Law your Demo Tape is the fastest way to climb the Popularity Tracks. Higher Popularity means more bonuses and more Fans!
"Promoting your band is the secret to scoring extra bonuses and gaining more Fans! Stick some Flyers up on the walls or catch up with me at one of the locations and hand me your Demo Tape. I'll get your band on Pirate Radio, cranking up your popularity around town!"
Play A Gig
On Step 2 of your turn, you have the option to Play A Gig. You may choose to Play A Gig if you have met either of these two conditions:
- You do not have any other Band Members left to place out to take an action. If this is the case, you must Play A Gig.
- You meet the necessary Gig requirements and are ready to Play A Gig.
There is no Promote step when you Play a Gig.
PRO TIP: Sometimes it's smart to Play early before placing all 4 Band Members, especially if you're racing for a Headline Gig spot. Playing sooner also lets you recall your Band faster so you can upgrade the same member again and aim for Rock Star status.
Remember: you can't Play a Gig if all 4 Band Members are on your player board. At least one must be out on an action space.
Gig Card Anatomy
- Gig Name - The name of the Gig Location where you will be playing.
- Song Requirement - The minimum required number of Song Tokens that must be on your Setlist Area on your Garage Player Board.
- Skills Requirement - Minimum required Skill Value Level tracked on your Mixing Board.
- Fans Payout - Fans earned from playing the Gig.
- Song Match Payout - Optional Song Token match to earn bonus Fans.
- Money Payout - Money earned from playing the Gig.
- Merch Bonus Spots - Optional Merch Spots to sell Band Merch (T-Shirts), earning immediate bonuses.
- Flyer Bonus Spots - Spots to place a Flyer during the Promote Action, gaining the covered bonus immediately.
"Before we learn how to play a Gig, let's take a look at the Gig Cards!"
Steps for playing a Gig
1. Gather the Band
- Collect all of your Band Members from their Locations and your Garage Board.
- Place them on either the Headliner or Opener Stage of the Gig.
- Gain any bonuses from the stage spaces you cover.
- If both stages are open, you must choose the Headliner Stage.
2. Gain Stage Bonuses
- If you are the Headliner Band: gain 1 Performance Cube and 1 Popularity at the location of your Gig.
- If you are the Opener Band: gain 1 Motivation and 1 Fan for the Link Bonus.
- Link Bonus: If both Headliner and Opener bands are filled, each band gains 1 Fan immediately from the Link Bonus.
3. Gig Payout
- Gain the Fans shown on the Gig Card.
- If you matched all optional Song requirements, gain the bonus Fans shown on the card.
- Any Recorded Song: If an Optional Song has this icon, you must have any Recorded Song Token in your Setlist.
- Specific Recorded Song: Must have the exact recorded Song Token in your Setlist.
- Note: When matching optional songs, you must match all songs. You may not use 1 song for both matches.
- Gain Money listed on the Gig Card.
- Earn 1 extra Fan for each of your own Flyers placed on the Gig card.
4. Play your Songs
- Move all Song Tokens you performed back to your Written Songs area.
- Any unplayed Songs remain on your Setlist.
5. Sell Merch (optional)
- Place one Merch Token on a Merch space and gain the covered bonus immediately. You may only place one Merch per Gig.
6. Pirate Radio Air Time
- Drop 2 Radio Cubes plus the Johnny Law Cube into the Treehouse.
- Adjust Popularity and move Johnny Law based on the results (see page 23 for more details).
7. Advance the Calendar Marker
- Move the Calendar Marker forward one week.
Gig Clean Up
- On your next turn, remove any Merch and Flyers tokens from the Gig, return them to supply, and replace the Gig Card with the next one from the Gig Deck. Flip the new top card face-up.
- Return all Band Members to your Garage Board.
- If another band plays (opens) at the Gig before your next turn, you still perform the same cleanup steps immediately.
Additional Dive Bar Gig rules
- If you can't meet any Gig requirements at Blue, Yellow, or Red Locations, you must play at the Dive Bar (Green Location).
- Dive Bars have no requirements, no openers, and no bonuses. You only earn the listed payout of Fans, money, and +1 Fan for any of your own Flyers placed on the Gig.
- You may still sell Merch at a Dive Bar.
- Afterward, remove your band, any Flyers, and your Merch Tokens immediately.
- Only drop 1 Radio Cube and the Johnny Law Cube in the Treehouse when playing at a Dive Bar. Adjust your Popularity Tracks and move Johnny Law.
- Advance the Calendar Marker 1 Week (only when playing the Yogurt Dive Bar).
The game starts with the Yogurt Dive Bar. When the Calendar Marker reaches the Sushi Dive Bar icon (Week 6 in a 2- or 3-player game, or Week 8 in a 4-player game), you'll switch venues and replace the Yogurt Dive Bar Gig Card with the Sushi Dive Bar Gig Card.
- When playing any Dive Bar, skip this step. (Printed beside Gig Step 7, Advance the Calendar Marker.)
- When playing any Dive Bar, you only drop 1 Radio Cube and the Johnny Law Cube.
- When playing the "Rotten Roll" Sushi Dive Bar, skip this step. (Printed beside Gig Step 7, Advance the Calendar Marker.)
Example
It's Pink's turn, and they're ready to play a Gig. First, they check the Gig Requirements: they have the required 2 Songs on their Setlist and they confirm they meet the Skill Requirements, with at least 1 Image Skill and 1 Sound Skill, matching what's needed for the Gig.
With the requirements met, Pink gathers all 4 Band Members from the Action Location spaces and one from their Player Board. They place all Band Members on the Headliner Space, immediately gaining the Stage Bonuses. Pink increases the Red Popularity Track by 1 space and gains 1 Performance Cube by moving their Performance Cube Volume Knob up by 1.
Next, Pink receives their Gig Payout. They earn 5 Fans for completing the Gig. Since they performed 2 matching Songs, they gain 1 bonus Fan. Additionally, because Pink has their own Flyer posted on the Gig, they earn 1 more Fan. In total, Pink gains 7 Fans and moves their Fan Token up accordingly. Finally, they receive their cash payout of $3.
Pink now moves over the 2 Song Tokens from their Setlist on their Player Board back over to the Written Songs Area. These are the 2 Songs they played for the Gig.
Pink now chooses to sell Band Merch. They place 1 Band Merch Token on the Gig Card, covering the 3 Motivation bonus and immediately gain 3 Motivation.
Pink now gets airtime on Pirate Radio. They take 2 Radio Cubes and 1 Johnny Law Cube, placing them into the Pirate Radio Treehouse (see Pirate Radio Treehouse on page 23 for more details). One Radio Cube exits in the Red Location, showing 2 Notes, and the other exits in the Blue Location, showing 1 Note. Pink increases their Popularity by 2 spaces in the Red Location and 1 space in the Blue Location. Their Popularity Token in Red lands on the $2 bonus space, and they immediately collect $2. The Johnny Law Cube exits in the Yellow Location, so Pink moves Johnny Law to the Yellow Location's Pirate Flag.
Finally Pink advances the Calendar Tracker to the next week on the Calendar Board.
"Hey, if you wanna crank up your popularity around town, your band needs some serious airplay! I can hype up your upcoming gig, brag about how you totally rocked the last gig, and get your band some airtime by blasting your newest tracks. The more popular you get, the more bonuses and fans you'll rake in. Let's make you a local legend!"
Pirate Radio Treehouse
The Pirate Radio Treehouse is a cube tower with four exits at its base, each connecting to one of the town's four Locations: Green, Blue, Yellow, and Red. When a band interacts with the Treehouse, the player drops a specific number of Radio Cubes into the tower. These cubes scatter to the four Locations, representing townspeople who tuned in to Pirate Radio and caught Johnny promoting your band or playing your latest hit.
Each Radio Cube that lands in a Location increases your band's Popularity on that Location's corresponding Popularity Track. When moving your token along a Popularity Track, if you land on or pass a bonus space, you immediately gain its reward. Reaching the top of any Popularity Track earns your band an instant 3 Fans.
Radio Cubes have six faces: two show two music notes, and four show one music note. The exit the cube takes determines which Popularity Track you advance on, and the number of notes on the face-up side tells you how many spaces to move your token.
Note: Any time you drop Radio Cubes down the Treehouse, you will also drop the Johnny Law Cube with them.
Popularity Tracks
Each of the four Locations has its own Popularity Track. There are several ways to increase your Popularity:
- Headlining a Gig. When you take the Play a Gig action and place your band on the Headliner Stage, immediately move up 1 space on the Popularity Track for that Location.
- Flyer Radio Cube Bonus. If you have a Flyer Token and take the optional Promote action, you may place your Flyer on a flyer space with a Radio Cube bonus. When you do, immediately drop 1 Radio Cube and the Johnny Law Cube into the Treehouse and move up the corresponding Popularity Track based on where the cube lands and how many music notes are showing.
- Sell Merch During a Gig. While playing a gig, you can place a Merch Token (T-shirt) on one of the three Merch spots and gain its bonus immediately. If you cover the Radio Cubes bonus, you will drop 2 additional cubes during the Pirate Radio Air Time step. These are added on top of the 2 Radio Cubes and the Johnny Law Cube you normally drop when playing a Gig.
- Pirate Radio Air Time. One of the steps in the Play a Gig action includes Pirate Radio Air Time. During this step, drop 2 Radio Cubes and the Johnny Law Cube.
- Play Your Song on the Radio. After performing an action at a Location where Johnny Law is present, you can use the optional Promote action to give him your Demo Tape. Return your Demo Tape Token to the supply, then drop 3 Radio Cubes and the Johnny Law Cube into the Treehouse and move up the corresponding Popularity Tracks based on where they land.
Maxed Popularity Track
If you reach the top of any Popularity Track and you have more cubes exit to that location, the player will be awarded 1 Fan for each additional movement beyond the top.
Popularity Track Bonuses Example
It's Blue's turn, and they want to get a song played on Pirate Radio, but they haven't recorded a Demo yet. They notice that Johnny Law is currently at the Red Location, where the Hit Factory Recording Studio is located.
Blue decides to place their Singer at the Red Location and performs the Record a Song action at the Hit Factory. They pay $3, take a Demo Tape token, and slot it onto their Player Board. Then they flip their Love Song token to its recorded side.
Next, Blue performs the optional Promote action. Since Johnny Law is at the same location, they hand him the freshly recorded Demo by returning the Demo Tape token to the supply.
To determine where the song plays, Blue drops 3 Radio Cubes and the Johnny Law Cube down the Treehouse. Two Radio Cubes and the Johnny Law Cube exit to the Blue Location. One Radio Cube exits to the Yellow Location. Now Blue resolves the results:
- On the Blue Popularity Track, Blue advances 2 spaces (1 for each Radio Cube showing 1 note), earning 1 Merch token for passing a reward space.
- On the Yellow Popularity Track, they advance 2 spaces (from a cube showing 2 notes), earning $2 for passing a reward space.
Since the Johnny Law Cube landed at the Blue Location, he moves there.
Finally, Blue clears all cubes from the board and ends their turn.
End of Turn Cleanup
If one of your band members has achieved rock star status, the player will now select their rock star ability. The next player can go while you choose the rock star ability.
Gig Clean Up: After playing a Gig, on your next turn, you must return any Merch or Flyers to the supply. Remove the current Gig Card and replace it with the next one from the Gig Card Deck. Flip over the top Gig Card from the Deck so you always see what Gig is coming next.
Players return their Band Members to their Garage Player Boards. If another band plays (opens) at the Gig before your next turn, you must still perform the same cleanup steps at that time.
"Upgrade all three skills (Image, Talent, and Sound) and watch your band member transform into a full-blown neighborhood Rock Star! Once you've mastered it all, your band member unlocks a special Rock Star ability that'll help you dominate the rest of the game. Become a local legend, one skill at a time!"
Rock Stars
When a Band Member has all three Skills (Image, Talent, and Sound) upgraded, they achieve the coveted "Rock Star" status. Once you have upgraded your final Skill, on Step 4 of your turn you will choose a Rock Star Ability token and slot it below your Band Member Tile on your Garage Player Board. This will activate your Rock Star Ability for the entire band for the rest of the game.
Rock Star Abilities
- When you take a Promote action, you can place 2 Flyers gaining both covered bonuses.
- When you sell Merch at a Gig, you can place 2 Merch gaining both covered bonuses. You must have the Flyer or Merch Tokens in your supply to use this ability.
- When you take the Buy Merch action at the Totally Inked Screen Printing you gain 1 Flyer for free.
- When you Record a Demo Tape at the Hit Factory Recording Studio, you gain 1 Flyer for free. You only gain 1 Flyer when you take either of these actions.
- Anytime you drop a Radio Cube, you may move 1 cube result to a different location. You may not move it to a maxed out Popularity Track.
- Drop your 4 Super Fan Cubes in the Treehouse. Based on the result, place the Cubes on a Shop (Zinko's, Shred Shack, Just Rad, Totally Inked, Hit Factory, The Academy), the House (Green Location Garage), or a Gig.
- Super Fans placed at Shops give you a $1 discount when taking that action.
- Super Fans placed at one of the two Garage actions give you $1 when taking that action.
- Super Fans placed at a Gig Location give you 1 extra Fan if you play a Gig at that location.
- Super Fans are a one-time use and are immediately removed once activated.
Performance Cubes
Performance Cubes represent your band's energy, showmanship, and musical skill that will be used as your "fuel" to impress the crowd and climb the Stage Tracks during the Battle of the Bands Showcase.
Players track their Performance Cubes on their Garage Player Board using the Performance Cube Knob. Each time you gain a Performance Cube, turn the knob to the next number to reflect your new total.
How to Earn Performance Cubes
- Headlining a Gig. When your band takes the Play a Gig action and places on the Headliner Stage, you immediately earn 1 Performance Cube. Turn your Performance Cube Knob up by one on your Garage Player Board.
- Battle of the Bands Showcase. Right before performing at the Battle of the Bands Showcase, each band earns additional Performance Cubes based on the End Game Performance Cube conditions (see Battle of the Bands Showcase below).
Battle of the Bands Showcase
Once the Calendar Marker reaches the Battle of the Bands end game trigger, you will finish out the round so that everyone has an equal amount of turns.
Once every player has had an equal amount of turns, the Battle of the Bands Showcase will begin. During the Battle of the Bands Showcase, each band will perform one last time, trying to move their band members up the Stage Tracks. The Stage Tracks represent how well each of your band members performed. The more the band members increase on their track, the more end game Fans you will receive.
In order to increase on the Stage Track, players will be dropping a number of Performance Cubes down the Treehouse and depending on the locations the cubes land in, Band Members will be increasing on the Stage Track.
Every player will determine how many Performance Cubes they will be performing with.
"It's time for your performance at the Battle of the Bands Showcase! This is your final gig, where you'll showcase all the hard work your band has put in. It's your last chance to win over fans and leave a lasting impression with everything you've accomplished throughout the game."
Note: In a 2 Player Game, the Band Bot does not participate in the Battle of the Bands Showcase.
Battle of the Bands Performance Steps
1. Performance Cubes - Turn Up the Volume!
Place Johnny Law on the first space of the Performance Cube Scoring Track. For each condition met (from left to right), turn your Performance Cube volume knob up by 1.
- Have $10 or more left over
- Have one Band Skill at Level 4
- Have all 6 Songs written
- Have at least 3 Songs on your Setlist
- Have at least 3 Motivation remaining
- Have at least 1 Demo Tape Token slotted on your Player Board
2. Take The Stage
The player with the fewest fans (in last place) will collect all their band members and place them on the Main Stage Board, positioning them on the four Stage Tracks, covering their matching band member icons. This will serve as the starting position for your band members on the Stage Track. If any of your band members are Rock Stars (fully upgraded with all three skills), you'll advance those members along the Stage Tracks, covering the Rock Star icon. This will become their new starting position.
3. Place A Flyer and Sell Merch
Before the Band on stage performs, they may place 1 Flyer Token and 1 Merch Token on the available spots, immediately gaining the bonus covered. See next step "Perform" to help you determine which bonuses might help you the best.
4. Perform
It's time to hit the stage one last time and show the town what your band can do! In the Battle of the Bands Showcase, your goal is to deliver a showstopping performance. The better each band member performs, the more fans your band will earn.
Each band member is placed on a Stage Track that matches one of the four Town Location colors: Green, Blue, Yellow, or Red. To perform, drop all of your earned Performance Cubes based on your current value on the Performance Track into the Treehouse Cube Tower. The cubes will exit out and land in one of the four Town locations. For each cube that lands in a colored location, advance the matching band member along the corresponding Stage Track. The farther they climb, the better their performance and the more fans they'll bring in.
Performing Steps
- If any of your band members are Rock Stars, place them on the Rock Star Icon on the Stage Track. Rock Stars always start higher on the Stage Tracks.
- Look at the total value of where your token is on the Performance Track. Take that number of Performance Cubes.
- Play your show! Drop all earned Performance Cubes down the Treehouse Tower.
- For each Performance Cube in each of the Colored Locations, you will increase the matching Band Member up the Stage Track of the matching color.
- Once you have finished your performance and all Band Members have advanced on the Stage Track, locate the Fan value based on where the Band Members are on the track. Calculate the Fans and move your Fan Token up that number.
- Remove your Band from the stage and prepare for the next performance.
Bands will perform based on the Fan order, from last to first before the final performance.
Flyer Bonuses (on the Battle of the Bands stage):
- Gain 2 Fans immediately.
- Gain 1 Performance Cube.
- Move your Bassist OR Drummer up one space.
- Move your Singer OR Guitarist up one space.
Merch Bonuses (on the Battle of the Bands stage):
- Gain 3 Fans immediately.
- Gain 1 Performance Cube and 1 Fan.
- Move your Bassist AND Drummer up one space.
- Move your Singer AND Guitarist up one space.
Battle of the Bands Example
It's time for the Battle of the Bands, and Yellow is last on the Fan Track, which means they will perform first.
Yellow gathers all of their Band Members and places them on the corresponding icons on the Main Stage. Since both their Singer and Guitarist have reached Rock Star status, they begin two spaces up on their respective Main Stage tracks, starting on the Rock Star icon.
Yellow has earned a total of 8 Performance Cubes, calculated as follows:
- 4 cubes for headlining 4 shows
- 1 cube for having at least $10
- 1 cube for maxing out their Image Skill (Level 4)
- 1 cube for finishing the game with 3 or more leftover Motivation
- 1 cube for having at least 1 Demo Tape slotted on their Player Board
Yellow also has 1 Flyer and 1 Merch token remaining. These are placed before performing.
- The Flyer is placed on the +2 Fans bonus, and Yellow gains 2 Fans immediately.
- The Merch Token is placed on the bonus that advances Band Members, moving both the Singer and Guitarist up 1 space on their respective Main Stage tracks.
Now Yellow drops their 8 Performance Cubes into the Treehouse:
- 4 cubes exit to the Yellow Location, moving the Drummer up 4 spaces on the Yellow Main Stage track.
- 2 cubes exit to the Red Location, moving the Singer up 2 spaces on the Red Main Stage track.
- 1 cube exits to the Blue Location, moving the Bassist up 1 space on the Blue Main Stage track.
- 1 cube exits to the Green Location, moving the Guitarist up 1 space on the Green Main Stage track.
Now it's time to calculate Fans earned from the performance. For each Band Member, look at their final space on the Main Stage track and award the corresponding Fan value (shown on the right side of each track).
- Singer: 5 Fans
- Drummer: 4 Fans
- Guitarist: 4 Fans
- Bassist: 1 Fan
Yellow gains a total of 14 Fans from their performance. They move their Fan Token up 14 spaces on the Fan Track.
With Yellow's performance complete, their game is over. The next band in ascending Fan order now takes their turn to perform, following the same steps.
End Of The Game
Once all bands have finished performing at the Battle of the Bands Showcase, the game immediately ends. The player with the most Fans wins, and becomes the neighborhood's best band!
In case of a tie, the player with the most total popularity wins. If there is still a tie, share in the glory and go on tour together.
Alternate End Game Scoring
If players prefer to not use the Treehouse Cube Tower for the Battle of the Bands Performance, you may use this End Game Scoring method instead.
Once all players have had equal number of turns:
Use Johnny Law and place him on the first spot of the Performance Cube End Game Scoring Track and move him for each Scoring Condition starting from left and proceeding to the right.
Performance End Game Scoring Track
Each Band will earn 1 Performance Cube per each condition met.
- Space 1: Have at least $10 left over.
- Space 2: Have one of the Band Skills fader at Level 4.
- Space 3: Have all 6 Songs written.
- Space 4: Have at least 3 Songs on your Setlist.
- Space 5: Have 4 Motivation left over.
- Space 6: Have at least 1 Demo Tape Token slotted on your Player Garage Board.
Note: the printed Battle of the Bands condition reads "at least 3 Motivation remaining" and this alternate track reads "4 Motivation left over". Both are transcribed as printed.
Each player now adds the total value shown on their Performance Cube Knob and gains 1 Fan per Performance Cube.
Next, each player gains 2 Fans for every Rock Star in their band.
The player with the most Fans is declared the winner of the game.
2 Player Rules
To simulate a third player in a 2-player game, you will use the Band Bot. The Band Bot doesn't collect Fans, Money, resources, or participate in the Battle of the Bands at the end of the game. They only use Band Members, Flyer tokens in its player color, and the Band Bot Deck. After following the setup shown on pages 6-8, return here for rules on how to play with the Band Bot.
Band Bot Turn
The Band Bot takes turns just like a third player in clockwise player order. On their turn, flip over the top card from the Band Bot Deck and follow the card directions.
Band Bot Card Anatomy
The printed card anatomy is illustrated with numbered callouts. The callout numbered 2 on the card front has no separate printed text, so only the printed steps 1, 3 and 4 are transcribed.
-
Check for Gig Eligibility. Before placing a band member on an Action Space, first check how many Band Members the Band Bot has on the main board:
- a. If all 4 Band Members are on the board, the Band Bot will play a Gig. Use the Gig Color shown by the Stage Arch Color at the bottom of the card.
- b. If the card shows the 3+ icon, this means if 3 or more Band Members are on the board, the Band Bot will decide to play a Gig early, also using the Stage Arch color to determine the Gig location.
If neither condition is met, continue with the steps below.
-
Place a Band Member. Place one available Band Member at the preferred Action Location shown on the card (by color). The Band Bot will try to cover the bonus space shown.
- If that space is occupied, they will choose another available space at that location, preferably one with a bonus, or otherwise a Bike Rack.
- If all 4 Action Spaces are covered, the Band Bot will move to the next clockwise location. The Band Bot will still try to cover the bonus from the Band Bot card first, then any other bonus if available.
-
Promote Action (Flyer Placement). If the card shows the Flyer Placement icon on the top right, the Band Bot performs a Promote action at the same location:
- Place a Flyer Token on the Gig Card at that location.
- The token is placed on the left or right side, as indicated by the icon on the card.
- The Band Bot does not pay for Flyer Tokens. They always have a supply of Flyers for free.
- When a Flyer is removed from a Gig, it is returned to the Band Bot's supply.
- If the Band Bot runs out of Flyer Tokens, it simply skips the Promote Action, and no Flyers are placed.
Band Bot Example Turn
It's the Band Bot's turn, playing as the Blue Band.
- The top card of the Band Bot Deck is flipped and its instructions are followed.
- The Band Bot currently has only 2 Band Members placed in town, so it does not meet the requirement to play a Gig (which requires 3 or more Band Members on this particular card).
- Instead, the Band Bot will place a Band Member at the Red Action Location, aiming for the Action space with the Motivation bonus, as indicated on the card.
- However, that space is already occupied by another player. When this happens, the Band Bot chooses an alternate space at the same location, preferably one with a bonus, or if none are available, one of the Bike Racks.
- In this case, the Dollar bonus is open, so the Band Bot places a Band Member there.
- Finally, the card instructs the Band Bot to take a Promote Action, placing a Flyer Token on the left side of the current Red Location Gig Card.
- The Band Bot's turn is now over, and the card is placed in a Discard Pile formed next to the Deck.
Band Bot Example Turn: Playing a Gig
It's the Band Bot's next turn, still playing as the Blue Band.
- The top card of the Band Bot Deck is flipped and its instructions are read.
- The Band Bot now has at least 3 Band Members on the board, and the card states that if this condition is met, the Band Bot will play a Gig.
- The Band Bot skips the placement instructions at the top of the card and goes straight to the Gig.
- All 4 Blue Band Members are gathered and placed at the Blue Gig location (marked by the Blue Stage Arch), on the Headliner Stage from the card.
- Note: The Band Bot does not gain the bonus associated with the Headliner Stage.
- The Band Bot now performs only two Gig Steps:
- Drop the Johnny Law Cube and move Johnny Law based on the result.
- Advance the Calendar Marker forward 1 space.
If both the Headliner and Opener spots on a Gig are filled, the Band Bot and the other player each return their Band Meeples to their supply. Then, replace the completed Gig with the next card from the Gig Deck.
Remember, the Band Bot does not gain any Fans, Money, nor do they sell Merch or drop any Radio Cubes.
Quick Reference
Icon legend as printed on the final page. Icons are described by their printed labels.
- Resources: Fans (Points) (heart); Motivation (blue lightning bolt); Money; Demo Tape; Gain (a plus symbol); Gain Merch; Place Merch; Gain Flyer; Place Flyer; Merch (T-shirt); Flyer.
- Skills: Image Skill; Talent Skill; Sound Skill; Skill Fader; Talent Certificate.
- Songs: Written Song; Any Song; Any Recorded Song; Rockin' Song; Hit Song; Love Song; Practice Songs Value (how many songs you can move to your Setlist during a Practice Action); Song Fader; Move Songs from Setlist back to Written area.
- Actions: Write a Song (place a new Song token into your written song area); Practice a Song (move a song to your Setlist); Give a demo tape to Johnny Law (drop Radio and Johnny Law Cubes); Place a Band Member; Play a Gig; Dive Bar Gig; Advance Calendar Token.
- Popularity and Radio: Popularity Track; Johnny Law Cube; Performance Cube; Move up 1 or 2 spaces on the popularity track where this cube lands.
- Instrument icons: Bass, Drums, Vocals, Guitar.