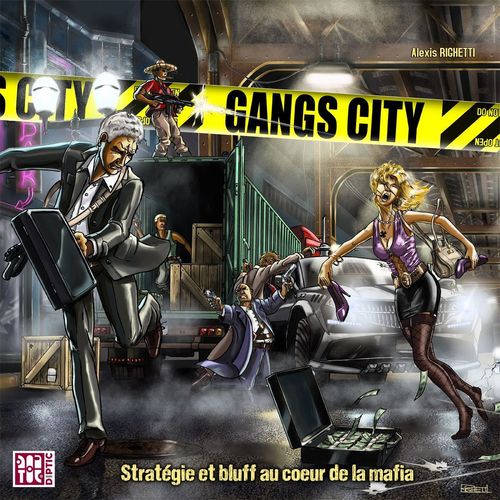
Gangs City
Gangs City Rulebook
Table of Contents
Table of Contents
Turn Overview
Each turn is played in four phases:
- Placements: 1. designate the first player; 2. players place their characters in turn order.
- Trafics: 1. bid stock tokens; 2. reveal the characters; 3. place gang tokens on the warehouse; 4. designate the trafic managers.
- Actions: 1. shootouts; 2. recruitments.
- End of turn: 1. reveal and place the new location(s); 2. mark the scores.
1. Object of the Game
There are two ways to score victory points: controlling trafics and owning a district.
1-1 Controlling Trafics
Each player scores the number of victory points corresponding to the trafics they control at the end of the turn. The longer a player remains leader of a trafic, the more points it is worth (see Chapter 5.4: Designating Trafic Leaders).
| Trafic | Drugs | Weapons | Prostitution | Alcohol | Tobacco |
|---|---|---|---|---|---|
| Victory points | 3 to 5 | 2 to 4 | 2 to 4 | 1 to 3 | 1 to 3 |
1-2 Owning a District
A player owns a district when they control at least 2 locations that are adjacent (touching along at least one side). In that case, the player scores a number of victory points equal to the total number of locations in their district minus 1. If a player has several districts, they score only for the largest one.
Example of a district: In the example, the green player has a district of 3 locations, made up of the gambling den (tripot), the cabaret and the nightclub (boîte de nuit). The Ghetto, at the top right, is not part of their district, so it does not count. The green player scores 2 victory points (3 locations minus 1). The purple player controls only one location, the arms dealer, which scores nothing.
1-3 Scoring Points
At the end of each turn, each player adds the victory points from the trafics they control and the points from their district to the points gained in the previous turn. Each player records their total by placing a gang marker of their colour on the score track of the board. When a total passes 10 or 20, a second marker is left on the "10" or "20" space as a reminder.
Example of recording the score: The score track is made of the numbers printed on the containers. Here the purple player has a score of 5 points. If they had 15 points, they would also place a marker on the "10" space.
The first player to reach the number of victory points shown in the table below wins the game.
| Players | 3 players | 4 players | 5 players | 6 players |
|---|---|---|---|---|
| Victory points needed to win | 26 | 22 | 18 | 14 |
2. Components
- 1 game board
- 15 hexagonal location tiles
- 55 character tiles, made up of:
- 8 small-time thugs (petites frappes)
- 11 drivers (conducteurs)
- 10 bodyguards
- 5 cops (flics)
- 4 dealers
- 4 pimps (macs)
- 3 hitwomen (tueuses à gages)
- 10 mercenaries
- 6 settling-the-score tiles (règlement de compte)
- 6 sets of 23 gang tokens (each set has 22 tokens in one colour plus 1 boss token)
- 60 stock tokens (12 for each trafic)
- 5 trafic manager markers (gérant de trafic)
- 3 player aid sheets and mercenary detail sheets
2.2 Character Tiles
There are two types of characters. "Generic" characters appear in several copies. "Specific" characters are unique and each has a special ability; these are the mercenaries, which are detailed in the reference sheets annexed to the rules. Generic characters are tiles showing the following information:
- Possible actions: depending on how the tile is placed on the board, the character performs an attack or defence action (red side) or a recruitment (green side). The value beside each symbol is the character's strength for that action. Not every character can perform every action: for example, a small-time thug cannot recruit.
- Trafic management capacities: defines which trafics the character can manage.
- Recruitment cost: the minimum recruitment value that must be reached to recruit the character.
2.3 Location Tiles
Locations are hexagonal tiles showing the following information:
- a space where the character tiles available for recruitment are placed;
- a space where the character tiles that manage the location's trafics are placed;
- the characters that can be recruited on the location (for example, 2 bodyguards, 1 driver and 1 mercenary);
- the trafics that can be managed on the location (for example, 1 drug trafic and 1 prostitution trafic);
- the location's initiative value.
Each time a new location is revealed and added to the city, place face up on it the character tiles available for recruitment there. When the location shows a mercenary symbol, draw one mercenary tile at random.
Place the recruitable characters as shown in the example, so that the location's information stays visible and the recruitment cost of each character can be seen.
Example of placing recruitable characters: On the Ghetto there are 2 dealers, 1 small-time thug and 1 mercenary to recruit. One mercenary is drawn at random, then the tiles of all these characters are placed so that their recruitment costs remain visible.
3. Setup
3.1 Forming the Starting Gangs
Each player chooses a gang colour and takes:
- the matching set of gang tokens of that colour (including the boss token);
- their starting gang, made up of 1 small-time thug, 1 bodyguard and 1 driver;
- 1 settling-the-score tile.
3.2 Placing the Board, Tokens and Tiles
- The board is placed on one side of the table. Each player places one of their colour tokens on the "0" space of the score track.
- The generic character tiles are placed beside the board, face up, sorted by type of character.
- The mercenary tiles are shuffled and placed in a face-down pile.
- The stock tokens and the trafic leader markers are placed beside the board.
3.3 Setting Up the Starting City
-
Shuffle the 15 location tiles, then place them face down in a pile in the middle of the table. This is the "city centre". For a 5 or 6 player game, split this pile into two piles of roughly equal size and place them side by side.
-
Draw one location from the pile and place it arbitrarily on one side of the city centre.
-
Then each player, in turn (order does not matter), draws a tile from the pile. If there are two piles, players draw alternately from one pile and then the other. All the tiles are then revealed. The player whose location has the lowest initiative value places their tile first, and play then proceeds clockwise. Players place their tiles in turn, wherever they wish, provided they respect these two constraints:
- the location must touch at least one other location along one side (the pile counts as a location);
- it is forbidden to completely surround a location during this initial setup.
Once every player has placed a location, the starting city is ready. The location pile(s) stay face down where they are.
-
On each location now revealed, set up the character tiles to be recruited, as explained in Chapter 2.3: Location Tiles.
Note: all the locations placed at the start are neutral; they belong to no one.
Example of a starting city: For a 5 player game, 5 locations plus the city centre are placed. For 3 players, 3 locations plus the city centre are placed. Two piles of locations are drawn from for 5 or 6 players; one pile is used for 3 or 4 players.
4. Placing Characters
4.1 Designating the First Player
The player who controls the location with the lowest initiative value chooses which player starts. Play then proceeds clockwise.
For the first turn of the game, the player who initially drew the location with the lowest initiative value starts (see Chapter 3.3: Setting Up the Starting City).
There are four types of action:
- Attack: lets a gang try to seize a neutral location or a location already owned by a player.
- Defence: lets a gang defend a location it owns against attacks by other gangs. A location that is not defended will necessarily be taken if someone attacks it.
- Recruitment: lets a gang recruit a character available on the location.
- Managing trafics: a character can manage one or more trafics of a location if it is itself competent in those trafics (that is, if the trafic's drawing appears on its tile). This allows the player to control a trafic, or at the very least to gain stock tokens.
4.2 Placement Procedure
During this phase, each player must place all their characters face down on the city, each with a gang token of their colour clearly visible on top.
To do this, the first player places a single one of their characters on the city. Then the second player places one, and so on. Table rounds are played in this way until all the characters of all the gangs have been placed.
There are three types of placement:
- Placements on the sides of locations: these allow an attack, a recruitment or a defence action. Here the orientation of the character tile (placed face down) secretly defines the action performed.
- Placements on locations (only possible if the player owns the location): these allow the player to manage the trafics of the location.
- Placements on the city centre: all players can place characters on the city centre (the pile) to seize the first unrevealed location in the pile. The action is then necessarily an attack.
4.3 Placements on the Sides of Locations
Characters can therefore be placed on the free sides of location tiles. Depending on the orientation of its tile, a character can perform an attack, a defence or a recruitment. The side of the character tile that touches the location defines which action is performed. The red side designates the "combat" action: an attack on an opposing location, or a defence of a location the player owns. The green side designates a recruitment.
Example (Figure 1): the cop performs an attack on the cabaret, while the bodyguard recruits at the casino.
When a player has placed one of their characters on the edge of a location tile, no other player can bring a character to that side. Opponents must position themselves on the other edges of the location, if any are still free. Moreover, once a character is placed on a side, it takes up the space that would otherwise be occupied by a location tile placed on that side.
For example, in Figure 1, no other character can be placed on the location side in the hatched grey area 1, because it is already occupied by the cop. This placement is strategic for the green player, who owns the nightclub (see their green token 2): it prevents other players from coming to that location.
It is however possible for a player to stack characters on top of one another, provided that they perform the same action (see Figure 2). Nothing prevents a player from placing several characters performing the same action, or different actions, on several sides of the same location (see Figure 2).
Example (Figure 2): the yellow player attacks the bar from several sides, 1 and 2. They have also "stacked" 2 characters on side 2. The green player already owns the location, which explains why they could place the bodyguard 3 on it. They have also placed a dealer in defence 4. Finally, they perform a recruitment with their pimp 5.
4.4 Placements on Locations
A player can place one or more characters on a location if they own it and wish to perform the action "manage the trafics of the location". In that case no tile orientation is defined. Only characters that can actually manage one or more of the location's trafics may be placed for management. For example, if the location shows a weapons and drugs trafic symbol, only a character able to manage at least weapons or drugs may be placed there, that is, a character that also bears at least one of these symbols on its tile. As mercenaries cannot manage trafics, they cannot be placed on locations either.
4.5 Placements on the City Centre
When placing, a player may choose to put characters on the city centre (the face-down pile of location tiles, in the middle of the board) in order to seize the first location at the top of the pile. The action is necessarily an attack.
In the case of two piles (5 or 6 players), a player may place on either pile, so two new locations can potentially be taken.
If several players place characters on the same pile, a shootout necessarily takes place. It is resolved normally (see Chapter 6.1: Shootouts), except that any settling-the-score tile is then necessarily treated as placed "big calibre" (see Chapter 4.7: Settling-the-Score Tiles).
The winner of the shootout takes the first tile of the pile and keeps it face down. It will be revealed and placed at the end of the turn (see Chapter 7.1: Opening a New Location).
4.6 The Gang Boss
When placing, a player must choose one of their characters as gang boss. To show this, they place the boss token of their colour in place of the standard token (the boss token is the largest). The gang boss may change each turn.
The player chooses their boss during placement. They may not add the boss token to a character that is already placed. If they forget, their gang has no boss for the turn.
A gang boss gives a +1 bonus to all the characters of their gang that perform the same action as them on the location (attack, defence or recruitment). If the gang boss manages a trafic, this gives no advantage. For more details, see the following chapters on resolving actions.
Example (Figure 2): the yellow player has chosen their hitwoman as gang boss 1. In this example she gives a +1 bonus to herself and to the other attacking characters of the gang, namely the cop and the small-time thug 2.
4.7 Settling-the-Score Tiles
When placing, each player may add their settling-the-score tile to accompany one or more characters that perform an attack or defence action. This tile is placed exactly like a character tile: face down, with a token of the player's colour, at any moment during placement. No opposing player must know that it is a settling-the-score tile.
- If the side of the tile facing the location is the red side ("big calibre"), the player will kill one opposing character.
- If it is the blue side ("bulletproof vest"), the player is protected against opposing settling-the-score tiles (see Chapter 6.1: Shootouts).
It is forbidden to place this tile alone on the side of a location, or on a location. Likewise, this tile cannot accompany a character that is recruiting.
However, even though the "big calibre" side designates an attack on an opposing gang and the "bulletproof vest" side designates a defence against other gangs, a gang in defence may very well receive this tile oriented "big calibre", and vice versa.
It can happen that a player makes a mistake when placing their settling-the-score tile and only realises it when the tiles are revealed (a tile placed alone on a side of a location, a tile placed on a location, or a tile placed on a recruiting character). In that case, apply the rules in the table below:
| Situation | First time the player makes this error | The player has already made this error |
|---|---|---|
| The player has characters fighting on the location concerned | The tile is counted for the characters in the fight, as if nothing had happened. | The tile is removed before the shootouts are resolved. It will not be taken into account. |
| The player has no characters fighting on the location concerned | The tile is removed, with no effect. | The player loses 1 victory point. |
At the end of placement, characters must remain face down on the city.
5. Trafics
5.1 Selling Stock
Before managing trafics proper, each player may decide to sell stock tokens they collected from their trafics in previous turns (see Chapter 5.5: Collecting Stock Tokens). Stock is sold by secret bidding: each player takes the number of tokens they want (or none) in hand, out of sight, and everyone simultaneously reveals what they bid. The stock tokens bid by a player are added to the number of trafic symbols that player manages this turn. However, any token bid is discarded afterwards.
Each player then places the stock tokens they bid in piles on the matching spaces of the warehouse (entrepôt) drawn on the board: weapons in the "weapons" sector, drugs in the "drugs" sector, and so on. To remember that these are their tokens, each player places a gang marker of their colour on top of them.
Example (Figure 3): 1 shows the result of the secret bids of the blue and red players. The stock tokens are then placed on the board's warehouse in piles with a colour token, as shown in 2.
5.2 Revealing the Characters
Once these bids are made, all the characters on the board are revealed. Their tiles are turned over, taking care to keep their orientation and to leave the gang colour and boss markers on them.
5.3 Managing the City's Trafics
During the trafic phase, only the characters placed ON locations matter, that is, those managing the trafics of a location. A character on a location must manage all the trafics it is able to manage. Several characters may be put in management together so that, combined, they manage several or all of the location's trafics. However, a single trafic symbol cannot be managed more than once.
For each match between the trafic symbols of a character and the trafics present on the location, place a gang token of the player's colour on the corresponding space of the warehouse. For example, if a character can manage 1 drug and there are 2 drug symbols on the location, the player places a token in the drugs space of the warehouse.
As soon as a character in management has been counted in this way, it is removed from the city and returns to its owner's hand.
Example of trafic management (continuing from Figure 3): three players manage locations. The blue player 1 manages the weapons trafic of the upmarket district (quartier huppé), since their cop can manage all trafics. They place a gang token of their colour in the weapons space of the warehouse 4. The purple player 2 has a dealer and a small-time thug in the Ghetto. Together these characters can manage the 3 trafics of the location (the two drugs and the weapons). The characters together bear 3 drug symbols, but since there are only 2 drug trafics on the location, they manage only 2 drugs. The purple player therefore places 3 tokens of their colour in the warehouse: 2 in the drugs space and 1 in the weapons space 5. Finally, the red player 3 manages the trafics of the prison, where there are two tobacco trafics. Since the driver has only one tobacco symbol, they manage only one of these two trafics and place a token of their colour in the tobacco space of the warehouse 6.
5.4 Designating the Trafic Leaders
We now determine who finally controls the trafics. For each trafic, count which player has the majority in the warehouse. For a given trafic, simply count which player has the most tokens in the warehouse. Tokens corresponding to trafics managed this turn, or to stock sold this turn, are each worth 1. However, do not forget to subtract from the count the gang colour token that marks the owner of any stock tokens (see Figure 5).
The player who totals the most points for a trafic controls it this turn. In case of a tie, nobody controls the trafic.
When a player wins a trafic, they take the corresponding trafic manager marker. Each marker has 3 spaces with 3 different numbers. A player who gains control of a trafic they did not hold this turn places the marker in front of them and places a token of their colour on the space with the lowest number, on the left.
If the player already controlled the trafic and keeps it this turn, they move their colour token one space to the right, to the number that is 1 higher. Thus, the next turn, the player will score 1 extra victory point, because they have consolidated their authority. Once the maximum number of points is reached (+2 compared with the base number of points), the marker stays there. If the player loses their trafic to another player while already at +1 or +2, the new holder returns to the lowest level.
Use of the trafic manager marker (example for the alcohol trafic, which is worth 1 to 3 points): On the first turn, the player scores 1 VP at the end of the turn. On the second turn, while they still hold the trafic, they score 2 VP. They score 3 VP once they have held it for 3 turns or more.
Warning: a player cannot keep a trafic if, during the turn, they did not manage at least one symbol of that trafic or bid a stock token (see the next chapter).
5.5 Collecting Stock Tokens for Players Who Did Not Win a Trafic
All players who managed trafics in the city but who, in the end, did not win control of those trafics collect as many stock tokens as the number of symbols they managed this turn. For example, a player who managed 2 alcohol symbols but did not take control of that trafic takes 2 alcohol stock tokens. Players who were tied for control of a trafic also collect stock tokens for the symbols they managed.
However, in no case does a player who won a trafic gain stock tokens for that trafic, even if they managed more trafic symbols than were needed to be the majority. The stock tokens bid during the turn, for their part, obviously do not bring in new tokens (see Figure 5).
Example (continuing from Figure 4): the players count their value for each trafic. A stock token is worth 1, and a management token for this turn is also worth 1.
- Weapons trafic 1: 2 points for the blue player (1 stock, 1 management) and 1 point for the purple player (1 management). The blue player becomes the weapons trafic leader. They discard their stock token and take the corresponding 3D marker. The purple player collects a stock token for the trafic they managed this turn, to use on a later turn.
- Tobacco trafic 2: 2 points for the red player (1 stock, 1 management) and 2 points for the blue player (2 stock). The blue and red players are tied, so neither wins the trafic and all the stock tokens on it are discarded. However, the red player collects a new stock token for the trafic they managed this turn.
- Drugs trafic 3: the purple player is the only one present (2 management). They seize the drugs trafic and gain no stock token.
6. Resolving Actions
We now resolve the other actions: influence struggles and recruitments. Resolution proceeds location by location, in whatever order the players wish. This order has very little influence on the game; nevertheless, in case of conflict, the first player decides the order of resolution.
That said, for each location, a shootout must be resolved BEFORE the recruitments.
6.1 Shootouts
A shootout occurs when characters from several different players are on the sides of the same location, with attack and/or defence orders. The shootout is mandatory: it cannot be avoided once the characters are placed.
To resolve the fight, first look at whether settling-the-score tiles have been placed on the location with the "big calibre" (red) side facing outwards. In that case, the owner of the tile may kill any opposing character performing a combat action (attack or defence) on the location. It is therefore impossible to kill a character that is recruiting. If several players are in the shootout, each kills one character of their choice from among the opposing characters. A killed character is permanently removed from the game and does not count in the resolution of the influence struggle.
By contrast, it is forbidden to kill any character of a player who has placed their settling-the-score tile on the location with the "bulletproof vest" (blue) side showing, even if some of that player's characters are on another side of the location from the one where the "bulletproof vest" tile is placed.
If several settling-the-score tiles are present, the losses are considered simultaneous. If a gang boss is killed (see Chapter 4.6: The Gang Boss), the +1 bonus that was applied to the other characters is lost.
Note: in the case of fights on the city centre (see Chapter 4.5: Placements on the City Centre), any settling-the-score tile is necessarily treated as "big calibre".
Example of a settling-the-score tile: The purple player attacks the gambling den of the green player. The green player, however, has placed a dealer in defence with a settling-the-score tile, "big calibre" side up 1. They also have a pimp recruiting 2, but that pimp does not take part in the settling of scores. The purple player did not place a settling-the-score tile on the "bulletproof vest" side, which would have protected them against the "big calibre" tile, so they suffer a loss. The green player chooses to kill the hitwoman, who has an attack value of 7, which is more than the cop even counting the cop's boss bonus (see Figure 7 below). The hitwoman is removed from the game and does not count in the shootout.
Next, for each side involved, the attack points of the attacker(s) and the defence points of the location's owner are calculated. For each character involved, add:
- the character's strength: its attack or defence value, depending on the case;
- the gang boss bonus: if the gang boss is present, add +1 to the value of all the characters of their colour fighting on the location (the bonus applies to the boss too).
The player with the highest result wins the location and places a gang token of their colour on it. If there is no defender, the location's value is zero and it is taken automatically.
In case of a tie for taking the location, priority goes in this order: to the owner of the location, then to the player who has a gang boss present in the fight, then to the first player in turn order.
After the fight, all the characters involved return to their owner's hand.
Example of a shootout (continuing from the previous example): each player's strength in the fight is counted.
- Green player: dealer: 4 (defence value, because the location belongs to the green player); pimp: 0 (recruiting, so it does not count).
- Purple player 2: cop: 4 (attack value) + 1 for the boss = 5; small-time thug: 3 (attack value) + 1 for the boss = 4.
The green player therefore has 4 defence points against 9 attack points for the purple player. The green player loses their gambling den. The purple player immediately places a marker of their colour on the location.
6.2 Recruitments
After the shootouts, the characters performing recruitment orders are resolved location by location. Each player may recruit only one character per location in a turn.
For each player present with a recruitment action, calculate their recruitment value:
- the recruitment value of each character involved;
- the gang boss bonus: if the gang boss is present, add +1 to the value of all the characters of their colour recruiting on the location (the boss included).
To recruit a character, the sum of the recruitment values of the characters recruiting on the location must be greater than or equal to the cost of the desired character (shown on its tile).
On each location, players then recruit in order of their recruitment value: the player with the most recruitment points chooses first and takes the character they want. In case of a tie, priority goes in this order: to the owner of the location, then to the player who has a gang boss present in the recruitment, then to the first player in turn order.
Once a character is recruited, it joins its new owner's hand and is no longer available on the location.
Note: a small-time thug cannot recruit, and neither can some mercenaries.
All the characters that performed a recruitment action return immediately to their owner's hand.
Example of recruitment (Figure 8): in this example, 3 players try to recruit at the luxury hotel. Two characters are available there: 1 hitwoman and 1 driver. Each player's recruitment points are counted:
- Green player: bodyguard, value 3.
- Red player: cop, value 3.
- Purple player: dealer, value 5 plus the gang boss bonus of 1 = 6; mercenary, value 3 plus the gang boss bonus of 1 = 4. The purple player therefore totals 10 points.
The purple player starts, since they have the most points. They choose to recruit the hitwoman, which needs 5 recruitment points at minimum, and they have enough. In theory they would have enough points to recruit the hitwoman and the driver, but it is forbidden to recruit more than one character per location per turn. The remaining players are then tied. However, the green player owns the location, so they have priority. They take the driver, and the red player goes home empty-handed.
Note that in this example the purple player could also play a nasty trick on the other two: if they recruit the driver, the others will not have enough points to recruit the hitwoman (which requires 5 recruitment points at minimum), and both will leave empty-handed.
6.3 Maximum Number of Characters
IMPORTANT: a player cannot own more than 6 characters (not counting the settling-the-score tile).
However, it is allowed to recruit a character in order to replace another. In that case, the replaced character (chosen by the player) is placed on any location of the city that is not surrounded by other locations, at the end of the turn.
7. End of Turn
7.1 Opening a New Location
After the recruitments, if a new location was taken from the city centre (see Chapter 4.5: Placements on the City Centre), it is set up. The player who took it reveals it (the location must stay hidden until this point of the game) and places it where they wish in the city, touching at least one other location or the city centre, with a gang token of their colour on it. They therefore own the location immediately.
In a 5 or 6 player game, two locations may be discovered in the same turn. In that case, the players place them in turn order.
If, during the game, a location ends up completely surrounded by other locations (on all 6 sides), any neutral characters still on it that are available for recruitment are removed from the game.
7.2 Scoring Victory Points
At the end of the turn, each player scores the victory points for the turn by adding:
- the points given by all the trafics they control (the numbers printed on the trafic manager markers, see Chapter 5.4: Designating the Trafic Leaders);
- the points given by the largest district they own (see Chapter 1-2: Owning a District).
Victory points accumulate with those of the previous turn. Players record them on the score track of the board with a gang token of their colour.
7.3 End of the Game and Victory
When, at the end of a turn, a player reaches or exceeds the number of victory points needed to win (see Chapter 1-3: Scoring Points), the game stops and that player becomes the Godfather (Parrain).
If players finish tied, the winner is the one who controls the most victory points at the end of the last turn, counting trafics and districts. If there is still a tie, the player who owns the location with the highest initiative value wins the game.