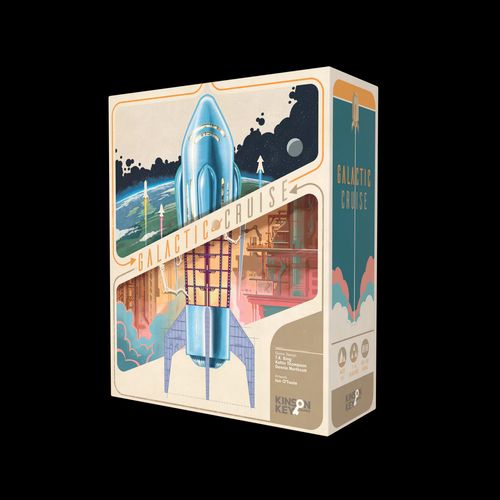
Galactic Cruise
Galactic Cruise Rulebook
Table of Contents
Table of Contents
- How to Use This Manual
- Campus Tour (The Main Board)
- Object of the Game
- Components
- Intro Game Setup
- Standard Game Setup
- Player Board Anatomy and Setup
- Turn Structure
- Step 1 — Advance Ships
- Step 2a — Assign a Worker and Actions
- Agenda Cards
- Step 2b — Launch a Ship
- Step 2c — Call a Meeting
- Step 3 — Accomplish Company Goal
- Progress Track and Game End
- Final Scoring — AGM C
- Clarifications and Edge Cases
- 2-Player Rules
- Solo Rules
- Expansion: Advancements
- Expansion: Accommodations
How to Use This Manual
The rulebook is written as an in-fiction employee "Training Manual." Throughout the manual you will encounter several kinds of boxes:
- What Does That Mean? — Whenever you see player-count symbols, pay attention to the rules for the player count of the current game.
- Key Concept — Fundamentals of your day-to-day responsibilities. Be sure to read each of these as you encounter them.
- E.g. — Examples to help clarify things. Reading them is not required to learn the game.
- Notes from Zoë — Helpful reminders, especially for new supervisors.
- Flavor text — Entertaining to read but not necessary to play.
The Intro Game is highly recommended for your first game. It's easier to learn and set up and will be a slightly shorter game. The Intro Game uses the intro side of the board with the tiles pre-printed on it; on the standard side these areas are blank.
Campus Tour (The Main Board)
The Main Board is themed as the Galactic Cruise campus and comprises these areas:
- Agendas — Where the Board of Directors have their regular meetings and hand out agendas (Agenda Cards).
- Progress Track & Goals — Where the Board tracks your progress over the three years, including launching ships, sending guests, and Company Goals.
- Technologies — On the north side of the campus, where you develop cutting-edge technologies that benefit the whole company.
- The Network — The central area with six large buildings (locations) and walkways (connections) between them. This is where your Workers spend most of their time: hiring workers, drawing up blueprints, constructing and installing them into ships, acquiring new ships, and more.
- Reputation — Tracks your reputation among your fellow colleagues.
- Storage Silo — Just outside the Network; where you take the Resources needed to launch your ships and refill them when low.
- Blueprints — The manufacturing department where architects draft blueprints and craftspeople transform them into ship segments.
- Ships — Where new ships (cockpits and engines) are constructed.
- Marketing — The marketing department where upcoming cruises are broadcast and tickets are sold to guests. A Queue of guests forms outside.
Object of the Game
Earn the most Victory Points (VP) over three in-game years. VP is earned for constructing ships, satisfying guests, developing the company, reputation, and progress. The player with the most VP wins and becomes the new CEO of Galactic Cruise. Ties are broken (in order) by: most Progress Cubes on the Progress Track, then most Reputation, then most VP from Cockpits, then the tied player later in turn order.
Components
- 1 Main Board
- 1 Marketing Board
- Agenda Cards (36)
- Blueprint tiles (48, double-sided: Blueprint / Ship Segment)
- Cockpit tiles (15)
- Engine tiles (12)
- Technology tiles (8)
- Action tiles (12, standard side only)
- Guest tokens (36, in three Destination types)
- Cruise tiles (18)
- Guest Bonus tokens (3)
- Money and Ads (in trays)
- Neutral Developments, neutral cubes
- Company Goal tile and 3 Company Goal trackers
- Progress Track tiles (per player count)
- Expert Worker tiles (8)
- Small Resource trackers (Storage Silo)
- Marketing Board overlays
- Employee Handbook (player aid) and Company Records book
- Per player (in player color): 1 Player Board, 2 Workers, 2 Expert Workers, 9 Developments, 3 Large Resource trackers, 8 Upgrade Tokens (4 brown Funding-Bonus + 4 gray), 1 Cruise Consultant, 1 VP Tracker, 1 Reputation Tracker, 1 First Player token (shared), Progress Cubes, 1 100VP/200VP token
Intro Game Setup
Use the intro side of the board (tiles pre-printed). Additional setup for a 1- or 2-player game is on the 2-Player Rules and Solo Rules sections.
Main Board Setup
- Place the Main Board in the center of the playing area (intro side up) and the Marketing Board to the right of it.
- Shuffle the Agenda Cards and place them facedown beside the Main Board. Then reveal 4 cards from the top of the deck and place them faceup on the indicated spaces from bottom to top.
- Place the Progress Track tiles labeled with the correct player count (4-player / 3-player / 2-player / 1-player) on the matching indicated spaces (1/2/3). Return the rest to the box.
- Place a neutral cube in the bottom left space of each Progress Track tile. (1- or 3-player: place a neutral cube in the bottom left space of only the 2 Progress Track. Do not place any in the 1 or 3 tiles.)
- Place a Company Goal tracker in each of the 3 bottom spaces of the Company Goal area. (In a 2-player game, use the middle spaces instead.)
- Place a Technology tile at random facedown next to the Main Board to be used in Step 7. Return the rest to the box. (1- or 3-player: leave the rest facedown nearby instead.)
- Refer to the printed graphic on the facedown Technology to see where to place the neutral Development(s) depending on the player count. Place a neutral Development in each depicted area for the corresponding player count, covering the Reputation icon. Then return that Technology tile and any unused neutral Developments to the box.
- Place the Money and Ad trays within reach of the players, creating the supply of Money and Ads.
- Place the Blueprint tray next to the Main Board. Shuffle the Blueprint tiles and return them to the tray. Take 5 Blueprints from the tray and place them Blueprint side up on the indicated spaces from bottom to top.
- Place a Small Resource tracker of each type into the Storage Silo on the "2" space on the Main Board.
- Place the Cockpit and Engine trays next to the Main Board. Shuffle the Cockpit tiles, return them to the tray, take 4 Cockpits, and place them with the 5 side up on the indicated spaces from bottom to top.
- Shuffle the Engine tiles, return them to the tray, take 4 Engines, and place them Bonus side up on the indicated spaces from bottom to top.
Note: When drawing Blueprint/Cockpit/Engine tiles, pull them from the back of the tray; during gameplay draw them from the front, which gives them a slight tilt to make them easier to draw.
Marketing Board Setup (Intro)
- Shuffle the Guest Bonus tokens and randomly place one of them faceup onto each of the 3 indicated spaces on the Marketing Board. Return the rest to the box.
- Use the Marketing Board overlays to cover the bottom one or two spaces of the Marketing Board. Use one overlay in a 3-player game and two overlays in a 1- or 2-player game.
- Place the Marketing tray next to the Marketing Board, creating the supply of Guests and Cruise tiles.
- Fill the top 3 spaces of the Marketing Board with the Cruises marked with a star on the front of the tile.
- Shuffle the remaining Cruises and return them to the Marketing tray. Fill the empty spaces on the Marketing Board with faceup Cruises (4/5/6 tiles in total for 1-2/3/4 players).
- From the supply, take a matching Guest for each Destination listed on the faceup Cruises and set them aside to be used in Step 19. If the number of set-aside Guests is fewer than 7/9/11 for a 1-2/3/4 player game, add in one Guest of each color (repeat if necessary).
- Randomly place all of these set-aside Guests, one at a time, in the Queue next to the Marketing Board, placing one in each of the 3 sections bottom to top, then repeating until all set-aside Guests are placed. All 3 sections of the Queue are used regardless of the number of players.
Standard Game Setup
Use the standard side of the board (tiles are blank). The Standard setup is the same as the Intro setup with these differences:
- Step 4 (Action tiles): Shuffle the 12 Action tiles and place them at random on the indicated spaces on the Main Board, 2 at each location.
- Step 5 (Expert Worker): Shuffle the Expert Worker tiles and place one at random faceup on the indicated space on the Main Board. Return the rest to the box.
- Step 6 (Company Goal): Shuffle the Company Goal tiles and place one at random faceup onto the indicated space on the Main Board. Return the rest to the box.
- Step 8 (Technologies): Shuffle the Technology tiles and place 4 of them at random faceup onto the Technology tile spaces on the Main Board.
- Subsequent Progress Track, Company Goal tracker, Storage Silo, Money/Ad, Blueprint, Cockpit, Engine, and Marketing Board steps are performed as in the Intro game (renumbered).
Player Board Anatomy and Setup
Areas on the Player Board:
- Launch Elevator — An elevator your Worker rides to board the Ship when launching. It represents a 5-second countdown and lists the 6 steps performed during a launch.
- Launch Tower — Comprises 8 Upgrade Tokens split between 2 sections. Throughout the game these tokens are triggered for bonuses, flipped, and removed.
- Break Room — Where your Workers and Experts stay when they are not working (i.e., not placed in the Network or piloting a Ship).
- Upgrades — Across the top are the 3 different Destinations: Adventurous, Relaxation, and Family. Each has 3 different Upgrades that can be unlocked throughout the game by visiting it.
- Developments — Kept here until built. They limit how many Resources can be stored on your Player Board.
- Resources — Food, Oxygen, and Fuel are stored here, tracked using Large Resource trackers moved right and left as you gain and spend them.
Player Setup
Each player takes a Player Board, an Employee Handbook (Player Aid), and a player tray, then does the following:
- Take your Starting Cockpit and Engine tiles (marked with a star) and place them to the left of your Player Board with the correct sides faceup.
- Place your 2 Expert Workers into the spaces shown.
- Place your 2 Workers in your Break Room.
- Place your 9 Developments into the spaces shown.
- Place your 3 Large Resource trackers on the "1" spaces (one of each type: Food, Oxygen, Fuel).
- Place the 4 brown Upgrade Tokens with the Funding Bonus icon on the top 4 spaces of your Launch Tower, matching the bonus type. Place the remaining 4 gray Upgrade Tokens into the bottom in any configuration.
- Take your starting 10 Money and 2 Ads from the supply (listed on the back of your starting Engine tile as a reminder).
- Place 3 of your Progress Cubes above the Company Goal tile in the spaces matching your player color on the Main Board. Do not place any cubes in the leftmost column. Place the remaining cubes near your Player Board.
- Place your VP Tracker at "5" and your Reputation Tracker at "0" on their respective tracks on the Main Board. Place your 100VP/200VP token beside your Player Board.
- Place your Cruise Consultant on the Marketing Board as shown.
- The player who most recently went on a cruise (or vacation) is the first player and takes the First Player token.
- In clockwise order starting with the first player, draw one Agenda Card from the top of the deck, and set your starting Reputation: the first player stays at 0 Reputation, the second player starts at 1, the third at 2, and the fourth at 3.
- In reverse turn order, do both 13a and 13b:
- 13a Place one Development (at no cost) from the left column on your Player Board into the Network, into an area where no Development is currently present. You will cover a Reputation icon and gain 1 Reputation. This Development cannot be placed below a Technology.
- 13b Take a Blueprint tile from the Main Board and place it to the right of your Player Board in one of the indicated spaces. You do not pay when taking Blueprints, only when building them into your Ships. Do not refill the Blueprints until Step 14.
Turn Structure
Galactic Cruise is played over a variable number of rounds. Starting with the first player, each player takes a turn, followed by the next player clockwise. Play continues until game end is triggered. (Each player will usually get about 20 turns.)
On your turn you do the following:
- Advance Ships
- (a) Assign a Worker, OR (b) Launch a Ship, OR (c) Call a Meeting
- Accomplish Company Goal
Worker Bumping
When assigning your Worker, you may place it on an empty location or a location containing another player's Worker. If the location contains another player's Worker, that Worker is bumped (removed) and returned to that player's Break Room. The player whose Worker is bumped immediately gains a Funding Bonus. You cannot bump your own Worker.
Funding Bonus
A Funding Bonus is gained any time you place a Worker into the Break Room on your Player Board and cover the Funding Bonus icon. There are 4 different Funding Bonus options shown in the top area of the Launch Tower:
- Gain 1 Money
- Gain 1 Ad
- Gain 1 VP
- Gain 1 Resource
When gaining a Funding Bonus, choose one of your available options. You might gain more than one Funding Bonus at the same time; when this occurs, you may choose the same bonus more than once. Gaining a Funding Bonus does not remove or flip tokens from the Launch Tower; you simply gain a visible bonus for each Worker returned.
Reputation
Throughout the game you gain Reputation and may use it during your turn in two ways:
-
Pay to use other players' Developments in the Network or below a Technology. The Development(s) are usable for your entire turn. You must pay Money to every other player (or the supply for neutral Developments) that has a Development in that area. The amount paid is based on your Reputation:
Reputation 0–6 7–14 15+ Cost (X) 2 1 0 -
Once per turn, at any time, use your Reputation to gain one bonus type depicted below the Reputation Track. Reduce your Reputation Tracker as far as you would like in order to gain all bonuses of one type that you pass over.
At 18 Reputation you gain 1 VP for every Reputation gained while at 18; at 0 Reputation you lose 1 VP for every Reputation lost while at 0. You start at 5 VP for this reason.
Step 1 — Advance Ships
If, at the start of your turn, you have a Ship in space, it automatically advances to its next Stop, where you may gain bonuses, unlock Upgrades, and/or score points. Advance the Pilot (the Worker piloting the Ship) one space forward on the Cruise. If you have more than one Ship in space, advance them in any order, completing each Stop fully before moving on.
There are 3 types of Stops: Destination, Day in Space, and Returning to Earth.
Destination
When your Pilot lands on a Destination, you may choose an Upgrade and/or score Guests.
1. Choose an Upgrade. If you have an Upgrade Token on the Engine, you may place it onto one of the Upgrades on the current Destination, unlocking that specific Upgrade. If there is another Destination on the same Cruise, you may wait to drop off the Upgrade Token there. You cannot have more than 3 Upgrade Tokens on a single Destination; if a Destination already has 3 and you have no other Destination on the Cruise, discard the Upgrade Token instead.
2. Score the Guests. You may score each Guest on board your Ship (once per Destination) by paying the Guest's associated Ad cost. If the Destination matches the Guest, pay 1 Ad to score that Guest; if it does not match, pay 2 Ads. Any number of Guests may be scored, but each Guest may only be scored once per Destination. The VP each Guest scores equals 3 VP plus 1 VP for each Upgrade Token on that Destination.
Day in Space
When a Pilot lands on a Day in Space, gain bonuses based on the Guests and their matching Segment icon. For each Guest, gain their bonus (listed on the Marketing Board) for each matching icon in the Ship:
- Each Adventurous Guest gives 1 Money for every Adventurous icon in your Ship.
- Each Relaxing Guest gives 1 Resource for every Relaxing icon in your Ship.
- Each Family Guest gives 1 Ad for every Family icon in your Ship.
(The Guest Bonus tokens are placed randomly during setup, so Guests reward you differently each game. A Day in Space is NOT a Destination.)
Returning to Earth
When a Pilot lands on the last Stop of a Cruise, the Ship, Guests, and Worker return to Earth. Place your Worker back into your Break Room, gaining one Funding Bonus as usual. Then discard the Cruise to a facedown stack next to the Marketing tray and return all Guests from the Ship to the supply. Once returned, the Ship may be launched again or more Segments may be built into it (following normal building restrictions).
Step 2a — Assign a Worker and Actions
Take one of the Workers from your Break Room and place it onto 1 of the 6 locations in the Network (except where you already have a Worker). Then take up to 2 actions you have access to. You must always complete all steps of an action before moving on to your next action.
Action Selection
After placing a Worker on a location, you may take up to 2 actions with that Worker, choosing from all actions that Worker has access to. A Worker always has access to the 2 actions at its location. If there is at least one Development connecting them to an adjacent location, the Worker may also access the actions at that location. Your Worker may use your own Developments for free, or, if you do not own one, you may pay to use other players' Developments (see Reputation). Actions may be repeated and may be taken in any order.
The available actions are:
Build a Development
Build one Development. Choose one of the leftmost Developments from any Resource row on your Player Board and pay the cost listed at the bottom of that column. This cost may be paid in Money and/or the Resource associated with the row, in any combination. After paying, remove the Development and place it in the Network or below a Technology. If it is the first Development placed in a given area, place it on the Reputation icon and gain 1 Reputation. You may never build a Development in an area where you already have one. Removing a Development also increases the amount of that Resource you can store on your Player Board by one.
- Network Developments give you more access to actions. You may use them immediately after building.
- Technology Developments immediately give ongoing benefits for the rest of the game. The first time a Development is placed below a Technology, that Technology is Invented — it can now be used by all players (for free by players who have a Development below it, or by paying the players who do).
- Neutral Developments function identically, except you pay the supply to use them instead of another player.
Hire an Expert Worker
Hire one of your Expert Workers. Pay the cost associated with the Expert you are hiring, then move it to your Break Room, gaining 1 Funding Bonus as usual. This Expert is now available for the rest of the game.
- The cost to hire the rightmost Expert is 2 Money per Development remaining in the Food and Oxygen rows on your Player Board.
- The cost to hire the leftmost Expert is 3 Money per Upgrade Token remaining (faceup or flipped) in the bottom 4 spaces of the Launch Tower.
Expert Workers function just like your other Workers, except they gain a special ability. Each game, an Expert Worker ability is assigned during Setup and applies to all players' Expert Workers for that game. (Intro Game ability: gain a Funding Bonus when your Expert bumps a Worker back to their Break Room.)
Purchase Supplies
Purchase Resources and/or Ads. You may: pay 1 Money to gain 2 Resources of your choice, and/or pay 1 Money to gain 2 Ads. As a single action, you may do one or both of these once. Any Resources you purchase but cannot store are lost.
Acquire Blueprints
Take up to 2 Blueprint tiles. Choose any of the faceup Blueprints in the display on the Main Board. There is no cost. Place the chosen Blueprints to the right of your Player Board. At the end of the action, slide all remaining Blueprints down in the display, filling empty spaces, then add new ones from the Blueprint tray from bottom to top. You can hold a maximum of 5 Blueprints beside your Player Board; you may exceed this during your turn but must discard down to 5 at the end of your turn.
- Refresh Blueprint Display: At any time on your turn, you may spend 1 Reputation to discard any number of Blueprints from the display. Refill the empty spaces from the tray, but do not slide the remaining Blueprints down. No action is required, and this may even be done before placing a Worker. Repeat by paying 1 Reputation each time.
- Discarded Blueprints: Placed in a pile next to the Blueprint tray. If you ever run out of Blueprints, shuffle the discard pile and add them back to the tray.
Build Ship Segments
Build up to 2 Ship Segments. The other side of a Blueprint is a Segment; a Blueprint becomes a Segment when built into a Ship and flipped. Segments can be built from two areas:
- Beside your Player Board: Pay the cost listed on the left side of the Blueprint.
- The Blueprint display on the Main Board: Pay the listed cost on the Blueprint AND pay the ADDITIONAL Reputation and Money cost listed beside the Blueprint.
Costs can be reduced to 0, but not below 0, by playing Agenda Cards, using Technologies, etc. After paying, flip the Blueprint over to its built side and place it between the Cockpit and Engine of any Ship beside your Player Board, following the building restrictions. When building 2 Segments, you may build them into the same Ship or multiple Ships. The VP on Segments is scored at the end of the game.
Building Restrictions:
- A Segment must be built into a Ship.
- Each Ship may only contain up to 3 Segments.
- You may not build Segments into Ships currently on a Cruise.
- Once a Segment is built, it cannot be moved or replaced.
Cabins: The top and bottom of a Segment has half of a Cabin. When two Segments are built into the same Ship, they form a complete Cabin which can hold one Guest during a Cruise. Each Segment added after the first adds one additional Cabin. (The Cockpit and Engine do not form Cabins.)
If Segments were built directly from the Blueprint display, at the end of the action the remaining Blueprints slide down and are replaced from the tray as usual. (You may only have up to 3 Ships, each with up to 3 Segments.)
Acquire New Ship
Take a new Cockpit and Engine set, creating a new Ship. You may only have up to 3 Ships. Choose one paired Cockpit and Engine set from the display on the Main Board. Place the new Cockpit and Engine beside your Player Board next to your other Ship(s), immediately gain the bonus printed on the Engine, and then flip it over. Keep the Cockpit on the side with the 5 icon. At the end of the action, refill any empty spaces in the display from the Cockpit and Engine trays (remaining ones do not slide; new ones are simply added). When refilling, place Cockpits with the 5 icon side up and Engines bonus side up.
Cockpit and Engine anatomy: the Engine has an Immediate Bonus (gained when taken, then flip the tile). The Cockpit has a Penalty (lose 5 VP at end of game if this Ship has not been launched) and Scoring Criteria (scored each time the Ship is launched and at end of game). Cockpits and Engines are not considered Ship Segments.
Gain Resources
Take up to 3 Resources from the Storage Silo. You may take any combination of different Resources as long as they are available. Reduce the chosen Resource tracker(s) in the Storage Silo accordingly, then increase the respective Resource tracker(s) on your Player Board. You can only take Resources that you can store (i.e., not blocked by a Development). (The Storage Silo icon means you take Resources from the Storage Silo. Any other time you gain Resources without this icon, they do not come from the Storage Silo.)
Refill Storage Silo
Refill one Resource in the Storage Silo and gain Money and Reputation. Discard 1 Agenda Card from your hand (ignoring everything on the card) to increase one chosen Resource in the Storage Silo to its maximum by moving its Resource tracker to "5." Then gain 1 Money from the supply for each step the Resource tracker was raised. Additionally, gain a total of 1 Reputation. (The Resource on the discarded card does not need to match the Resource being increased.)
Schedule a Cruise
Schedule a Cruise. You may only have one Cruise scheduled at a time and may not switch Cruises once scheduled. Take your Cruise Consultant from the top of the Marketing Board and place it beside a Cruise that has not already been scheduled. Then choose one Upgrade Token in the Launch Tower on your Player Board, gain the bonus printed on it, and flip it over (do not remove it).
Upgrade Token Bonuses: Gain 1 Money / Gain 1 Ad / Gain 1 VP / Gain 1 Resource / Build a Development with a discount of 4 Money / Gain 4 Money / Gain 4 Ads / Gain 4 Resources.
The top 4 Upgrade Tokens give a smaller one-time bonus; once removed, they double that Funding Bonus from a value of 1 to a value of 2. The bottom 4 Upgrade Tokens give a larger one-time bonus; once removed, the leftmost Expert Worker is cheaper. When a Funding Bonus Upgrade Token is flipped, it can no longer be chosen as a Funding Bonus until it is removed. Upgrade Tokens are removed when you Launch a Ship.
Cruise Tile anatomy: each Cruise lists a Fuel cost, a sequence of Stops (Adventurous/Family/Relaxing Destinations and Days in Space).
Advertise for a Cruise
Choose one Cruise with 1 or 2 empty Guest spaces and advertise for it. The Cruise may be unscheduled or one that you've scheduled (you may not advertise for a Cruise scheduled by another player). Advertise to 1 or 2 Guests. Choose Guests from the Queue by paying the Ad cost of the section they are taken from (1, 2, or 3 Ads respectively). Or choose any Guest from the supply by paying 4 Ads per Guest. Place the chosen Guest(s) in a Guest space next to the advertised Cruise. For each Guest placed, you gain:
- 1 Money per Destination on that Cruise.
- 1 Reputation if the Cruise includes the Guest's preferred Destination.
(A Day in Space is NOT a Destination.)
Draw Agenda Cards
Draw up to 2 Agenda Cards to your hand. Any time you draw Agenda Cards, you may draw from the cards in the display OR spend 1 Reputation to draw from the top of the discard pile. You may not draw from the facedown Agenda Card deck, nor draw a card from the discard pile that you played this turn. Agenda Cards are not refilled automatically (see Refill Agenda Cards). (Agenda Cards in the discard pile are public information.)
Refill Agenda Cards
Gain bonuses and refill the Agenda Card display. First, gain any bonus(es) associated with the empty card spaces in the display. Then discard (in any order) all remaining Agenda Cards, and refill the spaces from bottom to top with 4 new cards from the top of the Agenda Card deck. (Any time you need to draw from the deck and it is empty, shuffle the discard pile to create a new deck.)
Agenda Cards
Each Agenda Card has a Card #, Title, Restriction, Text Ability, Resource, and Flavor Text. Agenda Cards may be played in one of two ways:
- For its Text Ability: Play a card to immediately gain the benefit/effect/action, following any restriction listed.
- For its Resource: Play a card to immediately gain the Resource. If it is being immediately spent, you do not need to have room for it on your Player Board.
After an Agenda Card is played, it is placed faceup on top of the Agenda Card discard pile.
When Can I Play an Agenda Card?
- Played for its Resource: at any time on your turn; does not count as an action.
- Played for its Text Ability: only while taking the action or performing the step shown in the top right of the card (Restriction). If there is no Restriction, the card text tells you when it can be played. Some cards may be played during another player's turn. Some have no restrictions and can be played at any time on your turn (these do not count as an action).
Playing Multiple Agenda Cards
Multiple Agenda Cards may be played at the same time, as long as they are all applicable (following all restrictions). Agenda Cards always compound with other benefits and effects. Costs can be reduced to 0 but not below 0. Any number of Agenda Cards can be played for their Resource at the same time; if spent immediately (such as paying for a Development or launching a Ship), you do not need room to store the Resources being spent. There is no limit to the number of cards held or played in a single turn, but your hand limit at the end of your turn is 5. If you have more than 5 and cannot play them, discard down to 5 (in any order), gaining the Resource on them if able.
Agenda Cards supersede normal rules: Any time an Agenda Card's effects conflict with the normal rules, the Agenda Card takes precedence and allows a rule to be broken as part of the card being played.
Step 2b — Launch a Ship
Instead of assigning a Worker in the Network, you may send a Worker from your Break Room into your Launch Elevator to initiate the launch. When Launching a Ship you do not take any actions on the Main Board.
Preflight Checklist: Cruise scheduled; Available Ship with 1+ Cabin; Access to Resources to launch; Guest pre-sold or Last-Minute Sale.
There are 6 steps to launching (a 5-second countdown listed on your Player Board):
T-Minus 5 — Assign and Board
Choose which of your Ships (with at least one Cabin and not already on a Cruise) to launch. Take your scheduled Cruise and place it above that Ship. Return your Cruise Consultant to its office on the Marketing Board. Then place your Guest(s) into the Cabin(s) — you must take at least one Guest. Each Cabin holds a maximum of one Guest, and it does not matter which Guest goes in which Cabin. A maximum of 2 Guests per Cruise can be pre-sold tickets; anything above 2 must come from a Last-Minute Sale during the launch sequence. Guests can come from 3 areas:
- Next to the Cruise being launched — pre-sold tickets (from Advertise for a Cruise); free to board.
- The Queue — a Last-Minute Sale; pay the Guest's Ad cost, but you do not gain any Money or Reputation.
- The Supply — during a Last-Minute Sale, taken by paying the usual 4 Ads; no Money or Reputation gained.
Not Enough Room: If a Guest has been pre-sold a ticket but you do not have room (or do not want to take them), lose 2 Reputation and move the Guest to the top (3 Ads) section of the Queue.
T-Minus 4 — Place Progress Cube
Take a Progress Cube from your supply and place it on the next available space on the Progress Track.
T-Minus 3 — Pay Resources
Pay the needed Resources to launch:
- Food: 1 Food per Guest in the Ship, +1 (for your Pilot).
- Oxygen: 1 Oxygen per Segment in the Ship.
- Fuel: 1 Fuel per Fuel icon listed on the Cruise tile.
These Resources can come from 3 sources: (1) your Player Board, (2) Agenda Cards, and/or (3) spending Reputation. Costs may be paid in any order and from any combination of sources. You do not need space on your Player Board to accommodate Resources coming from Agenda Cards or Reputation.
T-Minus 2 — Score Cockpit
Score VP based on the criteria listed on the Cockpit of the Ship being launched. Then, if this is the first time you have launched this particular Ship, flip the Cockpit over to remove the 5 listed at the top (the 5 is subtracted from the Cockpit's scoring at end of game if you have not launched that Ship at least once).
T-Minus 1 — Load Up
Remove the Upgrade Token that was flipped when your Cruise was scheduled, and place it onto the Engine of the Ship being launched.
T-Minus 0 — Liftoff!
Place your Worker (which now becomes the Pilot) into the Cockpit, and then add a new Cruise to the Marketing Board.
Add a New Cruise: Take a new Cruise from the Marketing tray and place it faceup onto the empty space on the Marketing Board. Then, for each Destination on the new Cruise, move all matching Guests in the Queue down one section (if already in the bottom section, they do not move). Last, add a number of new Guests from the supply to the top section of the Queue equal to the number of Guests that boarded the Cruise launched this turn. The type of Guest(s) added is based on the new Cruise (start with the leftmost Destination, moving right, repeating if necessary). Guests are limited; if a type is needed and not available, add a different Guest of your choice.
Step 2c — Call a Meeting
If, at the start of Step 2 of your turn, you do not have any Workers in your Break Room, you MUST call a meeting. (You may Call a Meeting no matter how many Workers are in your Break Room.)
To Call a Meeting: first recall all your Workers from the Network and place them back into your Break Room, gaining a Funding Bonus for each covered as usual. (Workers currently Piloting a Ship remain in space.) After gaining your Funding Bonus(es), take one action from a location that has at least one of your Developments connected to it. No Workers are placed for this action, and you may not pay to use other players' Developments.
(If you also do not have a Development in the Network, you will not get an action.)
Step 3 — Accomplish Company Goal
Each game there are 3 different Company Goals, shown on the Company Goal tile. To accomplish a Company Goal, you must match or exceed the current requirement as indicated by the Company Goal tracker for that goal. When you accomplish a goal, remove your Progress Cube from above that goal and place it on the next available space on the Progress Track. This reveals a Wings icon of your color. Then advance the Company Goal tracker for that goal one step higher (this may increase the goal's threshold for all other players; if already at the topmost position, the tracker does not move). You may accomplish more than one goal on the same turn but may only accomplish each goal once during the game. (In a 4-player game, both the 3rd and 4th players are allowed to accomplish the top level of a Company Goal.)
Progress Track and Game End
The Progress Track is the timer for the game. Progress Cubes are added when you Launch a Ship or Accomplish a Company Goal, always placed in the bottommost empty space (fill Section 1 before Section 2, and so on).
- At the end of the turn in which the final cube is placed in Section 1 or 2, an Annual General Meeting (AGM) occurs (AGM A and AGM B respectively).
- At the end of the turn in which the final cube is placed in Section 3, the end of the game is triggered.
AGM A & B — Progress Scoring
Each player scores VP equal to the number of Progress Cubes they have in the given section (Section 1 during AGM A, Section 2 during AGM B) multiplied by the number of Wings in their color that have been revealed. Each player starts with one Wings icon revealed; an additional Wings icon is revealed each time they accomplish a Company Goal. Additionally, the player with the most Reputation at that moment is considered to have one extra cube for scoring purposes (no cube is actually added). If tied for most Reputation, all tied players get the extra cube. (When scoring Sections 2 and 3, you only score the cubes in that Section, but your Wings multiplier stays uncovered for the entire game.)
Section 3 — Game End
The end of the game is triggered when the final cube is placed in Section 3. Play continues with players finishing out the current round, and then a final round is performed. During this time, additional cubes may be added to the Progress Track in the overflow area to the right of Section 3.
Final Round: Before taking a final turn, each player simultaneously returns their Workers from the Network to their Break Room, gaining a Funding Bonus for each as usual (this is not Calling a Meeting, so no actions are taken). Then, in turn order, take one final turn, executing your turn as normal. Finally, in turn order, advance all Ships you have on Cruises one final time, advancing to any one remaining Stop and completing the steps of that Stop as usual. Once complete, it is time for the third and final AGM.
Final Scoring — AGM C
The game is over. Each player scores the following:
- Cockpits: VP based on the criteria of each Cockpit of your Ships (-5 VP to a Cockpit's score if that Ship hasn't been launched).
- Ship Segments: VP (blue VP icons) on each Ship Segment in your Ships.
- Progress Scoring: Section 3 (include all cubes in the overflow area), scored as in AGM A/B.
- Reputation: VP based on the highest VP threshold reached on the Reputation Track.
- Developments: VP of the rightmost empty column in the Development area on your Player Board.
- Supplies: 1 VP per 3 leftover supplies (any combination of Resources, Money, Ads, Agenda Cards, Blueprints).
The player with the most VP wins and becomes the new CEO of Galactic Cruise! Ties are broken by: most Progress Cubes on the Progress Track, then most Reputation, then most VP from Cockpits, then the tied player later in turn order.
(Place your 100/200 VP token on the 0 space of the VP track with the 100 VP side up when passing 100 VP; flip it if you pass 200 VP.)
Clarifications and Edge Cases
What happens when I Call a Meeting and all my Workers are in space? You gain no Funding Bonuses and recall no Workers, but you still take an action connected to one of your Developments. If you also have no Development in the Network, you will not get an action.
What happens when I gain Reputation at 18, or lose Reputation at 0? You lose 1 VP for every Reputation lost while at 0 and gain 1 VP for every Reputation gained while at 18. If at 0 VP and 0 Reputation, you cannot perform an action that would cause you to lose Reputation. You start at 5 VP so this should be extremely unlikely.
When can I spend Reputation to gain the bonuses on the Reputation Track? At ANY time on your turn (limit once per turn), including in the middle of an action.
When can I pay to use other players' Developments? At ANY time on your turn. Once paid, you have access to the Development(s) for the remainder of the turn.
When launching, can I take Guests from the Queue in a Last-Minute Sale instead of pre-sold Guests? Yes. You must follow the "Not Enough Room" rule, losing 2 Reputation for each pre-sold Guest you don't take and moving those Guests to the top section of the Queue.
Can I Accomplish a Company Goal at the end of the game? Yes, after visiting a Destination during the final step before AGM C.
How does the "Board Game Cruise" Agenda Card work? It increases one Cabin's capacity to 3. Only up to 2 Guests can be pre-sold tickets, so you still pay Ads for Guests taken from the Queue or Supply during a Last-Minute Sale. Make sure you have enough Food.
What happens if I run out of...?
- Cockpits and Engines: You cannot truly run out, but if there aren't enough to refill the display, leave those spots empty.
- Blueprints: If you run out and cannot fill the display, fill as much as you can, leaving the topmost spaces empty.
- Upgrade Tokens: If you have removed all of yours, you may still Schedule a Cruise and launch, but no Upgrade Token is flipped or removed.
- Money and Ads: These are not meant to be limited; use any suitable replacement.
2-Player Rules
2-Player Setup
Follow the usual setup instructions for the Intro or Standard Game, then perform these additional steps:
- Take 6 Developments, 2 Workers, and 2 Expert Workers of a non-player color (NPC).
- Place the 2 Workers on the Main Board, one in each location clockwise from the neutral Developments.
- Place the Developments and Expert Workers off to the side for use later.
- Reminder: Place the Company Goal trackers on the middle space of each goal, instead of at the bottom.
- Reminder: If playing the Intro Game, only place a single neutral cube into the 2 Progress Track tile.
- Reminder: Set aside the unused Technology tiles instead of returning them to the box.
- Reminder: Use both Marketing Overlay tiles on the Marketing Board.
Worker Bumping (NPC)
When placing a Worker onto a location occupied by an NPC Worker, you bump that Worker to the next location clockwise:
- If that location is empty: The NPC Worker stays there until bumped again in the future.
- If occupied by your opponent's Worker: The NPC Worker bumps that Worker back to their Break Room (as if you had bumped them).
- If occupied by an NPC Worker: The NPC Worker skips this location and moves clockwise to the next.
- If occupied by one of your own Workers: The NPC Worker will not bump your Worker (unless you have the ability to bump yourself); it skips this location and moves clockwise to the next.
Expert Worker Bumping (NPC)
Throughout the game, NPC Workers become Experts (see Hire NPC Expert). NPC Expert Workers function the same as NPC Workers except, when bumped, they skip over empty locations unless there is no other possible location.
AGM A/B — Progress Scoring (2-Player)
After the last cube is placed in the current section, score that section as usual, and then perform two extra steps:
Build NPC Developments: Shuffle the remaining unused Technology tiles set aside during setup and reveal one facedown. Refer to the printed graphic on the tile and place one Development (from the NPC Developments set aside during setup) in each depicted area for a 2-player game, covering the Reputation icon if able. If there is already a Development of that color in the depicted area, skip that placement and discard that NPC Development from the game. Return the used Technology tile to the box.
Hire NPC Expert: After AGM A, replace one NPC Worker (closest to the top middle location going clockwise) with one NPC Expert Worker; return the NPC Worker to the box. After AGM B, replace the other NPC Worker with an NPC Expert Worker.
Solo Rules
You play against Rachel, an automated opponent. Rachel's turns function like yours: she will Advance Cruises, place Workers and take actions, and Accomplish Company Goals.
Solo Setup
- Set up the game for a 2-player game.
- Rachel receives a Player Board and sets up all the usual pieces a player would use. She does NOT need Resource trackers and always uses the base game Upgrade Tokens.
- She is the 2nd player, so place her Reputation tracker on the "1" space.
- Shuffle the 12 Solo Action Cards and place them in a deck beside her Player Board (numbers and Worker/location grid faceup).
- Place the Solo Tokens (Rachel's Company Goal threshold reminders) on the appropriate spaces depending on your chosen difficulty (Easy: rightmost Food Development; Medium: middle Fuel Development; Hard: middle Oxygen Development; plus the Segment-goal and Ship placements per difficulty).
- Place the Solo Worker Card of your chosen difficulty next to the Action Cards. This is her Break Room — place her Workers here instead of on her Player Board.
- Rachel places her first Development (from the Food row) in the Network based on the Number System (must be in an area with no other Developments).
- She then discards a Blueprint based on the Number System.
The Number System
Each Solo Action Card has two numbers on its back. As Rachel makes decisions, these numbers determine her choices. Refer to the back of the top card of the deck and use the first number unless it would never work (e.g., a "5" or "6" when there could only be 4 choices), in which case use the second number. If that item is unavailable (or if multiple items are targeted), begin with that number and continue top to bottom / left to right / clockwise until the action is satisfied. When using the Number System for something in the Network, start at the top middle location and count clockwise.
Rachel's Supplies and Bonuses
Rachel does not gain Resources, Money, or Ads. She DOES gain VP and Reputation. When she would gain an Agenda Card, she discards it instead. When Rachel gains a Funding Bonus, she always chooses her VP Funding Bonus (1 or 2 VP based on its current value). Unless otherwise stated, all normal multiplayer rules still apply.
Rachel's Turn
1. Advance Cruises. If she has a Cruise in space, she advances it to the next Stop, gaining rewards:
- Day in Space: Rachel gains 1 Reputation for each Guest on the Cruise, regardless of type.
- Destination: If it's the first Destination of the Cruise, she drops off her Upgrade Token on the leftmost empty space, increasing scoring here by 1 VP (she does not unlock or trigger Upgrade bonuses). Then she scores all of her Guests at the Destination (she does not gain/spend Ads to do this).
2. Rachel's Actions. If Rachel has available Workers, reveal the top card of the Solo Action Card deck and place one of Rachel's Workers (an Expert if available) into the Network at the location determined by the Worker grid on the back of the top card. If she already occupies that space, go to the first available space clockwise. After placing her Worker, resolve the first possible action from top to bottom on the revealed card. After completing the action, if Rachel's Worker is at (or, in Medium/Hard, adjacent and connected to) the location displaying the action she took, she reveals and resolves an additional Action Card (maximum 2 actions per turn). If Rachel has no available Workers, she Calls a Meeting, gaining VP for each Worker recalled (in Hard mode she also resolves a single action).
3. Accomplish Company Goal. If she has accomplished one of her Company Goals at the end of her turn, she moves the corresponding cube to the Progress Track. Rachel's three Company Goals are the same every game:
- #1 Build X Developments (Easy: 7; Medium: 6; Hard: 5).
- #2 Build X Segments (Easy: 7; Medium: 6; Hard: 5).
- #3 Launch X Different Ships (Easy: 3; Medium/Hard: 2).
Each goal corresponds to one of your Company Goals (#1 to leftmost, #2 to middle, #3 to rightmost). When she completes a goal, she removes her cube and the corresponding tracker raises to the top level. Her achievement of goals affects you, but yours do not affect her.
Rachel's Scoring
Rachel scores during AGM A/B (Progress Scoring) and in the Final Round as normal. In AGM C: she does not score Supplies; she scores Progress, Reputation, Ship Segments, Developments, and Cockpits as usual.
Adjusting Difficulty
Easy, Medium, and Hard modes differ in: Developments Built Goal (7/6/5), Segments Built Goal (7/6/5), Different Ships Launched Goal (3/2/2), whether she performs a second action, how Calling a Meeting resolves, and her Expert Worker ability. You can further tailor difficulty by mixing and matching elements from each level.
Expansion: Advancements
Includes several modules that may be played individually or in any combination. Components: 6 Agenda Cards, 2 Expert Worker Tiles, 8 Upgrade Tokens, 6 Location Bonus Tokens, 4 Technology Trackers, 1 Cockpit Tile, 1 Engine Tile, 48 Cabin-Matching Blueprints, 8 Advanced Technology Tiles.
- Module: Cabin-Matching — 48 Blueprints replacing the base game ones. Instead of half-Cabins in the middle, these have half-Cabins in one of three places (left, center, or right). To build a Segment into a Ship, it must make a full Cabin with previously installed Segments.
- Module: Advanced Technologies — Upgradeable Technology tiles, each with a Technology track along the top that determines its ability level. Each Technology starts at its base ability but improves as its tracker advances. Each time the Technology is used, move its tracker one space right at the end of the action (at most once per turn). Whenever the tracker passes a marker, it increases the cost of building/using that Technology by 1 Money; when it reaches the final space, it permanently improves the Technology's ability.
- Module: Location Bonus Tokens — Randomly place one Location Bonus token on each of the six Network locations, grayed-out side up. When there are 3 Developments adjacent to a location (4 in a 4-player game), the token flips to its active side. Then, whenever you place a Worker onto a location with a flipped token, you immediately gain the listed bonus for each of your adjacent Developments.
The expansion also includes other components (new Agenda Cards, Upgrade Tokens, a Cockpit and Engine, Expert Workers) and variants, and works with the Accommodations expansion (except the Cabin-Matching module and the Specialized Blueprints module cannot be combined, as both replace the base 48 Blueprints).
Expansion: Accommodations
Includes several modules. Components: 6 Agenda Cards, 2 Expert Worker Tiles, 8 Upgrade Tokens, 33 Starting Upgrade Cards, 2 Advanced Technology Tiles, 2 Technology Tiles, 48 Specialized Blueprints, 3 Guest Bonus Tokens.
- Module: Specialized Blueprints — 48 Blueprints replacing the base ones, each with an action triggered during a Day in Space as Guests visit them. During setup, place the matching Guest Bonus tokens from this expansion instead of the base ones. During a Day in Space, instead of gaining the usual Guest Bonuses, send Guests to different Segments; for each Guest, place them onto an available Segment with their matching icon and carry out the action/bonus listed. Each Segment may only be triggered once per Day in Space. When building these Segments you must follow the Cabin-Matching rules.
- Module: Starting Upgrade Cards — Cards that unlock an Upgrade and remove an Upgrade Token from your Launch Tower at the start. Deal two to each player. On your first turn, before placing your Worker, choose one to activate: gain the bonus on the Upgrade Token shown, flip and remove it from your Launch Tower, and place it on the Upgrade shown (resolving any immediate bonus). Then return both cards to the box.
The expansion also includes new Agenda Cards, Upgrade Tokens, Expert Workers, Technology Tiles, and variants (including a Starting Upgrade Cards auction/balancing variant and solo-mode rules for Rachel).