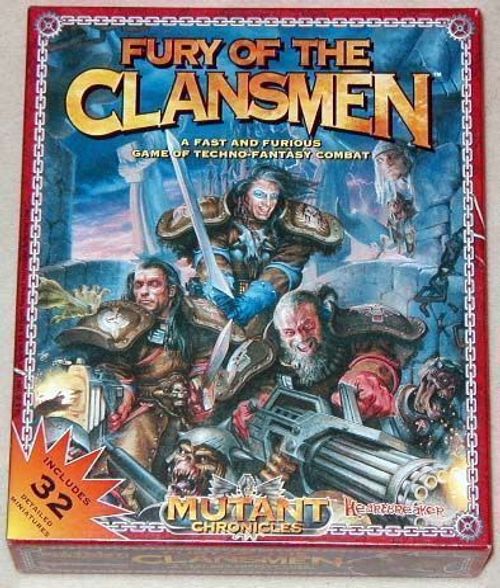
Fury of the Clansmen
Fury of the Clansmen Rulebook
Table of Contents
Table of Contents
Object of the Game
In Fury of the Clansmen, each game represents a special mission which must be completed to win the game. A number of missions are presented in the missions section of this book. From two to eight players control the noble forces of Imperial Clansmen or the hideous masses of the Dark Legion. Each side has special objectives in each mission, and the team that accomplishes its goals first completes the mission and wins the game. Often your goal is simple: annihilate the enemy!
Components
Your Fury of the Clansmen game should include the following:
- 1 Rules and Missions Book
- 9 Board Sections
- 2 Reference Cards
- 12 Clansmen Figures (3 Chieftains, 6 Regulars and 3 Charger Carriers)
- 20 Dark Legion Figures (5 Centurions and 15 Necromutants)
- 32 Slotted Stands
- 2 Counter Sheets of board features and playing pieces
- 9 Dice (3 white, 3 red and 3 black)
Rules and Missions Book
This book contains all of the rules you need to play Fury of the Clansmen, plus a number of ready-to-play missions. The first part of the book presents the basic game. Once you have the basic game down, you can proceed to the advanced rules which will make your games more detailed and give your warriors more options. In the back of the book, you'll find a number of game missions which can be played with either version of the rules.
Game Boards
There are nine game boards included in the game. They represent the ruined battlefield on which the game takes place. These may be set up in many different ways depending on the mission you are playing. Notice that in the corner of each board is a number from 1 to 9. Refer to the mission description to see how the boards are set up, and pay particular attention to which numbered board is placed where, and in what direction. Some missions are set up so that the boards are randomly placed in a particular pattern. The possibilities are endless!
Terrain Features
There are many different types of terrain on the boards. The terrain features have drastic effects on movement and combat. One of the secrets of Fury of the Clansmen is learning how to use the terrain to your best advantage. Each square only has one terrain feature, and this terrain takes up the entire square, even if the illustration doesn't cover the entire square. The different types of terrain are as follows:
Clear. These are open spaces which have no distinguishing features. Likewise, they have no effect on movement or combat.
Jungle. There are many dense areas of vegetation on Venus. Warriors that move deep into the jungle cannot be seen or fired at. Warriors on the edge of jungles may be fired at, but the jungle gives them extra cover.
Ruined Walls. These are the remains of the once-great cities that dotted the landscape of Venus. Ruined walls can be fired over, but they give cover because they block a good portion of a warrior's target.
Rubble Piles. These piles of rock and metal jut from the ground like shattered bones through tattered skin. They are tall enough that they may be climbed, and in addition to providing firing advantages due to the increased height, they also give extra cover when fired upon.
Boulders. These are incredibly large hunks of rock scattered across the battlefield. Boulders are large, smooth and impassable. Figures may not enter spaces with boulders. Also, boulders block all view.
Bridges. There are two bridges included on the counter sheets. They are used to traverse a chasm or river. They are considered clear spaces in all respects.
Foxholes. The game includes four foxholes which can be placed on the board in strategic areas. A single warrior may jump into a foxhole for additional coverage in clear areas.
The Building. There is also a building included in the game to place on the board. Building spaces are considered clear spaces, but the walls of the building cannot be moved or fired through. Note that the building has two openings which may be moved and fired through.
Reference Cards
Each side in the game has its own reference card. On these cards are listed the capabilities for your figures, plus a number of handy charts to assist play.
Squads
In Fury of the Clansmen, figures are grouped into squads of warriors trained to fight together as a unit. A squad of Clansmen consists of one Chieftain, two Regulars and one Charger Carrier. A squad of Dark Legion warriors consists of one Centurion leader and three Necromutants. Once you have pushed each figure into a slotted stand, organize the figures into squads by their color.
Counter Sheets
A number of cardboard counters and markers are used while playing Fury of the Clansmen. Many of them are used only with the advanced rules.
Initiative Counters. There are 8 initiative counters included in Fury of the Clansmen. Each represents a different squad of figures. There are three squads of Clansmen and five squads of Dark Legion forces. These counters are used to determine when a squad may move and attack.
Starting/Goal Squares. There are eight squares which have a 2x2 grid of spaces on them. Each has a design that corresponds to a particular squad's initiative counter. These squares are used as either starting points for your squads (one figure per space) or as goal squares which you must reach to complete your mission. Each mission description will tell you how they are to be used.
Basic Game
For purposes of keeping these basic rules simple, we're going to assume that there are two players playing, each one in command of all the squads on a side.
To begin, turn to the missions section of this book and choose a mission to play. For your first game, we recommend that you play Mission One: Breakthrough!
Follow the instructions for the mission, including setting up the board and placing the Starting/Goal squares. Then set up your figures as described in the mission. Now take the Initiative counters and place them in an opaque container, like a coffee cup or the box top. Each player takes the reference card for his side, and you're ready to play!
Order of Play
Each turn, initiative counters are drawn from the cup, one at a time. When a squad's counter is drawn, it takes its turn. During the squad's turn, each figure in the squad has a number of actions that it may perform, such as moving and fighting. If the squad's leader is still in the game, he may be able to give extra actions to members of his squad. Once all of the squads have taken a turn, the initiative counters are placed back in the cup and a new turn starts. Play continues in this manner until one side completes its mission.
Initiative
Unlike other games, in Fury of the Clansmen the order in which each squad moves and fights changes from round to round. Place all eight initiative counters into a cup and shake it up. Then draw one counter from the cup. The squad represented by the drawn counter takes its turn. Once all of the figures in that squad have used up their actions, another counter is drawn from the cup and that squad takes its turn. Repeat this process until all squads have taken a turn. At this point, a new game round begins. Place all of the initiative counters into the cup and start the sequence again. If all of the figures in a squad are eliminated, remove its initiative counter.
Actions
When a squad takes its turn, each figure in the squad is allowed to perform actions. Normally, each figure is allowed to take three actions per turn as listed on the Actions Chart on the reference cards. In the basic game, the only actions figures are allowed to take are MOVE and ATTACK. There are two types of ATTACK actions: Close Attack and Firearm Attack. A figure does not have to use all of its available actions. It may even do nothing.
Example: On its turn, a figure may MOVE three times, MOVE twice and ATTACK once, MOVE once and ATTACK twice or ATTACK three times. It may even MOVE, ATTACK and then MOVE again. Any combination of three actions is allowed. These actions can be performed in any order the player likes.
A figure does not have to use all its actions at once. You can perform one action with a figure, two actions with another and then return and complete the two remaining actions of the first. However, the whole squad has to have finished all actions before you move on to the next squad.
Extra Actions
If the squad's leader (a Clan Chieftain or a Dark Legion Centurion) is still in play at the beginning of its turn, that leader may be able to give extra actions to his troops. Before any member of the squad takes its turn, the player may make a Leadership roll to see if the squad gets any extra actions. For Clan squads, roll three black dice. For Dark Legion squads, roll three white dice. For every hit you roll, you may allocate one extra action to the figures in that squad.
No individual figure in a squad may take more than two extra actions per turn, and extra actions may not be used in other turns or by other squads. If a squad's leader has been eliminated, that squad cannot receive extra actions.
Move
A figure performs a MOVE action by moving a number of spaces on the board. A figure may normally take four steps per MOVE action. The figure may move forward, backward, sideways or diagonally. It may change direction at any time, and it doesn't have to move all of its allowed steps. A figure may not enter or move through a square that contains another figure, but it may move diagonally between two figures. If a figure leaves the game board, it is out of play for the rest of the game.
Adding Move Actions Together
If a figure takes MOVE actions in sequence, it can add the steps together. For instance, three consecutive MOVE actions will give a total of 12 steps. Adding together movement steps comes in handy when crossing many terrain features, as a single MOVE action may not provide enough steps to move across them.
Example: A figure that takes two MOVE actions in a row has 8 total steps to take. If in one MOVE action a figure does not have enough steps to move up a rubble pile (see below), it may use the steps from its next MOVE action to complete the move. A second MOVE action cannot help to complete a move if a different sort of action is performed between the two MOVES.
Terrain and Movement
There are many different types of terrain on the game boards. Each of these terrain features has an effect on movement:
Clear. A figure moving into a clear square simply spends one step to move into the square.
Jungle. A figure moving into a jungle square must spend 2 steps to enter the square. If the figure does not have enough steps remaining, it may not move into that square. A figure moving from a jungle square to a clear square only spends one step.
Example: A Clan Regular moves one space next to a jungle and one space into the jungle. The warrior has used three steps--one to enter the clear space, and two to enter the jungle space. The Clansman has one step remaining. He can move back into a clear space (one step), but cannot move into another jungle space because this costs two steps. Note that if he wants to immediately take another MOVE, he can add his remaining step onto the 4 he gets for the MOVE and continue through the jungle (see above).
Rubble Piles. A figure moving into a rubble pile square must spend 2 steps to enter the square. If the figure crosses the EDGE of the rubble pile on his way up, the cost is increased by one, to 3 steps. The edge of a rubble pile is clearly defined between the two squares. If the figure does not have enough steps remaining, it may not move up the rubble pile.
Example: A Necromutant starts his turn one clear space away from a rubble pile. He takes two MOVE actions in a row, giving him a total of 8 steps. The Necromutant moves one space toward the rubble pile (one step), climbs up the pile (three steps), and moves two spaces across the rubble (two steps each). The Necromutant has used all eight steps.
Ruined Walls. These are the remains of glorious cities now utterly destroyed. A figure may jump or climb over a ruined wall at the cost of one extra step. If a figure does not have enough steps remaining, it may not move over the ruined wall.
Boulders. A figure may not enter a square that contains a boulder. These squares are off limits.
Buildings. The open spaces inside a building are considered clear spaces. Figures may enter buildings through doorways. A figure cannot move through a building's wall.
Proximity
A squad must stick together to fight at its peak performance. If, at the beginning of their turn, any member of the squad is more than three squares away from any other member of its squad, no Leadership roll may be made for extra actions. Figures may be on the other side of a ruined wall from each other, or even cut off by boulders, but as long as they're all within three squares of each other, the Leadership roll can be made.
Attack
There are two different kinds of ATTACK actions: Close Attack and Firearm Attack. A Close Attack happens when a figure is in a square next to an enemy and ATTACKS it with a sword or knife. A Firearm Attack happens when a figure shoots its firearm at an enemy figure from a distance. A figure can only perform an action if it has the proper equipment, so a Clan Chieftain may not use a Firearm Attack because he has no firearm. A Clan Charger Carrier may Close Attack, but since he is limited to his fists, his abilities are very limited. Clan Regulars and all Dark Legion forces may make both kinds of ATTACKS.
Combat Execution
When a warrior attacks an enemy, both sides roll dice. The attacking player makes an Attack Roll, and the defending player makes an Armor Roll. The more hits (explosion symbols) the player rolls, the better.
Various factors may allow either player to roll extra dice to increase the chance of eliminating or saving the defending warrior. These are known as Attack Roll Bonuses and Armor Roll Bonuses. The reference cards have a chart detailing all of the Attack and Armor Roll Bonuses in the game, and they are all detailed below as well.
Close Attacks
A figure may make a Close Attack if an enemy figure is in an adjacent square.
To attack the enemy, roll the number and color of dice listed under Close Attack on the Reference Card for that figure. Also roll any extra Attack Roll Bonus dice that may apply. Count up the number of hits you roll. The enemy player then makes an Armor Roll for the attacked figure. He rolls the number and color of dice listed under Armor on his Reference Card, plus any Armor Roll Bonus dice that apply. Count up the number of hits he scored. If the number of Attack Hits is greater than the number of Armor Hits, the figure is eliminated and removed from the board.
Example: A Clan Chieftain is Close Attacking a Dark Legion Necromutant. The Necromutant is on a rubble pile, so he gets an Armor Roll Bonus due to his height advantage. The Clan player looks at the reference card and sees that the Chieftain gets three black dice when Close Attacking. He rolls the dice and gets two hits. Now it is the Dark Legion player's turn to try and save the Necromutant from certain annihilation. The Legion player looks at his reference card and sees that a Necromutant rolls three white dice as a base Armor Roll. Because the Necromutant is atop the rubble pile, the Legion player also rolls an extra black die as an Armor Roll Bonus. He rolls all four dice and gets three hits. Not only did the Necromutant escape death, he had an extra hit to spare!
Violator Attacks. Clan Chieftains are equipped with the lethal Violator Sword, a tremendous electro-charged blade which is the bane of many Dark Legion forces. Chieftains are specially trained to use the Violator in the thick of enemy troops and are able to cut down many Legionnaires with a single swipe. A chieftain may swing his Violator in a full circle, attacking every figure in each space adjacent to his. Treat each attack as a normal, separate Close Attack. If there is a Clansman in an adjacent space as well, the Chieftain may not swing his Violator in a full circle, as this would cause him to attack his kinsman. Instead, he must stop the attack when it reaches the Clansman. The attack will also stop when the swing strikes a boulder or a building wall.
Violator attack (diagram caption): the swing must stop once it reaches a friendly miniature or a BOULDER square. Separate attack rolls are made against each enemy.
Firearm Attacks
A figure may make a Firearm Attack on an enemy that is NOT in an adjacent square PROVIDED that the attacking figure has a Line of Sight to the enemy. Note that if an enemy figure is in a space adjacent to the figure, that figure may not use a Firearm Attack. He may only Close Attack the enemy next to him.
Line of Sight
In order to shoot at an enemy, a figure must be able to see it. Imagine a straight line from the exact center of your figure's square to the exact center of the target's square. This is called drawing a LINE OF SIGHT. If anything gets in the way of this line, the Line of Sight may be blocked. If so, the foe cannot then be shot at.
Figures and terrain features will have an effect on the Line of Sight:
Figures. If the line goes through a square containing another figure, the Line of Sight is blocked, and the enemy may not be shot at. If the line goes through the point of two diagonal squares with figures in them, the Line of Sight is still clear and the enemy may be shot at (this can happen when you shoot along a diagonal line of squares).
Clear. A clear square has no effect on Line of Sight.
Jungle. If the Line of Sight goes through a square containing jungle, the Line of Sight is blocked. If the target figure is on the edge of a jungle area, the line of sight is not blocked, but the figure gets a three white dice Armor Roll Bonus due to partial cover.
Line of Sight (diagram caption): the Clansman has a clear Line of Sight to the white figures. The dark ones receive an armor bonus due to jungle (the left one) and a ruined wall (the right one). The other figures are not in Line of Sight. (The diagram marks figures as "May not be fired at", "May be fired at, but will receive armor bonus" and "In clear line of sight".)
Rubble Piles. If the Line of Sight crosses the slope of a rubble pile, Line of Sight is blocked unless either figure is at the TOP of the rubble pile AND at its edge. If both attacker and target are on top of rubble piles, no figures or terrain between the rubble piles can block Line of Sight (the shots go over the terrain).
EXCEPTION: Figures and terrain on top of a rubble pile can block Line of Sight (they're up high enough).
Ruined Walls. Ruined walls do not block Line of Sight, but if the Line of Sight crosses one, the enemy figure gets a bonus to its Armor Roll due to cover. He gets one red die Armor Roll Bonus for the first ruin wall, and an additional white die for every other ruined wall that the Line of Sight crosses.
EXCEPTION: If one of the two figures is on a rubble pile, ruined walls do not give Armor Roll Bonuses due to cover, UNLESS the TARGET is right next to the ruined wall. Also, if an attacker is next to a ruined wall and makes a Firearm Attack, the cover does not apply.
Boulders. Boulders always block Line of Sight.
EXCEPTION: If both the attacker and defender are on top of rubble piles, their shots go over the boulders.
Buildings. Doorways do not block Line of Sight, although figures inside a building get an Armor Roll Bonus due to cover UNLESS the attacker is also in the building or right next to the doorway. A building's walls always block Line of Sight. Figures on rubble piles may only shoot at a figure in a building if the target is right next to a doorway. Otherwise, the attacker is too high up to see into the building.
How to Shoot
Once you've determined that the enemy can be shot at, it's time to fire! Make an Attack Roll. Roll the number and color of dice listed under Firearm Combat on your Reference Sheet, plus any Attack Roll Bonuses that may apply. Count up the number of hits you roll.
The other player now makes an Armor Roll for the enemy figure. There are a number of Armor Roll Bonuses listed on the reference cards. Remember that cover adds up, so if the Line of Sight, for example, crosses a ruined wall and the enemy figure is in a jungle square, all of those dice are added to the Armor Roll! Note that if the Line of Sight crosses more than one ruined wall, the Armor Roll Bonus for the first wall is applied normally. Each wall after the first gives an additional white die as an Armor Roll Bonus.
Count up the number of Armor Hits rolled. If the number of Attack Hits is greater than the number of Armor Hits, the figure is eliminated and removed from the board.
Example: A Centurion is firing at a Regular. The Centurion is on top of a rubble pile, and the Regular is in an edge jungle space.
The Centurion draws a Line of Sight from the center of his space to the center of the Regular's space. The line goes through the edge of the rubble pile, a ruined wall halfway between the figures, and the jungle space that the Regular is in. The Centurion has a shot at the Regular. He rolls to attack. The Centurion gets three red dice to attack, plus an extra black die because he is on top of a rubble pile. The Legion player rolls all four dice and gets four hits!
The Clan player now makes an Armor Roll. The Regular gets three red dice for armor, plus three white dice because he is in the jungle. He does not get an extra red die for the Line of Sight crossing the ruined wall because the attacker is on a rubble pile and can shoot over it (if the Regular had been right next to wall, the bonus would have applied). The Clan player rolls all six dice and gets three hits. Not enough! The Regular is terminated.
Time to Play!
That's all there is to the Fury of the Clansmen basic game. Try out a few missions to get the hang of it, and when you're comfortable with the game, move on to the advanced rules, where a world of new possibilities await!
Advanced Rules
Aiming
When a figure attacks a foe, you may choose to have that figure take the time to aim at the enemy. You may aim with both Firearm Attacks and Close Attacks. This will greatly improve the quality of the shot. Taking an aimed shot uses up 2 actions. When you use a Firearm Attack or Close Attack with an aimed shot, you earn an Attack Roll Bonus. A warrior may not aim if Auto Firing (see below) or if on Snap Alert (also below), nor may a Clan Chieftain aim when swinging his Violator in a circle (see above).
Brainbusters
The Clan Chieftains each have three Brainbusters--a special sort of neural hand grenade--at the start of the game. A good way to keep track of them is to place three Brainbuster counters on each Clan squad's Starting/Goal Square at the beginning of the game. Store them here throughout the game. When the Chieftain throws one, remove one of the Brainbuster counters. Once a Chieftain has thrown all three Brainbusters, he may not throw any more.
Throwing a Brainbuster uses up one or two actions, depending on if the Chieftain wishes to aim or not. Brainbusters may be thrown at any space on the board up to eight spaces away from the Chieftain. The Chieftain may even throw the Brainbuster at a square he can't see! He can throw them over boulders, but he cannot throw them through walls.
To throw a Brainbuster, pick any square on the board within 8 spaces of the Chieftain. The space may have a figure in it, or it may be empty. Although a Chieftain may throw a Brainbuster over a boulder, a Brainbuster may never land on a boulder space. Place a Brainbuster counter on the target space.
Throw Accuracy. Now the Clan player must roll for the accuracy of the throw. Draw a Line of Sight from the Chieftain's space to the target space. If the Line of Sight crosses ANYTHING--figures, boulders, ruined walls, buildings, jungle, etc.--it is a Blind Throw. If nothing crosses the Line of Sight, it is a Clear Throw. Note that if the target square has a figure in it or is an edge jungle square, it is still a Clear Throw. If the Chieftain can see the space he is throwing the Brainbuster into, it is a Clear Throw.
If the Chieftain is making a Clear Throw and he didn't aim (a one-action throw), roll TWO BLACK dice. If the Chieftain aimed (a two-action throw), roll only ONE die. However, if he is making a Blind Throw, roll TWO WHITE dice for a normal throw and ONE white die for an aimed throw.
If the Clan player rolls all hits on his required accuracy rolls, the Brainbuster explodes on the square he targeted. However, for every miss (no explosion symbol showing), the Legion player gets to move the Brainbuster that many squares! So, for example, if the Clan player didn't aim and rolls two misses, the Legion player may move the Brainbuster counter up to two spaces in any direction away from the target space. The space that the Legion player moves the Brainbuster into is the space it lands in and detonates. If the Legion player moves the Brainbuster to a boulder square, it explodes harmlessly.
Brainbuster Damage. When a Brainbuster explodes, it has the potential to wound figures in the space it lands in and every space surrounding it. If a figure is in the space the Brainbuster lands in, it is attacked with three black dice. If the figure is in an adjacent space, it is attacked with three red dice. Only two attack rolls are made for the Brainbuster: one for the target square and one that affects all of the adjacent squares equally!
Separate Armor Rolls are made by each warrior, and Armor Roll Bonuses due to being in the jungle or on a rubble pile apply. Also, if there is a ruined wall between the detonation space and an adjacent space, a figure in that space earns the appropriate Armor Roll Bonus.
Brainbusters know no loyalty. If there is a Clansman in a space affected by a Brainbuster explosion, he is just as likely to be killed as a Necromutant!
A Brainbuster exploding in a foxhole automatically kills any figure inside the foxhole, but does not affect the adjacent squares.
Auto Fire
All figures may Auto Fire with their firearms (except the Clan Chieftain, who has no firearm). This means that instead of popping off a single shot, they can fire a sustained burst at one or more enemies. There are three kinds of Auto Fire: an Auto Fire Burst, in which the figure concentrates a burst of bullets on a single enemy, an Auto Fire Spread, in which the figure sprays several foes at once, and finally Full Auto, which can only be performed by the Charger Carrier. Both normal types of Auto Fire take up two actions. If a figure has only one action remaining in a turn, it cannot Auto Fire.
Auto Fire Burst. When you Auto Fire Burst at a single enemy figure, all standard shooting rules (e.g. Line of Sight) apply. Simply state that you are going to fire a Burst at the enemy figure. This uses up two actions. When you fire a Burst, you get an Attack Roll Bonus (see the reference cards).
After you Auto Fire Burst, there is a chance that you will run out of ammunition. (See "Weapon Failure" below.)
Auto Fire Spread. When you Auto Fire Spread, you may shoot at almost any number of enemy figures within Line of Sight. Imagine a soldier with his gun at his hip, sweeping it from side to side, constantly spewing out hot lead. That's Auto Fire Spread! However, as soon as your arc of fire reaches a friendly figure, you must cease firing. Also, the more figures you fire at, the greater the danger to your weapon and your warrior!
Announce that the figure will be firing an Auto Fire Spread and which figures it will attack. There may be any number of targets within that arc, but there mustn't be any friendly figures. Any figures that come into the attacker's Line of Sight only after an interceding figure has been eliminated may NOT be fired at. All figures that are shot at receive an Armor Roll Bonus.
Separate Attack Rolls and Armor Rolls are made for each target.
After you Auto Fire Spread, there is a chance that you will run out of ammunition, and maybe even that the weapon will explode from overheating! See "Weapon Failure" below.
Full Auto. Only Clan Charger Carriers may attack with Full Auto. The Charger is specially designed to unload a great deal of firepower at once. A Charger Carrier may fire his Charger for an unbelievably long period of time, shooting every figure he can see.
A Full Auto attack is exactly like an Auto Fire Spread attack except that you receive an Attack Roll Bonus of one red die and targets don't get an Armor Roll Bonus for this type of attack. Essentially, this type of fire allows the Charger Carrier to make a regular attack against every figure he can see. Additionally, if another figure comes into the attacker's Line of Sight after an intervening figure is eliminated, the Charger Carrier may fire at it as well.
A Full Auto attack uses up three actions. After you've finished firing, make a Weapon Failure check (see below). Chargers cannot explode like other firearms can.
Weapon Failure
Making an Auto attack (Burst, Spread or Full Auto) takes a lot out of a weapon, especially ammo! After all enemies have been shot at, roll three black dice a number of times equal to the number of enemies the figure shot at. If you roll three hits on a single roll, the weapon is out of ammunition. Place an OUT OF AMMO marker next to the figure. If you still have rolls left over, keep rolling! If you twice more roll three hits in one roll, the weapon overheats and explodes, killing the trooper!
Note that the Clan Charger Carrier is not at risk of having his weapon exploding. Chargers are designed for this kind of punishment and will not overheat. However, they may still run out of ammo, so the three black dice must still be rolled.
Example: A Necromutant is going to Auto Fire Spread at a cluster of four Clansmen. Combat is conducted as normal for each, with the exception that the Necromutant makes four separate Attack Rolls, one against each Clansman, and that the Clansmen each receive an extra black die as an Armor Roll Bonus. After the four combats are resolved, no matter what the outcome, the Dark Legion player must roll three black dice four times to check for possible ammo depletion. He rolls once and gets three hits! Not a good sign, as he still must roll the dice three more times. The player places an OUT OF AMMO counter next to the Necromutant and continues to roll. He makes a second roll and gets only two hits, and breathes a sigh of relief. Only two more rolls to go. He rolls a third time and gets three hits again! The Legion player makes his fourth roll and grimaces as three hits come up. His Necromutant goes up in a blaze of fire as its weapon explodes in its hands.
Reloading. If a trooper's weapon has run out of ammo, make sure an OUT OF AMMO marker is placed next to the figure. The figure may not use Firearm Attacks until it reloads its weapon with a new ammo clip. Reloading uses up one action. Once a firearm is reloaded, remove the OUT OF AMMO marker. The figure may now use Firearm Attacks as normal.
All figures have plenty of extra ammo to get them through a battle. They never run out of clips!
Optional Rule. If you roll three hits TWICE only when making the OUT OF AMMO ROLLS, the weapon breaks, but the warrior survives! However, he may only make close attacks for the remainder of the mission.
This is an Optional Rule, and you should agree before the mission starts if you should use it or not.
Snap Alert
Only a Clan Regular may go into Snap Alert. They are specially trained for the quick reactions necessary to be effective at such a maneuver. A Regular on Snap Alert has the ability to shoot at enemies when it is not his turn.
A Clan Regular may enter Snap Alert at the cost of 2 actions. Place a SNAP ALERT counter next to the Regular. The Regular remains on Snap Alert until his squad's next turn, he is eliminated, or he is forced out of Snap Alert.
If an enemy figure ENDS any action within the Line of Sight of a Regular on Snap Alert, the Regular may shoot at the enemy. This is a quick, reflexive shot, so the enemy gets an Armor Roll Bonus. The Regular may fire at that enemy each time it ends an action.
Example: A Centurion ends a move in a Regular's Line of Sight. The Regular may then take a Snap Alert shot at the Centurion. Assuming the Regular misses, the Centurion then shoots at another Clansman. After the Firearm Attack is played out, the Regular may again fire at the Centurion. Again assuming the Regular misses, the Centurion then fires at the Regular. The attack is played out, and assuming that the Regular survives, he may once again fire at the Centurion.
Being on Snap Alert is a difficult and consuming effort for a Regular. Every time a Regular makes a Snap Alert shot, dice are rolled to determine if the Regular has lost his concentration and fallen out of Snap Alert. After each shot is resolved, the Clan player rolls three black dice. If the player rolls three hits, the Regular loses his concentration. Remove the Snap Alert counter. The Regular may enter Snap Alert again on his next turn. If a Dark Legion warrior attacks a Regular on Snap Alert, it has no effect on the Regular's concentration (unless, of course, he is eliminated).
Foxholes
No warrior likes to be stuck out in the open, an easy target. Some troopers may jump into a foxhole to reduce their chances of being hit. A figure in a foxhole cannot MOVE until he climbs out, but he may still fire, and he receives an Armor Roll Bonus when attacked because he is harder to hit.
Jumping into a foxhole counts as one step when moving. A figure may not move over a foxhole square unless it intends to jump in. Once a figure jumps into a foxhole, its MOVE action is over, and any extra steps are lost. A figure in a foxhole may use Fire Attacks as normal, but if he makes a Close Attack, the defender receives an Armor Bonus as if he was on top of a rubble pile, i.e., one black die. However, a figure that Close Attacks a figure in a foxhole gains an Attack Roll Bonus.
Line of Sight to a figure in a foxhole is completely blocked if the line goes through a ruined wall (the figure is completely hidden by the ruined wall), unless the attacker is right next to that ruined wall. If a figure on a rubble pile attacks a figure in a foxhole below, ruined walls have no effect on Line of Sight (the Armor Roll Bonus for being in the Foxhole still applies) unless the target figure is right next to the intervening ruined wall, in which case the Line of Sight is blocked. Of course, the reverse situation goes for the figure in the foxhole, when it attacks.
Figures in foxholes never block Line of Sight.
Crawling Out. Before a figure in a foxhole can move, it must first crawl out of the hole. Crawling out uses one action. Place the figure in a square next to the foxhole. The figure may then move and fight as normal.
Sectioner Charge
The sectioner is a huge bayonet fastened to all the Necromutants' weapons. It can be used to make devastating Close Attacks.
Only Necromutants may make a Sectioner Charge. It is a special Close Attack with a running start, and it increases the chance to do harm. To initiate it, the Necromutant must first have a clear Line of Sight to its intended victim.
A Sectioner Charge incorporates a MOVE action and an ATTACK action into one devastating attack. The Necromutant may take up to 4 steps to move next to a enemy and immediately attack it with a Close Attack. This will give the Necromutant a very nice Attack Roll Bonus! A Sectioner Charge uses 3 actions.
The Necromutant must move at least one step. It may not make a Sectioner Charge if it already is next to a figure.
Missions
When you play a game of Fury of the Clansmen, you engage in a desperate mission. Each mission is designed to introduce a new facet of play and unlock the many possibilities that this game provides. You will notice that in each mission, both sides have objectives to work toward. Often they are nothing more than to prevent your opponents from pulling off their objectives, but in some games, both sides have specific instructions. The side that completes its mission objectives first wins the game.
The eight mission descriptions all follow the same format, detailed as follows.
Background. The story behind the mission, and the reason for the game.
Set Up. This diagram will tell you how to arrange the boards. Sometimes you are instructed to set up the boards randomly. If so, turn the boards face down and shuffle them, then set up the boards in the arrangement determined by the mission. After that, turn the boards face up. This way, you can play a mission over and over, and it will be different every time! There may also be additional instructions on how to set up the playing surface.
Deployment. This tells you how to set up the figures at the beginning of the game.
Clan Objective. This is the mission objective for the Clan troops. If they complete their objectives before the Dark Legion completes theirs, they win the game.
Dark Legion Objective. This is the mission objective for the Dark Legion troops. If they complete their objectives before the Clansmen complete theirs, they win the game.
Special Rules. This section will give any special rules that apply to the mission.
Note: each mission has a board set-up diagram (numbered board sections, Starting/Goal Square positions, deployment areas) that is a picture and is not reproduced here; only the printed caption is given.
Mission One: Breakthrough!
Background. It has been a grave day of battle. Weary troops on both sides have attacked with salvo after salvo. It is time to put an end to it, time for one last clash, a desperate attempt to break through into enemy territory. Whoever can infiltrate the installations of their sworn foes will surely win the day.
Setup. Randomly set up the boards in the arrangement shown. Place the three Clan Starting/Goal Squares and the five Dark Legion Starting/Goal Squares in the positions shown. (Diagram: Mission 1, random board placement; a 3x3 grid of boards, the three Clan squares along one edge and the five Dark Legion squares along the opposite edge.)
Deployment. Each side sets up their squads on their respective Starting/Goal Squares, one figure per space.
Clan Objective. Move at least one different Imperial figure onto each Dark Legion Starting/Goal Square.
Dark Legion Objective. Move at least one Dark Legion figure onto each Clan Starting/Goal Square.
Special Rules. Once a figure has entered an enemy Starting/Goal Square, it is out of play for the rest of the game. Leave the figure on the Square to signify that a portion of the mission has been accomplished. If so many figures are eliminated that it is impossible for either side to occupy all of the Squares, the game is considered a draw.
Mission Two: Escape
Background. The Battle for New Bocca has not gone well for Imperial. Confident the fray would be an easy victory, the Clansmen stormed onto the battlefield. Soon after, although the best forecasting equipment had predicted a day of perfect sunshine, it mysteriously started to rain. Imperial troops were soon slogging through torrential downpours and knee-deep mud. To make matters worse, the Dark Legionnaires were somehow able to entirely ignore the horrible conditions. The remaining Clan troopers have but one option--retreat! Transport ships have landed in random positions at the outskirts of the battlefield and have each managed to form a defensive perimeter. The Clan forces must make their way to their respective transports and escape the battlefield or face certain doom.
Setup. Set up the boards exactly as shown. Take any two Dark Legion Starting/Goal Squares and place them at areas A and B. Shuffle the remaining six Starting/Goal Squares and lay them face down in the positions shown on the diagram. Deploy the Clan troops (see below) and then turn the Squares over. (Diagram: Mission 2, exact board placement, Clan forces deploy in gray areas; a 3x3 grid of numbered boards with Starting/Goal Squares around the edges and areas A and B marked.)
Deployment. Before you turn over the six randomly-placed Starting/Goal Squares, place all three Clan squads on the center board section, one squad per area designated on the diagram. Then turn over the Squares. Set up the Legion figures on their respective Starting/Goal Squares.
Clan Objective. Each Clan squad must get as many men as possible to their respective Starting/Goal Squares. This represents the area where their transport ships are waiting.
Dark Legion Objective. Destroy as many Clansmen as possible. If the Legion terminates 9-12 Clansmen, the Nepharite Overseer will indeed be pleased, and will consider their efforts a major victory. If they destroy 5-8 Clansmen, the battle will be won, but only a minor victory will be awarded, and the mission should be considered a draw. If only 0-4 Clansmen are terminated, the mission is a failure, and a major victory is awarded to the Clan player.
Special Rules. The Dark Legion forces get one free turn at the beginning of the game. This free turn is limited to two MOVE actions per figure, and no extra actions for leadership are allowed. After this free movement occurs, the game proceeds as normal.
Because of the torrential downpour that only seems to be affecting the Clan troops, Clansmen only get three steps per MOVE Action. Because of their high-tech targeting gear, combat is not affected.
Mission Three: In the Gardens of the Overlord
Background. After a hard-fought battle through Alakhai's Citadel, three squads of Imperial Clansmen have discovered what appears to be a massive courtyard. Sensors indicate that beyond this expanse lies one of the sacred meditation chambers which is rumored to be the source of so much of the Nepharite's power. There are many doors that open onto the courtyard, and behind one of them lies this chamber. The Clansmen must discover behind which door lies the chamber, destroy the room with a Brainbuster and leave the way they came in.
Setup. Set up the board exactly as shown. The two open spaces in the center of the courtyard are enormous pillars that reach to an unseen ceiling above, masked by an unknown light source. Place two Clan Starting/Goal Squares upside-down in these spaces to represent the pillars. Take the third Clan Square and shuffle it in with the five Dark Legion Squares. Randomly place the six Squares face down in the spaces indicated on the diagram. Neither player may turn over the Squares. These represent the six doors that open onto the courtyard. The Clan Square is the room that holds the meditation chamber. (Diagram: Mission 3, exact board placement, Clan forces deploy inside the building.)
Deployment. The Clan figures are deployed inside the building, according to the diagram. The Legion player may set up his forces on top of any five Starting/Goal Squares (except the two serving as pillars) as if they were right side up.
Clan Objective. Discover which of the six doors opens onto the meditation chamber (it will be the one Clan Starting/Goal Square). Once the room is located, a Chieftain must move next to the room and throw a Brainbuster into it (automatic accuracy). After that, the mission is a success, but for a major success, at least 4 Clansmen must escape the courtyard the way they entered.
Dark Legion Objective. Prevent the destruction of the meditation chamber at all costs.
Special Rules. A Clan figure may open a door by moving next to a Starting/Goal Square and spending one action to turn it over. If the Square is the Clan Square, the Clansman has found the meditation chamber. A Clan Chieftain must move NEXT TO the Square and spend an action to throw a Brainbuster into the chamber. The Brainbuster automatically destroys the chamber. No accuracy rolls are necessary.
The two pillars in the center of the courtyard are completely impassable. They block Line of Sight and may not be moved through. Also, a Clan Chieftain may not throw a Brainbuster over a pillar, as they continue upward beyond sight.
Mission Four: The Mountain Fortress
Background. Dark Legion Seers have discovered a secret mountain fortress that is serving as the recon headquarters for a small force of Imperial Clansmen. They have dictated that this fortress must be utterly destroyed and all within wiped out. The Legion forces have snuck up on the fortress from the far side of the mountain and have managed to infiltrate this far without being detected. Now they have only to make their way around the mountain and into the fortress itself. Unfortunately, a careless Necromutant has triggered an early-warning device, and what was to have been an easy sneak attack has blossomed into a hard-fought battle.
Setup. Randomly set up the boards as shown. The large open space in the center is the mountain. Place the five Legion Starting/Goal Squares and the building as indicated on the diagram. (Diagram: Mission 4, random board placement, Clans deploy inside the building, the foxholes may not be moved.)
Deployment. The Legion troops are placed on their Starting/Goal Squares. The Clan troops begin in the building at the areas indicated.
Clan Objective. Prevent the Dark Legion from taking over the fortress by destroying all of the Dark Legion warriors.
Dark Legion Objective. Move at least one Centurion into the fortress through the portal indicated on the diagram by the arrow. Also, all Clan forces must be destroyed. If a Centurion enters the fortress, and the rest of the Dark Legion is destroyed, the mission is a draw. If the Clan squads kill all of the Centurions, but are themselves all destroyed, the game is also a draw.
Special Rules. Because of the urgency of this mission, Centurions are allowed to roll three red dice when determining extra actions for leadership, instead of the normal three white dice.
Mission Five: Ambush
Background. All is quiet--too quiet. Clan troops reconnoiter across a wide valley; sheer cliffs rise to each side, their summits towering over the brave troops. Suddenly, an enormous rumbling is heard from above. Landslide! Huge rocks and piles of dirt rain down upon the scattering forces. Three squads manage to run forward far enough to escape the landslide, but they are not yet safe. The Dark Legion has set up an ambush at this spot, helped along by the landslide set off by Dark Legionnaires above. Squads of minions of the Great Darkness pour out of hidden caves in the rock walls. Their backs to tons of earthen debris, the Clan forces must make it to the far side of the valley where transport ships, unable to land between the cliffs, are waiting. However, this difficult task is further hampered by the Dark Legionnaires on the cliff high above blasting away with an enormous Gehenna Cannon, spouting fiery plasma on the brave Clansmen far below.
Setup. Set up the board exactly as shown. Place the Starting/Goal Squares for each side in the spaces shown. (Diagram: Mission 5, exact board placement, Clan forces deploy in gray areas A, B and C.)
Deployment. Clan forces set up in the gray areas shown on the map, one squad per area. The squad represented by Starting/Goal Square A must set up in the area marked A, the B squad must set up in the B area, and the C squad must set up in the C area. Dark Legion forces are set up on their respective Starting/Goal Squares.
Clan Objective. Get across the valley and board your respective Starting/Goal Square, which represents each squad's transport ship. If 9-12 troopers escape, the mission is a success. If 5-8 troopers escape, the mission is a draw. If 0-4 troopers escape, the mission is a failure and the Legion is victorious!
Dark Legion Objective. Destroy as many Clan warriors as possible.
Special Rules. The caves represented by the Legion's Starting/Goal Squares are off-limits to the Clans for the entire game. Once a Dark Legion squad entirely leaves its cave, take the Square off the board. No figure may leave the board except for the Clan troopers, and then only to enter their transports.
Once every turn, after all squads have taken their actions, Dark Legion forces high above the fray fire their Gehenna Cannon down onto the battlefield. Due to the range, the shots may not be too accurate and accuracy rolls must be made, just like with Brainbusters. The Dark Legion player chooses one space ANYWHERE on the board to be the target center of the Gehenna Cannon's plasma fire. The Legion player now rolls two RED dice for accuracy. If he rolls two hits, the Gehenna Cannon hits the targeted space. If he rolls one miss, the Clan player may move the target by one space. If both dice miss, the Clan player may move the target up to two spaces. Once the center space is determined, the Legion player rolls for hits. Any figure on the center space takes a three black dice hit, and figures on the surrounding squares take three red dice hits. Review the rules for Brainbusters if this is unclear.
The Clan forces are not able to attack or destroy the Gehenna Cannon (they can't even see it!).
Mission Six: Defend the Tower
Background. Imperial engineers have built an enormous tower on the edge of their permanent headquarters on Venus to look out for enemy movement. As long as this tower stands, the Dark Legion will never be able to secure a strong foothold on this part of the planet. The Nepharite Alakhai has decided to send a small company of Dark Legionnaires into the compound in order to take or destroy the tower.
Setup. Set up the board exactly as shown. Place the five Legion Starting/Goal Squares in the areas noted on the diagram. Place the tower and the building on the board where indicated. (Diagram: Mission 6, exact board placement, Clan forces deploy in gray areas. The book also includes a "Tower Assembly" picture showing how the tower pieces fit together.)
Deployment. The Clan forces set up in the three areas on the diagram. Legion forces begin on their Starting/Goal Squares.
Clan Objective. Destroy the Legionnaires before they take over or destroy the tower.
Dark Legion Objective. Secure the tower to be awarded a major victory. To do so, at least two Legion figures must occupy the tower (with no Clan figures up there with them) for three complete turns. For a minor victory, simply blow the tower up by moving two Centurions next to the tower and spending their entire next turn setting the explosives. While the Centurions are setting explosives, they may not issue extra actions (no leadership die rolls are allowed for that turn).
Special Rules. The tower is a mighty stone monument to the power and glory of the Imperial regime. It stretches high overhead, its occupants ready to shower any incursion with heavy fire. For game purposes, a figure standing in the tower is treated just as if it were atop a rubble pile in terms of attack and armor roll bonuses, but a figure in the tower may also see any space on the entire board with no Line of Sight penalty. Even the middle of a forest! He may not be attacked in close combat, except if the attacker is also in the tower. A Brainbuster landing outside the tower makes no damage on the warriors inside it.
It takes eight steps to occupy a tower space. Each of the four spaces represents one of the tower's turbolifts. If all the spaces are filled, no turbolifts are available, as each warrior is preventing his turbolift from operating. If a figure in the tower is eliminated, its space immediately becomes available and any warrior may occupy it.
Mission Seven: Cross the Chasm
Background. Clan spies have discovered a secret Dark Legion installation perched on the edge of a tall mountain. The installation is protected by solid rock on three sides and a deep chasm to the front. The only means of access to the fortress are two bridges which lead over the chasm. Clan forces have been transported to the edge of the Legion perimeter, and now it's time for an all-out assault. Orders are to enter the installation, blow it up with two Brainbusters and fall back to the waiting transport ships.
Setup. Randomly set up the board as shown in the diagram. Place the bridges and the building where indicated. (Diagram: Mission 7, random board placement.)
Deployment. All forces begin the mission on their respective Starting/Goal Squares.
Clan Objective. Get at least one Clan Chieftain into the building and throw two Brainbusters into the complex through the opening indicated by the arrow on the diagram. The Chieftain must be on the edge of the opening in order to successfully use the Brainbusters. No accuracy rolls are required. Blowing up the complex will award a minor victory to the Clan forces. A major victory will be awarded if the same Clan Chieftain(s) that blew up the installation exits the board onto his Starting/Goal Square.
Dark Legion Objective. Prevent the destruction of the installation. A minor victory will be awarded by eliminating all three Clan Chieftains. A major victory will be awarded by eliminating 8 additional Clansmen.
Special Rules. Neither the chasm nor the bridges block Line of Sight. Figures may shoot at enemy forces on the other side of the chasm.
Mission Eight: Islands of Darkness
Background. The Nepharite Alakhai's Citadel is massive indeed, pushing up and out through the land like a wildly malignant tumor stretching high into the sky. Like an iceberg, what is seen from above is only a fraction of its true size. Underground passageways stretch for miles in every direction. Some of these end in small above-ground entrance points, completely disguised within a city or hidden in the jungles. One such remote entrance has been discovered by Imperial. Spies have determined that it is little used and is protected by only a small company of Dark Legion squads. This remote entrance has been deemed "the Back Door" by the planning and tactical commission.
The Back Door is located among a series of small islands in a nearby archipelago. It is a small, unobtrusive building, and it should be easy to infiltrate. If a small group of Clan squads could secure that building, it could be used as an access point for raiding parties into the Citadel. Time is of the essence. If the Dark Legion squads are able to raise an alarm, reinforcements will surely arrive!
Setup. Randomly set up the boards as shown in the diagram. Place the bridges and building in the areas indicated. (Diagram: Mission 8, random board placement.)
Deployment. All forces begin the game on their respective Starting/Goal Squares.
Clan Objective. Destroy every last Dark Legionnaire. At least one Clansman must enter and remain in the building. This will ensure that no (additional) Dark Legion reinforcements enter into play. Dark Legion reinforcements may begin entering the board after five turns, so the faster a trooper gets into the building, the fewer reinforcements there will be (see the special rules below).
Dark Legion Objective. Destroy every last Clansman.
Special Rules. Keep track of how many turns have elapsed. At the beginning of the SIXTH turn, Necromutant reinforcements may enter the board via the building. A reinforcement's first step puts it in the building, as indicated by the arrow. At the beginning of every turn, before initiative counters are drawn, the Legion player rolls three white dice to determine how many reinforcements he gets. The Legion player may enter as many reinforcements per turn as hits are rolled on three WHITE dice, but only as long as there are eliminated figures to draw from. If there are not as many available figures as there are hits rolled, those extra reinforcements are lost. The Legion player chooses which figures to return to play.
Reinforcements move when their squad's initiative counter is drawn, as indicated by the figure's color. Reinforcements may only spend actions to MOVE until they are within three spaces of the rest of their squad. Once they have joined up with their squad, they can perform ATTACK actions, too.
Clansmen inside the building can keep blast doors closed and prevent reinforcements from entering the board. If there is at least one Clansman anywhere inside the building at the beginning of the turn, no reinforcements may enter the board. If there are no Clansmen inside the building at the beginning of the turn, a reinforcement roll can be made (on turn 6 and after, of course). Only Necromutants can return as reinforcements--Centurions cannot.
Copy-Free Counters
The last page of the book contains counters that can be used if you want to design your own units for use in Fury of the Clansmen. It may be photocopied only for personal, non-commercial use.