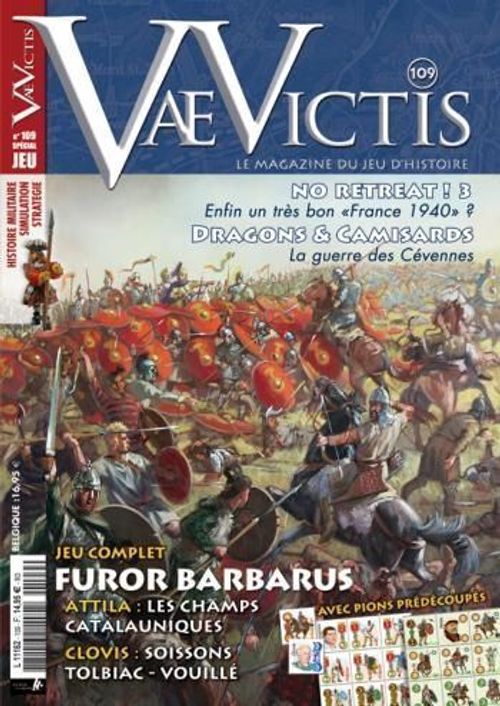
Furor Barbarus
Furor Barbarus Rulebook
Table of Contents
Table of Contents
- 1 - Basics
- 2 - Counters
- 3 - Scenarios
- 4 - Game Sequence
- 5 - Stacking
- 6 - Commanders
- 7 - Movement
- 8 - Zones of Control
- 9 - Combat
- 10 - Victory Conditions
- 11 - Optional Rules
- Terrain Effect Chart
- Combat Result Table
- Scenario 1 - Campus Mauriacus, 451
- Scenario 2 - Soissons, 486
- Scenario 3 - Tolbiac, 496
- Scenario 4 - Vouillé, 507
1 - Basics
The game is played with two players and includes the following materials:
- two maps, each with a hexagonal grid printed on it to regulate movement (the hexagons are hereafter referred to as hexes);
- one or two sided counters representing the combat units;
- 1 turn marker;
- Charge markers;
- a Combat Results Table and a Terrain Effects Chart
Players will also need to supply a 6 sided die.
2 - Counters
There are 6 types of unit: infantry (figure on foot and without a range value), foot soldiers with missile weapons (figure on foot and with a range value), cavalry (figure on horseback and without a range value), mounted soldiers with missile weapons (figure on horseback and with a range value), commanders (represented by a face) and baggage (represented by a wagon).
Most units have two sides (or 2 step loss); the front side with the unit's full strength values, called "complete", and the reverse side which has lower values, and represents the "reduced" unit. Commanders, baggage and some units have only one side.
Units have no facing.
The counters bear the following information:
- the background colour indicates which army the unit is in;
- the unit's name;
- the strength points, also representing the unit's morale;
- the range in hexes (if missile fire is possible);
- the movement points, expressed in MPs.
- between 0 and 4 unit characteristics (for the Campus Mauriacus scenario).
Counters description
- A white background shows that the unit has lost a step.
- Counter elements shown: Name, Strength and Moral Points, Movement Points, Range, Baggage.
- Unit characteristics (marks): Possible charge; Impetuous; Feigned flight; No penalty during a melee (for mounted firing units).
3 - Scenarios
The two players choose the scenario that they wish to play. The scenario will give them the necessary instructions to place the different overlays on the map which simulate the terrain of the particular battlefield, unit deployment, the side playing first (player 1), the player who plays second (player 2) and finally any special rules that may apply.
3.1 - Scenarios length
Each scenario lasts a set number of turns. In Phase 6 of each turn the Turn Marker is advanced one square on the Turn Record Track. The game finishes at the end of the last turn, if neither of the two sides has previously achieved the victory conditions.
4 - Game Sequence
Each turn is composed of 6 phases:
- Movement of Player 1
- Combat of Player 1
- Movement of Player 2
- Combat of Player 2
- Check victory conditions
- Advance the Turn Marker
5 - Stacking
A unit may never be placed in a hex occupied by another unit, friendly or enemy. However, during movement a unit may pass through a hex occupied by a unit from the same side.
Exception: the commander and/or one baggage unit may be placed on another friendly unit (infantry, cavalry, missile infantry, missile cavalry).
6 - Commanders
During hand to hand combats, commander adds his strength points to those of the unit with which he is stacked (both in attack and defence).
In addition, during morale checks, he adds a bonus of 1 to the unit with which he is stacked and to any units situated in the six adjacent hexes.
A commander retreats if the unit with which he is stacked retreats (after a R result or an unsuccessful morale check). He is also eliminated if the unit is eliminated. He is also eliminated if he is alone in a hex and an enemy unit passes through that hex.
Commanders never check their morale.
7 - Movement
During his movement phase, each player moves as many units as he wishes, within the Movement Point limits of each unit. A unit will expend a varying number of MPs depending on the terrain present in the hex it wishes to enter (see Terrain Effects Chart). If a unit does not have enough MPs available to enter a hex, it may not enter the hex. A unit may not keep unused MPs for use in the next turn. Unused MPs are permanently lost. Each unit must have finished its movement before another unit may move.
The road bonus is only applied if the unit was originally in a road hex.
A unit can always carry out the minimal movement of a hex as long as it enters an authorised terrain, regardless of the cost.
8 - Zones of Control
Each unit extends an influence into the six hexes surrounding the hex it occupies. These hexes constitute its "Zone of Control". Zones of Control have particular qualities:
- A unit may enter an enemy Zone of Control without expending any extra MPs. However it must stop its movement upon entry.
- A unit may not pass directly from one enemy Zone of Control to another; it must first of all enter a hex free of any enemy Zone of Control.
- Zones of Control do not extend over river hexsides, unless crossed by a bridge.
- A unit may not retreat into an enemy Zone of Control.
9 - Combat
9.1 - Basics
Combat is optional and takes place between one or several attacking units and one defending unit.
In order to fight, the attacking unit, in the case of infantry or cavalry, must be adjacent to the unit it wishes to engage; for those units able to shoot missiles, the target unit must be within the range in hexes indicated on the counter. Several units may together attack a single enemy unit, providing that each attacking unit is within the required distance. This is treated as a single combat, and is resolved with one die roll. Each unit may only attack, or be attacked, once per phase. Each combat is resolved separately, and combat results are applied immediately.
9.2 - Charge
Each cavalry unit (but not missile cavalry) that charges adds +2 to its strength in attack. It's possible if:
The charged enemy unit is in a clear, road or bridge hex.
The charging unit must move only towards its target and the hexes crossed must be road or clear hexes. No retreat before going back in the same hex for example.
A unit may only charge across a stream if it passes by a road.
A commander stacked with a charging unit adds only his strength points (the charge bonus applies to the unit not the commander). The charging unit must advance after combat.
9.3 - Units with a missile firing capacity
A unit capable of firing (mounted or on foot) may engage:
- an adjacent unit in attack or in defence (hand to hand). However it must reduce its strength by 1 (minimum: 1 strength point).
This only applies to combat, not to morale checks.
Except when facing a unit of enemy snipers.
A missile firing unit on its own may only attack in hand to hand combat at odds better than 1/1.
- a unit within firing range, but only in attack and if the firing unit is not adjacent to an enemy combat unit. The firing unit suffers neither elimination, retreat, morale check, unless it is attacking another unit capable of firing. It may fight alone, or add its strength points to other units attacking the same hex, either in hand to hand combat, or by missile fire. It may fire over an enemy unit and a river/stream/ford/bridge.
Example of combat
The units of Lothaire attack Fontenoy. If the Austrasie cavalry unit and the Bourgogne infantry unit join their attack, they will have 5FP against 2FP for the Provence unit thus obtaining a ratio of 2 to 1. If the Bowmen unit supports the attack, it adds 1PF to allow a ratio of 3 to 1 (6FP against 2FP). But the unit of Charles the Bald is firmly entrenched in the town of Fontenoy (plus one to the die result) and behind a creek (another plus one to the die result).
To cancel the defensive bonus of the creek, Lothaire decides to charge with his Aquitaine cavalry which adds 3FP + 2FP for charging + 0FP for the commander. To charge, the unit must go to 0710 then 0709. There would be no charge if the unit had moved in 0810, 0809 and then 0808 or 0709. The Aquitaine cavalry now being on the same side of the creek that the defending unit, the terrain bonus for the creek no longer applies. The force ratio is now 4 to 1 (11FP in attack and 2FP in defense) with a defensive bonus for the village.
Lothaire could have continued to attack the 3 FP Neustrie unit located in 0611. But he would not have the same bonus for charging even by moving successively in 0811 and then 0711 or 0712 because the unit must do all of its movement in a straight line towards the charged enemy unit.
It should be noted that the Bowmen unit could have fired by itself against the Provence unit. But given the force ratio, it cannot do better than making it retreat and the other units couldn't then attack Lothaire (11.1 Each unit may only attack, or be attacked, once per phase.) or enter the vacated hex (6. the movement phase takes place before the combat phase).
9.4 - Baggage
A Baggage unit cannot attack. It always has a strength of 1 in defense (never modified by the terrain). It has no ZoC and can only be attacked hand to hand. The combat results of R & T have no effects on baggage.
When another unit is stacked with a baggage unit, the combat unit can only be attacked hand to hand and adds its Strength to the baggage's strength. The R combat result (after a combat or a morale check) has no effects on the two units. On the contrary, the combat results of T (with a step loss), 1 and 2 are applied normally on the combat unit and the baggage unit is automatically eliminated if the defending unit is eliminated. When a baggage unit is eliminated, it is turned over on its Pillé side and has no more effects on Combat and Stacking.
9.5 - Combat resolution
Once combat has been declared, the attacking player adds together the strength points of the attacking units, including any possible charge bonus. The defender does the same for the defending unit, also taking into account any bonus due to the terrain. The ratio between the two forces is worked out, expressed with the attacker's ratio first and the defender's second. This ratio may go from 1/2 (or "1 against 2") to 4/1 (or "4 against 1"), and is always rounded in favour of the defender. The attacker then rolls the die. According to circumstances, the number rolled may be modified by the nature of the terrain (see Terrain Effects Chart).
Lastly, using the final strength points ratio and the number rolled on the die, the players refer to the Combat Results Table (eventually modified by the terrain). The result of the combat is where the two lines meet. Combat results are applied immediately.
9.6 - Terrain
All modifiers due to terrain are cumulative. Only the terrain of the defending unit counts. The die bonus for a stream or a bridge does not apply if:
- At least one attacking unit is on the same side as the defensive unit;
- The attack includes a firing unit that don't engage in hand to hand combat.
9.7 - Combat results
1st letter:
- A: Attacker
- D: Defender
2nd letter or digit:
- 2: 2 step losses
- 1: 1 step loss
- T: Morale check
- R: Retreat 1 hex
9.8 - Retreat
A R result leads to a retreat of one hex of all the affected units.
The order of priority is
- No enemy Zoc, No friendly unit
- No enemy Zoc, with a friendly unit
- In enemy Zoc, with a friendly unit
- In enemy Zoc, without a friendly unit
A unit which is unable to retreat because it has an impassable terrain or an enemy Zone of Control behind it, suffers a step loss unless it is surrounded by friendly units. In this event, the retreating unit displaces a friendly unit, occupies the vacated hex, and the owning player carries out a morale check on the displaced unit. The adjacent unit must also be able to retreat in accordance with the rules. If not, the same procedure is repeated. In this way several units may retreat in sequence, each undergoing a morale check, all as the result of one combat.
Note: This simulates the possibility of panic overtaking those units watching their comrades retreat or flee.
If a unit is forced to retreat off the map it is eliminated.
9.9 - Allocation of step losses
Each unit has one or two steps. Units which have only one step loss are eliminated after their first step loss. Upon the first step loss, a two step loss unit is turned onto its reduced side; on the second step loss the unit is eliminated. Losses are distributed as the owning player desires, but in such a way as to ensure as far as possible that all step losses are applied. If two or more units are attacking, losses may thus be distributed amongst them.
Example: Player 1 attacks with one full strength and one reduced unit. He suffers an A2 result. He therefore has the choice of either reducing the full strength unit and eliminating the reduced unit, or simply eliminating the full strength unit.
9.10 - Morale Check
When a morale check is required the owning player rolls a die for each unit concerned and compares the die roll with the unit's morale value. He adds 1 to the unit's morale value if the commander is stacked with, or is adjacent to the unit.
- If the result is lower than the unit's morale there is no effect.
- If the result is equal to the unit's morale, it must retreat 1 hex.
- If the result is greater than the unit's morale level, it suffers 1 step loss. If the unit is already reduced, it is eliminated.
9.11 - Advance after combat
When the result of a combat forces the defender to retreat or when the defender is eliminated, one of the adjacent attacking units may, if it wishes, occupy the hex abandoned by the defender, without regard to the effects of any Zones of Control or movement limits. This doesn't apply if the defender has retreated before the combat (for example the Breton cavalry at the battle of Jengland). The reverse is also true for the defender.
The decision whether or not to occupy the opponent's hex must be announced immediately after the combat has been resolved. A unit which has charged must always occupy the hex of an opposing unit which has retreated or has been eliminated.
If several units are eligible to advance, only one unit (plus eventually a commander) may advance.
Retreat and morale (example)
Unit A is attacked and according to the order of priority, it must retreat by pushing back unit B. Unit A tests its morale and gets -1. B can only retreat by pushing back C which can retreat to a hex that isn't an enemy ZoC. B and C test their morale normally.
10 - Victory Conditions
During Phase 5 of each turn the players check to see if one of the two armies has passed its Army Morale Threshold (specified for each scenario). Each player totals the strength points of his own eliminated units. If his commander is eliminated, he adds the strength of the latter to the total, + 4 points. If a Baggage unit is eliminated, he adds its strength + 2 points. Then he checks to see if he has passed his Army's Morale Threshold.
If one player has reached the threshold or more, the other player achieves a major victory.
If both armies have passed their thresholds at the end of the same turn, the player whose army has passed the threshold by the least achieves a minor victory.
If, at the end of the scenario, neither army has passed its Morale Threshold, players should refer to the victory conditions for that particular scenario.
11 - Optional Rules
Both players must agree on one or several optional rules to apply them.
10.1 - Moving from an enemy ZOC to another enemy ZOC
(Numbered 10.1 in the source, under heading 11.)
A unit that is in an enemy ZOC may go directly into another enemy ZOC. It must first test its morale. If a leader is stacked with the unit, he follows in every way the results of this unit.
- If the result is lower than the morale of the unit, the unit passes through another enemy ZOC.
- If the result is equal to the morale of the unit, nothing happens.
- If the result is higher than unit morale, it suffers 1 step loss. If the unit was already on his side reduced, it is eliminated. If a leader was stacked with the unit, he is also eliminated.
10.2 - Counter charge
(Numbered 10.2 in the source, under heading 11.)
To simulate implicitly the counter-charges, the charge bonus applies only against units not having that ability.
Terrain Effect Chart
| Terrain | Movement (cost per hex) | Combat |
|---|---|---|
| 1 - Clear | 1 | - |
| 2 - Road | 0,5 | - |
| 3 - Village | 1 | +1 on the die roll |
| 4 - Woods | 2 | -1 column for the defending unit |
| 5 - Hill | 2 | -1 column for the defending unit |
| 6 - River | impassable | No retreat possible |
| 7 - Bridge | 1 (0,5 if road) | +1 on the die roll (unless at least 1 Shot) |
| 8 - Ford | 2 | - |
Combat Result Table
| Die | 1/2 and - | 2/3 | 1/1 | 3/2 | 2/1 | 3/1 | 4/1 and + |
|---|---|---|---|---|---|---|---|
| 1 | DR | DT | D1 | D1 | D1R | D2 | D2 |
| 2 | DR | DR | DT | D1 | D1 | D1 | D2 |
| 3 | AR | AR | DR | DT | DT | DT | D1 |
A: Attacker; D: Defender. 2: 2 steps losses. 1: 1 step loss. T: Moral check. R: Retreat one hex.
Scenario 1 - Campus Mauriacus, 451
Romans (and allies) against the Huns (and allies)
- First player: Both players roll 1D6. The player with the higher result is the first player. In the case of a tie, the Roman player is the first player.
- Number of turns: 12
- Set-up: If the specific strength of a unit is not indicated, the units with the same name but different values are placed in designated hexes chosen by the player. The Hunnic player places his units first, then the Roman player places his. The two players secretly note the position of their commanders and reveal their positions simultaneously.
Roman army
- Aetius (red units): with a red unit
- Roman allies (Burgundians, Franks, Armoricans, Saxons): 1705, 1804, 1905, 2005
- 3 Roman: 1604, 1505, 1504
- Sangiban (Brown units): With an Alan unit
- 3 Alan: 1404, 1305, 1204
- Theodoric (Blue units): With a Visigothic unit from the right wing
- 8 Visigoth: 1105, 0905, 0705, 0505, 0305, 0205, 0803, 0403
- 2 Visigoth: 2309, 2410
Hunnic army
- Ardaric (blue units): With a Gepid unit
- Burgundians (Strength 2), Franks (Strength 2), 2 Gepids (Strength 3): 2212, 2011, 1811, 1711
- Attila (yellow units): With a Hunnic unit
- Huns: 1511, 1411, 1311, 1211, 1111, 1011, 0911, 0811, 0712
- Valamir (green units): With an Ostrogothic unit
- Ostrogoths: 0512, 0411, 0312, 0311, 0211
Special Rules
1 - Charge. Only units with a (charge) mark can charge.
2 - Hand-to-hand penalty. Units with a (no melee penalty) mark have no penalty for hand-to-hand combats (11.3).
3 - Feigned flight. A unit with a (feigned flight) mark can activate the special feigned flight capability by declaring it at the beginning of its movement. It targets an enemy unit that is not adjacent to another enemy unit, located a maximum of 3 hexes away. The targeted unit rolls 1D6 (-1 if the targeted unit also has the FR capability, +1 if the targeted unit is impetuous). If the result is less than its strength steps, there is no effect. Otherwise, the opponent advances the targeted unit 2 hexes toward the activated unit. A commander adds his strength steps to the targeted unit if they are stacked.
Historical note: This rule implicitly simulates - without realising all the movements - the tactics of feigned flight as well as the harassment typical of the nomad troops of the steppes.
4 - Defection of the Alans. With each loss of an Alan unit, the Roman player rolls 1d6. If the result is less than or equal to the total number of Alan units lost, all the remaining Alan units are removed from the map. Otherwise, there is no effect. If a full unit is eliminated, the player rolls 2d6.
Alan units eliminated from combat are counted in the morale limit for the army, those removed from the map by this rule are not.
Historical note: Confronted with the dubious loyalty of the Alans (who almost delivered Orleans to the Huns), Aetius decided to place them at the centre to force them to combat. However, it is possible that faced with the losses of his men, their King Sangiban decided to withdraw suddenly.
5 - Role of the commanders (optional). A commander only affects his own troops (same colour band).
When a commander is eliminated, the player of his camp rolls 1D6:
- 1-2: All the units of this commander have -1 in Strength/Morale for the following turn.
- 3-5: No effect.
- 6: All the units connected to this commander have +1 in Strength/Morale for the following turn. For Aetius, only the Roman units are concerned. For Ardaric, only the Gepid units are concerned.
Historical note: As news of the death of their King Theodoric spread, the Visigoth soldiers managed to rally his son, Thorismond, to successfully counter-attack the Huns.
6 - Impetuousness (optional). For an impetuous unit (with the (impetuous) mark) that is not adjacent to an enemy unit, each time it suffers firing from a distance or wants to move less than 3 hexes from an enemy unit, the owning player rolls 1D6. If the result is 5 or 6, the impetuous unit advances immediately with all its MP toward the closest enemy (opponent's choice). For 1, 2, 3 or 4, there is no effect.
- Army morale threshold: Roman army: 30; Hunnic army: 29
- Victory conditions: If neither player has obtained a major victory at the end of turn 12, each player calculates the total strength of his eliminated units. The player with the lesser number obtains a minor victory. Otherwise, it is a tie. The Hunnic threat has been temporarily repelled.
Scenario 2 - Soissons, 486
Franks against Gallo-Romans
- First player: Frankish player.
- Number of turns: 6
- Set-up: If the specific strength of a unit is not indicated, the units with the same name but different values are placed in the designated hexes chosen by the player. The Gallo-Roman player goes first.
Gallo-Roman army (red units)
- Syagrius: 0508
- 2 Legionaries and Palatina: 0507, 0508 and 0509
- 1 Roman cavalry and 2 Foederati: 0511, 0512 and 0513
- 3 Militias: 0502, 0503 and 0504
- 3 Archers: On line 04XX
Franckish army (blue units)
- Clovis, 2 Salian Franks (strength 4), 4 Salian Franks (strength 3), 1 Light inf. (strength 2), 1 Light inf. (strength 1): Between 0806 and 0814
- 1 Archers (strength 1): Between 0907 and 0912
Chararic's Corps
- 1 Salian Franks (strength 3): 0703
- 1 Salian Franks (strength 2): 0702
- 1 Light inf. (strength 1): 0803
Special rules
1 - Chararic. The three units of Chararic's corps are neutral during the first two turns. If a camp attacks one of the units while it is still neutral, it automatically becomes part of the opponent's camp.
At the beginning of each turn (starting with the 3rd) and until Chararic chooses a camp, the Frankish player rolls a die. For a result of:
- 1: Chararic betrays Clovis and his three units are henceforth considered Gallo-Roman until the end of the game. In order to distinguish among the units, the Gallo-Roman player can replace the Chararic units with 2 Juthunges de Tolbiac counters and the Arverne de Vouillé counter.
- 2-5: Chararic remains neutral.
- 6: Chararic sides with Clovis and his three units are henceforth considered Frankish until the end of the game.
Historical note: Grégoire de Tours indicates that the Frankish chief Chararic, having joined Clovis's forces, did not fight that day. Several years later, Clovis would remember that and seek revenge by capturing and killing Chararic to end the Franks' unity.
- Option: The Gallo-Roman player can choose to place his units freely on lines 04XX and 05XX. In this case, the Frankish player can place his units on lines 08XX and 09XX but not after column XX05.
- Army morale threshold: Frankish army: 13; Gallo-Roman army: 14
- Victory conditions: If neither player obtains a major victory at the end of turn 6, the Gallo-Roman player obtains a minor victory. The Frankish threat has been temporarily repelled.
Scenario 3 - Tolbiac, 496
Franks vs Alemanni
- First gamer: Frankish player
- Number of turns: 8
- Set up: If the specific strength of a unit is not indicated, the units with the same name but different values are placed in the designated hexes chosen by the player. The Frankish player places his units first.
Frankish army (blue units) - on lines 09XX and 10XX
- Clovis, 2 Salian Franks (strength 4),
- 4 Salian Franks (strength 3),
- 1 Light inf. (strength 1),
- 1 Ripuarian Franks (strength 3),
- 1 Ripuarian Franks (strength 2),
- 2 Archers (strength 1)
Alemanic army (brown units) - on lines 03XX and 04XX
- Gibuld,
- 2 Suevi warriors,
- 4 Hermunduri warriors,
- 2 Juthungi warriors,
- 2 Armalausi warriors,
- 3 Archers (strength 1)
Special rules
1 - Aid of the god of Clotilde. If the Frankish army is the first to reach or surpass the limit of 12 for the morale of the army, the following effects are applied during the following turn (and only that turn):
- +1 in strength for all units adjacent to Clovis
- +2 in strength for Clovis
- +1 in morale for all Frankish units
The Frankish player places a Divine Help (Aide divine) marker on the turn counter as a reminder.
Historical note: As the Alemanni were gaining the upper hand on his army, Clovis believed that his gods were no longer aiding him; he invoked the god of his Christian wife to alter the course of the battle.
2 - Terrain. The terrain which run from 0114 to as well as the farms in 1115 and 0214 have no influence on the game.
- Army morale threshold: Frankish army: 15; Alemannic army: 14
- Victory conditions: If neither player obtains a major victory at the end of turn 8, each player calculates the total strength of his eliminated units. The player with the lesser number obtains a minor victory. Otherwise, victory goes to the Alemanni. The Frankish threat has been temporarily repelled.
Scenario 4 - Vouillé, 507
Franks against Visigoths
- First player: Visigoth player
- Number of turns: 6
- Set up: If the specific strength of a unit is not indicated, the units with the same name but different values are placed in the designated hexes chosen by the player.
Frankish army (Brown units)
- Clovis: 0907
- Bretons (Light cavalry): 0903
- Alans (Heavy cavalry): 0902
- 2 Aquitaines (Gallo-Romans): 0913, 0914
- 1 Salian Franks (strength 4), 2 Salian Franks (strength 3), 1 Salian Franks (strength 2): 0906, 0907, 0908, 0909
- 1 Ripuarian Franks (strength 3): 0910
- 1 Light inf. (strength 1): 0911
- 3 Archers: 1007, 1009, 1013
Visigothic army (red units)
- Alaric II: 0407
- 5 Visigoths (heavy cavalry): 0406, 0407, 0408, 0409, 0410
- 2 Visigoths (infantry): 0412, 0413
- 3 Urban militia: 0402, 0404, 0304
- 1 Laeti: 0403
- 2 Arverni (Gallo-Romans): 0208, 0209
- 1 Archers: 0313
Special Rules
1 - Breton cavalry. Each time a Breton cavalry unit is attacked, and if at least one of the hexes adjacent to the unit is free of enemy units, this Breton unit may roll a die. For a 5 or 6, the unit may retreat up to 2 hexes (even across enemy ZoC). If it must retreat off the map, it is eliminated.
2 - Alan cavalry. As an exception to the rules for mounted shooters, this unit has no penalty for hand-to-hand combats (11.3) and can charge (11.2).
- Army morale threshold: Frankish army: 15; Visigothic army: 15
- Variation: A unit of Visigothic cavalry of Strength/Morale 3 becomes Strength/Morale 4 and 1 Visigothic cavalry unit of Strength/Morale 2 becomes Strength/Morale 3. As a reminder, the Visigoth player may add the two "Elite strength +1" markers.
Historical note: Part of the elite of the Ostrogothic cavalry remained in Spain to take possession of newly conquered lands.
- Victory conditions: If neither player has obtained a major victory at the end of turn 6, each player calculates the total strength of his eliminated units. The player with the lesser number obtains a minor victory. Otherwise, it is a tie.