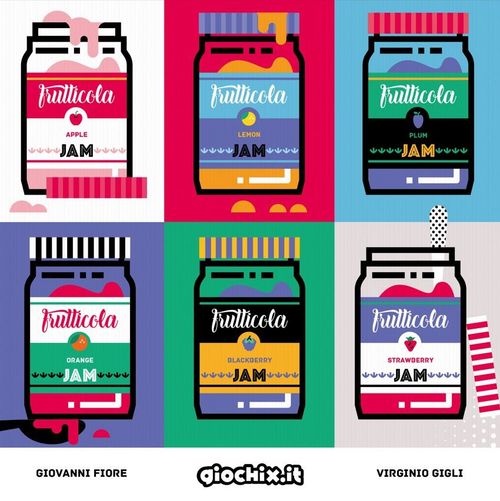
Frutticola
Frutticola Rulebook
Overview
In Frutticola you take on the role of a jam producer who will have to optimize his efforts and maximize his earnings to be the richest at the end of the game.
In each round you will send your farmers and workers to carry out their actions in the various areas and improve your structures and equipment. Selling at the best price is important but selling the highest quantity of jams is even more important. Sometimes it will be profitable to sell unprocessed fruit directly.
At the end of the game, the player with the most money will be the winner.
Components
- 1 double-sided game board
- 4 starting warehouses
- 28 pawns (3 farmers and 3 workers in each player color, plus 4 apprentices)
- 12 goal markers (3 in each player color)
- 74 fruits (11 per type and 8 additional oranges)
- 42 jams (7 per type)
- 32 development tiles (1 and 2)
- 15 organic Pesticides
- 15 Fertilizers
- 12 goal tiles
- 28 action cards
- 1 billboard
- 1 season marker and 4 board markers
- 80 bills
- 6 double-sided cardboard trees
- 1 double-sided cardboard bush
- 1 rulebook
Before playing, insert the trees in the bases of the corresponding colors, with the face for the correct number of players showing.
Set Up
- Place the game board on the table showing the correct side for the number of players. Place the trees and bush on the side, showing the correct side for the number of players. Place the fruits and jams near the corresponding plants.
- Divide the Development tiles into two groups: 1 (tiles 1 to 16) and 2 (tiles 17 to 32). Shuffle them separately and place the Development 1 tiles in a stack near the game board; set aside the Development 2 tiles, they will be used in the third round. Place the first 5 Development 1 tiles face up on the Town Store, to fill all the available spaces.
- Sort the goal tiles by color and shuffle them separately. Draw one goal tile per color and place them near the center of the table.
- Place the season marker on the first space (spring) of the year track.
- Place one fruit per type as selling price markers on the selling price track, on the following spaces: oranges at 6, lemons at 8, apples at 10, peaches at 12, strawberries at 14 and blueberries at 16.
- Place the apprentices, dollars, Pesticides and Fertilizers near the game board to form the supply.
- Each player chooses one color and receives all of their components:
- 1 starting warehouse tile
- 3 goal markers
- 6 pawns (3 farmers and 3 workers)
- Then each player receives:
- 2 oranges
- 2 Pesticides
- 2 Fertilizers
- $10
- 5 action cards (choose method A for beginners or method B for experienced players):
- A) Deal 5 cards at random to each player.
- or
- B) Draft 5 cards: each player receives 5 random action cards, chooses 1 to keep and passes the remaining four to the player on their left. Now each player chooses 1 to keep and passes the other 3 to the player on their left, and so on, until they receive their 5th and last action card from the player on their right.
Game Flow and Goal
A game of Frutticola lasts 1 year (4 rounds, or seasons) and at the end of the year you will sell all of your goods in the Christmas sale.
At the start of each season, every player chooses an action card to play in the current season. Each action card shows how many farmers and workers you will place and which advantage or disadvantage you get in the current season.
Then each player takes a turn to place one of their farmers or workers in order to complete 1 action.
When all the players place their last pawn, the season ends and the players prepare for the next season.
During the game players gain money by selling their jams and fruits and by achieving goals.
At the end of the game, the player with the most money is the winner.
Playing a Season
Each player chooses one of the Action cards in their hand and places it face down on the table. Then all players reveal their cards simultaneously and determine the turn order: the first player for the current season is the player with the lowest number on their Action card, followed by the one with the next lowest number, and so on.
Your action card describes how many farmers and workers you will have during that season and their order.
Each action card has an advantage or a disadvantage that applies to its owner for the entire season.
Every player places the appropriate number of farmers and workers on top of the corresponding icon on the action card.
Starting with the first player and proceeding in turn order, each player chooses one action area and places their pawn on the corresponding action space, taking it from the first available position on their action card (highest position).
Then the player immediately performs the chosen action.
When placing your pawn, you have to check if the space you choose is exclusive or not, if it is available for your type of pawn, and if there is a bonus or a penalty on that space.
Action Space
There are two kinds of action spaces: exclusive ones (the small circles) and open ones (the wider spaces). Only 1 pawn can be placed on an exclusive space per season, while any number of pawns of 1 or more players can be placed on an open space.
Exclusive — This action space is exclusive and may be occupied only by one pawn.
Open — This action space is open, so it may be occupied by any number of pawns.
Action Areas
There are 6 Action areas:
Orchard
Orchard (composed of 6 trees and 1 bush): Place a pawn here to harvest the fruits depicted on the plant. Every plant has 2 action spaces and both are exclusive.
When you harvest 1 or more fruits, you have to store them in your warehouse (1 fruit per space); so if you don't have enough available spaces in your warehouse you cannot harvest all the fruits shown on the space (you choose which fruits to harvest).
Fruits in the supply are limited, so you may only take up to the currently available quantity.
When you place your pawn on the chosen space, you have to pay the Fertilizers or the Pesticides shown on that space.
If a farmer or worker is depicted on the space, you may only place the corresponding pawn.
Example: The white player places his farmer (only a farmer may be placed on this tree) on the action space on the left, pays 3 Fertilizers and gains 3 oranges and 1 blueberry. The next player who wants to harvest 3 oranges and 1 blueberry will have to place his farmer on the other space and pay 2 Pesticides.
Town Store
Place a pawn here to buy 1 development tile.
The cost of each development tile is equal to the sum of the price shown above the development tile and the price on the action space you choose.
If you buy a development tile with a farmer, you get a discount of 2 dollars on the total amount to be paid (up to $0). After buying a tile, immediately shift the remaining tiles to the right to fill any empty spaces, and draw another tile from the stack.
Example: The turquoise player places his farmer on the $0 action space and pays $1 to buy the 3rd development tile (the pink one) from the right ($0+$3=$3-$2=$1).
NOTE: In the very rare case that there are no more first-level development tiles before summer is over, do not use second-level development tiles until the start of autumn.
Chemical Plant
Place a pawn here to buy Fertilizers and Pesticides. Placing a pawn on the exclusive space you may choose to take 3 Fertilizers or 3 Pesticides, but you may not choose a combination of the two. Placing a pawn on the open space you may choose to take 1 Fertilizer or 1 Pesticide. If you buy Fertilizers or Pesticides with a farmer you can also take an additional one of any kind.
Fertilizers and Pesticides in the supply are limited, so you may only take up to the currently available quantity.
Example: The white player places his farmer and gains 3 Fertilizers, then chooses an additional Pesticide as a bonus for having placed a farmer.
Kitchen
Place a pawn here to produce jam. You produce 1 jar of jam by spending 2 fruits of the same kind.
When you produce 1 or more jars of jam, you have to store them in your warehouse (1 jar per space).
The maximum number of jams you may produce (if you have enough fruits) with a single action is shown on the action space chosen. If you produce jams with a worker this number is increased by 1.
Fruit(s) made into jam go back to the general supply.
Example: The turquoise player places his worker on the exclusive x2 space. He then pays 4 oranges, produces 2 jams and puts them in his warehouse.
Market
Place a pawn here to sell jams or fruits.
You may sell 1 jam or 3 fruits of the same kind at a time; the number of times you can sell with a single action is depicted on every action space.
When you sell 1 jam or 3 fruits, you move them from your warehouse to the general supply and gain an amount of money equal to their selling price.
NOTE: the selling price is for the entire group of 3 fruits, not for each single fruit!
After the player's turn decrease the selling price of each kind of fruit sold (consider both jams and fruits, even if they were sold without using the Market action) by 1 space. Each single selling price may decrease only by 1 per turn.
If you sell with a worker, you may sell 1 additional time.
Example: The turquoise player places his worker on the open space to sell 2 times (having placed a worker, he may sell an additional time). He discards 3 lemons and 1 apple jam from his warehouse and gains $18 (8 for the 3 lemons and 10 for the apple jam). He then lowers the price of lemons and apples by 1 space.
House
Place a pawn here to recruit 2 apprentices.
The apprentices are not specialized, so they do not count as a farmer or a worker for any purpose (they cannot gain any worker or farmer-type bonus).
You will use the apprentices in your last two turns of the season.
If you recruit the apprentices with the farmer, you have to pay $3 to the general supply, while the worker can recruit them for free.
Example: The white player places their worker on the space and gains the 2 apprentices for free. He places them at the end of his actual line of workers and farmers.
Goal Tiles
During set up, you place 3 goal tiles on the table. The first player who achieves the goal shown on a goal tile places 1 of their goal markers on the highest value in dollars depicted on the tile and adds that number of dollars to his total.
A player can place only 1 goal marker per single tile, even if he achieves the goal more than once.
The players who achieve the goal on a tile afterwards place their goal markers on the highest value in dollars left available on that goal tile.
Example: The white player has all the kinds of fruits depicted on the goal tile in his warehouse and places one of his goal markers on the first empty space of the goal tile, immediately gaining $15.
End of the Season
When all the players have placed their last pawn (so they have placed all the farmers and workers depicted on their action card plus any apprentices), the season ends.
At the end of each season perform the following steps:
- The players retrieve all of their farmers and workers from the action areas.
- Advance the season marker by 1 space on the season track.
- Increase the selling price of each kind of fruit by 1 after Spring, Summer and Autumn.
NOTE: in a 2 or 3-player game, not all the seasons cause an increase of prices. See the 2-player game and 3-player game sections for more information.
- Put the apprentices back on their action area.
After the second season (summer) remove any remaining first level developments tiles (numbered 1 to 16) from the Town Store and replace them with the stack of second level tiles (numbered 17 to 32). Then draw 5 development tiles from the stack to fill the area.
After the fourth season (winter) skip all the steps above and immediately proceed with the Christmas sale.
Following Seasons
In the following seasons, players do not recover the action card used in the previous season(s), so they have to choose 1 new action card for the current season among those remaining in their hand. After winter they will only have 1 action card in their hand.
Christmas Sale
At the end of the fourth season, the Christmas sale starts and the selling price of each kind of fruit is decreased by 1.
Then all players sell all their jams and fruits (remember that you can only sell fruits if you have 3 of the same kind) they still have in their warehouse at the current selling price.
The Christmas sale is not a normal sell action, so:
- The selling prices never decrease.
- Selling advantages or disadvantages never apply.
- You may not achieve goals.
- Bonuses for the Christmas sale (from Development tiles) always apply.
Example: Christmas sale — The player sells 2 blueberry jars of jams, gaining $28 (14 each) and 3 oranges, gaining $5. The player may not sell his 2 remaining lemons (because you may only sell groups of 3 fruits of the same kind).
Example: The brown player gains 8 additional dollars from his development tile since he has 2 sets of 1 Pesticide and 1 Fertilizer.
End of the Game
After the Christmas sale the game ends.
Each player adds the dollars gained during the game to those on the "end of the game" bonuses on their development tiles.
The player with the most dollars is the winner. In the case of a tie, the player with the highest number on the card kept in his hand is the winner.
3-Player Game
For a 3-player game, apply the following changes:
- During setup place the board with the 2-3 players side up. Place the board markers on the spaces not allowed to 3-player game (symbol).
- Place the trees with the 3-player side showing, and insert them in the corresponding bases. Return the others to the box.
- Increase the selling prices of the fruits only after the second and third seasons (summer and autumn).
2-Player Game
For a 2-player game, apply the following changes:
- During setup place the board with the 2-3 players side up. Place the board markers on the spaces not allowed to 2-player game (symbol).
- Place the trees with the 2-player side showing, and insert them in the corresponding bases. Return the others to the box.
- Increase the selling prices of the fruits only after the second season (summer).
Appendix
Action Cards
- When you use the Chemical Plant gain an additional Fertilizer (or Pesticide) and $3.
- Gain 1 additional fruit of the same type of one gained with the Orchard action.
- Gain a discount up to 2 Fertilizers/Pesticides while using the Orchard action space in this season.
- Do not pay the cost on the action space when using the Town Store action. You must still pay the cost above the Development tile.
- At the end of the season gain a free Development tile from the ones on the Town Store.
- You have 1 additional sell in the Market action(s) and consider all sales of the current season as if they were at the selling price +1 level, which means one step higher on the selling price track. For example, if the selling price for oranges is $8, with this card you would sell oranges at $10.
- When you use the Kitchen action you may produce jams spending only 1 fruit, up to 2 times per action.
- When you use the Chemical Plant you can immediately use the following pawn which you have available and gain $3 (max 1 additional placement per turn).
- Gain a discount of 1 Fertilizer/Pesticide while using the Orchard action space in this season.
- When you use a farmer on the Orchard action, you can immediately use the following pawn and gain $2 (max 1 additional placement per turn).
- When selling you may sell jams/fruits at +1 selling price.
- When you use the Market with a farmer, you may sell groups formed by 2 fruits of the same kind.
- When you use the Town Store action with a worker you may buy a second development tile paying its cost and an additional $4 (do not pay the action space cost for this tile).
- During this season you may sell jams as soon as you produce them, up to 2 jams per action.
- Gain one additional orange when gaining oranges with the Orchard action.
- You may use workers as farmers and farmers as workers.
Goal Tiles
- You must have at least 1 fruit of all the 6 types in your warehouse.
- You must have at least 12 fruits of any kind in your warehouse (additional warehouse slots included).
- You must have at least 1 jam of Oranges, Apples and Blueberries in your warehouse.
- You must have at least 1 jam of Lemons, Peaches and Strawberries in your warehouse.
- You must have at least 5 Blue/Green development tiles (any combination).
- You must have at least 5 White/Pink development tiles (any combination).
- You must have at least 4 development tiles of the same color.
- You must have at least 6 development tiles (any combination).
- You must sell, with a single action, 3 Oranges, 3 Peaches and 3 Blueberries.
- You must sell, with a single action, 3 Lemons, 3 Apples and 3 Strawberries.
- You must sell, with a single action, 3 jams of the same kind.
- You have to gain at least $50 with a single sell action.
Development Tiles
- Immediately gain 2 oranges. You have 1 additional warehouse slot.
- Immediately gain 2 lemons. You have 1 additional warehouse slot.
- Immediately gain 1 apple and 1 blueberry. You have 1 additional warehouse slot.
- Immediately gain 1 peach and 1 strawberry. You have 1 additional warehouse slot.
- You can sell oranges and blueberries at +1 level. You have 1 additional warehouse slot.
- You can sell lemons and strawberries at +1 level. You have 1 additional warehouse slot.
- You can sell apples and peaches at +1 level. You have 1 additional warehouse slot.
- You can sell fruits (any type) at +1 level. You have 1 additional warehouse slot.
- Gain 1 additional orange when harvesting oranges and 1 additional lemon when harvesting lemons. You have 1 additional warehouse slot.
- Immediately gain 3 Pesticides or 3 Fertilizers. At the end of the game gain $4 for every pair made by 1 Fertilizer and 1 Pesticide.
- You have an apprentice which you can use after your workers/farmers every season.
- You can use workers as farmers when using the Harvest action. During the Christmas sale you can sell fruits at +2 level selling price.
- After producing a jam you can immediately place and use another pawn. If the second pawn is placed on the Kitchen it does not trigger another placement. During the Christmas sale you can sell jams at +2 level selling price.
- You produce lemon/orange jams by using only 1 lemon/orange respectively.
- In the Kitchen action you can use any 2 fruits to produce jams of 1 of the fruits used. Max 1 per turn.
- You never pay more than $2 for the action spaces in the Town Store, even if you were supposed to.
- Immediately gain 1 peach and 2 apples. You have 2 additional warehouse slots.
Expansion Set
These expansions have been realized thanks to the backers from our Kickstarter and Giochistarter crowdfunding campaigns. They are available as a unique Expansion set in a limited quantity, check your favorite shop for them!
Rewards Expansion (4 tiles)
Set-up. Place these tiles next to the Game board.
Rules. The first player to gain 3 Development tiles of the same color gains the corresponding tile. Note: These tiles are not Development tiles.
Effects. Tiles are explained below:
- Gain any 3 fruits when you take this tile. You have 2 additional Warehouse spaces.
- When harvesting gain 1 additional fruit from any of the ones harvested.
- When selling jams or fruits you may do so as if the selling price were 1 level higher. You have 2 additional Warehouse spaces.
- When you take this tile immediately produce 2 jams by using a total of any 3 fruits. The jams must be of the same kind of one or two of the fruits used.
Initial Resources Expansion (20 cards, green back)
Set-up. If playing with this expansion, during Set-up do not give each player the following: 2 oranges, 2 Fertilizers and 2 Pesticides, 10$. Shuffle the 20 Initial Resources cards and randomly deal 3 cards to each player.
Rules. Each player chooses one card to keep and gives the remaining two cards to the player to his left, then each player chooses another card and gives the remaining card to the player to his left. Every player must then choose one of his 3 drafted cards, and plays it face-down in front of him.
Everyone turns their card face-up and gains the resources shown on their card (fruit, Pesticides, Fertilizers and money).
Card number 9 allows you to gain a development tile from the available ones on the board.
Several cards have Warehouse spaces: These cards must be kept in front of the player, while the other cards, including the ones that weren't chosen, are discarded.
Note: If playing with the Personal Powers expansion, and if the "Gain a card that wasn't chosen" power (see below) is in play, do not yet discard the cards that weren't chosen. If playing with the Personal Powers expansion, starting with the player who has played the card with the lowest number (shown on the bottom left corner of the card), and following with the players who have played the next lower number, every player chooses one Personal Power.
Personal Powers Expansion (7 cards, pink back)
Set-up. Shuffle the 7 Personal Power cards and place face-up a number of cards equal to the number of players + 1. For example, in a 4-player game, place 5 cards. Place any remaining cards back in the box.
Rules. If playing with the Initial Resources expansion, starting with the player who has played the card with the lowest number (shown on the bottom left corner of the card), and following with the players who have played the next lower number, every player chooses one Personal Power, and places it in front of himself.
If not playing with the Initial Resources expansion, randomly decide the order of play.
Discard the remaining card.
If the "Gain a card that wasn't chosen" power is in play, after its owner has chosen the additional Initial Resources card, discard the remaining unused Initial Resources cards.
- You have a personal Apprentice to use during each season (which must still be played after Workers and Farmers from your cards).
- At the end of the season you may buy a Development tile from the ones on the board, paying its cost (but not the one on the action space). If buying at the end of summer, you may only pick one of the level 1 development tiles from that season.
- Every time you produce jams you may produce 1 with only one fruit.
- You start the game with 1 additional strawberry, 1 blueberry and 2 more Warehouse spaces. Once per season you may use a Worker as a Farmer, or a Farmer as Worker.
- Any money you gain by completing goals is doubled.
- Once per season you can do the Orchard action without paying Fertilizers or Pesticides.
- Gain an Initial Resources card that wasn't chosen by players and gain its resources (and any warehouse spaces).
When you use a power that can be used "once per season", turn the card 90 degrees to show it's no longer usable during the current season. Turn it back at the beginning of the next season.
Goal Expansion (3 goal tiles)
Set-up. Add these tiles to the goals of the corresponding color.
Effects. Tiles are explained below:
13: Have 4 different types of jams in your warehouse. 14: Have 8 jams in your warehouse (any type). 15: Gain at least 1 Development tile of every color.
Fifties Legends Expansion (4 development tiles)
Set-up. Add these tiles to the Development tiles of the corresponding kind (check the tile back).
Effects. Tiles are explained below:
- Rock 'n' Roll: Once per season you may use an occupied action space as if it were unoccupied.
- Drive-in: Once per season you may choose one of your opponent's employees and place him on the Drive-in tile. That employee is no longer available during the current season, and must be returned at the beginning of the next.
- Space Race: During the game you may place up to 9 fruits and/or jams on (or near!) this tile, where they are no longer available for the game. You can do it during your turn as free action in any quantity per time taking the elements from your warehouse. At the end of the game, score $ as following: the number of fruits and/or jams on the tile, multiplied by the number of DIFFERENT fruits and/or jams on the tile.
- UFO: During the game you can pay a Pesticide to use a Worker as a Farmer, or a Farmer as a Worker.