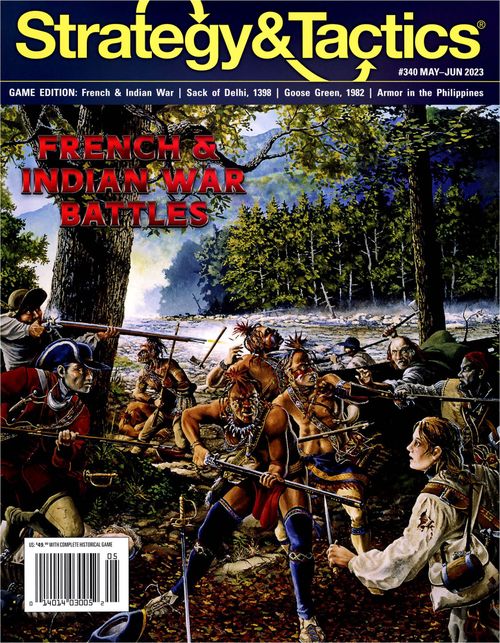
French & Indian War Battles
French & Indian War Battles Rulebook
Table of Contents
Table of Contents
- 1.0 Introduction
- 2.0 Game Equipment
- 3.0 Setting Up the Game
- 4.0 Sequence of Play
- 5.0 Visibility & Fog
- 6.0 Artillery & Bombardment
- 7.0 Movement & Stacking
- 8.0 Zones of Control
- 9.0 Combat
- 10.0 Retreat & Pursuit After Combat
- 11.0 Unit Status & Rally
- 12.0 Leaders
- 13.0 Demoralization
- 14.0 Reinforcements
- 15.0 Exiting the Map
- 16.0 Light Infantry
- 17.0 Victory Conditions
- Optional Rules
- 18.0 Special Tactics
- 19.0 Indians & Militia Balk
- 20.0 Supply Trains
- 21.0 Burning
- Scenario Rules
- 22.0 Lake George; 8 September 1755: The Struggle for Upper New York
- 23.0 Fort Oswego; 14 August 1756: Battle for Lake Ontario
- 24.0 Quebec; 13 September 1759: Wolfe's Great Victory
- Explanation of Combat Results
- Bombardment Results
- Unit Summary
- Leader Effects Summary
1.0 Introduction
French & Indian War Battles (F&IWB) is a two-player grand tactical system for simulating battles in North America during the French & Indian War (1754–60). While these battles often involved small armies for the era, they decided the fate of the continent. Each game in the system is based on one of the major battles of the conflict. Each battle has its own map, special rules and counters representing the military formations which participated in the original action.
1.1 Game Scale
Each game turn (GT) represents from 10 minutes to one hour depending on the pace of operations. Each hex represents 50–150 yards, depending on the scenario. Combat units represent anything from a wing (two or more companies) to a battalion. Each combat strength point represents 40–150 men, depending on the quality of training and weaponry. Each artillery unit represents two to six guns. Leaders represent a single great commander plus staff.
1.2 Game System
The rules for F&IWB are in three sections. The first contains the Standard Rules common to all games in the series. The second is the Optional Rules section, which gives rules that players can use at their option. The third is the Scenario Rules for each battle to include deployment, victory conditions and special rules.
The rules model the overall effects of the weapons and tactics in the era of linear warfare and frontier fighting, and include combat, leadership, and morale.
2.0 Game Equipment
A complete game of F&IWB includes a 22×34-inch game map sheet, rule set, and a sheet of 176 5/8-inch counters. Players must provide one six-sided die to resolve combat and other random game events.
2.1 Game Map
Each game in the series has its own map, with each scenario having its own map area, representing the terrain over which the battle was fought. A hexagonal grid is overlaid on the map to regularize terrain and positioning of playing pieces. Hexagons are referred to as Hexes.
2.1.1 Game Charts, Tables & Tracks
- Artillery Bombardment Table (ABT): Used to resolve attacks by artillery units.
- Combat Results Table (CRT): Used to resolve attacks by cavalry and infantry units.
- Demoralization Tracks: There are two Demoralization Tracks on the map. One is labeled Player A and the other Player B. Scenario instructions will detail which player is Player A and B.
- Rally Table: Used in attempts to restore disordered units to good order.
- Terrain Effects Chart (TEC): Lists the effects of terrain on movement, combat, and various game functions.
- Turn Record Tracks (TRT): Used to show the current game turn (GT) and the possibility of Fog during that GT. Each scenario map has a TRT and is labeled for the specific scenario it is associated with.
Note: the ABT, CRT, TEC and Rally Table are printed on the map sheet and are not reproduced in the rules document.
2.2 Counters
There are two general types of cardboard pieces (or counters): Units and Markers.
- Units represent military units, artillery, and leaders which fought in the original battles.
- Markers are used to record administrative information. Markers include Turn, Demoralization Level, Special Tactics, Road March, Artillery Fired, and Building Fire.
2.2.1 Nationalities & Contingents
There are two opposing sides in the game: British and French. Each side is composed of multiple contingents. Nationalities and contingents are identified by the background color of the counters.
- British Forces (including American colonial units): Red
- British-Allied Indians: Dark Red
- French Forces: White
- French-Allied Indians: Gray
2.2.2 Scenario Code
Each combat unit has a scenario code printed on the center left side of the counter. It is used to identify the scenario in which the unit will be used:
- F: Fort Oswego
- L: Lake George
- Q: Quebec
2.2.3 Combat Units
Combat units are divided into the following types of units:
- Leader Unit: Counter labels read Name, National Flag, Portrait, Scenario Code, Leader Command Value and Movement Allowance.
- Leader Name: The name of the leader.
- Leader Command Value: Represents the relative ability of the leader to inspire subordinate units and his ability to control subordinate forces.
- Movement Allowance (MA): The number of movement points (MP) the unit may expend in each GT.
- Infantry Unit: Counter labels read Unit ID, Reinforcement Designator, Combat Factor, Movement Allowance, Scenario Code, Light Infantry Designator (where applicable), Unit Type Illustration and, on the disordered side, Rally Rating.
- Unit Identification: The historical name of the unit.
- Combat Factor: Relative strength of a unit when attacking or defending.
- Rally Rating: The unit's die roll modifier when attempting to rally from disordered status (11.2).
- Reinforcement Designator: Indicates the unit does not start the scenario on the map. The unit will enter the map on the GT designated in the scenario instructions. Instead of a reinforcement designator, the counter may be printed with "OPT", designating the unit as an optional unit that is only used with the optional rules.
- Important: Units may have scenario set up codes in place of a reinforcement designator. See scenario instructions.
Unit Type: Indicates the exact type of unit by the figure pictured: Line Infantry, Grenadier Infantry, Indian Infantry, Militia Infantry, Cavalry, and Light Infantry (units bearing the light infantry symbol).
- Supply Trains: Supply trains are only used with the optional rules (20.0). Supply trains may not be disordered (the back of the counter is blank).
Counter Errata: The two British "Peppernell" units should be spelled "Pepperell". The British "Conv L1" unit should have "Conv L1" on back of the counter.
2.2.4 Markers
Markers are used for various administrative and information purposes.
- Demoralization Track Markers: Players use these markers to keep track of each army's current demoralization level on the corresponding Demoralization Track. Note: There are two sets of demoralization markers so that players may run two scenarios at one time if desired.
- Game Turn Marker: Players use the GT marker to note the current GT on the TRT.
- Artillery Fired Marker: Players use these markers as mnemonics to denote artillery units that have fired.
- Building Fire: These markers are on the back of some of the Artillery Fired markers. See Optional Rule (21.0).
- Attack Markers: Are used as a mnemonic to denote units that are attacking. Attack markers are also on the back of some Artillery Fired markers.
- Tactics Markers: There are two sets of tactics markers, one for each side. They are only used with the optional rules (18.0).
2.3 Definitions & Abbreviations
- 1d6: Roll one six-sided die.
- Demoralized: A condition for an army which has reached its morale breaking point.
- Demoralization Points (DP): A quantification of an army's total morale losses.
- Disordered: An individual unit which has temporarily lost effectiveness, indicated by the reverse side of the counter.
- DR: Die Roll.
- DRM: Die Roll Modifier.
- Friendly & Enemy: Friendly units are those controlled by the player. Enemy units are those controlled by the opposing player.
- Enemy Zone of Control (EZOC): The six hexes surrounding an enemy unit.
- Good Order: Combat units that are at full effectiveness, indicated by the front side of the counter.
- LOS: Line of Sight, a path of hexes from a firing artillery unit to a target hex.
- May: The player can choose to take the action or not.
- Must: The player is required to take the action.
- Occupy a Hex: Have a unit physically in a hex.
3.0 Setting Up the Game
Players determine which battle they will play and which army each will command. Punch out the counters and sort them out by battle, army, and type. Then consult the Scenario Rules (22.0 through 24.0) for instructions on how to set up (deploy) the units. Set up in the order indicated by the scenario rules.
3.1 Player A & Player B
Each scenario will indicate one side to be the First Player (Player A) and the Second Player (Player B). The First Player moves first in each GT, then the Second Player (per the Sequence of Play).
3.2 Deployment Restrictions
Stacking limits must be met during initial deployment (7.1).
- Units that are not initially deployed are called Reinforcements and are held aside (14.0). They enter the map later in the game per scenario rules.
3.3 Marker Placement
Place the following markers as indicated:
- Place the GT marker in the "1" box on the TRT corresponding to the scenario being played.
- Each player places his DP markers in the "0" spaces on his respective Demoralization Tracks.
- Place all other markers aside (they come into play via special rules).
3.4 Start Play
Once set up has been completed, begin the first GT. See the Sequence of Play (4.0). Play continues until the end of the last GT at which point the victory conditions are consulted to determine who won the game (17.0).
3.5 Scenario Rule Precedence
Scenario Special Rules take precedence over Standard and Optional Rules.
4.0 Sequence of Play
The game is played in successive GTs, each composed of a Fog Determination Phase, then a First Player Turn, a Second Player Turn, and a GT Inter-Phase. During each Player Turn, the designated player conducts actions in the order indicated by the Sequence of Play (below).
4.1 Phasing Players
Each Player Turn is divided up into phases in which certain actions take place. All actions must take place within the order designated.
- The player who is executing his Player Turn is the Phasing Player; the other player is the non-Phasing Player.
- Only the Phasing Player can take actions in the friendly Player Turn; the non-Phasing player cannot.
- All actions must take place in the order shown in the Sequence of Play. Once a player has ended a phase and initiated a new one, he cannot go back and redo prior phases.
4.2 The Sequence of Play
Fog Determination Phase: If it is GT 6 or later, the First Player rolls 1d6 to determine if there will be Fog this GT (5.0).
First Player Turn: The First Player is the Phasing Player and performs the following phases:
- Artillery Bombardment Phase: The Phasing Player conducts bombardment with any or all friendly artillery units (6.0).
- Designer's Note: Artillery bombards at the start of the GT (prior to movement). In the ensuing friendly Combat Phase, artillery does not engage in combat, even if in an EZOC. This avoids the issue of artillery potentially engaging in combat twice per GT.
- Movement Phase: The Phasing Player moves any scheduled reinforcements onto the map (14.0) and then may move any or all friendly combat units, artillery, and leaders (7.0).
- Combat Phase: The Phasing Player uses friendly combat (infantry and cavalry only; not artillery) units to attack enemy units adjacent to them (9.0).
- Rally Phase: The Phasing Player makes any rally attempts to return disordered friendly units to good order (11.0).
Second Player Turn: The Second Player now becomes the Phasing Player and performs the Second Player Turn in the same order as the First Player Turn.
End of GT Inter-Phase: If this is the final GT of the scenario, the game ends. Otherwise, move the GT marker one box along the TRT.
5.0 Visibility & Fog
Fog refers to a combination of smoke, weather, and general battlefield chaos.
- During the Fog Determination Phase, the First Player consults the TRT and if there is a parenthesized number or range of numbers at the bottom of the current GT box the player rolls 1d6 to determine visibility for the current GT. If the DR result falls within the range of the number or numbers, fog occurs. Flip the GT marker over to show fog is in effect.
- Example: Lake George TRT, GT 13: if the DR is one, fog occurs. On GT 14, fog would occur on a DR of one or two.
- If fog occurs, the condition is in effect for the entire GT.
Important: Fog is only possible on GT 6 or later in all scenarios.
5.1 Effects of Fog
During fog GTs the following restrictions apply:
- Movement: The printed MA of all good order units is halved (round up). Retreat and pursuit are not affected (10.0).
- LOS: The maximum LOS is two hexes. The effectiveness of artillery at one or two hexes remains the same (6.0).
- Rally: Apply a minus one DRM to all rally DRs, this DRM is cumulative with all other DRMs.
5.2 Fog of War
Fog of war is a term used to describe which units each player can examine.
- A player can examine all friendly and enemy units on the map during their own player turn if there is no fog.
- During fog GTs, a player may only examine enemy stacks if they are within two hexes of a friendly unit.
6.0 Artillery & Bombardment
During a friendly Artillery Bombardment Phase, the Phasing Player may use any number of friendly good order artillery units to bombard enemy units. Artillery bombardment is defined as firing at enemy units (targets) at any distance up to the range factor of the firing unit (Exception: Effects of Fog (5.1)).
Important: Disordered artillery units cannot conduct bombardment, even if the enemy unit is adjacent.
Designer's Note: This rule models the limited, if sometimes decisive, impact of artillery in this era.
Important: Artillery units that are adjacent to enemy units can bombard them. Artillery never attack during the ensuing friendly Combat Phase, even if they are adjacent to enemy units.
- A player may fire artillery units in any order desired; bombardments do not have to be designated ahead of time.
- A player fires each artillery unit individually (they never combine fire).
- Artillery units can bombard any hex within their LOS and which contain enemy units of any type (ordered or disordered).
6.1 Bombardment Procedure
Follow the procedure below when conducting bombardment:
-
Determine the range of the target hex. Range is determined by counting the number of hexes from the artillery unit (exclusive) to the target hex (inclusive). If the number of hexes is less than or equal to the artillery unit's printed range, the target is within range. If the number of hexes is greater than artillery unit's printed range, the hex cannot be targeted.
-
Determine if the artillery unit has an LOS to the target hex. LOS is traced from the center of the firing artillery unit's hex to the center of the target hex. If any of the intervening hexes is blocked, the artillery unit cannot bombard that target hex.
Important: Players may need to lay a straight edge to determine the viability of a unit's LOS.
-
A LOS is blocked by:
- a) The presence of friendly or enemy combat units (good order or disordered). Leaders do not block LOS.
- b) Blocking terrain: The TEC lists all blocking terrain types.
- c) If the LOS is congruent to a hexside with blocking terrain or units, and another hex that is not blocked, then the LOS is not blocked.
- d) The in-hex or hexside terrain in the firing unit's hex and the in-hex or hexside terrain in the target hex, do not block LOS.
- e) A hilltop is a hex adjacent to a slope hexside (on the up-slope side). Artillery can fire onto a hilltop hex, but not beyond that hilltop (i.e., further past the slope hexside). Slopes themselves do not block LOS if it is being traced laterally (i.e., from hilltop to hilltop).
- f) An artillery unit in a hilltop hex may ignore any blocking terrain in its LOS that is less than half the total distance (in hexes) from the target hex.
- Example: An artillery unit on a hilltop, fires at a target five hexes away: there is a town two hexes from the artillery unit, so it can fire over that hex. If the town were three hexes away, it could not fire over it. The converse of the above also applies. An artillery unit not on a hilltop hex could fire at a target on a hilltop hex and would only be blocked by terrain that is less than half the distance from its own hex.
6.2 Artillery Unit Operations
Artillery units operate as infantry with the following restrictions:
-
Artillery units cannot move in the Movement Phase of the same player turn that they fired in. Use the artillery fired markers as a mnemonic.
- Exception: Artillery units with a MA of zero may never move.
-
They can bombard if adjacent to an enemy combat unit, but the bombardment must be against only one adjacent enemy occupied hex.
Important: Unlike other combat, a single artillery unit can initiate an attack against only one enemy-occupied hex per each Artillery Bombardment Phase.
-
Artillery units that are adjacent to enemy units during the friendly Combat Phase cannot attack. This is so even if in an EZOC. They are not affected by combat results of other units attacking out of their hex.
-
Artillery units that defend against an enemy adjacent attack are affected normally by combat.
- Exception: Artillery units that receive a rout combat result are eliminated.
7.0 Movement & Stacking
7.1 Stacking
Stacking is the placement of more than one unit in a hex.
- Stacking restrictions apply only at the end of each phase (friendly or enemy).
- Friendly units (all types) cannot enter hexes containing enemy units.
- Exception: Friendly units may enter a hex containing only one or more enemy leaders. The leader(s) is automatically eliminated in this case.
- A player may stack the following number of friendly units in a hex:
- One combat unit (infantry or cavalry); and,
- One artillery unit; and,
- Any number of Leaders.
Important: Friendly units can move through hexes containing friendly units; however, stacking restrictions must be met at the end of the current Movement Phase.
7.2 Movement
The Phasing Player may move any number of friendly mobile units (see below) in the friendly Movement Phase. Units expend Movement Points (MP) to enter various types of hexes.
- A unit with a Movement Allowance (MA) of one or more is a mobile unit.
- A unit with a MA of zero on the front of the counter is a static unit.
- The Terrain Effects Chart (TEC) summarizes the number of MP a unit expends to enter each hex.
Important: A unit must immediately halt its movement when entering an EZOC (8.0).
-
A player moves units one unit at a time, tracing a path of contiguous hexes across the map. As a unit enters each hex, it must pay one or more MP from its MA.
- Exception: A player may move a leader with any unit with which it begins the current Movement Phase stacked. The leader may continue moving after the other units have ended their movement.
-
Movement is from hex to adjacent hex. Moving units cannot skip hexes. Units can move in any direction or combination of directions.
-
A player can only move units during a friendly Movement Phase.
Important: Pursuit and retreat are not movement and are conducted during the Combat Phase.
-
Once a player has moved a unit and removed his hand from it, he cannot go back and redo the movement.
-
The number of MP a unit expends during a single Movement Phase cannot exceed its printed MA.
Important: A mobile unit may always move a minimum of one hex, regardless of terrain or hexside costs. This does not allow a unit to enter terrain that is otherwise prohibited to it.
-
Unused MP cannot be accumulated from GT to GT, nor can a unit transfer MP to another unit.
-
Units cannot enter certain types of hexes or cross certain types of hexsides (TEC).
-
Units may have different movement costs for entering certain types of terrain (TEC).
7.2.1 Terrain & Movement
A unit expends one MP to enter a clear terrain hex. To enter other types of terrain, the player must expend the number of MPs designated by the TEC.
- Units crossing certain hexsides may be required to expend additional MP (TEC). The MP cost to cross a hexside is in addition to the cost of the in-hex terrain.
- Creek Hexsides: The crossing cost for creeks is the same in both directions.
- Slope Hexsides: Units pay one additional MP when moving across a slope hexside to the hilltop side (that is, uphill). Units pay no additional MP to move from the hilltop to a down-slope hex. Units do not pay any additional MP to move from one slope hex to another.
- Entrenchment Hexsides: Units pay one additional MP when moving across an entrenchment hexside from the side with the teeth to the inside. Units pay no additional MP to move from inside to the outside (teeth) hex. Units do not pay any additional MP to move from one entrenchment hex to another.
- Rivers: Units cannot cross rivers other than at bridges and fords.
- Forts: Fort George on the Oswego map requires the expenditure of two MP when entering the fort.
7.2.2 Roads, Trails & Bridges
A unit which moves directly from one road or trail hex to another road or trail hex via a hexside crossed by the road or trail expends one MP regardless of other terrain in the hex.
- The unit can enter and move through otherwise prohibited terrain by moving along roads or trails; however, the unit could not exit into a prohibited hex via a hexside not crossed by the trail.
- A unit moving across a creek or river hexside via a bridge pays no additional movement costs. A unit can cross an otherwise prohibited hexside via a bridge. Certain bridges have no roads running through them, but still negate creek and river hexsides.
Important: There are no bridges in the three scenarios provided. Reference to bridges are provided for future scenarios.
8.0 Zones of Control
The six hexes adjacent to a good order combat unit constitute its Zone of Control (ZOC). Hexes upon which a unit exerts its ZOC are called controlled hexes. ZOCs affect movement and combat.
Designer's Note: ZOCs model the area influenced by unit firepower and the rigid linear tactics of the era.
8.1 Extent of Zones of Control
All good order infantry, cavalry and artillery units always exert a ZOC, regardless of phase or GT.
Important: Leaders do not exert ZOC.
- ZOCs are never negated by units, enemy or friendly.
- ZOCs extend into and across all terrain types with the following exceptions:
- ZOCs do not extend across rivers; however, ZOCs do extend across bridge or ford hexsides.
- The ZOC of units outside of an entrenchment or fort do not extend into the entrenchment or fort. The ZOC of units inside an entrenchment or fort do extend out of the entrenchment or fort hexside.
- If there are both friendly ZOC and EZOC on a hex, then both co-exist. There is no additional effect of more than one unit exerting a ZOC into a single hex.
- Disordered units (and leaders) do not exert a ZOC.
- Good order units of a demoralized army retain their ZOC (13.0).
8.2 Effects of ZOC
EZOC have no effect on units attempting to rally (11.0).
- Units must cease movement when they enter an EZOC.
- Exiting an EZOC is called disengagement. The following units may disengage:
- Leaders.
- Good order cavalry units in clear and building hexes.
- Good order light infantry in town, building, and forest hexes.
- Demoralized units (13.0).
- Units that receive a retreat combat result (10.0).
- Units that are conducting pursuit (10.0).
- During a friendly Movement Phase, units allowed to disengage:
- Must have started the Movement Phase in an EZOC.
- Must move into a hex not in an EZOC.
- Disengagement itself does not expend MP (but the units must still pay the regular MP cost for the hex by which it exits the EZOC). Units may move up to their full printed movement allowance.
Important: A disengaging unit may not move directly from one EZOC to another EZOC without first moving into a hex not in an EZOC.
- A player must attack with all friendly infantry and cavalry units that are in EZOC (9.0).
9.0 Combat
Combat is used by combat units (cavalry and infantry) to attack and then disorder, retreat, or destroy enemy combat units that are in adjacent hexes. Combat is resolved on the Combat Results Table (CRT).
- The Phasing Player is termed the Attacker; the non-Phasing Player is termed the Defender (regardless of the overall strategic situation on the game map).
- Leaders may provide a combat bonus to friendly units they are stacked with.
- Artillery defends normally in combat but cannot attack during a Combat Phase.
- A given unit's combat factor is unitary; it cannot be divided among different combats, attacking, or defending.
- Only units which are adjacent to enemy units can attack.
- All friendly infantry and cavalry units in an EZOC must attack.
- All enemy units (including artillery units) that are exerting a ZOC into hexes containing friendly infantry and cavalry units must be attacked.
- At the beginning of the Combat Phase, the attacker must state which friendly units will attack which defending enemy units such that the above requirement is fulfilled.
Important: Players should use the attack markers to provide a mnemonic to show which friendly units are attacking which defending units.
- The attacker may resolve individual attacks in any order desired.
- A defending unit may be attacked by as many friendly units which can be brought to bear in the six adjacent hexes.
- There is no requirement for disordered units to be attacked; however, the attacker may, at his option, have friendly good order units attack disordered enemy units. Such attacks may only be launched if the requirement for attacking good order enemy units have been met.
- No unit can attack more than once per Combat Phase.
- No unit can be attacked more than once per Combat Phase.
- If two or more good order units are in the ZOC of a single enemy unit, they must combine their combat factors into one attack against that enemy unit.
- If a combat unit is in the ZOC of more than one enemy good order unit, then it must attack all such good order enemy units as one combined combat. In this case, the combat factors of all enemy units are totaled into one combined defense strength. The attacker could also choose to declare any disordered enemy units which are also adjacent to the attacking units as a target for the combat, thereby adding it to the defense.
- If two or more good order combat units are in the ZOC of two or more enemy units, the attacking units may combine their combat factors into a single attack against those enemy units, which defend as a single force. This type of attack can be initiated only if all attackers are adjacent to all the defending units.
- When more than one attacking or defending unit participates in a combat, combat results are applied against all such units, respectively.
- Example: A friendly combat unit is adjacent to both an enemy good order combat unit and an enemy disordered combat unit. The friendly unit could attack both the enemy units as one combined attack; or it could attack only the enemy good order unit (ignoring the disordered unit). If the attack is made against both units and the combat result is a Dd, the defending good order unit would be disordered, and the disordered unit would be eliminated.
- A unit (or group of units) may attack at poor odds in order that other units can attack at higher odds.
Exception: If a defending hex contains both good order and a disordered unit, adjacent enemy units must attack that hex, and all units in it must defend (including the disordered unit).
9.1 Combat Procedure
Follow the steps below when resolving each combat:
- Determine the Combat Odds.
- a) The attacker totals the combat factors (9.2) of all attacking units. Make all applicable adjustments to individual combat factors prior to totaling multiple units.
- b) The defender totals the combat factors of all defending units. Make all applicable adjustments to individual combat factors (9.2) prior to totaling multiple units.
- c) Divide the total attacking combat factors by the total adjusted defending combat factors. This will provide a ratio termed the combat odds.
- Use the above determined combat odds to identify which column on the Combat Results Table (CRT) will be used to resolve the combat (9.3).
- The attacker rolls 1d6 and cross references the DR with the above combat odds. This will provide a combat result.
- Immediately apply the combat result.
- The attacker then proceeds to the next combat, if any.
9.1.1 Determining the Combat Odds
- High Odds Attacks: If the total attacker's combat factors are equal to or greater than the defender's total adjusted combat factors, all fractions are dropped.
- Low Odds Attacks: If the defender's adjusted total combat factors are greater than the attacker's total combat factors, round down any remaining fractions and conduct the combat on the next lowest column.
Example (high odds): 13 combat factors attack 4 defending factors. The combat ratio would be 3.25 to 1. Drop the fractions which would be 3 to 1. Use the 3 to 1 column on the CRT to resolve the combat.
Example (low odds): 7 combat factors attack 10 defending combat factors. The combat ratio would be 0.7 to 1. Round this down to 1 to 2.
Important: The 1.5 to 1 column is used in situations when the attacker's total combat factors are at least 50% more than the defender's total adjusted combat factors, but less than twice as much. Example: 8 to 5.
9.1.2 Maximum & Minimum Combat Odds
Odds greater than 6 to 1 are resolved on the 6 to 1 column. Odds less than 1 to 5 are resolved on the 1 to 5 column.
9.2 Adjustments to Combat Factors
9.2.1 Terrain Effects
Units defending in certain types of terrain, or behind certain types of hexsides, may have their combat factors doubled (TEC).
- If several units are defending in different types of terrain, determine terrain effects for each unit separately.
- Units attacking across certain types of hexsides will double the defender's strength. The doubling applies only if all attacking units are attacking across such hexsides. If a defending unit is attacked from both defensive hexsides and non-defensive hexsides, then use its printed combat strength.
- If more than one terrain multiple can be applied to a defender in a hex/behind a hexside, then use the single best one (terrain effects for defense are not cumulative). In situations where more than one unit is defending, apply defensive multiples for each hex individually. Scenarios may provide special cases.
9.2.2 Other Adjustments
-
Enfilade Attack: If attacking units are on two opposite sides of a single defending hex, or if three (or more) attacking units have an empty hex between each of them, this becomes an enfilade attack. If the attacker qualifies for an enfilade attack, double all attacking combat factors.
Important: It is not enough to simply have surrounding units present in hexes adjacent to a defender; to gain the enfilade bonus the stipulated units must be taking part in the attack on that defender.
-
Leaders: A leader's command value is treated as a combat factor (including terrain and enfilade adjustments) when defending or attacking. Only one leader in each hex may add its leader command value to a single combat. Multiple leaders may apply their leader command value to single combat if each leader is in a different defending or attacking hex.
Important: If using optional rule Special Tactics, additional adjustments may apply (18.0).
9.3 Combat Results
These are explained at the end of rules. Players execute the outcome for each result in the order listed.
Example: In a Bx result, disorder units on the side with the fewer combat factors first; then disorder units on the side with the greater number of combat factors per the explanation.
10.0 Retreat & Pursuit After Combat
Retreat and pursuit are special forms of movement after combat.
10.1 Retreat
When a combat result requires a player's units to retreat, the owning player must immediately move each affected unit the indicated number of hexes away from the hex it occupied during the battle.
-
The player controlling the retreating units conducts the retreat. Each retreating unit is retreated individually.
- Exception: Leaders may retreat with one other unit.
-
There are two types of retreat:
- Withdrawal: Only occurs as a bombardment result or if a leader changes the effects of a rout result. All affected units retreat one hex.
- Rout: Eliminate all disordered units. For each good ordered affected unit roll 1d6 and retreat it that number of hexes. All surviving units are then disordered.
Important: Artillery units withdraw normally. An artillery unit that is routed is eliminated regardless of status (11.0).
-
If a leader is in the same hex as units (ordered or disordered) that receive a rout combat result, the player may choose to convert a rout result in that hex to a withdrawal.
-
Retreats are by hexes, not MP. Each hex of retreat counts as one hex regardless of terrain.
-
Within the following restrictions, a player can retreat units in any direction:
- Units may retreat into and through hexes containing friendly units. Stacking limits must be obeyed at the end of the retreat.
- A unit which retreats into an over-stacked situation must continue retreating until it ends its retreat in a legal stacking situation. If the retreating unit is required to halt its retreat in an over-stacked hex, the retreating unit is eliminated.
- A retreating unit must end its retreat the indicated number of hexes away from its battle hex. If it can retreat only a portion of the number of its obligated retreat hexes, it is eliminated in the last hex in which it was able to retreat.
10.2 Pursuit (Advancing After Combat)
Attacking units can advance into hexes which were cleared of defenders by elimination or retreat.
- Pursuit is always voluntary (but see 10.2.1).
- Any or all surviving good order mobile units that participated in an attack may Pursue. The player may choose to pursue with any number of qualified units.
- Leader units may pursue as a stack with infantry or cavalry.
- Pursuing units ignore EZOC.
- Units must end their pursuit within stacking limitations.
- Pursuit is by hexes, not MP. Each hex of pursuit counts as one hex regardless of terrain.
- A unit cannot pursue into enemy-occupied hexes, prohibited terrain, across prohibited hexsides, or off the map.
- Cavalry units may pursue up to two hexes (the vacated hex and one additional hex (10.2.1).
- Infantry units may only pursue one hex (into the vacated enemy hex).
- Artillery and disordered units cannot pursue.
10.2.1 Cavalry Pursuit
If there are any cavalry units in the attacking force, and the player chooses to pursue, then the player must pursue with all cavalry units prior to pursuing with any infantry units. The second hex of pursuit may be any eligible hex (it does not have to follow the routing unit's path of retreat).
10.3 Exhaustion
Pursuing and retreating units cannot attack again during the current Combat Phase, even if their retreat or pursuit places them next to enemy units whose battles are yet to be resolved, or who were not involved in a battle.
- Retreating units can be attacked if they end up in a hex containing friendly units which are then attacked. This may occur owing to retreats into fort (which negate EZOC). In this case, the units defend normally.
11.0 Unit Status & Rally
Cavalry, infantry, and artillery units are always in one of two states: Good Order (front side of counter) or Disordered (reverse side of counter).
- Good order units become disordered because of bombardment (6.0), combat results (9.0), or other designated game actions.
- A player can attempt to restore disordered units to good order via rally.
- A unit that is disordered and then suffers a second disordered result is eliminated.
11.1 Disorder Effects
Disordered units suffer the following effects:
- Disordered units cannot move in the friendly Movement Phase, nor may they pursue. Disordered units may conduct a withdrawal result due to bombardment and/or a leader converting a rout result to a withdrawal.
- Disordered units have their combat factor reduced to the number printed on their reverse. They can still attack (and must do so if in EZOC, as normal).
- Disordered units do not project a ZOC. Thus, enemy units do not have to attack them, though the enemy player may choose to do so.
- Disordered artillery units cannot conduct bombardment. They defend normally.
Important: Leaders are never disordered.
11.2 Rally
During the friendly Rally Phase, the Phasing Player may attempt to restore disordered units to good order status.
Important: EZOC have no effect on rally.
- To rally units, the owning player rolls 1d6 for each friendly disordered unit and applies the following cumulative DRMs:
- Rally Rating: Add the rally rating of the unit to its DR.
- Leaders (12.3): Add one to the DR if the unit is within the number of hexes equal to a leader's command value. No more than one leader can apply this modifier to a single unit's rally attempt, but a leader can apply a modifier to all units within his command range.
- Fog (5.1): Subtract one from the DR if fog conditions exist.
- Modified DR of 6 or more: the unit rallies (flip the counter over to show its good order side).
- Modified DR of 5 or less: the unit remains disordered.
Important: Units belonging to a demoralized army cannot attempt rally (13.0).
12.0 Leaders
Each leader counter has a leader command value which has two functions in the Standard Rules:
- Augment the combat strength of friendly units with which the leader is stacked; and,
- Provide a positive DRM for rally for units within radius.
- A player can stack any number of leaders in a single hex.
- Leaders cannot enter hexes containing enemy units.
- Exception: A leader that is moving stacked with an infantry, artillery, or cavalry unit may enter a hex containing only enemy leaders.
- Leaders are always in good order. They never disorder.
- Leaders do not project ZOCs.
- The leader command value is not a combat strength per se. Leaders cannot attack or defend on their own.
12.1 Elimination of Leaders
A leader is eliminated if:
- The leader is in a hex, not stacked with any type of combat unit, and an enemy infantry, cavalry, or artillery unit enters its hex.
- If the leader is in an EZOC and is not stacked with a friendly infantry, cavalry, or artillery unit.
- If a leader eliminated result is inflicted in combat. Other combat results do not affect leaders; however, see below.
Important: A leader is not affected by being adjacent to enemy units that have no ZOC but could be eliminated if by itself and an enemy disordered unit enters its hex. Also, the strict sequencing of Bx combat results for determining the instant at which a leader would be in EZOC may result in leader elimination.
12.2 Leader Effects on Combat
A player may add the leader command value of one leader to any infantry or cavalry unit with which it is stacked. If more than one leader is in a hex, then the controlling player selects one (and only one) to apply its bonus.
Important: If friendly participating units are attacking or defending in multiple hexes, one leader in each hex may contribute his leader command value to the combat.
- When a leader participates in a combat, its value is treated as its combat strength and is subject to all strength adjustment such as terrain, enfilade, etc.
- Example: A leader with a value of two would have it increased to four if stacked with a defending unit in doubling terrain.
Important: Leaders do not add combat strength to artillery bombardments (unless specifically stated in the scenario).
12.3 Leader Effect on Rally
Each leader has a command radius equal to the leader command value.
- The command radius is the number of hexes from the leader unit in which it can provide a rally DRM (11.2).
- Leader radius is not blocked by enemy units, EZOC or terrain.
- Example: A leader with a value of 2 may provide a +1 DRM to all friendly rally attempts within 2 hexes of the leader (1 intervening hex).
Designer's Note: Leaders cannot attack enemy leaders, there is no personal combat among gentlemen!
13.0 Demoralization
Each army has a Demoralization Level. This is the point at which losses have gone high enough to create a general decrease in combat effectiveness.
- Scenarios will designate the Demoralization Level for each side. This is usually in terms of elimination of unit combat factors which are recorded on the army's Demoralization Track, and sometimes by occupation of geographical objectives.
13.1 Demoralization Tracks
Each player has a Demoralization Track printed on the map. Record the number of Demoralization Points (DP) using the demoralization markers. The ×1 records digits and the ×10 the tens.
- When an army's demoralization level reaches the threshold designated by the scenario, it becomes demoralized. Once demoralized, that army can never become un-demoralized.
- Example: 23 DPs would be indicated by placing the ×10 marker in the two box and the ×1 marker in the three box.
13.2 Demoralization Points
Each scenario will provide the conditions which raise an army's demoralization level.
- DP for eliminated units are for their full-strength combat value (unless otherwise stated).
- DPs for routed units are ignored for units which convert a rout to a withdrawal (leaders) or no retreat (fort) (10.1).
Important: This game does not include DPs for routed units.
- DPs for occupying hexes are recorded the instant they occur. They are not lost if the hex is later abandoned or retaken by the enemy.
- Example: In the Lake George scenario the British gain DP for the French occupying the British Camp deployment hex. If the French occupy the hex on GT 4, the British player will add the appropriate DP to his track. If the French player abandons the hex on GT 5 and the British player retakes it later, the British player will not reduce the British demoralization level.
13.3 Effects of Demoralization
A demoralized army suffers the following effects once the army reaches or exceeds its demoralization level.
Important: Leaders are not affected by demoralization.
13.3.1 Movement
At the start of any ensuing Movement Phases the demoralized army's player must roll 1d6. The result is the maximum number of hexes each friendly disordered unit may move in that Movement Phase.
Important: The result is in hexes, not MP. Disordered units may enter up to that number of hexes (regardless of terrain) in that Movement Phase.
- Disordered units cannot move adjacent to an enemy unit (regardless of ZOCs).
- Disordered units that begin the Movement Phase in an EZOC may exit that EZOC; however, the unit cannot move into another hex adjacent to an enemy unit.
Important: Disordered units that cannot move for any reason must remain in position until such time as they can move or are eliminated.
13.3.2 Rally
Disordered units cannot rally.
13.3.3 Special Tactics (Optional Rules)
All units of a demoralized army (good order or disordered) cannot use special tactics.
Designer's Note: Demoralization is distinct from disorder insofar as the former is a general condition for the entire army as opposed to a temporary condition for individual units. The variable movement for demoralized units that are also disordered represents the tendency to withdraw from contact in a disorganized fashion after an army's morale broke.
14.0 Reinforcements
Reinforcements are units that enter the map after the start of a scenario. Reinforcements are listed by scenario.
14.1 Entry onto the Map
Reinforcements move onto the map from a designated map edge during the Movement Phase of the designated arrival GT.
- Reinforcements pay normal movement costs for the entry hex.
- More than one unit may enter via the same hex, but line them up off-map; each successive unit pays one additional MP for each unit that has already entered the map (i.e., they may not be stacked as they enter the map but may stack in the entry hex or beyond).
- Reinforcements may enter the map in a hex containing EZOC (stopping in the hex). They cannot enter the map into hexes occupied by enemy units or into prohibited terrain.
- If all entry hexes are blocked, or units cannot otherwise move onto the map, then remaining units enter on the first available friendly Movement Phase. Otherwise, units must enter on the designated GT; they cannot be voluntarily delayed.
15.0 Exiting the Map
When an army reaches its Demoralization Level, the controlling player may exit friendly units from the map via friendly map edges (which are defined by scenario).
- When exiting the map, the unit is moved to an eligible map edge hex and then must be able to expend an additional number of MP equal to the cost of entering that map edge hex (do not count hexside terrain).
- Units that have exited the map may not re-enter the map.
- Exited units do not count as VP for the enemy (17.0).
Designer's Note: Exiting units from a demoralized army is useful for salvaging units that would otherwise be eliminated by the enemy and thus count towards additional DP. It also is a reason for the winning side to conduct a vigorous pursuit.
16.0 Light Infantry
Light infantry units have a special indicator (the light infantry symbol) on the counter. They have the following special rules:
- Disengagement: Light units that begin their movement in an EZOC may disengage (8.2) if they begin the movement in a town, building, or forest hexes.
- Combat: Light units are doubled in defense in certain terrain types (TEC).
Important: Light units include all counters with the Light symbol: light infantry, certain militia, and Indians.
17.0 Victory Conditions
Victory is evaluated at the end of the final GT of a scenario. Players receive Victory Points (VP), usually in terms of eliminating enemy units and other conditions per the scenario. VP are awarded only for conditions at the end of the game (unless otherwise specified).
17.1 VP Procedure
Players are awarded VP based on the scenario victory conditions.
- The side which has the lower VP total subtracts its VP from the higher side's VP total to determine the Victory Margin.
- Consult the Victory Level Table (in the scenario rules) to determine the extent of the winner's victory. If both players have the same number of VP, the game ends in a draw.
- VPs for demoralization levels are stated in the scenario victory conditions.
- VP for occupation of hexes require a unit to be physically in the hex. Being the last player to move through a hex is not enough.
- One player can make a tactical concession, giving the victory to the other side at any agreed upon level of victory. The other player must agree for the game to end.
Optional Rules
Players can use the Optional Rules to increase realism and play balance.
18.0 Special Tactics
Special tactics markers provide players with various combat bonuses. Each player has eight markers. These markers may be used in any scenario.
Special tactics markers are held off-off map [sic] until used by the owning player.
Important: Each special tactics marker may only be used once per scenario.
- Use the unit's printed combat strength when extracting combat losses.
- Only good order units may receive special tactics bonuses, disordered units cannot. Units of a demoralized army cannot use special tactics.
- Special tactics markers have no effect on artillery bombardment.
- Special tactics markers can only be used during clear weather GTs (i.e., not on GTs with fog).
- A player may always examine friendly special tactics markers. A player may not examine enemy markers until they are played.
18.1 Special Tactics Procedure
Forced March special tactics is a movement tactic.
- The Phasing Player must play the forced march marker at the beginning of his friendly Movement Phase. Remove the marker from play at the end of the player's Movement Phase.
- All friendly units that are within command radius of a friendly leader may double their printed MF.
- A unit using forced march may not start in, move through, or enter an EZOC.
All other special tactics markers are combat tactics and may be used during any Combat Phase when defending or attacking.
- After the attacking and defending units have been declared, the attacking player and defending players may each secretly select one special tactics marker.
- Once both players have selected their marker (if any), the markers are revealed.
- Each player applies his own marker's combat modifiers. At the conclusion of the current combat, those special tactics markers are removed from play.
- Bayonet Attack: Double the combat strength of all attacking grenadier and line infantry units.
- Volley: Double the combat strength of all defending grenadier and line infantry units.
- Ambush: Double the combat strength of all attacking or all defending light infantry for one combat. The light infantry must be in a woods, forest, or marsh hex.
- If a unit's combat strength would be doubled for terrain or enfilade, it is only tripled (not quadrupled) when playing a special tactics marker.
- Special tactics markers do not affect the strength of leaders.
- Special tactics markers provide the bonus to all applicable units in the combat. Units that are not qualified do not receive the bonus.
Example: The attacker has two line infantry units and one cavalry unit in an attack. He declares a Bayonet Attack and the combat strength of the infantry are doubled. The defender has a line infantry and light infantry in the defense and plays a Volley. The line infantry doubles its combat strength.
19.0 Indians & Militia Balk
Often, Indians and militia units showed reluctance to attack well-entrenched positions. Use this optional rule only if called for by the scenario.
- A player may not move Indian or militia units adjacent to enemy artillery units that are located across entrenched hexsides or in fortress hexes. This does not affect retreat and pursuit combat results.
- This rule does not apply if the Indian or militia units are within command radius of a leader specified by the scenario.
20.0 Supply Trains
Certain scenarios will give players supply train units.
- Units in the same or adjacent hex as a friendly supply train add one to their rally attempt DR.
- Supply trains:
- Do not count towards stacking. Only one supply train may be in any hex at the end of any phase.
- Do not exert a ZOC.
- May not attack, their combat factor is only used when defending.
- Do not have a rally rating.
- Supply trains are not affected by combat results.
- If alone in a hex when attacked, combat is determined normally. Attacking units suffer combat results normally; however, if the supply train suffers any adverse result, any good order surviving attacker may enter the hex.
- If stacked with any friendly combat units, the supply train does not suffer any adverse results. If all other friendly units are withdrawn, routed, or eliminated attacking units may then enter the supply train's hex.
- When an enemy unit enters a hex containing an enemy supply train it is captured by those enemy units. The player controlling the units then rolls 1d6 and applies the below result:
- 1–2: The supply train is eliminated. Eliminated supply trains count towards VP.
- 3–4: The supply train is captured by the enemy units. It now functions as a supply train for all units of the capturing side. Captured supply trains count towards VP.
- 5–6: The supply train is looted; flip the supply train over. It remains on the map (it may no longer move). For the remainder of the game, any unit (either side) attempting to rally in or adjacent to the supply train's hex subtracts one from its rally attempt. Looted supply trains do not count towards VP.
Important: If an Indian unit (friendly or enemy) participated in the combat that resulted in the supply unit being affected, add one to the DR when determining the effect of the enemy units entering the supply train's hex.
21.0 Burning
Whenever an artillery unit fires at a town or building hex and rolls a 1, the town catches fire. This is in addition to any combat result scored against an occupying enemy unit.
- Artillery can fire at either an enemy-occupied or empty town or building to start a fire (but not a friendly-occupied hex).
- If a fire is started place a burning marker in the hex. It remains in place for the remainder of the scenario.
21.1 Effects of Burning
The effects of a burning marker are as follows:
- Disordered units in the hex cannot rally.
- Artillery units in the hex cannot conduct bombardment.
- If a unit enters the hex, it ceases movement. If the unit is a good order infantry or cavalry unit, it becomes disordered. Disordered units remain disordered. Units starting in a hex with a burning marker can move out normally.
- Units in burning hexes cannot use special tactics. They do not receive multiples for town or building defense. Units attacking a burning hex are not affected.
Scenario Rules
22.0 Lake George; 8 September 1755: The Struggle for Upper New York
Lake George is a grand tactical level game simulating the series of actions which took place around the southern shores of Lake George in New York colony. Baron Dieskau commanded a French flying column for a preemptive attack against Colonial provincial forces commanded by General William Johnson building a fort (which would later become William Henry). In the first action, the French ambushed and routed a colonial column. Dieskau followed up with an assault on Williams' fortified camp just south of the lake but was repulsed and the Baron himself captured. The final action saw a reinforcement column from Fort Lyman (late Fort Edward) defeating a French detachment. And with that, the remaining French withdrew back towards Fort Carillon. This action was significant for a number of reasons, chief of which that it showed the value of American colonial forces.
22.1 Scenario Details
Game Length: 15 GTs. The French set up first; British set up second.
Player Sequence: The French player is Player A. The British player is Player B.
23.2 Unit Identification Abbreviations
[Printed as "23.2" in the Lake George section of the source; the subsection number is transcribed as printed.]
British
- Conn: Connecticut
- Mass: Massachusetts
- NH: New Hampshire
- NY: New York
- RI: Rhode Island
French
- CFM: Compagnies Franches de la Marine
- Mil: Milices (Militia)
22.3 French Deployment & Reinforcements
No French units begin the game on the map. On GT 1 during Player A's Movement Phase, the French player moves all French units onto the map from the east map edge. At the beginning of the friendly Movement Phase, the French player must designate one east map edge hex as the entry hex. All units must enter within three hexes of that hex (two intervening hexes). If playing with the optional Supply Train rule, add one Supply Train.
Friendly map edge hexes: Any east map edge hex.
22.4 British Deployment & Reinforcements
Place the unit marked as a reinforcement (R) aside. The remaining units are set up on the map prior to commencing the game.
Start Force: Deploy all 13 British units and the one Iroquois unit within three hexes (two intervening hexes) of the British Camp (hex 0810). If playing with the optional Supply Train rule, add one Supply Train.
British Reinforcements: During the first British Movement Phase of the GT after that in which a French unit attacks any unit friendly to the British player, the British player must roll 1d6. If the result is a one or two, the British reinforcement unit enters on any hex on the south map edge. The hex may be in an EZOC. If the result is a three or more, there is no result; however, the British player may continue to roll once in each ensuing British Movement Phase.
Friendly map edge hexes: Any south map edge hex.
22.5 Demoralization Levels
French: 14 DP
The French army receives DP equal to:
- The good-order combat strength of all eliminated friendly units.
- Twice the command value of each eliminated friendly leader.
British: 15 DP
The British army receives DP equal to:
- The good-order combat strength of all eliminated friendly infantry units.
- Four times the number of British artillery units eliminated (ignore their individual strength).
- Twice the command value of each eliminated friendly leader.
- Five DP the instant a unit friendly to the French player enters the British Camp (hex 0810) and/or hex 1913 (a maximum of five DP).
22.6 Victory Conditions
French Victory Points: The French player receives the following VPs:
-
+1: The British army is at 50–99% of its demoralization level; or,
-
+2: The British army is at 100% or higher of its demoralization level.
Important: Only one of the above may apply.
-
+2: French units (including Indians) occupy the British Camp (hex 0810) at the end of the game.
-
+2: French units (including Indians) occupy the Fort Lyman line of communication hex (hex 1913) at the end of the game.
British Victory Points: The British player receives the following VPs:
-
+1: The French army is at 50–99% of its demoralization level; or,
-
+3: The French army is at 100% or higher of its demoralization level.
Important: Only one of the above may apply.
-
+1: British units (including Indians) occupy the British Camp (hex 0810) at the end of the game.
-
+2: British units (including Indians) occupy the Fort Lyman line of communication hex (hex 1913) at the end of the game.
Victory Level Table: Subtract the side with the lower total VP from the side with the higher total VP. The result is the level of victory obtained by the side with the higher VP total:
- 0–1: Draw
- 2–3: Marginal
- 4–5: Substantive
- 6: Decisive
Historical Result: British marginal victory. Neither army reached its demoralization level, but the British held their camp and lines of communications.
22.7 Lake George Recommended Optional Rules
Players should feel free to use any optional rules agreed upon.
- The French player should use the Indian & Militia Balk rule. Indian and militia units within command radius of the St Pierre leader are exempt from this restriction.
- If using the Special Tactics Rule, the French player selects four markers.
- If using the Special Tactics Rule, the British player selects three markers.
23.0 Fort Oswego; 14 August 1756: Battle for Lake Ontario
Fort Oswego is a grand tactical level game of the French attack on Fort Oswego, which controlled access to Lake Ontario and from there the upper St Lawrence River valley. Montcalm marched on the Oswego, which consisted of three forts: Ontario on the northeastern side of the Oswego River, and Oswego and George on the southeastern side. The forts were garrisoned by a couple of regiments dispatched by Massachusetts governor William Shirley. Montcalm, seeing their strategic importance, marched on them with a small army. On 11 August he started besieging Fort Ontario, but the garrison abandoned the position to make a stand at Oswego. On 14 August Montcalm began a bombardment of Fort Oswego. The garrison surrendered, though it could have gone differently as British reinforcements were on the way.
23.1 Scenario Details
Game Length: 8 GTs
British set up first; French set up second.
Player Sequence: The French player is Player A. The British player is Player B.
23.2 Unit Identification Abbreviations
British
- NJ: New Jersey
French
- CFM: Compagnies Franches de la Marine
- Mil: Milices (Militia)
23.3 French Deployment & Reinforcements
Start Force: Deploy the two Ontario artillery units (B/Ontario, C/Ontario) in Fort Ontario, one per hex (23.7).
Reinforcements: On GT 1 during Player A's Movement Phase, the French player moves all other French units onto the map from the south map edge. The French player must designate one south map edge hex as the entry hex. All units must enter within three hexes of that hex (two intervening hexes). French units that (for any reason) cannot enter the map on GT 1 may enter on subsequent GTs. If playing with the optional Supply Train rule, add one Supply Train.
Friendly map edge hexes: Any south map edge hex.
23.4 British Deployment & Reinforcements
Start Force: Deploy all units not marked with a "R" three hexes or more from the south map edge (hex row 11xx or greater).
Reinforcements: On GT 2 during Player B's Movement Phase, the British player moves all other British units onto the map from the west map edge. The British player must designate one west map edge hex as the entry hex. All units must enter within three hexes of that hex (two intervening hexes). If playing with the optional Supply Train rule, add one Supply Train.
Friendly map edge hexes: Any west map edge hex.
23.5 Demoralization Levels
French: 18 DP
The French army receives DP equal to:
- The good-order combat strength of all eliminated French (NOT allied Indian) infantry units.
- The number of friendly Indian units eliminated (ignore their individual strength).
- Twice the command value of each eliminated friendly leader.
- Twice the bombardment value of each eliminated friendly artillery unit.
British: 20 DP
The British army receives DP equal to:
- The good-order combat strength of all eliminated friendly infantry units.
- Twice the bombardment value of each eliminated friendly artillery unit.
- Twice the command value of each eliminated friendly leader.
23.6 Victory Conditions
French Victory Points: The French player receives the following VPs:
- +2: The British army is at 100% or higher of its demoralization level.
- +2: French units (including Indians) occupy Fort Oswego (hex 0605) at the end of the game.
- +2: French units (including Indians) occupy Fort George (hex 0511) at the end of the game.
British Victory Points: The British player receives the following VPs:
-
+2: The French army is at 50–99% of its demoralization level; or,
-
+4: The French army is at 100% or higher of its demoralization level.
Important: Only one of the above may apply.
-
+1: British units (including Indians) occupy Fort Oswego (hex 0605) at the end of the game.
-
+1: British units (including Indians) occupy Fort George (hex 0511) at the end of the game.
Victory Level Table: Subtract the side with the lower total VP from the side with the higher total VP. The result is the level of victory obtained by the side with the higher VP total:
- 0–1: Draw
- 2–3: Marginal
- 4–5: Substantive
- 6 or More: Decisive
Historical Result: French decisive victory. British surrendered and Montcalm captured all three forts.
23.7 Fort Ontario & French Guns
Fort Ontario is located across the Oswego River, on the east map edge. The French artillery placed in it cannot move. They are fortified and ignore all withdrawal results. They can fire onto the map across the designated hexes. Similarly, British artillery can fire against them, treating the target hex as forts. Also, the hexes east of the lake and river cannot be entered. They do not block LOS.
23.8 Fort Oswego Optional Rules
Players should feel free to use any optional rules agreed upon.
- If using the Special Tactics Rule, the French player selects two markers.
- If using the Special Tactics Rule, the British player selects one marker.
24.0 Quebec; 13 September 1759: Wolfe's Great Victory
Quebec is a grand tactical level game of the climactic battle of the French & Indian War where James Wolfe's British army defeated the French under the command of Marquis de Montcalm. Wolfe had sailed up the St. Lawrence River, then landed his army below the city, deploying on the Plains of Abraham. Montcalm marched out to meet him and, in a brief, but sharp battle, Wolfe gained the victory, one in which both army commanders were killed in action. Quebec surrendered soon after.
24.1 Scenario Details
Game Length: 12 GTs
French set up first; British set up second.
Player Sequence: The French player is Player A. The British player is Player B.
24.2 Unit Identification Abbreviations
British
- Conv Gr: Converged Grenadiers
- Conv LI: Converged Light Infantry
- HL: Highland
- LB Gr: Louisbourg Grenadiers
- Prov: Provisional
- Rgrs: Rangers
- RM: Royal Marines
French
- BC: Bougainville Column
- CdC: Corps de Cavalerie
- Col: Colonial
- CR: Charles River
- Gl: Glacier
- Gr: Grenadier
- LW: Left Wing
- M: Montreal Militia
- Q: Quebec Militia
- RR: Royal Roussillon
- RW: Right Wing
- St J: St John
- St L: St Louis
- St U: St Ursula
- TR: Trois Rivieres Militia
- Vols: Volunteers
24.3 French Deployment & Reinforcements
Start Force: Deploy one Quebec artillery unit (those marked QA) in each of any four Quebec bastion hexes. All other starting units may be deployed in any hex east of the 17xx hex row. They may not be placed in Quebec City or Quebec bastion hexes.
Reinforcements: There are two groups of reinforcements:
- Bougainville Group (BR): Beginning GT 2, at the start of each French Movement Phase, roll 1d6. If the result is less than the GT number, the six BR reinforcements arrive in any Charles River Entry Zone hex (2201–2801, inclusive). If the DR is equal to or higher than the GT number, the BR units do not arrive. The French player continues to roll each GT until the units arrive. If playing with the optional Supply Train rule, add one Supply Train.
- Charles River Group (CR): Use the same procedure for the two CR group units as used for the BR group.
Friendly map edge hexes: Charles River Entry Zone hex (2201–2801, inclusive).
24.4 British Deployment & Reinforcements
Start Force: Deploy all units (except the five marked "R") west of the 05xx hex row. If playing with the optional Supply Train rule, add one Supply Train.
Reinforcements: Beginning GT 2 and on all successive GTs, during Player B's Movement Phase, the British player rolls 1d6. If the result is one, the British player may select one reinforcement unit. The unit enters on any west map edge hex. The British player rolls in each successive GT until all five reinforcement units have arrived or the game ends.
Friendly map edge hexes: Any west map edge hex.
24.5 Demoralization Levels
French: 40 DP
The French army receives DP equal to:
- The good-order combat strength of all eliminated French (not Indian) infantry and cavalry units.
- The number of friendly Indian units eliminated (i.e., zero or one DP total).
- Twice the command value of each eliminated friendly leader.
- Twice the bombardment value of each eliminated friendly artillery unit.
- Five DP if a British (including Indian units) unit enters hex 1909 or 1903. This is only awarded once per game.
British: 50 DP
The British army receives DP equal to:
- The good-order combat strength of all eliminated friendly infantry units.
- Twice the bombardment value of each eliminated friendly artillery unit.
- Twice the command value of each eliminated friendly leader.
- 10 DP if a French unit (including Indian units) enters hex 0403, 0409, or 0412. This is only awarded once per game.
24.6 Victory Conditions
French Victory Points: The French player receives the following VPs:
-
+1: The British army is at 50–99% of its demoralization level; or,
-
+3: The British army is at 100% or higher of its demoralization level.
Important: Only one of the above may apply.
-
+1: For each objective hex (hex 0403, 0409, or 0412) occupied by French units (including Indian units) at the end of the game.
British Victory Points: The British player receives the following VPs:
-
+2: The French army is at 50–99% of its demoralization level; or,
-
+4: The French army is at 100% or higher of its demoralization level.
Important: Only one of the above may apply.
-
+1: For each objective hex (hex 1909 or 1903) occupied by British units (including Indian units) at the end of the game.
Victory Level Table: Subtract the side with the lower total VP from the side with the higher total VP. The result is the level of victory obtained by the side with the higher VP total:
- 0–1: Draw
- 2–3: Marginal
- 4–5: Substantive
- 6: Decisive
Historical Result: British decisive victory. The French army was demoralized and Quebec surrendered soon after.
24.7 Quebec Special Rules
The only units (either side) which can be placed in the Quebec bastion hexes are the four static French artillery units marked QA. Units cannot be placed in Quebec City hexes.
- Units cannot otherwise enter Quebec City or Quebec bastion hexes by movement, retreat, or pursuit.
- British units cannot move adjacent to Quebec bastion hexes. French units can.
- Quebec artillery can fire onto the map and British artillery can fire at them.
24.8 Quebec Optional Rules
Players should feel free to use any optional rules agreed upon.
- If using the Special Tactics Rule, the French player selects three markers.
- If using the Special Tactics Rule, the British player selects four markers.
Explanation of Combat Results
| Result | Explanation |
|---|---|
| Ad | Attacker Disordered: Disorder all attacking units. |
| Ae | Attacker Eliminated: Eliminate all attacking units. |
| Ar | Attacker Routed: Eliminate all disordered and artillery units. Disorder all attacking units; surviving attacking units must rout. |
| Bx | Disorder Exchange: a) If the attacker's printed combat strength is equal to or greater than the defender's printed combat strength: apply a Dd; then the attacker must disorder friendly units whose total printed combat strength is equal to or greater than the now-current printed combat strength of all defending units. b) If the attacker's printed combat strength is less than the defender's printed combat strength: apply an Ad; then the defender must disorder friendly units whose total printed combat strength is equal to or greater than the now-current printed combat strength of all attacking units. |
| Dd | Defender Disordered: Disorder all defending units. |
| De | Defender Eliminated: Eliminate all defending units. |
| Dr | Defender Routed: Eliminate all disordered and artillery units. Disorder all defending units; surviving defending units must rout. |
Important: When computing losses, use the unit combat strength for the current status of the unit (good order or disordered) at that instant. Do not count leaders. Leaders are never disordered.
Multiple Disorders: A unit which was disordered and is disordered by a CRT result again is eliminated.
See Leader rules (12.0) for effects on Leader units.
Bombardment Results
| Artillery Fire Result | Target is in Good Order | Target is in Disorder | Target is a Leader |
|---|---|---|---|
| Ds | Disorder | Withdrawal: 1 hex | — |
| Dz | Disorder + Rout | Eliminated | — |
| * | — | — | Eliminated |
Unit Summary
| Unit Status/Type | Movement | Blocks LOS? |
|---|---|---|
| Good Order | Printed Movement Factor | Yes |
| Disordered (pre-Demoralization) | Static | Yes |
| Disordered (post-Demoralization) | One Die Roll | Yes |
| Leaders | Printed Movement Factor | No |
Leader Effects Summary
| Phase | Effect |
|---|---|
| Rally | +1 DRM if disordered unit is in command radius. |
| Combat | Add leader command value to the combat strength of a cavalry or infantry unit in the same hex. |
| Rout | May convert a rout to withdrawal for units in the hex. |
| Pursuit | May pursue with units stacked with the leader. |