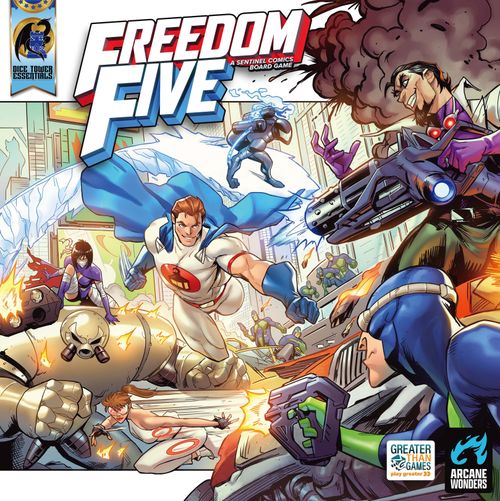
Freedom Five: A Sentinel Comics Board Game
Freedom Five: A Sentinel Comics Board Game Rulebook
Table of Contents
Table of Contents
- Components
- Setup
- Game Overview
- Game Turns
- Private Life Phase
- Hero Phase
- Attribute Dice & Tests
- Available Actions
- Villain Phase
- Advancing to the Next Chapter
- Winning and Losing
- The Mastermind Track
- Ability Cards
- Special Cards
- Personal Tasks
- Justice Cards
- Bystanders
- Hero HQ (Freedom Tower)
- Taking Damage
- Losing Hero HQ
- Henchmen
- Anarchy
- Villains
- Fighting Villains
- Non-Mastermind Villains
- The Mastermind
- Mastermind Tokens
- Campaign
- Customizing Your Heroes
- Side Quests
- Trouble Brewing in Megalopolis
Components
- 1 Megalopolis Map board
- 1 HQ board
- 1 Rulebook
- 1 Scenario Comic Volume 1
- 5 Hero Loadouts, each containing:
- 1 Hero board
- 1 Character card
- 1 Hero standee
- 24 Ability cards (120 total, 24 per hero)
- 3 Personal Task cards (15 total, 3 per hero)
- 5 Action tokens (25 total)
- 20 Hero Damage tokens
- 1 Mastermind Standee
- 4 Mastermind cards
- 5 Mastermind tokens
- 7 Villain Standees
- 7 Villain cards
- 16 Anarchy tokens (4 of each color)
- 68 Henchman Meeples (17 of each color)
- 28 Anarchy cards (7 of each color)
- 33 generic counters
- 42 Scheme cards
- 16 Justice cards
- 1 Mastermind Track Marker
- 12 Attribute Dice (3 of each color)
- 1 Legacy Die (white)
- 15 Special cards
- 3 Plot tokens
Setup
Follow the steps below to set up a game of Freedom Five. The setup diagram shows a 3-player set up for Scenario Comic #1.
1. Set up the City — Place the Megalopolis Map in the center of the table and place the HQ board nearby.
2. Place Henchmen — In each of the 30 Locations in the city, place 1 Henchman meeple matching that Location's color. For example, each Green Location starts with 1 Green Henchman. Place the remaining Henchmen in a supply near the board, grouped by color.
3. Gather Dice & Tokens
- 3a. Shuffle the Mastermind tokens with the numbers face down and stack them on the HQ board.
- 3b. Set aside the Anarchy tokens for now (instructions will be given in Scenario Setup).
- 3c. Stack the Bystander tokens on the HQ board.
- 3d. Pile the red, blue, green, and yellow dice in a common space on the table.
- 3e. Pile the generic counters nearby.
- 3f. Place all Hero Damage tokens in the cloth bag nearby.
4. Prepare Decks — Shuffle the following decks and place them on the designated spaces of the HQ board:
- 4a. Scheme cards (remove and set aside all Justice Rules the Night cards before shuffling)
- 4b. Anarchy cards (shuffle all 4 colors together)
- 4c. Freedom Tower Anarchy cards
- 4d. Bystander cards
- 4e. Justice cards
- 4f. Special cards
5. Choose Your Game Mode
Campaign – Begin with Scenario Comic #1 and proceed with the story as instructed. When playing a Campaign, you will receive powerful rewards or face lasting penalties as your adventures in Megalopolis unfold. Learn more about Campaign Play on pg. 22.
Free Play – Select and play any Scenario Comic you want. When your game concludes, you'll ignore the Campaign rewards and penalties listed on the back of the book. If you are new to the game, we still recommend playing Scenario Comic #1 first to get a feel for things. Learn more about Free Play on pg. 22.
6. Select Heroes — Each player selects a Hero and takes their Hero Loadout:
-
1 Hero board
-
1 Character card
-
1 Hero standee
-
24 Ability cards
-
3 Personal Task cards
-
5 Action tokens
-
Any additional materials listed on your Hero board
-
6a. Place your Character card (with the Private Life side up) in the center of your Hero board.
-
6b. Stack your Action tokens in the Available Actions slot at the top of your Hero board.
-
6c. Shuffle your Ability cards and Personal Task cards and place each deck face down near your Hero board.
-
6d. Place your Hero standee in one of the Home Base Locations listed on your Hero board.
-
6e. Draw a starting hand of 4 Ability cards from your deck. Since you're on a team with the other players, you may choose to display your Ability cards face up or hold them in your hand.
-
6f. Draw 1 Special card and 1 Justice card and place them face up in the designated slots at the bottom of your Hero board. Place your Special card in the leftmost slot. Note that there are special rules for dealing Justice and Special cards in the tutorial.
7. Determine First Player — If Legacy is one of the Heroes, he chooses who will be first player. If Legacy is not one of the Heroes, the players mutually decide who will be first player.
8. Scenario Setup — Read the introduction to the Scenario Comic you chose and follow the Scenario Setup instructions to prepare the Villains, Anarchy tokens, Mastermind track, and other Scenario-specific setup. See pg. 12 for how to resolve Scheme cards.
Game Overview
Freedom Five is a cooperative strategy game where 1-5 Heroes race to protect their city from an onslaught of villainy. Each game, you'll play through a Scenario Comic that lays out which Villains you'll fight and what you have to do to stop them. Stop the menacing Villain Mastermind and put an end to their master plan before it dooms the city!
Playing a Scenario Comic
Each Scenario Comic begins with a Scenario Setup section and a Scenario Objective, which tells you what you need to do to win (or lose) the Scenario (see pg. 13).
The rest of each Comic is divided into Chapters. You'll start by playing through Chapter 1 and advance to new Chapters as you progress through the game. Each time you advance to a new Chapter, carefully read any new Special Rules, Chapter Objective, and Villain phase instructions (don't read the Mastermind Events until the matching-numbered Mastermind tokens are resolved; see pg. 21.)
As you play, leave the Scenario Comic open to the current Chapter, so you can reference its rules as needed. Only flip to the next Chapter when you are instructed to do so (see pg. 13).
Example Chapter — each Chapter of a Scenario Comic shows:
- Special Rules that are in effect during this Chapter.
- An optional Chapter Objective you can complete to advance to the next Chapter (pg. 13).
- Rewards you can claim by discarding resolved Justice cards (pg. 15).
- What to do during the Villain phase at the end of each Hero's turn (pg. 12).
- Mastermind Events that are resolved when Heroes interact with Mastermind tokens (pg. 21).
- How and when to advance to the next Chapter (pg. 13).
Game Turns
Beginning with Chapter 1 of each Scenario, the Heroes take turns in clockwise order, starting with the first player and continuing until they either win or lose the Scenario.
Each turn is made up of 4 phases:
- Private Life Phase – At the start of your turn, you can flip your Character card to the Private Life side to take Actions that have the Private Life symbol and use the Private Life Special Power on your Character card.
- Hero Phase – Once you've taken all Private Life Actions you want to take, you can flip your Character card to the Hero side to take Actions with the Hero symbol, play Ability cards from your hand, and use the Hero Special Power on your Character card.
- Villain Phase – Once you've finished taking your Actions, the bad guys have a chance to act. Follow the Villain phase steps listed in the current Chapter of the Scenario Comic.
- Refresh Phase – At the very end of your turn, refresh all of your Action tokens and discard down to 12 Ability cards.
Taking Actions
Your Hero board lists the Actions you can take during your turn. The symbol next to each Action indicates whether you can take it during your Private Life phase, Hero phase, or either phase.
In order to take an Action, you must exhaust 1 Action token in the Available Actions slot at the top of your Hero board. Flip the token over and move it to the Exhausted Actions slot. Exhausted Action tokens remain exhausted until the Refresh phase at the end of your turn (unless they are refreshed by an effect).
If you run out of Action tokens, you can't take any more Actions for the rest of your turn. However, you can keep taking Free Actions until you start your Villain phase (see below).
Free Actions
Not everything you can do on your turn requires an Action token. If an Ability card, Character Power, or other optional effect does not have an Action symbol next to it, it is considered a Free Action.
Unlike Actions, you may use any number of Free Actions on your turn, even if you have exhausted all your Action tokens.
Private Life Phase
Both the Hero and Private Life phases of your turn are optional, but the Private Life phase must always resolve before the Hero phase.
If you wish to resolve a Private Life phase, flip your Character card to the Private Life side. While in Private Life mode, you can exhaust any number of your Action tokens to take Actions with the Private Life symbol. You may use the same Action multiple times (unless it says "once per turn.") You can also use the Private Life Power on your Character card.
You must take all Private Life Actions you want to take before you start the Hero phase of your turn. Note that you can't use any Ability cards while you are in Private Life mode, unless an Ability or effect says otherwise (see pg. 14).
Staying in Private Life — If you decide NOT to resolve a Hero phase, you can stay in Private Life mode and move directly to the Villain phase of your turn. While in Private Life mode, Henchmen in your Location can't see through your secret identity and won't attack you (see pg. 12). However, since you haven't suited up, you won't be able to play any Ability cards (see pg. 14) or join in any Villain fights in your Location (see pg. 20) until you flip back to Hero mode on your next turn.
Hero Phase
Once you've taken any Private Life Actions you want to take, you can flip your Character card to the Hero side to start your Hero phase.
While in Hero mode, you can exhaust any number of available Action tokens to take Actions that have the Hero symbol. You may use the same Action multiple times (unless it says "once per turn.") You can also play Ability cards from your hand for their text effects (see pg. 14) and use the Hero Power on your Character card.
When finished with your Hero phase, move on to your Villain phase.
Attribute Dice & Tests
Each Hero has 4 Attributes: Mind, Body, Spirit, and Tech (representing both "technology" and "technique").
When you fight enemies or resolve events, you will need to test 1 or more Attributes by rolling a given number of Attribute dice of the matching colors, then counting the number of successes you rolled.
The enemy you're fighting or event you're resolving will determine how many dice you roll and how many successes you need for a good or bad result. The Attribute numbers listed on your Hero board give the minimum number you must roll on each die to count it as a success. For example, a 4+ in Mind means that whenever you roll green dice, each 4 or better you roll is a success.
There is no limit to the number of Attribute dice you can roll during a single test. If you run out of dice of a certain color, you can either make multiple rolls with the same dice, or roll dice of another color and treat them as if they were the correct color.
A lower number in an Attribute means you are more skilled in that Attribute, since you will succeed more often.
Example: Legacy is fighting 2 Red Henchmen and 1 Blue Henchman, so he rolls 2 Body dice and 1 Spirit die. His Body is 3+, so 1 red die hits and the other misses. His Spirit is 4+, so his blue die also hits, giving him 2 hits in total.
Available Actions
Each Hero has a similar list of available Actions printed on their Hero board, but how each Hero resolves each Action varies slightly. For example, most Heroes have to visit a specific Location to Heal, and some can move further than others with a single Move Action.
Move (either phase) — Move your Hero standee the indicated distance through the city. You may only move into orthogonally adjacent Locations (not ones that meet at a corner), and may not move into areas that don't have Location numbers.
Recover (either phase) — Draw the indicated number of Ability cards from your deck. See Ability Cards on pg. 14.
Heal (either phase) — Remove the indicated number of Hero Damage tokens of your choice from your Hero and return them to the bag. You may then shuffle your Ability card discard pile back into your deck, if desired. See Taking Damage on pg. 16.
Personal Task (private life only) — If you are at the Location listed on one of your face up Personal Task cards, discard that card. See Personal Tasks on pg. 15.
Attack (hero only) — If there are any Henchman in your Location, attack all of them. If there are no Henchmen in your Location, instead attack 1 Villain of your choice there. See Fighting Henchmen on pg. 17 and Fighting Villains on pg. 20.
Ability (hero only) — Play and discard an Ability card with an Action symbol. (Abilities without Action symbols are Free Actions.) See Ability Cards on pg. 14.
Justice (hero only) — Attempt to resolve the Justice card on your Hero board. If successful, place it face up in your Justice Rewards pile, then draw a new Justice card and place it face up on your board. See Justice Cards on pg. 15.
Interact (hero only) — If there are no Henchmen in your Location, you may interact with 1 of the following tokens there:
- Anarchy Token: Draw through the Anarchy deck until you find a card of the matching color, then attempt to resolve it. If successful, return the token to the HQ board. See Anarchy on pg. 18.
- Mastermind Token: Flip this token and resolve the Mastermind Event with the matching number in the current Chapter of the Scenario Comic. Whether you succeed or fail, shuffle the token back into the stack on the HQ board. See Mastermind Tokens on pg. 21.
If there are no Henchmen OR Anarchy tokens in your Location, you may interact with 1 of the following tokens there:
- Bystander Token: Draw and resolve 1 Bystander card, then place it face up near your Hero board. Return the token to the HQ board. See Bystanders on pg. 15.
- Quest Token: Follow the instructions for the Side Quest in the current Chapter of the Scenario Comic. If successful, claim this token. See Side Quests on pg. 23.
Villain Phase
At the end of each Hero's turn, your enemies attack and chaos spreads through the city!
Follow the Villain phase steps listed in the current Chapter of the Scenario Comic. In most Chapters, the Villain phase is made up of 3 steps:
- Henchmen Attack – If you are in Hero mode, each Henchman in your Location deals 1 damage to you. Draw 1 Hero Damage token from the bag for each damage you take. See Taking Damage on pg. 16.
- Draw Ability Cards – Draw the indicated number of Ability cards and add them to your hand. See Ability Cards on pg. 14.
- Resolve Scheme cards – Reveal the indicated number of Scheme cards and resolve them as instructed. See below.
Example: Bunker was only able to take out 2 Henchman in his Hero phase, so during Step 1 of the Villain Phase, he suffers 1 damage from the remaining Henchman.
Scheme Cards
Scheme cards are how Villains spread their influence throughout the city. Each card lists 3 steps that add or move tokens and enemies in the city, as well as an Event at the bottom that can either be Good (green background) or Bad (red background).
During Scenario Setup and each Villain phase, you will be instructed to draw 1 or more Scheme cards and resolve certain steps and/or Events on them. Always resolve the indicated steps in order, from top to bottom on the card. If the Scheme deck is ever empty, immediately shuffle the discard pile into a new deck.
Scheme card step icons:
- Place Henchman — Place a Henchman of this color in the Location listed. If there are already 3 Henchmen there, the Location is Overrun. See Henchmen on pg. 17.
- Place Bystander — Place a Bystander token in the Location listed. If there are none left on the HQ board, ignore this symbol. See Bystanders on pg. 15.
- Place Mastermind Token — Place the top Mastermind token from the stack face down in the Location listed (don't look at it). If there are none left on the HQ board, instead advance the Mastermind track +1 space. See Mastermind Tokens on pg. 21.
- Move Villain — Move the non-Mastermind Villain of this color to the Location listed, then activate the Movement ability on their card. If the Villain of this color is the Mastermind, or there is no Villain of this color in the city, ignore this symbol. See Villains on pg. 19.
- Justice Rules the Night — During Scenario Setup, a number of Justice Rules the Night cards are added to the Scheme deck based on the difficulty of the Scenario. When you draw a Justice Rules the Night card, your Villain phase ends immediately. No further tokens or enemies are placed or moved. If the Scenario Chapter requires you draw additional Scheme cards, disregard this and do not draw any more. After resolving the card, return it to the game box. In the event the Scheme deck is reshuffled, resolved Justice Rules the Night cards are not shuffled back in.
Random Locations — Certain Villain abilities or other game effects will require you to select a random Location in the city. To do so, reveal the top card from the Scheme deck, and use the location listed in step 1. Then discard the card without resolving it (unless the effect says otherwise).
Advancing to the Next Chapter
Unless the Scenario Comic states otherwise, you must immediately advance to the next Chapter when either of the following occur:
- The Heroes complete the current Chapter Objective; OR
- The Mastermind track marker reaches the next Plot token.
Advancing to the next Chapter can happen at any time, on any Hero's turn. All new Chapter rules take effect immediately (which may mean that the active Hero needs to resolve a different set of steps for their Villain phase).
Chapter Objectives
Chapter Objectives are optional objectives that allow you to progress through Scenario Chapters faster.
There is no penalty for failing to complete a Chapter Objective (since the Mastermind track will eventually force you to advance anyway). However, completing it will usually help you control chaos in the city or bring you closer to completing the Scenario Objective and winning the Scenario.
Winning and Losing
Each Scenario has a unique Scenario Objective that details what the Heroes have to do to win the Scenario, as well as how they can lose.
A. Victory – If the Heroes achieve any win condition described in the Scenario Objective, immediately read Victory on the back of the Comic. For example, the Heroes may need to defeat the Mastermind to win the Scenario.
B. Defeat – If the Heroes meet any Scenario loss condition described in the Scenario Objective, immediately read Defeat on the back of the Comic. For example, the Heroes may lose if the Mastermind track reaches 10.
Unless otherwise specified, reaching the final Chapter is not required to win a Scenario. If the Heroes complete the Scenario Objective at any time, they immediately win!
Anarchy at Hero HQ
In addition to the loss conditions described in the Scenario Objective, the Heroes immediately lose if there are 2 or more Anarchy cards on Hero HQ (Location #15) at the start of any player's Villain phase (see pg. 18).
The Mastermind Track
Whenever the Mastermind accomplishes one of their goals, or the Heroes fail to control the chaos in the city, the marker on the Mastermind track will advance. This can force the Heroes to progress to the next Chapter before they are ready, or even cause them to lose!
- Plot Tokens – If the Mastermind track marker reaches a Plot token, immediately advance to the next Chapter.
- Master Plan Success – If the Mastermind track marker reaches 10, the Mastermind achieves their master plan! In many Scenarios, this is a loss condition included in the Scenario Objective. However, in some Scenarios, reaching the end of the track may instead trigger a final showdown or other unique end-game condition.
Advancing the Mastermind Track
You must advance the Mastermind track marker whenever any of the following occur:
- Advance +1 space when you would place a Mastermind token, but there are none left in the stack (see pg. 21).
- Advance +1 space when you would place an Anarchy token of a certain color, but there are none left of that color, AND there are no Purple Anarchy tokens left to place instead (see pg. 18).
- Advance +1 space when Hero HQ (Location #15) is Overrun by Henchmen (see pg. 17).
- Advance +1 space when a Hero would gain a third Personal Task card (see pg. 15).
- Advance +2 spaces when a Hero is knocked out (see pg. 16).
- Advance the indicated number of spaces when any Mastermind Event, Anarchy card, Villain ability, or other game effect instructs you to do so.
Learn more about The Mastermind on pg. 21.
Ability Cards
During the game, you will draw Ability cards from your deck and play them from your hand to either attack Villains or use Ability effects.
Each of your Ability cards has an Attribute color, as well as a number of Attribute dice and a text effect. (Your deck has the same distribution of each color as each other Hero, but all of your Abilities' text effects are unique to your Hero.)
You can only play Ability cards while you are in Hero mode (the Hero side of your Character card is face up). There are 2 ways you can play an Ability card:
- Attack a Villain – When you start or join an attack on a Villain (but NOT when you attack Henchmen), you must commit Ability cards matching the Villain's Attribute color to roll the dice shown on them (see pg. 20). Do not resolve any text effects on cards you play this way.
- ABILITY Effect – If an Ability card has a Hero symbol on it, you can exhaust an Action token during your Hero phase to use its text effect (see pg. 11). If it does NOT have a Hero symbol, you can play it for its text effect as a Free Action at the time indicated on the card (as long as you are in Hero mode).
After you play an Ability card for either purpose, place it face up in a discard pile next to your deck. If you are ever forced to discard an Ability card from your hand, you may choose which card you discard (unless you are told to discard a random card). If your Ability deck is ever empty, shuffle your discards into a new deck.
Hand Limit: At the end of your turn, you must discard down to a maximum of 12 Ability cards. At all other times, you can have any number of cards in your hand.
Special Cards
Special cards are powerful one-time-use rewards that are earned for rescuing Bystanders, defeating Villains, or resolving certain Anarchy and Mastermind Events.
Whenever you gain a Special card, place it face up in the leftmost empty Special slot on your Hero board. If you don't have any empty slots, you may play or discard one of your Special cards immediately (including the card you just drew).
Like Ability cards, you may play Special cards to add dice to Villain fights or for their text effects. Dice on Special cards are Purple, meaning their Attribute color is wild and they can be used against any Villain. Additionally, all Special card text effects are Free Actions, and they can always be used at the indicated time, even if you are in Private Life mode.
After you play a Special card for either purpose, place it in a face up discard pile near the deck. If the Special deck is ever empty, shuffle the discards into a new deck.
Personal Tasks
Personal Task cards represent responsibilities and challenges in your Private Life that get in the way of being a Hero.
Whenever you draw a Scheme card with the Personal Task Event, you (and only you) must draw the top Personal Task card from your deck and place it on top of the 2 leftmost uncovered Special and/or Justice slots at the bottom of your Hero board (and any cards that are in those slots).
While you have any active Personal Tasks, you may not use any Special cards or resolve any Justice cards they are covering. Additionally, you may not draw new Special cards into empty slots that are covered.
If you ever have 2 active Personal Tasks and would gain a third, instead discard all your Tasks and advance the Mastermind track +1 space (see pg. 13).
Example: During Legacy's Villain phase, he draws a Scheme card that forces him to take a Personal Task. He places it on the bottom left of his Hero board, blocking 2 of his Special cards until it is resolved.
Completing Personal Tasks
In order to remove a Personal Task, you must travel to the Location listed on the Task during your Private Life phase and exhaust an Action token to take the Personal Task Action. You may also need to discard Ability cards of a specific Attribute color (indicated on the Personal Task card).
Personal Tasks cannot be completed during your Hero phase. However, they can be completed even if Henchmen or Anarchy tokens are present in the required Location.
When you remove a Task, place it face up in a discard pile next to your deck. If you ever run out of Personal Tasks, shuffle the discards to create a new deck.
The only reward for completing Personal Tasks is getting them out of the way—so you can get back to being a Hero!
Justice Cards
Justice cards are minor missions you must complete to keep crime in check and Megalopolis safe. You must balance these duties with your pursuit of the Mastermind.
You will always have 1 active Justice card face up at the bottom of your board. Whenever you resolve OR discard a Justice card, immediately draw a new one to replace it as your active card. If the Justice deck is ever empty, shuffle the discards into a new deck.
Each Justice card has an objective or event you must successfully complete to resolve the card, as well as a reward effect you can use once you've resolved it. To resolve a Justice card, take a Justice Action during your Hero phase, then follow the instructions on the card.
If you successfully resolve the card, move the card to your Justice Rewards pile to the right of your board (and leave it face up). If you fail, instead resolve the card's failure penalty (if it has one).
Justice Rewards
While a Justice card is face up in your Rewards pile, you can use its Reward effect as a Free Action at the time indicated on the card. After you do so, flip it face down (but leave it in your Rewards pile).
Additionally, you may discard any face up OR face down Justice card from your Rewards pile to use any of the Chapter Justice Rewards listed in the current Chapter of the Scenario Comic. This is also a Free Action.
There is no limit to the number of face up or face down cards you can have in your Rewards pile at a time.
Bystanders
Bystander tokens represent imperiled civilians you need to save. If you are in a Location with a Bystander token during your Hero Phase and there are no Henchmen OR Anarchy tokens present, you can take an Interact Action to rescue the Bystander.
When you Interact with a Bystander token, draw the top card from the Bystander deck and resolve its reward or penalty. Then return their token to the HQ board, but keep their card face up near your Hero board.
Each card has a number of Bystander icons in the top left. Once you've collected 2 or more of these icons, you may discard them to draw 1 Special card (as a Free Action).
Most Bystanders will help you out—but not all of them!
Hero HQ (Freedom Tower)
Hero HQ (Location #15) is your headquarters in Megalopolis. It's essential to your defense of the city, so it must be protected at all costs!
Hero HQ has the following special rules:
- Some Heroes must be at Hero HQ to take certain Actions (as indicated on their Hero board).
- Henchmen at Hero HQ don't attack Heroes during the Villain phase. (Heroes can still take damage from Villains or other effects.)
- If Hero HQ is Overrun by Henchmen, also advance the Mastermind track +1 space (see pg. 17).
- When an Anarchy token would be placed at Hero HQ, instead place 1 Freedom Tower Anarchy card there, face down. If there are 2 or more Freedom Tower Anarchy cards at Hero HQ at the start of any Hero's Villain phase, the Heroes immediately lose (see pg. 18).
Taking Damage
Whenever your Hero suffers damage, you must draw random Hero Damage tokens from the bag to see how you're affected.
Place the tokens you draw face up on your Hero board to show their ongoing effects. When you use a Heal Action, you can remove the indicated number of Damage tokens and return them to the bag (see pg. 11).
Damage tokens can have the following effects:
- Attribute lockout: While you have this token, you may not use Ability cards of this Attribute color (either for fighting Villains or text effects). If you Heal this token, you may use Ability cards of this color again immediately.
- Action lockout: Place an Action token from your Available Actions slot face down underneath this token. If you Heal this token, return the Action token face down to your Exhausted Actions slot (you do not get it back until you refresh at the end of your turn).
Example: A Henchman in Legacy's Location deals 1 damage to him. He draws a Hero Damage token and reveals it. Until he Heals the token, he can't play Mind Abilities.
Losing Hero HQ
Some events and effects may cause lasting damage to Hero HQ, rendering it unusable to the Heroes. (This is not the same as having 2 Anarchy cards on Hero HQ, and does not cause you to lose the Scenario.)
While the Under Construction token is on Hero HQ, it is treated as a normal Location for all purposes. This means that Heroes can't use any unique Actions that require them to be at Hero HQ, and Henchmen will attack Heroes there normally.
This also means that Hero HQ can be Overrun normally (without advancing the Mastermind track), and that normal Anarchy tokens are placed there instead of Freedom Tower Anarchy cards (without causing the Heroes to lose the game).
The Under Construction token is removed at the end of the Scenario.
Getting Knocked Out
If you ever have 5 Hero Damage tokens, or if all of your Action tokens are covered by Damage tokens, you are knocked out!
When you're knocked out, immediately advance the Mastermind track +2 spaces (see pg. 13). Then discard all Damage tokens from your board and move your standee to one of the Home Bases listed on your Hero board.
If you are dealt damage that is unblockable, you can't use Ability cards or other effects to prevent it.
Henchmen
Henchmen are low-level thugs that work for the Villains. They're easy to take out, but can cause problems in large groups.
Henchmen are primarily placed in the city by Scheme cards. They don't stop you from moving in or out of their Location, but they will attack you if you're in their Location during your Villain phase (see pg. 12). They also prevent you from interacting with tokens or attacking Villains in their Location.
Each Henchman comes in 1 of the 4 Attribute colors, which indicates which Villain they work for and what Attribute you must use to defeat them.
Henchmen Overruns
There can never be more than 3 total Henchman (of any Attribute colors) in a single Location. Whenever a fourth Henchmen would be placed in a Location, it is Overrun:
- Instead of placing the fourth Henchman in the Location, place them on the Villain card matching their Attribute color.
- Place 1 new Henchman of the matching color in each adjacent Location. If any of these Locations already has 3 Henchmen, instead place the new Henchman on the matching Villain card. This does NOT trigger a secondary Overrun.
If multiple Henchmen in excess of 3 would be placed in a Location, place all of them on the Villain card, but only place 1 Henchman in each adjacent Location.
Overruns cannot be triggered during setup. If any Henchman placed during setup would cause an Overrun, do not place it.
Example: During Legacy's Villain phase, he draws a Scheme card that adds 1 Yellow Henchman to the Conteh Sporting Complex. The Location is full, so it is Overrun—the Henchman is instead placed on the Yellow Villain card, and 1 Yellow Henchman is added to each adjacent Location.
Fighting Henchmen
If you are in a Location with any number of Henchmen during your Hero phase, you can take an Attack Action to fight them.
For each Henchman in your Location, roll 1 die of the matching Attribute color. For each success you roll (i.e. each result equal to or greater than your Attribute number of the matching color), remove 1 Henchman of that color from your Location and return them to the supply.
See pg. 10 for an example of fighting Henchmen.
Running Out of Henchmen
If you must place a Henchman, but none of the required color are left in the supply, instead place 1 Anarchy token of that color in the Location (see next page).
Anarchy
Anarchy tokens represent chaos in the city caused by villainy (and sometimes heroic accidents!) The more Anarchy spreads, the further the Mastermind will progress towards their goal.
Anarchy tokens can be placed as a result of Villain Movement abilities, Scenario Special Rules, or other game effects (like running out of Henchmen). Unlike Henchmen, there is no limit to how many Anarchy tokens can be in a single Location (they don't cause Overruns).
Each Anarchy token is double-sided, with 1 of the 4 Attribute colors on one side and Purple on the other. Scenario Setup or some game effects may instruct you to flip certain tokens to the Purple side to represent Anarchy that is not tied to a specific Villain or Attribute.
Example: Bunker uses an Action to Interact with this Green Anarchy token. He draws a Green Anarchy card that requires him to roll 4 Mind dice. He rolls only 1 success, which is a failure! He must resolve the failure penalty and leave the token in his Location!
Managing Anarchy
Each Scenario's Setup will specify how many Anarchy tokens of each color are used during the Scenario (including Purple). While all tokens of a color are in the city, any time you would place a new token of that color, you must place a Purple token instead. If you are also out of Purple tokens (or there are none used in the Scenario), advance the Mastermind track +1 space (see pg. 13).
Any Anarchy tokens you remove from the city are returned to the HQ board and can be placed again. Make sure that while you hunt down the Mastermind, you keep an eye on how much Anarchy is spreading and remove enough tokens to stay in control.
Removing Anarchy
If you are in a Location with an Anarchy token during your Hero phase and there are no Henchmen present, you can take an Interact Action to attempt to remove the token.
Draw through the Anarchy deck until you find a card that matches the Attribute color of the token. (If you Interacted with a Purple Anarchy token, you may choose the color of card you reveal.) Place all cards you did not reveal on the bottom of the deck.
Reveal the card you drew and follow its instructions to make an Attribute test matching its color (see pg. 10). If you roll the required number of successes, earn the reward and remove the Anarchy token from the Location. If not, suffer the Failure penalty and leave the token in the Location. In either case, discard the card to a face up pile near the deck.
If you fail to remove an Anarchy token, you or another Hero can attempt to remove it again with another Interact Action. A new Anarchy card must be drawn with each attempt.
If you use an Ability card or other effect to remove an Anarchy token, you do NOT have to draw an Anarchy card.
Example: During Bunker's Villain phase, Ermine moves to Hero HQ and places a second Anarchy card. The Heroes have until the next player's Villain phase to remove it, or they lose!
Anarchy at Hero HQ
Anarchy at Hero HQ is especially dangerous, as it can disrupt your ability to defend the city. Whenever you would place an Anarchy token of any color on Hero HQ (Location #15), you must instead place the top card from the Freedom Tower Anarchy deck there face down, without looking at it.
Like Anarchy tokens, you can use the Interact Action while no Henchmen are present to reveal and resolve a Freedom Tower Anarchy card. However, Freedom Tower Anarchy cards cannot be removed by Ability cards or other effects; they can only be removed using the Interact Action.
If there are ever 2 or more Anarchy cards on Freedom Tower at the start of any player's Villain phase, the Heroes immediately lose the Scenario!
Learn more about Winning and Losing on pg. 13 and Hero HQ on pg. 16.
Villains
Each Scenario includes a number of Villains, each with a different Attribute color. One of them may be a Mastermind with a nefarious master plan that you must stop at all costs. Any other non-Mastermind Villains will support the Mastermind by causing chaos throughout the city.
Each Villain has a Villain card that describes their abilities and tracks how much damage they've taken. A Villain card shows:
- Attribute – This is the Attribute color of the Ability cards you need to play to attack the Villain, as well as the color of Henchmen that work for them and Anarchy tokens they place.
- Movement Ability – What the Villain does when they move to a new Location.
- Defense – An ability that makes the Villain more difficult to attack.
- Counterstrike – How the Villain fights back when they're attacked.
- After Attack – Any followup actions the Villain takes after they've been attacked (if they weren't defeated).
- Durability – The amount of damage it takes to defeat the Villain. This may be modified by the number of Heroes in the game.
While a Villain is not in the city (because their standee is on their card or they have been defeated), they don't move or use abilities, and can't take damage.
Example: Step 3 of this Scheme card triggers Ermine to move to Legacy's Location. She activates her Movement ability to place 1 Green Anarchy token and deal 2 damage to Legacy. She then forces every Hero to roll a MIND 2 test, and discard 1 random Ability card if they fail.
Villain Movement
A Villain may move to a new Location as a result of their After Attack ability, a Scheme card drawn during the Villain phase, or a Scenario Special Rule.
Each time a Villain moves to a new Location, they activate their Movement ability. When a Villain would move to a Location they already occupy, they still activate their Movement ability.
Henchmen on Villain Cards
Effects such as Henchmen Overruns (see pg. 17) can place Henchmen directly on a Villain's card. Henchmen on a Villain's card act to defend them and help them spread Anarchy.
- Whenever a Villain with Henchmen on their card suffers damage, each point of damage they would receive instead removes 1 Henchman. All Henchmen must be removed before any damage can be done to the Villain.
- If there are ever 3 Henchman on a non-Mastermind Villain's card, immediately return all of them to the supply and place 1 Anarchy token of the matching color in the Villain's Location. (Masterminds can have any number of Henchmen and don't place Anarchy; see pg. 21.)
- Henchmen on Villain cards are not considered to be "in the city" and don't attack during the Villain phase.
Example: A third Red Henchman is added to Fright Train's card. This hits the limit, so all Henchmen on the card are removed and a Red Anarchy token is placed in Fright Train's location.
Fighting Villains
If you are in a Location with a Villain during your Hero phase and there are no Henchmen present, you may take an Attack Action to start a fight with them. Other Heroes in your Location can also join you for a Team Up Attack.
Follow these steps to resolve your Attack:
- Team Up – Each other Hero in your Location (who is not in Private Life mode) declares whether they want to join the fight.
- Commit Cards – Each attacking Hero commits any number of Ability cards from their hand that match the Villain's Attribute color, then counts up the total number of dice on them. Heroes may also use Special cards, Justice Rewards, or other effects to add extra dice to their total.
- Choose Attack Order – If this is a Team Up Attack, the active Hero chooses the order that Heroes will roll their attacks.
- Roll Attack – The first attacking Hero collects and rolls their dice, then counts the number of successes they rolled, using the Attribute number of the appropriate color on their Hero board. The Villain's Defense ability may modify what the attacking Hero needs to roll.
- Apply Damage – For each success rolled, deal 1 damage to the Villain. If the Villain has any Henchmen on their card, each Henchman blocks 1 damage and is returned to the supply. The remaining damage is dealt to the Villain. Place counters on their card to track how much damage they've taken. If the Villain has counters at least equal to their Durability, they are defeated (see next page).
- Discard & Next Attack – The attacking Hero discards all cards they used to attack. If the Villain hasn't been defeated and there are other attacking Heroes, the next Hero chosen by the active Hero makes their attack, repeating steps 4 and 5.
- Counterstrike – After each Hero has resolved their attack, the Villain resolves their Counterstrike ability against the attacking Heroes, even if they were defeated.
- After Attack – If the Villain was not defeated, they also use their After Attack ability. If they were defeated, ignore this ability.
Example: Wraith uses an Action to attack Ermine. She plays 2 Mind Ability cards (since Ermine's color is Green), giving her 3 total dice to roll. She compares the results to her Mind Attribute (3+). The 4 and the 3 each deal 1 damage, but Ermine's Defense ability blocks 1 damage (because Wraith has fewer than 4 cards left in hand).
Example: Now that all Heroes have finished attacking, Ermine activates her Counterstrike. She deals 3 damage to Wraith, but Wraith can discard Ability cards to block it, so she discards 1 card and only takes 2 damage.
Example: Ermine hasn't been defeated, so she activates her After Attack ability. She heals 1 damage per Ability card discarded to block her Counterstrike, then draws the top card of the Scheme deck and moves to the first listed Location. This activates her Movement ability, so she places a Green Anarchy token there and forces all Heroes to roll a MIND 2 test.
Non-Mastermind Villains
Non-Mastermind Villains move around the city spreading Anarchy and attacking Heroes. Defeating non-Mastermind Villains earns you rewards, reduces how much Anarchy can be spread, and weakens all Henchmen of the matching color. Depending on the Scenario, you may need to defeat certain non-Mastermind Villains to win, or it may be optional.
Whenever the number of damage counters on a non-Mastermind Villain card equals or exceeds their Durability, remove their standee from the city and flip their card to the "Defeated" side. The attacking Heroes then collectively choose 2 rewards from those listed on the card, dividing them up however they like.
If you defeat a non-Mastermind Villain during a fight, don't flip their card until the end of the fight—they will still get to use their Counterstrike as they go down!
Weakening Henchmen and Anarchy
Once a non-Mastermind Villain has been defeated, all Henchmen and Anarchy tokens of their color become weaker in the following ways:
- When you attack Henchmen of a defeated Villain, you automatically defeat them without needing to roll.
- When Henchmen of a defeated Villain Overrun a Location, return any Henchmen that would be placed on the Villain's card to the supply. (Henchmen are still placed in adjacent Locations normally.)
- When you remove an Anarchy token of a defeated Villain's color, flip it to the Purple side and place it in the Purple Anarchy token stack on the HQ board.
- When you would place a new Anarchy token of a defeated Villain's color, instead place an Anarchy token of another color of your choice.
The Mastermind
While other, lesser Villains create mindless chaos, the Mastermind is hard at work on their master plan! The Mastermind is a special Villain with powerful Scenario-specific abilities and effects.
Masterminds follow all general rules for Villains, with the following exceptions:
- Movement – Masterminds do not move as a result of Villain movement icons on Scheme cards (see pg. 12). The Mastermind's Movement ability will specify how and when they move.
- Henchmen – Masterminds can have an unlimited number of Henchmen on their card. (They do not remove them to place Anarchy.)
- Durability – Masterminds' Durability will often depend on the number of Heroes in the game. An "H" is used to denote the number of Heroes. For example, "H+5" means "the number of Heroes + 5."
- Flipping – Some Mastermind cards are double-sided, with a different set of abilities on the back. The Scenario Special Rules will specify when a Mastermind's card flips over. Any damage counters placed on the front side of the card remain on the card when it flips.
Mastermind Tokens
Mastermind tokens represent the Mastermind's nefarious activities throughout the city. They can be placed in the city by Scheme cards, Scenario Special Rules, or effects on the Mastermind's card.
Mastermind tokens are always placed in the city with the number side face down. The Scenario or Mastermind card may list additional effects that trigger when a new Mastermind token is placed. If all Mastermind tokens are in the city, and another one must be placed, instead advance the Mastermind track +1 space (see pg. 13).
If you are in a Location with a Mastermind token during your Hero phase and there are no Henchmen present, you can take an Interact Action to remove the token.
When you Interact with a Mastermind token, find and resolve the matching-numbered Mastermind Event in the Scenario Comic. Then, regardless of whether you succeeded OR failed, remove the token and shuffle it back into the stack on the HQ board (unless the Event says otherwise).
Unlike Anarchy tokens, Mastermind tokens are removed regardless of the result.
Example: There are no Henchmen in Legacy's Location, so he uses an Action to flip over the Mastermind token, revealing Mastermind Event #2. He finds Event #2 in the Scenario Chapter and follows the instructions.
Don't read further until you've finished comic #1!
Campaign
Free Play vs. Campaign Mode
Scenario Comics are replayable challenges that can be experienced in any order as standalone Free Play missions. However, the intended way to play is to tackle the stories in numerical order as a continuing Campaign, with each player gaining rewards and upgrading their Hero as they progress.
- Campaign play – To play a Campaign, start with Scenario Comic #1. When you win or lose a Scenario, follow the instructions in the Victory or Defeat section on the back of the Comic to unlock new content. Then continue on to the next Scenario, even if you lost. The next Scenario may have altered setup depending on whether you won or lost the previous one.
- Free Play – For a Free Play game, choose any Scenario and follow the Scenario Setup, including choosing Hero customization options and drawing Henchmen Modifiers from the pool of content you have unlocked through Campaign play (see next page). If you do not have any of the relevant content unlocked, ignore these instructions. Also ignore any alterations to setup due to winning or losing the previous Scenario. When you finish the Scenario, read the Victory or Defeat section, but do not unlock any new content.
Progression Envelopes
While playing through the Campaign, you will unlock new content through progression envelopes. These may contain new ways to customize your Heroes and new threats that emerge in Megalopolis.
Each envelope contains an information card that details its contents, as well as any special setup rules related to them. If an envelope contains new additions to a public deck, such as Bystander, Special, or Justice cards, permanently add them to the corresponding deck and use them in all future Scenarios.
We recommend keeping the envelopes and storing the information cards inside them. They are intended to be reused for storing and organizing new content, as well as giving you the option to reset your copy of Freedom Five to experience the Campaign fresh.
Customizing Your Heroes
Progression envelopes include a number of tools that Heroes can use to customize their Loadout, such as Upgraded Ability cards and Augment cards. Each Scenario's Setup will list which customization options are available for Heroes to select, based on the difficulty of the Scenario. You're encouraged to select a completely new set of options with each new Scenario you play!
Upgraded Ability Cards
Upgraded Ability cards are new versions of your Ability cards that you can use to amplify your deck. They may add extra Attribute dice or use the Purple Attribute color. Purple Abilities count as all 4 Attributes, and can be played against Villains of any color.
Each Upgraded Ability has an Upgrade Point cost in the top left. The Scenario will specify the total number of Upgrade Points each Hero can spend during setup. (You may spend less than the allowed number of Points.)
For each Upgraded Ability you add to your deck, you must remove a basic Ability to make space, such that your deck always has 24 cards. Cards you remove do not have to match the names or colors of cards you add.
Augment Cards
Augment cards provide potent ongoing effects that can be used to modify your playstyle or specialize in a particular role.
Each Scenario will specify how many Augments each Hero can select during setup. Each Hero may select their Augments from the unlocked Generic Augments, which can be used by any Hero, and/or Unique Augments, which are specific to their Hero. Your Augments are kept face up near your Hero board, and are active throughout the game.
Ally Cards
Allies do not show up often, but each one represents a full-fledged Hero from outside the Freedom Five's main roster.
Each Scenario's Setup will indicate how many total Allies the Heroes may select (as a team). Each Ally must be assigned to a Hero during setup, and may not be moved or swapped to a different Hero during the game.
Each Hero controlling an Ally should keep them face up near their Hero board. Each Ally has an ability with a limited number of uses, indicated by a number of counters placed on their card during setup.
Side Quests
Some Scenarios have an optional Side Quest that can be completed to unlock additional new content.
When you start a new Chapter that has a Side Quest, follow its setup instructions to place Quest tokens in the city. If you are in a Location with a Quest token during your Hero phase and there are no Henchmen OR Anarchy tokens present, you can take an Interact Action and follow the instructions in the Scenario Comic to attempt to claim the token.
If you claim all Quest tokens in the city, you resolve the Side Quest successfully. When you reach the end of the Scenario, read Side Quest - Success on the back of the comic and follow its instructions (even if you lost the Scenario).
Each Side Quest is only available for one Chapter. If you advance to the next Chapter before completing a Side Quest, you must remove all Quest tokens from the city map and can no longer resolve it.
Trouble Brewing in Megalopolis
Not all new content you unlock is good news—as you grow stronger, so will the threats bubbling beneath the surface of Megalopolis!
Scenario Tokens
The game includes a number of miscellaneous tokens that remain in the game box until they are referenced by a Scenario. The effects of these tokens are detailed in the Scenario Special Rules. The same token may have different effects in different Scenarios. Unless otherwise specified, Scenario tokens do not persist between Scenarios and are removed at the end of each game.
Henchmen Modifiers
Henchmen might not seem like much of a threat at first, but once they've been armed, trained, mutated, augmented, or otherwise enhanced, they can pose much more of a challenge!
Progression envelopes may contain Henchmen Modifier cards that add special effects to Henchmen of specific Attribute colors. During Scenario Setup, you may be instructed to randomly draw a number of Henchmen Modifiers from those you've unlocked. Each Modifier you draw is placed face up near the HQ board and applies to all Henchmen of the indicated color throughout the game (unless the Scenario says otherwise). If you draw multiple Modifiers that apply to the same Attribute color, all of their effects apply to all Henchmen of that color.
Challenge Mode
Once you have unlocked Henchmen Modifiers, you can choose to increase the difficulty of any Free Play or Campaign Scenario by drawing 1 additional Henchmen Modifier during setup. If you do, each Hero may add +1 Ability Upgrade point to their Loadout.