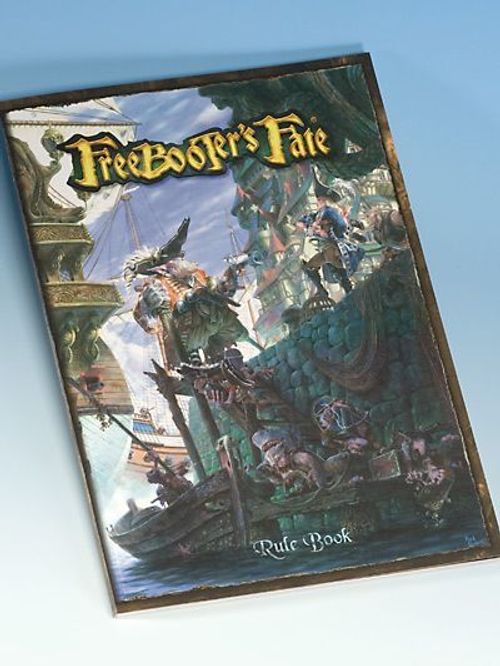
Freebooter's Fate
Freebooter's Fate Rulebook
Table of Contents
Table of Contents
1. Ready to Board!
Freebooter's Fate is a fast skirmish tabletop game with pirate and fantasy elements.
In contrast to the classic board game, the game pieces are moved freely across the playing surface, usually the top of a suitable table. Their movement possibilities are determined and influenced by their own attributes as well as by the terrain and are measured with a tape measure in centimetres.
It is played by two or more players and their respective crews. A crew consists of about six to twelve figures, the characters, who each have different strengths and weaknesses and are led by an experienced leader. The aim of the game is to fulfil a victory condition set by a scenario. The game runs over several rounds in which the characters are activated alternately and can then perform different actions in their activation.
What is special about Freebooter's Fate is that all random decisions, hitting, the damage caused and other squabbles are played out with playing cards. As if a real pirate, who holds at least a little to himself, would trust such an unreliable random moment as d... di... dice! In Freebooter's Fate the players hold the cards in their own hands. In the truest sense of the word!
What is needed for a game?
Besides this rulebook, a set of Freebooter's Fate playing cards and the figures of a crew for each player, the following utensils are needed:
- A table as playing surface; ideal is a playing area of 90 x 90 cm, or 120 x 120 cm for larger battles.
- The game gets a unique flair on a table with self-made terrain and is especially fun, but to begin with a small table with a play mat and a few pieces of felt serving as buildings, woods and lakes is enough.
- A tape measure with centimetre markings. Better still: one for each player.
- A few markers to keep track of some actions, such as Waiting, Reloading, Panic and the like.
- The templates for the size of the characters, for Steep Fire weapons and the like.
- Transparent sleeves for the character cards and an erasable pen for marking damage.
- Possibly writing implements for notes during the game. It is well worth recording unusual situations, special cases and house rules for further games.
- And the most important thing: good humour and fun!
... and a bottle full of rum!
2. Characters and Playing Cards
The figures in the Freebooter Miniatures range come with character cards that list all values and properties relevant for play.
Hit zone cards are used to determine the success or failure of hits in combat. Fate cards determine, as the random component, the damage caused, the initiative, and more. Event cards trigger events, completely unforeseeably, which can be good or bad. In addition there are equipment cards, with which the characters can be equipped further. On the Loa cards, similar to the character cards, the inhabitants of the spirit world and their areas of use are described.
The boat cards are the character cards for boats, ideal companions for crossing small lakes and rivers relatively safely, provided one is not rammed by the enemy! With side mission cards, additional objectives during a game can cause nasty surprises and snatch games that were already believed lost.
2.1. Characters
The personality of every character is described by different attributes, values and rules, properties and equipment on his character card. All players must be able to see all character cards at any time, including those of the opponent.
Front of the character card
Parts of the card: Name of the Character, Affiliation, Size, Authority, Rank, Attributes, Life Energy & Morale, Ranged weapons, Close combat weapons, Life Energy Max., Special rules.
Name The name of the character.
Affiliation Every character belongs to a crew for which he fights. These are the Pirates, the Imperial Armada, the Goblins, the Brotherhood, the Amazons, the Cult, Debonn and the Mercenaries. The affiliation is shown by the emblem at the top right of the character card. There are also characters who can be hired for more than one crew. They accordingly have two half emblems each.
The Rank Within his crew every character has a rank. There are Leaders, Specialists, Followers and Mercenaries. Every crew is commanded by an experienced Leader. Specialists are hardened and tough veterans, who can be hired only once per crew and also only in a limited number. Characters from the Following on the other hand are numerous, yet they form the backbone of every crew.
Mercenaries are special characters who can be hired in addition by a crew. They can however also be fielded as an independent crew under a Mercenary Captain.
Authority It gives the radius in cm around a character within which other characters of the own crew may use, among other things, the Morale of a Leader for tests.
The Size Characters can be Small, Medium or Large. This mainly influences how well they can be seen in the terrain and which obstacles they can overcome.
Attributes
The attributes of the characters are MOVEment (BEW), Attack (A), Defence (V), STrength of the right and of the left arm (ST) and Resistance (W). The higher a numerical value, the more experienced and better the character. Every attribute has two values, the left value always being the base value.
Furthermore every attribute is bound to a body zone. Should a character in the course of the game suffer damage there in the form of Critical Hits, the respective attribute drops.
BEW, the Movement The Movement gives the distance a character can move on the playing area. As a basis, one point of Movement results in a movement of 1 cm on the playing area. This can be modified by movement types and different terrain types. The Movement is bound to the body zone Legs.
A, the Attack The attribute states how skilled a character is at hitting his opponent and how many hit zone cards he has available in an attack. The Attack is bound to the body zone Head.
V, the Defence The attribute states how skilled a character is at evading a hit and how many hit zone cards he can use for defence. The Defence is bound to the body zone Abdomen.
ST, the Strength This attribute stands primarily for the ability to deal damage in close combat. The Strength is bound to the body zones Right and Left Arm and is given separately, because the character can use a different weapon in each hand.
W, the Resistance The Resistance is the measure of the physical endurance and resilience of the character. A high Resistance can prevent too severe damage in combat. The Resistance is bound to the body zone Torso.
LE, the Life Energy The Life Energy is shown as a life energy bar: for every point of Life Energy there is exactly one box, which is crossed out with each damage suffered. The grey boxes mark the range in which the character is Seriously Wounded.
M, the Morale The Morale of the character is the measure of his courage and bravery. The Morale is shown with numerical values in the boxes of the Life Energy bar. Through damage both Life Energy and Morale sink. The more damage a character suffers, the less he feels like continuing.
Equipment and Special Rules In the lower text field the equipment and special rules of the character are listed. Each of the three possible entries is marked with a corresponding small graphic, which only appears if the character also has the corresponding equipment or special rule. First all ranged weapons are listed. A distinction is made between black powder weapons, Steep Fire weapons and other ranged weapons.
The actual entry begins with the name of the ranged weapon. RANGED, the ranged strength, stands for the penetrating power of the ranged weapon. For RANGED, as for the attributes, two values are given. The left value applies if a target is at Short range and the right one for a target at Long range. Directly after it, set off, stands a third value giving the maximum Range in cm. Any existing weapon properties follow, as well as the information with which hand the ranged weapon is wielded. Next the available close combat weapons are listed: the name, special weapon properties if any, and the information with which hand it is used. At the end of the list all special rules are listed, such as special actions, traits or equipment cards available to the character.
Back of the character card: Rules and Equipment
On the back of the character card the most important rules and equipment of the character are described in more detail. Parts: Name of the Character, Pay in Doubloons, Special rules.
Pay The amount of Doubloons that must be paid for the character to take him into one's own crew.
2.2. Fate Cards
Fate cards are used to determine the initiative at the start of each round, to determine damage, for Risk and Morale tests, and in all other cases in which the outcome is uncertain and is influenced by fickle fate and thus by luck and misfortune. The influence of fate is represented by numbers from 1 to 10 on a total of 40 Fate cards. Before the game begins the Fate cards are shuffled and laid face down on a stack. All players of a game draw from this one stack. The player of the currently acting character always draws a Fate card first, and only then the other player(s). The drawn Fate card should always be clearly visible to all players involved. Drawn and played Fate cards are laid face up on a separate discard pile. When all Fate cards are used up, they are shuffled anew and form a new stack. The players may not look through the pile of discarded Fate cards. The Fate cards are divided into White and Black ones, and some additionally have one or more symbols. The symbols are the Treasure Chest, the Voodoo Doll, the Pistol, the Skull and the Doubloon. The colour or the symbols, if depicted on a drawn Fate card, can have a special meaning, such as the Treasure Chest, which triggers the drawing of an Event card.
Halved values
It can happen that a value, such as that of a Fate card or a distance, is halved. As we do not do things by halves, the result is always rounded up.
2.3. Hit Zone Cards
Hit zone cards are needed for the hit determination in an attack on an opponent and for defence. Every player has six hit zone cards available for this. They show the different body zones that can be hit. These are the Head, the Torso, the right and the left Arm, the Abdomen and the Legs. For easy handling there are 6 light and 6 dark hit zone cards each.
2.4. Further Playing Cards
The further playing cards, such as Event cards, Equipment cards, Loa cards, Boat cards and Side mission cards, are introduced in the following chapters, as many rules apply to them that are only explained later.
- Event cards, see Chapter 13.1. Event Cards, page 70.
- Loa cards, see Chapter 9. Mysticism, page 30.
- Equipment cards and boat equipment cards, see Chapter 13.2. Equipment Cards, page 71.
- Boat cards, see Chapter 14. Boats, in the core rulebook.
- Side mission cards, see Chapter 13.3. Side Missions, page 72.
3. Game Preparation
A game of Freebooter's Fate begins with the selection of a scenario. Next every player hires a crew. Then the playing area is set up according to the chosen scenario. Finally the cards are laid out and the game can begin.
Selecting a scenario The scenarios tell short stories in which the players must complete certain tasks in order to win. A scenario can be chosen freely or at random with the help of Fate cards. Of course self-invented scenarios can also be played. Some scenarios with their special rules are described in Chapter 16. Scenarios on page 76. Further ones are published in the Crew Book, in expansion books and online.
Hiring a crew The characters are organised in crews and demand a pay for their services. Therefore the players involved agree on a sum of Doubloons for the pay per crew. With these the characters from their respective crew lists must be "paid". Especially suited to the beginning of a pirate career is a pay of 300 Doubloons for each crew. Our standard is 500 Doubloons. Depending on mood and the time available, a game with a pay of 1000 or more Doubloons can also be fought without problems. Many scenarios specify the pay and special rules for the hiring of the crew. For every character of a crew the corresponding Doubloons are then paid, until the desired crew is complete or no Doubloons are left. Further rules for the hiring of characters are described in Chapter 15. Crews, on page 72 and in the Crew Book.
Setting up the playing area and other preparations Once the crews are hired, the playing area is set up according to the specifications of the scenario. Further rules for terrain and the setup of the playing area are described in Chapter 7. Terrain on page 16 and 16. Scenarios on page 76. Furthermore the Fate cards and the Event cards are shuffled and laid face down on a separate stack each. Every player receives a set of six hit zone cards. Finally the tape measures, markers, pens and other required utensils are laid out. And then it can start ...
4. Start of the Game and Course of the Game
Once the preparations are complete, the players pick a role, such as Attacker or Defender, or a side of the playing area in the chosen scenario from which they want to begin the skirmish. The crews are set up in the respective deployment zones and the first round begins. All these decisions can be made by mutual agreement or with the help of a test on the Initiative.
The Initiative
The players draw a Fate card and add the Morale of their respective Leader or his deputy. The crew with the highest total has the initiative. In a tie the crew whose Leader has the higher Morale wins the initiative. If the Morale values are also equal, a Fate card is drawn again - until one wins the initiative. A player who has the initiative can make a decision or selection first. He can just as well pass the right of decision or selection to the other player. So he can, for example, at the start of a round leave the first action to the opponent, or perform it himself. For a decision that does not concern the first action per round, the same principle applies. Such as when choosing the playing area side, the deployment of the crew and similar choices. In all further rounds (after the first) the player who did not have it in the round before always draws a Fate card for the initiative first.
4.1. Deployment of the Crews
In the deployment of the crews, unless this is specified by a scenario or otherwise, the figures are placed by the players alternately and one after the other in their respective deployment zones. The crew that has the initiative may begin.
4.1. Rounds and Activations
(Numbered 4.1 a second time in the original.)
Freebooter's Fate is played over several rounds. Most games last 8 rounds, but this can vary depending on the chosen scenario. At the start of every round the Initiative is determined first. Effects / events follow that take place, according to their description, at the start of the round. In case of doubt the player with the initiative determines the exact order. In every round every character can perform exactly one Activation by performing the Actions available to him. The player with the initiative can perform the first activation and for this chooses one of his characters and thereby activates him. The actions within an activation can be performed in any order. Excepted are Mandatory actions, which must always be performed first. If a character has finished all actions of his activation or cannot or does not want to perform any further ones, his activation is thereby completed and the opponent is on turn. He chooses any character who has not yet acted and performs an activation with him. In this way all characters of the crews taking part in the game act one after the other and alternately. If a player has no more characters who can act, all characters of the opponent can perform their not yet used activations. Unused activations lapse at the end of the round. They cannot be split, saved up or carried over to the next round. A character who has completed his activation can be marked by turning his character card or by placing a marker on it. When all characters of all crews taking part in the game have performed their activations, the round ends and a new one begins.
4.3. Outnumbered
A crew is outnumbered if at the beginning of a round it has at least 3 characters fewer than the next most numerous opponent on the playing area. If this is the case, it can pass once in this round with an activation of a character, without this being used up. It can do this at any time in this round, even if it should no longer be outnumbered later in the course of a round, e.g. through eliminated opponents.
4.4. Games with More Than Two Players
Freebooter's Fate is designed for two players each with one crew. One possibility to play with more than two players is to divide a crew among two players. In this way very large crews can also be led. But two players can also ally with their crews against two others, so that each can lead his preferred crew. Yet a game with three or more competing crews can also be very appealing and offers many new tactical challenges. The course of the game remains the same except for the initiative. The player with the highest initiative may decide whether he begins the round by performing the first activation with a character, or not. If he passes the right of the first activation, the player with the next highest initiative may decide whether he begins or not. If all players have passed the right of the first activation of the round, the player with the lowest initiative must begin the round. The other players act alternately after the first player in clockwise direction.
4.5. Game Length and End
A game of Freebooter's Fate usually runs for 8 rounds. Of course the game can also be continued for many more rounds to the bitter end. The victory conditions and the end of the game are specified for each individual scenario, see Chapter 16. Scenarios on page 76.
5. Basic Terms
The basic terms are explanations and rules that describe certain game situations. For example, the lines of sight are described from the point of view of a character who, unlike the player, does not always have an overview. Some rules of the basic terms are very comprehensive and also contain many new rules, e.g. for movement or combat. So first skim them, save the concept, and look back here later.
"Current" value A Current value is the remaining, not crossed-out numerical value. For an attribute it is always the remaining numerical value standing furthest to the right. For Morale it is the top remaining numerical value on the LE bar. Unless expressly worded otherwise in the rules, a value always means the respective Current value.
On the Ground A character who is On the Ground is Defenceless. The character himself, despite his lying state, remains in base contact with other characters, but cannot engage any opponents in close combat, even if he should have a corresponding trait. He cannot support a friendly character. A character lying On the Ground cannot perform any actions himself other than the mandatory action Stand Up. If a character On the Ground is in terrain that is Deep, he is Under Water instead.
Lowering and raising attributes Through special circumstances values and attributes can be changed temporarily. +1 A means that the attribute Attack is raised by 1. Here only the current value is always raised. +2 / +2 ST means that both values of the Strength are each raised by 2. +2 / -1 RANGED means that the left value, that for the short range, is raised by 2, while the right value, that for the long range, is lowered by 1. Through the effects of Critical Hits attributes first sink on the left value. If an attribute is critically hit again permanently, the value only sinks to 1, as long as the character is not taken out by it. Through non-permanent Event cards, traits or Loas, attributes can however sink temporarily to zero or below.
Base contact Two characters are in base contact if their bases touch over more than half the edge length of the smaller base. Per 25 mm of length of a base edge only one character may be in base contact. Example: Revlugg is in base contact with the Teniente and Moby Dugg. But not with Rosso. For one, the sides touch over less than half the edge length, and for another Revlugg is already in base contact with the Teniente.
Beginning of a .... The beginning of a round or activation is the time at which no tests or actions have yet been declared. Here some things can be done for which the order does not matter.
Friendly characters These are all characters from the own crew, as well as those from allied crews.
Free action Such an action costs the character no action. He thus keeps the actions available to him.
Opponents These are all characters from opposing crews and their allies.
Size and size template The figures of Freebooter's Fate are modelled, for the sake of aesthetics and a spectacular effect, in dynamic poses: the character reaches his arms victoriously upwards, is in mid-jump or swings his cutlass dramatically. So that this artistic exuberance has no influence on the battlefield, the actual characters acting in the game, where it matters, are represented by a size template. There are three sizes: Small, Medium and Large. On every character card it is noted which size the respective character has. Thus e.g. rats and goblins are small, humans are medium and El Grandulon is large. Every size template is divided into quarters and always has the width of the base of the character. The template has an edge for holding and an area with the 4 quarters. To check a line of sight the template is held in front of the figure so that it fully touches one side of a base. The template may not be shifted beyond the corner points of the base.
Size of the characters and their bases Small and Medium characters have a 25 x 25 mm square base. Mounts and some animals have a 25 x 50 mm base. Large characters have a 50 x 50 mm base.
Field of view, sight range and line of sight Every character has a field of view of 180° within which he can draw lines of sight to other characters, objects, etc. The field of view extends over the entire front, consisting of the front side as well as the right and left side of the base of the character. The field of view extends additionally upwards and downwards, if necessary and possible. What does not lie in his field of view the character also cannot see. The area that lies behind the imaginary line along the rear of the base is the Back.
Within his field of view the character has an unlimited sight range on the playing area. However this sight range can be limited e.g. by and within terrain types (such as in a wood) or by the weather (rain, dusk, night, ...). A character sees another character if, from one of the two upper quarters of the size template placed in front of his figure, he can see a part of the size template placed in front of the other character. If such a straight line can be drawn without interruptions (such as by terrain), then a line of sight to another character or target exists. The line of sight is not blocked by characters, neither friendly nor opposing.
Examples of lines of sight and field of view: The Imperials on land and in the Yola (3), as well as the three Fusiliers in the bow of the Barkazza, are in the field of view of Lieutenant Krud. But he cannot see all of them and therefore has the following lines of sight:
- He can see Arrequin and El Mastin on land.
- But he can also see the Arquebusier behind cover.
- Likewise Tipo Duros, although he stands behind his El Mastin.
- He can see the three Fusiliers in the bow of the Barkaza.
- He cannot see the Arquebusiers in the Jola, as the rock spire blocks his line of sight completely.
- He cannot see the Fusiliers in the middle row, as they are outside his field of view, behind his back. The same applies to Potee, Armond and Clisson in the stern of the Barkaza.
6. Movement
A character can, per Movement action, move as a rule up to 1 cm on the playing area for every point of his BEW. The possible distance of the movement can be influenced by the chosen movement type, the number of actions spent, the terrain, various special rules, traits and Event cards, as well as Loas and similar circumstances. The entire BEW available for the movement, and thus also the distance in cm, may not be exceeded. A character does not have to move the full distance, however. Exceptions are mandatory actions such as a Flight. Movements are measured from the rear edge of the base in the starting position to the rear edge of the base in the end position. Of course it can also be measured from front edge to front edge. A movement upwards or downwards is always measured horizontally and vertically, never diagonally. This is especially important for the movement types explained later and the different terrain types with their terrain properties.
Examples:
- and 2. Arrequin moves 10 cm in both cases. The movement is measured from rear to rear edge, or from front to front edge. Well done!
- If Arrequin measured her movement from the front edge of her base to its rear edge, she would thus move 12.5 cm. That does not work at all!
- Revlugg is going about it quietly: his movement is only 7 cm, but he measures so cleverly that the 2.5 cm of his base are added three times. In total 14.5 cm! A little more than his BEW of 8 permits. "Keelhaul him!"
Secure footing A figure must always be able to stand on the playing area with its base without falling over. If this is not possible at a spot, it has no firm ground beneath it and cannot get there. It is therefore only moved as far as it can still stand securely.
Overcoming smaller obstacles During their movement characters can step over smaller obstacles without much fuss. With an action Run, obstacles that are not deeper or higher than the longest side of the base of the character can be overcome without restriction. They are treated like the terrain surrounding them. If a character needs a special movement type before or during the crossing of a smaller obstacle, then the distance to be overcome counts toward it. See also the example Climbing on page 13. Friendly characters are treated like smaller obstacles if they are either the same size or smaller.
6.1. Movement Types
Movement types are Turn, Jump, Climb, Jump Down and Swim. They are part of movement actions and are integrated into them, where these permit it. Several movement types can be performed together with one or more movement actions. A movement type can be performed as often as desired and at any time together with a movement action, as long as the total Movement of the character is not exceeded. A character can e.g. perform a Simple or Complex action Run and climb up a wall, turn, and still jump over a chasm. He could also run along the beach and then jump into the water, swim a short stretch and then heave himself into a boat. If a movement includes at least part-stretches with movement types that can become dangerous, e.g. Climbing, or that lead over Dangerous terrain, then it is necessary to measure each individual stretch separately, as a Risk test could fall due for these. In the examples for the individual movement types this is shown in detail. It is important always to let common sense decide on the possibilities of the combinations for all movements and to state the intended movement as precisely as possible.
Turn A Turn uses no BEW, but is always part of a movement action. The character can be turned as often as desired during a movement action. He is simply turned on the spot around the centre of his base, not around his base edge, so that he looks in a different direction. If the character remains in place but turns, then this is a movement action that also uses up a Simple action.
Facing A character can face a new direction immediately after he
- has eliminated all his opponents in close combat and now stands free, or
- has successfully ended his Panic. For this the character receives a free Turn on the spot, which he can perform immediately. This is not an action. Facing is actually a movement type, as it can also take place independently, outside of a movement, and is thereby visible; an opponent may react to it, e.g. with Waiting.
Jump With the movement type Jump, obstacles such as a chasm or the gap between two house roofs are overcome. For every cm covered with the movement type Jump, 1 BEW must be spent. A character can thereby jump without problems over obstacles from a distance up to at most his half BEW in cm. This is the safe distance when jumping. If the distance jumped is greater than the safe distance, a Risk test must be performed. Once begun, the Jump must take place in a straight line. During a Jump the character may turn around his own axis, but not change his direction of movement. A Jump can in this way be "interrupted", e.g. for an Assault Shot, or be performed together with an Assault Attack or a Delaying Attack. A Jump can also be performed in or into a wood. However, the dense vegetation hinders the character so much that he receives the restrictions for Difficult terrain even in a Jump. But only for the part of the Jump that is performed in this terrain. Not every Difficult terrain hinders a Jump. A character can, for example, jump over a body of water with his full possible distance. Examples: Arrequin of the Imperial Armada has a BEW of 10 and wants to jump over several obstacles, here two chasms. She declares her movement in the direction of the doorway opposite: "A Complex action Run, together with two Jumps." The movement is altogether more than sufficient. The first chasm is 7 cm wide. She has to make a Risk test, easily passes it (see 6.2. Risk and Fall, page 14). She moves the 4 cm over the footbridge before she takes off for the second Jump of 4 cm. No risk, and so with her remaining BEW she goes 5 cm further, off through the doorway. In the second example Arrequin simply has bad luck. She wants to perform a Complex action Run together with a Jump. For this she moves 5 cm to the end of the bridge and tries to jump from there over the 10 cm wide chasm. Altogether her BEW would be more than enough, but unfortunately she fails the Risk test. The safe distance is only 5 cm; everything beyond it has to be tested. She falls and drops into the water, directly at the spot she wanted to reach.
Climb With the movement type Climb, steep obstacles, such as a house wall, are overcome. A character can climb both upwards and downwards. For every cm that is to be covered with the movement type Climb, 2 BEW must be spent. A character can thereby climb over obstacles from a height up to at most his half BEW in cm without problems. This is the safe distance when climbing. If the distance climbed is greater than the safe distance, a Risk test must be performed. When measuring, the entire distance is always measured. For example terrain and walls that are lower and narrower than the base are also counted. They could be overcome without restriction, but the character is not at the same height as they are and must first climb up to them. Examples: Defty Jim has to get away quickly. His BEW of 12 should be easily enough to climb with a Complex action onto the balcony. He has to climb 8.5 cm high. The railing of the balcony must in this case be climbed over too. It is "only" as high as his own base, but Defty Jim does not stand on level ground in front of it. Rounded up that is 3 cm more than the safe distance. If it works and Jim is placed on the balcony, he has needed 19.5 cm in total - the 8.5 cm of climbing use 17 BEW plus 2.5 BEW to reach a secure footing on the balcony. Right: Defty Jim wants to go high up. His BEW of 12 is just enough to reach the platform on the second storey. The climbing onto the balcony uses his entire BEW of 24 and is thus a Complex action. It is difficult to assess the risk. A whole 6 cm more than the safe distance. Brave!
Jump Down A character can jump down from an elevated position from a height up to at most his BEW in cm without problems. This is the safe distance when jumping down. If the distance jumped down is greater than the safe distance, a Risk test must be performed. For every cm that is to be covered with the movement type Jump Down, only ½ BEW must be spent. When jumping down, restrictions of movement through terrain do not count. The movement is treated as if the character were in Open terrain. Jumping down can be performed together with an Assault Attack or a Delaying Attack. Example: Down in the harbour pirates are on patrol. Quickly out of sight. Akondo jumps down from the roof to get into the building. With his BEW of 10 a Simple action Run is enough for this. The 9.5 cm jumped down use, rounded up, only 5 BEW, and the movement through the door a further 5 BEW. The best part: the distance Akondo jumps down is smaller than his safe distance of 10.
6.2. Risk and Fall
Risk test
A Risk test is required and must be performed as soon as
- the distance to be overcome with the movement types Jump, Climb and Jump Down is greater than the safe distance stated there,
- a terrain property requires it, or
- some other circumstance makes it necessary. A Risk test is performed immediately at the end of the (part-) stretch that triggered the Risk test. Thereby the Risk test interrupts the current movement and, if failed, prevents its continuation. A character passes the Risk test if the value of a drawn Fate card is equal to or greater than the stretch in cm covered beyond the safe distance. He fails the Risk test if the value of the drawn Fate card is smaller. A failed Risk test always results in a Fall or Sinking, see also Chapter 7. Terrain Properties, page 19. Naturally a passed Risk test does not enable a character to overcome a greater distance than his currently remaining movement distance permits. Such an attempt always results in a Fall.
Fall
A Fall is the consequence of a failed Risk test during a Jump, Climb or Jump Down, as well as of a push over the edge of a chasm. A Fall begins
- during a Jump in the direction of the end point of the risky (part-) stretch to which the character wanted to get - however at most as far as the BEW of the character permits.
- during Jumping Down and Climbing Down at the starting point of the risky (part-) stretch that the character wanted to cover.
- during Climbing at the end point of the (part-) stretch to which the character wanted to get.
- during a Push at the spot where the character is pushed over the edge. The figure of the character is placed directly vertically below the spot where the Fall begins. There the Fall also ends. The fallen character lies On the Ground and is thereby Defenceless, unless he fell into water. A Fall always ends the activation of the character.
Fall damage In addition a Fall causes Fall damage and possibly Critical Hits, if it takes place from a great height. The possible Fall damage is the height in cm from which a Fall begins, down to the ground. From it the W of the character plus the value of a Fate card are subtracted. Everything else is handled like a normal damage determination. See also Chapter 8.4. Damage Determination on page 28.
Fall into water A Fall into a body of water or a swamp causes no damage. The character does not lie On the Ground; he is instead pushed Under Water. See also Chapter 7.5. Sinking and Under Water on page 21.
6.3. Swimming
With the movement type Swimming all terrain types must be crossed that have the terrain property Deep. See Terrain Properties, page 19. For every cm that is to be covered with the movement type Swimming, 2 BEW must be spent. A character can swim over several rounds as long as he does not sink. Further particulars of swimming are:
- A swimming character as target of a Ranged attack is in Cover.
- A swimming character cannot himself perform any Ranged attack.
- A swimming character suffers a malus of -1 A for every Close combat attack.
- A swimming character who has a Resistance of 4 or more must make a test to see whether he possibly sinks. See also Chapter 7.5. Sinking and Under Water on page 21.
Example: Canita absolutely must get to the other shore, Akondo is on her heels. Unfortunately she is already in the water and must first swim. For this she declares a Complex action Assault Shot with Run, as well as the movement types Swimming and Jumping. Assault Shot only comes in Chapter 11.2. Special Actions on page 40, but the opportunity is too favourable to let pass. She has 24 BEW in total. Of these she needs 12 alone for swimming the stretch of 6 cm (1). Afterwards she moves 4 cm over the rickety remains of a jetty and performs her Assault Shot there (2). Whether successful or not, she then takes off for a further 8 cm Jump (3). At its end she still turns towards the Debonners, so that she does not have to take a hit in her back.
7. Terrain
In Freebooter's Fate terrain is divided into different terrain types with certain terrain properties and sizes. Terrain types are e.g. Plain, Wood or Water. A terrain property of a wood is e.g. Difficult terrain, which means that a character can move in it only at half speed. The wood in turn can cover the whole playing area, or only a part of it, or just a single, precisely bounded terrain piece. Terrain is represented on the playing area by models of the different terrain types and terrain pieces. All rules and properties accordingly relate to the look and size of the actual model. A representation of e.g. a swamp can be an elaborately built model or just a piece of brown felt or a printed mouse pad. It is important that the size and shape of a terrain be chosen so that its borders and transitions can always be clearly recognised. In cases of doubt these should best be clarified by mutual agreement before the game begins, when setting up the playing area.
7.1. Terrain Types
A terrain type always covers a precisely bounded area and possesses special properties. A character who is in a terrain type or enters it for the first time is immediately subject to all its special rules. For every terrain type the properties are given separately for characters and boats. For a boat a body of water presents no great obstacle, whereas a character must properly swim and there is even the danger of sinking. The terrain types listed here are the most frequently occurring and are to be understood as examples. So it is possible to create your own terrain types with certain properties, such as a house whose floor has sunk into the swamp and which thus has the properties Difficult terrain and Treacherous. For completeness the effects on boats are also listed here. The rules for boats are described in the core rulebook, Chapter 14. Boats from page 66.
Plain This is a flat terrain type that imposes no restrictions on sight or movement. It includes meadows, clearings in woods, floors in houses, streets, bridges and paved squares. In most scenarios the entire base area of the playing area consists of a plain. Property for characters: Open Property for boats: Impassable
Wood This is a very dense and tall-growing terrain type. It also includes jungle and all kinds of vegetation that is taller than a Large character. Properties for characters: Limited Sight (10), Difficult terrain Property for boats: Impassable
Additionally a Wood has the following extended rules: In contrast to all other terrain types, Wood is not played as the model looks. Only the outline and the wood area are relevant for play; any trees present are ignored. It is assumed that the wood is 20 cm high everywhere. A character who is with his complete base in the wood, or is directly behind it and in base contact with the wood, receives Cover against Ranged attacks. Wood does not count as a Defended Obstacle, as hanging branches, undergrowth etc. hinder all fighters so much that any advantages are cancelled out. This also applies if only one of the two characters is in the wood.
Fields These can be sugar cane plantations or cornfields. They are treated like "low woods". This terrain type gives Cover and/or Limited Sight (10), depending on the height set. For example a sugar cane plantation has the height "Medium" or a cornfield the height "Small". Then only characters of this or a smaller size suffer the effects of the Limited Sight (10). Property for characters: Difficult terrain, Limited Sight (10) and/or Cover, depending on size Property for boats: Impassable
Rough terrain This is a flat terrain type that strongly hinders movement, but does not completely hide a character in or behind it. It includes for example mudflats, heavy bog or mud fields, fields of rubble, freshly ploughed fields, rubble mountains of ruins, shallow hills and mountains covered with rubble, as well as shallow waters such as flat lakes, ponds and brooks. Property for characters: Difficult terrain Property for boats: Impassable
Bodies of water This is a terrain type that can only be crossed by swimming. It includes deep lakes, raging rivers and the sea. A character swimming in a body of water receives Cover against Ranged attacks, even if he cannot really "submerge" into the terrain. Properties for characters: Difficult terrain, Deep, Treacherous Property for boats: Open
Mangrove forests This is a terrain type composed of two other ones: dense woods that are in bodies of water. It also includes tall reed forests. Properties for characters: Difficult terrain, Deep, Treacherous, Limited Sight (10) Properties for boats: Difficult terrain, Limited Sight (10)
Driftwood fields After a shipwreck there often remain driftwood fields that hinder both characters and boats. This terrain type occurs only on a body of water, and also includes dense fields of seaweed or sea roses. Properties for characters: Difficult terrain, Deep, Treacherous Property for boats: Difficult terrain
Raging river This terrain type is a strongly flowing body of water. Properties for characters: Difficult terrain, Deep, Current (X), Treacherous Properties for boats: Open, Current (X)
Swamp This is an extremely insidious terrain type with the danger of sinking. It also includes quicksand. Properties for characters: Difficult terrain, Treacherous Property for boats: Difficult terrain
Reefs Hard-to-see and unfortunately very solid obstacles that can suddenly appear in the water. They are a component of the terrain type Bodies of water, and the area in which they could appear should be precisely marked. Properties for characters: Deep, Difficult terrain, Treacherous Property for boats: Dangerous (X)
Islands Islands can be open or overgrown with wood, they can be built on or consist only of a steep rock. Properties for characters: according to the surface of the island. Property for boats: Impassable
Fog bank A fog bank can be located both over solid ground and over a body of water. All properties of the underlying ground and of the fog bank then apply. Properties for characters: Limited Sight (10) Property for boats: Limited Sight (10)
7.2. Terrain Type Buildings
Buildings are solid terrain pieces. These also include ships, ruins, castles, towers, as well as hills with steep flanks. What they all have in common is that they consist of several components with different terrain properties.
Walls This includes high walls and mountain walls. Depending on their nature they are Steep or Impassable or even both.
Roofs Depending on the slope they can be Open or Steep.
Ladders, stairs and the like This also includes rope ladders (shrouds). They can be crossed without restriction. The Movement needed for this is measured along the entire stair. This is an exception to the rule when measuring distances.
Open doors, gates and windows, holes in walls or rocks Depending on size they can be crossed without restriction of movement. Lines of sight can be drawn through them, even if the character is not in base contact with them. A character can cross every opening whose size corresponds to at least one quarter of his size template. Example: The size template is held behind the window so that as far as possible one quarter is visible. It does not need to touch the model for this. In the example Arrequin, with the measurements 90..., oh, too many details, of course of Medium size, can be moved through this opening without restriction. A Small character of course also fits through this window, as he is smaller. A Large character would unfortunately not get through here.
7.3. Obstacles (Gedöns)
"Gedöns" (obstacles) is the collective term for all terrain pieces that are smaller but solid, horizontal or vertical obstacles. These include walls, railings, hedges, fences, bushes, barricades, stacks of crates, barrels, chests or sacks, furniture, gravestones, heaps of rubble, single free-standing trees, masts, columns and statues, to name only the most important. Depending on their actual size they can be overcome with or without restrictions, and give a character in base contact behind them Cover, or they block the sight to him. Obstacles can be overcome without restriction of movement if they are not higher or deeper than the longest side of the base of the character. If they are higher or deeper, they must be overcome with the movement type Climb and/or Jump Down, or simply be walked around.
7.4. Terrain Properties
Every terrain type has certain properties that act very differently on movement and sight conditions. If a terrain type has several properties, then all of them affect the character who is in it and wants to move or look through it.
Limited Sight (X) The line of sight of a character can penetrate only a certain distance of this terrain type, after which this terrain type becomes a sight obstacle. This value is cumulative, i.e. a character can see through several separately standing terrain pieces of this type as long as their total depth is not greater than the maximum set distance. The distance that the line of sight of a character can penetrate is given in brackets after the property and is stated in centimetres. A character can for example see 10 cm through the terrain type Wood with Limited Sight (10) before it becomes a sight obstacle. If terrain pieces with Limited Sight overlap, such as a fog bank in a wood, then the greater restriction always counts. For example a very dense fog bank with Limited Sight (5) in a wood with Limited Sight (10) would have a total Limited Sight of 5. Example: Canita and Totol are hunting Apagado and a Coscritti of the Brotherhood. Canita (1) sees the Coscritti (2). Her line of sight can penetrate a distance of up to 10 cm in the wood. She has to go through both woods, but can see through only 8.5 cm in total. She does not see Apagado (3), unfortunately, as both woods have a total width of 15.5 cm at this spot. Totol (4) possesses the trait Jungle Warrior and her line of sight thereby penetrates twice the stated distance through Wood - in this case 20 cm. So she can spot Apagado very precisely behind the two woods that are 11 cm and 4 cm wide!
Dangerous (X) If a character crosses a dangerous terrain piece, he must perform a Risk test if he moves further than the Safe distance that the terrain piece allows, through it. The Safe distance is given in brackets after Dangerous. Dangerous (Hard, 5) means that the character can cross up to 5 cm of the dangerous terrain type without making a Risk test. Only if he covers a safe distance of more than 5 cm must he test. The effects of a failed Risk test are Hard here. A character must perform a Risk test as soon as he
- leaves the dangerous terrain,
- wants to perform a different type of action after a movement action (for example with an Assault Attack the test is made after the movement, but before the attack) or
- ends his activation in the terrain. If the character passes the Risk test, he gets through the dangerous terrain unhindered. If the character fails the Risk test, he suffers, depending on the danger, the following effects:
- Light - the character is Knocked Over.
- Medium - the character suffers damage.
- Hard - the character is Knocked Over and additionally suffers damage. The possible damage is the distance in cm covered in total in the dangerous terrain. From it the W of the character plus the value of a Fate card are subtracted. If the movement was sufficient to cross the dangerous terrain, then the character is Knocked Over outside, but in base contact with it. If he is still within the dangerous terrain, he is Knocked Over at the end of his movement.
Open Terrain with this property causes no restrictions for the movement or the sight of the character. A character must spend 1 BEW for every cm covered when crossing. 1 cm thus uses 1 BEW.
Difficult terrain Terrain with this property strongly hinders the character in his movement. A character must spend 2 BEW for every cm covered when crossing. 1 cm thus uses 2 BEW.
Steep A character must mostly overcome this terrain with Climbing. Downwards the character can also Jump Down. A character must spend 2 BEW for every cm covered when crossing with Climbing. 1 cm thus uses 2 BEW.
Current (X) A current can affect a terrain piece, such as a whirlpool, or a whole river course. The strength (X) and the direction of the carrying current are set by the players before the game begins or in the scenario. All characters and boats that are at the end of their activation, even if only partly, within this terrain type, are moved the number in cm given in brackets in the specified direction. This additional movement always takes place in the set current direction, independent of the facing of the character or boat; the facing of the character or boat is retained, he or it is not turned. Example: The Yola comes out from behind the island and moves another 10 cm straight ahead. With that she ends her boat action. As there is a Current (4) in the river at this spot (2), the Yola is moved another 4 cm in the direction of the current (3).
Deep This terrain type can be crossed by characters only with the movement type Swimming.
Treacherous When crossing this terrain type there is a danger that characters Sink.
Impassable This terrain type may not be entered or crossed by characters and boats themselves. Special rules, such as jumping over a lava stream or running away from a conflagration, are described in the scenarios.
7.5. Sinking and Under Water
A character who is in Treacherous terrain and has a Resistance of 4 or more must pass a test or he sinks. The test is performed if the character is still within a terrain type with the property Treacherous at the end of his activation. The character draws a Fate card for this. He sinks with
- a W of 4 if he draws the Skull symbol,
- a W of 5 if he draws the Doubloon symbol,
- a W of 6 if he draws a Black Fate card,
- a W of 7 and more automatically, without drawing a card. For the test the current W always counts, with all effects of traits, Event cards, equipment, Loas, etc. The character passes the test if the drawn Fate card does not show the corresponding symbol. He stays on the surface and does not sink. If the character fails the test, he sinks and is pulled Under Water.
Under Water Characters who sink or are "On the Ground" in a terrain type with the property Deep are Under Water. As long as a character is Under Water,
- he is Defenceless, but can not be attacked in Ranged combat,
- at the end of his activation he suffers damage of 7 to a randomly determined body zone, plus his Resistance and minus a Fate card, but always at least 1 point of damage,
- he must use a Simple mandatory action Stand Up, or Surface, respectively. The state Under Water ends as soon as the character has performed his mandatory action Surface.
7.6. Terrain Pieces
Terrain pieces represent the different terrain types in the form of models on the playing area. Terrain pieces are needed in the setup of the playing area and represent a further tactical possibility, e.g. to block the way of the opponent with a building or to block the sight. A terrain piece should in its dimensions not exceed a base area of 20 x 15 cm and a height of 20 cm. A terrain piece can have several different properties of terrain types. A good example of this are the "swamped" houses described before. The effects on movement and on lines of sight, as well as the suitability as Defended Obstacle or as Cover, are always influenced by the actual look of the model. For example a massive building can block the sight and thus represent a sight obstacle. Characters can however also, under some circumstances, open doors and windows in order to draw a line of sight through the building to an opponent, and thereby even be in cover. Ideally this is clarified as objectively and jointly as possible before the beginning of the game, so that all players have the same understanding of the terrain pieces on the playing area.
8. Combat
Fights are divided into Ranged combat, which is performed over a distance, and Close combat, which is performed between characters in base contact. To attack an opponent a Combat action, such as the action Attack, must be performed. With one Attack as a rule one opponent can be attacked once. The character who declares an action is the Attacker. A character who is attacked is the Defender or, in Ranged combat, the Target. In rare cases it can happen that Attacker and Defender come from the same crew. Here the currently acting player takes the role of the Defender, the opponent that of the Attacker.
Weapon change The change between a ranged weapon and a close combat weapon, or between different weapons of the same type, takes place automatically and needs no action. The character must however state exactly, together with the declaration of an Attack, which weapon he uses.
The course of a fight
- First the intention of an attack is declared together with the movements needed for it, so that the opponent has the opportunity to react to it if applicable.
- Then the distances, e.g. for movements and ranges, are measured and - if possible - the movements are performed.
- If an Attack is possible, the Hit is determined.
- If it hit, the damage is determined, and whether a Critical Hit was caused.
- Finally any Morale tests that arise, any Flight movements resulting from them, and Facings are performed.
8.1. Ranged Combat
To be able to perform Ranged combat, the character must be equipped with a ranged weapon. These are weapons that have a Range given in cm. A character can declare a Ranged attack on any target, provided he can draw a line of sight to the target. A character can perform no Ranged attack if he is in Close combat with an opponent, regardless of whether this is to be the target or not.
Example of possible Ranged combat: The Debonners are taking Arrequin nicely in a pincer.
- Arrequin can fire without restriction at D'Arebousse and Maitre Charlemont.
- She can also fire at Akondo and the Fusilier, but these may possibly get a bonus for Cover, as they stand behind walls.
- The Vieille Garde stands behind the house wall. It is higher than he is, so Arrequin does not see him and may not fire at him.
- She cannot fire at the Chevalier and Jeanne, as both are in her back. Hard times are ahead for Arrequin - hopefully reinforcements come soon!
Ranges of ranged weapons
The Range of a ranged weapon gives the maximum distance at which a Ranged attack can take place. It is measured in cm and is the shortest distance in a straight line between the base of the shooter and the base of the target. An aimed-at target must be within Range in order to be hit. If the measured distance is greater than the Range, the Ranged attack automatically misses. No hit determination is performed, but both the action and the ammunition are used up. If the target is at a distance from the Attacker that lies between the maximum and the half of the possible Range of the Ranged weapon used, it is at Long Range. The Attacker mostly attacks with reduced penetrating power and uses the right value RANGED for the damage determination. If the target is at a distance from the Attacker that is below the half possible Range of the Ranged weapon used, it is at Short Range. The Attacker attacks with full penetrating power and uses the left value RANGED for the damage determination.
Example of ranges: The Pirate is armed with a pistol with a Range of 30 cm. She sees herself faced with a superior force of Amazons and must act quickly. She can fire at Tzinaka. She is nearest to her and is at a distance of 12 cm measured from base to base, and thus at Short Range (1). She could also fire at the Atl-Atl. She is still within her Range of 30 cm. However the Pirate has to fire at her at Long Range (2). Canita cannot be hit, as she is outside the Range of the pistol (3).
Cover
A character receives the bonus for Cover if
- he is in base contact with a terrain piece that lies between him and the Attacker,
- and when checking the line of sight from the Attacker to the character, at least one quarter of his size template is covered by this terrain lying in between. As long as a character is in Cover, he receives a bonus of +1 to his V.
Examples: Coffee klatsch at the edge of town. Arrequin and the Seasoldier do not receive Cover. For the Arquebusier the lower left quarter is covered by the wall - she receives Cover. For D'Arebousse even 2 quarters are covered by the house corner - she likewise receives Cover. Wait - D'Arebousse? What is she doing here?.... Arrrrr!
Melee (Getümmel)
A Melee is a group of characters who are all connected to one another via base contacts. These can be both Friendly characters and Opponents. Characters who stand back to back or are On the Ground also count toward the Melee. As described above, the Attacker declares a target in a Melee and the Attacker must be able to draw a line of sight to the target. However, before the hit determination it must be established not only whether the aimed-at target is within Range, but also whether it is actually attacked. For this the Attacker draws a Fate card for this "Melee test". If he draws a White Fate card, he attacks the originally aimed-at target. If he draws a Black Fate card, one of the other characters involved in the Melee is attacked. The Attack can however only "deviate" to characters who are in direct base contact with the originally aimed-at target. Each of these possible new targets is assigned a Fate card. Discarded Fate cards or e.g. hit zone cards can also be taken for this, as long as the card backs are the same. When all cards are assigned, they are shuffled and the Attacker draws one of them face down. The character assigned to this card is the new target that is actually attacked. The new target may also be attacked and can be hit if
- it is not within Range and
- the Attacker has no line of sight to it. In a Melee all relevant circumstances such as Range, line of sight and Cover are determined only for the originally aimed-at target and then "transferred" to the new target. Just as if the two characters had swapped their positions, without changing their facing. For weapons that have an Explosion radius, such as a bomb, the Melee rule does not apply. After the target or the actually hit targets have been determined, the following hit determination is continued according to the rules.
Example: Revlugg fires in support at Maitre Charlemont. He sees him and the Range fits, but he must draw a Fate card, as Maitre Charlemont is in a Melee. Unfortunately Revlugg draws a Black one! Thereby one of the other characters involved in the Melee is hit. With Maitre Charlemont in the Melee are Gront, Akondo and Momma Fiara. Ouch! Of the discarded Fate cards a 1 is assigned to Gront, a 5 to Akondo and a 6 to Momma Fiara. The Defender shuffles the cards and Revlugg draws one face down and can only hope that it is the right one. Had Revlugg fired at Akondo instead of Maitre Charlemont, he could only have hit these two, as nobody else is in base contact with Akondo.
Elevated position
An Attacker is in an elevated position if the lower edge of his base lies twice as high as the size template of the aimed-at target is tall. In this case the target receives no Cover against a Ranged attack. In this example both Goblins can see Sybiline (1) behind the cover. If Revlugg (2) fires at Sybiline, he loses his bonus for Cover. The Sailor (3) simply does not stand high enough for this, unfortunately only 1.5 times as high as the size template of Sybiline.
Ammunition
Every Attack with a ranged weapon uses up ammunition, even if the target was not hit or could not be hit because e.g. the Range was not sufficient. Most characters have enough ammunition for their ranged weapons for the whole game. Many characters however have to laboriously reload their weapons after one shot, and a few even have only limited ammunition. This is noted on the respective character card in the special rules. Accordingly this consumption must be marked or crossed off with e.g. reload markers.
8.2. Close Combat
A Close combat exists if at least two characters are in base contact with each other and one of them intends to perform an Attack. As a rule a character can attack ONE opponent of his choice in Close combat who is in his field of view and in direct base contact with him. Characters are not engaged in Close combat and can leave a Close combat with a Retreat. A Close combat ends for a character as soon as he
- performs a Retreat,
- is taken out of action, or
- falls into Panic and flees.
Support
If an Attacker attacks an opponent in Close combat, he receives from Friendly characters who are also in base contact with the Defender a bonus for his Attack through their support.
- One supporting character gives the Attacker a bonus of +1 A.
- Two or more supporting characters give the Attacker together a bonus of +1 A and +1 / +1 ST. A character cannot support if he is himself in Close combat with a further opponent, if he stands with his back to the Defender, or is On the Ground. However an opponent does not prevent support if he stands with his back to the supporting character or is himself On the Ground.
Example: A wild melee has broken out in the harbour between the Debonners and the Goblins.
- D'Arebousse is in the Melee with Gront, a Sailor and a Velero. She would receive, in an Attack on Gront, the support of Maitre Charlemont. He is indeed in base contact with Momma Fiara, but as she has turned her back to him, she does not distract him and thus does not prevent the support.
- Gront attacks D'Arebousse. He receives support from two Goblins: the Sailor and the Velero.
- Maitre Charlemont attacks Gront in the back and unfortunately receives no support, as D'Arebousse was busy with the two Goblins next to her.
Retreat
A character can move out of a Close combat with a Simple action Run. With this action he may however not establish base contact again with an opponent. Should the character have a further action in his activation, he may also go into a new base contact with this second action.
"Parting Blow" (Nachschlag) However, in a declared Retreat an opponent may draw a Fate card. If it shows a Voodoo Doll, this opponent can react with a Parting Blow, by performing immediately and out of turn a Simple action Attack on the character who wants to withdraw. The Attack takes place with an A of 1, before the character performs his action Run. Only one opponent may react to a Retreat, regardless of how many opponents the character was in base contact with. Even a successful Parting Blow does not prevent the opponent from the Retreat, unless he is thereby taken out of action or falls into Panic and flees.
Defended Obstacle
A railing, wall, hedge or barricade, as well as a door or window frame, counts as a Defended Obstacle if it lies between Attacker and Defender and is not lower than the shortest edge of the base of the Defender. Attacker and Defender must
- both be in base contact with the Defended Obstacle that lies between them,
- stand opposite each other such that they would be in base contact if the obstacle did not exist, and
- both be able to attack the other. If the Defender stands with his back to the Defended Obstacle, he does not receive the bonus. The Defender receives a bonus of +1 V from the Defended Obstacle. This bonus the Defender also receives if he turns his back to the obstacle. In this case the obstacle is indeed not defended quite as well as it could be, but it still remains an obstacle that is in the way of the Attacker. The bonus always counts only for the Defender. If the Defender in turn acts, the roles change - he becomes the Attacker and for the previous Attacker the terrain piece now becomes the Defended Obstacle, if the above conditions continue to be fulfilled.
Example: The Pirate has fired her pistol empty and attacks the Seasoldier standing behind the wall. Her Simple action Run with BEW of 10 cm is sufficient to get into base contact with the Seasoldier. She may place herself in front of the wall and is adjusted again to the position of the Seasoldier, or the wall, respectively. She is now at the same time in base contact with the wall and the Seasoldier. An imagined "extension" of her base over the wall touches the base of the Seasoldier over more than half an edge length.
Close combat at different height levels
For characters at different height levels to be able to fight in Close combat at all,
- they must stand in base contact with the edge above or below the terrain separating them,
- it must look, viewed from a bird's-eye perspective, as if they were in direct base contact with each other, and
- the lower edge of the base of the character standing higher may not lie higher than the size template of his opponent is tall. Both characters are thereby in Close combat with each other despite the height difference. If the base lower edge of the character standing higher is in the upper half of the size template of the opponent standing below, he receives a bonus of +1 A. Example: Lieutenant Krud and the Vieille Garde stand on different height levels and in base contact with each other. The edges of their respective bases are directly on top of each other, and if one extended the underside of the base of Lieutenant Krud, it would touch the edge of the other base over more than half the edge length. Lieutenant Krud receives the bonus, as the lower edge of his base is in the upper half of the size template. That is how it is fun!
8.3. Hit Determination
For the hit determination both players have six hit zone cards available each. They show the body zones that can be hit. These are the Head, the Torso, the right and the left Arm, the Abdomen and the Legs. The Attacker must try, with the help of the hit zone cards, to hit at least one body zone that the Defender has not defended. For this Attacker and Defender conceal a number of hit zone cards corresponding to their values for Attack or Defence. In detail this means that the player of the Attacker secretly selects the body zones he wants to hit and keeps the selected hit zone cards face down in his hand. He can select as many hit zone cards for this as his attribute A dictates. Correspondingly the player of the Defender selects the body zones he wants to defend, and keeps the hit zone cards for them in his hand. He can select as many hit zone cards for this as his attribute V dictates. Both players lay their non-selected hit zone cards face down on a separate discard pile. The Attacker turns over his selected hit zone cards one after another, first. The Defender must turn over only successfully defended hit zone cards each time; unsuccessful ones he may keep secret. The Attacker hits if he has selected at least one body zone that is not present in the selection of the Defender. If the Attacker has scored a hit, the Damage is determined immediately afterwards. If no hit was scored, the damage determination and the further steps are omitted. If the Attacker has hit more than one body zone, he must select one of them. This one additionally automatically receives a Critical Hit if at least 1 point of damage is caused. The attributes A and V can be raised or lowered by different modifiers, such as actions, Event cards, traits, Loas or equipment. All these effects are cumulative, unless expressly restricted. The hit determination is the same for Ranged and Close combat.
A character can never have more than a Defence of 5 or an Attack of 4, regardless of how many and which modifiers come into play!
Example: Revlugg casually fires with only one pistol at a Coscritti of the Brotherhood. He has an A of 2, so he may select 2 hit zone cards that he wants to hit: Torso and Head are his choice. The Coscritti has a V of 3 and tries to defend three of his body zones with it. He takes his Legs, the Head, and wavers between Abdomen or Torso. He decides for the Abdomen, as there, in the case of a Critical Hit, his V would sink to 2 (rule for Critical Hits, see page 29). The hit zone cards are turned over one after another. First Revlugg turns over the Head - next to it. Second card: Torso. Unfortunately the Coscritti has not defended the Torso, and Revlugg has therefore scored a hit there. ... and time for the Coscritti to get properly annoyed!
Random hit
In some situations the body zone must be determined at random, such as in a Fall. The player of the affected character shuffles his six hit zone cards and the opponent draws one of them face down. This is the affected body zone.
Automatic hit
If an opponent is Defenceless or, through other circumstances, not in a position to defend himself, he suffers a random hit from an Attack.
Attack in the back
If a character is attacked in his back, he receives a malus of -1 to his Defence, as he notoriously has no eyes in the back. This applies both in Ranged and in Close combat.
Defenceless
A Defenceless character cannot attack or defend. His values for A and V are reduced to 0. He is automatically hit in combat. The body zone is thereby random, the damage determined according to the rules.
8.4. Damage Determination
To determine the damage after a successful hit, the corresponding values RANGED or ST of the Attacker are compared with the W of the Defender, plus a Fate card each. The Attacker draws a Fate card and, in Ranged combat, adds his RANGED at Short Range or at Long Range. In Close combat on the other hand the Attacker adds the ST of the chosen weapon to the drawn Fate card. The Defender draws a Fate card, both in Ranged and in Close combat, and adds his Resistance. Through special circumstances, such as a preceding action Wind Up, bonuses and/or maluses can be added. From the result of the Attacker, that of the Defender is subtracted. If the Attacker has a higher value, the difference is the Damage. If the Defender has an equal or higher value, no damage is caused. The damage reduces the Life Energy. Per point of damage one box on the character card, in each case beginning from the top, is crossed off on the Life Energy bar. Example: Quetcholli has had to take 4 points of damage here. Characters who have no Life Energy left immediately leave the game Out of Action.
Damage determination RANGED + Fate card +/- bonus/malus must be greater than W of the Defender + Fate card +/- bonus/malus. If a positive value results, this is the damage caused. In the damage determination in Close combat, instead of RANGED the ST of the character is used.
Seriously Wounded
If on the Life Energy bar all light-backed boxes with black numbers for Morale are crossed off and only grey ones with white Morale values are visible, the character is Seriously Wounded. Example: Romerto has slipped into the grey area and is thereby Seriously Wounded. Should he take 5 further points of damage, he is even taken out of the game Out of Action.
Out of Action
If a character loses the last point of Life Energy, or suffers correspondingly many Critical Hits, he is Out of Action and the figure representing him is immediately removed from the playing area.
Unarmed combat
A character can at any time, instead of using a weapon, leave it out and attack in Close combat with fists, kicks, bites or the like. The hit determination remains the same and for the damage determination he simply takes the left ST base value of one of his arms. If a character has already suffered Critical Hits in both arms, his Attacks count as Unarmed.
8.5. Critical Hit
If a character has suffered damage, there is the possibility that he suffers on top of that a Critical Hit. For this the Attacker draws a further Fate card immediately after the damage determination. If the numerical value is smaller than or equal to the damage just caused, then additionally a Critical Hit is caused to the hit body zone of the character. A Critical Hit is caused automatically if an Attacker has hit at least two body zones and has thereby inflicted at least 1 point of damage. In this case no additional Fate card is drawn to determine a Critical Hit. An Attack can cause only one Critical Hit. If a character suffers a second Critical Hit to one and the same body zone, he is immediately taken Out of Action. If a character has suffered three Critical Hits in total, no matter to which body zones, he is likewise immediately taken Out of Action.
8.6. Effect of a Critical Hit
Every body zone is assigned to one of the attributes of the character. These are impaired by a Critical Hit. A Critical Hit is marked on the character card by crossing out the right value of the corresponding attribute. The character has from now on only the left value at his disposal.
A Critical Hit to
- the Legs impairs the MOVEment (BEW).
- the Head impairs the Attack.
- the Abdomen impairs the Defence.
- the right or left Arm impairs the Strength of the corresponding arm.
- the Torso impairs the Resistance.
If the character uses equipment, such as weapons, in a body zone, he possibly loses it too. Thus, for example, every one-handed ranged and close combat weapon held in the hand of an arm becomes unusable. An exception are weapons with the property Two-handed. See Chapter 12.1. Weapon Properties, Two-handed on page 70. Other carried equipment and scenario objects likewise become unusable, or are dropped, respectively. See also Chapter 16.1. Scenario Objects on page 78. Unusable equipment is crossed off the character card or laid down, respectively.
Example: Just now Revlugg dealt out, now he has to take it. The hit causes only three points of damage, which are crossed off on the LE bar, but much worse is that his right arm is Critically Hit and he loses one of his pistols. No matter, he has a second one. Think - what is downright catastrophic is that he thereby at the same time loses his beloved special action Firestorm!
9. Mysticism
Mysticism is the first expert rule. With it, certain characters - the Mystics - are able to exert a subtle influence on other characters. For this Loas are invoked so that they briefly leave the spirit world and enter a Victim in order to achieve the desired effect there. Loas are difficult beings and not easy to master. A Mystic must "hire" them, flatter them in the process, and often also pay blood for their services.
9.1. Selecting and Hiring Loas
There are very many different Loas, which can have both good and bad effects on the Victim. Loas are, like characters and equipment, hired at the beginning of the game. Therefore a Mystic should decide on the Loas that can be useful to him in the coming fight or in a scenario. The costs arising here are settled with the available Doubloons and count toward the total pay of the crew.
- A Mystic can only hire Loas from the Doctrines that he masters.
- A Loa can be hired only once per crew, even if two Mystics in a crew master the same Doctrine. Other crews can however hire the same Loa without further ado. How these Loas came by it is as yet unexplained.
- A Mystic can altogether select only as many Loas as his trait Mystic permits.
- For every Loa the pay must be paid in Doubloons. After hiring, the selected Loas stand under the Influence of the Mystic.
Properties of a Loa Every Loa has its own Loa card. It is practically its "character card" with all values and rules. Parts: Name of the Loa, Aura, Blood Debt, Dominance, Effect, Sojourn Duration, Doctrine, Pay Cost.
Aura The Aura is the range in cm within which a Loa can be Invoked and Banished.
Dominance Not all Loas are willing to follow the instructions of a Mystic without further ado. Some Loas are simply prouder or generally more unwilling than others and are thus harder to invoke despite a properly concluded pact. This is reflected in the Dominance of a Loa, which can make the Invocation harder again. The higher, the mightier or more headstrong the Loa.
Blood Debt If the Invocation or Banishment of a Loa requires a Blood Debt, it is paid immediately after the declaration and before the Duel of Wills, and is in every case lost, even if the Invocation or Banishment fails later. The sum of a Blood Debt is subtracted from the LE of the character who accompanies it. A Blood Debt causes no Critical Hit. A Morale test that possibly falls due because the Mystic was thereby Seriously Wounded is performed only after the Invocation. The paying of a Blood Debt is part of the action and this is only fully completed afterwards. These rules also apply to the use of traits or equipment that demand a Blood Debt. Here too, after the announcement of the use, the Blood Debt is paid and only then is it checked whether the corresponding action has success.
Doctrine Every Loa belongs to a certain Doctrine, and only Mystics who master it may use the Loa. The Doctrines known so far are Ill-will, Death, Wilderness and Benevolence.
Effect and Sojourn Duration of a Loa Unless something else is noted on the card of the Loa, the Loa becomes active immediately after the Invocation was successful. Thus still as part of the Invocation of the Mystic. The exact effect of a Loa is noted on the corresponding Loa card. The following Sojourn Durations of Loas are known so far: Permanent Guest. The Loa remains in his Victim until he is actively driven out of it. A measure often practised for this is a Banishment. Sleeper. The Loa remains in the Victim until he has fulfilled his task once. Immediately afterwards he vanishes back into the spirit world. Unless further restrictions are stated in the description of the Loa, the Victim decides when exactly the Loa fulfils his task. Visitor. The Loa remains in the Victim, unnoticed by the fulfilment of its task, at most up to a certain point in time and vanishes immediately afterwards into the spirit realm. If nothing else results from his description, a Visitor Loa generally remains until the end of the next activation of his Victim. Impatient. The Loa performs his task immediately after his Invocation and then immediately vanishes back into the spirit realm. Beyond that all Loas remain at most as long in their Victim as they are banished, or their Victim is taken out of the game.
Pay The hiring of every Loa is connected with costs that must be settled with Doubloons from the available pay. After all, these spirits want to be presented with gifts in advance in the first place, so that they talk to one at all.
9.2. Invocation and Banishment of a Loa
Invocation and Banishment follow the same principles and mechanisms. Therefore in the following a Banishment is also always meant when the Invocation is spoken of, unless the rule expressly says something else. The Invocation of a Loa is a Simple action and requires no line of sight to the Victim. The target of an Invocation - the Victim - and the Mystic must both be within the Aura of the Loa. The Aura is the maximum distance in cm that may lie between Mystic and Victim for an Invocation to take place at all. A Loa can be invoked by a character with the trait Mystic or with the help of an equipment card or Event card.
Duel of Wills
If the Mystic has selected a Victim and both are in the Aura of the Loa, then the Duel of Wills is performed. This is quasi a "hit determination" with the A of the Mystic against the V 3 of the Victim. The V value is the same for all Victims regardless of the actual character, but can be modified. The Duel of Wills is performed, according to the rules, like a hit determination. The following modifiers can come into play:
- Concentration: +1 A
- Dominance 1: -1 A
- Dominance 2: -2 A
- Second Invocation of the same Loa in one activation: -1 A
- No line of sight to the Victim: Victim receives +1 V
- Spirituality: +1 V or -1 V at the choice of the Victim
- Mystic Choir: +1 A if at least 2 characters with this trait are within a radius of 10 cm around the Mystic.
- Traits, Event cards and equipment can additionally influence the Duel of Wills.
Failed Invocation
If the Victim manages to ward off all hit zone cards of the Mystic, the Invocation is failed and the Mystic immediately suffers a Blood Debt of 1. This is a little note to the Mystic that he had better concentrate on the Invocation!
Successful Invocation
If the Mystic has hit with at least one hit zone card, the Invocation is a success and the Loa unfolds its effect in the Victim.
Additional Effect
If the Mystic has hit with only one hit zone card, he draws a Fate card. With a Pistol an Additional Effect occurs depending on the hit body zone. If the Mystic "hits" with 2 or more hit zone cards, the Mystic automatically achieves one of the Additional Effects. He must select one of them on one of the hit body zones. However no Critical Hit is caused, always only the Additional Effect. All Additional Effects are also found for reference on the Loa Invocation card. The Additional Effects are:
- Legs: The Mystic immediately receives +1 LE back, provided he has already lost at least 1 LE.
- Head: The Loa can not be invoked until the end of the next activation of the Mystic.
- Abdomen: The Mystic needs to pay no Blood Debt for the current Invocation. Loas that demand no Blood Debt have no effect in the Abdomen.
- Right Arm: The Mystic suffers an additional Blood Debt of 1.
- Left Arm: The Victim suffers an additional Blood Debt of 1.
- Torso: The Victim immediately receives +1 LE back, provided it has already lost at least 1 LE.
(Loa Invocation card, V: 3: Legs - Mystic +1 LE; Head - Loa not invocable for 1 round; Abdomen - No Blood Debt; Right Arm - Mystic +1 Blood Debt; Left Arm - Victim +1 Blood Debt; Torso - Victim +1 LE.)
Banishment of a Loa
A Banishment uses the same rules as the Invocation. Only the Loa vanishes from the Victim on a successful Banishment. The Loa card goes back to the Mystic under whose Influence the Loa stands. All further results, such as a failed Invocation and a successful Invocation with more than 2 hit zone cards, are applied. Thus the Additional Effects also unfold their full effect. Furthermore a Blood Debt must also be paid if a Loa demands it. A Loa that stands under the own Influence can be banished without the Mystic having to perform a Duel of Wills for it. The Banishment succeeds automatically and the Mystic must spend no action for it. He can however perform a Banishment of his own Loa only in his activation.
Several Loas on the same character
A Victim can be ridden by only one Loa at a time. This also means that a character cannot be the Victim of a briefly acting Loa if he is already ridden by a longer-term active Loa. This Loa would have to be banished first. This applies both to Loas under own Influence and to those under the Influence of another Mystic.
10. Morale
Morale reflects the mental stamina of a character. Especially in dangerous situations and when he is Seriously Wounded, doubts overcome even the most hardened pirates and a Morale test must be performed. A Morale test must be passed immediately as soon as
- the character becomes Seriously Wounded,
- an already Seriously Wounded character suffers further damage and is not yet in Panic,
- the character himself wants to engage in Close combat with a Fear-inducing opponent,
- a Fear-inducing opponent wants to engage in Close combat with the character (see also Chapter 12. Traits, page 46), or
- another circumstance, such as an event, prompts the character to do so. For a Morale test a Fate card is drawn. If the value is smaller than or equal to the Morale of the character, the character has passed the test and can act normally. If he fails the test, this has far-reaching effects on his behaviour. He falls into Panic. A Morale test is not an action and must also be performed during the activation of an opponent, as soon as one of the described circumstances occurs.
Morale can only be raised to a maximum of 9! Never above it.
10.1. Panic
A character who has fallen into Panic must immediately perform, as the directly following Reaction, an action Flight. See also Chapter 11.1. Basic Actions on page 34. A character in Panic is
- Defenceless and
- makes no further Morale test in the same round. Unless he tries to Rally, either on his own or due to a Rally Cry, see Chapter 11.2. Special Actions, page 40. A character in Panic thus does not have to pass a Morale test again and possibly flee again if he receives further damage that makes him Seriously Wounded, finds himself faced with a Fear-inducing opponent or the like. Example: A Seasoldier is attacked by Romerto the Strangler with an Assault Attack. By the brutal attack he suffers a hit with fearsome damage and is Seriously Wounded. Although it is the activation of Romerto, he must immediately, after damage and Critical Hits have been determined, perform a Morale test. Luck seems to have deserted him, he fails the Morale test. As a Reaction he falls into Panic and must immediately perform a Flight. He can only hope that it takes him far enough away from this terrible opponent and his mighty hammer.
10.2. Rallying
At the beginning of the activation the character can try to Rally in order to put an end to his Panic and Flight. For this he performs a Morale test. This is not an action. If he passes the Morale test, his Panic and his Flight end immediately. The character may however perform no further actions, as the Rallying has exhausted him and all his actions are thereby used up. He can however Face. See Chapter 6.1. Movement Types, page 12. In his next round the character can act normally again. If the character fails the Morale test, he is still in Panic and must perform a further Flight in this activation.
11. Action Possibilities
In his activation a character can perform two Simple actions or one Complex action. Simple actions can be performed several times and in any order. A Complex action takes up the complete activation and allows no further action of the acting character. As a rule actions can only be performed during the activation of a character. Exceptions, such as in an Order or the Reaction of a character in Waiting, are stated in the description of the actions. Actions must be declared before execution, so that the opponent has time to react to it. Every action must be completed fully before a further action can be performed. Unused actions do not lapse at the end of the activation. They cannot be split, saved up or carried over to the next round. Some actions are classified into Movement, Combat and Mandatory. The classification can be important for events and certain rules and is stated in the description of an action.
- A Movement action is always an action in which the figure representing the character is moved on the playing area.
- With a Combat action attacks, such as Close or Ranged combat attacks, as well as Invocations of Loas, can be performed.
- A Mandatory action must always be the first action at the beginning of the activation of the affected character. Most Mandatory actions result from the effects of preceding activations. This can for example be a Flight that was triggered by an Attack of an opponent. Some effects of actions should be marked or labelled accordingly. Especially with lasting effects, such as when a character is in Panic or Waiting, this prevents ambiguities. It is important that all players involved can clearly recognise these markings. We distinguish between Action and Special action. While Actions can be performed by every character, Special actions may only be performed if a character also masters them and they are thereby stated on his character card.
Reaction Under certain circumstances one can react to an action of an opponent also outside of one's own activation. This can happen for example by playing an Event card or with an own action, if a character is Waiting. To make this possible, it is important to declare all actions precisely.
11.1. Basic Actions
Attack Simple action, Combat The character attacks an opponent with either a Close or a Ranged attack. He can thereby attack one opponent in his field of view. The Attack must be declared precisely: who is attacked with which weapon? An Attack can be strengthened by a preceding action, such as Wind Up or Aiming. An Attack can also be performed on objects if it is allowed in a scenario. With it, for example, doors can be "opened".
Waiting Complex action, Reaction With Waiting a character can react to an action of an opponent visible to him. The character himself may perform no actions in his activation except for Waiting. Waiting is not possible if the character is in base contact with an opponent. Reaction With a Reaction an action of an opponent can be interrupted, during his activation, by the waiting character himself performing one Simple action. A Reaction is declared immediately after an opponent has declared his action. A Waiting character can not react to an action of an opponent again. However several characters can react simultaneously to one and the same action. All these Reactions must first be declared together before they are then performed one after another individually. The order of several Reactions is determined with the Initiative. The crew that has the Initiative in this round may also perform the first Reaction, followed by a character of another crew and so on, always alternating. As a Reaction only a Simple action Run or Attack is possible. Thus no Special action, such as a Firestorm, may be performed as a Reaction. It is however a Simple action, but just a Simple action Attack. A Reaction Run is performed before a declared action of the opponent. His action possibly now goes into the void, because the attacked character has left the field of view or has got outside the Range. Nevertheless he must perform his action as declared, i.e. it is fired and ammunition is used up, even if the target is no longer within Range or out of sight. Likewise he must perform a movement that was supposed to lead into Close combat.
Reaction Run With a Reaction Run a movement, such as an Assault Attack, can also be interrupted, by the waiting character moving exactly into the declared path of the opponent. For determining a possible ST bonus the distance to the originally aimed-at target is used. If the waiting character declares a Reaction Run on an opponent who wants to perform a Ranged attack and manages to get into base contact with him, then the shot automatically misses. The action lapses; the weapon may have to be reloaded and/or ammunition is used up.
Reaction Attack A Reaction Attack with a ranged weapon interrupts the action of an opponent at an arbitrary point in time. For example in the middle of a movement or before a Ranged attack of the opponent. The line of sight, Range and Cover at the point in time of the interruption are used for the performance of the Reaction. The Reaction Attack is performed completely before the opponent can continue his declared and begun action - with all effects such as damage, Critical Hit, Morale test, Panic, etc. A Reaction Attack with a close combat weapon is performed as soon as the opponent gets into base contact with the Waiting character, but before the opponent himself can attack. The state of Waiting ends
- at the beginning of the next activation of the character in the following round,
- when the character has performed his Reaction,
- when the character receives an Order or
- when the character is drawn into a Close combat by an opponent.
Example 1: An opponent declares an Assault Attack on the waiting character. The character announces an action Run as a Reaction. He now immediately performs his movement and runs away from the storming opponent, thereby enlarging the distance to him. Only afterwards may the opponent perform his declared Assault Attack movement - and of course has bad luck: the distance has unfortunately become too great and he no longer manages to catch up with the character. Example 2: Again an opponent declares an Assault Attack on the waiting character. The character declares a Ranged attack as Reaction this time. The opponent with BEW 10 measures the distance to the character. It is 18 cm and the Assault Attack is possible over the open terrain. He begins his movement for the Assault Attack. The waiting character interrupts the movement after the opponent has already moved 10 cm, and performs his Reaction immediately. The shot hits, causes damage and even a Critical Hit to the Legs! A Critical Hit to the Legs causes a halving of his attribute BEW. He has already moved 10 cm. His remaining possible movement of 10 cm is halved and he can thus move only 5 cm more. Too little - the Assault Attack has failed. Example 3: An Imperial Seasoldier moves out of cover and tries to reach Position C in order to get out of the sight of Revlugg. Revlugg has chosen an action Waiting in his activation and now plans a Ranged attack as Reaction. The Seasoldier begins his movement with somewhat mixed feelings. Revlugg could already react when the Seasoldier reaches Position A. But he waits and interrupts the movement only at Position B, as he can thereby shoot at Short Range. If the Seasoldier is Seriously Wounded by the Reaction Ranged attack and falls into Panic, he must flee from Position B. If the Seasoldier survives the Reaction, he can continue his movement.
Stand Up Mandatory action, Simple action, Movement Characters who are On the Ground or Under Water must spend an action during their activation to stand up again, or to surface, respectively. Standing Up can be combined with the movement type Turn.
Wind Up Simple action, Combat A character who winds up receives a bonus of +3 / +3 ST for his next Combat action following the Wind Up in this activation. Wind Up is possible only in Close combat.
Use Object Simple action, Movement This action encompasses all activities that can be performed with a suitable object, such as examining and opening a chest or a locked door, picking up, putting down or handing over an object and of course the use of an object. To be able to use an object, the character must be in base contact with it and the object must be in his field of view. A picked-up and collected object can be handed over to a character in base contact. Equipment items that are described on the character card can not be handed over, as they belong to the personality or appearance of the character. A character who is in Close combat or in Panic can not perform the action Use Object.
Run Simple or Complex action, Movement With a Simple action Run the character has his BEW available once for his movement, with a Complex action double the BEW. As a base value 1 BEW is a movement of 1 cm on the playing area. However the possible movement is still influenced by the movement type and the terrain. Run can be performed as a Simple or Complex action. Run can be combined with the movement types Turn, Jump, Climb, Jump Down and Swim, as long as the entire BEW available to the character is not exceeded. For a turn of the character on the spot a Simple action Run must also be spent, even if the character does not move from the spot in doing so. Further rules and explanations are described in Chapter 6. Movement on page 17.
Reload Simple or Complex action, depending on weapon type With an action Reload the character reloads one ranged weapon completely. If a character has several firearms, he must state exactly which of them he reloads. Reloading a Heavy weapon requires a Complex action. Reloading can not be performed if the character is in Close combat with an opponent. Loaded weapons can be marked, e.g. by small chips or markers that are laid on the character card: one marker for every ranged weapon the character has. A marker is removed and laid next to the character card when the ranged weapon has been fired. Examples: Both pistols are loaded in the first example - both reload markers lie on the character card. In the second example only the pistol in the Teniente's right hand is loaded. In the third example the Teniente has already fired both pistols. Both are not loaded.
Flight Mandatory action, Complex action, Movement A character who is in Panic can only perform the Flight. The first Flight movement directly after the beginning of an onset Panic must be performed on a direct path in as straight a line as possible, away from the event that triggered the Panic. All further Flight movements must be performed in the direction of the next edge of the playing area. A Flight movement is uncontrolled and nobody knows how far he gets. Therefore a character on the run is moved the value of two Fate cards in cm. The fleeing character must always move the full distance. If the character has already suffered a Critical Hit to the Legs and/or is lying On the Ground and must stand up, then he moves only the value of one Fate card in cm. If a character is affected by both, he still flees the value of one Fate card. For a Flight movement the following is further to be observed:
- The character may never come into base contact with an opponent with his Flight movement.
- Restrictions of terrain properties fully apply.
- The character can integrate the movement types Climb, Jump, Jump Down and even Swim into the Flight movement.
- Impassable terrain can be walked around for the character.
- Likewise steep terrain can be walked around if the character has already once unsuccessfully tried to climb or jump over it.
- If the character must move down steep terrain, he must always try to overcome it with Jump Down and never climbs down.
- Terrain that is Deep may not be walked around.
- Single trees and column-like obstacles that are not wider than the base of the fleeing character may be walked around.
- If he moves over the edge out of the playing area, the character is removed from the game. If there is no possibility to perform the Flight movement, because the character e.g. is surrounded by opponents and pressed into a corner, then the movement is not performed. The character is nevertheless in Panic. Should the character still be in Panic while an opportunity for Flight arises, e.g. because an opponent withdraws, then the character must use it with his next possible Mandatory action as soon as his activation begins. A Flight immediately as soon as the character
Push Simple action, Combat Pushing is an unarmed Close combat in which additional effects can be achieved. The hit determination is performed as in Close combat, but the Attacker is mainly concerned with pushing his opponent instead of hurting him. If the Attacker has hit, he adds his base ST to the value of a Fate card. If the sum is greater than the W of the Defender plus the value of a Fate card, the Defender is pushed away from the Attacker by this difference in cm. If it is equal or smaller, it has no effects and the Defender remains in base contact with the Attacker. The Defender is always pushed in a straight line away from the side of the Attacker with which they were in base contact. He does not change his facing in doing so. Pushing equals an Attack action. That means that Pushing can also be performed together with e.g. an Assault Attack, Hail of Blows, Sweeping Strike, Underhand Attack and also Waiting.
Additional Effect If the Attacker has hit with only one hit zone card, he draws a Fate card. With a Pistol an Additional Effect occurs depending on the hit body zone. If the Attacker hits with 2 or more hit zone cards, he automatically achieves one of the Additional Effects. He must select one at one of the hit body zones. It does not matter whether the Defender was actually pushed or not; it is enough that he was hit. Pushing causes through its Additional Effects no damage and no Critical Hits. The Additional Effects are:
- Legs - Leg sweep. The Defender stumbles at the end of the Push movement and is Knocked Over.
- Head - Head butt. The distance of the Push is increased by +3 cm. The Defender is always pushed away at least this 3 cm, even if the determined distance was 0 cm before.
- Abdomen - Low blow. The Defender suffers a Blood Debt of 1.
- Right Arm - Viennese Waltz. The Attacker may, if he wishes, follow the movement of the Defender and keep the base contact. For this the Defender is moved first and can also still be turned to face at the end of the Push movement. Afterwards the Attacker is placed again in base contact, at the side at which he stood in front of the Push.
- Left Arm - Salto Mortale with arm lever. The Defender is grabbed by the collar and thrown over the Attacker. The direction of the Push is performed from the side of the base of the Attacker opposite the base contact. Neither Attacker nor Defender may turn to face in doing so.
- Torso - Frontal. The Attacker may draw 2 Fate cards and select one of them. Its value in cm is the pushed distance. The other is discarded without effect.
(Push card: Legs - Leg sweep, Knock over; Head - Head butt, distance +3 cm; Abdomen - Low blow, Blood Debt 1; Right Arm - Waltz, follow; Left Arm - Salto, back; Torso - Frontal, 2 Fate cards.)
Assault Attack Complex action, Movement, Combat An Assault Attack is the combination of a Complex action Run with a Simple action Attack or Push in Close combat. In addition a bonus to the ST of the Attacker is possible through the momentum. An Assault Attack nevertheless "uses up" only one Complex action. The opponent must be visible to the character and be in his field of view at the beginning of his activation. The Complex action Run must be performed in a straight line towards the opponent. The path must be free for the Attacker, and it must also be possible for him to get into base contact with the opponent. If, for example, he would no longer have a Secure Footing in base contact with the opponent, he may not declare and perform the Assault Attack. Insurmountable obstacles that lie on the straight line to the opponent and are not wider than the half base of the Attacker can be circumvented with a small sidestep. Wider ones prevent an Assault Attack. The Assault Attack can be combined with the movement types Jump and Jump Down, as long as the character does not have to turn in doing so. He can also cross Difficult terrain, but no ladders or walls. The storming character may not integrate the movement types Climb and Swim into the movement of his Assault Attack. He may however turn towards the opponent before he runs off, and turn to align himself with the base of the opponent if he manages to get into base contact with him. Should the Complex action Run be insufficient to get into base contact with the original opponent, then the character must complete the movement fully despite this, and his activation ends without his being able to perform the Attack. He must get into base contact with another opponent. An is a of a waiting opponent who heroically steps into the path of the Attacker. In this case the Assault Attack is interrupted at this point and the attack is made on the reacting opponent instead of the original target. If the Attacker in getting into base contact with the Defender, he can then perform a Simple action Attack. He receives for this Attack a bonus of on his if he has moved his in on the playing area. Lieutenant Krud declares an Assault Attack on the Sailor of the Goblins! Krud must first jump down 5 cm (1). No problem. With momentum he runs 13 cm in a straight line to the Sailor (2). The bases already touch and Krud may perform a small turn (3) to align himself so that he is adjusted to the base of the Sailor and a base contact is established. In total Lieutenant Krud has moved 18 cm. That is clearly more than his Simple BEW of 10 and he thus receives the bonus on ST. Lieutenant Krud thinks to himself: "I'll easily get over the bit of clutter!" and declares an Assault Attack on the Sailor. But he has overestimated himself, as the debris (1) is wider and higher than his base. He must stop in front of it (3).
Aim Simple action, Combat The character receives a bonus of +1 A for his next Attack following the Aim in this activation. Aim can be used in Close and Ranged combat.
11.2. Special Actions
Invocation Simple action, Combat The character can try to invoke a certain Loa from the spirit realm so that it achieves the effect desired by him in the Victim. An Invocation is indeed no Attack, neither in Ranged nor in Close combat, but counts nevertheless as a Combat action, as it can have similar effects. An Invocation can be reacted to according to the rules, as the necessary gestures and sounds are perceptible. It can however not be used as a Reaction when Waiting.
Banishment Simple action, Combat A character can try to banish a Loa already in the game so that it ceases to influence a Victim further. A Banishment follows the same rules as an Invocation, but possibly has other modifiers and as its effect the sending back of a Loa into the spirit realm.
Order Simple action The character who gives the Order is an Ordering character. With it he can give one Simple action to a Friendly character who must be within his Authority. With the Order the Friendly character can immediately perform an additional Simple action. This action takes place outside the order of activations and is independent of whether the Friendly character has already acted in this round. A character can give only one Order per round. A character can receive only one Order per round. An Order can not be given to a character with the trait Loner or Mercenary. A character who is in Panic can neither receive nor give an Order.
Bribe Simple action, Combat The character can try to bribe one character from the Following of the opposing crew. The character must be within a radius of 20 cm around this character. The selected opponent must immediately perform a Morale test against his lowest own Morale value (the one standing in the lowest grey box). The Morale value of Leaders, Lieutenants and Sergeants may not be used. Bonuses that raise one's own Morale (such as Spur and Cowardly), as well as Steadfast, Fearless and other effects directly concerning the character in a Morale test, do however come into use. If the character fails the test, the Briber may immediately perform one Simple action with the Bribed. The Simple action may only be an Attack. With this Attack a Friendly character must be attacked by the Bribed. The Bribe counts for the Bribed character as an Order, whereby he cannot receive a further Order in the same round.
Denounce Simple action The character can publicly accuse an opponent of some invented deed. All Friendly characters who are within the Authority of the character during this denunciation receive, for their next activation, a bonus of +1 / +1 ST against this denounced character.
Intimidate Simple action, Ironball Once per game the character can try, with a Simple action, to intimidate the opponents. All opponents in a radius of 20 cm must immediately pass a Morale test or fall into Panic. Ironball: Additionally all opponents may perform a change from the cabin to the deck only if they draw a White Fate card. This applies until the end of the round and is an additional effect to the Morale test.
En Passant Complex action, Ironball The character can, with a Complex action Run, perform once an action Pick Up Object or Snatch Ball. He interrupts his declared movement for this at any point by briefly getting into base contact with an opponent or object. There he can perform an action Use Object or Snatch Ball. The action Run interrupted in this way is continued afterwards. This is no Retreat and the opponent may not react with a "Parting Blow". Ironball: He is so nimble that he can even jump over the opposing deck. The movement must however end in his own deck or his own cabin. Should the movement not be sufficient, he loses the complete declared action and remains standing instead.
"Fetch!" Order Simple action "Fetch!" is handled like an Order. The ordering character can issue only one "Fetch!" Order per round, to a character controlled by him. This character must for this be within the Authority of the ordering character and may not be in Panic. With the "Fetch!" Order a character receives one Simple action. He can however only perform the actions Run or Attack in Close combat with it. In addition he is set on a certain target visible to the ordering character and must always try to reach his target, attack it and if possible eliminate it. The actions necessary for this become Mandatory actions for him. He can use only the actions Run, Attack in Close combat, Stand Up and Assault Attack for this. All actions Run must be performed in as straight a line as possible towards the target and in such a way that the character gets into base contact with the opponent by the shortest way. Terrain and obstacles that cannot be overcome for the character, such as single trees or opponents, must be walked around. The "Fetch!" Order ends when
- the target is taken Out of Action,
- moves off the playing area,
- the character himself is taken Out of Action or falls into Panic, or
- the "Fetch!" Order is replaced by a new "Fetch!" Order. If a character with the first action has taken an opponent Out of Action, the "Fetch!" Order ends, but the character may continue the current activation according to his possibilities by performing his second action. A character already under a "Fetch!" Order can receive a new "Fetch!" Order, e.g. to be set on a new target or to perform another Attack on a target in base contact. Should a character under a "Fetch!" Order be intercepted by another character than his target and drawn into a Close combat, he can attack this one and try to eliminate him, in order to continue his way to the original target of his "Fetch!" Order. A "Fetch!" Order can not be passed on by another character, e.g. one with the trait Musician.
Firestorm Simple action, Combat If the character holds two loaded ranged weapons, one in each hand, he can fire them simultaneously at one target. Only one hit determination is performed. The character receives a bonus of +1 A and +2 / +2 RANGED for it. Ammunition is used up for both ranged weapons. The Firestorm can only be performed with ranged weapons.
Haka Simple action While the character performs the Haka, all Friendly characters of the Whaitaua within a radius of 20 cm around him receive once the trait Onslaught until the end of their next activation. The character himself does not receive the trait Onslaught, as he is busy dancing with concentration.
Underhand Attack Complex action, Movement, Combat With an Underhand Attack the character can sneak up on an opponent with a Complex action Run and perform an Attack with a close combat weapon on him if he gets into base contact with him. The opponent needs not to be visible when the action is declared and must not be in the field of view of the character. The Underhand Attack can be combined with the movement types Turn, Jump, Climb and Jump Down. Should the movement not be sufficient to get into base contact with the opponent, the character must perform a Simple action Run in the direction of the opponent and the activation of the character ends without his getting into base contact with the opponent. He cannot perform the Attack. If he does get into base contact with the opponent, he receives a bonus of +1 A on his Attack through the stealth.
Bowling Simple action, Simple action Ironball Ranged attacks performed by this character with a cannonball are always rolled in a straight line over the ground; it is not thrown. Obstacles and barriers, as well as characters, delay the path of the ball and end the rolling. In this way the ball can however hit its target more precisely. A bowling character ignores the trait Inaccurate of a cannonball and does not suffer the malus of -1 A.
Concentration Simple action If the Mystic concentrates before a Duel of Wills for an Invocation or Banishment of a Loa, he receives a bonus of +1 A. The bonus therefore applies only to the Invocation or Banishment immediately following in the same activation of a Mystic. Characters with the trait Mystic can perform a Concentration even if it is not listed on their character card.
Croquet Stroke Simple action, Special action Ironball, Combat The character can hit a cannonball with his weapon instead of throwing it. The cannonball rolls the value of 2 Fate cards in cm towards the aimed-at target. If the second drawn Fate card is white, a further Fate card can be drawn and the value is added to the distance. Further cards can be drawn until a black Fate card appears. This value is still added, but no further Fate cards are drawn. The cannonball rolls in a straight line and stops when it meets an insurmountable obstacle, hits a character or when the entire movement distance is used up. When the ball reaches a target, it suffers an automatic hit in the Legs with ST 5 and Knock Over (5).
Provoke Simple action The character can once in his own activation try, with a Simple action, to provoke an opponent in a radius of 30 cm. The opponent must immediately perform a Morale test with a malus of -2. If he passes it, he ignores the provocation. If he does not pass the Morale test, he immediately receives a one-time "Fetch!" Order. The provoked opponent must with a Simple action Run immediately move towards the character. Afterwards he comes to his senses again and the "Fetch!" Order ends.
Passing Play Simple action, Ranged combat With a Passing Play the firepower is considerably increased by one character passing a projectile to another, who hurls it with tremendous force on to the target. For a Passing Play to be performed, both characters must have the action Passing Play. They must be within weapon range of each other and the currently acting character must be able to see the character passed to. The currently acting character applies a Simple action Ranged attack for this and thereby hurls the projectile to the character passed to. He does not have to spend an action himself and his weapon need not be loaded, as he "only" passes the projectile on to the target. The character passed to counts, rules-wise, as the one who performs the Ranged attack. Range, line of sight, etc. are determined from him and his attribute Attack is used. A Passing Play cannot be improved by Aim or the like, but can be by Event cards and equipment cards. A shot that was passed on with a Passing Play receives through the additional momentum the trait Armour-piercing.
Rending Attack Simple action, Combat The character performs an action Close combat attack with a bonus of +1 A and +1 / +1 ST. He can perform this action only if none of his arms has suffered a Critical Hit. In his activation a character may perform only one Rending Attack.
Judgement Reaction, only once per round A Judgement can be performed only once per round and is a Reaction to the blackening by a Chivato. The character always reacts immediately and without spending actions, as if he were Waiting. The character must have a line of sight to the blackened wrongdoer in order to perform the first two points of the punishment.
- First the character will try to perform an Assault Attack on the wrongdoer.
- If this is not possible, he tries to perform a Ranged attack with a ranged weapon on the wrongdoer.
- If that is not possible either, the character moves with a Simple action Run towards the wrongdoer to see whether everything is going properly.
Sweeping Strike Simple action, Combat The character attacks with the Sweeping Strike all opponents with whom he is in base contact with his front. For every opponent a separate hit and damage determination is performed. In his activation a character may perform only one Sweeping Strike. The Sweeping Strike can be performed only with a close combat weapon. It cannot be combined with Aim or Wind Up.
Rally Cry Simple action All Friendly characters who are in Panic and within the Authority radius of the Leader can immediately perform a Morale test, even if they have already tried to Rally in their activation. For the test they can use the Morale of the Leader. If the panicking character passes the Morale test, his Panic ends immediately and he can Face. The character can act normally again in his next round. A Rally Cry cannot be used if the character who wants to perform the Rally Cry is himself in Panic. A Rally Cry can be used only once per round, no matter how many characters in the crew master this action.
Shadow Run Complex action, Movement, Combat With the Shadow Run the character can cover unbelievable distances almost invisibly and additionally attack an opponent in Ranged or Close combat. For this he performs a special Complex action "Run" with a subsequent Attack in Ranged or Close combat. To be able to perform a Shadow Run, the character must be in base contact with a terrain piece. The two terrain pieces can also be obstacles, as long as they each cover at least the half of his size template. The character "jumps" then from the one to the other terrain piece. The distance between the two terrain pieces may be at most his double BEW in cm. If the BEW is sufficient, the character is placed in base contact with the second terrain piece again. He must in doing so always also be placed in base contact with a house or mountain wall, wall, bush or the like within this terrain piece. He may for example not appear in the middle of a room. An exception to this is a wood. There the character can appear at any point within the terrain piece. With the Shadow Run arbitrary height differences, such as storeys in a building, can be overcome. The distance is thereby, as an exception to the rules, measured diagonally.
- A Shadow Run is not influenced by terrain properties, such as Difficult terrain.
- The Shadow Run cannot be performed if the character is in Close combat with an opponent.
- An opponent may not react to a Shadow Run, as the character moves almost invisibly. If the character does not manage the Shadow Run, i.e. the distance of the Shadow Run is not sufficient to get into base contact with the selected terrain piece, then the character is moved as far as his declared movement reaches. If he has no Secure Footing there, he is Knocked Over and may not perform the Attack at the end of his Shadow Run. At the end of the movement of a successful Shadow Run the character can perform an action Attack. For this the attacked opponent need not be visible at the beginning of the Shadow Run and need not be in the field of view of the character. To be able to perform an Attack in Close combat, the character must manage to get into base contact with both a terrain piece and an opponent. The character receives through the surprise of the Shadow Run a bonus of +1 A on his Attack.
Hail of Blows Complex action, Combat The character performs 3 individual Attacks, each with A 2, against one opponent in base contact. The Attacks can be performed only against one and the same opponent. If the character still has Attacks available after he has eliminated his victim, he may perform them on a further opponent in base contact. A Hail of Blows can only be performed with a close combat weapon.
Side Strike Complex action, Movement, Combat, Ironball The character can perform a Complex action Run together with a Close combat attack. He interrupts his declared movement for this at any point at which he briefly gets into base contact with an opponent in order to perform an action Attack with a close combat weapon. The action Run interrupted in this way is continued after the action Attack. This is no Retreat and the opponent may not react with a "Parting Blow". The action Attack is rushed by the movement, however, and the character has only A 1 for this Close combat attack. The characters remain in base contact if the movement range of the Attacker is no longer sufficient to move at least 1 cm away from the opponent after the action Attack. The character needs a line of sight to the opponent to declare and perform a Side Strike. Ironball: With a Side Strike a cannonball can also be snatched. Here too the action is performed rushed with A 1.
Storm Run Complex action, Combat This action combines an Assault Attack with a Ranged attack. Before the character performs the Assault Attack, he may perform one Ranged attack at Short Range with -1 A against the target of his Assault Attack. If the Ranged attack eliminates the target of the Storm Run, or this is no longer reachable through a Flight or Reaction or through a movement that is too short, then the character must complete his movement fully.
Assault Shot Complex action, Movement, Combat The character can perform a Complex action Run together with a Ranged attack. He simply interrupts his movement at any point and performs the action Attack with his ranged weapon. The interrupted action Run can be continued after the shot. The shot is however rushed by the movement, and the character has a malus of -1 A on this Ranged attack.
Cook Soup Simple action The character can cook a plate of Potage Sibyllin with a Simple action. The Potage Sibyllin can subsequently be administered to a Friendly character in base contact, or to the character himself. He then profits from it immediately. A character can always profit from only one Potage Sibyllin at the same time. Taking the soup is no action; handing over a Potage Sibyllin on the other hand is a Simple action Use Object.
Camouflage Simple action As soon as the character is in base contact with a terrain piece that covers at least the half of his size template, he can blend in with his surroundings and can no longer be shot at in Ranged combat. There is however an exception, as weapons with an Explosion radius can still hit him. They do not attack aimed, but hit a certain area in which a camouflaged character could unfortunately be. Also camouflaged, the character can be attacked in Close combat at any time, as he nevertheless remains visible. As soon as the character spends a Movement action, himself performs a Ranged or Close combat attack or is attacked in Close combat, he is fully visible again for everyone and can also be shot at in Ranged combat. However a character stays camouflaged if he shoots with a Blowpipe.
Tend Wounds Simple action The character can try to tend his own wounds or those of a Friendly character in base contact. The wounded character immediately receives back a number of Life Energy that corresponds to the half, rounded up, value of a Fate card. Damage already suffered and marked is removed from the Life Energy bar. A wounded character cannot be healed above his base value of Life Energy. The character and the wounded character may not be in base contact with an opponent when tending wounds.
12. Traits
Special characters often possess traits that distinguish them from others. As a rule they permanently improve the base values of attributes and equipment, enable them to perform additional special actions, or come into effect as special effects in the performance of actions. They are listed here in alphabetical order. Behind some traits there is a bracket. Here special conditions and strengths of the traits are given.
Written in blood: Most traits are described in the masculine form. This is due solely to the German language, because e.g. the word "Charakter" is masculine. We relate all rules and names to male as well as female characters - without any judgement. For some traits the female form of the name also appears on the respective character card, such as Eye of the Hunter - Eye of the Huntress. The rule is the same in both cases.
Agile If the character can be attacked in Ranged combat, he is always attacked with the value RANGED for Long Range, even if he is already at Short Range.
Acrobatics This character can move over other characters with the action Run, provided he has a Secure Footing at the end of his movement. A character can only jump over other characters whose size is equal to or smaller than his own. The character can also move into Close combat with Acrobatics. He can also move out of it, without a Retreat and without receiving a "Parting Blow". The character need not move into a base contact. However, if the movement is not sufficient to reach a 1 cm minimum distance to an opponent, the character is placed in base contact with him. If the character is On the Ground, he receives at the beginning of his next activation a free action Stand Up and receives no additional malus on the Sinking test in water.
All for One The character can once per game call one or more Friendly characters with the same trait to his aid as soon as he is Seriously Wounded. For this the Friendly character must be within a radius of 20 cm around the character. The Friendly character immediately receives a "Fetch!" Order on an opponent who has attacked the character seeking help. From this point in time he is subject to the corresponding rules and must perform the Mandatory actions. Any number of Friendly characters with this trait can be called to help simultaneously. Even if they are in Close combat.
Clingy An opponent can only disengage from Close combat with this character and perform a Retreat if he succeeds in drawing a Fate card with a Doubloon. If the opponent does not manage it, the Simple action spent for it is lost without any effect. The character can react to a successful Retreat by receiving an automatic "Parting Blow".
Spur All Friendly characters within 20 cm around this character receive a bonus of +1 to their Morale. The character himself also receives this bonus, but Leaders do not receive it. This bonus cannot raise the current Morale of a character to a value of more than 9.
Onslaught The character can perform an Assault Attack with up to his triple BEW and ignores Difficult terrain in doing so. He receives the usual strength bonus for an Assault Attack as before if he has moved at least his single BEW in cm up to the target. This bonus is doubled if he manages to use his double BEW as run-up.
Attendre! With an Order the character can set a character or several who are in rank and file (himself included) into the state Waiting.
Attractive All Friendly characters who are within 20 cm around this character exert themselves unbelievably to protect him and to impress him. They receive a bonus of +1 / +1 ST. This character himself does not receive the bonus.
Alertness This character may not be the target of the action Underhand Attack. He can however be drawn into Close combat with an Assault Attack or an action Run and Attack.
Eye of the Hunter If this character fires into a Melee, the shot cannot go astray. The aimed-at target is always attacked. If this character aims, he receives an additional bonus of +2 / +1 RANGED.
Aura of Weakness All opposing characters who are within the Aura of Weakness in a radius of 20 cm around this character suffer a malus of -1 / -1 ST.
Evasion ( ) This character receives a bonus of +1 V against the type of Attack named in brackets. This cannot be combined with the bonus for Lightning Reflexes, Cover or Shield.
Authority ( ) Especially influential characters, such as Leaders, possess an Authority. It is stated at the top of the character card in cm, corresponding to the number in brackets. It is measured from the base of the character all around, and another character is affected by it if a part of his base is within this Authority. No line of sight needs to exist for this. Within the Authority a Friendly character can for example use the Morale of the character for a Morale test or receive an Order.
Known in All Alleys The character can be hired either as Leader of a crew of the Pirates or as a Mercenary. As Leader of a Pirate crew he may hire, instead of a Mercenary, a Specialist or character from the Following of another crew. These characters count in every respect as Mercenaries, so they cannot for example receive Orders. If several Specialists count together as one selection, such as Tecuani and his Oncas, then the character can hire these also together as one selection. As Mercenary he fights for all crews, but replaces the trait Order with Lieutenant. That means he can indeed receive no Orders from the Leader, but himself gives the Orders and becomes the Leader if the actual Leader has been taken out.
Enchanting An opposing character may attack this character in Close or Ranged combat only if he has previously passed a Morale test on his lowest own Morale value (the lowest grey box). The Morale value of Leaders, Lieutenants and Sergeants may not be used. Bonuses that raise one's own Morale (such as Spur and Cowardly), as well as Steadfast, Fearless and other effects directly concerning the character in a Morale test, do however come into use. If the Morale test is not passed, the action is only void if no other target conforming to the rules can be determined for the Attack. A character passes this Morale test automatically if he has already been attacked by this character at least once in this fight, even if this Attack was unsuccessful.
Lightning Attack The character can strike twice in Close combat per action Attack. A Lightning Attack can not be combined with Assault Attack or Sweeping Strike, but can be with other traits. The individual Attacks of a Lightning Attack can be performed on different opponents.
Lightning Reflexes This character receives a bonus of +1 V against every Ranged or Close combat attack directed at him. In addition the character receives no malus if he is attacked in his back. This can not be combined with the bonus for Evasion, Cover or Shield.
Chivato A Friendly character can become, at the beginning of the game, a Chivato, an informer of this character. For this this "equipment card" is assigned to any Friendly character. A Chivato can once in the game blacken any opponent with this character. This is a Simple action, and the Chivato must be within hearing range of 20 cm around the character. The action succeeds automatically and the character immediately performs, as a Reaction, a Judgement on the blackened wrongdoer. Chivatos are naturally especially popular with the opponent. Every Chivato taken out in the game gives the crew that took him out an additional bonus of +20 Ru(h)mpoints.
Code Duello The character can issue a formal challenge to an opponent with Authority who is in base contact with him, at the beginning of a Close combat. The opponent may not decline it. Both duellists may, from the acceptance of the duel on, not disengage from Close combat with a Retreat and not make use of Support. No other character may perform a Combat action, Invocation or Banishment against one of the two duellists. The duel ends as soon as one of the characters is taken Out of Action or falls into Panic and flees. A challenge according to the Code Duello costs no action and does not apply to Handlers with Authority.
Demagogue All characters of the own crew within the Authority of this character receive the trait Spirituality. The character himself also receives Spirituality.
Jungle Warrior The character ignores all restrictions through the terrain property Difficult terrain on land. He thus does not profit from his trait Jungle Warrior in terrain with the terrain property Deep. Additionally the sight range of the character is doubled in terrain with the terrain property Wood. His line of sight can thus for example penetrate 20 cm of the terrain type Wood with Limited Sight (10) before it becomes a sight obstacle.
Guard of Honour ( ) The character can permanently upgrade one type of characters named in brackets to the Guard of Honour by granting them special rules or traits. The traits and the Pay possibly to be paid for it are stated in the description of the character. Either all followers of this type must be upgraded to the Guard of Honour, or none of them. The character who grants the upgrade must himself be part of the crew.
Trainer A Specialist or all characters of one type of Following receive for the game +1 / +2 BEW.
Loner A character with the trait Loner may never use the Morale value of a Leader. The character can receive no Order and cannot profit from the action Rally Cry.
Insensitive The character cannot be taken out of the game by Critical Hits. He does suffer the restrictions in the affected body zones, but is never taken out of the game by two Critical Hits in the same body zone or by three in different body zones. With two Critical Hits in the same body zone the attribute sinks or remains at 1. Otherwise no further effects occur that go beyond the effect of a single Critical Hit in the body zone.
Archenemy ( ) The character is already in the state Hot-blooded at the beginning of the game if he fights against the opponent named in brackets. He needs to have suffered no loss of LE for this. If he fights against another opponent or another crew, he is instead "only" Hot-blooded, which still has to be triggered according to the rules.
There Is No Trying Once per game the character can let an own Invocation or Banishment succeed automatically. This must be declared before the Duel of Wills that thereby lapses. However the Blood Debt of this Invocation or Banishment increases by +1.
Exorcist The character can perform the action Banishment within the Aura of a Loa even if he is not a Mystic himself. He receives with every Banishment an additional bonus of +1 A and can even combine this with the action Concentration.
Fate Points ( ) The character possesses a number of Fate Points stated in brackets, each of which is usable once. For one Fate Point the character can have a hit determination that he performed or that was directed against him repeated. The second hit determination is binding. For one Fate Point the character can have the drawing of a Fate card within an action repeated. The result and/or effect of the second Fate card is binding. A Fate Point may not be used when drawing the Initiative or other draws that are not part of an action of the character. At most one Fate Point may be used per action, and a repetition cannot be repeated again.
Fencing Master The character receives a bonus of +1 A in Close combat.
Cowardly Every Friendly character in a radius of 10 cm gives a bonus of +1 to the Morale of the character. The maximum possible bonus is +3 to the Morale. Leaders are not cowardly and do not profit from the bonus. If a character can use the current Morale of a Leader instead of his Morale, he receives the bonus not. He can thus use either the bonus or the current Morale of the Leader.
Flying Cannonball The character need not be set up with the other characters of the crew, but can be held in Reserve. The character can then at the beginning of round 2 or 3 "crash in". For this the character is treated like a Steep Fire weapon EX 8/4 with a radius of 3 cm and a Range of 40 cm. The Range is measured from the own deployment zone. The character is placed arbitrarily within the Explosion radius, even in base contact with another character. In the "landing" the character himself suffers no damage and may act normally in the same round.
Nimble The character can act first in every round, regardless of which crew has the Initiative. After this nimble first activation the crew that has the Initiative continues.
Fear-inducing A Fear-inducing character causes fear and terror. Every opponent who gets or wants to get into base contact with him must perform a Morale test. If the Fear-inducing character wants to move into base contact with an opponent, the opponent must pass a Morale test in order not to fall into Panic. The Morale test is performed after it has been established that the movement is sufficient to get into base contact with the opponent, but before its performance. If the movement is not sufficient to get into base contact, no Morale test must be performed. If the opponent fails the Morale test, he is briefly paralysed with terror and must let the Attacks pass over him. Afterwards he automatically falls into Panic - if he is still in the game. This results in the following order of actions, tests and Reactions:
- Declaration of a movement into base contact, such as an Assault Attack, by the Fear-inducing character, the Attacker.
- Measuring the movement distance. If it is sufficient, continue with point 3. Otherwise the end.
- Morale test of the opponent, the Defender, is performed.
- Movement and Attacks of the Attacker and their result.
- Morale test for Seriously Wounded only if the Morale test for Fear-inducing was passed at the beginning.
- The Defender automatically falls into Panic and immediately begins the Flight if he had failed a Morale test (3 or 5). If an opponent wants to move into base contact with the Fear-inducing character, he must perform the Morale test before the performance of his movement. If he passes the test, the movement and any Close combat attacks can be performed. If he fails the Morale test, the Attacker is as if paralysed with terror and remains standing on the spot. He loses the declared actions. If an opponent has passed the Morale test, he has overcome his fear and counts, for the rest of the game, as Fearless with regard to this particular Fear-inducing character. He can perform all his actions according to the rules.
Fearless The character never falls into Panic and has no fear of Fear-inducing opponents. He passes all Morale tests automatically and need not draw a Fate card for this.
Possessed This character can already stand under the influence of a Loa at the beginning of the game if a Mystic with corresponding Loas is in the crew. The necessary Invocation and the Duel of Wills always succeed, use no actions and no Blood Debt must be paid. The Loa card is laid next to the character card of this character.
Sharpened Senses This character has a 360 degree field of view. He can thus, among other things, perform Assault Attacks into his back area and attack backwards without having to turn around. In addition he does not suffer the malus of -1 V against Attacks in his back.
Shapeshifter At the beginning of the game the player selects which of the two Personas he sets up on the playing area. Only one of the two may be on the playing area at a time. At the beginning of every activation of the character the Persona may be swapped voluntarily. This demands a Blood Debt of +1 from the character, which is paid after the change. Damage and Critical Hits are transferred to the other Persona with every transformation. The miniature is replaced by the other one at exactly the same spot with the same facing.
Mysterious Chest The character puts a bounty on a certain opposing character of his choice. He himself or a Friendly character receives the trait Bounty thereby. The trait Bounty remains only as long as the character with the Mysterious Chest is on the playing area. For if he is taken out, the nice gold in the chest is gone.
Hard Throw With a throw with a Throwing weapon the character receives a bonus of +1 / +1 RANGED.
Hot-blooded The hot-blooded rage of the character begins as soon as he has lost one LE. As long as the character is enraged, he receives a bonus of +1 / +2 ST and +1 / +1 W on his attributes and is Steadfast. The Hot-bloodedness ends permanently for the rest of the game as soon as the character fails a Morale test.
Mistress of a Thousand Masks The character need not be set up at the beginning of the game. She can suddenly appear in any round, at the beginning of an activation of her crew. For this a character from the Following of the opposing crew who has not yet acted in this round is swapped on the playing area for the character. She is placed at the spot where the opponent stood and may be turned to face in any direction. The character enters the playing area without Critical Hits or LE losses and with all her equipment. Any injuries she had apparently suffered in her disguise as an opposing character were pretended. She may keep all scenario objects that the opposing character had collected in the course of a scenario up to then. Loas by which the opposing character is ridden are not transferred to the character. The opposing character who was swapped for the character is placed, directly after the swap and before the actual activation of the character, as the opponent wishes, in the deployment zone of his crew by his captain. He too has no injuries, keeps his equipment and may be activated in this round - he was able to free himself from his shackles and now hurries to the aid of his comrades. This unveiling of the character is no action and her activation must begin directly afterwards. She receives +1 A on all Attacks in this activation. Should the character not have appeared in the game by the end of round 4, she draws a Fate card at the beginning of the and every further round. If the corresponding symbol appears, she be immediately in her deployment zone. She can no longer be swapped for a character from the opposing Following, as she has missed the favourable moment and has been discovered.
- Round 5: Skull
- Round 6: Pistol
- Round 7: White Fate card
- Round 8: The character must appear in this round! The Morale of the character may be used only after she has entered the playing area.
Court A Court is formed if at least two characters with this trait are in a crew. Together they receive a number of Fate Points that corresponds to the number of all characters of the Court minus 1. So for example the Comtessa and the Fool together would receive 1 Fate Point. All these Fate Points are laid at the beginning of the game into a pool from which every character of the Court can draw. Per round a character can take only one Fate Point from the pool.
Immune to Poison If the character is attacked with poisoned weapons, the additional damage through poison does not count.
Rank and File Friendly characters with this trait may be activated simultaneously and perform actions together as if they were a single character. For this they must
- all be together in the same Melee and be in direct base contact with each other,
- all possess this trait,
- all have the same facing, and
- none of them may already have performed his regular activation in this round. At least 2 characters and at most 3 characters may be activated together through use of this trait. At the beginning of an activation it must be declared precisely which of the characters that fulfil these conditions take part in the Rank and File action. After the joint activation in Rank and File all characters taking part have used up their actions and their activation is ended. Characters in Rank and File can receive an Order as if they were a single character. The Order always influences all characters who are in Rank and File. Of Loas always only one character is ridden, never the whole Rank and File formation - unless the Loa expressly permits it.
Movement All characters of a declared Movement action in Rank and File receive a bonus of +2 per Simple action on their BEW. The Movement action is performed by first moving one single character according to the rules. Afterwards the other characters are moved into base contact with him, or into a valid Rank and File formation, respectively. In doing so no character may be moved further than his current Movement permits. A character can however be moved to another place in base contact with the characters of the Rank and File formation than he had at the beginning of the activation. Formation changes can thus be performed. This can also take place during an Assault Attack, as long as the movement takes place according to the rules, e.g. in as straight a line as possible, etc. A character who cannot reach his place because his movement is not sufficient must try to get as near as possible to the Rank and File formation. For this he must fully use up his declared and possible movement. If he does not reach base contact with a character in the newly positioned formation, he is no longer part of the formation and is not subject any longer to the special rules applying to it. His activation is ended and any actions that can no longer be performed lapse. The character nevertheless receives the bonus of +2 BEW for the attempt to reach the formation. During the joint activation of a Rank and File formation a character in it cannot voluntarily leave it. Example: To avoid the movement restrictions through the wood, the characters change their formation during the movement. All characters are in Rank and File and declare a Complex action Movement with a bonus of 4 cm on their movement. First character 2, thinking of Pythagoras, is moved only about 18 cm straight ahead, so that the other two characters manage to get into Rank and File again. Character 3 moves to the left side of character 2 and character 1 to the right side.
Close combat attacks All characters who are in the same Rank and File formation already give an Attacker Support if they are in base contact with him. They need not be in base contact with the Defender for this. The Attacker himself must, according to the rules, be in base contact with an opponent. An Attacker in Rank and File formation can additionally be strengthened by "normal" Support from outside the formation. Examples: Characters 1, 2 and 3 are in a Rank and File formation. All characters have not yet acted, and therefore character 2 attacks Revlugg with the support of both characters. This is possible in both examples, as characters 1 and 3 need be in base contact only with character 2, not with Revlugg. In the two following examples character 1 only receives Support from one character, as character 3 is indeed in the Rank and File formation but not in base contact with the Attacker. It is possible that only characters 1 and 2 act in the Rank and File formation and character 3 performs an action of his own, since he cannot sensibly support the two. As character 3 cannot support the Attacker in both examples, it would be possible for him to perform an independent activation at a later point in time - provided the Rank and File formation had not yet acted (e.g. a movement). This must of course be declared before the activation of the Rank and File formation.
Ranged attacks All characters in Rank and File must have a line of sight to the target, be in Range, have ready-to-fire ranged weapons, and all use up ammunition, i.e. their weapons may have to be reloaded. But only one character performs the Ranged attack and receives a bonus depending on the total number of characters taking part.
- 1 character: the weapon is fired with the stated values.
- 2 characters in Rank and File: the Attacker receives a bonus of +1 A and +2 / +2 RANGED.
- 3 characters in Rank and File: the Attacker receives a bonus of +1 A and +4 / +4 RANGED. Accordingly all other factors influencing the Attack (Cover, Range, equipment cards, etc.) relate only to the Attack of the shooter.
Inspiring Friendly characters in a radius of 20 cm around this character receive the trait Steadfast.
Gunner A Gunner needs only a Simple action to fire a weapon with the trait Artillery.
Cavalry (Steed and Rider) Rider and Steed are two independent characters who practically become one by the mounting of the Rider. A Rider is at the same time the Handler for his Steed. There can be several Riders in one crew. A Steed can be mounted or dismounted by the Rider spending a Simple action Movement. For mounting the Rider must be in base contact with his Steed. After the Rider has mounted, the Steed possibly loses the actions still available to it for this round. When dismounting the Rider is placed arbitrarily in base contact with his Steed. After the Rider has dismounted, the Steed counts as an independent character and can still perform the actions available to it in its activation. As long as the Rider is sitting on his Steed - that is, riding - the following special rules apply:
- Both act together as one character, thus receive two Simple actions or one Complex action per activation.
- The actions available to them can be assigned arbitrarily to the two characters. The Steed could for example perform a Simple action Run and the Rider a Simple action Attack.
- If one of the two performs an Attack in Close combat, he receives Support from the other.
- If they themselves are attacked in Ranged combat, both are always treated as if they were in a Melee.
- In Close combat the opponent can choose which of the two he wants to attack.
- A Morale test is performed by the character who has the currently higher value. If the test is failed, both flee together.
- An action Use Object can be performed only by the Rider, and for him this action is a Complex action, since the Rider usually has to dismount.
- Of Loas always only one character is ridden, never both simultaneously - unless the Loa expressly permits it.
Cavalry Base The character stands on a 25 x 50 mm cavalry base.
No Authority This character is nominally the Leader of a crew, but has no Authority. Friendly characters can not use his Morale, and he can issue no Orders and no Rally Cry. He remains the Leader of the crew and his Morale is used for the Initiative. However a character with the trait Lieutenant or Sergeant can take over command and thereby issue Orders. Friendly characters can also use their Morale.
Blade Dancer As long as a Blade Dancer has not yet suffered a Critical Hit in the arms, every Attack directed at him receives a malus of -1 A.
Bounty ( ) The character receives against the characters or traits named in brackets a bonus of +1 A and +2 ST. If none are given in brackets, one character of the opposing crew may be selected before the beginning of the game. Example: Bounty (Tumb) gives the bonus against all characters with the trait Tumb, such as Sansâme, Balagonecos and Samuel.
Incorporeal The character ignores the movement restrictions of every kind of terrain and of height differences. He can even move through massive terrain, but not through other characters, as their essence prevents it. The character may however not end his movement in massive terrain. Should this nevertheless happen, he is taken Out of Action.
Load Bearer If the character carries a treasure chest or other scenario objects, he suffers no deduction from his BEW and can both Climb and Swim with it.
Lieutenant A Lieutenant is an officer subordinate to a Leader or Mercenary Captain and of lower rank. He receives through Lieutenant the trait Authority and the special action Order. He may use his Authority and Order only if the Leader is taken out of the game, in Panic or Defenceless, or himself has no Authority. Only one character in the crew can use the trait Lieutenant at a time. If more than one Lieutenant comes into question, one of them must be clearly selected.
Lucky 8 The character can modify every Fate card with an 8 by +/- 2. This applies both to Fate cards drawn by him and to Fate cards played on him.
Power Reserve As long as this character is on the playing area, all Tumb characters of his crew receive in total an additional action per round for the Action pool.
Mighty Blow If this character performs the action Wind Up or Assault Attack, he receives an additional bonus of +2 / +2 ST on the bonus already received through this action.
Manukawhaki This character can perform the Complex action Waiting as a Simple action.
March! All characters who are within the Authority of this character at the beginning of their activation receive a bonus of +2 BEW. He himself does not receive the bonus.
Masquerade Ironball: For this trait to be applied, at least two Friendly characters with this trait must be on the playing area at the same time. If one of the two characters with this trait is hit by a cannonball, or one of the two fends off an opponent from the cabin, his crew decides which of the two characters must swap from the deck into the cabin or vice versa. Damage, Critical Hits and Morale tests are determined before the swap and are not transferred. Should the hit character be taken out of the game, the other character can swap in his place nevertheless. The character who actually swaps takes the cannonball with him, if other rules do not prevent it and he swaps from the deck into the cabin.
Medium A Friendly Mystic can perform an Invocation or Banishment through a Medium. For this the Medium must be within the Aura of the Loa. The Mystic can perform the Invocation with the line of sight of the Medium. The Medium itself can invoke no Loas.
Master of Tactics As a Master of Tactics the character may look at the top 5 Fate cards at the beginning of every round and after determining the Initiative. He must put them back in the same order.
Mob Every character with this trait gives every other Friendly character with the trait Mob an additional bonus of +1 / +1 ST in a Support.
Musician The Musician passes on the Orders and the Rally Cry of a Leader, Lieutenant or Sergeant. If the Musician is within the Authority of a Leader, Lieutenant or Sergeant, he extends its Authority by measuring the radius of the Authority anew from the base of the Musician. A character who is within the Authority of a Leader, Lieutenant or Sergeant extended by the Musician can use their Morale value for a Morale test. The Musician himself can issue no Orders, perform no Rally Cry, and Friendly characters can also not use his Morale.
Mystic ( ) A Mystic is a character who may "hire" a certain number of Loas from certain Doctrines in order to use them with the actions Invocation and Banishment as well as Concentration. In the brackets the number of Doctrines and Loas is stated from which he can choose. Example: Sybiline is a Mystic (Ill-will, Death, Wilderness. 1-6). She must select at least one and can select up to 6 Loas from the Doctrines of Ill-will, Death and Wilderness. So she could for example "hire" 5 different Loas from the Doctrine of Death, or 2 from the Doctrine of Wilderness, 2 from the Doctrine of Ill-will plus one from the Doctrine of Death. Sybiline may not "hire" a Loa from the Doctrine of Benevolence, as she has no power over it.
Mystic Choir A character with this trait who is not in Panic or Defenceless gives every Friendly Mystic a bonus of +1 A on an Invocation or Banishment. For this at least 2 characters with this trait must be within a radius of 10 cm around the Mystic.
Night Vision The character has a doubled sight range in dusk, fog, night and in the wood. His line of sight can penetrate twice as much of the Limited Sight generated by this rule before a sight obstacle arises.
Parry If the character has been hit in Close combat, he can try to parry one of the successful hits. Both players lay their selected hit zone cards openly in front of them. The Defender selects one of the successful hit zone cards of the Attacker and lays it beside him. This is the hit on the body zone that is to be parried. The Attacker shuffles his hit zone cards that he did not use for this Attack, and the Defender draws one of them face down. This is the new hit deflected by the Parry. If the Defender fended off this new hit with the original selection of his defended hit zone cards, he is not hit. If he could not defend it, he is hit at this body zone instead. Example:
- The Attacker has hit the Head and the Abdomen. The Defender selects the Abdomen of them, which in no case may be hit.
- The Attacker shuffles the 4 hit zone cards that he had discarded, and the Defender draws one of them face down: the Legs!
- Luck! The Legs are also in his selection! Phew, parried. Even the automatic Critical Hit!
Pétard Breath As Pétard consists predominantly of fermented beans, excessive enjoyment does not remain without consequences. The comrades of the character are used to it, but all opponents within a radius of 10 cm around this character suffer a malus of -2 to their Morale and lose the trait Steadfast.
Plague Bringer All characters (friend and foe) who come into base contact with this character become infected and immediately suffer a Blood Debt of 1. If an infected character is healed at least one life point in any way, the plague is also cured and has no further effect. Every infected character who is not healed suffers at the end of each of his activations a further Blood Debt of +1. A character who has already been infected once is immune to a renewed infection in this game or scenario. Characters who are Immune to Poison are immune to the plague.
Pioche! With an Order the character can let a character or several, as long as they are in Rank and File (himself included), reload their ranged weapons as if they had the trait Powdermonkey.
Powdermonkey The character can once per activation reload one of his weapons with one Simple action less. This means he can reload a pistol and similar weapon without an action that would otherwise need a Simple action Reload. Two pistols to reload or a Heavy weapon need only one Simple action to reload. This trait can not be additionally combined with equipment such as a cartridge.
Priest The Aura of every Loa is increased by +10 cm. The Aura is increased only for an Invocation or Banishment by this character, not for other Mystics. This applies both to own Loas and to those of opponents.
Regeneration ( ) At the beginning of his activation this character automatically receives back the amount of lost life points stated in brackets. He cannot be healed beyond his initial maximum with it.
Smells Fear The character immediately receives a "Fetch!" Order on an opponent as soon as he is or falls into Panic within a radius of 20 cm. He needs no line of sight for this. The "Fetch!" Order is however only performed when all declared and already begun actions have been completely handled. The character must try to reach this opponent and take him out of the game, just as with a "Fetch!" Order. This "Fetch!" Order ends when
- the target is taken Out of Action or moves off the playing area, or
- the character himself is taken Out of Action, or
- the character himself falls into Panic. He receives no new "Fetch!" Order before the existing one has ended. Should an opponent fall into Panic while he is in base contact with this character, the character receives a "Parting Blow" before the opponent begins the Flight.
Riposte If a Close combat attack against this character does not hit, i.e. he could defend all attacked body zones, he may immediately perform a Close combat attack with A 1 against this Attacker. This is a Reaction and uses no action. The Riposte can not be performed against opponents who are in the back of this character.
Rower A boat receives one additional action Steer or Row for the boat action if this character takes part as a crew member in the boat action. For this he must also be at a corresponding place. So he cannot, for example, Row or Steer from a Gunner's place.
Savate As long as the character has not yet suffered a Critical Hit in the legs, he can attack with a Kick instead of with the fists. A Kick receives a bonus of +1 ST and can be combined with Wind Up, Aim and other actions that improve Attacks. Ironball: An attack with the fists and/or legs counts as unarmed.
Marksman The character receives a bonus of +1 A in Ranged combat.
Shackle Right - Shackle Left If the character hits at least two body zones of the opponent in a Close combat attack (two hit zones are not defended), he receives for this Attack a bonus of +2 / +2 ST. Neither of the two arms of the character may have suffered a Critical Hit.
Dirty Shanties The character can strike up a dirty shanty with a Simple action in his activation. He may not be in base contact with an opponent or in Panic or have suffered a Critical Hit in one of his arms. The shanty lasts until the beginning of the next activation of the character in the following round. It ends as soon as he becomes Defenceless, is in base contact with an opponent, suffers a Critical Hit in one of his arms or is taken Out of Action. If he does not strike up a new shanty in his activation, he simply continues singing the old one. This then uses no action. A shanty affects the character himself as well as all characters of his own crew who begin their activation within hearing range of 20 cm around him. Every shanty has a different effect. Only one shanty can be in the game at a time.
- Des Gobbenor's Stab hat'n Knubbel am End. Characters receive +1 A on the first Close combat attack that they perform in their activation. However they may not Aim in doing so.
- Hosen mit Schlag - die Impalas ham keine. Characters receive for their first Simple Movement action that they perform in their activation a bonus of +2 cm on their maximum movement (not on their BEW value). Alternatively the crew of a boat receives one action Row additionally in their boat action.
- Der Seeigel ist in jedem Fall besser dran. Characters receive temporarily +1 W. This shanty affects (as a variation of the general rule) only characters who are within hearing range of 20 cm of Delora at the point in time when they suffer damage.
Quick Shooter The character can always perform a Reaction Ranged combat to a Ranged attack directed at him, even if he is not Waiting. However this Reaction has Inaccurate (Ranged combat) and his ranged weapon must of course be loaded.
Marksman's Aid The character grants every Friendly character in base contact the trait Powdermonkey.
Black Soul If the character is in the game, the Event card Black Spot is shuffled into the stack of Event cards during game preparation. As soon as the character holds the Event card Black Spot in hand, he may reveal it and receives a bonus of +1 / +2 ST. The Event card nevertheless stays in hand and continues to block a place, as with everybody else.
Seaworthy The character is never affected by Knock Over or a Recoil and does not go Overboard. By other effects he can however certainly go to the ground or be pushed out of a boat.
Soul Driver ( ) Soul Drivers "collect" actions from Friendly, Tumb characters. Thereby an Action pool is formed, from which Friendly, Tumb characters can be assigned actions in order to drive them on. For every Soul Driver in the crew at most the number and type of Tumb characters stated in brackets can be hired. All Soul Drivers together then, however, have all Tumb characters in this crew in their care. For this an Action pool is formed at the beginning of every round. Into it goes, per Soul Driver, one marker "collected" by the Soul Driver for each Tumb character in the crew. Every marker corresponds to one action. For this Action pool to be formed, at least one Soul Driver and one Tumb character must still be on the playing area. The Soul Driver may not be in Panic. A Tumb character who is subject to the compulsion of a Mandatory action contributes no action to the Action pool. From the Action pool a Tumb character can be assigned up to two actions at the beginning of his activation. With these actions a Tumb character can declare and perform actions. He can act only once per round, however, and use the Action pool only once. The actions taken from the Action pool are put aside until the next round and are used up for this round. If there are no actions left in the Action pool, no further Tumb character can be activated in this round. Actions remaining at the end of a round lapse and cannot be carried over to the next round. Special cases: If a Tumb character falls under compulsion of a Mandatory action during the round, he receives a Simple action as a "bonus" for the Mandatory action possibly to be performed. This is not paid from the Action pool. If the remaining Soul Driver of a crew falls into Panic or is taken Out of Action, the current Action pool is . All actions still in it are distributed to the Tumb characters not yet activated up to then. However at most per Tumb character. If the last Soul Driver "returns", e.g. by Rallying, a new Action pool is formed only at the beginning of the next round. A Soul Driver can at any time, i.e. also outside his own activation, add an action to the Action pool by paying a of , even if it is already empty, but not if it has been dissolved. In this way at most per round can be added to the Action pool.
Sergeant A Sergeant is an officer of lower rank subordinate to a Leader, Mercenary Captain or Lieutenant. He receives through Sergeant the trait Authority and the special action Order. A Sergeant may use his Authority and Order only if all superior officers, Leaders and Lieutenants, have been taken out of the game, are in Panic, Defenceless or themselves have No Authority. Only one character in the crew can use the trait Sergeant at a time. If more than one Sergeant comes into question, one of them must be clearly selected.
Siren Song Every opponent within a radius of 20 cm around this character receives the trait Loner.
Mercenary This trait is a Rank within a crew and states for which crews the character fights at all. Mercenaries can receive no Orders from non-Mercenaries and also not use their Authority. Characters with this trait also belong to the OLHG and, as described in Chapter 15. Crews, page 72, can form an independent crew.
Mercenary Captain ( ) A Mercenary Captain is either a Mercenary who can be hired for other crews, or the Leader of a crew consisting only of Mercenaries. As a Mercenary he can also have the trait Lieutenant or Sergeant at his disposal and use it according to the rules. If present, this is stated in brackets.
Scout The character can before the first round and after all crews have been set up perform one Simple action Run outside his activation.
Arachnophobe ( ) This character does not fight for a crew in which the character named in brackets also fights.
Spirituality The character can modify an Invocation or Banishment by +1 A or -1 A if he is himself the Victim.
Steadfast The character can repeat all tests based on Morale once. The second result is however binding and cannot be repeated again. The character can use the Current Morale of a Leader, Lieutenant or Sergeant if he is within their Authority.
Stubborn If this character is to become the Victim of a Loa, the Mystic must pay an additional Blood Debt of 2 for the Invocation.
Animal An Animal is treated like a character. It can however, with few exceptions, not act independently. For this it needs a Handler who controls it and prevents it from falling prey to its instincts.
- Animals can only perform the actions Run, Attack, Stand Up, Flight, Rally and Assault Attack.
- An Animal can receive no equipment unless the equipment card expressly permits it.
- Animals must be controlled by their Handler so that they can perform all the actions possible for them. The Handler acts, as it were, as the "Leader" for his animals. As long as they are within his Authority, they can act "normally" and receive "Fetch!" Orders. This means an animal will never use the Morale of the Leader of a crew and can also receive no Order or Rally Cry from him.
Out of Control and Driven by Instinct Under certain circumstances an Animal becomes Out of Control and acts Instinctively if it is not within the Authority of its Handler at the beginning of its activation and at the same time
- is not under the effect of the "Fetch!" Order, or
- is not in Close combat (in this case it continues to fight), or
- is not in Panic and does not have to perform a Mandatory action, such as Rally or Flight. Such an Animal driven by instinct must draw a Fate card at the beginning of each of its activations. With a white Fate card it can act according to its possibilities. With a black Fate card the Animal seeks the open. It moves with all actions of this activation and with full movement directly in the direction of the next edge of the playing area, is neither in Panic nor Defenceless. For the Animal terrain that cannot be overcome and obstacles, such as single trees or opponents, must be walked around. If the movement is sufficient, it leaves the playing area and is thereby taken out of the game Out of Action, so that the opponent receives the full Ru(h)mpoints. If an Animal has taken its opponent Out of Action with the first action but is Out of Control, it may continue the current activation according to its possibilities without having to draw a Fate card. Example: Fidanzata must take care not to lose the overview and control over her rat swarms. Rat swarm 1 is within her Authority and can thus act according to its possibilities. Fidanzata had already sent rat swarm 2 a round before with a "Fetch!" Order against Hueso Narg. It is now indeed outside Fidanzata's Authority, but is in Close combat and thus need not perform a test for being Driven by Instinct. The activation of rat swarm 3 begins. It is Out of Control, not in Close combat and not in Panic. Luckily she draws a white Fate card. Rat swarm 3 can act "normally" and should attack Hueso Narg in order to support rat swarm 2.
Handler ( ) A Handler is the Leader of his animals. He possesses an Authority which, however, applies only to his animals. Within his Authority they can thus use only his Morale, and he can control them and can issue them a Rally Cry as well as a "Fetch!" Order. A Handler can only have with him the type and number of animals stated in brackets. Every animal must be hired individually. It can only be hired if its Handler is also in the crew. A Handler and his animals together always count as one selection with the rank of the Handler. For example the Specialist of the Imperial Armada, Tipo Duros, has the trait Handler (0-2 El Mastins). That means he can hire 0 to 2 El Mastins at 30 Doubloons each, and all together count as "one" Specialist.
Tumb A Tumb character "generates" one action per round, which must be collected by a Soul Driver in an Action pool. From it the character can be assigned 0-2 actions per activation. With a Mandatory action a Tumb character draws only one Fate card to determine the movement range.
Clumsy ( ) The character cannot perform certain actions. The affected actions are listed in brackets behind the name of the trait. So for example Clumsy (Reload) means that the character cannot reload ranged weapons of any kind.
Indestructible This character draws a Fate card each time after he would actually have to be taken Out of Action. With a white Fate card he stays in the game with exactly one LE. Should he have to be taken out through a second Critical Hit in the same body zone or through a third Critical Hit, this Critical Hit is ignored and not marked on the character card. The character stays in the game. If he is taken out at the same time through the loss of all his LE and a Critical Hit, he draws only one Fate card and applies the result for both causes together.
Hiding As long as the character is in Cover, he receives for a Ranged attack directed at him an additional bonus of +2 / +2 W.
Veiling A Waiting opponent can perform no Reaction to an action of this character.
Reinforcement ( ) The character can hire the stated Following if he is the Leader of the crew. Even if it does not come from his own crew list.
Hidden Deployment ( ) The character is not set up at the start of the game. Instead he hides behind the Friendly character named in brackets and counts as if he stood on his base. He is moved with him and cannot be attacked as long as he does not come out of his hiding place. If the Friendly character is taken from the playing area while the character is still hiding, both characters count as taken out. The character can come out of his hiding place at any time during the activation of the Friendly character. He is set up on the playing area in base contact with the Friendly character and can act according to the rules from the next activation of his crew. The character can however not go back into his hiding place and remains on the playing area for the rest of the game.
Related ( ) As long as related characters are on the playing area together, they receive a bonus of +1 Morale. In addition related characters can occupy only one selection when hiring if they also have the same rank. All characters with whom the character is related stand in brackets behind the trait. So for example Momma Cebada has the trait Related (Cucaracha). As long as both are on the playing area, she receives the bonus of +1 Morale. When hiring, Momma Cebada and her sister Cucaracha occupy only one selection of Specialists. With Chulo Bolu and Momma Galina this unfortunately does not work, as he is a Leader and his Momma is a Specialist.
Confused If at the beginning of every round one of the following symbols appears on the Fate card drawn for the Initiative of the own crew, this has an effect on the behaviour of this character:
- Voodoo Doll - the character receives a bonus of +1/+2 ST.
- Skull - the character receives a one-time "Fetch!" Order on the character nearest to him - friend or foe.
- Pistol - the character is cursed and acts only with the left values of his attributes.
- Doubloon - the character receives a bonus of +1 A. If several symbols appear on a card, the character can select one of them. The effect lasts until a new symbol is drawn, or until the end of the next activation of the character. If the character does not assume a special behaviour, he can act quite normally.
Vigilant This character always performs an action Waiting at the end of his activation. This action Waiting uses no action and is additional to the actions the character has already performed. It cannot be performed if the character is in Panic or in Close combat, or if the character is Defenceless or swimming.
Whaitaua The character is a Whaitaua. These are allied with Debonn and thereby also count as Debonners.
Forest Runner The character ignores all restrictions through the terrain property Difficult terrain on land. He thus does not profit from his trait Forest Runner in terrain with the terrain property Deep.
Wall Runner The character can climb obstacles up to a height of at most twice the value of his current BEW without problems, and can Climb 1 cm with one point of BEW. When Climbing the character need perform no Risk test. Unless he overestimates himself and the distance to be overcome is greater than his entire movement range permits.
Waterborn A character with this trait may Swim without deductions to his BEW and even perform an Assault Attack in the water. He can never Sink and receives an additional +1 V against Close combat attacks if he is swimming. In addition he suffers no deduction to A in a Close combat in terrain with the property Deep.
Water-bound Water-bound characters or creatures can only stay in terrain types with the property Deep; other terrain types and boats are impassable for them. Water-bound characters or creatures can perform no actions for which they would have to leave the Deep terrain type at least partly.
Tough Every time the character would suffer a Critical Hit, he draws a Fate card. If it is white, he does not suffer the Critical Hit. If it is black, the Critical Hit is marked on the character as usual.
12.1. Weapon Properties
Distracting A character hit by this weapon suffers the effects of Inaccurate until the end of his next activation. He need not suffer damage for this. As long as the hit character is under the influence of Distracting, further hits by weapons with this property have no additional distracting effects until the end of the duration.
Artillery Such weapons each need a Complex action to fire and to reload. The shooter may not have a Critical Hit in the arms for this, as he needs both arms for firing and reloading.
Bayonet In an Assault Attack with the bayonet the character receives a bonus of +2 / +4 ST instead of the usual bonus of +2 / +2 ST. As soon as the character has suffered a Critical Hit in the arm holding the weapon, he no longer receives the increased bonus for the Assault Attack.
Blood Dagger By paying a Blood Debt of 1, the Mystic can receive a bonus of +1 A on an Invocation or Banishment. This Blood Debt arises additionally to the one that the Loa demands anyway. The equipment card Blood Dagger has no additional effects.
Burning ( ) If this weapon causes damage after a hit, it can cause further damage. After the determination of the damage a further damage determination is performed immediately with the ST or RANGED stated in brackets. This is continued until no more damage is caused. Only after that is a possible Critical Hit and/or a Morale test determined on the basis of the total damage inflicted.
Double-barrelled The character can fire and/or reload each barrel of such a weapon individually with a Simple action. Both barrels count as two individual ranged weapons and can for example be fired simultaneously by a character with the trait Firestorm.
Ferracero Weapons of this kind are made of special alchemical alloys that have a devastating effect on mystic auras. On a hit with this weapon the Attacker receives for his Attack a bonus of +2 ST or +1 / +1 RANGED against Mystics and against characters who are ridden by a Loa at the time of the Attack.
Ordnance Ordnance (guns) can only be mounted on an ordnance mount on a gun carriage or in a vehicle, such as a boat.
Ghost Weapon If an opponent ridden by a Loa is hit by this weapon and at least one point of damage is caused, the Loa is automatically banished.
Poison A poisoned weapon always receives, on a successful hit, a bonus of an additional +1 point of damage caused. This one point of damage is caused even if no damage would otherwise be caused.
Chain Weapon An opponent receives no bonus from a Shield or from a Defended Obstacle against attacks with a chain weapon. He thus receives no bonus of +1 V.
Long Arm The trait Long Arm allows attacking opponents at a distance with Close combat attacks. A character can attack opponents at a distance of up to 3 cm with this weapon in Close combat. The character need not be in base contact with the opponents for this. Long Arm can be performed together with various Close combat actions, such as a Sweeping Strike. Example: Cadena plunges into the middle of a clash between the Imperials and the Pirates. He can attack the Teniente and Rosso with a Sweeping Strike and the Long Arm trait of his chain whips. The Seasoldier not. He is outside his weapon's reach.
Solid Shot Instead of a normal shot the character can fire a solid shot with his ranged weapon. For this one shot the weapon receives +2 / +1 RANGED and Knock Over (4).
Multi-shot A multi-shot weapon can fire a Ranged attack with an ammunition use of one, two or three points, as chosen. This makes the weapon of different strength. Firing with a use of
- 1 point of Ammunition is performed with the stated values and is a Simple action.
- 2 points of Ammunition is performed with a bonus of +1 A as well as +2 / +2 RANGED and is a Simple action.
- 3 points of Ammunition is performed with a bonus of +1 A, +4 / +4 RANGED as well as Knock Over (5) and is a Complex action.
Monstrous Shot A Monstrous Shot flies with great force in a straight line always the full Range. It flies unhindered through wood, but gets stuck in impassable terrain (such as a solid wall). The line of fire is declared, precisely determined and measured out. All characters who are with their base "under" the line of fire are the targets. For every target a separate hit and damage determination is performed with the stated values. This begins with the target nearest to the character. With a shot into a Melee the possible targets are determined according to the rule. A target can however be hit only once. If therefore another character is hit who was already a target, whether reachable or successful, another character is selected as target instead or the shot hits nobody. If the character aims, the bonus of +1 A is applied in the hit determination only to the first target on the line of fire. Example: Unexpectedly Buzo surfaces from the water and fires his harpoon at the Pirates in the Piñassa. He selects the line of fire so that in total 3 characters are underneath: Piratin, Cuchillo and Tiradoro. The first possible target is the Pirate woman. She is indeed in a Melee with three others, but is hit nevertheless. As next possible target it is Cuchillo's turn. Unfortunately it hits another, Tiradoro! Actually he would be next, but as he has already been hit, the shot automatically deviates into the Melee and hits the unlucky Seaman.
Ammunition A ranged weapon with this property has only a limited amount of ammunition. This is listed in the form of fields at the ranged weapon. For every shot with this weapon the ammunition is used up, and in each case one round field on the character or equipment card is crossed off. When these are used up, the weapon can not be reloaded any more - unless special spare magazines are available and have also been bought. Whether such a ranged weapon can have a magazine is stated at the character or the equipment. A ranged weapon with Ammunition (1) has exactly one shot and is thus single-shot.
Reload A weapon with this property must be made ready to fire again with a Simple action Reload.
Nowhere Safe With this weapon Ranged attacks may also be performed against characters outside the line of sight - but not outside the field of view; Cover and shields are useless against it.
Powder Keg A powder keg is "fired" by being rolled, with a Complex action, in a straight line the value of 10 plus a Fate card in cm towards an aimed-at target. If the Fate card is white, a further card can be drawn. Further cards can be drawn until a black Fate card appears. This value is still added, but no further Fate cards are drawn. The keg rolls in a straight line and stops when it meets an insurmountable obstacle or a character, or as soon as the entire movement distance is used up. At the end of the roll the keg explodes with a radius of 2 cm plus the half value of the last Fate card drawn for the Range, with an Explosion radius of EX 7/5, see also Steep Fire weapons.
Armour-piercing On a hit with an Armour-piercing weapon the Defender can use only the left value of his Resistance in the damage determination, even if he has not yet suffered a Critical Hit in the Torso.
Sawtooth If the character draws a white Fate card when determining a Critical Hit in Close combat, the hit is Critical independently of the number drawn.
Shield A character with a Shield receives a bonus of +1 V against attacks performed on his front. He does not receive the bonus in his back. A Shield cannot be used together with Lightning Reflexes, Evasion or Cover. On a Critical Hit to the arm with which the character uses the Shield, the Shield becomes unusable and can no longer be used. On the character card there is a Shield symbol on the right in the entry of the corresponding arm. It is crossed off there together with the Critical Hit.
Heavy Weapon A Heavy weapon needs a Complex action to reload.
Steep Fire Weapon An attack with a Steep Fire weapon is performed as a Ranged attack with the changes described below.
Aiming With a Steep Fire weapon the Attacker must first aim at a point on the playing area. This can be any point within his field of view.
- This aiming point need not be visible to the Attacker; he needs no line of sight to it.
- The target need not be a character.
- The aiming point must however be within Range. If it is not, it is "pushed back" on a straight line towards the Attacker until it is within the Range of the weapon.
- The aiming point is marked with the small aiming marker.
Hit determination Once the aiming point is placed, a hit determination is performed with the A of the shooter against the V 4 of the aiming point. The V value is basically the same for all aiming points, but can still be modified. The hit determination is performed according to the rules. The following modifiers can come into use:
- Aim: +1 A
- Shot at Short Range: -1 A
- No line of sight to the aiming point: -1 A
- The target is a boat or is on board: -1 A
- Event cards, equipment or Loas can also influence the hit determination. The possible results of this hit determination are the same as in regular Ranged combat: not hit, hit with one hit zone card and hit with more than one hit zone card, only the effects are different.
Not hit - Deviation If the Defender has fended off all hit zone cards of the Attacker, there is nevertheless the chance that other attackable targets may be hit. The aiming point marker initially stays where it is and the Wind Rose is placed in its vicinity. If the Attacker has a line of sight to the aiming point, he may place the Wind Rose. Otherwise the Defender places the Wind Rose. Then the Deviation of the aiming point takes place. For this the Attacker draws two Fate cards one after another: the first gives the direction, the second the distance of the Deviation. As the Wind Rose has only 8 directions,
- with a 1 for the direction the aiming point marker is not moved; the shot is a Dud and has no further effects. The Fate card for the distance is not used any more.
- with a value between 2 and 9 the aiming point marker is moved in the direction given by the Wind Rose.
- with a 10 a direction on the Wind Rose (2 - 9) can be freely chosen by the Attacker. The aiming point marker must be moved the full distance of the value of the second Fate card in cm. The Deviation is not influenced by terrain. If the aiming point marker deviates beyond the edge of the playing area, the shot automatically misses. The final position of the aiming point marker is the point of impact of the Steep Fire weapon. If attackable targets are in its vicinity or directly beneath it, the Steep Fire weapon template is placed and the procedure continues as for a hit.
Hit If the Attacker has hit with at least one hit zone card and the final point of impact is fixed, the Steep Fire weapon template is placed directly over it so that the cut-out is exactly over the aiming point marker. If attackable targets are under the template, they are hit automatically and a separate damage determination is performed for each target. At the central point of impact only one target is hit, even if for example a character and a boat are underneath.
Attackable targets can be characters, a vehicle such as a boat, or a terrain piece. For this at least a part of the base of a character, or of the model of a vehicle or terrain piece, must be within the Explosion radius or point of impact of the Steep Fire weapon. Several targets can be attackable if, for example, a character is in a boat.
If the Attacker has a line of sight to the point of impact, he selects the final target from the possible ones, otherwise the Defender does so. Additionally all targets whose bases or models lie at least partly within the Explosion radius are hit. A target already hit at the point of impact is not hit again by the explosion. In the damage determination it matters whether a target is at the point of impact or in the Explosion radius. For this a Steep Fire weapon has an EX value instead of a RANGED value. The left value EX gives the strength of the point of impact, the right one that of the Explosion radius. A Steep Fire weapon causes no Critical Hits through damage. Example: Unfortunately Wolfgang does not hit the aimed-at aiming point with his grenade launcher. Through the Deviation of 4 cm the aiming point is moved in the corresponding direction. But he is lucky, for after placing the Steep Fire weapon template he has at least hit the Pirate woman and the Yola. The Tiradoro is not hit, as the radius is only 3 cm and unfortunately not 4 cm. For both the Yola and the Pirate woman a damage determination with the right value EX 5 for the Explosion radius is performed. Unfortunately there is no target beneath the point of impact.
Additional Effect If the Attacker has hit with only one hit zone card, he draws a Fate card. With a Pistol an Additional Effect occurs depending on the hit body zone. If the Attacker hits with 2 or more hit zone cards, he automatically achieves one of the Additional Effects. He must select one at one of the hit body zones. A Steep Fire weapon causes through its Additional Effects no Critical Hits. All Additional Effects are also found for reference on the Steep Fire weapon card. The Additional Effects are:
- Legs: If a character hit here suffers at least 1 point of damage, he is automatically Knocked Over.
- Head: If a character hit here suffers at least 1 point of damage, he must additionally perform a Morale test. If the character is Seriously Wounded by the Attack, he need not perform a further Morale test for it in this case.
- Abdomen: If a character hit here suffers at least 1 point of damage, a Critical Hit is automatically caused at a randomly determined body zone.
- Right Arm: The EX value is modified by +3 / -1 before the damage determination.
- Left Arm: The EX value is modified by +0 / +1 before the damage determination.
- Torso: The radius of the template is increased by +1 cm. The Additional Effects for the Legs, the Head and the Abdomen are applied only to one of the targets hit by the Attack. The Attacker determines the order in which damage is determined for all targets hit. The first target that suffers at least one point of damage is also affected by the Additional Effect.
(Steep Fire weapon card, V: 4: Legs - Knock Over; Head - Morale test; Abdomen - Auto. Crit. on damage; Right Arm - +3/-1 EX; Left Arm - +0/+1 EX; Torso - +1 cm radius.)
Example: The Pirates must be sunk! The Attacker places the aiming point marker exactly between the two boats (1). Unfortunately he does not hit. The Defender may place the Wind Rose, as the Attacker cannot see the aiming point. The Attacker draws a 7 for the direction and an 8 for the distance. The aiming point is moved accordingly and the grenade lands there (2). Directly beneath the point of impact there is nothing, but as it is a boat mortar, the template with 4 cm radius is taken and that should still be enough. For the Yola, the Pirate woman and the Sailor a damage determination is performed in each case.
Knock Over ( ) If an opponent suffers at least as much damage as the value in brackets, he goes to the ground and counts as On the Ground. If an opponent is simultaneously knocked over and put into Panic by an Attack, he is first thrown to the ground and then must flee immediately, but only one card far, since he first spends an action on Standing Up.
Inaccurate ( ) These weapons are designed to hit certain targets well or to be used in a very specific way. The Attacker suffers a deduction of -1 A in the usage type named in brackets and/or against targets named there. If no brackets are given, the malus applies to all Attacks against all targets and opponents. If it is possible for the character to use the weapon differently than in the type named, it is applied without this malus. Example: Inaccurate (while Riding; Small, Medium). A riding character suffers a deduction of -1 A when firing at a target that is Small or Medium. The character has dismounted and fires at a Medium-sized target - no deductions!
Underwater Weapon This weapon can be used in addition to firing on land also for a Ranged attack if the character is in terrain with the property Deep.
Cursed Arrows (0-3) This character may "hire" 0-3 Loas from the Doctrine of Wilderness and/or Ill-will at the usual hiring costs. Every Loa is bound to a Cursed Arrow and can be used with it only once per game. Before the shot the character can announce that he wants to fire, instead of a normal arrow, a Cursed Arrow with a certain Loa. If the Cursed Arrow hits and causes at least one point of damage, this counts as a successful Invocation on the target. No further Invocation is performed. If it does not hit or causes no damage, the Loa vanishes without effect into the spirit realm and is used up. If a target is already ridden by a Loa, the Cursed Arrow has no effect, as it cannot banish a Loa. A Friendly Mystic can indeed also invoke these Loas bound in the arrows, but the Mystic can only invoke them if they are not bound to the Cursed Arrows, i.e. their effect has already unfolded or they have vanished without effect and/or have been banished or the character has been taken out of the game.
Two-handed A two-handed weapon must be wielded with both hands in order to be used effectively. For a Close combat weapon the final ST is represented by the third Strength value to the right next to the two arms on the character card. If the character suffers a Critical Hit in one of his arms, both the value of the two-handed weapon and the right value of the attribute of the hit arm are crossed off. He can continue to use the two-handed Close combat weapon with his remaining ST. With a two-handed wielded ranged weapon the Critical Hit is marked as usual. Nevertheless the hit character can continue to use it, but then receives the trait Inaccurate. If he suffers Critical Hits in both arms, he can no longer use a Two-handed weapon.
13. Further Playing Cards
This chapter describes the use of further playing cards.
13.1. Event Cards
Before the game begins the Event cards are shuffled and laid face down on a stack. From this stack all players of a game draw their Event cards. If a player draws, for one of his characters, a Fate card with the symbol Treasure Chest, he may immediately and secretly draw an Event card. If the drawing of an Event card is triggered without it taking place in the activation of a certain character, it is received by the player who has the Initiative in this round. Event cards can be played at any time when it makes sense, but always only when a sub-step of an action has been completely handled and before the next begins. It is irrelevant here whether the action was declared by a Friendly character or an opponent. So for example an Event card that gives a bonus or malus on ST or RANGED is played after a successful hit determination but before the draw of the Fate card for the damage. If several players want to play an Event card simultaneously, the player whose character is currently acting has priority. The effect of an Event card applies in each case to one action, one hit determination or one damage determination, unless the card text describes a longer or different effect. Through Event cards attributes can sink briefly to zero or below. In this case a declared action must be performed, but is automatically unsuccessful. For example a character whose attribute A has already sunk to 1 through a Critical Hit has, after the playing of the Event card "Parrot Polly", an A of 0. If he has already declared an action Attack when Polly surprises him, he must "perform" this action and thus use it up, even if it is automatically unsuccessful. Events that bring a bonus or malus for a certain period should be clearly assigned to a character by laying the Event card on the character card. The card text has priority in cases of doubt. A player may at no time hold more than three Event cards in hand. As soon as he draws a fourth card, the player must immediately discard a card of his choice. The effect of the Event card discarded in this way is not applied. Played Event cards are laid on a separate stack. If all Event cards are used up, the further game is unfortunately eventless. The players may look through the stack of discarded Event cards.
13.2. Equipment Cards
Equipment cards are bought when hiring the crew for the number of Doubloons stated on them. Every equipment card must be clearly assigned to a character at the beginning of the game by simply laying it on or next to the character card. Up to three equipment cards can be assigned to a single character if the Equipment Card Usage Conditions(TM) permit it. A character can only receive and use an equipment card if all the conditions listed in the header line under the name of the equipment card are fulfilled.
Equipment Card Usage Conditions(TM):
- Large - A character can receive only one large equipment card at a time. This equipment is simply too large and cumbersome to carry several of them.
- Rare - The same copy of a rare equipment card may be present only once in a crew, and every character may be assigned at most one rare equipment card.
- Permanent - The equipment card grants the character the described traits or bonuses for the entire game, unless the equipment card becomes unusable early.
- Single use - The equipment card can be used only once per game. Afterwards it is unusable.
- Body zone - Some equipment cards are automatically assigned to a certain body zone of the character. If this body zone suffers a Critical Hit, the equipment card becomes unusable (see below).
- Weapon type - The equipment card can only be assigned to characters who carry a weapon of the stated weapon type. The card must be assigned to one of these weapons and may only be used in conjunction with it. So for example Sergeant Escopeta can mount the Telescope only on a Heavy black powder weapon, his arquebus.
- Not for / only for... - The equipment card can only be assigned to characters of a certain crew or of a certain rank. A character who already possesses a trait granted by an equipment card without the card (Agile, Tough, etc.) receives no additional bonus or multiple applicability of the trait through this card. Equipment cards may not be discarded during a running game, exchanged between characters in any way or assigned to another weapon, unless a character has corresponding traits or a scenario expressly permits it. An equipment card becomes if
13.3. Side Missions
Side missions can be used if all players involved agree. After hiring, but before setup, every player may secretly draw 4 mission cards from the stack. 3 of them must be played, one is discarded. If none of the mission cards pleases, all 4 can also be discarded and 3 new ones drawn. These must then be played. The missions are played openly, so that all players know which mission is assigned to a character and which mission the opponent has. At the end of the game a crew receives an extra 75 Ru(h)mpoints for every fulfilled mission.
15. Choosing a Crew
A crew consists of different characters. Before the start of the game they are hired with Doubloons according to the specifications of a crew list, a scenario or other rules. Every player decides for a crew from one of the crew lists. With the exception of Mercenaries, only characters from their crew list can be hired for a crew. For example no Coscritti of the Brotherhood may be hired for a crew of the Pirates. It is however quite possible that two players lead the same crew and thereby have the same Leader and even the same Specialists.
Hiring a crew Before the game the players put together their crews according to taste, the tasks in a scenario and the specifications described there. For this a pay is specified by a scenario. The players involved can also agree on a different pay as long as it applies to everyone. The pay is an amount of Doubloons with which the characters for the own crew are hired. For every character the corresponding Doubloons are then paid, until either all are spent or the crew is complete. The total number of Doubloons should be exceeded only by agreement with the fellow players. Therefore the use of equipment is a good opportunity to sensibly squander leftover Doubloons. If no equipment is used, but only then, an exceeding of the total pay of up to 5% should be accepted. Unused Doubloons lapse.
The crews and their strengths
- The Pirates have a lot of character, show few weaknesses and are universally usable.
- The Imperial Armada is famous for its discipline and firepower.
- The Goblins always have many characters in their ranks and some spectacular surprises ready.
- The Brotherhood has well-trained assassins who can run fast and deal out well in Close combat.
- The Amazons are at home in the jungle and very good with bow and arrow and other silent ranged weapons.
- The Cult has devoted itself to the Invocation of Loas and drums up large numbers of Following in danger.
- The Mercenaries of the OLHG can be hired singly by the crews or fielded as an independent crew of highly specialised individuals.
- The allies from Debonn are drilled for fighting in formations and can thus enormously increase their striking power.
Ranks Important when putting together a crew is that the characters are hired according to their ranks. So a crew can always have only one Leader, any number of Following and a number of Specialists and/or Mercenaries limited by the amount of selected Following.
- Every crew is commanded by an experienced Leader, and therefore always one Leader must be hired.
- The characters from the Following are the backbone of every crew. At least one character from the Following must be hired, but any number can be. One and the same character can be present several times in a crew.
- The Specialists are hardened veterans, seasoned warriors and leading officers. Every Specialist may be present only once in a crew.
- Mercenaries are experienced specialists who earn from the highest bidder. Every Mercenary may be present only once in a crew. The exact number of Specialists and Mercenaries is limited by the number of characters from the Following. It varies and is specified for every single crew.
Mercenaries Mercenaries can either be hired as further characters for a crew or they form, under the command of a Mercenary Captain, an independent crew. How many Mercenaries a crew can hire is noted in its description. Often Mercenaries also fight only for certain crews and for others not at all. This is noted on the character cards of the Mercenaries.
Scenarios In individual scenarios the pay and certain compositions of the crews can be specified. This then has priority over the rules described here and in the respective crew lists.
The individual crews and their composition In the following the individual crews are briefly introduced. Detailed stories and descriptions are to be found in the "Crew Book".
15.1. Amazons
The Amazons live in the dense and almost impenetrable jungle that covers most of Leonera. They consist of a loose association of tribes of natives, who however only too gladly take in women in need of help. Male beings are not welcome in the ranks of the Amazons; if needed they are simply abducted from the surrounding regions. On the battlefield the Amazons are dangerous especially in the wood and with their missile weapons, whereas in the open field their lack of robustness shows.
Hiring In a crew of the Amazons the following number of characters from the listed ranks can be hired:
- 1 Leader (female)
- 1 + characters from the Following
- 0 - 1 Specialist (female) for every one character from the Following
- 0 - 1 Mercenary (female). The Amazons may not hire male Mercenaries!
Special rules and traits: Jungle People After placing all terrain pieces, the Amazons can convert one of them into a wood. The selected terrain piece is replaced by one of about the same size.
15.2. Brotherhood
The Brotherhood, in whose ranks there are also many sisters, is an organisation of assassins that tries, by the targeted "removal" of key persons, to restore the old blood line of the succession to the throne. They hide in the underground of the city of Longfall and wait there for the right moment to strike. On the battlefield they are sneaky, nasty and mean, love cover, and in their special discipline of Close combat they are especially good when they have the first strike.
Hiring In a crew of the Brotherhood the following number of characters from the listed ranks can be hired:
- 1 Leader
- 1 + characters from the Following
- 0 - 2 Specialists for every one character from the Following
- 0 - 1 Mercenary.
Special rules and traits: Hidden The player of the Brotherhood may set up one terrain piece more than is permitted in a scenario.
15.3. Debonn
Debonn is a nation neighbouring the heartland of the Empire, whose main export seems to be political agitators. A large group of political prisoners has recently escaped from an imperial camp and is now mixing in vigorously in the fight for Longfall. On the battlefield Debonn lives from making individually rather weak characters more powerful through organisation in formations. In addition they have the first cavalry troop on the island of Leonera.
Hiring In a crew from Debonn the following number of characters from the listed ranks can be hired:
- 1 Leader
- 1 + characters from the Following
- 0 - 1 Specialist for every two characters from the Following
- 0 - 1 Mercenary.
15.4. Goblins
Goblins are a non-human race, many of whom until the great uprising were held as slaves for not too long a time. Many of them now live in the notorious Goblinopolis, a laboriously fought-for part of Longfall. They are of variable sex and only settle on one when it seems necessary to them. On the battlefield they are mostly in swarming superiority and carry, due to their manic inventiveness, a series of exotic, frequently explosive, sometimes erratic but always entertaining weapons and items of equipment.
Hiring In a crew of the Goblins the following number of characters from the listed ranks can be hired:
- 1 Leader
- 1 + characters from the Following
- 0 - 1 Specialist for every one character from the Following
- 0 - 2 Mercenaries.
15.5. Imperial Armada
The Imperial Armada tries desperately to hold together its slowly fraying empire and is about to go on the attack on Leonera. They embody trust in reason, science and law, but in practice also let the end justify the means. On the battlefield their firing lines armed with arquebuses are feared - the Empire is good at riddling the opponent with holes at long distance and at not running away even in adverse circumstances.
Hiring In a crew of the Imperial Armada the following number of characters from the listed ranks can be hired:
- 1 Leader
- 1 + characters from the Following
- 0 - 1 Specialist for every one character from the Following
- 0 - 2 Mercenaries.
Special rules and traits: Chain of Command A Lieutenant or Sergeant of the Imperial Armada can also give Orders when the Leader is still on the playing area. In doing so he may not himself be within the Authority of a higher-ranking officer and he may issue an Order to no higher-ranking officer. So for example a Lieutenant can issue an Order to a Sergeant, Specialists and Following, but not to the Leader. The chain of command begins with the highest-ranking, the Leader, goes on via Lieutenant to Sergeant and ends with the "ordinary" Specialists and Following. A lower-ranking character can in addition use the Morale of a higher-ranking officer. If he is for this within the Authority of two officers, he can decide which he uses. As before, a character can receive only one Order and give only one Order.
15.6. Cult
The actually persecuted Cult has suddenly shot out of the ground on Leonera in a time of imperial weakness like weeds in the fields. Its ability to fall back on the inhabitants of the spirit world makes it a hard-to-assess opponent. On the battlefield the Cult tends to keep the opponent busy with numerous and hard-to-clear Following, while its thus protected Mystics wear down the opposing characters with their Loas.
Hiring In a crew of the Cult the following number of characters from the listed ranks can be hired:
- 1 Leader
- 1 + characters from the Following
- 0 - 1 Specialist for every two characters from the Following
- 0 - 1 Mercenary.
15.7. Pirates
Pirates are freedom-loving men and women who have had enough of imperial harassment and have created their own niche. That only those thrive here who can rob gold from others and keep it themselves is really also only capitalism - just without a state. On the battlefield the Pirates are hard in taking and dealing out. They can inflict damage on the opponent both at a distance and from close up, and shrug off one or the other hit.
Hiring In a crew of the Pirates the following number of characters from the listed ranks can be hired:
- 1 Leader
- 1 + characters from the Following
- 0 - 1 Specialist for every one character from the Following
- 0 - 2 Mercenaries
15.8. Mercenaries of the OLHG
Wherever gold is in play, sooner or later someone is found who has a talent for getting a lot more gold from others than his service is actually worth. A group of such people founded the East Leonera Trading Company (OLHG) a few years ago, which in the meantime has its fingers and its gold in everything that merely smells profitable - morals absolutely negotiable. On the battlefield the OLHG commands a series of Mercenaries who are very good at their trade, profit-oriented, but because of their steep pay often fight outnumbered.
Hiring In a crew of Mercenaries the following number of characters from the listed ranks can be hired:
- 1 Mercenary Captain as Leader
- 1 + Mercenaries
- 0 - 1 character from the Following for every 2 Mercenaries*
Special rules and traits: Mercenaries can be set up as an independent crew only if they are commanded by a Mercenary Captain. * Characters from the Following of other crews can only be hired if the Mercenary Captain has the trait Reinforcement.
16. Scenarios
Choosing a scenario Every game of Freebooter's Fate begins with the selection of a scenario. This can be done by mutual agreement or at random, for example by assigning a Fate card to each scenario in question and drawing one of them face down. For the beginning we recommend playing the scenario "The Feud". This is a simple scenario with the aim of sweeping the opponent off the playing area and having fun in doing so. The scenarios are laid out for playing areas with an edge length of about 90 x 90 cm. This size is ideal for an exciting game that does not last too long.
Structure of a scenario All scenarios are structured about the same, with small deviations. After a short introduction follow the description of the aim, the selection of the crews, the setup of the playing area and the deployment, special rules, the game duration and the victory conditions.
- Introduction. A short, atmospheric story that leads into the scenario and sometimes also contains valuable tips.
- Game description. Which aims are to be achieved in this scenario and how does it proceed? Who is the Attacker and who is the Defender?
- Selection of the crews. Here all conditions for hiring the crews are listed. How large may a crew be? Is it hired according to the "normal" rules or do only certain characters take part in this scenario? If nothing else is stated, a crew is always hired according to its rules.
- Setup of the playing area. A detailed sketch with the description of how the playing area is set up.
- Deployment of the crews. How, where and in which order are the characters set up on the playing area?
- Special rules. Here all additional or deviating rules that play a role in this scenario are listed.
- Game duration. As a rule a game lasts 8 rounds, but fulfilled victory conditions can also end it earlier.
- Victory conditions. Under which circumstances does a crew win the scenario?
Some of these descriptions need a somewhat more exact explanation:
Setup of the playing area As the base surface for the playing area, unless something else is stated, an open surface is always used. This can be a meadow, a field, a sandy beach or the like. It has the terrain property Open as described in Chapter 7.4. Terrain Properties on page 19. On it the different terrain pieces are then placed. If a scenario is played, the kind, size and order of the placement of the terrain should agree with the description there.
Placing terrain pieces In a scenario a certain number of terrain pieces is provided for the setup. If a scenario for example specifies 6 - 10 terrain pieces, then with 2 players each can place 3 - 5 terrain pieces. With 4 players each player can place 1 - 2 terrain pieces and the two terrain pieces left over are placed by mutual agreement or left out. At any time two Gedöns (obstacles) can be set up instead of one terrain piece. Terrain pieces should be about 5 - 10 cm apart from each other after placing. The terrain pieces can be placed alternately and according to the specifications of the scenario on the playing area. Every player decides alone how many and which of the available terrain pieces he wants to use. So the setup can also be passed. As with many other decisions, it can be determined by mutual agreement or with the help of the Initiative who may begin with the placing of the terrain pieces.
Deployment of the crews In the deployment of the crews, unless this is specified by a scenario or otherwise, the figures are placed alternately in the respective deployment zones. The crew with the Initiative first sets up one figure in its deployment zone defined by the scenario, then the opposing crew sets up one figure in its defined deployment zone. Alternately both players now set up their crews until every figure needed for the scenario has a place on the playing area.
Game duration The game as a rule ends
- as soon as the victory conditions of a scenario are fulfilled,
- after 8 rounds,
- if a crew has left the playing area,
- if a crew is completely wiped out or a crew gives up. This is the usual game duration. Of course it can also be played longer or shorter, entirely according to the time available.
Victory conditions The victory conditions vary from scenario to scenario. As a rule however the crew wins the game that
- has fulfilled the victory conditions first,
- has collected the most Ru(h)mpoints after the game duration has run out, or
- is the last one still on the playing area when all others are completely wiped out or have given up. A crew counts as wiped out if all its characters have been taken out of the game. Boats that were left behind unmanned on the playing area do not count. A crew can give up at any time and thereby end the game.
Ru(h)mpoints Ru(h)mpoints are our measure of experience, wealth and fame that a crew can collect in a game or a campaign. At the end of a game the characters receive Ru(h)mpoints for
- every opponent who has been taken out of action,
- every opponent who is in Panic at the end of the last round, and
- fulfilled tasks of a scenario. One Ru(h)mpoint corresponds to one Doubloon that was paid as hire for the character and his equipment. Loas, boats with their boat equipment and possibly found scenario objects also count here. If in a scenario Ru(h)mpoints are awarded for characters put out of action, the crews also receive Ru(h)mpoints for sunk or captured boats on the basis of the following rules:
- A crew receives for every opposing boat that it has sunk by an Attack or a directly acting action (e.g. boring a hole) Ru(h)mpoints in the amount of the hire of the boat including the boat equipment.
- A crew receives at the end of the game for every captured opposing boat, i.e. on which at the end of the game it is the dominant crew, Ru(h)mpoints in the amount of the total hire of the boat including the boat equipment.
- Crews receive no Ru(h)mpoints for the sinking or (re-)capturing of their own boats.
- If a captured boat at the end of the game is Seriously Damaged (all white boxes of the structure point bar crossed off) or if opponents not in Panic or On the Ground are still on board, the boat counts for only half of its hire total including boat equipment in Ru(h)mpoints. The designation "own" or "opposing" boat always refers to the crew that hired the boat at the beginning of the game. Empty boats that ran aground on their own or were not sunk by a direct enemy action give no Ru(h)mpoints. Example: A Yola of the Pirates that is damaged by the Imperial Armada in round 1 and thereafter takes no further damage, sinks in round 6 due to the penetrating water. The Imperial Armada receives the full Ru(h)mpoints. If the Yola rams a reef before its sinking and takes further damage, the Imperial Armada receives no Ru(h)mpoints for the Yola if it finally sinks.
16.1. Scenario Objects
In some scenarios special objects can be looted. These scenario objects are partly needed for victory, support the characters in doing so, or are useful in some other way. Insofar as a rule in a scenario does not expressly state something different, the following applies to all scenario objects:
- They can be picked up with a Simple action Use Object. If a character may not perform this action because he is e.g. an animal or is in a Close combat, then he may also carry no scenario objects.
- A character can carry any number of Light scenario objects. They do not hinder his movement. With a Simple action Use Object any number of them can be handed over to a character in base contact.
- A character can carry up to 2 Medium-heavy scenario objects, but each of them reduces the BEW by -1. With a Simple action Use Object only one scenario object can be handed over to a character in base contact.
- A character can at any point during his activation put down any number of large scenario objects. This is not an action.
- A character must drop all scenario objects as soon as he falls into Panic, before he performs the Flight movement, or if he is taken Out of Action.
- Put down or dropped scenario objects are placed at the spot in base contact with the character at which the event occurs. If this is not possible, they are placed as near as possible. The character determines the exact position.
- Scenario objects on the playing area neither block a line of sight nor hinder movement over them.
- If a scenario has an area to which scenario objects must be brought, they count as secured as soon as they are put down or dropped there. Secured scenario objects may be removed from this area any more.
Objects Besides the scenario objects, permanently installed objects can also occur in a scenario. These are items with which the characters can interact, but cannot carry. These include for example individual closed doors and windows, flags, barrels, chests and furniture. In which way a character can use an object is described either in a scenario or in a rule. For example closed doors can be "opened" with a Simple action Attack.
16.2. Additional Scenario Rules
External conditions such as weather and times of day have a great influence on the course of the game and can completely change well-known scenarios. For example fights at dusk take place in considerably worse visibility. The kind of change of a scenario and how many of the changes are used should always be determined by mutual agreement and is optional. The possible changes can simply be picked out or fate must decide. For this every single entry has a number that corresponds to the result of a draw of a Fate card. If a change makes no sense - e.g. if the boats of the crews suddenly lie on a large plain - it can be determined again.
Environment In most scenarios the playing area is treated by default as open terrain. There is nothing against playing a scenario in a dense jungle for once. Or? On the entire playing area the terrain type specified by the scenario is replaced by the following: 1 - 2: Jungle Properties for characters: Difficult terrain and Limited Sight (10) Property for boats: Impassable 3 - 4: Moor Properties for characters: Difficult terrain, Treacherous Property for boats: Impassable 5 - 6: Open plain Property for characters: Open Property for boats: Impassable 7 - 8: Water Properties for characters: Difficult terrain, Deep, Treacherous Property for boats: Open 9 - 10: Fog Property for characters and boats: Limited Sight (10)
Times of day Different times of day are a very simple possibility to modify a scenario. They demand however good and balanced crews. Times of day can also very well be determined anew at the beginning of every round. This results in an extremely varied game! 1 - 3 Night On the entire playing area Limited Sight (20 cm) applies. 4 - 7 Day All is well, the sun shines, the sight is not influenced by brightness. 8 - 10 Dusk On the entire playing area Limited Sight (40 cm) applies.
Weather The weather too can change from hour to hour. It can therefore also be determined anew at the beginning of every round. These are the weather conditions that frequently occur on Leonera: 1 Monsoon It is pouring buckets! The Range of all ranged weapons, except black powder and underwater weapons, is halved. For a black powder weapon a Fate card is drawn when reloading. If it shows the symbol Pistol, the powder has become damp and the weapon cannot be reloaded with this action. The action Reload is wasted. The weapon can however be reloaded again - as if a shot had been fired. Underwater weapons can be used as usual. 2 Refreshing drizzle Every crew receives at the beginning of every round one additional Simple action that it can assign to a Friendly character of its choice. The character can however receive no Order, as this counts as an Order. The action lapses at the end of the current round if it was not used. 3 - 4 Windy All ranged weapons receive a malus of -1 / -1 on their RANGED value. 5 - 6 Clear conditions The scenario can be played without restrictions through the weather. 7 Cold snap 28 degrees is REALLY cold on Leonera. All characters suffer a malus of W 0 / -1 due to the constant shivering and trembling with cold. characters on the playing area suffer through the sultry weather a malus of , unless they are in the water. Water refreshes the soul, as is well known! This unbearable heat makes the hardest muscles turn to pudding. characters receive a malus of on their . Instead of drawing an Event card, a character may let a lightning bolt strike at a point of his choice. For this he picks a point on the playing area where the lightning is to strike. The lightning is treated like a Steep Fire weapon, but has only an of for the hit determination. , EX 6/3, Steep Fire weapon, 3 cm radius, Burning (3). You surely do not expect any rules here?! As if it snowed on Leonera. Arrrr!
16.4. Scenarios for Beginners
The first scenarios are especially suited to beginners. Further ones are introduced in the Crew Book, on our website and in the coming expansions. Almost all scenarios from the volumes of the 1st edition can still be played with a few adjustments to the playing area size.
16.5. The Feud
"Tell me, Piedro, why did we actually have that disagreement with the Pirates of old Rosso last Miercoles?" "I believe it was at the wedding of Sabrina Garbaldos. Pedro said something unseemly about the cousin of the wife of Jose." "Really? I thought it was you." "No, no. It was the run-down pirate. Came without an invitation. Just invited himself!" "Now that you say it, didn't he say something about the ears? ... Uninvited, you say?" "It had to do with ears. Exactly!" "Such a rascal! Come! Let's ask him!"
Game description This is an open confrontation between two or more crews.
Selection of the crews This scenario can be played with any pay for each crew. Up to four crews can take part in this scenario.
Setup of the playing area The players have 4 - 10 terrain pieces at their disposal, which can be placed freely on the playing area. The player who wins the Initiative may pick a deployment zone. The opponent begins from the opposite side. With more than two players the players pick a deployment zone in the order of their Initiative. (Deployment diagrams: for two crews, a 20 cm deep strip along each of two opposite edges, Crew A and Crew B; for four crews, a triangular corner zone A, B, C, D with 30 cm edges.)
Deployment of the crews The player who has won the Initiative must place a character in his deployment zone, then his opponent, and following always alternately until both players have placed their crews completely. With more than two players the players place their characters in the order of their Initiative.
Special rules No Shirkers This is an open fight in which the honour of the crews is at stake. There is therefore no room in it for shirkers. Every character who is in his own deployment zone after the game duration has run out counts as "in Panic" and brings his opponent the full number of Ru(h)mpoints, as he was obviously too cowardly to take an appropriate part in the melee.
Game duration The game ends
- after 8 rounds or
- when all but one crew have been completely wiped out or have given up.
Victory conditions The game is won by the crew that has collected the most Ru(h)mpoints after the game duration has run out. If a crew is completely wiped out before the game duration has run out or gives up the game early, the last crew remaining on the playing area automatically wins.