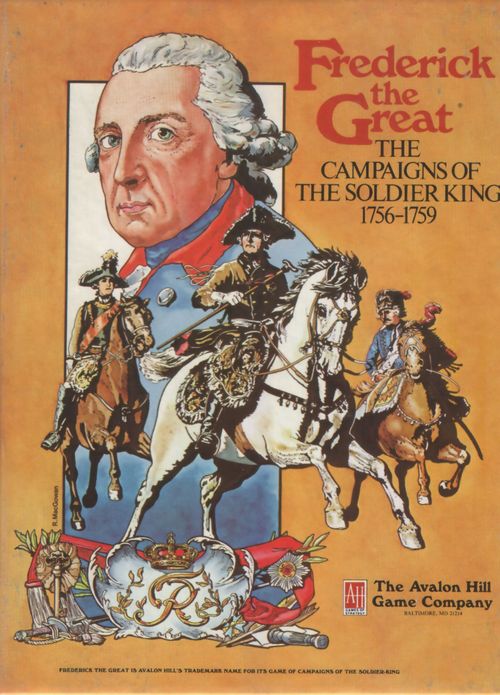
Frederick the Great: The Campaigns of The Soldier King 1756-1759
Frederick the Great Rulebook
Table of Contents
Table of Contents
- 1.0 Introduction
- 2.0 General Course of Play
- 3.0 Game Equipment
- 4.0 Sequence of Play
- 5.0 Movement
- 6.0 Zones of Control
- 7.0 Stacking
- 8.0 Leaders
- 9.0 Combat
- 10.0 Supply
- 11.0 Morale
- 12.0 Fortresses and Garrisons
- 13.0 Siege
- 14.0 Prisoners of War
- 15.0 Reinforcements
- 16.0 Winter
- 17.0 Victory Conditions
- 18.0 Scenarios
1.0 Introduction
Step into a period of history when warfare was an elaborate and deadly game of chess; when all of Europe was swept into the politico-military struggle that became known as the Seven Years War; when warfare itself was dominated by perhaps the greatest soldier in history: the "Soldier-King", King Frederick II ("The Great") of Prussia. In this operational simulation, recreate the rigid yearly campaigns that were waged across the length and breadth of Europe from 1757 through 1763. Step into Frederick's shoes and try to comprehend the military situation facing you, and your possible strategic alternatives. Or, on the other hand, put yourself in the place of Frederick's enemies and see if you can come to grips with the strategic brilliance of history's greatest military leader.
2.0 General Course of Play
Frederick the Great is basically a two-Player game in which one of the Players controls the Prussian (and allied) forces, while his opponent controls the forces of the anti-Prussian coalition (as outlined by the particular scenario being played). The game is played in sequenced segments called "Game-Turns." Each Game-Turn is composed of two Player-Turns. Each Player uses his Player-Turn to maneuver his forces and participate in combat for the purpose of reducing the Enemy's overall strength and/or to gain or secure various geographical objectives.
Combat may occur between opposing units occupying the same hex during a Combat Phase. Combat is resolved by comparing the total Combat Strength Points of the attacking force to the total Combat Strength Points of the defending force.
3.0 Game Equipment
3.1 The Game Map
The 21" x 32" mapsheet depicting the central European theater of war is the playing area on which the unit counters are maneuvered. A hexagonal grid is superimposed on the mapsheet to regularize the movement and positioning of the playing pieces and to delineate the various political boundaries and terrain features as required by the game rules.
3.2 The Playing Pieces
Differently colored sets of playing pieces (hence-forth known as "units") are supplied. These units represent the military forces of the belligerent countries. The units are distinguished by the numbers and symbols printed on their faces.
IMPORTANT: Combat units represent nothing more than a collection of Strength Points of a certain nationality. Like money they are completely interchangeable so long as their nationality and total value remains the same. Two Prussian units each worth four Strength Points may be exchanged for one Prussian unit worth eight Strength Points or four Prussian units each worth two Strength Points. All three collections of units represent a Prussian force of eight Strength Points and are equal in every way. Players may alter the composition of units on a given hex at any time as long as the Strength Point total of each national force remains constant. See the Stacking Rules for further details.
(The countermix provides: a Depot counter; a Combat Unit counter showing Nationality and Combat Strength; a Leader counter showing Rank, Initiative Value, Attack Bonus, and Defense Bonus; and Demoralized and Fortified Camp markers.)
3.22 Definition of Basic Terms
Combat Strength is the basic offensive and defensive power of a unit quantified in Combat Strength Points.
Leader Rank defines a given Leader's status within the military hierarchy of his nation.
Initiative Value represents a given Leader's audacity and decisiveness in comparison with other Leaders in the game.
Attack Bonus represents a Leader's capacity to augment the offensive power of troops under his command.
Defense Bonus represents a Leader's capacity to augment the defensive power of troops under his command.
3.3 Game Charts and Tables
The game makes use of various charts and tables as part of its play system and also to organize data into an easily retrievable form. The use of these graphic aids is explained in the appropriate rules sections. Players should examine charts and tables on the mapsheet and in the rules before reading further.
3.4 Game Equipment Inventory
- One map
- One Rules Folder
- One Countersheet
- One six-sided die
4.0 Sequence of Play
4.1 The Game-Turn
Frederick the Great is played in sequenced turns called Game-Turns. Each Game-Turn consists of two Player-Turns. Each Player-Turn consists of eight Phases. The Player whose Player-Turn is in progress is called the Phasing Player. All action must take place in sequence as outlined below. Any action taken out of sequence is a violation of the rules.
4.2 Sequence Outline
NOTE: The Prussian-Allied Player-Turn occurs first in all Scenarios. Also note that in either Player-Turn, the non-Phasing Player is active in certain Phases (Force March and Attrition).
A. PRUSSIAN-ALLIED PLAYER-TURN
- Reinforcement Phase. The Phasing Player determines what reinforcements (if any) are due and places these on the map as outlined by the Reinforcement Rules.
- Morale Recovery Phase. The Phasing Player rolls the die once for each demoralized Friendly force. Demoralized Markers are removed from Friendly forces as outlined in the Morale Rules.
- Depot Creation Phase. The Phasing Player places all depot units currently on top of Friendly forces on the bottom of such Friendly stacks. He may begin creating new depots as outlined in the Supply Rules.
- Prussian-Allied March Phase. The Phasing Player rolls the die once and the resulting number is added to each Friendly Leader unit's Initiative Value. The sum of this addition indicates how many Movement Points each of the Phasing Player's Leader units may expend during the current March Phase. Leaders and the forces they command are moved according to the restrictions of the Movement Rules.
- Anti-Prussian Coalition Force March Phase. The non-Phasing Player may (at his option) force march any or all of his eligible forces according to the procedure and restrictions of the Force March rules.
- Combat Phase. If no hex is occupied by opposing forces, this Phase is skipped. In each hex occupied by opposing forces there is the potential for combat. If either Player elects to attack, combat is resolved according to the Combat Rules. The option to attack is granted as outlined in the Combat Rules. If neither Player exercises his attack option, there is no combat.
- Siege Resolution Phase. The Phasing Player resolves sieges of Enemy occupied fortresses according to the Siege Rules.
- Anti-Prussian Coalition Attrition Phase. The non-Phasing Player eliminates Strength Points from his forces in accordance with the Supply Attrition and Winter Attrition Rules.
B. ANTI-PRUSSIAN COALITION PLAYER-TURN
- Reinforcement Phase
- Morale Recovery Phase
- Depot Creation Phase
- Anti-Prussian Coalition March Phase
- Prussian-Allied Force March Phase
- Combat Phase
- Siege Resolution Phase
- Prussian-Allied Attrition Phase
C. PRISONER EXCHANGE PHASE
During this Phase, on even numbered Game Turns (only), Players exchange prisoners as outlined in the Prisoners of War Rules.
D. GAME-TURN INDICATION PHASE
The Prussian-Allied Player advances the Game Turn Marker one space on the Turn Record Track, signaling the start of a new Game-Turn.
5.0 Movement
GENERAL RULE:
There are three basic types of units in the game (combat units, depot units and Leader units - henceforth referred to as "Leaders"). There are no Movement Allowances printed on the unit counters. Depot units may never be moved. A Player may never examine the contents of an Enemy force until he becomes committed to combat. Combat units can only be moved by an accompanying Leader of the same nationality: (exception: see 9.53, 9.57 and 11.16). In effect, a Leader is used to "pick up" and "transport" the otherwise immobile combat units. In the same manner, a Leader may be used to move other lower ranked Leaders of the same nationality. All Leaders, however, possess the ability to move independently whereas combat units cannot.
PROCEDURE:
Frederick the Great employs a unique double, Movement Phase system. During the March Phase of his Player-Turn, the Phasing Player may move as many or as few of his Leaders (and any combat units they "pick up") as he desires. Each Leader of a given nationality is moved in strict sequence of rank, beginning with the Leader possessing the lowest Rank Number (the highest ranked Leader). Each Leader may be moved as many or as few hexes as the Player desires so long as the Leader's Movement Allowance is not exceeded in a single Movement Phase.
Leaders may be moved individually, or in company with other Leaders and/or combat units. Any aggregation of combat units and Leaders moved together as one stack is considered a "force." Once a force has been moved and the Player's hand withdrawn, that force may not be moved again during the same Movement Phase. Forces must be moved one at a time. Unused Movement Points may never be accumulated from Phase to Phase nor transferred from unit to unit.
5.1 March Phase Movement
GENERAL RULE:
During the March Phase of his Player-Turn, the Phasing Player rolls the die once. The Movement Allowance of each of his Leaders for that Phase is equal to the sum of the die roll and the Initiative Value of the particular Leader the Player desires to move. Regardless of this sum, however, a Leader's Movement Allowance is limited to a maximum of six Movement Points.
Example: During the Prussian-Allied March Phase, the Prussian Player rolls a "four." Prussian Leader #1 (Frederick) thus has a Movement Allowance of six Movement Points (despite the fact that the sum of the die roll and Frederick's Initiative Value of "three" gives a total of "seven.")
5.2 Force March Phase Movement
During the Force March Phase of the Enemy Player-Turn, the non-Phasing Player is permitted to move his units according to the following procedure. The non-Phasing Player rolls the die once for each force he wishes to move. The Movement Allowance allotted to that force is equal to the sum of that die roll plus the Initiative Value of the Leader in command of the force (see 8.2). Regardless of this sum, however, the maximum Movement Allowance allotted to the force is six Movement Points. Regardless of how far the Player moves the force, if the sum of the die roll plus the Initiative Value of the Leader in command of the force is six or higher, one Strength Point of that force is immediately eliminated.
5.3 How to Move Units
[March and Force March Phase]
[5.31] During the March Phase only the Phasing Player's units may be moved. During the Force March Phase only the non-Phasing Player's units may be moved. Except for Overwhelming Attacks (see 5.5), no combat is permitted during either Movement Phase.
[5.32] Movement is calculated in terms of Movement Points. Leaders expend Movement Points from their Movement Allowance when moving through the hexagonal grid. The cost (in Movement Points) to move varies with the terrain entered and traversed and the presence of Enemy units. All effects of terrain and the presence of Enemy units on Movement are detailed on the Terrain Effects Chart (5.6).
[5.33] During his Movement Phase, the Player may move the different national forces he controls in any order he desires. Once he begins moving units of one nationality, he must finish that nationality's movement before moving units of another nationality (exception: see 9.57 and 11.16).
[5.34] The Leaders of a given nationality must be moved in strict sequence of rank, beginning with the Leader possessing the lowest Rank Number. Once the Player bypasses a Leader and proceeds to move another Leader of the same nationality, he may not subsequently move the bypassed Leader during that same Movement Phase.
[5.35] A Leader may "pick up" and/or detach any eligible units of the same nationality at any point (i.e., in any hex) during his movement (including the hex the Leader occupies at the start of his movement). Units thus picked up are considered "under the command" of the Leader unit. There is no additional Movement Point cost for a Leader to do either of these operations.
[5.36] No force may move more than six Movement Points in a single Movement Phase and no unit may be moved more than once in a single Movement Phase. Thus, a Leader "picked up" by another Leader loses his ability to move independently during that Movement Phase, and a combat unit moved by one Leader may not subsequently be moved by another Leader in the same Movement Phase. In either Friendly Movement Phase, a Leader may be moved as many or as few as the owning Player desires as long as the Leader's Movement Allowance is not exceeded.
[5.37] During the entire game, the Leader possessing the lowest Rank Number within each nationality is considered to be the supreme commander of that nation's forces. Detachments (or force reorganizations) by Leaders of a given nationality may not be made in a manner which causes any single subordinate commander to be in command of more of his nation's strength than are under the command of the supreme commander of that nation. (Exception: The Prussian Army is entirely exempt from this restriction.)
NOTE: This rule is meant to restrict the Player from utilizing Leaders in a manner entirely alien to the prevailing military doctrine. As such, it is the spirit rather than the letter of the rule which should be enforced. The rule is meant to restrict the Player primarily during his Friendly Movement Phases. If losses sustained due to attrition or combat cause the supreme commander of a nationality to be in command of less strength than one of his subordinates, the Player is not obliged to reinforce him.
[5.38] Depot units may never be moved.
[5.39] Terrain, Morale, Supply and Winter (weather) also affect Movement. These additional effects are summarized on the Terrain Effects Chart and are fully detailed in other rules sections.
5.4 Movement Inhibitions and Prohibitions
[March and Force March Phases]
[5.41] A force may never enter a hex unless it has sufficient Movement Points to expend to pay the full entry cost dictated by the terrain and the presence of Enemy units (if any) in the hex the unit is attempting to enter. Terrain effects on Movement Point costs are cumulative (i.e., it costs a total of three Movement Points to enter an Enemy occupied hex when moving across a river hexside). See the Terrain Effects Chart (5.6).
[5.42] A force may freely enter and/or move through hexes containing other Friendly units. A force does not expend any additional Movement Points to enter or leave Friendly occupied hexes.
[5.43] A force may enter an Enemy occupied hex at a cost of one additional Movement Point. There is no additional Movement Point cost to leave an Enemy occupied hex. Opposing forces may occupy the same hex at the end of any Movement Phase.
[5.44] A force may never be moved off the mapsheet.
[5.45] A force may never move across an all-sea hexside, a lake hexside, or a Mountain hexside which is not intersected by a Mountain Pass. A force may only move across a Mountain hexside between the two hexes connected by the Mountain Pass (see the Terrain Effects Chart).
5.5 Overwhelming Attack
GENERAL RULE:
An Overwhelming Attack is a special type of combat which is permitted during any Movement Phase.
PROCEDURE:
During any Movement Phase, at the instant a Player moves a Friendly force into an Enemy occupied hex, he may choose to attempt an Overwhelming Attack against the Enemy force in that hex at his option. If he so chooses, the Player controlling the moving force must announce the total Combat Strength of the force he moved into the hex. The Enemy Player then determines the total Combat Strength of his (stationary) force. If the moving force is at least 400% as strong as the stationary force, he informs his opponent that the Overwhelming Attack is successful. In such a case, the entire stationary force (all Leaders, depots, and combat units) is considered captured (see 14.0) and the moving force may continue its movement. If the moving force is less than 400% as strong as the stationary force, the Player controlling the stationary force simply informs his opponent that no Overwhelming Attack has been made.
[5.51] Attempting an Overwhelming Attack is always optional. A Player is never forced to attempt an Overwhelming Attack when he moves a Friendly force into an Enemy occupied hex. The Player who attempts an Overwhelming Attack is not permitted to examine the Enemy force in the hex before he decides whether to attack, or at any subsequent time. The Player controlling the stationary force need not reveal the strength of the stationary force if the moving force is less than 400% as strong as it.
[5.52] Terrain and leadership effects on combat are not taken into account in determining the outcome of an Overwhelming Attack.
[5.53] If a Player attempts an Overwhelming Attack unsuccessfully, he has two options concerning the force he is moving:
A. He may continue the movement of that force (exception: see 5.54). Note: A force is never forced to end its movement merely due to its entering an Enemy occupied hex. Therefore, regardless of whether or not an Overwhelming Attack is successful, unsuccessful, or not even attempted, a force may always continue its movement up to the limit of its Movement Allowance.
B. He may leave the force in the Enemy occupied hex. (This option would be chosen if the Player wished to attack the Enemy force in that hex in regular combat during a subsequent Combat Phase.)
[5.54] A force which enters an Enemy occupied hex by crossing a Mountain Pass hexside may not leave that hex in the same Movement Phase unless it makes a successful Overwhelming Attack. If the Player chooses to do so and is unsuccessful, the force which moved into the hex cannot decline to attack in the first subsequent Combat Phase, if there are still Enemy units in that hex at that time (see 9.0).
[5.55] There is no additional Movement Point cost per se involved in attempting an Overwhelming Attack. A unit must, however, always expend an additional Movement Point to enter an Enemy occupied hex.
[5.56] Attempting an Overwhelming Attack (whether successful or not) has no effect on a force's ability to participate in combat in a regular Combat Phase.
[5.57] Supply has no effect on an Overwhelming Attack.
[5.58] Each distinct force which a Player moves into an Enemy occupied hex allows the Player to attempt an Overwhelming Attack against the Enemy force in the hex. Thus, a force may be subjected to more than one Overwhelming Attack attempt during a single Enemy Movement Phase. The Player's option to attempt an Overwhelming Attack, however, must be executed at the instant he moves a particular force into an Enemy occupied hex. A given force may, therefore, participate in only one Overwhelming Attack attempt in each hex it enters during a single Movement Phase.
5.6 Terrain Effects Chart
(See the mapsheet.)
6.0 Zones of Control
GENERAL RULE:
Austrian combat units are the only units which exert a Zone of Control. The six hexes immediately surrounding a hex occupied by one or more Austrian combat units constitute the Zone of Control of those Austrian combat units.
6.1 Zone of Control Effects
[6.11] A Zone of Control has no effect on movement, combat, or retreats.
[6.11] A Prussian-Allied supply path may be traced into but not out of a hex which is part of an Austrian combat unit's Zone of Control.
6.2 Terrain Effects on Zones of Control
[6.21] Zones of Control always extend into all hexes except all-sea hexes and through all hexsides except all-sea hexsides, lake hexsides, and all-Mountain hexsides (Mountain hexsides which are not intersected by a Mountain Pass).
6.3 Negation of Zones of Control
[6.31] Zones of Control do not extend into Enemy occupied hexes. Friendly units do negate Enemy Zones of Control.
[6.32] Zones of Control do not extend out of Enemy occupied hexes. An Austrian combat unit in an Enemy occupied hex forfeits its Zone of Control.
[6.33] An Austrian combat unit inside a fortress forfeits its Zone of Control.
7.0 Stacking
GENERAL RULE:
A maximum of one depot unit may occupy a given hex. In addition, an unlimited number of Leader and combat units (of all nationalities) may occupy a single hex at any time during the game.
7.1 Effect on Movement
[7.11] There is no additional Movement Point cost to stack or unstack Friendly units. All units controlled by a single Player are considered Friendly units to each other regardless of their different nationalities.
[7.12] A Leader must expend an additional Movement Point to enter any Enemy occupied hex (even if Friendly units also occupy the hex).
7.2 Effect on Combat
[7.21] All units stacked in a hex must participate in any type of combat that occurs in that hex (Exception: see 12.33).
7.3 Stacking Position and Unit Types
[7.31] Friendly units of different nationalities may stack together freely.
[7.32] Units are always stacked in a hex according to type. The stacking order from top to bottom is as follows: Leader units (stacked in strict sequence of rank), combat units, depot unit (exception: see 10.41 and 9.55). When opposing units occupy the same hex, each Player maintains his own units in the proper stacking order. When Friendly units of different nationalities are stacked in a hex, the stacking order should be preserved separately for each nationality.
[7.33] The Player may change the composition of his stacks (as explained in Case 3.2) at any time he desires. Combat units may be replaced with other combat units of the same nationality as long as the Strength Point total remains constant.
NOTE: There is a limit to the number and denominations of combat units provided with the game. This counter mix is the product of the game development and merely represents the optimum assortment of combat units in various denominations and nationalities. If the need arises for combat unit denominations in excess of those provided with the game, the Players may "coin" their own.
8.0 Leaders
GENERAL RULE:
Each national army includes one or more Leader units numbered according to rank. Leader units have a variety of effects upon game play. Leadership effects on Movement, Combat, Sieges and Supply are explained in the appropriate rules sections. Other Leadership effects are detailed in the following Cases.
8.1 Rank of Leaders
[8.11] The Rank Number of a given Leader defines that Leader's status within the military hierarchy of his nation. The Leader possessing the lowest Rank Number is the highest ranked Leader of a given nationality.
[8.12] At any time during the game, the Leader possessing the lowest Rank Number who is presently on the map is considered the supreme commander of his nation's military forces.
8.2 Command
[8.21] For each national force within a given hex, the Leader of that nationality with the lowest Rank Number is the commander of that force. This Leader will always be stacked on top of all other units of his nationality within the hex he occupies.
[8.22] For movement purposes, Leaders may only move other units of the same nationality. A unit may never be moved by a Leader of a different nationality (exception: see 9.57).
[8.23] For combat purposes, only one Leader is considered the commander of all Friendly units occupying a given hex. If a stack of units is composed solely of units of the same nationality, the highest ranked Leader of that nationality (in that hex) is the commander for combat purposes. For combat purposes, when Friendly units of different nationalities occupy a hex, the commander is the highest ranked Leader of the predominant nationality (the nationality with the greatest number of Strength Points) within that hex. If the Strength Point total of the different Friendly nationalities within a hex is equal, the commander of that hex is the highest ranked Leader in that hex. If the Strength Point totals and Leader Rank Numbers are equal, the owning Player may nominate the Leader of his choice as commander, providing no Leader in the hex has a lower Rank Number than the chosen commander.
8.3 Capture of Leaders
[8.31] Leader units alone in a hex (and not inside a fortress) are automatically captured at the instant an Enemy combat unit enters the hex. Captured Leaders are treated as Prisoners of War (see 14.0).
9.0 Combat
COMMENTARY:
Frederick the Great employs a unique joint Combat Phase system. Combat may occur between opposing forces which occupy the same hex during any Combat Phase at the Player's discretion.
GENERAL RULE:
During each Combat Phase, the Player whose Player-Turn is in progress chooses the sequence in which all potential combats are resolved. Combat occurs between opposing forces which occupy the same hex during a Combat Phase at the discretion of either Player. The Player who elects to attack is the Attacker and his opponent is the Defender, regardless of their overall strategic position.
PROCEDURE:
A Player's option to attack is completely voluntary. If neither Player elects to attack, opposing forces may freely coexist in the same hex throughout the Combat Phase. The first option to attack is granted to the Player whose commander has the highest Initiative Value. If that Player declines to attack, the option is immediately granted to his opponent who may also decline it. If both Players' commanders have the same Initiative Value, each Player rolls the die. The Player with the higher die roll is then granted the first option to attack. The entire procedure just described is used to grant the first option to attack for each and every hex jointly occupied by opposing units during the Combat Phase.
A Player may never examine the contents of an Enemy force until he becomes committed to combat in a given hex as a result of either Player exercising the option to attack. If either Player elects to attack in a given hex, both Players are committed to combat in that hex and each Player may then examine the opposing force in that hex for combat resolution purposes.
If either Player elects to attack, combat is resolved immediately. Combat is resolved by comparing the total Combat Strength Points of the attacking force to the total Combat Strength Points of the defending force and expressing the Attacker's total as a percentage of the Defender's total. This percentage ratio is rounded down to the nearest percentage ratio shown on the Combat Results Table. The attacker then rolls the die. The die roll is modified for Leadership and Terrain effects and the modified result is located under the proper percentage ratio column of the Combat Results Table. The indicated Combat Result (given in terms of a percentage loss for each of the opposing forces) is immediately applied to the forces involved. After the appropriate number of Strength Points are eliminated from either or both of the opposing forces (determined by referring to the Percentage Loss Table) the victor of the battle is determined. To determine the victor, each Player adds the number of Enemy Strength Points eliminated in the battle to his commander's Initiative Value. If the opposing totals are equal, the battle is considered a draw and neither Player takes any further action. If the totals are unequal, the Player with the higher total is considered the victor and is granted a number of Enemy Strength Points (from the defeated force) as Prisoners of War equal to the difference between his total and his opponent's. These Enemy Strength Points are considered captured Prisoners of War. The defeated Player must then immediately retreat the remnants of the defeated force. At the conclusion of this retreat, a Demoralized marker is placed on top of the defeated force and the battle is considered ended. The Players then proceed to resolve any additional combats using the same procedure.
9.1 Which Units May Attack
[9.11] Only the Friendly force which occupies the same hex as an Enemy force may participate in an attack against that Enemy force. No combat is permitted except between opposing forces which jointly occupy the same hex during a Combat Phase (exception: see 5.5).
[9.12] No force may participate in more than one attack per Combat Phase. No force may be attacked more than once in a single Combat Phase.
[9.13] All units must participate in any combat executed in the hex they occupy (exception: 12.33).
[9.14] Demoralized units may not attack but retain their full Combat Strength for defense.
9.2 Effects on Combat Strength and Combat Resolution Die Roll
[9.21] A unit's Combat Strength is never affected or altered for any reason.
[9.22] There is only one effect of Terrain on combat. Two (2) is subtracted from the Combat Resolution die roll when a combat occurs in a Mountain hex.
[9.23] Only combat and Leader units may participate in combat. A Leader unit has no Combat Strength per se. The commanding Leader of an attacking stack participates in the attack by contributing his Attack Bonus which is added to the die roll used to resolve the attack. The commanding leader of a defending stack participates in his stack's defense by contributing his Defense Bonus, which is subtracted from the die roll used to resolve the combat. A maximum of one attacking Leader and one defending leader may participate in a single combat in this manner (see 8.23).
[9.24] For all combat procedures, a force that does not include a leader is considered to have a "zero" Initiative Value, a "zero" Attack Bonus, and a "zero" Defense Bonus.
9.3 Percentage Ratio and Percentage Loss Calculations
[9.31] To determine the percentage ratio of a given attack, the defending Combat Strength total is divided into 100 times the attacking Combat Strength total. The result of this division is an expression of the attacking Combat Strength as a percentage of the defending Combat Strength. This percentage is then rounded down to the nearest percentage ratio shown on the Combat Results Table.
[9.32] Combat Results are given in terms of percentage loss for either or both of the forces involved in the combat. The Strength Point loss to a force is determined by cross-referencing the percentage loss with the total Combat Strength of the force on the Percentage Loss Table. For example, a 15% loss to a force of nineteen Strength Points is three (3) Strength Points.
[9.33] Percentage Loss Table
(See the mapsheet.)
9.4 Explanation of Combat Results
[9.41] In each distinct Combat Result, the portion to the left of the slash applies to the attacking force. The portion to the right of the slash applies to the defending force.
[9.42] There are three types of Combat Results (a percentage loss number, the letter "L," or the letter "P"). A percentage loss result represents the percentage of a given force which is eliminated in the combat. This loss is translated into Strength Points by reference to the Percentage Loss Table.
[9.43] A "P" result indicates that the entire receiving force is captured by the Enemy Player and held by him as Prisoners of War (see 14.0).
[9.44] An "L" result causes the immediate elimination of the lowest ranked leader of the receiving force which is present in the combat hex. This leader must be eliminated immediately, before the victor of the battle is decided. A Leader lost in this manner is considered killed in action and is thus permanently removed from the game.
[9.45] Strength Points lost in combat (including Points which must be yielded to the Enemy as Prisoners of War) must be extracted from a force (or stack) as fully as possible. If such losses exceed the total Combat Strength of a force, the excess loss is ignored.
[9.46] If after Combat and prisoner losses are subtracted from a force only a leader and/or depot units of that force are left in the combat hex, these units are automatically captured by the Enemy providing at least one Enemy Combat Strength Point survived the battle (see 14.0).
[9.47] No attack may be made at a Combat Percentage Ratio less than thirty-three (33%) percent. An attack made at a Combat Percentage Ratio of greater than four hundred (400%) percent is resolved using the 400% ratio column on the Combat Results Table. A Player may not resolve an attack using a lower Combat Percentage Ratio than the actual calculated Percentage Ratio determined as explained in Case 9.31.
9.5 Retreat After Combat
[9.51] During the Combat Phase, after combat and prisoner losses are subtracted from the forces involved in a given battle, the remainder of the defeated force (or stack) must be immediately retreated by the owning Player. To execute a retreat, the Player rolls the die. The Retreat Allowance of the retreating force is equal to the sum of the die roll plus the Initiative Value of the Leader commanding the retreating force (the same procedure used to move units during a Friendly Movement Phase).
[9.52] A retreating force must be retreated as a single group. A force in retreat must expend its full Movement Allowance in the retreat movement. A retreating force may retreat into and/or through any hex it could enter during a Friendly Movement Phase. A force may retreat through an Enemy occupied hex, paying an additional Movement Point for each Enemy occupied hex it enters. A retreating force may never end its retreat in an Enemy occupied hex. A retreating force may never enter a given hex more than once during the course of its retreat. A retreating force must end its retreat in supply if possible. If it is impossible for a retreating force to end its retreat in a supplied hex, the force must be retreated as far as possible toward the nearest Friendly supply source. A retreating force may not attempt an Overwhelming Attack during its retreat. Within these restrictions, a retreat may be made in any direction or combination of directions.
[9.53] For the purpose of determining the Retreat Allowance of a force without a Leader, the force is assumed to have a "zero" Initiative Value.
[9.54] Terrain effects on movement are applicable during a retreat.
[9.55] At the conclusion of a retreat after combat, a Demoralized marker should be placed on top of the topmost unit of the retreated stack.
[9.56] Depot units may not be retreated.
[9.57] Because a force must retreat as a single group, the units in a retreating force (or stack) may be moved by a Leader of a different nationality. For example, if a combined Austro-Russian anti-Prussian Coalition force is defeated in combat, the Initiative Value of the force's commander (the highest ranked Leader of the predominant national force) is used to determine the Retreat Allowance for the entire defeated force.
9.6 Combat Results Table
(See the mapsheet.)
10.0 Supply
GENERAL RULE:
An unsupplied unit (or stack) is subject to attrition during each Friendly Attrition Phase. Supply also has a restrictive effect on how leaders may be moved. Supply has no effect on combat. A unit which is not in supply is "unsupplied." To be in supply, a unit (or stack) must be able to trace a supply path of contiguous hexes leading from an operative Friendly supply source to the hex occupied by the unit(s) in question. The length of a supply path is measured in hexes and varies according to the nationality of the supply source.
10.1 Supply Sources
[10.11] There are two types of supply sources; fortresses and operative depot units. A fortress may only be used as a supply source if there is at least one Friendly Combat Strength Point inside the fortress. A depot unit may only be used as a supply source if it is operative.
[10.12] In order for a depot unit to be operative, it must meet three requirements:
A. The process of creating the depot must have concluded on a previous Depot Creation Phase (see 10.41).
B. There must be at least one Friendly Combat Strength Point in the hex occupied by the depot unit.
C. The depot unit must be part of a network of operative depot units, each of which is linked to another by an unblocked supply path. At least one depot unit in this network must be linked by an unblocked supply path to a fortress inside of which there is at least one Friendly Combat Strength Point.
[10.13] Fortresses and depot units are neutral. The status of a fortress is determined by the nationality of any Combat Strength Points inside the fortress. The status of a depot unit is determined by the nationality of the unit stacked immediately on top of the depot unit (see 7.32). A supply source may be used by any nationality Friendly to the nationality in control of that supply source (for example, all anti-Prussian Coalition units may use an Austrian supply source for supply purposes).
10.2 Supply Paths
[10.21] A supply path is always traced from a supply source to the unit(s) being supplied by that supply source.
[10.22] The maximum length (in hexes) of a supply path is determined by the nationality of the supply source. A supply path traced from a Prussian-Allied supply source has a maximum length of five hexes. A supply path traced from an anti-Prussian Coalition supply source has a maximum length of four hexes. The hex occupied by a supply source is never counted against the length of its supply path. The hex occupied by the unit(s) being supplied is counted against the length of the supply path.
[10.23] An unlimited number of units may trace a supply path through the same hex and an unlimited number of units may use the same supply source. The supply capacity capability of a supply source is never reduced due to its being used as a supply source, regardless of the number of units using it or the number of Game-Turns during which it functions as a supply source.
[10.24] A supply path may be traced through any hex which the Movement Rules allow units to enter. A supply path can never be traced through an all-sea, all-Mountain, or lake hexside. A supply path can be traced through a hexside intersected by a Mountain Pass. A supply path can be traced in any direction or combination of directions.
10.3 Blocking Supply Paths
[10.31] A supply path can be traced into but not out of a hex occupied by an Enemy combat unit. A supply path which originates in a hex occupied by an Enemy combat unit is automatically terminated in that hex (it may not be traced out of that hex). A supply path cannot be traced out of a hex which is jointly occupied by opposing combat units.
Example: In hex #1125 (Prague) one Austrian Strength Point is inside the fortress and ten Austrian and fifteen Prussian Combat Strength Points occupy the same hex, but are outside the fortress. All of the Austrian units in hex #1125 are in supply as they occupy the hex in which their supply path originates. A supply path could not be traced from hex #1125 to any other hex, as the hex is jointly occupied by opposing Enemy combat units. The Prussian units in hex #1125 are in supply as it is possible to trace a Prussian supply path from hex #1623 (Dresden - where one Prussian Strength Point is inside the fortress) into hex #1125 despite the presence of Austrian combat units in the hex. NOTE: The Austrian units in the hex forfeit their Zone of Control (see 6.3).
[10.32] A Prussian-Allied supply path may be traced into but not out of a hex which is part of an Austrian combat unit's Zone of Control (see 6.12).
[10.33] Non-combat units (Leaders and depots) do not block supply paths.
10.4 Depots
[10.41] A Player may only create a depot during the Depot Creation Phase of his Player-Turn. At the start of his Depot Creation Phase, the Player should place each depot unit he placed on the map during the Depot Creation Phase of the previous Game-Turn below all other Friendly units in the hex occupied by the depot unit. This signifies that the process of building a given depot has been completed and the depot may begin to be used as a supply source (within the restrictions of Case 10.12). After the Player rearranges the depot units he placed on the previous Game-Turn, he may begin constructing new depots. To begin constructing a new depot, the Player places a depot unit on top of all other Friendly units in a given hex. At the start of his next Depot Creation Phase, the Player repeats this procedure again.
[10.42] A depot may only be placed in a hex occupied by a minimum of ten Friendly Strength Points during the Depot Creation Phase. If at any time prior to the start of the next Friendly Depot Creation Phase there are less than ten Friendly Strength Points in the hex in which a depot is in the process of construction, that depot unit is immediately removed from the map. Once a depot has been completed there is no minimum number of Friendly Strength Points which must remain with that depot.
[10.43] A depot may not be constructed in a hex unless it is possible to trace an unblocked Friendly supply path into that hex during the Depot Creation Phase. A depot in the process of construction cannot be completed unless it is possible to trace an unblocked Friendly supply path into the hex occupied by the depot during the Depot Creation Phase. If at any time it is impossible to trace an unblocked Friendly supply path into the hex occupied by a Friendly depot, the depot is left on the map (in whatever state of construction it achieved prior to the blocking of its supply path) but it may not be used as a supply source while its supply path remains blocked.
[10.44] A depot may be constructed in any "supplied" hex except a hex containing another depot unit or a hex containing a Friendly garrisoned fortress (see 12.0). There may never be more than one depot unit in a single hex. A Player may not create a depot unit in a hex already occupied by a depot unit.
[10.45] A depot unit may never be moved or be retreated.
[10.46] A depot unit is automatically captured in a hex occupied solely by Enemy combat units. For example, a depot unit left in an Enemy occupied hex by a force which retreated after a battle is automatically captured by the Enemy Player. Only completed depots may be captured. A depot which is captured while in the process of construction is immediately removed from the map. A captured depot may be used as a Friendly supply source at any time after its capture subject to the restrictions of Case 10.12.
[10.47] A Player may voluntarily destroy any depot units he controls (see 10.13) during any Friendly Movement Phase. To do so he merely removes the depot unit from the map.
[10.48] The depot unit used to resolve a successful siege is removed from the map when control of the besieged fortress changes hands (see 13.0).
[10.49] During the Depot Creation Phase of the Player-Turn a Player may begin constructing as many depots as he desires providing each depot unit is placed according to the restrictions of Case 10.42.
10.5 Supply Effect on Leaders
[10.51] The supply status of a Leader is judged at the instant the Player begins to move him.
[10.52] A Leader with a "zero" Initiative Value may never move out of supply during a Friendly Movement Phase (march or forced march), unless he is accompanying a Leader with a higher Initiative Value. A Leader with a "zero" Initiative Value which begins a Friendly Movement Phase out of supply must be in supply at the end of that Movement Phase if possible. If it is impossible for the Leader to reach a supplied hex during the Movement Phase, he must be moved as far as possible toward the nearest Friendly supply source.
[10.53] A Leader with an Initiative Value of "1" may move out of supply during any Friendly Movement Phase (march or forced march). A Leader with an Initiative Value of "1" who begins a Friendly Movement Phase out of supply must attempt to move back into supply during that Movement Phase (see 10.52 for procedure).
[10.54] A Leader with an Initiative Value of "1" or higher may freely move out of supply at any time, subject to attrition (see 10.6).
10.6 Supply Attrition
[10.61] There is only one effect of being unsupplied. During each Friendly Attrition Phase, one Strength Point is automatically eliminated from each hex occupied by unsupplied Friendly units, regardless of the total number of Strength Points in that hex.
[10.62] Leaders and depot units are never subject to attrition for being unsupplied. A depot unit which is unsupplied, however, cannot be used as a supply source.
11.0 Morale
GENERAL RULE:
There are two states of morale; good and demoralized. Units which are not demoralized have good morale. Units become demoralized as a result of being defeated in battle during a Combat Phase. Demoralization is signified by placing a Demoralized marker on top of a defeated force (or stack) at the conclusion of its retreat.
11.1 Effects of Demoralization
[11.11] All units stacked under a Demoralized marker are considered demoralized.
[11.12] While demoralized, a force may not be divided in any manner by the owning Player during his Friendly Movement Phase.
[11.13] A demoralized unit (Leader or combat) is considered to have a "zero" Initiative Value for all movement, combat and supply purposes. A demoralized Leader retains his actual (printed) Initiative Value for Morale Recovery purposes only (see 11.2).
[11.14] Demoralized units may not enter an Enemy occupied hex during a Friendly Movement Phase. Demoralized units may not attack Enemy units during a Friendly Movement Phase or during the Combat Phase. Demoralized combat units retain their full Combat Strength for defensive purposes.
[11.15] Whenever an undemoralized unit occupies a hex containing a demoralized Friendly unit, it too, becomes instantly demoralized.
[11.16] Because a demoralized force cannot be divided, demoralized units may be moved by a Friendly Leader of a different nationality. For example, a demoralized Austro-Russian anti-Prussian Coalition force is moved by the force commander (the highest ranked Leader of the predominant nationality) as a single force.
[11.17] There is no morale effect on depot units. A depot unit in a hex occupied by a demoralized force may be used as a supply source. Demoralized units may build depots. Because demoralized units may not enter an Enemy occupied hex, they may not besiege an Enemy occupied fortress.
[11.18] Demoralized units may not move during Friendly Force March Movement Phases.
11.2 Morale Recovery
During the Morale Recovery Phase of his Player-Turn, the Player rolls the die once for each Friendly demoralized force on the map. If the sum of the die roll and the Initiative Value of the Leader in command of a given demoralized force is seven (7) or higher, the Player immediately removes the Demoralized marker from that force. The force is considered to have recovered good morale. Note: A demoralized Leader uses his actual (printed) Initiative Value for Morale Recovery purposes.
12.0 Fortresses and Garrisons
GENERAL RULE:
Certain hexes contain permanent fortifications henceforth referred to as fortresses. These fortresses are indicated by the fortress symbols printed on the mapsheet (see the Terrain Effects Chart). A hex containing a fortress is called a fortress hex. Units in a fortress hex are considered to be either inside or outside the fortress (itself) at any given time during the game. Units inside a fortress are deemed to be garrisoning that fortress. Fortresses have special effects on movement, combat, supply, sieges, and Zones of Control. In addition, fortresses serve as winter-quarters and Victory Points are awarded for the occupation of fortresses at the end of the game.
12.1 How a Fortress Is Garrisoned
[12.11] Units are deemed to be garrisoning a fortress when they are placed inside that fortress. A unit in a fortress hex may be placed inside the fortress in that hex simply by inverting the unit. Inverted units occupying a fortress hex are considered to be inside the fortress in that hex. A non-inverted unit occupying a fortress hex is considered to be outside the fortress.
NOTE: In order to avoid confusion it is suggested that the Player mark an abbreviation of the nationality of each combat and Leader unit on the back of the unit counters. This will aid him in recognizing the nationality of inverted units which are garrisoning fortresses.
[12.12] Only Leader and combat units may garrison a fortress. A depot may never be placed (constructed) inside a fortress (see 10.44).
[12.13] A fortress may not be simultaneously garrisoned by opposing units. Enemy units may not be placed inside a fortress already garrisoned by Friendly units.
[12.14] A fortress may be garrisoned by an unlimited number of Friendly Combat Strength Points and/or Friendly Leaders.
[12.16] Fortresses cannot be destroyed during the course of a game. A fortress is never affected by being ungarrisoned. A fortress which is successfully besieged becomes captured (see 13.0).
12.2 How Fortresses Affect Movement
[12.21] There is no additional Movement Point cost per se for moving in or out of a fortress while remaining in the same hex. Units in a fortress hex may move into or out of the fortress in that hex during any Friendly Movement Phase or any Combat Phase without expending any Movement Points.
[12.22] Units inside a non-besieged fortress may move out of that fortress and leave that fortress hex during any Friendly Movement Phase, regardless of the presence of Enemy units in that fortress hex. Similarly, a unit may enter a fortress hex and move directly into a non-besieged Friendly garrisoned fortress regardless of the presence of Enemy units in that fortress hex.
[12.23] Units inside a besieged fortress may move out of that fortress, but may only leave that fortress hex during a Combat Phase in which the besieging Enemy units in that hex participated in combat. Similarly, a unit may only move into a besieged Friendly garrisoned fortress during a Combat Phase in which the besieging Enemy units participated in combat.
EXAMPLE: At the beginning of a Combat Phase, ten Austrian Strength Points are besieged in the fortress in hex #1125 by twenty Prussian Strength Points which are outside the fortress in the hex. Also outside the fortress in the hex are an additional five Austrian Strength Points. Assume that nine Austrian Strength Points from inside the fortress move outside the fortress and combine with the other five Austrian Strength Points to attack the Prussians during the current Combat Phase. If the Austrian attack is successful, the Prussians will be forced to retreat and the siege will be "lifted." If the battle results in a draw, or if the Austrians are defeated, the fortress will remain besieged. The surviving Austrians, which participated in the combat, however, are allowed to either retreat back into the fortress or retreat out of that fortress hex towards the next nearest Friendly supply source. Note that if the Prussian besieging force had not participated in combat, the five Austrian Strength Points which began outside the fortress could not have moved into the fortress.
[12.24] A unit must still expend an additional Movement Point to enter an Enemy occupied fortress hex even if all of the Enemy units are inside the fortress in that hex. A unit expends only one additional Movement Point to enter an Enemy occupied hex regardless of the presence of a fortress in that hex (see 5.43).
12.3 How Fortresses Affect Combat
[12.31] Units inside a fortress cannot attack Enemy units.
[12.32] Units inside a fortress cannot be attacked in regular Combat or by an Overwhelming Attack. Units inside a fortress are only affected by Sieges. Units which are in a fortress hex, but are outside the fortress in that hex are subject to both regular Combat and Overwhelming Attack.
[12.33] Units inside a fortress are never affected by regular Combat or Overwhelming Attacks executed outside of the fortress in the same fortress hex.
12.4 How Fortresses Affect Supply
[12.41] Fortresses are one of the two possible types of Supply Sources. The Player should refer to Case 10.0 for complete details on the supply functions of a fortress.
[12.42] A fortress captured by siege may be used as a Supply Source according to the restrictions of Case 10.13.
12.5 How Fortresses Affect Zones of Control
An Austrian combat unit forfeits its Zone of Control while it is inside a fortress.
13.0 Siege
GENERAL RULE:
Enemy garrisoned fortresses can only be captured by siege. During the Siege Resolution Phase of his Player-Turn, the Phasing Player may attempt to capture each Enemy garrisoned fortress which is besieged by Friendly units.
PROCEDURE:
The Phasing Player makes a separate die roll for each Enemy garrisoned fortress which is besieged by Friendly units during the Siege Resolution Phase. In each situation, the Initiative Value of the garrison commander (the highest ranked Leader inside the besieged fortress) is subtracted from the Phasing Player's die roll (if there is no Leader in the besieged fortress, the die roll is not modified). The adjusted die roll is then compared to the Siege Resolution Table. The result shown on the table is immediately applied to either the besieging or the besieged force according to the procedure given in Case 13.3. The Phasing Player then proceeds to resolve any additional sieges, in any order he desires, using the same procedure.
13.1 How a Fortress Is Besieged
[13.11] Only Enemy garrisoned fortresses may be besieged.
[13.12] An Enemy garrisoned fortress is considered besieged whenever a completely constructed, Friendly-controlled, supplied depot unit occupies the hex containing the enemy garrisoned fortress in question. Thus, in order to resolve a siege there must be an operative Friendly depot in the fortress hex containing the Enemy garrisoned fortress during the Phasing Player's Siege Resolution Phase.
[13.13] An Enemy garrisoned fortress is considered besieged at all times as long as the conditions of Case 13.12 are in effect, not merely during the Siege Resolution Phases of the Game-Turn. An Enemy garrisoned fortress is not considered besieged at any instant when the conditions of Case 13.12 are not in effect.
[13.14] During each Combat Phase, the Owning Player must reveal (verbally) the total number of Combat Strength Points occupying each hex containing a besieged Enemy garrisoned fortress. Only the besieging Player must reveal the strength of his besieging forces. The Player controlling the besieged fortress is not required to reveal the strength of besieged garrisons at this time.
[13.15] The Phasing Player is not required to seek a resolution for each besieged fortress during his Siege Resolution Phase.
13.2 Siege Resolution Table
(See the mapsheet.)
13.3 Explanation of Siege Resolution Table Results
[13.31] The Siege Resolution Table has three possible results: No Effect, Attacker Loss and Breach. A "No Effect" result has no consequence on either the besieging force or the fortress garrison.
[13.32] The besieging force loses one Strength Point when it receives an "Attack Loss" result. This Strength Point is considered to have been eliminated by an Enemy sortie and is counted for Victory Point purposes. The fortress garrison suffers no loss.
[13.33] If a "Breach" result occurs, the non-Phasing Player must immediately request (verbally) that the garrison be granted the honors of war. The Phasing Player must then choose either of the two following options:
1) Grant the honors of war. In this case, the entire garrison is automatically transferred to join the nearest Friendly garrison of the same nationality.
The Phasing Player may then take possession of the fortress by garrisoning it with any Friendly units in that hex.
NOTE: If a garrison is granted the honors of war, but there is no garrison of the same nationality elsewhere on the map, the garrison is removed from play, but is not considered eliminated for Victory Point purposes.
2) Deny the honors of war, and request the garrison's surrender. If this option is chosen, the non-Phasing Player must now choose either of the following alternatives:
A) Surrender. In this case, the entire garrison is removed from the map and held by the enemy as Prisoners of War. The Phasing Player immediately takes possession of the fortress by garrisoning it with any Friendly units in that hex.
B) Refuse. In this case, the Phasing Player must attempt to take the fortress by storm. This is executed in the following manner. Both Players reveal the strength of their forces. The force containing fewer Combat Strength Points is completely eliminated. The Leaders of this force are automatically captured. The opposing force then removes an equal number of Strength Points (but no Leaders are lost from this force). All Strength Points eliminated in this exchange do count for Victory Point purposes. If the original garrison is completely eliminated by this exchange, the Phasing Player may immediately garrison the fortress with any surviving Friendly units in the hex.
NOTE: The procedure described in this Case is mandatory in each detail and must be executed in proper sequence.
14.0 Prisoners of War
GENERAL RULE:
All captured Leader and combat units become Prisoners of War. Captured Leader and combat units are immediately removed from the map by the capturing Player. Each Player should divide his prisoners by nationality and keep them separated from eliminated units. Captured depot units are not taken prisoner (see 10.46).
14.1 Exchange of Prisoners
[14.11] During the Prisoner Exchange Phase on even numbered Game-Turns (only) prisoners are exchanged.
NOTE: Each Scenario has special rules that govern the exchange of prisoners. The special Scenario rules are considered exceptions to the general Prisoner Exchange Rules.
[14.12] The exchange of prisoners is mandatory.
[14.13] Combat Strength Points (as permitted by the Scenario) must be exchanged on a point for point basis (i.e., three Prussian Strength Points held by the Coalition Player are exchanged for three Austrian Strength Points held by the Allied Player).
[14.14] The exchange of captured Leaders is mandatory. Leaders are exchanged (as permitted by the Scenario) on a one for one basis, regardless of rank, initiative, or combat bonus values of the Leaders involved (exception: see 14.15). If a Player has two or more Leaders to choose from, he may choose which Leader to exchange, but every possible (and permissible) Leader exchange must be made as promptly as allowed by the Scenario rules.
[14.15] The #1 ranked Prussian Leader (Frederick) may never be exchanged. If this Leader is captured, the Allied Player may immediately forfeit the game. If he does so, the game is considered a decisive Coalition victory. If he chooses not to forfeit the game, play continues and the normal Victory Conditions are used to determine the winner.
[14.16] Exchanged prisoners are automatically returned to play at the end of the Prisoner Exchange Phase. The Owning Player may place them inside any non-besieged fortress(es) garrisoned by the same nationality as the exchanged units. This placement does not expend any Movement Points. Prisoners may not be exchanged if there is no fortress garrisoned by the appropriate nationality for them to return to.
[14.17] At the end of the game unexchanged prisoners are considered eliminated and are counted for Victory Point purposes.
[14.18] Prisoners are not turned over if the Enemy Player has no Prisoners to exchange them with.
15.0 Reinforcements
During the course of the game, both Players may receive additional combat and/or Leader units as reinforcements. The reinforcements due each Player are coded according to the Scenarios and are indicated on the Turn Record/Reinforcement Track (printed on the mapsheet).
15.1 Entry of Reinforcements
[15.11] During the Reinforcement Phase of his Player-Turn, the Phasing Player determines what reinforcements (if any) are due and places them on the map. The placement of a reinforcement does not expend any Movement Points.
[15.12] Reinforcements cannot be delayed. Reinforcements must be placed in the indicated hex. Reinforcements may arrive in Enemy occupied hexes. In a fortress hex, a reinforcement always arrives outside the fortress.
[15.13] Reinforcements are coded according to Scenario on the Turn Record/Reinforcement Track. Only those reinforcements coded for the particular scenario in play are used.
16.0 Winter
Game-Turns 16, 17, and 18 are considered Winter Game-Turns. Winter affects Movement and special attrition rules take effect during Winter Game-Turns.
16.1 How Winter Affects Movement
[16.11] The Movement Allowance of all units is reduced by one Movement Point during Winter Game-Turns.
16.2 Winter Quarters
[16.21] At the start of Game-Turn 16, all units inside fortresses are considered to have entered Winter Quarters. Any unit that is placed inside a fortress during Game-Turn 16, 17, or 18 is considered to have entered Winter Quarters at the instant it is moved into a fortress.
[16.22] Once a unit enters Winter Quarters it may not move nor may it come out of the fortress unless that fortress is successfully besieged by the Enemy and the garrison either surrenders or is granted the honors of war.
[16.23] The game automatically ends immediately when all combat units have entered Winter Quarters.
16.3 Winter Attrition
[16.31] During the Friendly Attrition Phase of each Winter Game-Turn, one (1) Strength Point is automatically eliminated from each Friendly force which has not entered Winter Quarters. This automatic winter attrition is additional to the attrition a force suffers for being unsupplied. Leader and depot units are not subject to winter attrition. All Strength Points eliminated due to any type of attrition are counted for Victory Point purposes.
17.0 Victory Conditions
The same procedure is used to determine the victor regardless of which Scenario is played. At the end of the game, each Player receives Victory Points for the fortresses he controls. Control of a fortress is determined by the nationality of its garrison. Neither Player receives Victory Points for besieging a fortress at the end of the game. Fortress Victory Points are only awarded to the Player whose Friendly units are garrisoning a given fortress. The number of Victory Points awarded for controlling a given fortress is printed directly on that fortress.
After each Player has totaled his fortress Victory Points, he subtracts one Victory Point for each FRIENDLY Combat Strength Point eliminated during the game. At the end of the game, all unexchanged prisoners of war are considered eliminated and count for Victory Point purposes. The Prussian Player (only) must subtract TWO Victory Points for each Friendly Combat Strength Point eliminated in excess of TWENTY Strength Points. No Victory Points are awarded for eliminating Enemy Strength Points. No Victory Points are awarded or subtracted for eliminated Leaders.
After each Player has determined his Victory Point Total, the smaller Player-total is subtracted from the larger Player-total and the resulting number is compared to the Level of Victory Table to determine the victor and the level of victory achieved. NOTE: If the Players' Victory Point Totals are equal, the game is automatically considered a draw. A Player whose Victory Point Total is a negative number is automatically defeated. If both Players have negative totals, the Player with the smaller negative total has won a pyrrhic (and virtually worthless) victory.
17.1 Level of Victory Table
| Net Victory Point Difference | Level of Victory Achieved by Player with the Larger Total |
|---|---|
| 1 to 7 | Draw |
| 8 to 15 | Marginal Victory |
| 16 to 24 | Substantive Victory |
| 25 or more | Decisive Victory |
18.0 Scenarios
There are seven different scenarios in FREDERICK THE GREAT, each simulating a yearly campaign from 1756 through 1762. All scenarios use the standard game rules, but are distinguished by different game lengths, varying force mixes, different initial deployments, and occasional special rules. Each scenario except the 1756 campaign begins on Game-Turn One (1756 begins on Game-Turn Nine).
After a scenario has been chosen, the players simultaneously deploy their forces according to scenario instructions. Units that are initially deployed in a fortress hex may be deployed either inside or outside that fortress at the owning player's option unless scenario instructions state otherwise.
ABBREVIATIONS: DP = Operative Depot unit; SP = Strength Points; (#) = Rank of Leader within that particular army.
1756
The game lasts from Turn 9 through Turn 18.
Allied Deployment — Prussians
| Force | Hex |
|---|---|
| 18 SP | 2217 |
| Frederick(1) | 2217 |
| Ferdinand(3) | 2217 |
| Keith(5) | 2217 |
| 10 SP | 1733 |
| Schwerin(2) | 1733 |
| 6 SP, 1 DP | 1729 |
| Brunswick(4) | 1729 |
| Maurice(6) | 1729 |
| 1 SP | 2030 |
| 1 SP | 1631 |
| 1 SP | 1532 |
Coalition Deployment — Austrians
| Force | Hex |
|---|---|
| 12 SP | 1129 |
| Browne(3) | 1129 |
| Lascy(6) | 1129 |
| 10 SP | 0834 |
| Picolomini(4) | 0834 |
| Nadasy(7) | 0834 |
| 4 SP | 1125 |
| Serbiloni(5) | 1125 |
| 2 SP | 1230 |
| 2 SP | 0631 |
| 2 SP | 0231 |
Coalition Deployment — Empire (Saxons)
| Force | Hex |
|---|---|
| 8 SP | 1623 |
| Rutowski(1) | 1623 |
| 1 SP | 1821 |
Special Rules
A. Empire (Saxon) forces may never leave Saxony. Successfully besieged Saxon units must surrender if denied the Honors of War.
B. There are no reinforcements.
C. No prisoners may be exchanged.
D. For all purposes (including Victory Points) use only the fortresses in Silesia, Saxony, Austria, and Magdeburg (2217).
1757
The Game lasts from Turn 1 through Turn 18.
Allied Deployment — Prussians
| Force | Hex |
|---|---|
| 16 SP | 1623 |
| Frederick(1) | 1623 |
| Henry(3) | 1623 |
| Keith(5) | 1623 |
| 12 SP | 1631 |
| Schwerin(2) | 1631 |
| 10 SP | 2925 |
| Lehwald(8) | 2925 |
| 8 SP | 1521 |
| Maurice(6) | 1521 |
| 8 SP | 1626 |
| Brunswick(4) | 1626 |
Allied Deployment — Hanoverians
| Force | Hex |
|---|---|
| 5 SP | 2413 |
| Cumberland(1) | 2413 |
| 4 SP | 2211 |
| Zastrow(3) | 2211 |
| 2 SP | 2310 |
| Karl(4) | 2310 |
| 4 SP, 1 DP | 2411 |
| 1 SP | 2711 |
| 1 SP | 3011 |
Coalition Deployment — Austrians
| Force | Hex |
|---|---|
| 16 SP | 1125 |
| Charles(1) | 1125 |
| Browne(3) | 1125 |
| 11 SP | 1230 |
| Serbeloni(5) | 1230 |
| 9 SP, 1 DP | 1528 |
| Koenigsegg(9) | 1528 |
| 8 SP | 1121 |
| Darenberg(8) | 1121 |
| 6 SP | 0834 |
| Nadasy(7) | 0834 |
| 4 SP | 0231 |
Coalition Deployment — French
| Force | Hex |
|---|---|
| 16 SP | 1901 |
| D'Estrees(1) | 1901 |
| Broglie(4) | 1901 |
| 9 SP | 1702 |
| Contades(3) | 1702 |
| 4 SP | 2104 |
| Chevert(5) | 2104 |
| 4 SP | 1804 |
| St. Germain(6) | 1804 |
| 1 SP | 1604 |
| 1 SP | 1306 |
| 1 SP | 1108 |
Coalition Deployment — Empire
| Force | Hex |
|---|---|
| 1 SP | 0816 |
Coalition Deployment — Swedish
| Force | Hex |
|---|---|
| 6 SP | 3321 |
| Hamilton(1) | 3321 |
Reinforcements
A. On Turn 8, 10 French SP and Soubise(2) appear on hex 0406.
B. On Turn 8, 22 Russian SP, Apraxin(1), Fermor(2), and 1 DP appear on hex 3742. Consider this depot operative (connected to a hypothetical Russian fortress off the map).
C. On Turn 8, 8 Empire SP and Saxe(1) appear on hex 0816.
Special Rules
A. Hanoverian units may never move east of Magdeburg until enemy (Coalition) forces capture the fortress of Magdeburg.
B. Austrian prisoners may only be exchanged for Prussian prisoners. Moreover, this exchange must take place at the END of the game.
1758
The game lasts from Turn 1 through Turn 18.
Allied Deployment — Prussians
| Force | Hex |
|---|---|
| 22 SP | 1733 |
| Frederick(1) | 1733 |
| Keith(5) | 1733 |
| 7 SP, 1 DP | 1631* |
| Ziethen(10) | 1631* |
| 9 SP | 1623 |
| Henry(3) | 1623 |
| Maurice(6) | 1623 |
| 9 SP | 2925 |
| Dohna(9) | 2925 |
| 4 SP | 2217 |
| 2 SP | 1821 |
* Outside fortress
Allied Deployment — Hanoverians
| Force | Hex |
|---|---|
| 10 SP | 2206 |
| Ferdinand(2) | 2206 |
| Karl(4) | 2206 |
| 1 SP | 2413 |
| 1 SP | 2711 |
| 1 SP | 3011 |
| 1 SP | 2310 |
Coalition Deployment — Austrians
| Force | Hex |
|---|---|
| 32 SP | 1230 |
| Daun(2) | 1230 |
| Loudoun(3) | 1230 |
| Darenberg(8) | 1230 |
| 9 SP | 1125 |
| Serbeloni(5) | 1125 |
| Harsch(11) | 1125 |
| 5 SP | 0631 |
| De Ville(12) | 0631 |
| 2 SP | 0834 |
| 2 SP | 0231 |
| 2 SP | 0631+ |
+ Inside fortress
Coalition Deployment — French
| Force | Hex |
|---|---|
| 6 SP | 1702 |
| Clermont(1) | 1702 |
| 2 SP | 2104 |
| St. Germain(6) | 2104 |
| 2 SP | 1804 |
| Broglie(4) | 1804 |
| 2 SP | 1604 |
| Contrades(3) | 1604 |
| 4 SP | 1901 |
| Chevert(5) | 1901 |
| 11 SP | 0406 |
| Soubise(2) | 0406 |
Coalition Deployment — Russian
| Force | Hex |
|---|---|
| 30 SP | 3741 |
| Fermor(2) | 3741 |
| Rumanjev(3) | 3741 |
| Tottleben(4) | 3741 |
Coalition Deployment — Empire
| Force | Hex |
|---|---|
| 11 SP | 0816 |
| Zweibrucken(1) | 0816 |
Coalition Deployment — Swedish
| Force | Hex |
|---|---|
| 5 SP | 3321 |
| Hamilton(1) | 3321 |
Reinforcements
A. On Turn 3, 4 Hanoverian SP appear on hex 2206.
B. On Turn 3, 4 French SP appear on hex 1702.
C. On Turn 5, 4 French SP appear on hex 1702.
D. On Turn 8, 4 Hanoverian SP and Sackville(5) appear on hex 2907.
E. On Turn 8, 4 French SP appear on hex 1702.
Special Rules
A. Austrian prisoners are exchanged for Prussian prisoners during the Prisoner Exchange Phase of each EVEN-numbered Turn. French prisoners are exchanged for Hanoverian prisoners during the Prisoner Exchange Phase of Turns 12, 14, 16, and 18. No other prisoner exchanges are permitted.
B. Empire units may never move west of the Rhine River.
C. Hanoverian units may never move east of Magdeburg until enemy (Coalition) forces capture the fortress of Magdeburg.
1759
The game lasts from Turn 1 through Turn 18.
Allied Deployment — Prussians
| Force | Hex |
|---|---|
| 20 SP | 1631 |
| Frederick(1) | 1631 |
| Finck(13) | 1631 |
| 11 SP | 1623 |
| Henry(3) | 1623 |
| 11 SP | 2426 |
| Dohna(9) | 2426 |
| Wedel(11) | 2426 |
| 5 SP | 1434 |
| Fouque(12) | 1434 |
| 2 SP | 2925 |
| Kleist(14) | 2925 |
Allied Deployment — Hanoverians
| Force | Hex |
|---|---|
| 12 SP, 1 DP | 1811 |
| Ferdinand(2) | 1811 |
| Karl(4) | 1811 |
| 4 SP | 2206 |
| Sporcken(6) | 2206 |
| 1 SP | 2310 |
| 1 SP | 3011 |
| 1 SP | 2413 |
Coalition Deployment — Austrians
| Force | Hex |
|---|---|
| 17 SP | 1230 |
| Daun(2) | 1230 |
| 11 SP | 1034 |
| De Ville(12) | 1034 |
| 6 SP | 1528 |
| Loudoun(3) | 1528 |
| 7 SP, 1 DP | 1217 |
| Harsch(11) | 1217 |
| Hadik(13) | 1217 |
| 2 SP | 1125 |
| 2 SP | 0631 |
| 2 SP | 0834 |
Coalition Deployment — French
| Force | Hex |
|---|---|
| 12 SP | 1210 |
| Broglie(4) | 1210 |
| St. Germain(6) | 1210 |
| 18 SP | 1604 |
| Contades(3) | 1604 |
| 6 SP | 2104 |
| Armentieres(7) | 2104 |
| 1 SP | 1901 |
| 1 SP | 1702 |
| 1 SP | 1804 |
| 1 SP | 1306 |
| 1 SP | 1108 |
Coalition Deployment — Russian
| Force | Hex |
|---|---|
| 30 SP | 3741 |
| Soltikov(1) | 3741 |
| Fermor(2) | 3741 |
| Rumanjev(3) | 3741 |
Coalition Deployment — Empire
| Force | Hex |
|---|---|
| 7 SP | 1016 |
| Zweibrucken(1) | 1016 |
| 1 SP | 0816 |
Coalition Deployment — Swedish
| Force | Hex |
|---|---|
| 5 SP | 3321 |
| Hamilton(1) | 3321 |
Reinforcements
A. On Turn 4, 4 French SP appear on hex 2104.
B. [On Turn 4, 4 Austrian SP appear on hex 1230.]
C. [On Turn 4, 4 Hanoverian SP appear on hex 2310.]
Special Rules
A. Austrian prisoners are exchanged for Prussian prisoners during the Prisoner Exchange Phase of each EVEN-numbered Turn. French prisoners and/or Russian prisoners are exchanged for Prussian prisoners during Turns 10, 12, 14, 16, and 18. No other prisoner exchanges are permitted.
B. Empire units may never move west of the Rhine River.
C. Hanoverian units may never move east of the Elbe River.
1760
The game lasts from Turn 1 through Turn 18.
Allied Deployment — Prussians
| Force | Hex |
|---|---|
| 18 SP | 1821 |
| Frederick(1) | 1821 |
| Wedel(11) | 1821 |
| 16 SP | 2030 |
| Henry(3) | 2030 |
| Fouque(12) | 2030 |
| 6 SP | 1532 |
| Dohna(9) | 1532 |
| 3 SP | 2426 |
| Finck(13) | 2426 |
| 2 SP | 1733 |
| Kliest(14) | 1733 |
Allied Deployment — Hanoverians
| Force | Hex |
|---|---|
| 30 SP | 2206 |
| Ferdinand(2) | 2206 |
| Karl(4) | 2206 |
| 3 SP | 2310 |
| Sporcken(6) | 2310 |
| 1 SP | 2413 |
| 1 SP | 3011 |
Coalition Deployment — Austrians
| Force | Hex |
|---|---|
| 35 SP | 1230 |
| Daun(2) | 1230 |
| De Ville(12) | 1230 |
| Hadik(13) | 1230 |
| Gemigen(14) | 1230 |
| 17 SP | 1623 |
| Loudoun(3) | 1623 |
| Harsch(11) | 1623 |
| 2 SP | 1125 |
| 2 SP | 0834 |
| 2 SP | 0631 |
| 2 SP | 0231 |
Coalition Deployment — French
| Force | Hex |
|---|---|
| 35 SP | 1210 |
| Contades(3) | 1210 |
| St. Germain(6) | 1210 |
| 18 SP | 1901 |
| Broglie(4) | 1901 |
| Armentieres(7) | 1901 |
| 1 SP | 2104 |
| 1 SP | 1804 |
| 1 SP | 1702 |
| 1 SP | 1604 |
| 1 SP | 1306 |
| 1 SP | [1108] |
Coalition Deployment — Russians
| Force | Hex |
|---|---|
| 30 SP | 3741 |
| Soltikov(1) | 3741 |
| Fermor(2) | 3741 |
| Rumanjev(3) | 3741 |
| 1 SP | 0703 |
| 1 SP | 0406 |
Coalition Deployment — Empire
| Force | Hex |
|---|---|
| 8 SP | 0816 |
| Zweibrucken(1) | 0816 |
Coalition Deployment — Swedish
| Force | Hex |
|---|---|
| 5 SP | 3321 |
| Hamilton(1) | 3321 |
Reinforcements
A. On Turn 3, 4 Hanoverian SP appear on hex 3011.
B. On Turn 6, 3 Hanoverian SP appear on hex 3011.
Special Rules
A. French prisoners are exchanged for Hanoverian prisoners during the Prisoner Exchange Phase of each EVEN-numbered Turn. Austrian prisoners are exchanged for Prussian prisoners during the Prisoner Exchange Phase of Turns 3, 6, 9, 12, 15, and 18.
B. Empire forces may never move west of the Rhine River.
C. At the beginning of every Turn starting with Turn 7, the Coalition player must roll a single die. If the die roll is "1", all Russian forces are immediately removed from play and may not return for the duration of the scenario - even if they are besieging or are under siege. If the die roll is any number other than 1, there is no effect and the die roll must take place again at the beginning of the next Turn.
1761
The game lasts from Turn 1 through Turn 18.
Allied Deployment — Prussians
| Force | Hex |
|---|---|
| 20 SP | 1733 |
| Frederick(1) | 1733 |
| Dohna(9) | 1733 |
| 18 SP | 1821 |
| Henry(3) | 1821 |
| Kliest(14) | 1821 |
| 6 SP | 2030 |
| Wedel(11) | 2030 |
| Fouque(12) | 2030 |
| 3 SP | 2426 |
| Finck(13) | 2426 |
| 1 SP | 3330 |
Allied Deployment — Hanoverians
| Force | Hex |
|---|---|
| 22 SP | 2206 |
| Ferdinand(2) | 2206 |
| Karl(4) | 2206 |
| 10 SP, 1 DP | 1912 |
| Sporcken(6) | 1912 |
| 1 SP | 2310 |
| 1 SP | 2413 |
| 1 SP | 3011 |
Coalition Deployment — Austrians
| Force | Hex |
|---|---|
| 22 SP | 1623 |
| Daun(2) | 1623 |
| Harsch(11) | 1623 |
| Hadik(13) | 1623 |
| 22 SP | 1230 |
| Loudoun(3) | 1230 |
| De Ville(12) | 1230 |
| 3 SP | 0834 |
| Gemigen(14) | 0834 |
| 2 SP | 1125 |
| 2 SP | 0631 |
| 2 SP | 0231 |
Coalition Deployment — French
| Force | Hex |
|---|---|
| 40 SP | 2104 |
| Soubise(2) | 2104 |
| Armentieres(7) | 2104 |
| 20 SP | 1210 |
| Contades(3) | 1210 |
| Broglie(4) | 1210 |
| St. Germain(6) | 1210 |
| 1 SP | 1901 |
| 1 SP | 1804 |
| 1 SP | 1702 |
| 1 SP | 1604 |
| 1 SP | 1306 |
Coalition Deployment — Russians
| Force | Hex |
|---|---|
| 30 SP | 3741 |
| Soltikov(1) | 3741 |
| Fermor(2) | 3741 |
| Rumanjev(3) | 3741 |
| 1 SP | 1107 |
| 1 SP | 0703 |
| 1 SP | 0406 |
Coalition Deployment — Empire
| Force | Hex |
|---|---|
| 7 SP | 0816 |
| Zweibrucken(1) | 0816 |
Coalition Deployment — Swedish
| Force | Hex |
|---|---|
| 5 SP | 3321 |
| Hamilton(1) | 3321 |
Special Rules
A. There are no reinforcements in this scenario.
B. French prisoners are exchanged for Hanoverian prisoners during the Prisoner Exchange Phase of each EVEN-numbered Turn. No other prisoner exchanges are allowed.
C. Any time after the end of Turn 7, the Prussian player may construct a FORTIFIED CAMP on any fortress hex in SILESIA that is Prussian-controlled. Use the Fortified Camp marker provided in the countermix. A Fortified Camp is constructed in the same manner as a depot with the exception that in addition to the ten Strength Points that must be present, the HIGHEST RANKING remaining Prussian leader in the game must be in the hex throughout the building process. The effect of a Fortified Camp is to subtract one from the die roll when the besieging player is consulting the Siege Resolution Table when conducting a siege against this Prussian controlled fortress. (NOTE: This modification is in addition to the subtraction of the garrison commander's Initiative Value [see 13.0] during a siege). Only one Fortified Camp may be built during the course of the scenario.
D. At the beginning of every Turn starting with Turn 7, the Coalition player must roll a single die. If the die roll is "1", all Russian forces are immediately removed from play and may not return for the duration of the scenario - even if they are besieging or are under siege. If the die roll is any number other than 1, there is no effect and the die roll must take place again at the beginning of the next Turn.
1762
The game lasts from Turn 1 through Turn 18.
Allied Deployment — Prussians
| Force | Hex |
|---|---|
| 32 SP | 1733 |
| Frederick(1) | 1733 |
| Dohna(9) | 1733 |
| Kliest(14) | 1733 |
| 13 SP | 1821 |
| Henry(3) | 1821 |
| Wedel(11) | 1821 |
| Finck(13) | 1821 |
| 3 SP | 2925 |
| Fouque(12) | 2925 |
| 1 SP | 2522 |
| 1 SP | 2217 |
Allied Deployment — Hanoverians
| Force | Hex |
|---|---|
| 25 SP | 2206 |
| Ferdinand(2) | 2206 |
| Karl(4) | 2206 |
| Sporcken(6) | 2206 |
| 1 SP | 2310 |
| 1 SP | 2413 |
| 1 SP | 3011 |
Coalition Deployment — Austrians
| Force | Hex |
|---|---|
| 35 SP | 1532 |
| Daun(2) | 1532 |
| Loudoun(3) | 1532 |
| De Ville(12) | 1532 |
| Gemigen(14) | 1532 |
| 15 SP | 1623 |
| Harsch(11) | 1623 |
| Hadik(13) | 1623 |
| 2 SP | 1631 |
| 1 SP | 1230 |
| 1 SP | 1125 |
| 1 SP | 0834 |
Coalition Deployment — French
| Force | Hex |
|---|---|
| 35 SP | 1210 |
| Soubise(2) | 1210 |
| Clermont(1) | 1210 |
| Broglie(4) | 1210 |
| St. Germain(6) | 1210 |
| 14 SP | 1804 |
| Contades(3) | 1804 |
| Armentieres(7) | 1804 |
| 1 SP | 2104 |
| 1 SP | 1901 |
| 1 SP | 1702 |
| 1 SP | 1604 |
Coalition Deployment — Empire
| Force | Hex |
|---|---|
| 6 SP | 0816 |
| Zweibrucken(1) | 0816 |
Coalition Deployment — Swedish
| Force | Hex |
|---|---|
| 5 SP | 3321 |
| Hamilton(1) | 3321 |
Reinforcements
A. On Turn 5, 8 Russian SP and Rumanjev(3) appear on hex 1936. THESE UNITS ARE CONTROLLED BY THE PRUSSIAN PLAYER!
Special Rules
A. French prisoners are exchanged for Hanoverian prisoners during the Prisoner Exchange Phase of each EVEN-numbered Turn. No other prisoner exchanges are allowed.
B. At the beginning of Turn 4, all Swedish units are removed from the map, even if they are under siege. No other units may enter Swedish Pomerania for the remainder of the game (and those that are currently there must leave by the next Turn). Neither player is considered to control the Stralsund fortress at the end of the game.
C. At the beginning of Turn 8, all Russian units are removed from the map, even if they are besieging or are under siege.