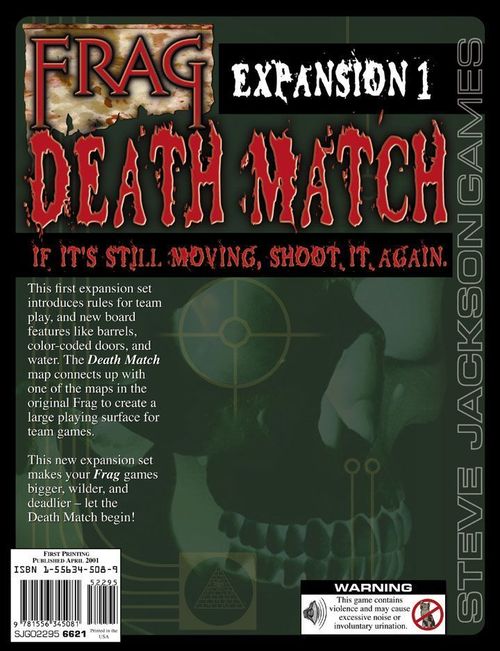
Frag: Death Match
Official rulebook: Steve Jackson Games · PDF
Frag: Death Match Rulebook
Table of Contents
Table of Contents
Game Components
This ziplocked expansion includes:
- This rulesheet.
- The game board, which is a single-sided poster-sized map. It can connect to one of the original Frag maps to form a larger arena. (See diagram at right.)
- 56 game cards (one is blank – if you come up with a good idea, let us know!).
- One sheet of counters and character standups.
You need the original Frag game to play. You'll want a handful of dice.
New Stuff
Barrels
The Death Match counter sheet includes a dozen barrels. Barrels may not be moved or fired through . . . but they may be fired AT.
Using barrels is optional; decide beforehand if you will use them. If you do, start with a barrel counter on each "grate" shown on the map.
The expansion deck includes two Respawn Barrels cards that refill all empty barrel spaces.
Hitting a Barrel
Barrels don't defend. A barrel vanishes if hit by any weapon that can do damage (which means a nuke can trigger several barrels, and a tranquilizer pistol has no effect). Roll on the table below to see what happens . . .
| Die Roll | Effect |
|---|---|
| 1-5 | Barrel explodes, causing 5d damage to all fighters within 2 spaces of the barrel (see diagram). Any barrels in the explosion radius also explode (don't roll for this; it's automatic). Anyone taken out by the explosion counts as a frag for whoever fired at it. |
| 6 | Something weird happens. There is no explosion. Remove the barrel and roll again: |
Diagram note: the explosion-radius diagram on the rulesheet shows the 2-space area around the barrel; it is not reproduced as text here.
New Die Roll / Effect table, used after a roll of 6 on the first table:
| New Die Roll | Effect |
|---|---|
| 1-2 | A weapon power-up appears. Draw the top weapon card and place it face down with a link to this space. |
| 3-4 | A gadget power-up appears. Draw the top gadget card and place it face down with a link to this space. |
| 5 | The barrel multiplies. Replace the vanished barrel and put two more barrels adjacent to it; the player who fired the shot determines where they go. They may not displace a fighter. |
| 6 | Nuclear barrel! The results are as for an explosion, but it does 10d damage instead of 5d, and the effect reaches for 3 spaces. Other barrels detonated by this explosion have their regular 5d explosions. |
Chain Reactions
If more than one barrel is triggered by the same attack (a nuke, for instance), roll separately for each of them before dealing with any further explosions that might be set off by those original barrels. The person who triggered the barrels rolls for them in any order he chooses.
Barrel Busters
This is a variant that can be used with either individual or team play. Make (or fake) a lot of extra barrel counters. Start with a barrel on every grate and on every power-up space. The only way to get a weapon or gadget now is to shoot a barrel and get lucky!
To make it a bit easier, though, a barrel now explodes only on a roll of 1-3. A roll of 4-6 sends you to the second table and gives you a chance of finding a power-up.
Door Keys
All doors, including those on the original maps, are coded as red, green, or blue. These colors correspond with the Door Key Cards in this set. A Door Key may be played to pass the wrong way through a one-way door. These can be very powerful if used wisely, so try not to squander the card if you find one.
Water
Shown on the map in blue, water slows down your fighter and protects him from Flame-type weapons. Moving through water costs 2 movement per space moved. However, a fighter who is successfully attacked with an Energy weapon while in a water space suffers 1 extra hit of damage.
Napalm
A new weapon in this set is the Napalm Launcher. When fired, it creates a cross-shaped flame effect that lasts the whole game. There are two Napalm counters.
Note that this is a very hazardous weapon. If it hits the target, fine. If it misses, this is a misfire, and the firer gets hit.
Mines
The Mine Dropper is a weapon which drops mines. (This is real rocket science here.) A mine counter does 4d damage if run over, and is then removed. It does not distinguish between targets . . . your own mines can kill you.
If you run out of mine counters, which can happen if your enemies won't cooperate by running over your mines, you can use pennies. Or, if you prefer, you can go to www.sjgames.com/frag/counters for a free PDF which you can use to print out lots of extra counters of several types.
Guided Nuke
On the turn the Guided Nuke is fired, a radiation counter is placed next to the firer to show its location. After that, it moves like a fighter, with a speed of 5, until the firer detonates it. (It may not be detonated on the turn it is first launched!) If the firer gets fragged before the detonation, the nuke disappears.
The nuke is not slowed by water or damaged by acid, and cannot be attacked.
You may not move while you are controlling a nuke, but you may fire, exchange items, etc., normally.
Teleporting Between Maps
If you are using both maps, any teleporter can take you to any of the other three teleporter squares. You choose which one to go to.
Team Play
Team play adds tactics . . . maneuver . . . even the possibility of self-sacrifice to bring victory to the team!
General Rules
The following rules apply to all team games.
Picking Teams: Each player rolls a die. The two highest rollers are the captains. They take turns picking players, starting with the younger captain. Teams should have the same number of players (but see below for variations).
Picking Colors: The captains now roll for colors. High roller picks his color (red or blue). This will determine which map he respawns on. The other captain chooses which player moves first. He does not have to choose someone on his own team!
Setup: Position the players around the table, alternating teams. Place the two maps together as shown in the diagram. The younger captain goes first. Fighter placement and game play follow the original Frag rules. (You may find it convenient to have the blue team take blue/purple fighters, and the red team take red/yellow/orange ones, to make it easy to distinguish the teams.)
Team Games
Capture the Flag: Each team has a flag to protect, and a base of the same color. At the beginning of the game, each team chooses a location for their base, and puts their flag there. The younger captain chooses first. The other captain must choose a base at least 10 squares away.
Bases cannot move, but any fighter can carry one (or both!) flags.
The object of this game is to capture the enemy flag and bring it to your own base while your flag is still there, scoring a point for your team. The first team to score 3 points wins.
Picking Up the Flag: If a flag is not being carried, any fighter may pick it up by moving through the square (flags do not add to your "load" or slow you down). Place the flag in the stand with the fighter (see illustration) and run for your base. If a fighter carrying the flag is fragged, it stays in that square.
Handoffs: If you pass next to a teammate, you may hand the flag to him, or take it from him (with his consent). Flags are easy to hand off; there is no movement cost for giving or receiving a flag. (This is an exception to the general rule for exchanging items and cards!)
No, you cannot snatch a flag from a foe. You have to frag him and take it from the pool of gore.
Death Match: The Death Match victor is the first team to score 5 frags against enemies. Friendly fire doesn't count.
If you are playing a series of Death Matches with the same teams, each fighter on the winning team gets to improve his character by one point. On the next game, the losing team moves first.
Frag Variants
In the original Frag rules, you score 3 frags and you win. For the battle-honed Frag fighter who wants some variety, we offer these new victory conditions and optional rules.
Every Man for Himself
These variants all assume you will be playing Frag games where every fighter is looking out for number one. There can be only a single winner. Make sure it's you.
Respawning: Blue-team players always respawn on the white numbers (on the map from the original game). Red-team players always respawn on red (the new map in this expansion).
Improving Fighters: If you're playing a series of games, one member of the winning team can improve his fighter after each game. Roll dice . . . the high roller wins the right to improve.
Fragging Your Buddies: You can do this, of course. If the victory conditions involve number of frags, only enemy frags count. There will certainly be tactical situations in which fragging a teammate can help the team . . . whether he agrees or not.
Exchanging Items: When you move next to a teammate, you can give him – or take from him, with his consent – any card or item that does not cause the receiving fighter to exceed the legal maximum that he can have. (Exception: Armor that is being worn cannot be transferred!) Each item or card costs the moving player 1 movement. "Item" includes blood points, if you have them . . . but you cannot exchange your character attributes! Note that giving a weapon away does not refill it with ammo.
Domination: Each team selects a base square (use the base counters). The blue base must be on the original (white numbers) map, and the red base must be on the new (red numbers) map. Teams pick their bases secretly and reveal them at the same time.
Each time a team can get a player on each base at the same time, the team scores a point. However, the same two fighters can't score 2 points in a row on the same bases . . . either they have to exchange bases, or another fighter has to get into the act! The first team to score 3 points wins.
Red Rover: When a fighter is fragged, he switches sides, and respawns on the spaces belonging to his new team. The game ends when all players are on the same team. The winner is the individual player with the most frags. In this game, you cannot attack a teammate . . .
Bodyguards: The object of the game is to frag the enemy captain. The other players – the bodyguards – respawn normally if fragged. (If the game ends too quickly, give the captains two or three lives.)
Team Variants
Unbalanced Teams: If you have an uneven number of players, try one team of two 9-point characters and one team of three 7-point characters. Or one team of three 10-point characters and one team of four 7-point characters.
Chaotic Spawning: No longer does each team respawn on its own map. Now, after you roll for respawn point, roll again to see if you come back on your own map or the enemy's. High roll: your map. Low roll: enemy map.
No Specials: Just take all the special cards out of play. This makes the game longer and makes tactics and coordinated planning much more important . . . it basically turns Frag into a wargame.
Last Man Standing: The major difference in this variant is that dying does matter! Each fighter starts with two lives. When he's been fragged twice, he's out of the game. The last fighter standing is the winner. (If two lives don't give a long enough game to suit you, pick a bigger number!)
The Blink of an Eye: Fighters respawn immediately when fragged, instead of waiting for their turn to come around. Yes, they are valid targets immediately – and may be fragged again! This option also works well for team play.
Tactical Advantage: Attacks are forbidden on the first turn of the game. Players may maneuver for position, attempt to gather weapons and gadgets, and so on. Normal play begins on the second turn.