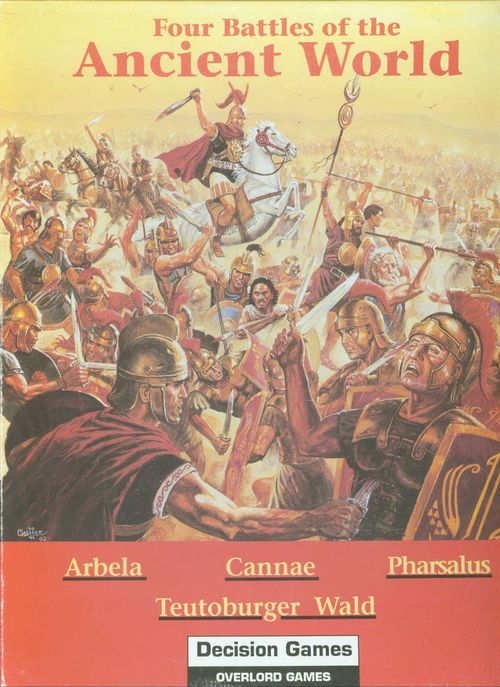
Four Battles of the Ancient World
Four Battles of the Ancient World Rulebook
Table of Contents
Table of Contents
- 1.0 Introduction
- 2.0 Game Equipment
- 3.0 Setting Up
- 4.0 Sequence of Play
- 5.0 Movement
- 6.0 Zones of Control
- 7.0 Missile Combat
- 8.0 Melee Combat
- 9.0 Charges
- 10.0 Reinforcements
- 11.0 Skirmishers
- 12.0 Elephants
- 13.0 Leaders
- 14.0 Rally
- 15.0 Army Morale
- 16.0 Victory Conditions
- 17.0 Developer's Notes
- Exclusive Rules
- Megiddo, 1479 BC
- Qadesh, 1274 BC
- Marathon, 490 BC
- Granicus, May 334 BC
- Issus, November 333 BC
- Arbela, 1 October 331 BC
- Lake Trasimene, 24 June 217 BC
- Metaurus, 22 June 207 BC
- Cannae, 2 August 216 BC
- Zama, October 202 BC
- Carrhae, 6 May 53 BC
- Pharsalus, 9 August 48 BC
- Munda, 17 March 45 BC
- Teutoburger Wald, September 9 AD
- Idivisto, 16 AD
- Boudicca, 61 AD
- Adrianople, 9 August 378 AD
1.0 Introduction
The Ancient Battles game system is a tactical simulation of battles fought prior to about AD 500. Each game in the system represents one of the great battles of the ancient world. The playing pieces represent the actual units that participated in the battles, and the map represents the terrain over which those units fought.
The rules in the series are presented in two sections: Standard Rules and Exclusive Rules. The Standard Rules are common to all the games in the series. The Exclusive Rules are different for each game and give scenario instructions and rules that apply only to the battle represented.
Players may also find it useful to supply charge and disorder (where not provided) and stand/leader shift (numerical) markers.
2.0 Game Equipment
2.1 Game Map
Each map portrays the area in which a battle was fought and the significant terrain affecting the battle. The map also contains a Terrain Key and a Turn Record Track.
A hexagonal grid is superimposed over the terrain features printed on the map to regulate movement and the positioning of the playing pieces. All numbered hexagons (hexes) are playable, although some types of terrain are prohibited to entry.
2.2 Game Charts & Tables
Various visual aids are provided on the Player Aid Card to simplify and illustrate certain game functions: the Terrain Effects Chart, the Combat Results Table, the Missile Fire Table, and the Rally, Demoralization & Disintegration Table.
2.3 Playing Pieces
The cardboard pieces represent the actual military units that took part in the original battle. The numbers and symbols on the pieces represent the combat strength, movement capability and type of unit represented by that piece. These playing pieces will hereafter be referred to as units. There are combat units and leader units.
Combat strength is the relative strength of a unit when attacking and defending, expressed in terms of strength points (SP). If a unit's SP is in parentheses, that unit may not charge, is not forced to attack, and its SP is halved if it does so.
LOS – line of sight is an intervening hex (if any) between a firing unit and its target.
MA – movement allowance is the maximum number of clear hexes a unit may be moved through or into in a single movement phase, expressed as movement points (MP).
Missile capability is the type of missile weapon (if any) a unit possesses.
Strength additive is the ability of a leader to add SP to a combat, and to generate combat odds column shifts.
VP – victory points are awarded for eliminating enemy units and achieving certain objectives.
ZOC – zones of control are exerted by most units; a dot signifies a restriction of this capability.
2.4 How to Read the Units
Each unit has certain information printed on it. Units are identified by numerals and/or nationality and contain information about their combat and movement capabilities.
2.5 Game Scale
Each hex on the map represents 100-200 metres across. Each combat unit represents between 100 and 1,000 men. Each game turn represents 30-90 minutes.
3.0 Setting Up
The players decide who will command each of the opposing forces. They then set up their units simultaneously (unless indicated otherwise in the Exclusive Rules) in their proper positions on the map as indicated by the scenario instructions.
Once the units are set up, players are ready to begin game turn one. Place the game turn marker in the first position on the Game Turn Track. Consult the Exclusive Rules to determine which side plays first. Play proceeds according to the sequence of play (see section 4.0) through to the final game turn or an automatic victory is achieved.
4.0 Sequence of Play
The game is played in successive game turns composed of alternating player turns. During each player turn, the player whose turn is in progress moves his units and resolves combat in sequence according to the following outline, and within the limits described by the rules that follow.
If an automatic victory has not already occurred, at the end of the final game turn, the players consult the victory conditions (see section 16.0) and a winner is determined.
First Player Turn
A. Movement Phase: the first player may move all, some or none of his units as he desires within the limits and restrictions of the rules of movement, zones of control and the Exclusive Rules of the game. The first player may bring reinforcements onto the map as allowed by the reinforcement rules. The second player's units may not move. See section 5.0, movement.
B. Missile Fire Phase: the first player may now use his units with missile capability to fire at enemy units. See section 7.0, missile combat.
C. Combat Phase: the first player conducts his melee attacks. See section 8.0, melee combat.
D. Rally Phase: the first player rolls a die and consults the Rally column of the Rally, Demoralization & Disintegration Table to determine if any of his eliminated units are rallied. Place those rallied units according to the rally rules. See section 14.0, rally, and the scenario Exclusive Rules.
Second Player Turn
The second player now follows the sequence of play in the manner described above. In each phase, the second player carries out the same actions as the first player.
Game Turn Record Inter-phase
The game turn marker should be advanced one space on the Game Turn Record Track to indicate the end of one game turn and signal the start of the next game turn.
5.0 Movement
During the movement phase, the current player may move as many or as few of his units as he chooses. They may be moved in any direction or combination of directions. Units are moved one at a time, tracing a path of contiguous hexes through the hex grid. As a unit enters each hex, it must pay one or more MP from its MA, depending on the type of terrain in each hex entered.
5.1 Movement Prohibitions
5.11 Movement may never take place out of sequence. A player's units may voluntarily be moved only during his own movement phase. Exception: see case 11.1, brush aside.
5.12 During the combat phase, a unit that is attacking or defending may be called upon to advance or retreat before or after its combat is resolved.
5.13 Friendly units may not move during the enemy player's movement phase nor during any player's combat phase, except when advancing or retreating because of brush aside or combat.
5.14 A unit may never enter a hex containing an enemy unit.
5.15 A unit may not exit a hex in an enemy ZOC (see section 6.0 and case 8.7) during a movement phase. An enemy ZOC hex may be exited only during a retreat or advance resulting from brush aside or combat. Exception: see section 11.0, skirmishers.
5.16 No combat takes place during the movement phase. Once a player has begun to resolve combat and has rolled the die, he has irreversibly initiated the missile fire phase or the combat phase, whichever is relevant to his current attack.
5.17 The number of MP expended by a unit during a single movement phase may not exceed that unit's MA. A unit may expend any portion of its MA, but unused MP may not be accumulated from game turn to game turn or transferred to another unit.
5.18 Movement from hex to hex must be consecutive.
5.19 Once a unit has been moved, and the player has begun moving another piece, the unit may not be moved any farther that phase, nor may it change its move without the consent of the opposing player.
5.2 Effects of Terrain
The movement cost (indicated as an MP number) of each hex or hex side is indicated on the Terrain Effects Chart (TEC); terrain types are printed on the map and/or the TEC.
5.21 A unit must expend one MP to enter a clear hex. To enter other types of terrain, a unit must often expend more than one MP. Some hexes are entirely prohibited to movement.
5.22 A unit that moves from one trail hex directly into an adjacent trail hex through a trail hex side expends only one MP regardless of other terrain in the hex.
5.23 Units may enter river hexes by paying three MP. No additional movement costs are assessed to leave a river hex.
5.24 Units may cross a stream hex side by paying one additional MP. For example, if a unit moves through a stream hex side into a woods hex, the cost is four MP.
5.25 A unit may cross a ridge hex side by paying two additional MP.
5.26 If a scenario allows units to exit the map, a unit must expend one MP to do so.
5.3 Effects of Friendly Units
5.31 A friendly unit may move through hexes occupied by other friendly units. There is no additional cost for entering a friendly occupied hex.
5.32 A friendly unit may not end any phase stacked in the same hex with another friendly or enemy unit. In general, there may never be more than a single unit in a hex at the end of any phase. Exceptions: section 13, leaders, and any special exemption units listed in the Exclusive Rules.
5.33 There is no limit to the number of friendly units that may pass through a single hex during a movement phase.
5.34 Friendly ZOC hexes never inhibit the movement of friendly units, but units may never move directly from one enemy ZOC to another enemy ZOC, regardless of the presence of friendly units (see case 6.1).
6.0 Zones of Control
The six hexes immediately surrounding a hex constitute the ZOC of a unit in that hex. Hexes into which a unit exerts a ZOC inhibit the movement of enemy units. All units must cease movement when they enter any enemy ZOC hex.
6.1 All units except those printed with a black dot exert a ZOC throughout the game turn, regardless of the phase or player turn (exceptions: see cases 6.2 and 6.3). The presence of ZOC is never negated by enemy or friendly units or by other ZOC.
6.2 Units printed with a black dot do not exert a ZOC during a combat phase.
6.3 Leader units never exert a ZOC.
6.4 Units do not pay additional MP to enter an enemy ZOC.
6.5 There are generally only two ways for a unit to exit a hex in an enemy ZOC: either by the unit itself retreating or advancing after combat, or by either eliminating or retreating the enemy unit projecting the ZOC. Exceptions: see sections 11.0, skirmishers, 12.0, elephants, and 13.0, leaders.
6.5 (sic – numbered 6.5 twice in the source) If a ZOC-exerting unit is in an enemy ZOC, the enemy unit is also within that unit's ZOC. The two units are equally and mutually affected.
6.6 If enemy and friendly ZOC are exerted into the same hex at the same time, those ZOC co-exist and that hex is mutually affected by both ZOC. There is no additional effect from having more than one unit exerting ZOC into a single hex.
6.7 ZOC generally extend into all hexes adjacent to the projecting unit's hex. Exception: a unit never projects a ZOC into any terrain prohibited to that unit.
7.0 Missile Combat
In addition to melee combat, missile type units may also attack by firing at a defending unit. This occurs in the owning player's missile fire phase, which precedes melee combat conducted during the combat phase. Different missile units have different ranges, depending on their weapon type.
Missile units have a symbol printed in the upper right of their counter to indicate their exact capability: bow, javelin, sling and pila.
Missile units may attack a unit from one or two hexes distance, as set out on the Missile Fire Table. Typically, bows and slings have a range of up to two hexes, whereas javelins and pila have a range of only one hex. Missile attacks affect the defender only, never the attacker.
Missile units are permitted an unlimited number of missile fire attacks throughout the game. Exception: Roman legionary units have a one-time capability; once used, legionary units are flipped to their reverse sides to indicate their missiles have been used.
7.1 Missile Attacks
Units with missile fire capability may launch one missile attack per game turn during their side's missile fire phase. Firing missile units must be designated one at a time to fire at any one enemy unit within range; it must be the closest enemy unit, at the firing player's choice. The missile unit must have a clear LOS to the enemy unit, see case 7.2. The firing player then rolls a die and finds the corresponding result on the Missile Fire Table. The result, if any, is applied immediately.
Place a 'disrupted' or 'D(½)' marker on a defending unit that receives a disrupted result. That unit defends at half SP (retain fractions) during the immediately following combat phase (but see also case 7.18).
A disrupted unit projects a ZOC normally. After the combat phase, the disrupted marker is removed, and the unit suffers no other effect; it functions normally until disrupted again. Additional disrupted results against a unit that is already disrupted have no further effect.
7.11 Missile attacks are carried out one attacking unit at a time; it is not necessary to pre-designate these attacks. A unit may be missile attacked more than once in a missile fire phase.
7.12 Missile units are never forced to make a missile attack.
7.13 Missile units may both missile fire and engage in melee combat during a player turn. If they do so, they need not missile attack and melee attack the same unit.
7.14 Range from the firing missile unit to the target hex is determined by including in the count the target hex but not the firing unit's hex.
7.15 When attacking in the missile fire phase, missile units suffer no combat results; they are never affected by their own attacks.
7.16 The Missile Fire Table is printed on the game map or Player Aid Card.
7.17 A lone leader may never be targeted for a missile attack.
7.18 A chariot unit may also be disrupted by terrain (see Megiddo) or by charging (see Arbela); in both cases the unit's SP is halved for attack. The disruption marker is removed at the end of the ensuing combat phase.
7.19 Elephant units are never disrupted; instead they are made berserk by disruption results (see case 12.6).
7.2 Line of Sight (LOS)
7.21 To determine if a missile unit may fire at a two-hex range, the intervening hex between the missile unit and its target hex must be clear. If the intervening hex contains a blocking terrain feature, the target hex may not be attacked by that missile unit. Woods and slope hexes are blocking terrain features (but see case 7.23); others may be defined in the Exclusive Rules.
7.22 If the LOS is congruent to a hex side, that is, falls exactly between two connected hexes, it is blocked only if hexes on both sides of that hex side include a blocking terrain feature.
7.23 Slope hexes are considered clear hexes except when intersected by a ridge symbol between the firing unit and the target.
7.24 The terrain in the target hex and the hex of the firing unit does not block LOS.
7.25 Missile units may fire through other units, enemy or friendly.
7.3 Adjacent Attacks
7.31 A missile unit in an enemy ZOC may fire during its side's missile fire phase but it is limited to firing at an enemy unit to which it is adjacent.
7.32 When in an enemy ZOC during the combat phase, missile units must participate normally in an attack against adjacent enemy unit(s). In such cases, the missile unit attacks using its SP on the CRT. Exception: see case 8.17.
7.4 Defence
7.41 Missile units may never fire during the enemy's missile fire phase; they may only fire during the friendly missile fire phase.
7.42 When missile units are themselves attacked, they suffer combat results in the same manner as any other unit.
8.0 Melee Combat
Melee combat occurs between adjacent opposing units. It is usually mandatory and takes place in the combat phase. The player whose turn is currently occurring is termed the attacker; the other player is the defender, regardless of the overall situation.
Procedure: The attacker totals the SP of all the units attacking a hex and compares that total to the SP of the defending unit in the hex under attack (the target hex). That comparison is expressed as an odds ratio of attacking to defending SP (that is, attacking SP divided by defending SP), and it is simplified by rounding down to one of the odds ratios printed on the Combat Results Table (CRT). For example, if 13 SP are attacking 4 SP, the combat odds ratio is 3.25:1, rounded off (always in favour of the defender) to 3:1.
Having determined the combat odds, the attacker then rolls a die. The roll indicates a result on the CRT that is cross-indexed under the column heading corresponding to the calculated combat odds. That intersection of line and column yields a combat result.
Separate melee combats may be resolved in any order the attacker wishes. All melee combats are resolved during the combat phase and no new combat is begun until the preceding one has been entirely resolved.
8.1 Which Units Attack
8.11 All friendly units in an enemy ZOC must attack and all enemy units in friendly ZOC must be attacked in a friendly combat phase. Exception: see case 8.18. The player may resolve those attacks in any order desired, ensuring all adjacent enemy units are attacked within the requirements of case 8.2.
8.12 All units that begin their side's combat phase in an enemy ZOC must attack at least one adjacent enemy unit during that phase. All units that begin their side's combat phase with an enemy unit in their ZOC must attack at least one adjacent enemy unit during that phase. Exception: see case 8.18.
8.13 The attacking player may choose which of his attacking units will attack each defending unit, insofar as all adjacent friendly units in an enemy ZOC or with an enemy unit in their ZOC participate in an attack. Exception: see case 8.18. A unit may attack more than one enemy unit.
8.14 An enemy occupied hex may be attacked by as many units as can be brought to bear from the six adjacent hexes.
8.15 No unit may attack more than once per combat phase. The same enemy unit may be attacked during the missile fire phase and the combat phase of the same player turn.
8.16 Units may only attack adjacent enemy units during the combat phase using melee combat. That is, missile attacks are not permitted during the combat phase. Similarly, melee attacks are not permitted during the missile fire phase.
8.17 Units not exerting a ZOC adjacent only to enemy units also not exerting a ZOC are not forced to attack, although they may do so voluntarily. They may choose to attack some enemy units, and not others.
8.18 Units with parenthesised SP are not obliged to attack under any circumstances, although they may do so at half SP.
8.2 Multiple Unit and Multi-Hex Combat
8.21 If a player's unit is in the ZOC of more than one enemy unit, it must attack all those adjacent enemy units not engaged by some other attacking unit (see case 8.23). In such cases, the SP of all those defending units are totalled into one combined combat strength that is then compared to the attacking units' total combat strength when determining the combat odds ratio.
Note: Lone leaders are never required to (and cannot) attack an enemy unit.
8.22 Attacking units in two or more hexes may combine their SP and attack a single enemy occupied hex provided all the attacking units are adjacent to that enemy occupied hex. The SP of those attacking units are totalled into a combined combat strength, and they are then compared to the SP of the defending unit to determine the combat odds.
8.23 Where possible, multiple attacking units may only attack one defending unit; for example, two attacking units may not voluntarily attack two defending units in one combat.
8.3 Combat Strength Unity
Each unit's SP is unitary; it may not divide its SP among different combats whether attacking or defending.
8.4 Effects of Terrain
The effect of terrain on melee combat is indicated on the TEC. Terrain types are printed on the game map and/or the TEC.
8.41 Units defending in certain types of terrain may have their SP affected. That effect is expressed as a multiple or division of the original SP; that is, it is halved, doubled or tripled. When a unit's SP is halved, retain fractions. The Terrain Key printed on the game map or the TEC will indicate either:
- NE – No Effect – neither the attacking nor defending unit's SP is affected;
- AH – Attacker Halved – all attacking units attacking that hex do so at half SP;
- DD – Defender Doubled – the defending unit's SP in that hex is doubled; or
- DT – Defender Tripled – the defending unit's SP in that hex is tripled
for each type of terrain. Alternatively, the odds column used to resolve the combat may be shifted left, that is, combat is resolved on the odds column to the left of the actual odds.
8.42 Units attacking across certain types of terrain features may have their SP reduced. For example, units attacking across a stream or a ridge have their SP halved (AH). When units are attacking from two directions, one across a hex side terrain feature (such as a ridge) and another not across that feature, those units attacking across the feature are affected, and those that are not attacking in that way are not affected.
8.43 If an attacking unit's SP is halved by terrain against any defending unit, it is halved against all defending units.
8.44 Any halving of SP by terrain is not cumulative with any other halving effects on SP such as skirmishers attacking or cavalry attacking elephant units.
8.45 Units on slopes have their SP doubled on defence only if the attackers are farther from a ridge hex side or hill hex than the defenders. If the attackers include a unit that is the same distance or closer to the ridge hex side or hill hex, the defender's SP is not doubled.
8.5 Diversionary and High Odds Attacks
8.51 A unit may attack at poor odds in order that other attacks against other defending units may be made at higher odds.
8.52 Units may never voluntarily attack at odds of less than 1:4. If a unit is forced to attack at odds of less than 1:4, it is automatically eliminated (AL). A player is not required to try to save a unit in such a situation.
8.53 Ignore the 5:1 odds column on the CRT. Attacks at odds greater than 4:1 attract a '-1' modifier to the die roll for every additional odds ratio. Example: an attack of 6:1 is resolved on the 4:1 column of the CRT, but with '-2' to the die roll.
8.6 Explanation of Combat Results
- AR – Attacker Retreat – all attacking units must retreat one hex (see case 8.7);
- AL – Attacker Loss – attacker must eliminate one involved attacking unit of his choice;
- EX – Exchange – attacker and defender eliminate one involved unit of their own choice; alternatively, the attacker may attempt to substitute an AR result at his option. A die roll of '1-3' is required; on a die roll of '4-6' the result remains EX;
- DR – Defender Retreat – all involved defending units must retreat one hex (see case 8.7);
- DL – Defender Loss – defender must eliminate one involved defending unit of his choice;
- – No Effect – nothing happens to any involved unit on either side.
8.7 Retreating and Advancing After Combat
8.71 When the combat result requires a player's units involved in that battle to be retreated, the owning player must immediately move those units one hex such that they are no longer in an enemy ZOC. The owning player generally decides the direction each of his retreating units moves.
8.72 A retreating unit may not retreat into a prohibited hex, cross a prohibited hex side, retreat off the map, or enter an enemy ZOC.
8.73 A retreating unit may enter any adjacent vacant hex within the restrictions of case 8.72. If there is no such vacant hex, that unit is eliminated unless it can displace (see case 8.8).
8.74 More than one unit cannot retreat into the same hex.
8.75 Whenever a hex is vacated because of melee combat, one victorious unit that participated in that melee combat may advance into the vacated hex. That advance may be made regardless of enemy ZOC. The option to advance must be exercised immediately, before any other combat resolution. A unit is never forced to advance (exceptions: see cases 9.7 and 9.8). An advancing unit may never advance more than one hex because of a melee combat, and an advancing unit may not attack again during that melee combat phase after advancing.
8.76 In general, only one victorious unit may advance into a vacated hex. If two or more hexes are vacated because of a single melee combat, the victorious player may still advance a unit into only one of those vacated hexes.
8.77 Leaders may advance after combat with the unit with which they are stacked.
8.8 Displacement
8.81 Displacement is always available unless denied in the Exclusive Rules of the game. Exception: see case 12.5.
8.82 Procedure: if the only hex available to a retreating unit is one that is not in an enemy ZOC but already occupied by another friendly unit that is not involved in that same melee combat, that uninvolved unit is displaced (pushed out of its hex) by the retreating unit. The displaced unit is moved by the owning player as if it were retreating because of melee combat, and its hex is then occupied by the original retreating unit.
8.83 Displaced units can themselves displace other friendly units in a chain reaction of displacement, if that is the only path open to them. A unit may be displaced more than once per combat phase, if that is the only alternative. Units may not displace other friendly units if they have other paths of retreat open to them, and they must displace the minimum number of units necessary. The owning player may choose between equal situations.
8.84 If displacement would cause any displaced unit(s) to be eliminated, the original retreating unit is eliminated instead.
8.85 A unit may not displace adjacent to an enemy unit, even if that hex is not in an enemy ZOC, and/or occupied by a friendly unit.
8.86 Retreats are considered simultaneous; therefore, one retreating unit cannot displace another retreating unit.
9.0 Charges
Cavalry and elephants utilize the element of shock during battle; they may charge and thereby double their SP when attacking.
Procedure: Cavalry and elephant units that do not start their move adjacent to any enemy unit may charge. Exceptions: cavalry units with parenthesized SP may not charge, and cavalry units may not charge elephant units (see case 12.3).
9.1 A charge is a normal move, followed by an attack during the ensuing combat phase. Exception: elephant units may double their MA if charging (see case 12.1).
9.2 The charging unit's SP is doubled during the attack.
9.3 An AR result (including an optional AR converted from an EX) in an attack involving a charge automatically converts to an AL, with one of the charging units being eliminated. Note that no retreat is necessary (or allowed).
9.4 Leaders may add their strength additives to a charging unit, but leader strength additives are not doubled when accompanying charging units,
9.5 To receive the charge SP doubling:
a) the charging unit must only move through and end its movement in a clear or slope terrain hex; and
b) the defending target of the charge must be in an adjacent clear or slope terrain hex.
A charging unit may begin its move in any terrain, but may not move or attack across a river, ford, stream, ridge or obstacle hex side.
9.6 Charging and non-charging units may combine their SP in an attack.
9.7 One charging elephant unit must always advance after combat if an enemy occupied hex is vacated.
9.8 Charging cavalry units may be forced to advance after combat. If an enemy hex is vacated because of combat involving one or more charging cavalry units, a die is rolled for each charging cavalry unit: on a die roll of '1 – 4' the cavalry unit must advance after combat. Exception: If the charging cavalry unit is a skirmisher, on a die roll of '1 – 2' the cavalry unit must advance after combat.
Once one charging elephant or cavalry unit has been forced to advance, no more die rolls are required. If no cavalry unit is forced to advance, the attacking player may advance any one attacking unit, including any charging cavalry unit.
9.9 After a charge is complete, a charging unit's SP is immediately normal again.
10.0 Reinforcements
Some scenarios call for reinforcements for one or both sides to appear after the game has begun. Follow the directions in the Exclusive Rules for their starting locations and game turn(s) of arrival. Upon arriving, reinforcements are treated like any other unit.
11.0 Skirmishers
Skirmishers are identified with a black dot symbol. They may be brushed aside by non-skirmisher enemy units. They do not exert a ZOC during combat phases and may be eligible to leave an enemy ZOC during their side's movement phase or immediately before a melee combat. They may thus be able to avoid combat, depending on the type of adjacent enemy unit(s), either by disengagement or retreat before combat.
11.1 Brush Aside
During its movement phase a non-skirmisher unit may ignore a skirmisher unit's ZOC and attempt to brush it aside.
11.11 A non-skirmisher unit adjacent to an enemy skirmisher, that could otherwise enter the hex occupied by the enemy skirmisher, may attempt to brush it aside. Note that the ZOCs of other enemy units, including enemy skirmishers, may therefore prevent a brush aside.
11.12 The enemy player determines whether his unit will stand, in which case the brush aside has failed, and the friendly unit must cease movement.
11.13 If the enemy skirmisher does not stand, it is retreated two hexes. Units unable to retreat two hexes must stand. Units retreating from brush aside may not displace friendly units.
11.14 The moving unit enters the hex formerly occupied by the enemy skirmisher and then may continue its movement if it has enough movement points to do so.
11.15 A unit may attempt only one brush aside during its movement phase.
11.16 An enemy skirmisher may be brushed aside more than once in a movement phase by different enemy units.
11.17 Each time a skirmisher stands during a movement phase it should be marked as doing so; a numerical marker is helpful for this purpose. Standing reduces a skirmisher's ability to retreat before combat in the ensuing combat phase.
11.2 Disengagement
Skirmishers may leave an enemy ZOC during their side's movement phase provided their printed MA is equal to or greater than the MA of all adjacent enemy combat (not leader) units.
11.21 The first hex entered may not contain an enemy ZOC; after the first hex, disengaging units may potentially enter other enemy ZOC and may engage in combat normally. Exception: case 11.22.
11.22 Cavalry units using disengagement may not charge during the same movement phase.
11.3 Retreat Before Melee Combat
Skirmishers may retreat before melee combat if their MA is equal to or greater than that of each of their attackers. Any unit meeting that criterion may, before its combat is resolved, refuse combat and attempt to retreat.
11.31 Immediately before the combat die roll, after odds (including leader shifts) have been calculated, a unit may attempt to retreat.
11.32 If the skirmisher's MA is greater than each of its attackers and it has not stood in the previous movement phase (see case 11.17), it retreats two hexes automatically. Otherwise a die is rolled by the owning player:
- '1' – the skirmisher is eliminated;
- '2-6' – the skirmisher retreats two hexes.
11.32 (sic – numbered 11.32 twice in the source) For each time a unit stands in the previous movement phase, one is deducted from the retreat die roll.
11.33 One of the attacking units may advance into the first hex vacated by the retreating unit. Example: Cavalry skirmishers with a 6 MA may retreat before melee combat from attacking cavalry with a 5 MA. The defending cavalry would thus retreat two hexes, thereby allowing the attacking cavalry to advance one hex. Had the cavalry skirmishers stood in the previous movement phase, an adjusted die-roll of '1-2' would eliminate the cavalry skirmishers, again allowing the attacking cavalry to advance.
11.34 After a retreat before combat, the attacking units may not attack again in that combat phase.
11.35 If a unit cannot retreat two hexes it may not retreat before combat. Units retreating before combat may not displace friendly units.
11.36 Disrupted units may never retreat before combat.
12.0 Elephants
Elephant units are subject to the following additional cases.
12.1 Elephant units double their MA when charging. This doubling does not count when assessing the eligibility of enemy units to retreat before combat.
12.2 The SP of cavalry units is halved attacking elephant units.
12.3 Cavalry units may not charge elephant units.
12.4 Leader shifts (see case 13.4) may not be used in any combat including elephant units.
12.5 Elephant units may never displace or be displaced.
12.6 Under the following conditions, elephant units go berserk:
a) If they receive any combat result calling for them to retreat; or
b) If they receive a disruption result from enemy missile fire.
12.7 Berserk Elephant Procedure
As soon as an elephant unit goes berserk, normal play is suspended whilst players resolve the following procedure:
a) The player controlling the elephant unit rolls the die to determine the direction the elephant moves: '1' means a hex towards the friendly map edge, '2' means one hex side clockwise, and so forth.
b) The player then attempts to move the elephant unit one hex in that direction. Berserk elephant units ignore ZOCs but may not enter a hex occupied by a combat unit.
c) If there is a combat unit in the hex the elephant unit is about to enter, the elephant unit immediately attacks it, whether that unit is enemy or friendly. This is resolved as follows:
- Die roll of '1-2': DL – Defender Loss – defending unit is eliminated;
- Die roll of '3-4': EX – Exchange – both elephant and defending units are eliminated;
- Die roll of '5-6': AL – Attacker Loss – elephant unit is eliminated.
d) If the elephant unit has not attacked, after entering the adjacent hex the owning player again rolls a die and the procedure is repeated.
e) If the elephant unit completes its berserk move of two hexes without attacking, the elephant unit may return to normal or rampage off the battlefield:
- Die roll of '1-3': Elephant unit returns to normal;
- Die roll of '4-6': Elephant unit runs amok and is eliminated. Owning player loses ½ VP (only) per elephant unit SP.
12.8 If a berserk elephant unit attacks another elephant unit then the second elephant unit may also go berserk. This is resolved after the first elephant unit's berserk move is completed.
12.9 Elephant units may go berserk in either the friendly or enemy player turn.
13.0 Leaders
Leaders are not considered combat units; they do not exert ZOC, and they may leave enemy ZOC using the disengagement and retreat before combat procedures (see section 11.0, skirmishers).
13.1 If any enemy unit moves into a hex occupied by a lone leader during the movement or combat phase, both players roll a die and add to that result the printed MA of his involved unit. If the leader's result is equal or higher, that leader must immediately be moved, up to the limit of his unmodified MA, toward the nearest friendly unit with which it can stack using normal movement rules. If the leader's result is lower, or if the leader cannot move toward a friendly unit by being surrounded by enemy units, enemy ZOC or obstructed by prohibited terrain, that leader is eliminated in place instead. He is not eligible for rally. In either case, the moving enemy unit that caused the retreat may continue its movement normally.
13.2 Leaders are unique units that may stack with friendly combat units. Leaders may not stack with leaders. If stacked with any friendly combat unit during the combat phase, a leader may add its strength additive to the SP of that unit (whether attacking or defending). If that friendly unit is eliminated, the leader simply remains in the hex, although if any enemy unit then advances into the hex after that combat, case 13.1 applies. A leader may not use its strength additive more than once in a combat phase.
13.3 A leader's strength additive is never affected by terrain, disruption or charging.
13.4 A leader may be used to shift the odds of any attack or defence involving the unit it is stacked with. Immediately prior to the combat die-roll, the owning player may state that he is using his leader shift. If a player uses a leader shift in the attack, the combat is assessed at one odds ratio higher than normal, and if on the defence one odds ratio lower than normal. A leader shift may be used in reaction to an enemy leader shift; leaders can therefore cancel out one another's effect. No more than one leader shift per side may be applied to any one combat. Exception: leader shifts can never be applied to a combat involving elephant units.
13.5 A leader is limited in the number of times his ability to shift combat odds may be used in a game equal to his strength additive; players should indicate usage with a numerical marker.
13.6 Enemy units may melee attack a lone leader, but that leader then automatically performs a retreat before combat, permitting the attacker to advance into the target hex. A lone leader may never attack; if adjacent to any enemy unit, a lone leader is not required to (and may not) attack.
13.7 Leaders are never affected by missile attack, though any unit stacked with a leader is subject to missile attack normally.
13.8 Leaders are marked with a black dot and may perform disengagement and retreat before melee combat (see section 11.0, skirmishers). They never require a die roll to retreat before combat.
13.9 Leaders can rally units (see section 14.0, rally).
14.0 Rally
Each scenario indicates a rally capability for each side.
Procedure: During each rally phase a player may designate a leader and attempt to rally one unit. The player simply rolls the die and refers to the Rally column on the Rally, Demoralization & Disintegration Table to determine if an eliminated unit is returned to play.
If the rally is successful, a randomly chosen eliminated unit is returned to play by being placed adjacent to the rallying friendly leader.
14.1 One is added to the rally die-roll if the rallying leader is in an enemy ZOC.
14.2 One is subtracted from the rally die roll if the rallying leader:
a) is a primary leader (highest strength additive) on that side; and
b) did not move or attack during that player turn.
There may be more than one primary leader per side.
14.3 If there are no friendly leaders on the map or placing a rallied unit adjacent to a friendly leader would also place the rallied unit in an enemy ZOC, no rally is possible.
14.4 If there are no eliminated units to rally, the player may not rally. Rally ability may not be accumulated from game turn to game turn.
14.5 Roman legionaries lose their missile weapon capability when rallied; they are returned to play on their reverse side even if they had not used their missiles prior to elimination.
14.6 Units with a reduced SP are returned to play at their reduced SP.
14.7 Once a unit has been rallied, it no longer counts as having been eliminated for purposes of victory conditions or points accumulated toward disintegration and demoralization (see case 15.1). Exception: units rallied with a reduced SP; these SP remain lost.
14.8 Leaders and elephant units may never be rallied.
15.0 Army Morale
The demoralization and disintegration levels for both sides in each battle represent the moment when fatigue and attrition affect each army's overall morale.
15.1 Demoralization
When the number of VP lost by a side is equal to or greater than that side's demoralization level, that side becomes demoralized. All the attack odds of a demoralized side are shifted one column left on the CRT for the remainder of that game. For example, a demoralized unit conducting what would otherwise be a 2:1 attack has those odds shifted left one column on the CRT to become a 1:1 attack instead.
Demoralization occurs the instant the demoralization level is reached, and the effects of demoralization apply to all melee combats occurring thereafter, even if starting in the middle of a combat phase. A side cannot recover from demoralization. If both sides are demoralized, the effect cancels out.
15.2 Disintegration
When the number of VP lost by a side is equal to or greater than the disintegration level, that side disintegrates, and the opposing side achieves an automatic decisive victory; the game is over. If both sides disintegrate at the same time (through an EX combat result), the game is a draw.
15.3 Demoralization and disintegration levels are printed on the map sheet, in the Exclusive Rules or on the Player Aid Card.
15.4 End of game VP awards do not affect demoralization or disintegration.
16.0 Victory Conditions
If neither side disintegrates (see case 15.2) by the final game turn, victory is awarded to the player who has amassed the greatest number of VP. Players receive VP for eliminating enemy units and leaders. In addition, the Exclusive Rules of each scenario may contain additional conditions or objectives that potentially award victory or VP to one or both sides.
16.1 Victory Point Schedule
16.11 Each player receives 1 VP for each enemy SP removed from play; rallied units do not count. Exception: see case 12.7 (e). Units that are reduced count their lost SP for VP.
16.12 Each player receives 5 VP per leader strength additive for eliminating an enemy leader.
16.13 Each scenario may have unique conditions which may affect VP or otherwise determine or affect victory.
16.2 Levels of Victory
Victory is awarded according to the margin of victory, expressed as a ratio of winner's VP to loser's VP:
- A ratio of greater than 1:1 is a marginal victory;
- A ratio of 1.5:1 or greater is a substantial victory; and
- A ratio of 2:1 or greater is a decisive victory.
17.0 Developer's Notes
The changes in these rules are quite extensive; they are enough to change the character of the game somewhat. Any increase in complexity is marginal.
The scenarios are not particularly balanced in their original form. Many changes have been made to the scenarios in this revision, but again, balance has not been the highest priority. Scenarios and components have, in principle, not been radically re-designed, although Megiddo and Qadesh needed additional work due to my disagreement on the use of chariots, the primary weapons system of the day, and Granicus requires additional counters.
The CRT has been abbreviated, and the attrition rate of desultory 1:1 and 2:1 combat has been reduced due to the optional retreat instead of an Exchange. Skirmishers are now more flexible but are vulnerable if they try to hold ground. Players may temporarily lose control of charging units, and berserk elephants remain a menace, if not mainly to themselves.
Note that the first edition facing rules have not been adopted in this revision in pursuance of a 'folio level' feel and complexity. The rationale, as always, is that the individual unit commanders are responsible for adopting the most appropriate tactical disposition; their success or otherwise is subsumed into the generality of the simple combat system.
For historical and players' notes, please refer to the original booklets.
Exclusive Rules
The Exclusive Rules give scenario instructions and rules that apply only to the battle represented. The scenarios follow in the order printed in the source.
Megiddo, 1479 BC
1.0 Introduction
Megiddo is a simulation of the battle between the Egyptians under Pharaoh Tuthmosis III, and a coalition of Asiatic armies from Qadesh, the Mitanni and the Hittites, under the command of the King of Qadesh. The battle took place north of modern Mount Carmel, within sight of the fortress of Megiddo.
2.0 Initial Deployment
2.1 Each player sets up his units in the hex designated on the map sheet. A chariot unit sets up in each hex indicating cavalry (see section 5.0).
2.2 The Egyptian player moves first on each of the ten game turns.
2.3 Scale: Each hex in Megiddo is 100 metres across. Each game turn represents approximately one-half hour. The playing pieces represent the chariot forces and other military formations of the time. Each SP represents about 125 men.
3.0 Special Rules
3.1 Chariots: Chariot units:
a) are skirmishers;
b) have missile capability (arrows and spears with one hex range);
c) when using missile fire a die roll of '1' eliminates the target unit; and
d) are disrupted attacking across a Kina Hill slope hex side (those hex sides immediately surrounding the hill top).
3.2 Displacement: No unit may use displacement in Megiddo.
4.0 Victory Conditions
4.1 If either primary (highest strength additive) leader is eliminated or forced off the map, the other side wins an automatic decisive victory.
4.2 Each enemy camp is worth 25 VP at the end of the game. The opposing player must simply pass through the camp hex at any time to gain the VP.
5.0 Errata
5.1 Map: North is hex row xx00.
Treat Kina Brook as a river for chariot units and as a ford for infantry and leader units.
The '2-5' notation in hex 4722 is an error; that hex should be blank.
5.2 Counters:
- Replace the 5 × Egyptian 2-4 chariots with 5 × Coalition 2-4 chariots.
- Replace the 4 × Coalition 1-5 cavalry archers with 4 × Egyptian 3-4 chariots.
- Replace the 2 × Coalition 3-4 cavalry archers with 2 × Coalition 3-4 chariots (these are Mitanni).
- Replace 2 × Coalition 3-4 cavalry archers with 2 × Coalition 1-9 leaders.
- Replace all remaining Coalition cavalry with Coalition 2-4 chariots.
- Replace all remaining Egyptian cavalry with Egyptian 3-4 chariots.
- Mark all chariot units with parenthesised SP, a skirmisher dot and an arrow icon.
- Mark all leaders with a skirmisher dot.
Qadesh, 1274 BC
1.0 Introduction
The battle of Qadesh was one of the most important battles in ancient history. It was the largest clash between the expanding Hittites under Muwatalli II and the Egyptians; the outcome determined the fate of what is today Syria, northern Iraq and Turkey. A brilliant Hittite ambush handed the Egyptians under Rameses II one of their most crushing defeats and limited the extent of Egypt's northern expansion.
2.0 Initial Deployment
2.1 Each player sets up his units in the hex designated on the map sheet.
2.2 The Hittite player moves first on each of the ten game turns. The Hittites east of the Orontes River may not move until game turn four.
2.3 Scale: Each hex in Qadesh is 200 metres across. Each game turn represents approximately one hour. The playing pieces represent the chariot forces and other military formations of the time. Each SP represents about 100-125 men.
3.0 Special Rules
3.1 Chariots: Chariot units:
a) are skirmishers;
b) have missile capability (arrows and spears with one hex range); and
c) when using missile fire a die roll of '1' eliminates the target unit.
3.2 Rallied Units: Only the Egyptian player may rally units. Rallied units do not appear next to the leader but anywhere in the Egyptian camp. If they cannot be placed there, they appear on the northern edge of the map. Ignore cases 14.1 and 14.2.
3.3 Displacement: No unit may use displacement in Qadesh.
4.0 Victory Conditions
4.1 If either leader is eliminated or forced off the map, the other side wins an automatic decisive victory.
4.2 Each Egyptian camp hex is worth 2 VP to the Hittites at the end of the game. A Hittite unit must simply pass through the camp hex at any time to gain the VP.
5.0 Optional Rule
5.1 Egyptian Awareness: Assume the Egyptians discovered the ambush before it was sprung; the Egyptian player moves first each game turn.
6.0 Errata
6.1 Map: North is towards the lake. Add names to Orontes River and Shabtuna Forest. Hittite 4-5 #30 sets up in hex 2020.
6.2 Counters:
- Mark all chariot units with parenthesised SP, a skirmisher dot and an arrow icon.
- Mark all archer units with a skirmisher dot.
- Mark all leaders with a skirmisher dot.
Marathon, 490 BC
1.0 Introduction
Marathon is a simulation of the battle between invading Persian forces and the Greek forces that occurred near Athens.
2.0 Initial Deployment
2.1 Each player sets up his units in the hexes designated on the map sheet.
2.2 The Persian player moves first on each of the ten game turns.
2.3 Scale: Each hex in Marathon is 150 metres across. Each game turn represents approximately 30 minutes. The playing pieces represent the military formations of the time; the Greek units are not the 'two-sided' phalanxes (represented in later scenarios) as they were assembled from city militia rather than professional soldiers; the counters have only one side.
2.4 Army Morale and Rally:
-
Greek demoralization – 60
-
Greek disintegration – 75
-
Greek rally die-roll – '1'
-
Persian demoralization – 60
-
Persian disintegration – 75
-
Persian rally die roll – '1'
3.0 Special Rules
3.1 Persian Deployment: The Persian army was still assembling when the Greeks attacked. No Persian unit may move on game turn one.
Persian cavalry may not move until game turn four. If attacked on Game Turns one to three, they defend at half SP and if forced to retreat are eliminated.
3.2 Greek Run to Battle: On game turn one all Greek units have an MA of nine. Consequently, Persian archers will be unable to retreat before combat if attacked.
3.3 Leading from the Front: Case 14.1 does not apply to the Greek leader.
3.4 Displacement: No unit may use displacement in Marathon.
4.0 Victory Conditions
4.1 Each Persian camp hex is worth 1 VP to the Greeks at the end of the game. A Greek unit must simply pass through the camp hex at any time to gain the VP.
5.0 Errata
5.1 Map: The watercourse is a stream, not a river. Roads have no effect other than negating the MP cost of a stream hex side. Swamp hexes are prohibited. Camp hexes count as 2MP for movement; there is no effect on combat.
5.2 Counters: Persian cavalry combat strengths should be parenthesised (each unit represents only around 80 riders).
Granicus, May 334 BC
1.0 Introduction
The battle of Granicus was Alexander's first battle in his attempt to conquer Asia. The Macedonians encountered a Persian army drawn up in a defensive position along the Granicus River.
2.0 Initial Deployment
2.1 Each player sets up his units in the hexes designated on the map sheet.
2.2 The Macedonian player moves first on each of the ten game turns.
2.3 Scale: Each hex in Granicus is 150 metres across. Each game turn represents approximately one-half hour. Each SP equals 250 men.
2.4 Army Morale and Rally:
-
Macedonian demoralization – 60
-
Macedonian disintegration – 75
-
Macedonian rally die roll – '1-3'
-
Persian demoralization – 60
-
Persian disintegration – 75
-
Persian rally die roll – '1'
3.0 Special Rules
3.1 Elite Leader: Alexander may use his ability to shift combat odds during the game equal to twice his strength additive; players should indicate usage with a numerical marker. In addition, Alexander may apply up to two shifts per combat. Case 14.1 does not apply to Alexander.
3.2 Elite Units: The Macedonian phalanxes and Companion cavalry have a reduced side. A full SP unit can satisfy a loss, or a retreat result when it cannot otherwise retreat due to enemy ZOC or prohibited terrain, by flipping to its reduced side.
Whenever a full SP phalanx or Companion cavalry unit is subject to an AL, EX or DL combat result, it is flipped to its reverse side. An already reduced SP phalanx or Companion cavalry unit is eliminated as normal.
An eliminated phalanx or Companion cavalry unit may be rallied and returned to play at reduced SP.
The SP lost by a reduced unit are counted for Persian VP and for Macedonian demoralization and disintegration.
3.3 Macedonian Initiative: The Persians placed their army in a strong defensive position behind the Granicus River, but this stance gave the Macedonians the initiative, and Alexander made full use of it. To simulate Alexander's aggressiveness, the Macedonians receive a one odds column shift to the right on the CRT for each of their game turn one melee attacks.
3.4 Displacement: No unit may use displacement in Granicus.
4.0 Victory Conditions
4.1 Additional Victory Condition: If either leader is killed or forced off the map, the other side wins an automatic victory.
5.0 Errata
5.1 Map: Icons in hexes 3707 & 3808 are wrong, but unit values are correct. Add name to Granicus River.
5.2 Counters: The following additional Macedonian cavalry counters are required (players may use the appropriate counters from Issus):
| Unit | Starting hex |
|---|---|
| 7-5/3-5 | 5925 |
| 2-6 skirmisher | 5204 |
| 2-5 skirmisher | 5205 |
| 2-5 skirmisher | 5820 |
| 1-6 skirmisher | 5922 |
Issus, November 333 BC
1.0 Introduction
Issus is a simulation of a battle between the Macedonian forces led by Alexander and the Persian forces lead by Darius. Alexander had moved down the Eastern Mediterranean coast to capture the ports which supported the Persian fleet. Darius then moved to the coast behind Alexander's march route and cut off the Macedonian's lines of communication. The battle became decisive because a Macedonian defeat would have ended Alexander's campaign. As it was, Issus was the closest Alexander came to defeat, even though he would go on to face a re-equipped and larger Persian army at Arbela.
2.0 Initial Deployment
2.1 Each player sets up his units in the hexes designated on the map sheet.
2.2 The Macedonian player moves first on each of the ten game turns.
2.3 Scale: Each hex in Issus is 150 metres across. Each SP equals 333 men, with a bonus SP added to superior units.
3.0 Special Rules
3.1 Elite Leader: Alexander may use his ability to shift combat odds during the game equal to twice his strength additive; players should indicate usage with a numerical marker. In addition, Alexander may apply up to two shifts per combat. Case 14.1 does not apply to Alexander.
3.2 Elite Units: The Macedonian phalanxes and Companion cavalry have a reduced side. A full SP unit can satisfy a loss, or a retreat result when it cannot otherwise retreat due to enemy ZOC or prohibited terrain, by flipping to its reduced side.
Whenever a full SP phalanx or Companion cavalry unit is subject to an AL, EX or DL combat result, it is flipped to its reverse side. An already reduced SP phalanx or Companion cavalry unit is eliminated as normal.
An eliminated phalanx or Companion cavalry unit may be rallied and returned to play at reduced SP.
The SP lost by a reduced unit are counted for Persian VP and for Macedonian demoralization and disintegration.
3.3 Rivers and Fords: All units' SP on attack when attacking out of a river or ford hex, including into another river or ford hex.
3.4 Displacement: No unit may use displacement in Issus.
4.0 Victory Conditions
4.1 Additional Victory Point Schedule:
4.11 The Macedonian player receives one-half VP for each SP north of the river at the end of the game.
4.12 The Persian player receives one-half VP for each SP south of the river at the end of the game.
5.0 Errata
5.1 Counters:
- Remove all information on the rear side of the Persian units.
- Remove all information on the rear side of 7 × Macedonian 3-4 infantry (units #4 - #10).
- Add '3-3' to rear side of 3 × Macedonian 6-3 phalanx (units #4 - #6).
- Add '2-3' to rear side of 4 × Macedonian 5-3 phalanx (units #7 - #10).
Arbela, 1 October 331 BC
1.0 Introduction
Arbela is a simulation of the climactic battle between the Macedonian army under Alexander and the armies of the Persian Empire under their God-King Darius.
2.0 Initial Deployment
2.1 Each player sets up his units according to the hex numbers printed on the back of each counter.
2.2 The Macedonian player moves first on each game turn.
2.3 Scale: Each hex in Arbela is 200 metres across. The unit scale is 1 SP equals 333 men, with 1 or 2 bonus SP to elite troops.
3.0 Special Rules
3.1 Elite Leader: Alexander may use his ability to shift combat odds during the game equal to twice his strength additive; players should indicate usage with a numerical marker. In addition, Alexander may apply up to two shifts per combat. Case 14.1 does not apply to Alexander.
3.2 Elite Units: The Macedonian phalanxes and Companion cavalry have reduced values as follows:
| Initial values | Reduced values |
|---|---|
| 9-3 | 4-3 |
| 7-3 | 3-3 |
| 9-5 | 4-5 |
A full SP unit can satisfy a loss, or a retreat result when it cannot otherwise retreat due to enemy ZOC or prohibited terrain, by being identified with a 'reduced' marker.
Whenever a full SP phalanx or Companion cavalry unit is subject to an AL, EX or DL combat result, it is flipped to its reverse side. An already reduced SP phalanx or Companion cavalry unit is eliminated as normal.
An eliminated phalanx or Companion cavalry unit may be rallied and returned to play at reduced SP.
The SP lost by a reduced unit are counted for Persian VP and for Macedonian demoralization and disintegration.
3.3 Persian Movement Restrictions: Darius may not move outside a two-hex range of hex 3112.
On game turn one the Persian player may move only twelve of his units.
3.4 Scythed Chariots: Persian chariot units must charge if they enter an enemy ZOC. Their SP is tripled when charging. If they survive a charge attack they are disordered until the end of the next enemy melee combat phase.
3.5 Displacement: No unit may use displacement in Arbela.
4.0 Victory Conditions
4.1 The game ends immediately either:
a) when one or both armies disintegrate;
b) when a royal leader (Alexander or Darius) is eliminated or forced to retreat off the map; or
c) if any complete player turn after game turn ten passes without a melee combat taking place. Brush aside and missile fire do not count.
In cases a) and b) the game ends in an immediate decisive victory for the side not disintegrating nor having its royal leader eliminated or retreated off the map.
Otherwise the game is over, and the level of victory is determined by the relative VPs at the end of the game. Players receive VP for destroying enemy units and for securing certain territorial objectives during play; see the VP Schedule for the specific VP awards.
Procedure: At the end of the game, the number of VP is totalled for each player; the player with the higher number of VP totalling 75 or more is awarded a victory.
4.2 Additional Victory Point Schedule:
4.21 The Macedonian player receives immediately 10 VP for occupying hex 3112 at any time during the game. This hex contained the Persian royal chariot, banners, and headquarters.
4.22 The Persian player receives immediately 20 VP for eliminating the Macedonian baggage train. The baggage train has a defence of 1 SP. It may never attack or retreat; if forced to retreat it is eliminated. One Macedonian combat unit may stack with the Macedonian baggage train; if attacked while stacked with a combat unit, the baggage train's 1 SP is added to the combat unit's defence strength. If a DL is obtained against them, both units are eliminated (i.e. this is an exception to the normal DL result).
4.3 Victory Levels: In the battle of Arbela both sides had the burden of attacking. Either side must accumulate at least 75 VP to achieve a victory; any less and the battle is a draw. Exception: if neither side achieves at least 50 VP, it is a Persian marginal victory.
5.0 Errata
5.1 Counters: Change Persian leader 'Bessue' to Bessus; leave his setup in hex 3023 (not 2904 per the replacement counter).
5.2 Counters:
- Change Persian 3-5 Med cavalry setup from hex 2903 to hex 3003 and remove its skirmisher dot.
- Change Macedonian (2)-4 Cretan foot archer in hex 2105 to (3)-4.
- Change (2)-4 horse archer in hex 1617 to a (2)-4 foot archer.
Lake Trasimene, 24 June 217 BC
1.0 Introduction
Lake Trasimene was one of Hannibal's greatest victories. After defeating the Roman general Sempronius at Trebbia in 218, Hannibal was caught between two Roman armies, one commanded by Flaminius and the other under Servilius. If the Roman armies combined, the Carthaginians could be doomed. Hannibal decided to destroy each enemy army in detail. He lured Flaminius and his army to a position near Lake Trasimene by pillaging the countryside. Once Flaminius was near, Hannibal positioned his forces on the heights of a narrow defile which followed the shore of the lake. Flaminius advanced without proper reconnaissance, trying to catch Hannibal, but was himself caught in an ambush in the defile. The Roman army was slaughtered. Flaminius' defeat caused the Romans to change their strategy, placing Quintus Fabius in charge, who emphasized a strategy of delay.
2.0 Initial Deployment
2.1 Each player sets up his units in the hexes designated on the map sheet.
2.2 The Carthaginian player moves first on each of the 10 game turns.
2.3 Scale: Each hex in Lake Trasimene is 200 metres across. Each game turn represents approximately one hour. The playing pieces represent the military formations of the time. Each infantry SP represents 250 men.
3.0 Special Rules
3.1 Carthaginian Surprise Attack: Hannibal put his forces in a strong tactical position on the heights overlooking the lake where they could sweep down on the Romans. To simulate that advantage, all Carthaginian units have their SP and MA doubled during game turn one. Carthaginian cavalry units do not receive a charge bonus on game turn one.
3.2 Displacement: Carthaginian units may not use displacement in Lake Trasimene.
4.0 Victory Conditions
4.1 Roman Desperation: If either side reaches their disintegration level, they have lost the battle. However, the Romans have no option but to fight on, with an adverse two column shift in combat. The Romans win a moral (only) victory if any of their units remain on the map at the end of ten game turns.
5.0 Optional Rules
5.1 Assume the Romans discovered the ambush before it was sprung; the Romans move and fight first each game turn, and the Carthaginians do not receive their game turn one advantages.
5.2 Earthquake: A huge earthquake occurred during the battle, but the armies were so fiercely engaged that no one noticed. Had this been seen as an omen, morale could have been affected. Starting with game turn six the Roman player rolls one die at the beginning of his turn:
'1-3' – the earthquake occurs;
'4-6' – no effect, roll again on the next game turn.
If the earthquake occurs, both players immediately roll two dice to represent their losses through panic; each player removes SP equal to or greater than their respective dice roll, owning player's choice. These losses count for demoralization and disintegration. Note the earthquake can happen only once per game.
6.0 Errata
6.1 Map: Change Hannibal leader in hex 3543 to '3-9'. Unit in hex 1442 should be 6-6 cavalry (not 6-4 infantry). The road negates the +1 MP cost when crossing streams; cavalry units still cannot charge across streams, even via the road.
6.2 Counters: Change the colour of 5 × Carthaginian cavalry to purple. Errata counters were provided for this, but they make the unit in hex 1442 an 8-6 cavalry, which is probably an error. Mark Roman leaders with a skirmisher dot.
Metaurus, 22 June 207 BC
1.0 Introduction
Metaurus is a simulation of the battle between the armies of Rome under their consuls and the Carthaginian forces under Hasdrubal (Hannibal's brother) in 207 BC. The Carthaginians were surprised at dawn while endeavouring to find a ford in the Metaurus River. A hastily drawn up line of battle, with the Gauls on the left behind a nearly impassable ravine set the stage for Nero's wide flanking manoeuvre. This caught the Carthaginians in the rear, routing them, and giving Rome ascendancy over Carthage.
2.0 Initial Deployment
2.1 Each player sets up his units in the hexes designated on the map sheet. Note that Nero's forces are marked with 'N's.
2.2 The Carthaginian player moves first on each of the ten game turns.
2.3 Scale: Each hex is 150 metres across. Each Carthaginian (African, Spanish and Gallic) unit is about 1,000 men. Slinger and African cavalry units are about 500 men each. Each elephant unit represents two elephants. Each Roman legion and ally velite unit is about 1,000-1,200 men, and each Roman cavalry unit is about 300-400 mounted men.
3.0 Special Rules
3.1 Gallic Inactivity: Hasdrubal posted the unreliable Gauls (4-4s) on his strongest defensive terrain and ordered them to hold. No Gallic unit may move until game turn six. If any Gallic unit is attacked prior to game turn six, all Gallic units may move and attack normally.
3.2 Nero's Flank Attack: All infantry units of Nero's command are eligible to make a special flanking manoeuvre; Nero's cavalry remained on the right flank to screen that side. To simulate this, on game turn one, the Roman player may declare the flanking move in effect and remove any or all of Nero's three 8-3 infantry units from the map (those which start on hexes 3825-3827). Nero may accompany the move but is not required to do so. On game turn three, these forces may re-enter the map anywhere along the eastern or southern map edge, paying one MP to enter. They may enter a Carthaginian ZOC.
3.3 Roman Units:
3.31 Roman 3-6 cavalry may not charge, disengage or retreat before combat (they fought dismounted).
3.32 Roman velites (4-4s) have unlimited javelins.
3.4 Metaurus River: The Metaurus River may not be entered or crossed. Treat all river hexes as prohibited except for the ford hex.
4.0 Victory Conditions
4.1 Additional Victory Point Schedule: The Carthaginian player receives one-half VP for each SP of non-Gallic Carthaginian units north of the Metaurus River at the end of the game.
5.0 Errata
5.1 Map: The leader who sets up in hex 3712 is Livius, and the leader who sets up in hex 3315 is Licinus.
5.2 Counters: The 'Hannibal' leader should be 'Hasdrubal'.
Cannae, 2 August 216 BC
1.0 Introduction
Cannae is simulation of the battle which took place between the armies of Rome under the Consul Varro and the Carthaginian army under Hannibal in 216 BC.
2.0 Initial Deployment
2.1 Each player sets up his units according to the hex numbers printed on the back of each counter.
2.2 The Roman player moves first on each of the ten game turns.
2.3 Scale: Each hex in Cannae is 150 metres across. The unit scale is:
| Unit type | No. of men |
|---|---|
| 6-3 Roman Ally | 1,400 |
| 8-3 Roman Legion | 1,400 |
| 4-6 Roman Ally Cavalry | 1,600 |
| 3-6 Roman Cavalry | 1,600 |
| 8-3 African | 1,000 |
| 6-4 Spanish | 1,000 |
| 4-4 Gauls | 2,000 |
| 2-4 Balearic Slingers | 500 |
| 8-6 African Cavalry | 500 |
| 6-6 Spanish Cavalry | 500 |
| 6-6 Gallic Cavalry | 1,000 |
| 4-8 Numidian Cavalry | 500 |
Note: The Roman Allied infantry are not labelled with any legion numbers, and the slingers on the Carthaginian side are Balearic.
3.0 Reinforcements
Before the battle, one unit of 500 Numidians rode over to the Roman lines and pretended to desert. Once the fighting started, they drew hidden weapons and attacked the Roman rear.
Procedure: At the beginning of the Carthaginian player turn two, place one 4-8 Numidian cavalry on any hex on the 70xx hex row.
4.0 Special Rules
4.1 Movement Restrictions: Due to its unwieldy size and large number of recruits in his army, Varro was determined to drive straight for the Carthaginian centre. The weaker Roman cavalry was to protect the flanks.
4.11 To represent this initial Roman drive, all Roman and Allied infantry must move north within the shaded Movement Zone marked on the map for their full MA unless blocked by another unit or stopped by enemy ZOC, on the first four game turns.
The northernmost line of Roman units moves first, then the next northernmost, etc. Roman units must move into the shaded area if they are not already in it by moving laterally and then northwest or northeast once they are lined up with the shaded area. Once in the shaded area, they must move either northwest or northeast unless blocked by other Roman or enemy units; if blocked by Roman units, they must move laterally toward the centre of the shaded hex row they are in.
Roman and Roman Allied cavalry may move freely but are always moved after Roman and Allied infantry until after game turn four.
4.12 If any Roman or Roman Allied Infantry unit is attacked by any Carthaginian unit during any Combat Phase during game turns one to four, all Roman and Roman Allied units are free from the restrictions of case 4.11. Otherwise, the restrictions are lifted at the start of the Roman player turn five.
4.2 Displacement: Due to the semi-trained state of the newly raised legions, and to Varro's decision to close intervals, there was little available room for Roman manoeuvre. Roman units may not use displacement in Cannae.
5.0 Victory Conditions
At the end of game turn ten, victory is awarded to the player who has amassed the greatest number of VP. Players receive VP for eliminating enemy units and for securing certain territorial objectives either during play or at the end of the game.
Procedure: At the end of the game, the number of VP is totalled for each player, and the player with the higher number of VP is awarded a victory. In the actual battle of Cannae, both sides had the burden of attacking. Either side must therefore accumulate at least 100 VP to achieve a victory; any less and the battle is a draw.
5.1 Additional Victory Point Schedule:
5.11 The Roman player receives 20 VP at the instant a friendly unit enters the northernmost line of river hexes (between hexes 4803 and hexes 4817, inclusive).
5.12 The Carthaginian player receives 20 VP at the instant the Roman player cannot trace a path of hexes free of enemy units or ZOC from one of his units to the north, south, or east map edge. This path can enter a river hex but may not cross it.
6.0 Optional Rules
6.1 Roman Free Movement: The two Roman consuls alternated command of the army on alternate days. Paullus was a much more cautious man than Varro and not committed to a total attack. For this scenario, the armies are deployed as in the regular game, but no Roman movement is mandated. Roman units may move and attack freely from game turn one. Roman displacement is not allowed. Use the Varro leader counter for Paullus; the leader values are the same for both commanders.
6.2 Free Deployment and Movement: Both armies may deploy and move freely from game turn one. Deploy on or behind row 66XX for the Romans and row 59XX for the Carthaginians. Roman displacement is not allowed.
7.0 Errata
7.1 Counters: Two Carthaginian African infantry set up in hexes 5808 and 5809 are incorrectly labelled as 6-4s; they should be 8-3s. Add one Roman 3-6 cavalry to setup in hex 6603. Change one Roman 6-3 infantry setup from hex 6803 to 6808.
Zama, October 202 BC
1.0 Introduction
Zama is a simulation of the climactic battle of the Second Punic War; a struggle for control of the western Mediterranean world between the Roman Republic and Carthage. The battle saw the confrontation of two great military geniuses: Hannibal of Carthage and Scipio Africanus of Rome. Zama was their first and only military engagement. The Roman victory at Zama ensured military and political supremacy for the Republic and cleared the path to Empire.
2.0 Initial Deployment
2.1 The Carthaginians set up first. Each side's initial deployment hexes are indicated on the map by tinted hexes. Each Sub-Command has its own set-up hexes. Players may set up their units from each Sub-Command as they wish, but all units of a Sub-Command must be placed on the proper set-up hexes. Sub-Commands are indicated by the coloured stripe on the units (see below).
2.2 The Carthaginian player moves first on each of the ten game turns. The Carthaginian player may only move his elephant units on game turn one.
2.3 Scale: Each hex in Zama is 100 metres across. Each Carthaginian and Numidian cavalry unit is composed of 500-1,000 men and horses. Their infantry units are 1,000 men each. Elephants are ten elephants per unit.
Carthaginian javelin units are notated with a 'J', slinger units with an 'S' and archer units with an 'A'.
Roman and Roman Allied legions and cavalry are 100 men per SP, velites are 300 men per SP. Roman citizen legionary units are given a bonus SP for superior discipline.
3.0 Special Rules
3.1 Roman Sub-Commands:
- Citizen Legions (no stripe);
- Italian Allied Legions (white stripe);
- Roman Cavalry (green stripe);
- Numidians (orange stripe);
Scipio and Laelius are set up with the Roman Cavalry; and Masinissa is set up with the Numidians.
3.2 Carthaginian Sub-Commands:
- Elephants (white stripe);
- Mago's Troops (orange stripe);
- Carthaginian Levies (red stripe);
- Hannibal's Veterans (no stripe);
- Cavalry (green stripe);
Hannibal sets up with the Veterans; and both Hanno and Hasdrubal set up with the Cavalry. The Carthaginian units may not stack on set-up.
3.3 Elephants: The elephants were not fully trained; their SP are not doubled when charging. Eliminated elephant SP count as one-half VP only (not cumulative with case 12.7 e).
3.4 Displacement: Neither the Numidian Sub-Command nor any units on the Carthaginian side may use displacement.
4.0 Optional Rules
4.1 Movement Restrictions: Hannibal's plan was to disrupt the Romans with an elephant charge and then commit his three lines of troops one at a time, reserving his veterans for the final blow. This plan failed badly. Players desiring to recreate these conditions of the battle should use the following:
4.11 All Carthaginian elephant units must enter a Roman ZOC during the Carthaginian movement phase of game turn one. Any elephant unit which fails to do so is considered to have run amok and is eliminated. Elephants move normally after game turn one.
4.12 Each group of Carthaginian infantry may not move until it is released. Whenever any of the listed events for each group occurs, all units of that group are immediately released and may move freely for the remainder of the game. Carthaginian cavalry units and leaders are not restricted.
4.13 Mago's Troops are released:
- When any Roman unit enters any hex on or north of hex row 22XX;
- When any unit of this group is attacked; or
- On game turn three.
4.14 Carthaginian Levies are released:
- When any Roman unit enters any hex on or north of hex row 25XX;
- When any unit of this group is attacked; or
- On game turn five.
4.15 Hannibal's Veterans are released:
- When any Roman unit enters any hex on or north of hex row 26XX;
- When any unit of this group is attacked; or
- On game turn seven.
5.0 Errata
5.1 Map: The four legion set-up areas each include one of the unlabelled front-line areas in row 18xx.
5.2 Counters: Carthaginian Levies are the 12 × 5-3 infantry, plus the Sacred Band and Greek Phalanx. All other units with a red stripe are Mago's Troops. Masinissa should be marked with a skirmisher dot.
Carrhae, 6 May 53 BC
1.0 Introduction
Carrhae is a simulation of the battle between the legions of Rome under Crassus and the Parthian forces under Surena in 53 BC. The Parthians, consisting entirely of cavalry, adopted their usual tactics of retiring and drawing their foes in pursuit. As the heavily armed legionaries became strung out, the Parthians turned upon them and cut them down.
2.0 Initial Deployment
2.1 Each player sets up his units in the hexes designated on the map sheet.
2.2 The Parthian player moves first on each of the ten game turns.
2.3 Scale: Each hex is 150 metres across. Each Parthian unit is about 1,000 mounted men. Each Roman legion unit is one or two cohorts. Each Gallic and skirmish unit represents about 500 men.
3.0 Special Rules
3.1 Parthian Mobility:
3.11 All Parthian cavalry and the leader unit may exit any map edge by expending one MP to exit from a map edge hex. On the next game turn, any such exited unit may re-enter any hex on that map edge not in a Roman ZOC. Note that units may neither retreat before combat nor displace off the map. ZOC do not extend off the map.
3.12 All Parthian cavalry units (not the camel train unit) may disengage and retreat before combat.
3.13 Parthian light cavalry (4-8s) may conduct missile fire during movement. They may move, interrupt movement to conduct one missile fire, and then continue moving up to their MA. They may still only missile fire once during their player turn.
3.14 Parthians use the following modified missile table:
| Die roll | Result |
|---|---|
| 1 | Defender eliminated |
| 2 | Defender disrupted |
| 3 | Defender disrupted |
| 4 | No effect |
| 5 | No effect |
| 6 | No effect |
3.2 Parthian Camel Train: The camel train may ignore slope hex side movement costs.
3.3 Displacement: Parthian units may not use displacement in Carrhae.
4.0 Victory Conditions
4.1 Additional Victory Point Schedule:
4.11 The Roman player receives 10 VP at the end of the game for each game turn they occupy hex 2111.
4.12 The Roman player immediately receives 20 VP for eliminating the Parthian camel train.
5.0 Optional Rule
5.1 Free Deployment: Both armies may deploy freely. The Romans set up first on or behind hex row xx17, except for their slingers and archers which must be on or behind hex row xx15. The Parthians then set-up on or behind hex row xx13. The Parthians still move first.
Pharsalus, 9 August 48 BC
1.0 Introduction
Pharsalis is a simulation of the battle for mastery of the Roman world between the legions of Julius Caesar and his rival, Pompey the Great, in Illyria.
2.0 Initial Deployment
2.1 Each player sets up his units according to the hex numbers printed on the back of each counter.
2.2 Pompey moves first on each of the ten game turns.
2.3 Scale: Each hex in Pharsalus is 200 metres across. Each game turn represents approximately one hour. The standard legion unit is a double cohort, with some units containing three understrength cohorts. Each legion SP equals 125 men, each auxiliary SP equals 250 men, and each cavalry SP equals 500 men.
3.0 Special Rules
3.1 Elite Leader: Caesar may use his ability to shift combat odds during the game equal to twice his strength additive; players should indicate usage with a numerical marker.
3.2 Movement Restrictions: Pompey had ordered his legions to stand fast and await Caesar's attack. To simulate this, Pompeian legions and missile troops cannot move until game turn three. If any Pompeian legions or missile troops are attacked by missile fire or regular combat sooner, all Pompeian forces are immediately released. Pompey's cavalry and all of Caesar's troops may move and fight normally from game turn one.
3.3 The X Legion: These were Caesar's elite troops; veterans of the Gallic Wars, they were the best troops on the field. The Caesarean player shifts his combat attacks one odds column to the right for each unit from the X Legion that is attacking, whether alone or with any other units. These units are signified by an orange stripe.
4.0 Victory Conditions
4.1 Additional Victory Point Schedule:
4.11 Caesar receives 20 VP if he has any units behind the ramparts (hexes 6601 - 6603, 6701 - 6703, 6801 - 6808, 6901 - 6909 & 7001 - 7010) at the end of the game.
4.12 Caesar receives an additional 20 VP if he has a unit in Pompey's camp (the smaller area delineated by ramparts and the map edge and east of hex 7011 (i.e. 7012 - 7015) at the end of the game.
4.13 If either leader is eliminated or forced off the map, the other side wins an automatic victory.
5.0 Optional Rules
5.1 Pompey may have decided to attack. Ignore case 3.1; Pompey may move and attack freely from game turn one.
5.2 Which army would attack first is open to question. Ignore case 3.1. Roll a die:
- '1-3' – Caesar moves first;
- '4-6' – Pompey moves first.
6.0 Errata
6.1 Counters:
- The Pompeian (2)-4 archer that sets up in hex 6027 should have a skirmisher dot.
- The Pompeian '2Br' 6-4 legion unit that sets up in hex 6008 should be '2Gr'.
- The Caesarean (4)-4 archer in hex 5224 should not have a skirmisher dot.
- The 'Caeser' leader should be Caesar '4-9'.
- The five units of the X Legion (1 × 10⁻⁴ & 4 × 8-4) should have an orange stripe on their under-side as well as their front.
Munda, 17 March 45 BC
1.0 Introduction
Munda is a simulation of the last battle of the Roman Civil War in Spain. At Munda, Julius Caesar fought and defeated his rivals, Gnaeus Pompey (son of Pompey the Great) and Labienus, thereby removing the final obstacle to his assumption of total power in Rome.
2.0 Initial Deployment
2.1 Each player sets up his units in the hexes designated on the map sheet. Leaders may be placed with any unit.
2.2 Caesar moves first on each of the ten game turns.
2.3 Scale: Each hex in Munda is 200 metres across. Each game turn represents approximately one hour. The playing pieces represent the legion and other military formations of the time. Each legion SP represents about 150 men, an auxiliary SP represents about 250 men, and a cavalry SP represents about 500 men.
3.0 Special Rules
3.1 Elite Leader: Caesar may use his ability to shift combat odds during the game equal to twice his strength additive; players should indicate usage with a numerical marker.
3.2 Caesar's Initial Attack: On game turn one, all Pompeian units in hex row 20xx must be attacked by Caesarean units. All attacks receive a one column shift to the right. This represents Caesar's strategy to bring the rebels to battle, and the momentum of his attack.
3.3 The X Legion: These were Caesar's elite troops; veterans of the Gallic Wars, they were the best troops on the field. The Caesarean player shifts his combat attacks one odds column to the right for each unit from the X Legion that is attacking, whether alone or with any other units. These units are signified by an orange stripe.
3.4 Caesarean Flanking Cavalry: The Caesarean player may move up to three cavalry units (3-6) off the map on game turn one. These units remain off the map until they are eligible to return. Beginning on game turn four, the Caesarean player begins his turn by rolling a die; on a '1-3' one cavalry unit is eligible to re-enter on any map edge hex that is not occupied by an enemy unit or an enemy ZOC.
The Caesarean player may continue rolling a die at the beginning of each game turn until all exited units have become eligible to re-enter. He may enter eligible units immediately or may delay one or more units as desired.
The first game turn that a Caesarean cavalry unit re-enters the map behind Pompeian lines (as sensibly determined), all Caesarean attacks on defending units within ten hexes of a flanking cavalry unit are shifted one column to the right. All Pompeian attacks during that game turn are shifted one column to the left.
3.5 Pompeian Camp: Beginning with game turn six, if any Caesarean unit occupies any hex of 2714-2718 or 2814-2818 at the beginning of a Pompeian combat phase, all Pompeian attacks are shifted one column to the left. This is cumulative with any other applicable shift.
3.6 Terrain: The slope hex sides in Munda portray a lesser slope than in other battles. Attacks which are entirely from one level to the next are shifted one column to the left; the defenders are not doubled.
4.0 Victory Conditions
4.1 If either leader is eliminated or forced off the map, the other side wins an automatic decisive victory.
4.2 Caesar must win a decisive victory, or he is considered to have lost the battle (and Spain to the rebels).
5.0 Errata
5.1 Counters: Replace Caesarean (2)-4 archer #3 with Caesarean 8-4 legion #31. Change 8 × Pompeian 6-4 legions (#31-38) from an underside strength of 5-4 to 6-4.
Teutoburger Wald, September 9 AD
1.0 Introduction
Teutoburger Wald is a simulation of the battle which took place between the legions of Imperial Rome under the Roman governor Publius Quinticulus Varus, and a confederation of the Germanic Cheruscii, Chaucii, and Marsii tribes under their war leader, Arminius. Lured into an ambush in the rugged terrain of Germania, the Romans fought a desperate battle for survival in 9 AD.
2.0 Initial Deployment
2.1 Roman Set-Up: The Roman player sets up first. Each legion sets up within two hexes of its designated hex. Each eagle and baggage unit must set up on the designated hex and the remaining units must set up within two hexes. At least three of the five legion units (the 8-4 and 6-4 units) must set up on trail hexes. Varus and his Guard unit set up together on any trail hex within two hexes of any eagle.
| Historical Scenario | Relief Scenario | |
|---|---|---|
| XVII | 1811 | 2011 |
| XVIII | 2309 | 2508 |
| XIX | 2807 | 3007 |
2.2 German Set-Up: In the historical scenario, the German tribes set up according to the following directions. In the relief scenario, they set up according to the hexes listed on their backs. In both scenarios, each chief and Arminius must be deployed on the designated hex with one warband.
2.21 Cheruscii set up within 5 hexes of 2416, and at least 3 hexes (inclusive) from any Roman unit:
- 1 x +1-9
- 2 x 3-6
- 4 x 2-5
- 14 x 4-4
2.22 Chaucii set up within 6 hexes of 2103, and at least 3 hexes (inclusive) from any Roman unit:
- 1 x +1-9
- 4 x 3-6
- 2 x 2-5
- 14 x 4-4
The 2-5s and 3-6s may be deployed in the forest hexes that run from hexes 2901 to 3605 (inclusive).
2.23 Marsii set up within 2 hexes of 1413:
- 1 x +1-9
- 8 x 4-4
Marsii warbands must occupy hexes 1511, 1512, 1613 and 1614.
2.3 Player Sequence: In the Historical scenario, the German player's turn is first each game turn. In the Relief scenario, the Roman player's turn is the first each game turn.
2.4 Scale: Each hex in Teutoburger Wald is 200 metres across. Each game turn represents one hour. Roman and auxiliary units are two cohorts (approximately 200 men per SP). Germans warbands are approximately 200 men per SP.
3.0 Reinforcements
3.1 None in the historical scenario.
3.2 Roman Relief Legion (Relief Scenario only): To reflect the possibility that Varus realized the seriousness of the situation and sent word to bring the XX Legion to assist him, the five units of the XX Legion arrive on game turn two along the western edge of the map in any of hexes 1012 - 1021.
German units may not move or advance after combat into any hex in the westernmost two hex rows until game turn three.
4.0 Special Rules
4.1 German First Turn Surprise (Historical Scenario only): To reflect the initial surprise of the German ambush, all German attacks are resolved with a one column shift to the right for the German player turn of game turn one only. German units that remain stacked with a leader receive a 2 MP bonus on the first game turn only.
4.2 Roman Eagles: The Roman eagles counters represent both the standard itself and the leadership of a legion. These units function as leaders for their own legion only, with a strength additive of two. If an eagle is alone in a hex and a German unit moves into the hex, it captures the eagle, and it is eliminated.
4.3 Roman Fighting Withdrawal: To reflect the Roman battle stance, the Roman player may elect in his combat phase to convert any Roman combat results (other than AL) to AR by declaring a fighting withdrawal before a melee combat is resolved. This may be declared prior to some melee combats and not for others at the discretion of the Roman player. The melee combat is calculated normally, and the die is rolled; all results other than AL are converted to AR.
4.4 Baggage Units: Baggage units represent camp followers, servants, etc. with a limited capacity to defend themselves. They do not count against stacking; however, only one baggage unit may be in a hex at the end of each phase. Thus, the maximum stack would include one combat unit, Varus, three eagles, and one baggage unit. A baggage unit adds its 2SP to both attack and defence.
Baggage units must conduct a fighting withdrawal if adjacent to enemy units and not stacked with a Roman combat unit. If a friendly combat unit is also present in the baggage unit's hex, the baggage unit may automatically retreat one hex without rolling for combat while the combat unit attacks normally (i.e. covers the baggage unit's retreat). A baggage unit may be removed as the result of an AL, EX or BL (sic – source reads "BL", presumably DL) melee combat result.
4.5 Retreat off the Map:
4.51 In the Historical scenario, any Roman unit which retreats off the west map edge under any circumstances will be considered to have met the condition of case 5.1 and result in a Roman victory.
4.52 In the Relief scenario, Roman legion units retreating off the west edge of the map between hexes 1012 and 1021 as the result of a fighting withdrawal will be considered to have successfully escaped while those which receive a normal combat AR will be considered eliminated for VP purposes. Roman units suffering a DR as the result of a German attack will be considered to have successfully escaped. Cavalry and leader units will be considered to have successfully escaped in any case.
4.6 Displacement: German units may not use displacement in Teutoburger Wald.
5.0 Victory Conditions
5.1 Historical Scenario: The Germans win by eliminating every Roman unit before the end of game turn six. The Romans win by having at least one unit left on the map at the end of game turn six. In addition, if the Romans can exit a unit off the west edge of the map by game turn six, they also win.
5.2 Relief Scenario: The VP awards set out in section 16.0 are used to determine demoralisation and disintegration but are otherwise ignored. Each side totals its VP according to the following conditions at the end of the game. The scenario lasts twelve game turns.
5.21 The German player receives the following VP for eliminating units:
- 1 VP for each Roman SP;
- 10 VP for each of the eagles;
- 10 VP for Varus; and
- 5 VP each for the three baggage train units.
5.22 The Roman player receives the following VP for units exited off the west edge of the map between hexes 1014 and 1018:
- 1 VP for each Roman SP;
- 10 VP for each of the eagles;
- 10 VP for Varus; and
- 5 VP each for the three baggage train units.
The Roman player also receives 1 VP for each German unit eliminated.
6.0 Erratum
6.1 Map: The trail passing through the obstacle hex sides does not negate the obstacle's effects on movement.
Idivisto, 16 AD
1.0 Introduction
Idivisto (Idistaviso) is a simulation of the battle between the armies of Imperial Rome under Germanicus and the confederation of Germanic tribes under Arminius. After losing three legions and their eagles to Arminius at Teutoberger Wald, the Romans eventually put together a force to recover the eagles and exact revenge. While the final battle that recovered the eagles was anticlimactic, Idivisto was the decisive battle of the campaign. The two armies fought over a mountain and around it for nearly the entire day, with the Germans finally retiring after a hard-fought struggle.
2.0 Initial Deployment
2.1 Each player sets up his units on the hexes designated on the map sheet.
2.2 The German player moves first on each of the ten game turns.
2.3 Scale: Each hex is 150 metres across. Each game turn represents one hour. Roman and auxiliary units are two cohorts (about 200 men per SP). German warbands are approximately 200 men per SP.
3.0 Special Rules
3.1 Ferocious German Attack: All German attacks on game turn one are shifted one column to the right on the CRT.
3.2 Roman Praetorian Guard: The unit with a gold stripe was comprised of elite troops. It receives a one column shift to the right when it attacks and a one column shift to the left on the CRT when it defends.
3.3 Death of Arminius: If Arminius is eliminated or moved off the map, the Germans are automatically demoralized, even if they have not reached their demoralization level. Continue to count VP towards disintegration.
3.4 Displacement: German units may not use displacement in Idivisto.
4.0 Victory Conditions
4.1 Additional Victory Point Schedule: The German player receives at the end of the game one-half VP for every SP exited off the east or north map edge. Any German unit may exit by paying the movement cost of the map edge hex they occupy to move off the map. The total German VP earned by this rule may not exceed the number of VP earned for Roman SP eliminated.
5.0 Errata
5.1 Map: The slope graphic has been omitted and should be assumed at the level 3/4 hex sides. The '3-4' unit iconography in hex 0215 is in error and should be ignored.
5.2 Counters: The Praetorian Guard unit should be back-printed.
Boudicca, 61 AD
1.0 Introduction
Boudicca was queen of the Iceni tribe in Britain, who led a revolt against the Romans which ultimately failed. The battle represented here was the climactic battle during which the Britons were slaughtered.
2.0 Initial Deployment
2.1 Each player sets up his units in the hexes designated on the map sheet.
2.2 The Romans move first in each of the ten game turns. The Britons must form up their host on game turn one, and their units may move only to other starting hexes. The Britons are free to move normally on game turn two and thereafter.
2.3 Scale: Each hex in Boudicca is 200 metres across. Each game turn represents approximately one-half hour. The playing pieces represent the standard military formations of the time. Each SP represents 100+ men.
3.0 Special Rules
3.1 Ferocious Briton Attack: All Briton attacks on game turn two are shifted one column to the right.
3.2 Chariot Units: Chariot units:
a) are skirmishers; and
b) have missile capability (arrows and spears with one hex range).
3.3 Briton Tribal Followers: The Briton tribes were following behind their combat forces. To represent this, the east edge of the playable area moves westward one hex row at the end of each game turn beginning on game turn three. Any Briton unit in a row that is no longer in play is removed from the map. Any Roman unit in such a row would secure a Roman automatic decisive victory.
3.4 Displacement: Briton units may not use displacement in Boudicca.
4.0 Victory Conditions
4.1 The Romans secure an automatic decisive victory if a Roman unit exits off the east edge of the map or enters a hex in the unplayable area (see case 3.3).
4.2 Otherwise, there are no VP for eliminating units, and no demoralization or disintegration. At the end of the game, if the Romans have units left on the map they win a marginal victory, otherwise the Briton player wins a decisive victory.
5.0 Errata
5.1 Map: North is towards hex row XX17/18. Most of the map area, including the Briton set-up area, is Level 0. The hill to the west is Level 1, rising to Level 2.
5.2 Counters: Mark each Briton chariot with parenthesised SP, a skirmisher dot and a javelin icon (one hex range).
Adrianople, 9 August 378 AD
1.0 Introduction
Adrianople is a simulation of the battle between Romans and Goths in which the Emperor Valens and his army were annihilated. The battle was a clash between the combined arms Roman field armies and the Gothic mass of cavalry and is frequently cited as one of the milestones on the road to the fall of Rome.
2.0 Initial Deployment
2.1 Each player sets up his units in the hexes designated on the map sheet or in the separate boxes (see section 3.0).
2.2 The Romans move first on each of the ten game turns.
2.3 Scale: Each hex in Adrianople is 200 metres across. Each game turn represents approximately one hour. The playing pieces represent the mobile field army of the Romans, and the barbarian war bands of the time. Each of the two Roman armies represents approximately 17,300 men and is broken down into individual legions wherein each SP represents about 250 men, each auxiliary SP represents about 150 men and each cavalry SP about 300 men. The barbarian scale is slightly different with each cavalry SP representing 100 horsemen and each infantry unit representing about 500 men.
3.0 Reinforcements
The Goths receive reinforcements during the game. After setting up the initial Goth forces, divide the remaining forces into two equal sets:
- 3 x 6-6;
- 12 x 5-6;
- 4 x 4-6; and
- 1 x 3-9
and place each set in one of the two reinforcement boxes.
The cavalry army of Saphrax begins arriving on game turn two. The cavalry army of Alatheus begins arriving on game turn three.
Procedure: Units enter the map by placing them in the unnumbered hexes next to their respective boxes. Once all boxes are occupied, units may then move into the adjacent hexes as per the regular rules, deducting 2 MP from their MA. Further units arrive similarly on subsequent game turns. Units may be held back in the boxes.
Units may not retreat off the map into the boxes. Roman units may not move, advance or retreat before or after combat into the unnumbered hex row (what would be hex row 50xx).
4.0 Special Rules
4.1 Scorched Earth: The dried grass of the battlefield was set afire during the battle. All MA are halved during game turns two and three.
4.2 Goth Baggage: The Goth baggage starts in hex 6017. Any Goth unit plus a leader may stack with it.
5.0 Victory Conditions
5.1 Additional Victory Point Schedule: If the Romans eliminate the Goth baggage, they receive 20 VPs at the end of the game.
6.0 Errata
6.1 Map: The leader in hex 7021 is 3-9. The '3-9' notation in hex 7009 should be under the leader icon in hex 7010.