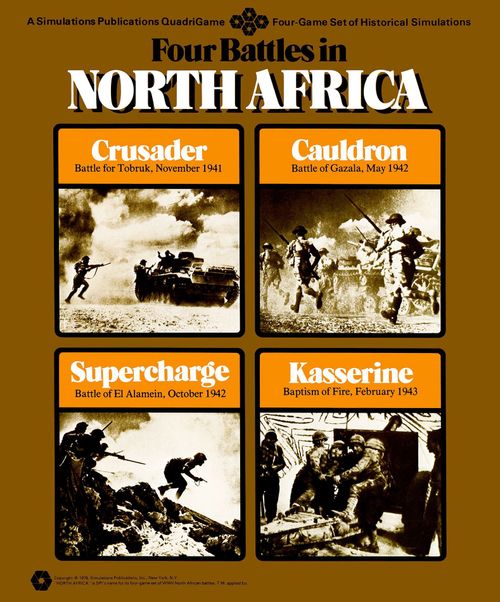
Four Battles in North Africa
Four Battles in North Africa Rulebook
Table of Contents
Table of Contents
- 1.0 Introduction
- 2.0 Game Equipment
- 3.0 Setting Up the Game
- 4.0 Sequence of Play
- 5.0 Movement
- 6.0 Zones of Control
- 7.0 Combat
- 8.0 Artillery
- 9.0 Ground Support
- 10.0 Minefields
- 11.0 Anti-Tank Units
- 12.0 Supply
- 13.0 Reinforcements
- 14.0 Exiting the Map
- Cauldron: Battle of Gazala, May 1942 (Exclusive Rules)
- 15.0 Introduction
- 16.0 Supply Sources
- 17.0 Allied Command Control
- 18.0 Victory Conditions
- 19.0 Initial Deployment Chart
- 20.0 Game Notes
- Crusader: Battle for Tobruk, November 1941 (Exclusive Rules)
- 15.0 Introduction
- 16.0 Supply Sources
- 17.0 Tobruk Defenses
- 18.0 British Diversion
- 19.0 Scenarios
- 20.0 Game Notes
- Kasserine: Baptism of Fire, February 1943 (Exclusive Rules)
- 15.0 Introduction
- 16.0 Rough Terrain
- 17.0 Supply Sources
- 18.0 Limitations on Ground Support and Artillery
- 19.0 Withdrawal
- 20.0 Weather
- 21.0 Optional Rules
- 22.0 Victory Conditions
- 23.0 Initial Deployment and Reinforcements
- Supercharge: Battle of El Alamein, October 1942 (Exclusive Rules)
- 15.0 Introduction
- 16.0 Minefield Effects on Armor
- 17.0 Victory Conditions
- 18.0 Scenarios
- 19.0 Game Notes
1.0 Introduction
The North Africa game system is a simulation of World War II ground combat in the North African desert. Each game in the system represents a clash between Allied and Axis forces during the struggle which raged from 1941 to 1943. The playing pieces represent the actual units which participated in the battles, and the map represents the actual terrain over which those units fought. Two rules folders are provided. The first contains Standard Rules, which are common to all the games in the North African system. The second folder contains Exclusive Rules for each game in the system, and the Initial Deployment and Reinforcement Rules.
The game has been designed to insure maximum playability and maximum reality (in that order). In order to achieve these goals, the physical components, as well as the game rules, have been designed to make the game easier to understand and play. The components include a smaller, more compact playing map, never more than a hundred playing pieces and standardized rules.
The standardization makes it easier for the gamer to go from one game to another within the series. It also enables the games' designers to concentrate on the realism aspect of the games. (The standardization generally takes care of any playability problems).
2.0 Game Equipment
2.1 The Game Map
Each of the 22" x 17" mapsheets portrays the battle area. A hexagonal grid is superimposed over the terrain features on the mapsheet in order to regularize movement and the positioning of the playing pieces.
To make the map lie flat, back-fold it against the creases. Small pieces of masking tape may be used at the corners of the map to hold it taut.
2.2 Charts and Tables
Various visual aids are provided for the Players in order to simplify and illustrate certain game functions. These are the Combat Results Table, the Terrain Key, and the Turn Record/Reinforcement Track.
2.3 The Playing Pieces
The cardboard pieces represent the actual military units that took part in the historical battle. The numbers and symbols on the pieces represent the strength, movement capability, and type of unit represented by the piece. These playing pieces will hereafter be referred to as "units."
2.31 How to Read the Units
Non-Artillery Unit: Size (above the unit symbol), Designation (below the unit symbol), Type (the unit symbol at the right of the piece), Attack Strength, Defense Strength, Movement Allowance.
Artillery Unit: FPF Strength, Barrage Strength, Range Allowance, Type, Designation, Movement Allowance, Defense Strength.
Unit Types. Mechanized: Mech Infantry, Reconnaissance, Self-Propelled Anti-Tank, Armor, Self-Propelled Artillery, Motorcycle. Non-Mechanized: Infantry, Artillery, Engineer, Machine Gun, Anti-Tank, Airborne, Anti-Aircraft, Ranger.
Unit Designations. The superior formation is shown to the right of the slash. Divisional designations are shown to the right of the unit symbol.
Unit Sizes. II = Battalion, III = Regiment, X = Brigade, XX = Division.
2.32 Definition of Terms
Attack Strength is the relative strength of a non-artillery unit with regard to attacking other units, expressed in terms of Attack Strength Points.
Defense Strength is the relative strength of a unit with regard to defending against the attacks of Enemy units, and is expressed in terms of Defense Strength Points.
Barrage Strength is the relative strength of an Artillery unit with regard to attacking Enemy units, and is expressed in terms of Barrage Strength Points.
Final Protective Fire (FPF) Strength is the relative ability of an Artillery unit to add to the Defense Strength of Friendly units, and is expressed in terms of FPF Strength Points.
Movement Allowance is the maximum number of Trail hexsides through which a unit may be moved in a single Movement Phase; each such hexside crossed requires one Movement Point of the total Movement Allowance to be expended. Note that the basic terrain type is Mixed terrain (there is no "clear" terrain); Mixed terrain costs two Movement Points per hex. Other terrain may require more than two Movement Points to enter (see the Terrain Key on the map).
Range Allowance is the maximum number of hexes from the hex of the Artillery unit using its FPF or Barrage Strength (exclusive), to the defending unit's hex (inclusive).
2.4 Game Scale
Each hexagon on the mapsheet represents from 1.7 to 3.0 miles of real terrain from side to side. Each Game-Turn is equivalent to one day of real time.
2.5 Parts Inventory
| Component | Folio Game | Quad Game |
|---|---|---|
| Die-Cut Counter Sheet | 1 | 4 |
| Game Map | 1 | 4 |
| Standard Rules Folder | 1 | 2 identical |
| Exclusive Rules Sheet | 1 | 4 different |
| Die (or Randomizer) | 1 | 1 |
| Game Box | 0 | 1 |
| Folio (Folder) | 1 | 0 |
3.0 Setting Up the Game
The cardboard playing pieces should be punched out of the Unit Counter Sheet. The differently colored units represent forces of opposing sides. Players should determine which side each will play. The Players then consult their respective Initial Deployment Charts. These charts tell the strength of each unit which is in play (on the map) during the First Game-Turn. Unit values are listed as follows: Attack Strength—Defense Strength—Movement Allowance. For Artillery units the values are listed as: Barrage Strength—Final Protective Fire Strength—Range Allowance/Defense Strength—Movement Allowance. Units may be assigned to specific set-up hexes or Players may be instructed to choose the set-up hexes for their units, in which case one Player or the other will deploy first.
The Exclusive Rules indicate which Player is the First Player. The Victory Conditions tell how the game is won. Play proceeds according to the Sequence of Play for the number of Game-Turns specified.
4.0 Sequence of Play
This game is played in successive Game-Turns, composed of alternate Player-Turns. During each Game-Turn the Players maneuver their units and resolve combat in sequence, according to the following outline and within the limits provided by the rules which follow. At the conclusion of the last Game-Turn, the Victory Conditions are consulted and a winner is determined.
4.1 Sequence Outline
The Game-Turn
The Game-Turn is divided into a First Player-Turn and a Second Player-Turn. The Player whose Player-Turn is currently in progress is termed the Phasing Player. The activity which may take place during each Phase is outlined below.
1. First Player-Turn
A. Movement Phase: The Phasing Player may move all, some or none of his units as he desires within the limits and restrictions of the rules of Movement, Zones of Control, Terrain Effects and Exclusive Rules of the game. The Phasing Player may bring Reinforcements onto the map as allowed by his Reinforcement Schedule and the Reinforcement Rules. The non-Phasing Player may not move his units.
B. Combat Phase: The Phasing Player uses his units to attack the non-Phasing Player's units. The Phasing Player may execute his attacks in any order he desires. Each attack follows the following sub-sequence where appropriate.
a. The Phasing Player states the number and strength of his attacking ground units.
b. The Phasing Player allocates Barrage Strength Points (if he wishes) from Artillery units and Ground Support Points.
c. The non-Phasing Player allocates Final Protective Fire Strength (if he wishes) from non-adjacent Artillery units and Ground Support Points.
d. The Combat Differential (total attacking strength minus total defending strength) is calculated, the terrain-type occupied by the defending unit is found and the combat differential column from that line is consulted. The die is rolled under that heading (see Combat Results Table) and the indicated result is immediately applied.
During the Combat Phase, neither Player may move his units, except when called for as a result of combat.
2. Second Player-Turn
The Second Player now becomes the Phasing Player and executes Movement and Combat in the sequence described above.
3. Game-Turn Record Interphase
The Turn Marker is advanced one space along the Turn Record/Reinforcement Track, signalling the start of a new Game-Turn.
5.0 Movement
General Rule:
During the Movement Phase, the Phasing Player may move as many or as few of his units as he desires. The units may be moved in any direction or combination of directions.
Procedure:
Units are moved one at a time, tracing a path of contiguous hexes through the hex grid. As each unit enters a hex, that unit pays one or more Movement Points from its Movement Allowance.
Cases:
[5.1] Movement Restrictions and Prohibitions
[5.11] Movement may never take place out of sequence. A Player's units may be moved during his own Movement Phase. During the Combat Phase, a unit which is either attacking or defending may be called upon to advance or retreat after Combat is resolved. During the Enemy Player's Movement Phase, and during both Players' Combat Phases, except when advancing or retreating as a result of Combat, Friendly units must not be moved.
[5.12] A Friendly unit may never enter a hex containing an Enemy unit.
[5.13] A unit may never expend more Movement Points than its total Movement Allowance in any one Movement Phase. A unit may expend all, some or none of its Movement Points in any one Game-Turn, but unused Movement Points may not be accumulated until another Movement Phase or transferred to another unit.
[5.14] A unit may never exit an Enemy-controlled hex during any Movement Phase. An Enemy-controlled hex may be left only during a retreat or advance as a result of combat (unless otherwise noted in the Exclusive Rules).
[5.15] Once a unit has been moved and the Player's hand taken from the piece, it may not be moved any further during the Player-Turn nor may it change its move without the consent of the opposing Player.
[5.2] Effects of Terrain
[5.21] A unit must expend two Movement Points to enter a Mixed terrain hex. To enter other types of hexes, a unit must expend more than two Movement Points. When the Terrain Key calls for a Movement Point expenditure to cross a terrain hexside, this cost is in addition to the terrain cost for entering the hex. Movement Point costs are summarized on the Terrain Key on the map. Movement Point costs are cumulative.
[5.22] A unit which moves from one Road hex directly into an adjacent Road hex through a Road hexside expends only ½ Movement Point (regardless of other terrain in the hex) plus the cost for any Minefield hexsides.
[5.23] A unit which moves from one Trail hex directly into an adjacent Trail hex through a Trail hexside expends one Movement Point (regardless of other terrain in the hex) plus the cost for any Minefield and Ditch hexsides.
[5.24] Example: A mechanized unit moves from one Mixed terrain hex to an adjacent Mixed terrain hex, passing through a Road hexside which is also a Friendly Minefield hexside. The unit would pay 4½ Movement Points in doing so (see Case 10.11).
[5.25] A unit may only move across an Escarpment hexside via either a Road or Trail. Movement through an Escarpment is not permitted except via Road or Trail hexsides.
[5.26] A unit may not enter a hex if it does not have sufficient Movement Points remaining to pay the Movement Point cost to enter the hex itself and the hexside being crossed. The unmarked hexes on the map(s) are "Mixed" not "Clear" terrain (as indicated on the Terrain Key). There are no "Clear" terrain hexes.
[5.3] Effects of Other Friendly Units
[5.31] A Friendly unit may move through hexes occupied by other Friendly units (at no extra Movement Point cost), but may not end the Movement Phase stacked in the same hex with another Friendly unit. Stacking is prohibited.
[5.32] There is no limit to the number of Friendly units that may pass through a single hex in one Game-Turn.
[5.33] Friendly-controlled hexes never interfere with Friendly movement.
6.0 Zones of Control
General Rule:
The six hexagons immediately surrounding a hex constitute the Zone of Control (ZOC) of any unit in that hex. Hexes upon which a unit exerts a Zone of Control are called controlled hexes and inhibit the movement of Enemy units: All units must cease movement when they enter an Enemy-controlled hex.
Cases:
[6.1] Effects on Movement
[6.11] All units exert a Zone of Control at all times, regardless of the Phase or the Player-Turn, during the entire Game-Turn. The presence of Zones of Control is never affected by other units, Enemy or Friendly.
[6.12] Units do not pay an additional Movement Point cost to enter an Enemy-controlled hex.
[6.13] There are only two ways to exit a hex in an Enemy Zone of Control: Either by retreat or advance as a result of combat, or by removal of the Enemy unit exerting the Zone of Control as a result of combat.
[6.14] Zones of Control extend into all types of terrain hexes and across all types of terrain hexsides (except those prohibited to movement).
[6.15] Zones of Control do not extend through an Escarpment, except across Road or Trail hexsides.
[6.2] Multiple Zones
[6.21] If there are both Enemy and Friendly Zones of Control exerted over a given hex, they have no effect on each other; both Zones exist and the hex is mutually controlled by both Players.
[6.22] There is no additional effect when more than one unit exerts its Zone of Control on a given hex.
[6.23] Obviously, if a given unit is in an Enemy controlled hex, the Enemy unit is also in its controlled hex. The two units are equally and mutually affected.
7.0 Combat
General Rule:
Combat between adjacent opposing units is mandatory. Artillery units (see Section 8.0) are the only units which may attack units to which they are not adjacent. See also the Ground Support Rules (Section 9.0).
The Phasing Player is termed the attacker; the other Player is the defender, regardless of the overall strategic situation.
Procedure:
Total the Attack Strength, Barrage Strength and Ground Support Strength of all attacking units involved in a specific attack; total the Defense Strength and the Final Protective Fire of all units which are the object of that specific attack. Subtract the total Strength of the defending units. The result is the Combat Differential, expressed in Points. It may be either a positive or a negative number.
Consult the Combat Results Table, and find the terrain type which the defending unit occupies. Directly across that line, find the appropriate Combat Differential column. Roll the die under that column heading, and then apply any combat results immediately, before resolving any additional attacks that are being made in the same Combat Phase. Example: If thirteen Strength Points were attacking a unit with four Strength Points in a Mixed terrain hex, the Combat Differential would be "+9." The attack would be resolved at "+9-11" on the line corresponding to Mixed terrain. (A die roll of one would result in a "D4").
Having determined the proper column on the Combat Results Table (7.61), the attacker rolls the die. The result indicates a line which is cross-indexed with the proper column. The intersection of line and column yields a combat result. This should be immediately applied to the involved units, before going on to resolve any other combat. Separate combats may be resolved in any order that the attacker wishes, so long as all combats are resolved during that Combat Phase.
Cases:
[7.1] Which Units Attack
[7.11] Each non-Phasing unit that has a Phasing unit adjacent to it must be attacked by some Phasing unit during that Combat Phase. The Phasing Player may resolve these attacks in any fashion desired, so long as all units are attacked within the requirements of Case 7.2 (exception: see Cases 7.46 and 10.21).
[7.12] All of the Phasing Player's units which end the Movement Phase in an Enemy-controlled hex must attack some Enemy unit during the ensuing Combat Phase. The Phasing Player may choose which units will attack each defending unit, as long as all adjacent Friendly units participate in an attack.
[7.13] A defending unit may be attacked by as many as six adjacent units, with the possible addition of Artillery Barrage Strength (see Section 8.0) and Ground Support (see Section 9.0).
[7.14] No unit may attack more than once per Combat Phase, and no Enemy unit may be attacked more than once per Combat Phase.
[7.15] Non-Artillery units may attack only if in a hex adjacent to the defending unit.
[7.2] Multiple Unit and Multi-Hex Combat
[7.21] If a Phasing Player's unit is in a Zone of Control of more than one Enemy unit, it must attack all those adjacent Enemy units which are not engaged by some other attacking unit (exception: see Case 10.21).
[7.22] Units in two or more different hexes may combine their Combat Strengths and attack a single hex, if all the attacking units are adjacent to (or are within range of) the Enemy-occupied hex.
[7.23] Attacks may involve any number of attacking or defending units. For the attacks to be resolved as a single combat, however, all the attacking units must be adjacent to all the defending units, with the addition of Barraging Artillery units, which need not be adjacent.
[7.3] Combat Strength Unity
A given unit's Attack and Defense Strengths are always unitary. That is, a unit's Strength may not be divided among different combats, either for attack or defense.
[7.4] Effects of Terrain
[7.41] Defending units, only, benefit from the terrain in the hex they occupy and/or that hex's perimeter hexsides. Terrain in hexes occupied by attacking units has no effect on combat.
[7.42] A defending unit does not benefit from a Ridge, Stream or Ditch unless all attacking units that defending unit are attacking through a hexside of any of the above types (see Case 10.22). Roads and Trails do not negate the effects of these terrain types on combat.
[7.43] The effect of terrain (on combat) has been integrated into the Combat Results Table. Simply find the terrain which the defending unit benefits from, trace over to the proper Combat Differential column, and roll the die under that column heading.
[7.44] A defending unit always benefits only from the most advantageous terrain to which it is entitled. Example: A unit in Rough terrain behind a Ridge hexside would benefit from the Rough terrain only.
[7.45] When two or more defending units are being attacked in a single combat and are on two different types of terrain, each having a different effect on the Combat Differential, then all defending units benefit from the terrain most favorable to the defender.
[7.46] Combat is not mandatory and is not permitted between adjacent opposing units which are separated by an Escarpment hexside, unless that hexside is traversed by either a Road or Trail. There is no special restriction or terrain effect on combat across either a Road/Escarpment or Trail/Escarpment hexside.
[7.5] Diversionary Attacks
[7.51] In making a series of attacks, a Player may allocate his attacking units so that some attacks are made at "poor" Differentials, so that adjacent attacks may be made at more advantageous Differentials (by allotting most of the attacking force to the major objectives). These attacks are known as diversionary or holding attacks.
[7.52] The Phasing Player may never voluntarily reduce the Differential of any given attack. That is, he may never voluntarily shift to the left of his Combat Differential column.
[7.6] Combat Resolution
[7.61] Integrated Combat Results Table (printed on the last page of the source; the Combat Differential columns are numbered 1 to 12 from left to right, matching the die-roll columns below).
Integrated Combat Results Table
Combat Differential (Attacking Strength minus Defending Strength)
| Terrain Type | 1 | 2 | 3 | 4 | 5 | 6 | 7 | 8 | 9 | 10 | 11 | 12 |
|---|---|---|---|---|---|---|---|---|---|---|---|---|
| Enemy Minefield | –1 | 0 | +1 | +2,3 | +4,5 | +6-8 | +9-11 | +12 | ||||
| Rough | –2 | –1 |
Layout note: in the source the terrain lines are set flush left against the Mixed line, so their differential headings are shown here in the die-roll columns they finish in (each line's last heading sits under column 12, as the Mixed line does). The die-roll results below are read from the same numbered columns.
| Die Roll | 1 | 2 | 3 | 4 | 5 | 6 | 7 | 8 | 9 | 10 | 11 | 12 |
|---|---|---|---|---|---|---|---|---|---|---|---|---|
| 1 | A1 | A1 | A1 | Br | Br | D2 | D3 | D3 | D4 | D4 | D4 | D4 |
| 2 | A1 | A1 | A1 | A1 | Br |
Attacks at less than the lowest differential are resolved at the lowest differential. Attacks at greater than +12 are resolved as +12 attacks.
Explanation of Results: Ae = Attacker Eliminated; A1,2 = Attacker retreats the indicated number of hexes; Br = Attacker and defender retreat one hex; defender first; D1,2,3,4 = Defender retreats the indicated number of hexes.
[7.62] Explanation of Results
- D1, 2, 3 or 4 = Defender Retreats the indicated number of hexes. Each Player retreats his own units. He must retreat his units in accordance with the Retreat Rules (see Case 7.7). Units may not retreat across prohibited hexsides (see Terrain Key).
- A1 or 2 = Attacker Retreats the indicated number of hexes.
- Br = Both the attacker and defender must retreat one hex. The defender retreats first. [Thus, if the defender is surrounded by units or Zones of Control, it is eliminated.] The attacking units then retreat.
- Ae = Attacker Eliminated. Defender may advance into the hex.
[7.7] How to Retreat
When the Combat Result requires a Player's unit(s) to be retreated, the Owning Player must immediately move those units the indicated number of hexes away from their combat position. This movement is not normal movement and is subject to the following restrictions. If the unit is unable to retreat within these restrictions, it is eliminated instead.
[7.71] In retreating, a unit may initially leave an Enemy-controlled hex; thereafter, it may not enter an Enemy-controlled hex. Friendly units do not negate Enemy Zones of Control for purposes of retreat.
[7.72] A retreating unit may not cross a prohibited hexside or enter a prohibited hex (see Terrain Key).
[7.73] Where possible, a retreating unit must retreat into and through vacant hexes. If no other route is available, the retreating unit may move through Friendly-occupied hexes, displacing every Friendly unit whose hex it moves into or through (see Case 7.8).
[7.74] In all cases, the retreating unit must terminate its retreat the Combat Result-indicated number of hexes away from its former combat position. If it cannot, and can retreat only a portion of the number of obligated hexes, it is eliminated in the last hex to which it is able to retreat. The retreat path (see Case 7.91) terminates in the hex a unit is eliminated in.
[7.75] In complying with a "Br" result, an attacking unit may not retreat into a hex formerly occupied by the defending unit.
[7.76] A unit may freely retreat through Friendly and Enemy Minefield hexsides.
[7.8] Displacement
[7.81] If Friendly units occupy hexes in the only possible retreat route available to a retreating unit, those Friendly units are displaced (moved out of their hexes) by the retreating unit. The displaced unit is moved one hex (by the Owning Player) as if it were itself retreating. Then the retreating unit enters the vacated hex and, if necessary, continues its retreat. The retreating unit may displace as many units as necessary to retreat the indicated number of hexes.
[7.82] If the displacement would cause any of the displaced units to be eliminated, the retreating unit is eliminated instead. Displaced units can themselves displace other Friendly units in a sort of chain reaction of displacement, if that is the only permitted path of displacement open to them. A unit may be displaced more than once per Combat Phase, if that is the only alternative. Displaced Artillery units which have not yet engaged in combat, may not fire during that Combat Phase. Units may not displace other Friendly units if they have other paths of retreat open to them.
[7.83] If a retreating unit displaces a unit in a hex which the Phasing Player had intended to Barrage Attack, the attack against that hex may not take place. Of course, the displaced unit may be Barrage Attacked in its new hex.
[7.9] Advance After Combat
[7.91] Whenever an Enemy unit is forced to retreat (or is eliminated) as a result of combat, it will leave a path of vacant hexes behind it called the Path of Retreat (this includes hexes vacated pursuant to Case 7.74). Any or all Friendly victorious units which participated in the combat and were adjacent to the retreated unit are allowed to advance along the Enemy Path of Retreat.
[7.92] The advancing victorious units may cease advancing at any hex along the Path of Retreat.
[7.93] Victorious units advancing along the Path of Retreat may ignore Enemy Zones of Control (see 10.14).
[7.94] Only victorious units which were adjacent to the retreating unit during the combat and participated in that combat may advance. Non-adjacent Artillery units may not advance after combat.
[7.95] Any unit permitted to advance may, alternately, advance independent of the Path of Retreat in any desired direction. This independent advance is governed by the following restrictions:
-
A unit which is not advancing along the Path of Retreat may advance a number of hexes equal to the required Enemy retreat. For example, if an Enemy unit vacates a hex due to a "D4" result, a Friendly victorious unit which participated in that combat may advance as far as four hexes in any desired direction. If the Enemy unit is unable to retreat the full required amount, the Friendly unit could still advance the full number of hexes specified in the combat result.
-
A unit which is not advancing along the Path of Retreat must stop in the first Enemy-controlled hex it enters.
-
A unit which is not advancing along the Path of Retreat is prohibited from crossing an Enemy minefield, and may not cross any prohibited terrain.
An advancing unit may take a portion of its advance along the Path of Retreat and the remainder of that advance independent of the Path of Retreat.
[7.96] The option to advance must be exercised immediately before any other combat resolution. Units are never forced to advance after combat. After advancing, units may neither attack nor be attacked in that Phase (see Case 7.14), even if their advance places them next to Enemy units whose battles are yet to be resolved, or who were not involved in combat. However, advances are useful in cutting off the retreat of Enemy units whose combat has not yet been resolved.
[7.97] Example: The Combat Result is "D4"; the defeated unit must retreat four hexes. The Path of Retreat is shown by the dotted line. Units A and B have advanced along the Path of Retreat. Unit C advanced along the Path of Retreat for two hexes, then strayed from the Path of Retreat with the third hex it entered. Since this hex is in an Enemy Zone of Control, unit C must cease movement in this hex, even though it has moved only three of the four hexes specified in the Combat Result.
8.0 Artillery
General Rule:
Artillery units may participate in combat from adjacent and non-adjacent hexes. The Artillery unit's Barrage Strength may be used to attack Enemy units. The Artillery unit's Final Protective Fire Strength may be used to supplement the Defense Strengths of other Friendly defending units. In either case, Artillery units need not be adjacent to, but must be within range of the defending unit. An Artillery unit may use both its Barrage Strength and Final Protective Fire in a single Game-Turn. When attacked, an Artillery unit defends itself with its Defense Strength.
Cases:
[8.1] Barrage Attacks
[8.11] Artillery units may attack non-adjacent Enemy units up to the extent of their Range Allowance, but they are never forced to attack merely because it is within range. Artillery units are not subject to Line of Sight restrictions.
[8.12] Range from the Barraging Artillery unit to the defending unit is counted by including the target hex (defending unit's hex), but not the Barraging unit's hex.
[8.13] Artillery units may only attack a single Enemy-occupied hex when Barraging, except when making a combined attack with other units attacking from adjacent hexes (see Case 8.2).
[8.14] Barraging Artillery (Artillery attacking from a non-adjacent hex) suffer no Combat Results; they are never destroyed or retreated as a result of their own attacks. Of course, other units cooperating with the Barraging Artillery units from an adjacent position would be affected by Combat Results.
[8.15] In attacks made solely by Artillery and/or Ground Support Strength, only Combat Results of D4 affect the defending unit.
[8.2] Combined Attacks
[8.21] Artillery units may attack alone, in concert with other Barraging Artillery and/or Ground Support, or in concert with any Friendly units making adjacent attacks, adding their bombarding Combat Strength to the attack. These attacks are called Combined Attacks.
[8.22] When Friendly units are attacking adjacent Enemy units in more than one hex, the Barraging Artillery units need be within range of only one of the defending units to add their Barrage Strength to the attack.
[8.3] Adjacent Attacks
[8.31] When adjacent to an Enemy unit, Artillery units must participate in an attack against adjacent Enemy units. In making this attack, the Artillery unit uses its Barrage Strength.
[8.32] When attacking from an adjacent hex, Artillery units may attack as many units as they are adjacent to, but may not attack non-adjacent units.
[8.33] Artillery units attacking from an adjacent hex must suffer all the Combat Results of their attacks.
[8.34] Barrage attacks may be made across Escarpment hexsides.
[8.4] Final Protective Fire
[8.41] A non-Phasing Artillery unit which has not yet been subject to a successful attack in the current Combat Phase, had suffered no adverse Combat Results in the previous Combat Phase, and is not adjacent to an Enemy unit, may use its Final Protective Fire Strength (FPF) to supplement the Defense Strength of a Friendly unit which is under attack. If a non-Phasing Artillery unit has been displaced, had suffered a Combat Result in the previous Combat Phase, or is adjacent to an Enemy unit, it may not use FPF during the current Enemy Combat Phase.
[8.42] The Friendly defending unit receiving Final Protective Fire must be in range of the Artillery providing the FPF. This range is computed to the hex occupied by the defending unit (the Friendly unit), not to the hex occupied by the attacking unit (the Enemy unit).
[8.43] FPF Strength Points are simply added to the Defense Strength of the unit receiving Final Protective Fire.
[8.44] When an Artillery unit supplies FPF, it neither benefits nor suffers from the Combat Result.
[8.45] FPF may not be used to supplement the Defense Strength of a Friendly unit which is under attack solely by Enemy Artillery (either adjacent or non-adjacent) and/or Ground Support.
[8.46] The non-Phasing Player allocates FPF only after the Phasing Player announces the total Attack Strength he will employ to resolve a particular attack.
[8.5] Defense
When an Artillery unit is attacked in any fashion, it uses its Defense Strength, not its FPF.
[8.6] Terrain Effects
[8.61] An Artillery unit may use its Barrage or FPF Strength anywhere within its Range Allowance, regardless of intervening terrain or units (either Enemy or Friendly).
[8.62] Defending units benefit fully from the terrain in the hex they occupy when attacked by Artillery (regardless of range). Defending units do not receive any hexside benefits if attacked solely by Artillery and/or Ground Support. Defending units do receive hexside benefits if they are subject to a Combined Attack involving adjacent non-Artillery units, all of which are attacking across the terrain hexside type in question.
9.0 Ground Support
General Rule:
Some Artillery and/or Air Power in the game is not represented by units, but rather by the allocation of Ground Support Points on a Game-Turn by Game-Turn basis. These Points are allotted on the Turn Record/Reinforcement Track. The Players must record (on scratch paper) the allocation and expenditure of Ground Support Points. Ground Support Points are presumed to come from off the playing area and do not have any range limitations (unless otherwise stated in the Exclusive Rules).
Procedure:
Ground Support Points may be used during any Combat Phase, exactly as if they were Artillery, and can function as Barrage or FPF. Example: A Player has 10 Ground Support Points allocated in a given Game-Turn. When he is the Phasing Player, he may use these Points as Barrage Strength Points. When he is the non-Phasing Player, he may use these same Points as FPF.
Cases:
[9.1] Restrictions and Prohibitions
[9.11] One Ground Support Point equals one Artillery Strength Point (both Barrage and FPF).
[9.12] A Player may assign all available Ground Support Points to one target unit, or he may split them up between as many targets as he sees fit.
[9.13] Ground Support Points have unlimited range. They may attack any Enemy unit on the map.
[9.14] Ground Support Points may not be accumulated from Game-Turn to Game-Turn. If they are not used in the Turn allocated, they are lost.
10.0 Minefields
General Rule:
Axis and Allied Minefield hexsides are represented on the map. Minefields are considered permanent terrain features, which can neither be created nor destroyed during the course of a game.
Cases:
[10.1] Effect on Movement
[10.11] Non-mechanized units must expend two additional Movement Points to cross a Friendly minefield. Mechanized units must expend four additional Movement Points to cross a Friendly minefield.
[10.12] A unit may only cross an Enemy minefield if it occupies an adjacent hex at the beginning of the Friendly Movement Phase. The unit must expend its full Movement Allowance to cross the Enemy minefield; it must then stop and may move no further during the current Movement Phase. Note that the Movement Point cost for all other terrain features is ignored when a unit crosses an Enemy minefield.
[10.13] The special Movement Point costs required to cross a minefield are not negated when a unit is moving via a Road or Trail.
[10.14] A unit advancing after combat along the Path of Retreat may cross Enemy Minefield hexes freely (see Case 7.95, nr. 3).
[10.2] Effect on Combat
[10.21] A Friendly unit is not required to attack Enemy units if the opposing units are separated from the Friendly unit by a Friendly minefield. (Note that this forms an exception to Case 7.2.) The Friendly unit must make no attacks or advances during its Combat Phase (though it maintains its Zone of Control). However, if the Phasing Player wishes the unit in question to attack, Case 7.2 applies with full vigor: all adjacent Enemy units must be attacked.
[10.22] When a unit is attacked through an Enemy Minefield hexside, the Differential is found on the Minefield line on the Combat Results Table if at least one adjacent Friendly unit participates in the attack. For example, if an Axis unit attacks an adjacent Allied unit through an Allied Minefield hexside, the combat is resolved using the Minefield column on the Combat Results Table. Note that the Minefield column is not used to resolve an attack made across a Friendly Minefield hexside, nor to resolve an attack made solely by non-adjacent Artillery units (and/or Ground Support).
[10.3] Fortified Boxes
Fortified Boxes have the effect of altering the results of attacks against Allied units in them, when attacked solely through Minefield hexsides. They have no additional effect on movement cost for entering the hex.
[10.31] "D2," "D1" and "Br" Combat Results against Allied units in Fortified Box hexes, when attacked solely through Minefield hexsides, are considered "no effect" results. All units involved must remain in place. (All other results remain unchanged.)
[10.32] There are no Axis Fortified Boxes. Axis units never derive any benefit from Fortified Boxes.
[10.33] Fortified Boxes can never be destroyed.
11.0 Anti-Tank Units
General Rule:
Anti-tank units are mechanized units which represent the massed batteries of anti-tank guns commonly employed by both sides during the North African Campaign. Anti-tank units have a special effect on combat (only).
Cases:
[11.1] Effect on Combat
[11.11] When an anti-tank unit, or any unit(s) adjacent to a Friendly anti-tank unit are attacked, the combat is resolved on the Anti-Tank line on the Combat Results Table, if at least one mechanized unit participates in the attack.
[11.12] The Anti-Tank line may never be used to resolve an attack in which no mechanized units participate, or which is made solely by Barraging Artillery.
[11.13] If a non-Phasing Anti-Tank unit is displaced or forced to retreat, it forfeits its special effect for the remainder of that Combat Phase.
[11.14] Example and Illustration (see the Illustrated Anti-Tank Defense diagram in the source, opposite page 6). Three separate attacks are being made. The attack against unit X is resolved on the AT Defense Line on the CRT (because, although unit B is non-mechanized, unit A, also attacking, is mechanized, and unit X is adjacent to a Friendly anti-tank unit). The attack against unit Y (the anti-tank unit) is not resolved on the Anti-Tank Defense Line on the CRT, since unit C is non-mechanized. The attack against unit Z is resolved on the AT Defense Line of the CRT.
[11.15] If a unit is in Rough terrain, it always uses the Rough terrain line of the CRT, regardless of AT defense.
12.0 Supply
General Rule:
A unit must be in supply in order to use its full Movement Allowance or to use its full Attack Strength. A unit which is not in supply is "unsupplied." To be in supply, a unit must be able to trace a Supply Path from the hex in which it is located to a Friendly Supply Source. A unit that is unsupplied for Movement at the beginning of the Friendly Movement Phase is considered unsupplied for that entire Movement Phase. Supply for combat is determined for each unit at the instant of combat.
Cases:
[12.1] Supply Sources
Supply Sources are specified in the Exclusive Rules Folder.
[12.2] Obstructed Supply Paths
[12.21] A Supply Path is a series of contiguous hexes; it may not be made up of any of the following types of hexes or hexsides: 1) All-Sea hexsides; 2) Enemy-occupied hexes; 3) Enemy Zones of Control (even if occupied by Friendly units); 4) non-Road, non-Trail Escarpment hexsides; 5) Mountain hexes.
If a Supply Path between a unit and a Friendly Supply Source cannot be traced without passing through any of the prohibited hexes or hexsides listed above, the unit in question is unsupplied.
[12.22] A Supply Path may not be traced through an Enemy Minefield hexside, unless a Friendly unit is in either hex adjacent to that hexside.
[12.23] No unit may move into an unsupplied position during the Movement Phase. Units which begin the Movement Phase unsupplied must, if they move at all, move in the direction of the nearest Friendly Supply Source.
[12.24] No unit may move into an unsupplied position during an advance after combat, even if it was already unsupplied in its attack. A unit may not move into an unsupplied position during a retreat after combat, unless there is no other alternative short of elimination.
[12.3] Effects on Unsupplied Units
[12.31] Supplied units' Movement Allowances and Combat Strengths are unimpaired.
[12.32] The Movement Allowance of an unsupplied unit is halved (rounding fractions up). This halving takes place after any other effects on the Movement Allowance have been taken into account. For example, a unit with a Movement Allowance of fifteen would have an unsupplied Movement Allowance of eight.
[12.33] The Attack, Barrage and Final Protective Fire Strengths of an unsupplied unit are reduced to zero. Note that an unsupplied unit must still attack adjacent Enemy units as required by the rules of combat. When resolving this combat, the Combat Differential is calculated by subtracting the defending unit's Defense Strength from zero. For example, if an unsupplied unit is attacking a unit with a Defense Strength of "2," the Combat Differential is "-2."
[12.34] The Defense Strength of a unit is never affected by supply.
13.0 Reinforcements
General Rule:
Players may receive Reinforcements. These appear during the Owning Player's Movement Phase on the Game-Turn indicated on the Reinforcement Schedule. The Reinforcement Schedule states the Game-Turn of appearance, the number of units, the Strength and Movement Value and the specific hex or map edge on which they enter.
Procedure:
During his Movement Phase, the Owning Player places a Reinforcing unit in the scheduled hex or on any hex of the specified map edge. The Owning Player may place Reinforcements at any time during his Movement Phase.
Cases:
[13.1] Movement of Reinforcements
[13.11] Reinforcements are presumed to be poised adjacent to the map. When placed on the map a Reinforcing unit expends Movement Points to enter the entry hex according to the Terrain Effects Chart. In almost all cases, the Reinforcements are entered onto a hex which has a Road leading off the map; these units expend Movement Points at the Road movement rate to enter the map.
[13.12] In several cases, more than one unit is scheduled to appear in the same hex on the same Game-Turn. These units are deployed off map, one behind the other, with the lead unit poised adjacent to the map entry hex itself. If the entry hex is a Road hex, a hypothetical road may be presumed to stretch off the map, away from the entry hex.
[13.13] As each unit enters the map, it will pay the cost for entering the entry hex, plus any additional cost for any hypothetical Mixed terrain hexes that it would have to traverse to reach the entry hex. If units are entering on a Road hex, they are considered to be moving through hypothetical Road hexes until they reach the map. Example: The lead unit in the column would pay ½ Movement Point to enter the map; the second would pay 1 Movement Point to enter the map; the third, 1½ Movement Points, etc., etc.
[13.14] Once on the map, Reinforcements may be moved normally. The Owning Player may begin the arrival of his Reinforcements at any time during his Movement Phase.
[13.2] Restrictions
[13.21] Reinforcements may not enter a hex which is, at that point, occupied by an Enemy unit. A Reinforcing unit may enter an Enemy-controlled hex (but it must cease movement therein).
[13.22] If, and only if, a scheduled entry hex is occupied by an Enemy unit, or a Friendly unit in an Enemy Zone of Control, the Reinforcing unit may enter the nearest unblocked map edge hex to the scheduled hex, in the direction of the nearest Friendly unit.
[13.23] A Player may deliberately withhold Reinforcements from Game-Turn to Game-Turn, bringing them into play (if at all) on some later Turn.
[13.24] Regardless of whether a Reinforcement unit is brought into play on its scheduled Turn, it must appear in its scheduled hex or alternate (see Case 13.22).
[13.25] Until they enter the map, Reinforcements have no effect on play; they may in no fashion attack Enemy units or hinder their movement until they enter the map.
14.0 Exiting the Map
General Rule:
Players may exit their units from the map. An exiting unit must expend Movement Points to enter an imaginary hex presumed to be adjacent to the map edge. The terrain in this imaginary hex is presumed to be similar to the terrain in the hex from which the unit exited.
Cases:
[14.1] Restrictions
[14.11] Once a unit exits the map it may not return.
[14.12] Exited units are not considered eliminated (but see Case 14.13) and are kept separated from eliminated units.
[14.13] A unit may not exit the map as a result of combat. If it does so, then it is eliminated. Units may only exit the map during the Owning Player's Movement Phase.
Cauldron: Battle of Gazala, May 1942 (Exclusive Rules)
15.0 Introduction
Cauldron is a simulation on an operational level of combat between the Axis and Allied forces around Tobruk in North Africa during World War II, May to June, 1942.
16.0 Supply Sources
General Rule:
In order to be in supply, a unit must be able to trace a Supply Path to a Friendly Supply Source, and if unsupplied it suffers adverse effects, as specified in Section 12.0.
Cases:
[16.1] Axis Supply Sources
An Axis unit is supplied if an unobstructed Supply Path of 10 or fewer hexes can be traced from the unit in question to a Trail or Road hex, which in turn is connected to an unobstructed series of adjacent, connected Trail or Road hexes (of any length), leading to any hex on the west edge of the map.
[16.2] Allied Supply Sources
An Allied unit is supplied if an unobstructed Supply Path of unlimited length can be traced from the unit in question to any hex on the east edge of the map. (The Path need not be made up of Trail or Road hexes.)
[16.3] Automatic Supply
All Axis units are automatically supplied, regardless of Supply Path, through the end of Game-Turn Three. All Allied units are automatically supplied through the end of Game-Turn Seven.
17.0 Allied Command Control
General Rule:
During the Allied Movement Phase of the First Game-Turn, only those Allied units which are within three hexes of an Axis unit, at the beginning of the Allied Movement Phase, or which were attacked by Axis units during the preceding Axis Combat Phase, may move normally. All Allied units may move normally on Game-Turn Two and all subsequent Game-Turns.
18.0 Victory Conditions
General Rule:
Victory is judged at the end of the game on the basis of Victory Points scored by the Players. Victory Points are awarded to Players for eliminating Enemy units, for controlling Tobruk (hex 0608), and (for the Allied Player) for exiting units off the map.
Procedure:
There is no Victory Point record chart. Players must keep track of Victory Points scored on a piece of scratch paper.
Cases:
[18.1] Value of Units in Victory Points
[18.11] Each unit has a numerical Victory Point value equivalent to its total Combat Strengths: Attack plus Defense Strengths for non-Artillery units; Barrage, FPF and Defense Strengths for Artillery units. Thus, a 4-5-15 armor battalion is worth nine Victory Points.
[18.12] Victory Points are awarded to a Player when he eliminates Enemy units. If the Allied Player eliminated an Axis 4-5-15, the Allied Player would receive nine Victory Points.
[18.13] Victory Points are also awarded, in the same quantity, to the Allied Player when he exits Allied units off the map (see Case 18.3).
[18.2] Control of Tobruk
[18.21] If any Axis unit physically occupies, or was the last to pass through Tobruk (hex 0608), the Axis Player receives 100 Victory Points at the end of the game. These Axis Victory Points are only awarded if an Axis Supply Path can be traced from Tobruk to the west edge of the map at the end of the game.
[18.22] If the Axis Player fails to fully satisfy the conditions of Case 18.21, the Allied Player receives 100 Victory Points at the end of the game (regardless of whether or not an Allied Supply Path can be traced from Tobruk to the east mapedge, or if, in fact, unsupplied Axis units occupy Tobruk).
[18.23] If at the end of any Allied Combat Phase, Tobruk is controlled by the Axis Player (according to the requirements of Case 18.21), the game ends and the victor is determined immediately (see Case 18.4).
[18.3] Exiting Allied Units for Victory Points
[18.31] The Allied Player receives the full Victory Point Value for each Allied unit exited off the east edge of the map. Value is determined as in Case 18.1.
[18.32] Allied units which arrive as Reinforcements must remain on the map at least one full Game-Turn before they can exit for Victory Points (Thus, if they arrive on Game-Turn Six, they may not exit until Game-Turn Eight.)
[18.33] No Axis Victory Points are awarded for exited units.
[18.4] Levels of Victory
The winner and the quality of his victory are determined by totalling each Player's Victory Points and then subtracting the smaller total from the larger. The resulting net Victory Point total is then compared to the following schedule:
| Net Victory Point Total | Level of Victory |
|---|---|
| 36 or more Axis VP | Axis Decisive |
| 21 to 35 Axis VP | Axis Substantive |
| 5 to 20 Axis VP | Axis Marginal |
| 0 to 4 Axis VP | Draw |
| 0 to 9 Allied VP | Draw |
| 10 to 25 Allied VP | Allied Marginal |
| 26 to 40 Allied VP | Allied Substantive |
| 41 or more Allied VP | Allied Decisive |
19.0 Initial Deployment Chart
General Rule:
Set up units according to the positions shown.
[19.1] Allied Eighth Army—Ritchie
| Strength | Designation | Hex |
|---|---|---|
| 13th Corps—Gott | ||
| 1st South African Div—Pienaar | ||
| 4-4-9 | 3rd SA Inf Bde | 0228 |
| 4-4-9 | 2nd SA Inf Bde | 0429 |
| 4-4-9 | 1st SA Inf Bde | 0730 |
| 50th Div.—Ramsden | ||
| 4-5-9 | 151st Inf Bde | 0928 |
| 4-5-9 | 69th Inf Bde | 1126 |
[19.2] Axis Panzerarmee Afrika—Rommel
| Strength | Designation | Hex |
|---|---|---|
| 15th Motorized Bde | ||
| 1-2-12 | 1/200th Inf Bn | 0334 |
| 1-2-12 | 2/200th Inf Bn | 0132 |
| 2-3-12 | 1/361st Inf Bn | 0232 |
| 2-3-12 | 2/361st Inf Bn | 0332 |
| Armee-Artillery | ||
| 2-1-3/1-9 | 190th Art Regt | 0233 |
| 2-1-3/1-9 | 361st Art Regt | 0433 |
| 2-1-3/1-9 |
[19.3] Allied Reinforcement Schedule
- On Game-Turn Six, enter hex 1201: 3-4-9 10th IND Inf Bde; 5-4-15 1st Royal Tank Regt
- On Game-Turn Eight, enter hex 0608: 1-2-9 1st Duke of Cornwall Light Inf
- On Game-Turn Eleven, enter hex 1201: 3-4-9 11th IND Inf Bde; 5-4-15 6th Royal Tank Regt
- On Game-Turn Fourteen, enter hex 1201: 3-4-9 20th IND Inf Bde
[There are no Axis Reinforcements.]
[19.4] Player Sequence
[19.41] The Axis Player is the First Player. His Player-Turn is first in every Game-Turn.
[19.42] The maximum Game Length is twenty-six Game-Turns. The game may be ended sooner if the Axis Player seizes Tobruk (see Case 18.23).
[19.43] Neither Player receives Ground Support Points.
20.0 Game Notes
Historically, the battles of Gazala represented the greatest triumph for Rommel and the severest setback for British armor in their history. Tobruk is the all-important objective for the Germans, for without it they could not maintain their drive to Egypt. It is also of great worth to the British, since by holding Tobruk they deny a much-needed supply point to their foe.
Besides Tobruk, the other important prominent geographic feature in the game is the Gazala-Bir Hacheim Line. The fortified boxes are the strong-points. These boxes were basically manned by infantry brigades and the special effects of these hexes reflect the defensive nature, plus the added artillery—field and anti-tank—that became part of its static defense.
The British were well-prepared for the Axis offensive and had numerous dumps scattered throughout the forward areas. The Axis, on the other hand, were sure to out-distance their supply and so all speed was made to bring the supplies to the front line—hence a road- and trail-bound supply line.
The battle of the Cauldron began when the Italian Trieste Division failed to take Bir Hacheim in the opening rounds and that position, sitting astride the Afrika Korps supply line, choked off the flow of badly needed petrol and ammunition. Finding themselves spread thin, the Afrika Korps reconsolidated their forces around the British 150th Brigade box. The plan was to hold off the Allied counterattacks while breaking through the minefields and the 150th, to the Italians on the other side, thereby renewing the supply flow. The plan succeeded, after which occurred a series of running battles with British armor, culminating in the seizure of Tobruk.
The majority of the new Grant tanks, which mounted both 75mm and 37mm guns, were found in the 5-4-15 British units. Each had two squadrons of these and one squadron of Crusaders, with a 2-pounder, and either one squadron of Stuarts and its 37mm, or one squadron of Grants. In addition, there are the infantry tanks, the Matildas and Valentines; these were slow-moving, but heavily armored and carried the traditional 2-pounder. These tanks were divided among the 1st and 2nd Army Tank Brigades, which supported the Line.
On the other side of the ledger are the tanks of the 15th and 21st Panzer Divisions. The bulk of the armor was made up of the Mark III and its 50mm gun, a superior tank to all but the Grant. That tank's equal could only be found in the new Mark III Specials and the Mark IV's. But these were in short supply. The Axis also had several Mark II's and Italian M13/40's and M14/41's. These were almost worthless in tank battles. Though outnumbered, the Germans possessed a better grasp of armor tactics and had an overall superiority in equipment.
Another advantage of the Axis was their superior flak gun/anti-tank gun—the dreaded 88mm. In the game, these guns are amalgamated in the panzerjager units, which contained the other anti-tank guns of the Germans.
Players' Notes
Axis Player: The initiative is in the hands of the Axis Player. Generally, Tobruk cannot be taken until Bir Hacheim falls or an alternative supply line is secured, and the Allied armor has been effectively crushed.
Allied armor can tie down too many units, so the next place would be just south of the 150th Brigade; but that would mean a thrust directly north and not a northeastern advance.
The Germans must utilize a 'flak wall' with the panzerjagers. This should hold off the concentrated British counterattacks. The Italians and Germans in the north should attack only one or two points in the line.
Allied Player: After the opening German attacks, the Allied Player is faced with two choices: either fall back to a line between El Adem and Knightsbridge, or close in on the Germans. The latter is the more dangerous. The Line must be held as long as possible. If the infantry is having a tough time, pull back to the second line around Acroma.
Crusader: Battle for Tobruk, November 1941 (Exclusive Rules)
15.0 Introduction
Crusader is a simulation of the combat between the forces of the British Empire and those of Germany and Italy in the Western Desert of Egypt and Libya during the British Winter 1941 Offensive. The offensive was code-named Operation Crusader.
16.0 Supply Sources
General Rule:
The Axis Supply Sources are hexes 0908 (El Adem), 3409 (Bardia), 3513 (Sollum) and any hex on the west edge of the map. The British Supply Sources are hex 1103 (Tobruk) and any hex on the east edge or south edge within eleven hexes of the east edge of the map. To be in supply, a unit must trace a Supply Path, of any length, to one of these Supply Sources, in the manner prescribed in Section 12.0.
17.0 Tobruk Defenses
[17.1] Effect on Zones of Control
An Axis unit is not required to attack an adjacent British unit, if they are separated by a Minefield hexside and the hex which the Axis unit occupies is exactly three hexes away from hex 1003. This exempts such Axis units from Case 7.2, which requires Friendly units to attack adjacent Enemy units. This exemption may be utilized or ignored at the Axis Player's option, while he is the Phasing Player. If he ignores the exemption, Case 7.2 applies, and all adjacent Allied units must be attacked. If the Axis Player uses the exemption, the Axis unit simply remains inactive and in place during his Combat Phase, although it maintains its Zone of Control.
18.0 British Diversion
General Rule:
During the actual battle, a reinforced British Brigade Group made a diversion in the area south of the map.
Cases:
[18.1] Effect of British Diversion
At the start of his Movement Phase on Game-Turn Six, the British Player rolls one die. If he rolls a "one" through "four," the diversion has failed and there is no effect. If he rolls a five or six, however, the diversion has succeeded. If the diversion succeeded, the British Player rolls the die again. A roll of "one" or "two" means that one German unit must be permanently exited from the west edge of the mapboard by the end of Game-Turn Eight. A roll of "three" or "four" means that two German units must exit in this fashion. A roll of "five" increases the number to three German units forced to exit. A roll of "six" requires four German units to exit.
[18.2] Axis Penalty
If the Axis Player fails to exit the number of units required by Case 18.1, the Allied Player may remove that number of Axis units from anywhere on the map at the end of Game-Turn Eight. Note: Axis units which exit the map in accordance with Case 18.1 are not considered eliminated for Victory Point purposes.
[18.3] Exiting the Map
In addition to the restrictions stated in Section 14.0, Axis units may only exit from the west edge of the map, and British units may only exit from the south or east edge of the map. Axis units may not exit the mapboard before Game-Turn Six.
19.0 Scenarios
General Rule:
Crusader includes three Scenarios. These are the Campaign Scenario, encompassing the entire action; the Sidi Rezeg Scenario, representing the first six days of the action; and the Dash to the Wire Scenario, which represents a key part of the offensive. The instructions for each Scenario include each Player's Initial Deployment. Units are identified by their Combat Strengths and Movement Values. Units must be deployed in the specific hexes listed. Also included in each Scenario are Special Rules, the length in Game-Turns and Victory Conditions.
Procedure:
Place a unit of the specified type on each of the hexes listed for that type. Hex numbers are shown in parentheses following each unit's designation. Unit designations are provided for reference only. Players may ignore them.
[19.1] The Campaign Scenario
This Scenario represents the whole of Operation Crusader, the British offensive to relieve Tobruk.
[19.11] Axis Initial Deployment
German:
- Unit Type: 5-4-11. Hexes: 1/8 (1605), 2/8 (1805), 1/5 (2610), 2/5 (2510).
- Unit Type: 3-4-11. Hexes: 33 (1606), 39 (2108), 605 (3515).
- Unit Type: 3-3-14. Hexes: 33 (2215), 3 (2516), 580 (1914).
- Unit Type: 2-2-11. Hexes: 2/200 (1806), 33 (2106), 900 (1506).
- Unit Type: 1-2-14. Hex: 15/200 (1906).
- Unit Type: 1-2-11. Hexes: 1/115 (2005), 2/115 (1706), 1/104 (3614), 2/104 (3415), 3/104 (2409), 1/155 (1405), 2/155 (3409), 3/155 (1305), 1/361 (3513), 3/255 (1306), 3/347 (1406).
- Unit Type: 4-2-2/1-11. Hexes: 33 (2208), 155 (2206).
- Unit Type: 5-2-3/1-11. Hex: 104 (3309).
Italian:
- Unit Type: 2-2-9. Hexes: 1/132 (1314), 2/132 (1115), 3/132 (1114).
- Unit Type: 1-1-13. Hexes: Recam (2917).
- Unit Type: 3-3-9. Hex: 8Bers (1215).
- Unit Type: 2-3-9. Hex: 65 (0614).
- Unit Type: 3-4-7. Hex: 9Bers (0112).
- Unit Type: 2-3-7. Hex: 66 (0114).
- Unit Type: 2-2-3. Hexes: 39 (1205), 40 (1106), 27 (0908), 28 (1007), 19 (0703), 20 (0704), 61 (0805), 62 (0906), 15 (2816), 16 (3116).
- Unit Type: 4-2-2/1-9. Hex: 132 (1214).
- Unit Type: 2-1-2/1-7. Hex: 21 (0113).
- Unit Type: 2-1-2/1-7. Hexes: 26 (1008), 1 (0603), 205 (1206), 12 (3015), 46 (0806).
- Unit Type: 6-2-3/1-7. Hex: XXI (0907).
[19.12] Allied Initial Deployment
- Unit Type: 4-5-9. Hexes: 4NZ (3220), 16 (1005), Pol (0802).
- Unit Type: 3-4-9. Hexes: 5NZ (3121), 6NZ (3122), 14 (0804), 23 (1204), 5I (3920), 7I (3118).
- Unit Type: 4-4-9. Hexes: 22Gds (3624), 11I (3915).
- Unit Type: 1-2-11. Hexes: 1KRRC (3224), 2RB (3325), 2SG (3223).
- Unit Type: 2-3-9. Hexes: 1RTR (1104), 4RTR (0904), 7RTR (0803).
- Unit Type: 5-3-9. Hex: 8RTR (3419).
- Unit Type: 4-3-9. Hex: 44RTR (3218).
- Unit Type: 3-2-10. Hexes: 7HUS (3423), 2RTR (3323).
- Unit Type: 3-2-11. Hexes: 6RTR (3324), 3CLY (3025), 4CLY (3126), 2RGH (3125).
- Unit Type: 3-2-12. Hexes: 8RIH (3222), 3RTR (3123), 5RTR (3124).
- Unit Type: 1-1-15. Hexes: 11HUS (3024), 1KDG (3023), 4SA (3022), CIH (3717), NZ (3019).
- Unit Type: 5-3-2/1-10. Hex: 7A (3225).
- Unit Type: 5-3-2/1-9. Hexes: 2NZ (3221), 4I (3425).
- Unit Type: 6-3-2/1-9. Hex: 70 (1004).
- Unit Type: 4-2-3/1-9. Hex: XIII (3919).
- Unit Type: 2-1-2/1-9. Hex: 22G (3724).
[19.13] Axis Reinforcements
None.
[19.14] Allied Reinforcements
On Game-Turn Two:
- Unit Type: 1-1-15. Hexes: 3SA (1625), 7SA (0625).
- Unit Type: 3-4-9. Hexes: 1SA (1625), 5SA (1625).
- Unit Type: 5-3-2/1-9. Hex: 1SA (1625).
On Game-Turn Six:
- Unit Type: 3-3-9. Hex: 6SA (3921).
[19.15] Ground Support Allocation
- The Axis Player receives four Ground Support Points every Game-Turn.
- The British Player receives six Ground Support Points every Game-Turn.
[19.16] Player Sequence
The Operation Crusader Campaign Scenario is eighteen Game-Turns long. As in all Scenarios, the British Player is the First Player; his Player-Turn is first in every Game-Turn.
[19.17] Victory Conditions
At the end of the eighteenth Game-Turn, or by mutual consent at the end of any preceding Game-Turn, play ceases and the victor is determined according to the following criteria.
For the British Player to win, he must fulfill these two conditions at the end of the game:
- He must be able to trace a path of hexes, of any length, from any hex on the east edge of the map to Tobruk (hex 1103). The hexes in this path (inclusive of the terminal hexes) must be free of Axis units or Zones of Control.
- He must destroy eleven Axis units, at least five of which must be German; or there must be fewer than eleven Axis units remaining on the map at the end of the game.
The Axis Player wins in any of the following situations:
- The British Player fails to fulfill either of his Victory Conditions.
- The Axis Player fulfills both his Victory Conditions and the British have lost more than 28 units, while not destroying more than 14 Axis units.
If neither Player wins, the game is considered a draw.
[19.2] Sidi Rezeg Scenario
This Scenario represents the crucial first six days of Operation Crusader. This Scenario is identical to the Operation Crusader Campaign Scenario, except that it is shorter and has different Victory Conditions. Otherwise, the same situation as Operation Crusader Scenario applies.
[19.21] Axis Initial Deployment: Same as Case 19.11.
[19.22] Allied Initial Deployment: Same as Case 19.12.
[19.23] Axis Reinforcements: Same as Case 19.13.
[19.24] Allied Reinforcements: Same as Case 19.14.
[19.25] Ground Support Allocation: Same as Case 19.15.
[19.26] Player Sequence
The Sidi Rezeg Scenario is six Game-Turns long, and is played on Game-Turns One through Six. The British Player is the First Player; his Player-Turn is first in every Game-Turn.
[19.27] Victory Conditions
Victory in this Scenario is decided on the basis of Victory Points. At the end of the Game-Turn, the Player with the higher Victory Point total is considered the winner.
For each Enemy non-Artillery unit destroyed, each Player receives Victory Points equal to the total of the destroyed unit's Attack Strength and Defense Strength. For each Enemy Artillery unit eliminated, each Player receives Victory Points equal to the destroyed unit's Barrage and FPF Strengths (only).
In addition, the British Player (only) receives sixty Victory Points if he establishes a route to Tobruk as described in the Victory Conditions for the Operation Crusader Scenario (see Case 19.17, nr. 1).
[19.3] The Dash to the Wire Scenario
The "Dash to the Wire" Scenario recreates Rommel's attempted counter-attack on British positions by driving towards Egypt.
[19.31] Axis Initial Deployment
- Unit Type: 5-4-11. Hexes: 1/8 (1313), 2/8 (1312), 1/5 (1413), 2/5 (1412).
- Unit Type: 3-4-11. Hexes: 33 (1510), 39 (1511), 605 (3315).
- Unit Type: 3-3-14. Hexes: 33 (1513), 3 (1806).
- Unit Type: 3-3-9. Hex: 8 Bers (1214).
- Unit Type: 2-2-11. Hexes: 2/200 (1410), 33 (1112), 900 (0706).
- Unit Type: 2-3-9. Hex: 65 (0708).
- Unit Type: 2-3-7. Hex: 66 (0507).
- Unit Type: 2-2-3. Hexes: 40 (1305), 27 (0909), 28 (1008), 19 (0703), 20 (0704), 62 (0805), 61 (0906), 15 (3215), 16 (3014).
- Unit Type: 1-2-14. Hex: 15/200 (1406).
- Unit Type: 1-2-11. Hexes: 1/115 (1311), 2/115 (1411), 1/104 (3619), 2/104 (3310), 3/104 (1310), 1/155 (1306), 2/155 (1108), 1/361 (3415), 3/255 (1308), 3/347 (1007).
- Unit Type: 5-2-3/1-11. Hex: 104 (1208).
- Unit Type: 6-2-3/1-7. Hex: XXI (0908).
- Unit Type: 4-2-2/1-11. Hexes: 33 (1309), 155 (1409).
- Unit Type: 1-1-2/1-7. Hexes: 26 (1009), 1 (0603), 205 (1406), 12 (3219), 46 (0806).
[19.32] British Initial Deployment
- Unit Type: 5-3-9. Hex: 8RTR (2816).
- Unit Type: 4-5-9. Hexes: 4NZ (2006), 16 (1206), Pol (0802).
- Unit Type: 4-4-9. Hexes: 22Gds (1316), 11I (3815).
- Unit Type: 4-3-9. Hex: 44RTR (1908).
- Unit Type: 3-4-9. Hexes: 5NZ (3010), 6NZ (1810), 14 (0804), 23 (1005), 5I (3517), 7I (2917), 1SA (1616).
- Unit Type: 3-3-9. Hex: 6SA (3418).
- Unit Type: 3-2-12. Hexes: 3RTR (1812), 5RTR (1913).
- Unit Type: 3-2-11. Hexes: 3CLY (1809), 4CLY (1808), 2RGH (1811).
- Unit Type: 3-2-10. Hexes: 7HUS (2215), 2RTR (2315).
- Unit Type: 2-3-9. Hexes: 1RTR (1205), 4RTR (1106), 7RTR (0905).
- Unit Type: 1-2-11. Hexes: 2RB (2014), 2SG (2013).
- Unit Type: 1-1-15. Hexes: 3SA (1516), 11HUS (1116), 1KDG (1718), 4SA (3217), CIH (2819), NZ (2007).
- Unit Type: 6-3-2/1-9. Hex: 70 (1105).
- Unit Type: 5-3-2/1-10. Hex: 7 Arm (2114).
- Unit Type: 5-3-2/1-9. Hexes: 2NZ (2107), 4I (2919), 1SA (1617).
[19.33] Axis Reinforcements: None.
[19.34] Allied Reinforcements: None.
[19.35] Ground Support Allocation
- The Axis Player receives four Ground Support Points every Game-Turn.
- The British Player receives six Ground Support Points every Game-Turn.
[19.36] Player Sequence
The "Dash to the Wire" Scenario begins with the Axis Movement Phase of Game-Turn Seven. It ends at the conclusion of Game-Turn Twelve. The British Player is the First Player (but he has no Player-Turn during the first Turn of the Scenario, Game-Turn Seven). Thus, the British Player is assumed to have completed his movement and combat for that Turn. All subsequent Turns are played in normal manner, with the British Player moving first each Game-Turn.
The British Diversion has already been resolved and is considered to have had no effect.
Aside from the 7th SA Recce. Bn., which is exited from the map in this Scenario, all units that do not appear in this Scenario are considered previously destroyed and thus do not take part in play. No Victory Points are awarded for such units considered previously destroyed.
[19.37] Victory Conditions
Victory in this Scenario is determined in the same manner as in the Sidi Rezeg Scenario (see Case 19.27), with the addition that the Axis Player receives ten Victory Points each for hexes 3516 and 3614 if an Axis unit was the last to occupy or move through them. The Axis Player also receives two Victory Points for each British unit out of supply at the end of the "Dash to the Wire" Scenario.
20.0 Game Notes
Operation Crusader is a game of mobile warfare. The British Player must never lose sight of his objective—the relief of Tobruk. Yet to accomplish this, he must first defeat the Axis forces opposing him. To do this, he cannot sit around. The strategy of a slow, slugging march up the coast from Hellfire Pass is doomed before it starts. The British must strike swiftly at the Axis positions and go for the heart of their strength—the big German armored units. Never pass up a chance to surround and destroy one of these, even if it means having to use a recce regiment or two as an expendable "screen." The Axis Player, on the other hand, cannot conduct a static defense. If he simply forms a line and waits for the British to come to him, he will find the British numerical superiority swamping him everywhere. The Axis Player must be active, agile and aggressive, shifting forces, staging counter-attacks, attempting to cut-off the British armored spearheads. The Axis Player is aided by the fact that time is on his side and that his goals are simply to deny the British their victory, or to make it prohibitively costly.
A Note on Unit Designations
RECAM=Italian Army Reconnaissance, Bers=Bersaglieri (Italian elite troops), NZ=New Zealand, Pol=Polish Carpathians, I=Indian, Gds=Guards, KRRC=King's Royal Rifle Corps (60th Rifles), RB=The Rifle Brigade (95th Rifles), SG=Scots Guards, RTR=Royal Tank Regiment, HUS=Hussars, RIH=Royal Irish Hussars, KDG=King's Dragoon Guards, CLY=County of London Yeomanry (Sharpshooters), SA=South African, CIH=Central India Horse, RGH=Royal Gloucestershire Hussars.
Kasserine: Baptism of Fire, February 1943 (Exclusive Rules)
15.0 Introduction
Kasserine is a simulation of the dramatic Axis offensive in Tunisia during February of 1943. The target of this carefully timed operation was the U.S. II Corps.
16.0 Rough Terrain
[16.1] Effects
[16.11] Rough terrain hexes are prohibited to all mechanized unit types (except Mechanized Infantry) at all times. No mechanized units, except Mechanized Infantry, may ever enter Rough terrain hexes. Non-mechanized units may enter Rough terrain hexes, paying the appropriate costs.
[16.12] All units may enter and exit Rough terrain hexes through Road and Trail hexsides. All mechanized units forced to retreat into Rough terrain hexes through non-Road/Trail hexsides are eliminated instead.
[16.13] Zones of Control of all unit types extend into Rough terrain and all unit types may attack into Rough terrain hexes.
17.0 Supply Sources
[17.1] Restrictions
[17.11] An Axis unit is in supply if an unobstructed initial path of four or fewer hexes can be traced from the unit in question to a Trail or Road hex, which is connected by a contiguous, connected line of unobstructed Trail or Road hexes to any Axis Supply Source. Axis Supply Sources are hexes 0623-1423, 2126-3926, 3926-3916 (inclusive). An Axis unit which cannot trace such a path is unsupplied.
[17.12] An Allied unit is in supply if an unobstructed initial path of three or fewer hexes can be traced from the unit in question to a Trail or Road hex, which is connected by a contiguous line of unobstructed Trail or Road hexes to any Allied Supply Source. Allied Supply Sources are hexes 0107-0101, 0101-0901, 1301-1901, 2401-3001 (inclusive). An Allied unit which cannot trace such a path is unsupplied.
[17.13] Note that once a Supply Path is traced into a Trail hex, all remaining hexes must be Trail hexes connected by Trail hexsides, and that once the Supply Path is traced into a Road hex, all remaining hexes must be Road hexes connected by Road hexsides.
[17.14] Additionally, each Player may trace his initial hexes directly to a Supply Source.
[17.15] If an Axis unit exits any Allied Supply hex, that hex and any Allied hexes east of that hex may no longer be used as an Axis Supply source.
18.0 Limitations on Ground Support and Artillery
General Rule:
Neither Player may add the Strength Points of more than three Artillery units in a single combat for either Barrage or FPF. In addition, the Axis Player may use no more than four Ground Support Points for either Barrage or FPF in any single combat. Axis Ground Support Points are listed on the Turn Record Track. The Allies receive no Ground Support Points.
19.0 Withdrawal
General Rule:
Once (and only once) during the course of the game, each Player may announce and execute a Withdrawal Player-Turn.
Procedure:
Immediately before the Movement Phase, the Phasing Player indicates that he is executing a Withdrawal by placing the Friendly Withdrawal Marker on the Turn Record Track. The Phasing Player then executes a Withdrawal within the following Cases. One Withdrawal Marker is included for each Player.
Cases:
[19.1] Effect of Withdrawal on Enemy Zones of Control
During the Movement Phase of the Player-Turn in which a Withdrawal has been indicated, any or all of the Phasing Player's units may exit from Enemy Zones of Control. In all other respects, the effects of Enemy Zones of Control fully apply.
[19.2] Effects of Withdrawal on Friendly Movement
[19.21] All withdrawing units move normally, except that, subsequent to exiting the Enemy-controlled hex, they may not re-enter an Enemy-controlled hex during the Withdrawal Movement Phase. Units which do not begin the Withdrawal Movement Phase in an Enemy-controlled hex may enter an Enemy-controlled hex that Phase.
[19.22] Not all Friendly units need undertake a withdrawal. A Player may select which units he wishes to withdraw.
[19.3] Special Considerations
Both Players must fulfill certain requirements after announcing a Withdrawal, as follows:
[19.31] Allied Player: All units of the U.S. 1st Armored Division still in play during the Withdrawal Movement Phase, must end the Allied Movement Phase within three hexes of El Ma el Aboid (hex 0312) three Game-Turns after the Allied Withdrawal Phase.
[19.32] Axis Player: Three Game-Turns after the Axis Withdrawal Player-Turn, all Axis units must exit the map from an Axis Supply Source hex.
[19.33] Meeting the Special Considerations: Points are added and subtracted to the Victory Point total for units which fail to meet the special considerations (see the Victory Point Schedule).
20.0 Weather
General Rule:
There are three types of weather: Good, Fair and Poor. Each Game-Turn is assigned a Weather Condition on the Turn Record Track.
Cases:
[20.1] Effects of Weather on Axis Ground Support Points
- On Good Weather Game-Turns: Axis Player receives nine Ground Support Points.
- On Fair Weather Game-Turns: Axis Player receives four Ground Support Points.
- On Poor Weather Game-Turns: Axis Player receives no Ground Support Points.
[20.2] Effects of Weather on Terrain
- On Good and Fair Weather Game-Turns: All terrain effects are normal.
- On Poor Weather Game-Turns: No units may move or attack across unbridged Stream hexsides at any time. Zones of Control do not extend across unbridged Stream hexsides during any Phase of Poor Weather Game-Turns.
[20.3] Effects of Weather on Movement Allowances
- On Good and Fair Weather Game-Turns: All Movement Allowances are normal.
- On Poor Weather Game-Turns: The Movement Allowances of all units with unmodified Movement Allowances of eight or more are reduced by five Movement Points. The Movement Allowances of all units with unmodified Movement Allowances of seven or less are reduced by two Movement Points. Thus, a 2-3-11 during a Poor Weather Game-Turn becomes a 2-3-6; a 1-2-3/1-7 becomes a 1-2-3/1-5.
21.0 Optional Rules
[21.1] Allied Desperate Defense
In all Combat Phases following the completion of the Allied Withdrawal Player-Turn, all Combat Results affecting Allied units must be modified as follows: A1, Br and D1 become No effect; D2 and A2 become D1 and A1, respectively; D3 becomes D2. However, all D4 and Ae results against Allied units result in the elimination of all Allied units in the combat, and Axis forces involved in the combat may advance four hexes as per the Advance After Combat Rules.
[21.2] Release of the 10th Panzer Division
No unit of the 10th Panzer Division may move west of the 2000 hexrow (inclusive) until released. Units of the 10th Panzer are released individually by a die roll at the beginning of each Axis Player-Turn following an Allied Withdrawal. A die is rolled for each unit individually, and if the die roll is greater than or equal to the unit's Attack Strength, it may move freely for the remainder of the game. Each unreleased unit may be rolled for only once per Axis Player-Turn. Unreleased units may only operate freely east of the 2000 hexrow.
22.0 Victory Conditions
General Rule:
Victory is judged at the end of the game on the basis of Victory Points. Victory Points are added to the Victory Point total for destroyed Allied units and for Axis-seized territorial objectives, as well as Axis units exited from the map. Victory Points are subtracted from the Victory Point Total for Axis units destroyed, as well as for Axis units which are unsupplied at the end of the game. The Victory Point Total is further adjusted by the post-Withdrawal Considerations.
Cases:
[22.1] Value of Units in Victory Points
[22.11] Each unit has a numerical Victory Point value equivalent to its total Combat Strengths (Attack plus Defense Strengths for non-Artillery units; Barrage, FPF and Defense Strengths for Artillery units). Thus, a 5-3-12 armored battalion is worth 8 Victory Points.
[22.12] Victory Points are added to the Victory Point Total when Allied units are eliminated. Victory Points are subtracted from the Victory Point Total when Axis units are eliminated. Thus, if the Axis Player loses a 5-3-12 armored battalion, eight Victory Points are subtracted from the Victory Point Total.
[22.2] Special Withdrawal Considerations Effect on Victory Point Total
[22.21] For each Allied unit which does not meet the Allied Special Considerations (listed in Case 19.3), double Point value for that unit is added to the Victory Point Total.
[22.22] For each Axis unit which does not meet the Axis Special Considerations (Case 19.3), full Point value for that unit is subtracted from the Victory Point Total.
[22.23] Note that these units are not eliminated. If any of the above units are eliminated subsequent to Friendly Withdrawal, adjustment to the Victory Point Total is again made.
[22.3] Territorial Objectives
[22.31] Certain hexes are listed by hex number and their Point Value to the Axis Player. These Points are awarded to the Axis Player (i.e., added to the Victory Point Total) the instant the first Axis unit enters (occupies) the listed hex.
[22.32] These hexes are listed as having conditional Victory Point value (e.g., 20 Points are added to the Victory Point Total the instant an Axis unit enters hex 2714, but only on or before Game-Turn Three).
[22.4] Victory Point Schedule
The Axis Player keeps a running total of all the Victory Points. Points may be added and subtracted from the Victory Point Total according to the following schedule.
[22.41] Points Awarded During the Course of Play:
- Thirty Victory Points (VP) the instant the first Axis unit enters Sbeitla (hex 2714), if on or before Game-Turn Three.
- Thirty VP the instant the first Axis unit enters Thelepte (hex 1319), if on or before Game-Turn Three.
- Five VP the instant the first Axis unit enters Sbeitla, if on Game-Turn Four through Six.
- Five VP the instant the first Axis unit enters Thelepte, if on Game-Turn Four through Six.
- Full Point Value for each Allied unit eliminated.
- Double full Point Value for each U.S. unit of the 1st Armored Division which fails to fulfill its post-Withdrawal Conditions as listed in Case 19.3.
- Sixty-Five VP at the instant the first Axis unit enters Tebessa (hex 0306) in any Game-Turn preceeding the Axis Withdrawal.
[22.42] Points Subtracted During Play:
- Full Point Value for every Axis unit eliminated.
- Full Point Value for every Axis unit which fails to fulfill the post-Withdrawal Conditions as listed in Case 19.3.
- Seven Victory Points (VP) are subtracted at the completion of every Game-Turn following Game-Turn Eight if the Axis Withdrawal has not yet occurred.
Example: If the Axis Player does not declare a Withdrawal on Game-Turn Nine, seven Victory Points are subtracted from the Victory Point Total at the end of the Game-Turn.
[22.43] Points Awarded at the End of Play: Victory Points are added if the Axis Player fulfills the following objectives:
- Triple Point Value for each Axis unit exited from any Allied Supply Source hex preceding an Axis Withdrawal is added, if it can trace a line of connected Road or Trail hexes from the Allied Supply Source hex to any Axis Supply Source hex (inclusive) unblocked by Allied units at the end of the game.
- Full Point Value for each Axis Armor (only) Attack Strength Point exited from Axis Supply Source hexes before the end of the game is added if the Axis Player has declared a Withdrawal.
Victory is determined by finding the final Victory Point Total on the schedule below, and comparing it to the Victory Levels.
[22.5] Levels of Victory
| Victory Point Total | Victory Level |
|---|---|
| Less than 45 | Allied Decisive |
| From 45 to 59 | Allied Substantive |
| From 60 to 79 | Allied Marginal |
| From 80 to 109 | Draw |
| From 110 to 129 | Axis Marginal |
| From 130 to 150 | Axis Substantive |
| More than 150 | Axis Decisive |
23.0 Initial Deployment and Reinforcements
General Rule:
Hex numbers are shown in bold, followed by the unit's Strength and Movement values; unit designations (important for play of the game) are shown in parentheses. Units must be set-up strictly according to unit designation.
[23.1] Axis Initial Deployment
No Axis units begin the game on the map.
[23.2] Allied Initial Deployment
Place the following units in the hex listed for each.
- 3718: 1-3-7 (2/168)
- 3922: 1-2-7 (3/168)
- 3722: 1-2-7 (-/168)
- 3721: 1-2-3/2-10 (91)
- 3821: 2-2-4/1-7 (2/17)
- 3819: 3-2-12 (3/1)
Place the following units in or adjacent to the hex listed for each group. Units may not be stacked.
- 2714: 2-1-14 (1/13), 2-3-11 (1/6), 1-2-3/2-10 (68)
- 3911: 3-2-12 (3/13), 2-1-11 (701), 2-3-11 (3/6)
- 1703: 1-2-7 (1/26), 1-3-7 (19)
- 0312: 2-3-11 (2/6)
- 0914: 2-1-14 (1/1)
Place the following units on or within two hexes of the hex listed for each group. Units may not be stacked.
- 0306: 2-1-11 (894 and 805), 1-2-3/1-7 (7), 2-2-4/1-7 (33)
- 1220: 1-2-7 (1/168)
[23.3] Axis Reinforcement Schedule
Enter Reinforcing units on the hex listed, or on any map edge hex (inclusive) between the hexes listed for each group. Reinforcements enter in column (see Section 13.0). Further Reinforcements are listed under Conditional Reinforcements.
The following units appear on Game-Turn One:
- 3918-3920: 5-3-12 (2/7), 3-4-11 (2/69 and 2/86), 2-2-9 (3/90 and 1/90), 2-1-2/1-9 (lt/90), 2-1-3/2-11 (1/90), 6-5-10 (501)
- 3726: 5-3-12 (1/5), 2-2-9 (609), 3-1-3/1-7 (1/155)
- 3225: 5-3-12 (2/5), 3-4-11 (1/104 and 2/104), 2-2-9 (Trupn), 3-1-3/1-7 (2/155)
The following unit appears on Game-Turn Two:
- 2526: 3-2-16 (580)
The following units appear on Game-Turn Four:
- 3920: 2-2-11 (10), 1-2-9 (Lang)
- 0623-1423 and/or 2126-2926: 3-2-16 (33), 4-3-12 (1/8), 4-4-11 (1/Afr and 2/Afr), 2-2-9 (Afr), 3-1-3/1-7 (1/190 and 1/Afr), 4-3-9 (LW)
The following units appear on Game-Turn Four if there is an Allied unit within seven hexes of hex 1023; otherwise, they appear on Game-Turn Five:
- 0623-1423 and/or 2126-2926: 5-1-2/1-7 (171), 3-2-11 (31), 3-3-11 (5 Bers), 2-1-7 (1/1 and 2/1), 1-1-2/2-10 (553), 1-1-2/1-7 (75/27), 2-1-3/1-7 (105/28)
[23.4] Axis Conditional Reinforcements
These Reinforcements appear only when the event described takes place. The following Axis units appear during the Game-Turn after both an Axis 5-3-12 and an Axis 6-5-10 have exited the map at either 3911 or 3909. The exited units also return at the same time that these Reinforcements appear.
- 3911 or 3910: 3-4-11 (1/47 and 2/47)
[23.5] Allied Reinforcement Schedule
Enter Reinforcement units on the hex listed. Reinforcements enter in column (see Section 13.0). Further Reinforcements are listed under Conditional Reinforcements.
If Axis units exit the map from any hex, Allied units scheduled to enter that hex or any hex east of that hex are no longer available to the Allied Player. These units are not destroyed; they are simply not available as Reinforcements.
The following units appear on Game-Turn One:
- 1023: 1-3-7 (3/26), 2-2-9 (1), 1-2-3/1-7 (175), 2-1-16 (1 DY)
- 3911: 3-3-12 (2/1)
The following units appear on Game-Turn Two:
- 3911: 1-2-3/2-10 (27), 2-1-11 (601)
- 2701: 3-2-12 (2/13)
- 1601: 1-4-6 (Welvrt), 1-1-2/2-5 (1/67 and 2/67)
- 0105: 1-2-7 (3/39)
[23.6] Allied Conditional Reinforcements
These Reinforcements appear only when the event described takes place. The events need not take place in the order in which they are listed.
The following units appear during the Movement Phase of the Allied Withdrawal:
- 3909: 1-2-7 (1/133), 2-3-7 (135), 2-2-4/1-7 (185), 1-2-3/1-7 (125 and 151), 1-1-6 (Guinet), 2-1-10 (FLA)
- 2701: 2-5-7 (18), 2-3-7 (1 Gd), 3-2-4/1-7 (152), 2-2-3/1-7 (12), 1-1-7 (72 and 93)
The following units appear during the third Game-Turn after Allied Withdrawal:
- 0105: 1-2-7 (2/16)
The following unit appears during the fourth Game-Turn after Allied Withdrawal:
- 0105: 2-3-7 (16)
The following units appear during the fifth Game-Turn after Allied Withdrawal:
- 0105: 1-1-2/1-7 (47 and 60), 1-2-3/1-7 (60 and 84), 2-2-4/1-7 (34)
The following units appear during the first Allied Movement Phase after any Axis unit has moved within nine hexes of Thala (1704) or Tebessa (0306), even if that Axis unit no longer occupied the hex:
- 1601 or 2701: 2-2-12 (16/5), 2-1-12 (17/21 and 2 Lth), 2-2-11 (10/R), 1-2-7 (2/5L)
The following unit appears during the first Allied Movement Phase after any Axis unit has moved within one hex of Sbiba (2706), Thala or Tebessa.
- 0104: 3-2-12 (Shrmn)
[23.7] Player Sequence
[23.71] The Axis Player is the First Player; his Player-Turn is first in each Game-Turn.
[23.72] Allied Movement Restrictions: On the First Game-Turn, only, Allied units listed in the Initial Deployment (except units within ten hexes of any Axis unit) may not be moved. After the First Game-Turn, all Allied units may be moved normally.
Supercharge: Battle of El Alamein, October 1942 (Exclusive Rules)
15.0 Introduction
Supercharge is a simulation of the battle of 'Alamein and the Battle of Alam Halfa. It depicts the Axis offensive against the 'Alamein Line in the last Axis attempt to break through to Cairo, and the Allied attack in preparation for the Torch landings.
Note: There are no supply restrictions or sources in Supercharge. Section 12.0 is ignored.
16.0 Minefield Effects on Armor
General Rule:
In addition to the standard effects of Minefields, any mechanized unit attacking through an Enemy Minefield hexside has its Attack Strength halved.
Procedure:
When calculating an attack, halve the Attack Strength of any and all mechanized units attacking through Enemy Minefield hexsides, dropping fractions. For a definition of what constitutes a "mechanized" unit, see Case 2.31 in the Standard Rules booklet.
17.0 Victory Conditions
General Rule:
During the game, both sides will receive Victory Points. The Player must keep track of the Victory Point total (paper and pencil suggested). A Player will receive Victory Points for reaching certain objectives during the game, as well as for holding certain objectives at the end of the game.
Procedure:
When the Scenario has been completed, total the number of Victory Points each side has. Subtract the lesser total from the greater, to yield a single number. Then examine the following chart to determine the level of victory of the Player with the larger Victory Point total.
| Difference in Victory Points | Victory Level |
|---|---|
| 0 to 3 | Draw |
| 4 to 15 | Marginal Victory |
| 16 to 30 | Substantive Victory |
| 31 and above | Decisive Victory |
18.0 Scenarios
General Rule:
Supercharge has three Scenarios: the Battle of Alam Halfa, the Battle of 'Alamein, and Operation Supercharge.
The instructions for each Scenario include each Player's Initial Deployment, Special Rules in effect for that Scenario, the length in Game-Turns of that Scenario and the Victory Conditions.
Procedure:
Place a unit of the specified type on each of the hexes listed for that type. Hex numbers are shown in parentheses following each unit's designation. Unit designations are not necessary for the play of the game, and may be ignored.
Cases:
[18.1] The Battle of Alam Halfa
[18.11] Axis Initial Deployment
Germans:
- Unit Type: 2-2-12. Hex: PZJ (1122)
- Unit Type: 2-1-12. Hex: Recce (1124)
- Unit Type: 2-2-5/2-12. Hexes: 155 (1224), 190 (1416)
- Unit Type: 3-2-5/2-12. Hex: Flak (1321)
- Unit Type: 5-3-12. Hexes: 5 (1324), 8 (1423)
- Unit Type: 3-3-12. Hexes: 104 (1325), 346 (1417), 113 (1422)
- Unit Type: 2-3-6. Hexes: 433 (1406), 382 (1408), 125 (1509)
- Unit Type: 2-3-12. Hexes: 200 (1418), 115 (1419)
- Unit Type: 2-2-5/2-6. Hex: 220 (1505)
- Unit Type: 2-4-6. Hex: Ramcke (1510)
Italians:
- Unit Type: 3-3-6. Hex: Folg (1123)
- Unit Type: 2-1-4/2-10. Hex: 20 (1320)
- Unit Type: 2-1-4/2-4. Hex: 21 (1410)
- Unit Type: 1-2-4. Hexes: Bol (1413), Trento (1511)
- Unit Type: 2-3-10. Hexes: 12 Bers (1420), 8 Bers (1521)
- Unit Type: 3-4-10. Hex: Tri (1421)
- Unit Type: 3-2-10. Hexes: 133 (1520), 132 (1621)
[18.12] Allied Initial Deployment
- Unit Type: 3-4-6. Hexes: 20A (1607), 24A (1609), 132 (1715), 6NZ (1716), 5NZ (1717), 3SA (1810), 1SA (1811), 2SA (1812), 26A (2510), 133 (2616), 131 (2915).
- Unit Type: 2-1-12. Hexes: 7 (1623), 8SA (1911), 2NZ (2017).
- Unit Type: 2-3-6. Hexes: 161Ind (1713), 4Ind (1714), 5Ind (2013).
- Unit Type: 3-4-12. Hex: 7 Mot (1719).
- Unit Type: 2-2-12. Hexes: 8H (1721), TG (2317).
- Unit Type: 2-2-5/2-6. Hex: 4Ind (1814).
- Unit Type: 4-3-6/2-6. Hexes: 1SA (1912), 2NZ (1915).
- Unit Type: 3-2-12. Hexes: 4CLY (2022), 5RTR (2117), 1RTR (2416).
- Unit Type: 4-3-12. Hexes: 23 (2815), NTY (3319), SFY (3320), 2RTR (3419).
[18.13] Player Sequence
- The Axis Player is the First Player. His Player-Turn is first in every Game-Turn.
- No Allied unit may move on the First Turn.
- The Scenario length is eight Game-Turns.
[18.14] Ground Support Allocation
- The Axis Player has two Ground Support Points each Game-Turn.
- The Allied Player has no Ground Support Points.
[18.15] Victory Point Schedule
(See Section 17.0.)
The Axis Player receives Victory Points as follows:
- Five Points for each Allied unit destroyed.
- Five Points for each Axis unit exited off the eastern edge of the map between hexes 3606 and 3616, inclusive.
- 100 Points if an Axis unit passed through Imayid or 'Alamein during the game.
The Allied Player receives Victory Points as follows:
- Five Points for each Axis unit destroyed.
- 100 Points if there is no Axis unit east of hexrow 0700 at the end of the game.
[18.2] The Battle of 'Alamein
[18.21] Allied Initial Deployment
- Unit Type: 3-4-6. Hexes: 26A (1507), 20A (1508), 153 (1608), 154 (1609), 24A (1707), 152 (1708), 5NZ (1710), 6NZ (1711), 2SA (1712), 3SA (1812), 1SA (1912).
- Unit Type: 3-3-12. Hexes: 3H (1709), RWY (1809), WWY (1810).
- Unit Type: 2-3-6. Hexes: 5Ind (1713), 7Ind (1714), 161Ind (1715), 69 (1717), 151 (1718), 1GK (1819), 1FF (2023).
- Unit Type: 4-2-6/2-6. Hex: 9A (1807).
- Unit Type: 4-2-5/2-6. Hex: 51 (1808).
- Unit Type: 2-1-12. Hexes: 2NZ (1811), 8SA (2009), 7 (2222), RD (2715), 12L (3210).
- Unit Type: 2-2-5/2-6. Hex: 4Ind (1813).
- Unit Type: 3-2-5/2-6. Hex: 50 (1818).
- Unit Type: 4-3-6/2-6. Hexes: 2NZ (1910), 1SA (1911).
- Unit Type: 3-4-12. Hexes: 132L (1919), 131L (1920), 133L (2813), 7Mot (2912).
- Unit Type: 2-2-12. Hexes: 8H (2020), TG (2021), AT (2712).
- Unit Type: 3-2-12. Hexes: 1RTR (2022), 5RTR (2122), 4CLY (2123).
- Unit Type: 4-4-6. Hex: 2FF (2025).
- Unit Type: 3-2-5/2-12. Hexes: 7A (2221), 10 (2811).
- Unit Type: 4-3-12. Hexes: 1TK (2612), NTY (2613), SFY (2713), 23 (2810), 2RTR (2814), QB (2910), 41RTR (2913), 45RTR (2914), 47RTR (2915), 9L (3009), 10H (3010).
[18.22] Axis Initial Deployment
German:
- Unit Type: 2-2-5/2-12. Hexes: 190 (0401), 155 (1216), 33 (1309).
- Unit Type: 2-3-12. Hexes: 115 (0502), 200 (0503).
- Unit Type: 3-3-12. Hexes: 346 (0602), 113 (1109), 104 (1315).
- Unit Type: 5-3-12. Hexes: 8 (1206), 5 (1319).
- Unit Type: 2-2-12. Hex: PZJ (1217).
- Unit Type: 2-3-6. Hexes: 382 (1307), 125 (1406), 433 (1509).
- Unit Type: 2-2-5/2-6. Hex: 220 (1405).
- Unit Type: 3-2-5/2-12. Hex: Flak (1412).
- Unit Type: 2-4-6. Hex: Ramcke (1514).
- Unit Type: 2-1-12. Hex: Recce (1623).
Italian:
- Unit Type: 3-4-10. Hex: Tri (0305).
- Unit Type: 2-3-10. Hexes: GGFF (0702), 7 Bers (1411), 9 Bers (1419), 12 Bers (1506), 8 Bers (1519).
- Unit Type: 1-2-4. Hexes: Pis (0703), Bres (1415), Bol (1512), Trento (1610), Pavia (1722).
- Unit Type: 2-1-4/2-10. Hex: 20 (1207).
- Unit Type: 3-2-10. Hexes: 133 (1306), 132 (1417).
- Unit Type: 2-1-4/2-4. Hexes: 10 (1318), 21 (1410).
- Unit Type: 3-3-6. Hex: Folg (1720).
[18.23] Player Sequence
- On Game-Turn One, all British Artillery units have their Barrage Strength doubled. Their FPF Strength remains as printed.
- The Allied Player is the First Player. His Player-Turn is first in every Game-Turn.
- The Scenario length is fifteen Game-Turns.
[18.24] Ground Support Allocation
The Allied Player has eight Ground Support Points on the First Turn, and four every Turn thereafter. This support may only be used as Barrage Strength; it may not be used for FPF.
The Axis Player has no Ground Support Points.
[18.25] Victory Point Schedule
The Axis Player receives Victory Points as follows:
- Ten Points for each Allied unit destroyed.
- Three Points for each Axis unit exited off the western map edge. [This is to simulate a withdrawal.]
- Five Points at the end of every Turn starting on Game-Turn Ten if the Axis Player has at least one Axis unit on the area east of hexrow 0700 and north of hexrow 0013.
The Allied Player receives: Four Points for each Axis unit destroyed.
[18.3] Operation Supercharge
[18.31] Allied Initial Deployment
- Unit Type: 3-4-6. Hexes: 6NZ (1107), 154 (1108), 152 (1109), 5NZ (1206), 153 (1310), 24A (1406), 3SA (1410), 26A (1506), 20A (1306), 2SA (1511), 1SA (1611).
- Unit Type: 4-3-12. Hexes: QB (1207), 9L (1208), 10H (1308), 23 (1309), 2 RTR (1407), NTY (1408), SFY (1409), 1TK (2009).
- Unit Type: 3-4-12. Hexes: 133L (1209), 7Mot (1307), 132L (1619), 131L (1720).
- Unit Type: 3-2-5/2-12. Hexes: 10 (1507), 7A (1708).
- Unit Type: 4-3-6/2-6. Hexes: 2NZ (1508), 9A (1510), 1SA (1606).
- Unit Type: 4-2-5/2-6. Hex: 51 (1509).
- Unit Type: 3-3-12. Hexes: 3H (1607), RWY (1608), WWY (1609).
- Unit Type: 2-2-12. Hexes: AT (1610), 8H (1721), TG (1722).
- Unit Type: 2-3-6. Hexes: 5Ind (1612), 69 (1615), 7Ind (1713), 161Ind (1715), 151 (1717), FF1 (1724), 1GK (1718).
- Unit Type: 4-4-6. Hex: 2FF (1624).
- Unit Type: 2-2-5/2-6. Hex: 4Ind (1813).
- Unit Type: 3-2-5/2-6. Hex: 50 (1815).
- Unit Type: 3-2-12. Hexes: 4CLY (2210), 5RTR (2310), 1RTR (2311).
- Unit Type: 2-1-12. Hexes: 12L (2409), 8SA (2410), RD (2510), 7 (2511).
[18.32] Axis Initial Deployment
German:
- Unit Type: 5-3-12. Hexes: 5 (0803), 8 (1007).
- Unit Type: 2-2-5/2-6. Hex: 220 (0804).
- Unit Type: 3-2-5/2-12. Hex: Flak (0907).
- Unit Type: 3-3-12. Hexes: 104 (1006), 346 (1405).
- Unit Type: 2-2-12. Hex: PZJ (1106).
- Unit Type: 2-3-12. Hexes: 115 (1205), 200 (1305).
- Unit Type: 2-2-5/2-12. Hex: 155 (1304).
- Unit Type: 2-3-6. Hexes: 433 (1311), 382 (1411).
- Unit Type: 2-4-6. Hex: Ramcke (1520).
- Unit Type: 2-1-12. Hex: Recce (1623).
Italian:
- Unit Type: 2-1-4/2-4. Hexes: 20 (0904), 10 (1321), 21 (1010).
- Unit Type: 3-2-10. Hexes: 133 (1008), 132 (1420).
- Unit Type: 2-3-10. Hexes: 12 Bers (1009), 9 Bers (1417), 7 Bers (1505), 8 Bers (1521).
- Unit Type: 1-2-4. Hexes: Bol (1210), Bres (1415), Pis (1514), Pavia (1519).
- Unit Type: 3-4-10. Hex: Tri (1512).
- Unit Type: 3-3-6. Hex: Folg (1621).
[18.33] Player Sequence
- The Allied Player is the First Player. His Player-Turn is first in every Game-Turn.
- The Scenario length is seven Game-Turns.
[18.34] Ground Support Allocation
The Allied Player has four Ground Support Points every Turn. These may only be used for Barrage; they may not be used for FPF.
The Axis Player has no Ground Support Points.
[18.35] Victory Point Schedule
Both Players accumulate Victory Points as in Case 18.25 (the Victory Conditions for the "Battle of 'Alamein" Scenario), with the following exception: the Axis Player gains Victory Points for having units east of the 0700 hexrow and north of the 0013 hexrow, starting on Game-Turn One, rather than Game-Turn Ten.
19.0 Game Notes
Alam Halfa
Axis Player: In this Scenario, the Axis Player must destroy enemy units, and make his way to the eastern map edge to exit units. He will only rarely be able to do the latter, and he will take Alamein only from an incompetent Allied Player.
The Player should take care not to overextend himself. One of his major difficulties will be in getting units across the first line of Allied mines. He will make a slow, steady push for the edge of the board.
For the first two Turns, the Axis Player's objective should be to get his units across the Allied lines as quickly as possible, and to advance as far as possible without endangering his position. On his first move, he should position his units so as to be able to make the maximum possible attacks on the Allied unit atop Qaret el Himeimat, and that in the southern part of the Allied mines. Only if the Axis Player is able to destroy the majority of the Allied armor will he be able to sweep around the position at Alamein and off the board.
Allied Player: For the First Turn, the only thing the Allied Player will be able to do is stare at the board while the Germans advance. Thereafter, he must work swiftly to contain the Germans. He should immediately move his artillery south. The three Allied armor units that begin in the south-eastern section of the board must form the mainstay of the southern Allied flank. The units along the Alam Halfa Ridge should cautiously advance south, and the units in the north along the mine line should be stripped from that line and sent south. Whenever the Allied Player sees a chance to kill one of the German Panzer regiments, he should seize it with glee. If he manages to destroy but one of the regiments, the Axis offensive will be severely crippled, and the destruction of both will effectively destroy all Axis hope of continuing the offensive.
On the last few Turns, the Allied Player should try to make up his early losses by destroying as many of the withdrawing German units as possible. Assuming, of course, that the Germans are forced to withdraw.
If the German offensive succeeds too well, the Allied Player can always fall back to the Alam Halfa Ridge line.
Alamein and Supercharge Scenarios
Allied Player: Players with an historical knowledge of the battle will often attempt an offensive across the northern portion of the Alamein line; however, a southern offensive is often as effective.
Whatever the case, the main Allied objectives in the opening Turns of the game should be to cut through the enemy mines as quickly as possible, and to destroy enemy units.
The main Allied strength is his artillery; this should always be placed sufficiently far forward to reach any enemy or friendly units that may need to be affected.
The major Allied offensive through the mines should be made with infantry, but a wave of 4-3-12 armor units should be immediately behind the breakthrough.
Axis Player: As the Axis in this Scenario, the major objective is to hold on as long as possible. It is nearly inevitable that, sooner or later, the Allies will be able to penetrate the line. It's merely a question of time.
When the Axis line begins to crumble, the Axis Player should set up a thin screen of slower moving units, and get the rest of his units off the board as expeditiously as possible.