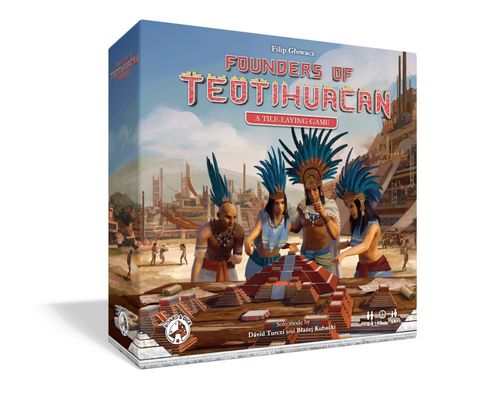
Founders of Teotihuacan
Founders of Teotihuacan Rulebook
Table of Contents
Table of Contents
- Components
- Game Setup
- Structure of Play
- Build Action: Construct a Building
- Build Action: Construct a Temple
- Build Action: Construct the Pyramid
- Influence Action: Produce Resources
- Influence Action: Make an Offering
- Influence Action: Gain Favor
- End of Turn
- End of Round
- New Round Setup
- Final Scoring
- Appendix 1: Bonus Disks
- Appendix 2: Pyramid Rewards
- Appendix 3: Worship Tiles
Components
Your copy of Founders of Teotihuacan includes the following components:
- Main board (consists of 2 pieces)
- 90 Building tiles (15 yellow, 40 gray, 35 brown): 5 gold size 4, 10 gold size 3, 5 stone size 4, 11 stone size 3, 14 stone size 2, 10 stone size 1, 11 wood size 3, 14 wood size 2, 10 wood size 1
- 4 double-sided player boards
- 15 Mask tiles (5 in each of 3 colors)
- 38 Temple tiles (13 green, 13 blue, 12 orange)
- 36 Worship tiles (12 in each of 3 colors)
- 46 Pyramid tiles (14 in each of 3 colors and 4 blank ones)
- 90 resource cubes of 3 types: 30 gold (yellow), 30 stone (gray), 30 wood (brown)
- 9 Bonus disks
- 1 Sun marker
- 1 Eclipse marker
- 1 First Player marker
- 24 Action disks (6 in each of 4 player colors)
- 4 Favor tokens (1 in each of 4 player colors)
Resources (Gold, Stone, and Wood) are considered unlimited. Should you run out, any suitable substitute may be used. Everything else (Buildings, Temples, Pyramid tiles, Mask tiles, etc.) are considered limited; if you run out of these, no more are available.
Living Rules Pledge
We pledge to support every game well after its initial release. Despite rigorous play testing and multiple rounds of both internal and external proof reading and editing, occasionally the need for rules corrections or minor game play adjustments are discovered only several months or years after the game was manufactured. We promise to produce timely rules updates as necessary, along with expanded FAQ clarifications if needed, available for download from our website in digital PDF format.
Missing or Damaged Components
Although we take a lot of care to make sure that your game is complete, manufacturing mistakes can still leave you with a missing or damaged component. If that happens, please contact us to receive replacements swiftly, and with our sincere apologies.
Customer support: https://boardanddice.com/customer-support/
Game Setup
If this is your first time playing Founders of Teotihuacan, carefully punch out all cardboard components.
-
Assemble and place the Main board in the middle of the table, and place the resources within easy reach of all players.
-
According to the player count, place a number of Buildings onto their assigned spaces on the Main board as depicted in the following table. Place all other Buildings (including size 1 Buildings) next to the Main board, forming a general supply.
2 players: one size 2 Stone Building, one size 2 Wood Building, one size 3 Stone Building, one size 3 Wood Building, one size 3 Gold Building, one size 4 Stone Building, one size 4 Gold Building
3 players: two size 2 Stone Buildings, two size 2 Wood Buildings, one size 3 Stone Building, one size 3 Wood Building, one size 3 Gold Building, one size 4 Stone Building, one size 4 Gold Building
4 players: two size 2 Stone Buildings, two size 2 Wood Buildings, two size 3 Stone Buildings, two size 3 Wood Buildings, two size 3 Gold Buildings, one size 4 Stone Building, one size 4 Gold Building
-
Regardless of the number of players, place two Temple tiles on each of the corresponding spaces on the Main board (two Green, two Blue, and two Red Temple tile stacks).
-
Shuffle the Worship tiles (separately, by type), and place them face down in stacks next to the Temple tiles on the Main board. Do not reveal any Worship tiles yet.
-
Place two Pyramid tiles of each color on the Main board. Set the rest of the Pyramid tiles next to the Main board, forming a common pool.
-
Shuffle all Bonus disks face down. Draw and place one disk face up onto each Bonus space on the Main board. Note that some spaces are only for games with 3-4 players and should be left empty (and unused) in 2-player games.
-
Place the Sun marker on the topmost space of the Round Track. Place the Eclipse marker: the position of the Eclipse marker is dependent on the number of players and is denoted by the symbols for 2, 3, or 4 players printed on the Round Track. For a 2- or 4-player game, the Eclipse marker is placed on the fourth space of the Round Track. For a 3-player game, the Eclipse marker is placed on the third space of the Round Track.
The number of Action disks you will be using depends on the number of players in the game:
- With 2 players, use 6 Action disks.
- With 3 or 4 players, use 5 Action disks.
- Give each player one Pyramid tile of each color from the common pool and one blank Pyramid tile. Each player should place the blank tile in the center of their Pyramid grid.
- Give the youngest player the First Player marker. This player should also place their Architect above their Player board.
- The second player in clockwise order places their Architect to the right of their Player board.
- (If present) the third player in clockwise order places their Architect below their Player board.
- (If present) the fourth player in clockwise order places their Architect to the left of their Player board.
- Each player places their Favor token on the starting position of the Pyramid track on the Main board.
- Each player places their Scoring token on the "0" space of the Victory Point Track surrounding their Player board.
It is crucial that you read and know the rules before proceeding beyond this step of setup. Make sure that all players know what Rewards they can receive when placing the starting Pyramid tiles on their Player boards.
- In player order, each player should now place their Pyramid tiles on their Player boards, ignoring their Architect's Reach, to receive the corresponding Rewards. See the "Build Action: Construct the Pyramid" section for additional details. (You do not need to pay for a Temple tile if you choose to gain it as a Reward in this way.)
- Reveal 2 Worship tiles of each color by placing one in the space next to its Worship tile stack, and flipping face up the top Worship tile of each stack.
- You are now ready to play Founders of Teotihuacan!
Structure of Play
A game of Founders of Teotihuacan takes place over three or four rounds, depending on the number of players (a 3-player game is three rounds long, while a 2- and 4-player game is four rounds long). Every round, beginning with the player holding the First Player marker and proceeding in clockwise order, players take turns placing their disks on Action spaces until everyone passes. Once all players have passed, the round ends, the Sun marker moves one space towards the Eclipse marker, and a new round begins. Once the Sun marker reaches the space with the Eclipse marker, this will be the last round of the game, and Final Scoring will be resolved at the end of the round.
Player Turn
On your turn, you must either perform an Action or pass. To perform an Action, place between 1 and 3 of your Action disks on an Action space on the Main board that already contains at least one disk (minimum a Bonus disk and possibly also opponent disk(s)), and carry out a corresponding Action. The Action disk(s) should be placed on top of the disk(s) already on that space, forming a stack.
Each Action space can hold a maximum of 4 Action disks—including Bonus disks!
If you do not have any Action disks remaining or do not wish to perform an Action, you must pass. Once you pass, you may not perform any more Actions until the following round.
Key Concept: Action Strength — Your Action Strength is equal to the total number of disks (whether yours, an opponent's disks, or Bonus disks) on an Action space.
Example: Anna is the green player and wants to perform an Action corresponding to one of the above Action spaces. She may place either:
- 1 of her Action disks on the leftmost stack. This would give her a total Action Strength of 4 (as there are already 3 disks in the stack, and she would add the fourth). She may not add more than 1 disk to this Action space, however, as this would exceed the allowable maximum of 4 disks.
- 1 or 2 of her Action disks on the middle stack. This would give her a total Action Strength of 3 or 4 (depending on whether she adds 1 or 2 disks, respectively).
Note that Anna is not allowed to place any disks on the rightmost stack, since it already contains the maximum of 4 disks.
Key Concept: Architect's Reach
Buildings and Temples can only be placed within the two Districts—two City quadrants—closest to your Architect. Pyramid tiles can only be placed within the six Pyramid squares closest to your Architect.
Only the part of the City marked with a color and the Pyramid spaces marked with check marks are within reach of the Architect.
While Resources are discussed later in the rules, it is important to place this reminder here: Your Architect's Reach only affects where elements may be built; you are always allowed to spend Resources from anywhere within your City.
Performing Actions
Each Action space lets you choose one of two options:
- Build Actions are depicted at the top part of the Main board (above the Action spaces). These Actions allow you to add elements to your Player board. When resolving them, you make use of your Action Strength and have to observe your Architect's Reach.
- Influence Actions are depicted at the bottom part of the Main board (below the Action spaces). These Actions grant access to different beneficial effects. These Actions do not make use of your Action Strength nor your Architect's Reach.
Every Action space is connected to exactly one Build Action and one Influence Action:
- The Action spaces marked with A correspond to the following options:
- Build Action: Construct a Building (top).
- Influence Action: Produce Resources (bottom).
- The Action spaces marked with B correspond to the following options:
- Build Action: Construct a Temple (top).
- Influence Action: Make an Offering (bottom).
- The Action spaces marked with C correspond to the following options:
- Build Action: Construct the Pyramid (top).
- Influence Action: Gain Favor (bottom).
If you select an Action space with an available Bonus (i.e., there are no Action disks on top of the Bonus disk, thus its printed Bonus is visible), you may use the printed Bonus either before or after performing your normal Action. Resolving a Bonus is optional; you may ignore it completely. Bonuses cannot be saved for later. Refer to the Bonus Disks appendix for a complete description of all Bonuses.
Build Action: Construct a Building
Select any available Building from the Main board, and place it in your City.
Step 1: Determine Required Action Strength
You may only construct a Building of size equal to or smaller than your current Action Strength:
- Size 1 Buildings are constructed using an Influence action, so they do not require any Action Strength.
- Size 2 Buildings require 2 or more Action Strength.
- Size 3 Buildings require 3 or more Action Strength.
- Size 4 Buildings require 4 Action Strength.
Regardless of your Action Strength, you are only allowed to construct one Building per Action. Any "extra" Action Strength is lost.
Step 2: Place the Building in Your City
The Building must be placed completely within your Architect's Reach and so that it wholly occupies District spaces equal to its size and shape.
You may not:
- place the Building so that any part of it extends beyond your Player board or Architect's Reach nor in a way that would overlap another Building, Temple, Pyramid tile, or Pyramid square.
You may:
- rotate and flip the Building.
- place the Building on top of spaces containing Resources (discarding such Resources immediately).
A Building may be placed across the border between two Districts within your City but only if both Districts are within your Architect's Reach.
Step 3: Place Resources
Place 1 Resource (of the same type as the Building) onto each space orthogonally adjacent to the Building.
You may not:
- place Resources on top of a Building, Temple, Pyramid tile, or Pyramid square.
You may:
- place Resources on top of spaces containing other Resources (discarding supplanted Resources immediately).
- place Resources on top of Mask spaces.
- place Resources into adjacent Districts, even if that District is outside your Architect's Reach.
Step 4: Take Masks
If you covered the last space of a cluster of Mask spaces, take the top tile from the corresponding Mask stack (if any tiles remain). Whenever you take a Mask tile, you immediately receive its Victory Points.
A cluster of Mask spaces consists of between 4 and 6 identical Mask symbols that form a contiguous group. Whenever all Mask symbols of a single cluster are covered, take the top tile from the corresponding Mask stack.
A Mask space is only considered covered when part of a Building or Temple is placed on top of it. Resources kept in Mask spaces are not counted when determining whether all spaces are covered.
Example: On her turn, Anna wants to construct a Building. Anna has just a single Action disk left, and she wants to construct the size 4 Gold Building. The stack on Action space A already comprises 4 disks, so Anna is not allowed to place her Action disk there. The B stack contains only 2 disks, so Anna would only have an Action Strength of 3 if she placed her Action disk on top. However, the C stack is perfect: it comprises 3 disks. So Anna places her Action disk on top of it, gaining an Action Strength of 4, which allows her to take the size 4 Gold Building. Note that with this Action Strength, she would be allowed to take any of the available Buildings—she does not have to take a size 4 Building.
Anna now takes her new Building and looks for a suitable location in her City. She would like to cover the final Yellow Mask symbol in a cluster, as this would allow her to take a Mask tile. Anna places the Gold Building and then places 1 Gold resource in each space orthogonally adjacent to the Building (with the exception of spaces already occupied by the Green Temple and the Stone Building). Finally, as Anna covers up the last Yellow Mask symbol in a cluster, she also takes the top tile of the Yellow Mask stack and receives 3 Victory Points.
Build Action: Construct a Temple
Select any available Temple from the Main board, pay its cost in Resources, and place the Temple in your City.
Key Concept: Paying Resources — Whenever you need to pay Resources, they must be taken from within your City. Recall that your Architect's Reach does not limit access to any Resources. You are always allowed to spend Resources from anywhere within your City.
Key Concept: Using 2 Gold as a Wild Resource — Whenever you need to pay Resources, you may always pay 2 Gold in place of any other Resource.
Step 1: Determine Required Action Strength
You may always construct a Temple of any size, regardless of your current Action Strength. However, if the Temple is larger than your Action Strength, you must pay additional Resources (of the type highlighted in gray below each Temple's cost) to make up the difference.
- Size 3 (Green) Temple costs 1 Stone and 1 Wood. Pay 1 additional Wood for each point of Action Strength below 3.
- Size 4 (Blue) Temple costs 2 Stone. Pay 1 additional Wood for each point of Action Strength below 4.
- Size 5 (Red) Temple costs 1 Stone and 1 Gold. Pay 1 additional Stone for each point of Action Strength below 5.
Regardless of your Action Strength, you are only allowed to construct one Temple per Action. Any "extra" Action Strength is wasted. Having an Action Strength higher than necessary does not grant any Resources or discounts.
Step 2: Place the Temple in Your City
This step follows the same rules as those of Step 2 of the "Construct a Building" Action.
Step 3: Take a Worship Tile
After adding the Temple to your City, do not place any Resources around it. Instead, take one of the face-up Worship tiles associated with the Temple you just constructed, and place it next to your Player board. Immediately replace the taken tile with a new tile from the same stack.
- After constructing a Green Temple, take one of the two face-up Green Worship tiles.
- After constructing a Blue Temple, take one of the two face-up Blue Worship tiles.
- After constructing a Red Temple, take one of the two face-up Red Worship tiles.
Worship tiles are explained in the "Influence Action: Make an Offering" section.
Step 4: Take Masks
This step follows the same rules as those of Step 4 of the "Construct a Building" Action.
Example: Anna wants to construct a Temple. Her Action Strength is 2, but she wants to construct a Blue Temple, which has a size of 4. Anna needs to pay 2 Stone (the base cost of the Blue Temple) and 2 Wood (for the difference in Temple size and her Action Strength). She discards 2 Stone cubes from her City and proceeds to pay Wood. With only 1 Wood in her City, Anna pays the remaining cost by using 2 Gold as a wild Resource, also discarding these Resource cubes from her City. After placing the Pyramid tile within her Architect's Reach, she selects one of the two Blue Worship tiles and places it next to her Player board, replacing the taken tile with a new Blue Worship tile.
Build Action: Construct the Pyramid
Select any available Pyramid tile from the Main board, pay its cost in Resources, and add the tile to your Pyramid on a Pyramid square.
Step 1: Determine Required Action Strength
All Pyramid tiles are considered to be of size 4. You may always build a Pyramid tile regardless of your current Action Strength. However, if the Pyramid tile is larger than your Action Strength, you must pay additional Resources (specifically, Gold, as highlighted in gray) to make up the difference.
Pyramid tiles cost 2 Gold and 1 Wood. Pay 1 additional Gold for each point of Action Strength below 4.
Step 2: Place the Pyramid Tile
Place the Pyramid tile on one of the six squares within your Architect's Reach.
You may place the tile on top of other Pyramid tiles as long as:
- it is completely supported by 4 Pyramid tiles underneath, and
- the 4 tiles underneath are either all within your Architect's Reach or this tile would form the top of your Pyramid.
Step 3: Receive Victory Points and Rewards
Immediately receive 2 Victory Points. If the Pyramid tile was placed on the bottom level of the Pyramid, you receive the depicted Reward according to the icon you covered. All Pyramid Rewards are discussed in the Pyramid Rewards appendix.
Example: On her turn, Anna has taken a Pyramid tile. After paying its costs, Anna is deciding on its placement. With three valid options, Anna elects to place the Blue Pyramid tile on Level 2. This does not earn her any immediate Reward (apart from 2 Victory Points received simply for performing this Action) but gives her an opportunity to score more Victory Points at the end of the game.
Influence Action: Produce Resources
Either a) add 0 or 1 Resource next to each of your existing Buildings or b) add two size 1 Buildings to your City.
Produce Resources Next to Buildings
Add 0 or 1 Resource to each of your existing Buildings, ignoring your Architect's Reach.
Example: Anna chooses to produce Resources. She has a total of 4 Buildings, so she produces 4 Resources—1 in each. Anna produces 1 Stone, 2 Wood, and then decides to produce 1 Gold. To do this, she first discards a Wood from the board and replaces it with 1 Gold. Note that Anna could have chosen not to produce Gold for her Gold building.
Add Two Size 1 Buildings
Choose one or two size 1 Buildings from the general supply, and add these to your City. The Buildings may be the same or different. Each Building must be placed within your Architect's Reach. After placing each Building, place Resources, following the same rules as those of Step 3 of the "Construct a Building" Action.
Influence Action: Make an Offering
Choose one of your Worship tiles, and resolve its effect. Note that some Worship tiles have prerequisites that you must meet. If you cannot meet the prerequisites, then you may not resolve that Worship tile. Once used, a Worship tile is returned face down to the bottom of its stack. You can find a detailed breakdown of all Worship tiles in the Worship Tiles appendix.
Influence Action: Gain Favor
Move your Favor Token to the next space of the Favor Track, and receive the indicated number of Victory Points. Additionally, you may return one of your existing Worship tiles (face down to the bottom of its stack) to take any one face-up Worship tile from the Main board (replacing the taken Worship tile with a new tile from the same stack).
Whenever you move to a new space on the Favor Track, receive the indicated number of Victory Points. This icon reminds you that you have the option to draw one Worship tile and then return one Worship tile to the bottom of its stack.
End of Turn
After performing an Action (not when passing), move your Architect clockwise to the next side of your Player board, signifying the end of your turn. This changes your Architect's Reach for your next turn.
This can be an easily forgotten rule. Try to remember about your own Architect, and help remind the other players to move their Architects as well.
End of Round
After all players have passed, the current round ends. If the Sun marker is occupying the same space of the Round Track as the Eclipse marker, the game is over, and you should proceed to Final Scoring. Otherwise, perform the steps of the New Round Setup.
New Round Setup
Step 1: Sun Marker Movement
Move the Sun marker to the next space of the Round Track.
Step 2: Remove Disks
Permanently remove 1 Action disk of each player color. Return remaining Action disks to their respective owners.
Step 3: Set Up Bonuses
Shuffle all Bonus disks face down. Draw and place 1 disk face up onto each Bonus space on the Main board. (Remember that some spaces remain empty in 2-player games.)
Step 4: Refill Buildings and Temples
Refill the Buildings on the Main board according to the number of players, as explained below. (This is the same as how they were set up at the beginning of the game.)
2 players: one size 2 Stone Building, one size 2 Wood Building, one size 3 Stone Building, one size 3 Wood Building, one size 3 Gold Building, one size 4 Stone Building, one size 4 Gold Building
3 players: two size 2 Stone Buildings, two size 2 Wood Buildings, one size 3 Stone Building, one size 3 Wood Building, one size 3 Gold Building, one size 4 Stone Building, one size 4 Gold Building
4 players: two size 2 Stone Buildings, two size 2 Wood Buildings, two size 3 Stone Buildings, two size 3 Wood Buildings, two size 3 Gold Buildings, one size 4 Stone Building, one size 4 Gold Building
Refill all Temple tiles on the Main board (ensuring there are two of each type).
Refill all Pyramid tiles on the Main board (ensuring there are two of each type).
Step 5: Pass the First Player Marker
Pass the First Player marker to the next player in clockwise order. Start a new round, beginning with the player holding the First Player marker.
Final Scoring
After the game has ended, players score additional Victory Points for how well their Districts complement their Pyramid as outlined below.
For each District in your City, score Victory Points for each Pyramid tile that is either fully or partially within the District as follows:
- If the Pyramid tile is at the bottom of the Pyramid, score 2 Victory Points for each Temple of matching color (that is either fully or partially within the District).
- If the Pyramid tile is at any upper level, score 3 Victory Points for each Temple of matching color (that is either fully or partially within the District). The top (third level) Pyramid tile is partially within all four Districts.
When scoring a District, Victory Points are awarded based on Pyramid tiles placed on the District's spaces and Temples placed at least partially within the District's border. Note that the center space may have two Pyramid tiles, one at the bottom of the Pyramid and one on the third level.
All Pyramid tiles and Temples on the border between 2 Districts are used in the scoring of both Districts.
The player with the most Victory Points is the winner. In case of a tie, the tied player with the most Pyramid tiles wins. If still tied, the tied players rejoice in their shared victory.
Example: It is the end of the game, and Anna is scoring her Pyramid tiles. We will go District by District: 1, 2, 3, and 4.
District 1: There is one bottom-level and one second-level Green Pyramid tile. The bottom-level Green Pyramid tile scores 4 (2x2, or 2 VP each as there are 2 Green Temples) Victory Points total, and the second-level Pyramid tile scores 6 (3x2) Victory Points, for a total of 10 Victory Points. The Blue Pyramid tile is on the bottom level, and there is one Blue Temple, so it scores an additional 2 (2x1) Victory Points. The Red Pyramid tile is partially within this District, as is one Red Temple, so it scores Victory Points. The Red Pyramid tile is on the bottom level, so it scores 2 more (2x1) Victory Points. With 14 Victory Points scored from this District, we move on to the next one.
District 2: There is one bottom-level Red Pyramid tile with two matching Temples, scoring another 4 (2x2) Victory Points. There are no Blue or Green Pyramid tiles in this District, so no additional Victory Points can be gained, regardless of the presence of a Blue Temple and a Green Temple. With 4 more Victory Points scored from this District, Anna has received a total of 18 Victory Points so far.
District 3: This District has Pyramid tiles but no Temples, so it scores no Victory Points. With the total still at 18 Victory Points, we move on to the final District.
District 4: In this case, there is little to score: there are two bottom-level Red Pyramid tiles with one matching Temple, scoring 2 (2x1) Victory Points each. This means Anna receives 4 additional Victory Points.
Anna's final total score for the Districts in her City is 22 Victory Points.
Appendix 1: Bonus Disks
Whenever you select an Action space with an available Bonus (i.e., there are no Action disks on top of the Bonus disk, thus its printed Bonus is visible), you may use the printed Bonus either before or after performing your normal Action. Resolving a Bonus is optional; you may ignore it completely. Bonuses cannot be saved for later.
- Perform any Influence Action. It does not have to be the one below this Action space.
- Perform any Build Action. It does not have to be the one above this Action space.
- You must adhere to your Architect's Reach.
- The Action Strength of this stack is used when performing the Build Action.
- Receive 2 Victory Points.
- Receive 1 Victory Point and 1 Resource. Take any one Resource, and place it in any valid space of your City, ignoring your Architect's Reach. You do not have to place the Resource adjacent to a Building, and you do not have to own any Buildings to be able to use this Bonus. You may replace an existing Resource with this Resource.
- Receive 1 Victory Point, and calculate your Action Strength as if it is 1 higher (meaning your minimum Action Strength is 3 instead of 2).
Appendix 2: Pyramid Rewards
Whenever you place a Pyramid tile on the bottom level of your Pyramid, receive the Reward that you cover with the tile.
If placing a Pyramid tile during setup allows you to construct a Building or a Temple, there are two special conditions that apply to this placement:
- Ignore your Architect's Reach.
- You may not place any part of the Temple or Building on top of a Mask symbol.
These conditions are extremely important, which is why they are repeated in all relevant Reward descriptions.
Construct the depicted Building(s), if able.
- Ignore your Action Strength.
- Take the Building from the general supply (not from the Main board).
- After placing the Building, produce its Resources normally.
- If you are allowed to place two Buildings, you may choose to only place one of them.
If you receive this Reward during setup: Ignore your Architect's Reach. You may not place any part of the Temple or Building on top of a Mask symbol.
Construct the depicted Temple, if able.
- Ignore your Action Strength and all Temple costs.
- Take the Temple from the general supply (not from the Main board).
- After placing the Temple, receive a Worship tile normally.
If you receive this Reward during setup: Ignore your Architect's Reach. You may not place any part of the Temple on top of a Mask symbol.
Receive the indicated number of Victory Points, and construct any Building of the depicted size.
- Ignore your Action Strength.
- Take the Building from the general supply (not from the Main board).
- After placing the Building, place its Resources normally.
- You may choose to only receive the Victory Points and not construct the Building.
If you receive this Reward during setup: Ignore your Architect's Reach. You may not place any part of the Building on top of a Mask symbol.
Take one face-up Worship tile from the top of any stack.
Receive 4 Victory Points.
Appendix 3: Worship Tiles
After adding a Temple to your City, take one of the face-up Worship tiles associated with the Temple you just constructed, and place it next to your Player board. The activation of Worship tiles is explained in the "Influence Action: Make an Offering" section.
- Spend any 5 Resources to construct any one Pyramid tile. You must adhere to your Architect's Reach. Take the Pyramid tile from the general supply (not from the Main board).
- Spend any 3 Resources to construct any one Temple. You must adhere to your Architect's Reach. Ignore your Action Strength. Take the Temple from the general supply (not from the Main board). After placing the Temple, receive a Worship tile normally.
- Spend 2 Wood to receive 3 Victory Points. This may be repeated to a maximum of 12 Victory Points in total.
- Spend 2 Stone to receive 3 Victory Points. This may be repeated to a maximum of 12 Victory Points in total.
- Spend 1 Gold to receive 1 Victory Point. This may be repeated to a maximum of 10 Victory Points in total.
- Spend 1 Gold, 1 Stone, and 1 Wood to receive 4 Victory Points. This may be repeated to a maximum of 12 Victory Points in total.
- Spend 2 Resources in any combination to receive 2 Victory Points. This may be repeated to a maximum of 10 Victory Points in total.
- Spend exactly 10 Resources in any combination to receive 12 Victory Points.
- Spend exactly 8 Resources in any combination to receive 9 Victory Points.
- If your City contains the depicted Buildings, receive the indicated number of Victory Points. (Eight distinct Building-combination tiles, worth 5, 5, 6, 6, 8, 10, 10, or 10 Victory Points depending on the combination depicted.)