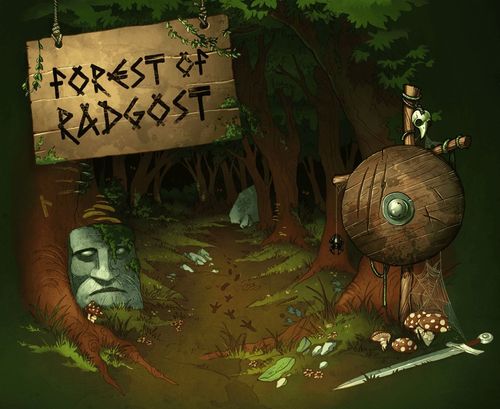
Forest of Radgost
Forest of Radgost Rulebook
Table of Contents
Table of Contents
- Our Golden Rule
- Game Components
- Overview
- Setup
- Your Character and Bag
- Objective
- Player Turns
- Time
- Cards
- End of Game: Exiting the Forest
- Optional: Personal Missions
- Mini Expansions: Rules and Stories
- Story-Starter Dice Set
- Appendix II: Creatures in the Forest of Radgost
- Appendix III: Locations in the Forest of Radgost
Our Golden Rule
Forest of Radgost is a co-operative storytelling game. Though the rules here and on cards have been written to explain everything that happens in the game, there will likely be a few times where you question how one rule will interact with another. In those instances, it is best to come to an agreement as a group based on what best makes sense according to the story, rather than spend too much time digging through the rulebook and various internet forums.
The focus of the game should be sharing a story, not winning or losing.
Game Components
- Game Board
- 21 tokens: 20 mythical creature tokens and 1 god Radgost token
- Creature figures: 20 mythical creatures and 1 god Radgost
- The Book of Encounters
- 8 Character figures
- 7 Character card packs
- Time Counter
- Matrix of Creature Reactions & Symbol glossary
- Overlay cards
- 5 Dice: Direction, 6-sided, 10-sided, 12-sided, 20-sided
- Group Abilities Table
- 9 Decks of cards (do not open the black deck just yet)
Overview
You are a member of the village, either part of the search party or the children themselves. Your goal is to work together with your other party members to escape the forest and return to your village. Optionally, you will also have your own personal objective to complete.
Forest of Radgost can be played by one to seven players. The game allows other players to join in the middle of play without consequence. Forest of Radgost is a narrative storytelling game where the journey is more important than the destination.
Number of players: 1–7. Game duration: 45–90 minutes. Age: 14+.
Setup
Forest Setup
- Place the Forest of Radgost board in the center of the table. The Forest is made up of paths covered in circles known as fields. The included Appendix III describes the various thematic details of specific fields and magical places on the board.
- Arrange the creature figures next to the board. See Appendix II for an overview of all creatures with their names and numbers in the Book of Encounters.
- Place the Time Counter next to the board.
- Collect the creature tokens numbered 1 to 21. Set aside tokens numbered 9, 11, 12 and 21. The remaining tokens should be shuffled face down and placed on mainland crossroads (4a) spaces on the board. The spaces you choose won't matter. The set aside tokens require special setup.
- 9, 12: Place each of these face up on a water crossroad (4b).
- 11: Place face up on a crossroad near the watermill (4c).
- 21: Place the yellow sun on the Time Counter (4d).
- First Game: Tokens 1, 3, 4, 7, and 10 should be placed in the yellow outlined crossroads shown on the map.
- Set aside the Book of Encounters, Group Abilities Table, and Matrix of Creature Reactions.
- Shuffle the orange, yellow, and white decks separately and set them aside.
- Set aside the black, blue, brown, green, pink, and red decks. These do not need to be shuffled. Keep them face down.
- Create a shared pile of ability slider clips, and another shared pile of dice, and set aside overlay cards.
Character Setup
- One player must take on the role of the children. All other players must choose a member of the search party. Then, give each player a lost bag token and two character folders matching their character: one represents their character's abilities, the other is their bag.
- Note: In a two or three player game, players are not assigned the children. The children will not move during the game and will wait for the search party to find them.
- Players may choose to play multiple characters. Simply follow the setup rules by counting the number of characters instead of players. This option can also be used to allow for solo play.
- Place the figure of your chosen character in the village. Place the children figures on the field indicated on the map (10a). You can take the time to read some of your character's backstory in the included Appendix I.
- Before leaving, your party hastily grabbed a few items from the Žrec's dark and chaotic cupboard hoping they'd be helpful. Deal three cards from the yellow Žrec deck to each search party character. Search party characters may trade these cards amongst themselves, but no player can have more than three cards.
- Note: The player playing as the children does not receive items from this deck.
- You may return any cards you do not want to the Žrec (yellow) deck (including all of them if you want). Place the Žrec cards that you decided to keep into the pockets of your bag folder. One card per pocket. Afterward, return the Žrec (yellow) deck to the game box.
- Give each search party character a personal mission card from the black deck.
- Note: These cards are optional and are for advanced play. You should skip them for your first few plays.
- All players put an ability slider clip on the top right circle of their character abilities folder.
- Determine the starting player. If the children are controlled by a player, the children start. Otherwise, the youngest player chooses one of their characters to start.
Your Character and Bag
Character Ability Folder
- Name: The name of your character in both Latin and Glagolitic script.
- Short description of the character with quote from their personal story (see Appendix I).
- Movement dice: Your character's movement through the forest is based on the use of two different dice. The numbers represent the speed of the character: the movement die. The two circles represent how lost your character is in the forest: the direction die. Place one slider clip over the uncrossed circle — this means your character will move using a direction die. See Movement for more information.
- Basic actions: Your character has four basic actions — running, hiding, fight, and communication.
- Natural ability: Your character's basic actions have a base ability level. In the example, the Warrior's running level is 9, hiding is 8, etc.
- Ability changes: Your character's natural ability may shift due to game effects, or you may be locked out of doing an action all together. Use a slider clip to mark these changes. In the example, the Warrior cannot use their fight action, but their communicate action is 9 due to a +1 bonus.
- Locking of actions applies until the end of your next encounter.
- Changes to ability level apply until that specific ability is used in some encounter. After you use an action, its ability resets to its base level.
- Card pockets: Any new abilities or travelers that join you in the game can be placed in these pockets. You are not limited in the amount you can have.
Bag Folder and Token
Capacity: There are seven places for cards from yellow, white, and red decks. There is an unlimited number of places for cards from other decks. You may exchange items with any characters you pass over or group with during your turn.
Losing a Bag: Should an encounter cause you to lose your bag, place your personal bag token on the Field where you lost it. Close your bag folder and set it aside. You cannot use the cards in the folder until you recover your bag. You cannot gain new cards with the bag symbol while your bag remains lost.
Recovering a Bag: To recover a bag, you simply need to enter the field containing your personal bag token. Then remove the token from the board. If any other player would enter that token's field, they may freely exchange any of their items with any of the items in your bag.
Objective
The goal of the game is to find the children and bring them safely back to the village, also all search team characters have to return to the village. Along the way, you'll encounter the mythical creatures of the forest. These encounters will play out in the Book of Encounters based on the way you choose to interact with the creature.
The game is divided into days, each day having three phases: Morning, Evening, and Night. Successful encounters advance the time as you meander through the forest. Should you bring the children back before the end of the third evening, or before you've become trapped in the forest, you and your team win the game only if all characters have returned to the village!
Player Turns
On your turn, you will roll your dice to move your character. Then you will either encounter a mythical creature, or you may Explore the Forest. After this, your turn is over and the player to your left will take their turn.
When you first leave the village, you may choose any path to take except the left-most path.
Movement
Begin your turn by rolling the direction die and your movement die (see the top of your ability folder). Choose a starting direction and move your character a number of fields equal to the movement die value you rolled. When your character lands on a crossroad, they will change direction based on the value shown on the direction die:
- L – Your character takes the path on their left.
- R – Your character takes the path on their right.
- F – Free choice, you pick their direction.
If your character moves onto a creature token, end their movement on that field (see Encountering a Mythical Creature).
Note: A character's "left" and "right" is based on their facing as they move along their path. Thus, if a character is moving towards you, the player, the "character's left" is actually your right.
Exploring the Forest
You may Explore the Forest after your movement ends as long as the following conditions are met:
- You did not encounter a mythical creature.
- You did not end your movement on the bridge.
- Your bag is not full.
Exploring the Forest is entirely optional. If you choose to do so, draw one card from the white deck and read it aloud. If the card drawn is a plant or object type, you may choose to keep it or shuffle it back into the deck. Cards in the white deck can be beneficial forest items, or they may lead you into an interesting story from the red deck.
Example: Živa ends her movement on a field without a mythical creature, so she wanders a little into the forest. Drawing a card from the white deck, she finds an Ash Tree. She remembers an old children's poem about snakes being afraid of ash leaves and decides to stuff a few into her bag just in case.
Encountering a Mythical Creature
If you move your character onto a creature token, immediately end your movement and start an encounter. There are four types of encounters, based on the status of the creature token: the first two are hidden and open encounters. The third are special kinds of encounters triggered by tokens 9, 11, and 12. The fourth type are sudden encounters.
Note: If you encounter a mythical creature during your turn, you cannot Explore the Forest.
Hidden Encounter
Do not turn over the token! You know there is a creature lurking, but you don't know yet what it is. First, choose one of your actions that isn't locked. Then, flip the token and place the appropriate creature figure on the token.
Take the Book of Encounters and open it to the chapter matching the mythical creature you are encountering. In the chapter, you will find the strength of the creature's reaction to your chosen action. You may play any relevant cards you own before comparing your abilities with that of the creature.
After comparing numbers, you will either be successful (your number is higher), unsuccessful (lower), or inconclusive (tied). Read aloud the final outcome from the Book of Encounters. If you were successful, move the creature token and figure to the Time Counter. If you were unsuccessful, the token and figure remain at the crossroad. If you are tied, roll a die and read successful on an even roll, or unsuccessful on an odd roll.
Your turn ends. The Book of Encounters will detail the remainder of your turn if there is more to it.
Any ability that was used during the encounter is reset to its base level, which means you remove its clip, unless explicitly stated otherwise.
Open Encounter
A member of your search party already faced this creature and warned you about them. This encounter is resolved in the same way a hidden encounter is resolved except that you know what you're facing. Ideally, you will choose the action that allows you to succeed. You may look at the creature reactions matrix before deciding.
Unique Encounter
Creature tokens 9, 11, and 12 are never hidden. When encountering one of them, simply go to their chapter in the Book of Encounters and follow the instructions.
Sudden Encounter
Sometimes you might encounter a creature without actually moving into their Field, such as a card effect. During these sudden encounters, you should follow all the normal rules as stated above. However, the creature's figure and token will not be moved in any way — even if the encounter is successful. You still suffer any sort of effects from the encounter as usual.
Various Effects
Ability Scores
The forest is full of both mundane and magical trappings and benefits which will change your ability values. If an action becomes locked, you cannot choose it during an encounter. When it unlocks, remove the clip. If you must increase or decrease these values, use a slider to mark the change. If an effect requires you to set your ability to a specific bonus, simply move your slider to that bonus. Your ability levels cannot go above +3 or below -3.
Note: Unless instructed otherwise:
- Locking of abilities applies until the end of the next encounter.
- Changes to ability level apply until that specific ability is used in an encounter. After you use that ability, reset it to its base level.
Sick or Delayed
Some game effects will cause your character to become sick or delayed in some way based on the story. This happens when you are told that you must skip your movement, which means you will skip your next turn. In some cases, this effect can be ignored using certain types of medicine cards.
Imprisoned
If your character becomes imprisoned, it acts as a sort of extended delay. You will not take a turn with this character until it is freed by some action triggered by the story. See paragraph New Character below.
Convalescent
Your character is hurt very badly and needs to recover. Move your character figure to the village — they can no longer be played. See New Character below.
New Character
If your character should become imprisoned, convalescent, or another player would like to join in during the game, a new character can be added to the village if there is one available. This new character is set up just like all the others, but cannot trade their yellow cards with players not at the village. Remember: a player can play more than one character, so long as each character gets a turn as normal.
Grouping
Your journey in the forest need not be alone. You and the other villagers may form a group while traveling. While in a group, your abilities are determined by the group as a collective. This may sometimes hinder you, but for some situations, there is safety in numbers.
Forming and Leaving a Group
You may form a group at the beginning of the game, rather than leave the village individually. Any player that wants to be in the group can join. On your turn, you may choose to leave the group rather than continuing on with them. In this case, when moving your character, simply move only yourself and leave the group behind. You cannot leave if an effect has you, or the group, imprisoned.
If you (or your group) would move into the field of another character (or group), those characters can form a new group if everyone agrees.
Should you gain a new companion character, you automatically form a group with that character based on the instructions you were given when gaining the companion.
Movement
On your turn, you roll the movement die of the group's slowest member, and the direction die. The group then moves. Each member of the group does this on their turn.
Before the dice are rolled, individual members of your group may choose not to be part of the movement and will therefore separate from the group when it moves.
Actions
Any time a character joins a group, remove all slider clips from the actions of the group members — reverting everyone to their base action scores. In all following encounters, effects that change ability levels or lock an action will apply to the group as a whole.
The Group Abilities Table describes how to calculate the group's ability levels. Any bonuses from items in the bag of any group member can be applied to the action's final ability value. Each action is recorded as follows:
- Running: Equal to the lowest number of the group
- Hiding: Equal to the highest number of the group
- Fight: Equal to the highest number of the group, then add 1
- Communication: Equal to the highest number of the group, then subtract 1
The Group Abilities Table sheet is used to track, calculate and write down changes to the group abilities.
Encounters
Unless stated otherwise, any results from the Book of Encounters will apply to grouped characters as a whole. Thus, if you would be moved, the group moves. If you would drop your bag, all members of the group drop their bag. If you would be imprisoned, everyone is imprisoned, and so on.
Cards that are gained from a successful encounter are first offered to the current player. That player has the option to give the card to another member of the group instead.
Children
The children start the game as a group of both the boy and girl. Each has their own abilities and base ability values.
The children can never voluntarily leave their group. Any character that moves into the children's field must form a group with the children. Characters cannot voluntarily leave a group containing the children. Their safety was your goal, after all.
The character folder for the children lists their combined stats following the rules for the Group Abilities Table. Should the children ever become separated due to a game effect, or should you need their individual stats, their individual character stats are included with the components.
Time
Time Counter
The Time Counter is used to measure time in the forest. Time is measured by the number of successful encounters that place creature figures onto the Time Counter. The game starts with the Day Phase and moves to the Evening Phase after seven creatures have been moved onto the Time Counter. The Evening Phase ends after another three creatures have been placed, which moves the game to the Night Phase. The second Day Phase begins after four creatures are added during the Night Phase.
On the rare occasion where multiple creatures are added to the Time Counter at the same time, these creatures are not placed on the next phase. Instead, place them on the symbol matching the color of the current phase (sun, star, or moon). For example, should six creatures be on the Time Counter during the Day Phase, and two more need to be added, only one is added to the spot marked 7 while the other is added to the sun.
You may spend a total of three days in the forest. At the beginning of the third night, if all villagers (including the children) are not back in the village, the game is over and the village loses.
Day Phase
You wake with a fresh start. Begin the day by removing all slider clips on locked actions, unless you were told otherwise.
The Day Phase progresses as normal, ending after the 7th creature is added to the Time Counter.
Evening Phase
The mythical creatures regroup and continue to prowl the forest. Radgost takes notice of your presence in his woods.
At the start of the Evening Phase, gather all hidden (facedown) creature tokens on the board and all creature tokens on the Time Counter. Add token 21 to this collection as well. Mix all these tokens and randomly distribute them to empty crossroads on the map.
The game continues as it did in the Day Phase, including turn order. After the 3rd creature is added to the Time Counter, the Evening Phase ends.
Night Phase
Your character does not move during the Night Phase. Instead, the mythical creatures of the forest will wander about while you sleep. The Night Phase begins with the reveal of all creatures, then those creatures move.
Begin the Night Phase by flipping all creature tokens so that they are face up. Add the creature's figure to their token. Creatures on the Time Counter remain there.
On your turn, roll the 20-sided die. The number you roll is the creature that will move on your turn. If you roll a creature that is already on the Time Counter, reroll until you get a different creature. Radgost, number 21, will not move in this Phase.
Once you have your creature number, roll the 10-sided die and the direction die and move your creature as you would yourself. Creatures should always start moving in a direction away from the village.
If your creature doesn't run into any other creature or villager, you end your turn and leave the creature where it landed.
Creature against Creature
Should a creature encounter another creature, a standoff occurs. Compare the Fight score in the Book of Encounters for both creatures. The creature with the higher Fight score wins. In case of a tie, the creature with the higher token value wins. The winner takes the field, the loser is put on the Time Counter.
Note: Radgost will always be the winner should a creature move into his spot.
Creature against Villager
Compare your Hide score with the creature. If you are successful, read the Night section in the Book of Encounters for the creature, as part of a successful Hiding action.
If you are unsuccessful at Hiding, check if there is an unsuccessful hiding entry for night and follow it, otherwise compare your Fight score. If you are successful, read the Night section in the Book of Encounters for the creature, as part of a successful Fight action. If you are unsuccessful, read that entry instead.
Note: During the Night Phase, you won't read any section of the Book of Encounters for a creature except the Night section.
Ending the Night Phase
Remove all creature figures and tokens from the board. Reset the board according to step 4 of the initial setup. However, token 21 should now be shuffled in with the other face-down creature tokens. When placing tokens, put them on empty crossroads.
Cards
Card Details
-
Name: The name of the item. If the title of the card is marked with a symbol it means that content is based on authentic sources. A list of used sources is given in a separate section.
-
Story text: Any text written in italics. Has no game effect.
-
Type: All cards fall into four different types.
- Objects, plants, and animals — Normally consumed or used once
- Companions — Add this companion to your group under the group rules
- Additional abilities — Bonus abilities and powers for you to use
- Task and effects — Story cards for your adventure
-
Sub-type: A card might have a sub-type for the purpose of encounters.
-
Use: Most cards simply list what they do. In the case of the Eagle's Feather, you have two options, return it to do one of the two.
-
Stack: Some cards require you to keep track of how often the card is used, which you do using the numbers on the right and an ability clip. Place the clip starting at the highest number. The card will list how and when the clip moves. When the slider reaches 0, discard the card. When you get the Bacon, it comes with eight strips. The letters EP stand for Energy Points. Whenever you would use the Bacon, spend EP by sliding your slider to the appropriate number.
-
Outcome: Many of the cards can be used as part of an interaction with specific creatures. The card will list which creature it can be used with, and what effect the card will have when used. Usually this lets you succeed when using a specific action. After using a card for this effect, shuffle it and any other used cards back into their proper deck, if not explicitly stated otherwise on the card. If you are required to spend EP to gain the effect, you can spend it from multiple cards rather than from only a single card.
When you encounter a hidden creature, you normally choose your action before the reveal. However, if you have a card that can be used with that creature, you may change your action after using the card.
Discarding
Whenever you would use a card, shuffle it back into its deck, unless stated otherwise.
Note: Certain cards can boost your abilities temporarily. There is no set limit to how high you can increase your ability level using these cards. Cards increase your ability for the single encounter in which they are used, unless explicitly stated otherwise on the card itself.
Card Decks
There are many colors of decks, each representing various things. Each deck is also marked with a symbol on the back of the cards.
- Yellow (Žrec's cabinets): Before leaving the village, the local Žrec gifted you various things to use on your trip. Some of the items you are given seem less than helpful at first... After finishing setup, this deck is put aside.
- White (Forest): The white deck is the largest and most used deck in the game. It represents all the various flora and fauna of the forest. Feel free to occasionally shuffle it to summon the wilds. You will use this deck when Exploring the Forest.
- Red (Gifts): These cards must be kept face down. Cards in the white deck will often point you to specific cards in the red deck. The names of those cards are written on the back of the card to easily search without spoilers.
- Green (Encounters): Like the red deck, the green deck is meant to stay secret at all times. You will be instructed to draw from this deck during some of your running actions. You will roll a 6-sided die and find a card with the matching number. If there is more than one card with that number, choose one at random.
- Orange (Hiding): When taking the Hiding action you will often be instructed to draw the top card of the orange deck.
- Pink (Extras) / Blue / Brown: Various happenings in the game will call on you to draw one or more specific cards from these 3 decks. It is best to not shuffle them for ease of finding the right card(s) faster.
- Black (Personal Missions): If playing with the Personal Missions variant, each player will get one of these cards at the start of the game.
End of Game: Exiting the Forest
The game ends once all children and search team characters have returned to the village. Once the children are in the village, a horn announces their return. Any villagers still in the forest can now move without using the direction die (they choose the direction they take at crossroads).
There are three ways to "lose" the game:
- The villagers and children are not in the village by the beginning of the 3rd night,
- All characters become imprisoned by mythical creatures in the forest, or
- At least one player is imprisoned and the village has no way to rescue them.
Characters that are convalescent are technically in the village for end game purposes (as part of a successful ending). It's not a heroic way to end your adventure, but it has ended all the same.
Optional: Personal Missions
The village Žrec has given you a personal mission to carry out while you're in the forest. You may choose to accept this mission by completing step 13 of the Character Setup at the beginning of the game. While playing, you have a goal beyond simply finding the children.
Mini Expansions: Rules and Stories
The Return to the Forest of Radgost
Introduction
Hypothetically, let's say that less than three days after the search party left the village gates, they reappeared again with the children by their side. Oh, how the whole village jumped with joy at this occasion! They thanked the mighty Radgost with all their hearts. That very night, Ratibor organized a merry feast, but in the midst of the celebrations, Dobromislil, with nobody noticing, retreated to his cabin. Alone he sat, wondering and pondering how village life might continue after the events which had transpired. The boundary between humans and immortal creatures had been breached. Surely, things would not remain the same...
In this section, there are three more missions, three mini extensions of the base game. These three missions are mutually independent. Each mission consists of several tasks solved in parallel and which, depending on the situation, can branch out further.
Before entering these missions, you must already have played the base game. It is assumed that the players have mastered the basic rules of the game and that they already have some knowledge about creatures, locations, etc. The rules in each of the missions have been modified to a small extent compared to the basic rules, and are explained in the instructions for each individual mission. The success of missions largely depends on the group's strategy at the beginning of the mission, as well as during the mission. As in the base game, unless otherwise indicated, the forest can be accessed independently, in smaller or larger groups. Groups can be modified during the game, depending on the situation.
- As has been mentioned, the mission often implies several parallel tasks. When an individual or group completes their task, they can help others who are still on some other task. The players decide on how they will cooperate according to the current situation in the story.
- Group members, while in the group, can combine items from their bags.
- Missions are solved during two "forest" days. If you enter the second night without finishing the mission, you have lost.
- The word "you" refers to both the individual and the group.
- When preparing the board, prepare the overlay cards for opening mythical places.
- It is essential that you do not read the cards the mission refers to in advance, in order to avoid spoilers.
- If you estimate that the mission is too complex for the younger members of your game group, you can simplify it, according to the house rule.
- The order in which the missions are given on the following pages is random.
- The stories are original narratives based on the motifs of Slavic mythology and Serbian folk tales.
1. The Unfinished Destinies
Turmoil engulfs the village. Someone or something is preventing the Suđenica trio from fulfilling their obligation to village newborns. Little is known about the Suđenica, a mysterious female creature. In groups of three, they visit each newborn to proclaim the child's destiny. To complete their assignment, the three Suđenicas visit each newborn three nights in a row. The family prepares seriously for this visit by leaving an offering each night: three cups of water, three cups of wine, three loaves of honey bread, and one gold coin. The mother has to remain awake. She and her baby wear the best clothes, the house is tidy, and a light must burn inside the home. But recently, and inexplicably, on the night of their supposed third visit, all the lamp flames and fires inside the village suddenly extinguish. This has happened in three recent cases, while the most recently born baby wasn't visited at all. This is unprecedented, and Dobromislil is worried. If the Suđenica trio does not complete their work, all these children will be left to wander through the world searching for their destinies. This means that the entire village may be robbed of its youth, sentencing it to a gradual but certain demise.
Nobody is exactly sure where the Suđenica trio lives, but it is somewhere in the forest. Now is not the best time to roam about deep in the forest, as it is Rusalka's week. The search party gathers once again, along with the children. This time they must pack their bags with the items that comprise the offerings to the Suđenicas. Under no circumstances can search party members lose any of these items. How will they split the items among themselves? Will they entrust all of the items to one single member? Or will they share the responsibility? Either way, the bags containing the items must not be lost. Meanwhile, Dobromislil and Živa will try another approach to the problem. Dobromislil thinks that the problem they have may be a kind of message for them. So he, as Dobromislil, along with Živa as priestess, will try to find out more by talking to Talason. He has been in the watermill for who knows how long, and knows about the forest more than anyone they could ask. The rest of the group will try to find where the Suđenica trio lives and bring them offerings. In order to do this they need to communicate successfully with one of the creatures who would be inclined to help them: Zmaj, Forest Mother, Lesnik, or Vila. Instead of the gift this creature would offer you, ask for information about where the Suđenica can be found.
Goal: Find out why the Suđenica stopped coming and remedy that problem.
Preparation of the board: Same as in the base game except
- On the table, place the overlay card called Watermill, for opening mythical places.
- Put Talason figure at Watermill, remove his token from the game (token will not be used).
- Children are in the village at the beginning of the game (not lost in the forest).
- At least one or both of Živa & Dobromislil must participate.
- At least one more character is needed.
- There is a time limit of two days to finish this mission, since Radgost only permits so much time. If you enter the second night without finishing the mission you have lost.
Entering the forest: Živa and Dobromislil will go to the watermill, and try to communicate with Talason. The rest of the characters will bring offerings to the Suđenica. Both tasks must be finished to end the game successfully.
Task 1: Go to the watermill. Živa and Dobromislil can go individually or as a group. When one of you reaches the watermill take the card LIGHTS FROM THE WATERMILL from the brown deck.
Task 2: Offerings for Suđenica. The rest of the group needs to organize themselves — as a group, as individuals, or as small groups. From the brown deck, take three cards named OFFERINGS FOR THE SUDJENICA and pack them in the bags as per player agreements. Your first task is to find out where the Suđenica live. You can get this information by communicating with Zmaj, Forest Mother, Lesnik, or a Vila. After a successful communication, don't take a gift (card) from the creature, but take the card from the brown deck named Suđenica Location.
Ending the game: All tasks must be finished to successfully end the game, or if time has run out you've lost the game.
2. The Key of Life
The village has run out of drinking water. The river became muddy and the main spring simply dried up. The other, smaller spring is not sufficient. Again, Dobromislil receives a message. Latawce, the child-faced bird, has brought him an item. This latawce is a black demon bird similar to a raven, but it has a child's face, and Dobromislil knows that prematurely lost souls could end up becoming latawce. Immediately, Dobromislil recognizes the shard brought by the latawce, as a matching piece once belonged to a fellow villager, an old friend. Ratibor, the village chieftain, was married to a Vila a long time ago. After she ran away, the broken piece of the mirror was the only reminder left of her, until one day, this item was stolen. Now a latawce brings it back. This is enough for Dobromislil to conclude that the Vila is angry and has locked the spring. But why, after all these years? The burden falls on Ratibor to find his former wife and convince her to unlock the spring. But that won't be enough. Once the spring starts flowing again, its water won't be pure. To restore its purity, the villagers will need to place a piece of charcoal from a live fire. For that, they will need the permission of Lesnik to take two pieces of wood from a special tree that is on the Bear path. Meanwhile, Dobromislil suspects that the latawce harbours a secret about the broken mirror, as he remembers the moment when the mirror was broken. A piece of Ratibor's life may be locked inside it. The old search party ventures into the forest once more.
Goal: To convince the Vila to unlock the springs and purify the water. To purify the water you will need to bring parts from the tree for the live fire.
There is a time limit of 2 days to finish this mission, since Radgost only permits so much time. If you enter the second night without finishing the mission you have lost.
Preparation of the board: Same as in the base game except
- On the table, place the overlay card called fairy ring, for opening mythical places.
- Put the figure of the Vila in the middle of the fairy ring and take out the Vila token, since you cannot meet this creature in regular encounters.
- Take the Broken mirror part 1 card from the brown deck and do as it says.
- Children are in the village at the beginning of game (not lost in the forest).
- Ratibor must participate.
- At least one or both of Darena and Dobromislil must participate.
- At least one more character is needed.
Entering the forest: In this game, the characters begin the mission in the village as Ratibor and two groups. In the first group are Darena and Dobromislil and Ratibor as individual character, and all the other characters in a second group will try to purify the water. If the players want they can split the groups after entering the forest.
Task 1: Convince a Vila to unlock the springs. Ratibor must go to the fairy ring and speak with the Vila.
Start position and special movement rules for Ratibor, Dobromislil and Darena: Ratibor takes his piece of the broken mirror (the Broken mirror part 1 card does not take any space in the bag), and goes to meet the Vila. He moves separately towards the fairy ring, but he doesn't have to be completely alone, since the problem is serious for the whole village. Dobromislil (and Darena, optionally) follow him trying to be near or around. All of them are moving with no direction die, but they must not form a group with Ratibor, until Ratibor arrives at the fairy ring and speaks to the Vila. When Ratibor arrives at the fairy ring, take a card named The mirror of the afterlife from the brown deck, and follow the instructions there.
Task 2: Purify the water. Other characters use base game mechanics for their movement at the start of the game. They will try to find Lesnik and gain permission for taking parts of the magic tree. In order to get Lesnik's permission, you need a successful outcome in an encounter with him. You can then go to the Bear path without using the direction die. When you reach this spot, take a TREE FOR LIVE FIRE card from the pink deck and bring it to Gradište. In the case that you must return this card to the pink deck, the whole process (encounter with Lesnik and other actions) needs to be repeated. If you've finished this task before Ratibor and his group finish theirs, you can help them. Latawce is the messenger between all of you.
Ending the game: All tasks must be finished to successfully end the game, or if time has run out you've lost the game.
3. The Witch's Secret Ties
Dobromislil has received word of a grave threat arising. The message — really an early warning — was issued by Talason, and delivered to Dobromislil by way of Rarog, the firebird. An unwelcome visitor from afar, Čuma the harbinger of plague, is coming to the forest. A witch has stolen Čuma's arrows and quiver, robbing the plague-bringer of her power and independence. Now, the witch is plotting to force Čuma into an alliance in order to destroy the village. Dobromislil brings together the same group that has gone into the forest on past missions. The children, now having more experience inside the forest than most grownups, are called upon as well. Without Čuma wielding them, the arrows have no power of their own, and the threat of the plague will be avoided. "We must find the arrow quiver and have Aždaja burn it with his fire," says Dobromislil. "This is an opportunity to solve more than one problem. We can also redeem the witch and thus free the village from both the plague and her." He then sets out his plan: he and Darena will search for the witch and the quiver, while the other members of the group will prepare the Aždaja to burn the quiver. "We have two days to do this, it is all that Radgost allows."
"Why will Darena and you go separately?" asks Ljubomila. "Well, the witch and Darena were born on the same day, they are jednodanci." Everybody in the room knows what that means, and nobody feels good about it. People, or even a child and an animal, who are born the same day have a special tie through their whole life. The power and destiny they received on the day of their birth will collide and join together in one unchangeable force, and it seems that time has come for Darena and the witch. They both have the same powers and have gained the same pieces of knowledge, but each used these in completely different directions. The final destiny will be the same for both of them, and it will be on the side of the stronger one. If the witch achieves her plans with Čuma, she will be the winner. "This is Darena's chance to take control of their shared destiny," says Dobromislil, "and she can either do it alone or with my help." The witch has great knowledge, which she uses for evil doings. If she redirects this knowledge to be good and useful towards other people and the world, she will be redeemed, and will stop being the witch. "What do we need to do?" asks Vitalij. "You will come into possession of the Golden Fetters, and you can shackle the Aždaja with them. Darena and I will bring the quiver to the place where the Aždaja is and burn it. Only then can we rest, and the mission will be over."
Preparation of the board: Same as for the basic game, with the following exceptions
- Remove the witch token and the Radgost token.
- Place a witch figure at any field near Psoglav's Cabin.
- Take Čuma's Arrow Quiver card from the pink deck and put it beside the Book of Encounters. This card is used by the witch. In this game, the only actions that are allowed against the witch are fight and communication.
- The children are in the village at the beginning of the game (not in the forest).
Goal: The game ends at the moment when the arrow quiver is destroyed by the flames of the Aždaja.
There is a time limit of two days to finish the mission, as Radgost only permits so much time. If you enter the second night without finishing the mission you have lost.
Entering the forest: In this game, the characters begin the mission in the village as two groups. The first group is Darena and Dobromislil who has the best chance to successfully communicate with the Witch. The second group represents all the other characters, who will try to capture Aždaja. If the players want, they can split the groups after entering the forest.
Start positions and special movement rules for the witch, Darena, and Dobromislil: The witch moves with the direction die through the forest, and her starting point is near Psoglav's cabin. For the free direction she will choose a path that leads toward Poljevoj's field, and she has no encounters with creatures, but just passes by them. The witch and Darena are connected by secret ties and Darena unmistakably moves to meet the witch (Darena and her group do not use the direction die). The witch is controlled by the player who leads Darena by throwing the die twice: once for the witch and once for Darena. Darena moves without the direction die in the direction of the witch, and the witch uses the movement die and the die for direction. Dobromislil is in the group with Darena and while in this group he will follow Darena's lead. Since the Witch is moving an encounter with her can happen at any field, not just crossroads.
Task 1: Find the quiver. To get the quiver you must have a successful encounter with the witch through either a fight or communication. But beware that the witch has more power with Čuma's quiver, so you should build up your abilities before the encounter. Darena and Dobromislil have the best chance to take the quiver from the witch with a communication action. In this mission, if you have a successful encounter with the witch do not read the outcome chapter from the Book of Encounters. Instead, take the card SUCCESSFUL ENCOUNTER WITH WITCH from the Brown deck and do as it instructs. If unsuccessful, read the Book of Encounters as usual.
Task 2: Capture the Aždaja.
- Acquire the golden fetters guarded by Vodenjak, as those are the only shackles strong enough to hold the Aždaja.
- Capture the Aždaja with the help of golden fetters. In the base game, when the creature has lost an encounter, it is moved to the Time Counter. In this specific case however, the Aždaja will stay tied up at the meeting place. But you must have the GOLDEN FETTERS card.
Task 3: Destroy the quiver. Take the quiver to the captured Aždaja and burn it, this will bring peace and end the main mission. To achieve this you must first capture the Aždaja.
Ending the game: Destroying the quiver will save the village from the witch's plan and end the mission successfully.
Story-Starter Dice Set
How to Use
After you have some experience playing the Forest of Radgost base game, you will progress to personal missions and eventually to additional missions and you will become so in tune with Slavic lore that you will be able to create your own stories. The story-starter dice are an aid to this kind of experienced player. It is a set of dice containing a variety of symbols to serve as storytelling prompts.
Most fairy tales and folktales contain some common structures and foundational pillars. These create a frame around which a story can be created and plotted. Each of the six dice in the set represents one type of foundation pillar around which a story can grow and offers possible value for that structure. Since this is a storytelling game, these dice can be used to generate a base story structure and serve as a foundation to make your own additional missions, which in turn can make this game a never-ending creative journey.
Mythical Place Die
The Mythical Place die can provide answers to questions beginning with where. For example: 1. Where does the mission start? 2. Where can something/someone be found? 3. Where should you arrive at the end?
This D6 die contains symbols of the following mythical places: Fairy ring, Cave, Watermill, Psoglav's cabin, Bridge, Omaja's crossroad.
Motive/Problem Die
Each story has some problems which will arise, and need to be solved. Usually, these come in the form of new dangers that can ruin current peaceful states of existence, or some error or transgression that was performed against norms, beliefs or rules which in turn set in motion evil forces. To counter these problems, a price must be paid, and redemption must be achieved. The Motive/Problem Die can provide answers to questions pertaining to why an action or the hero is needed.
This D6 die contains symbols of the following problems: Weather disaster, Sickness/Epidemic, Disappearance, Confrontation, Transgression and redemption, Sacrifice.
Time Die
The Time Die can provide answers to questions pertaining to how much time is available to finish your tasks. As human beings, we are inherently limited, and one of the most common limits is time. Therefore, it is no wonder that most tales include a challenge that must be completed in a given time frame.
This D6 die contains Glagolitic letters that represent numbers 1, 2, and 3 days.
Means Die
The Means Die can provide answers to questions about what is needed to solve the task. Usually, to solve a task, characters need to gain some knowledge, an object or a plant, that will help them to improve as a character.
This D6 die contains symbols that represent the following means: Potion, Object, Animal, Plant, Message, Knowledge/ability.
Character Die
The Character Die can provide answers to questions about who needs to solve or perform a task. In most stories, the protagonist is an integral element that strongly affects the path of the story and performs the action needed to reach a resolution or destination.
This D6 die contains symbols that represent the following characters: Dobromislil: sickle; Darena: bottle; Namless: sword; Ratibor: shield; Živa: a diadem; Vitalij: bow and arrow.
Part of the Day Die
There are certain events that happen only at specific times. The Part of the Day Die can help choose at which part of the day the important events occur. Faces: Dawn, Noon, Evening, Midnight.
Example Using the Story-Starter Dice
Let's say we have rolled all the dice from the set and the results were as follows:
- Mythical Place: Watermill
- Motive/Problem: Weather Disaster
- Time: 3
- Means: Animal
- Character: Darena
- Part of the Day: Noon
(The manual then shows an example story built from these results.)
Appendix II: Creatures in the Forest of Radgost
Creature numbers (as on the tokens and in the Book of Encounters):
- Wraith
- Mora
- Snake
- Omaja
- Wolves
- Psoglav
- The Witch
- Poljevoj
- Rusalkas
- Vilas
- Talason
- Vodenjak
- Giants
- Forest Mother
- Besomar
- Todorci
- Lesnik
- Aždaja
- Ala
- Zmaj
- Radgost
Companions: Biberče (Sir Peppercorn), Rarog, Zduhač, Međedović.
Appendix III: Locations in the Forest of Radgost
The game will sometimes point you to different places in the forest, which will be marked on the map. Those places are magical, and you can also see all of them clearly marked on the map illustration.
If an effect in the game requires you to move to a location on the map, it will tell you the number of the location. Move your figure as close to that location as possible, but not on top of a mythical creature.
Locations that are marked green have been magical places in beliefs held with old Slavic people. Locations that are marked as blue are the result of fiction and imagination of the game authors.
- Village.
- Movement fields. Circular fields placed on the path. Fields are used to mark the position of the character figure according to the number and direction on the thrown dice.
- Mainland crossroads. Circular fields located where paths cross each other. In this game: The place where creature tokens and figures will be placed, and where an encounter with them can happen. (Slavic lore: crossroads are magical and mystical places where you can encounter creatures and unholy forces; they were chosen for graves for bandits and people who committed suicide.)
- Water crossroads. Circular fields located where paths end at water. In this game: The place where water-related creatures, such as Vodenjak and Rusalkas, will be placed, and where an encounter with them can happen.
- The field where the children exited from the boat.
- Watermill. An abandoned watermill, and the area surrounding it, are mystical places. In this game: The watermill can be home to Talason (creature no. 11) and other mythical creatures and will play an important part in some scenarios. (Talasons are invisible to people, a nonphysical creature, like a shadow of unclear contours with a big mouth and eyes, whose only purpose is to keep and protect the building that his shadow is built into while he was human.) 7-7a. Bridges: Small Bridge and Watermill Bridge. In this game: Bridges can be home to Talason (creature no. 11) and are the place of many other magical encounters and scenarios.
- Fairy ring. In this game: A place of some magic encounters and scenarios with Vilas.
- Gradište. In this game: This location is a deserted holy place. People used it to offer sacrifice to gods before mythical creatures inhabited the forest and before it became a forbidden place for humans. However, it is also a place where some magical encounters and scenarios will be resolved.
Overlay Cards
Overlay cards are tiles that will enliven the forest map. You will be instructed when to place a card over the mythical location. Some of the cards have a QR code containing links to audio files connected with that place on the map. You may play the audio to enrich your gameplay experience. No game instructions are given in the audio files so this is entirely optional.