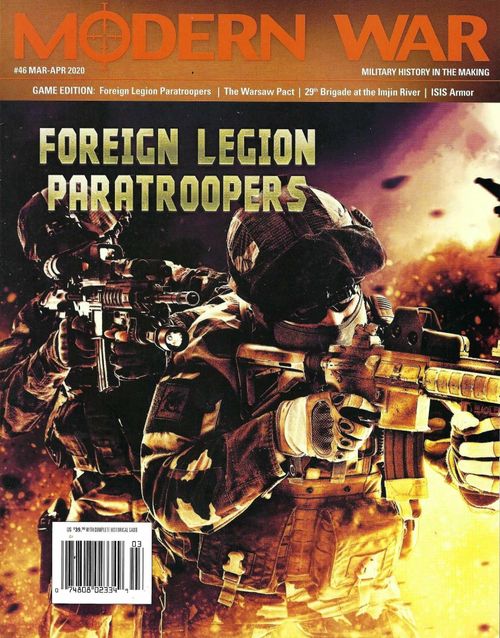
Foreign Legion Paratroopers: Rapid Response Force
Foreign Legion Paratroopers: Rapid Response Force Rulebook
Table of Contents
Table of Contents
- 1.0 Introduction
- 2.0 Components
- 3.0 How to Win
- 4.0 How to Set Up the Game
- 5.0 Sequence of Play
- 6.0 Strategic Map & Staging Units
- 7.0 Elán
- 8.0 Operations Points
- 9.0 REP Reinforcements
- 10.0 Refitting
- 11.0 InfoWar Operations
- 12.0 Mission Maps
- 13.0 REP Ground Movement
- 14.0 Airstrikes & Drones
- 15.0 Airborne Operations
- 16.0 Drop Zones
- 17.0 Ground Combat
- 18.0 Ranged Combat
- 19.0 Winning a Battle
- 20.0 Pursuit
- 21.0 OPFOR
- 22.0 OPFOR Units
- 23.0 Fog of War
- 24.0 Objective Markers
- 25.0 Crisis
- 26.0 Events
- 27.0 Logistics
- 28.0 Helicopters
- 29.0 Mission Map Transport
- 30.0 Special Units
- 31.0 Campaign Game
- 32.0 Optional Rules
- Events Table
1.0 Introduction
Foreign Legion Paratrooper is a wargame in which you (the player) command a French Foreign Legion Paratrooper Regiment dealing with crises in the current era and near future. Foreign Legion Paratrooper is a solitaire wargame. The player controls the French forces (abbreviated as REP from the French acronym for Foreign Legion Paratrooper Regiment). The game system controls various Opposition Forces (OPFOR). Each scenario represents a single mission. Each mission has two phases; the Preparation Phase and the Mission Execution Phase. You can link the various missions into a larger Campaign game. The designer recommends that you first play a couple of games before playing a Campaign game.
Color system used in the original rules: red for critical points such as errata and exceptions, blue for examples of play. Check for e-rules updates at http://modernwarmagazine.com/mwm/e-rules/
1.1 Solitaire Game Structure
Foreign Legion Paratrooper is a solitaire game and requires only one player to play. There are two sides in the game: the REP (player control) and the OPFOR (game system control). You can maneuver REP units as you desire, within the rules. When a rule calls for the OPFOR to perform an action, you must execute that action.
1.2 Team Play
Two or more players can play the game with each controlling different parts of the REP. Optional rules explain multi-player procedures.
1.3 Game Scale
Each turn equals anywhere from 12 hours to one week. Hexes on the Mission map are anywhere from 0.5 to 5 kilometers across. A platoon is 30 to 60 soldiers. OPFOR units represent anywhere from 10 to 1000 fighters.
2.0 Components
The components to a complete game of Foreign Legion Paratrooper include these rules, one 22×34 inch map and one counter sheet containing 176, 5/8 inch counters. Players will need to provide themselves with at least two standard six-sided dice to resolve combat and strikes.
2.1 Map
There are two sections to the map.
- Strategic map (lower left): Shows parts of Europe, Africa and the Middle East. It indicates various objective areas and movement lines.
- Mission maps (lower right): Players execute each mission on one of these seven mini-maps.
2.2 Game Displays
REP Staging Area Display: Organizes REP units that are available to deploy during a mission. This includes Airstrikes and Drones, ISR and Netwar markers. There are boxes for eliminated units.
2.3 Game Tracks
Game tracks provide a convenient way of recording various indices and status numbers for game functions.
- Crisis Index Track: Shows the current level of international tension. (Note: Crisis Index Track Note should read "See 11.0 Info War.")
- Elán Index Track: Shows the overall state of REP morale and support from higher echelons.
- REP Operation Points (OPs) Track: Shows the current command and logistical support available for the REP.
2.4 Game Tables & Charts
Game tables and/or charts provide various randomized events and actions.
- Air Defense Combat Table: Used to resolve ground versus airstrike fires.
- Events Table (at end of rules): Details various events and their impact on the mission.
- Kinetic Combat Results Table (CRT): Used to determine the outcome of combat.
- INFOWAR Table: Used to determine the outcome of intelligence, surveillance & reconnaissance (ISR) and Netwar combats.
- Mission Setup Table: Used to determine the parameters for individual scenarios.
- Mission Map Table: Used to determine the map used in each scenario.
- Mission Location Table: Used to determine the location of each mission.
- Mobilization Chart: Displays the cost of various REP units and actions in terms of operational points (OP).
- Parachute Drop Table: Used to resolve REP parachute landings onto the Mission map.
- Staging Chart: Outlines the various staging routes and transport information.
- Terrain Effects Chart (TEC): Indicates the effects of terrain on movement, combat and other game actions.
- Terrain Key: Displays the various terrain used on the Mission maps.
- Victory Point (VP) Chart: Lists conditions at the end of the game used to total VP. (Clarification: Second line should read, "For any eliminated OPFOR Command Posts.")
2.5 Game Pieces
There are three general types of game pieces (referred to as counters or units) in the game:
- Combat Units: Representing ground maneuver forces.
- Strikes: Representing tactical air, ISR and fire support.
- Administrative Markers: Counters used to track various game conditions or levels.
Ground Combat Units
- Combat Rating: The numerical rating of the unit's firepower. A bracketed combat rating designates the unit is a Heavy Weapons (HW) unit with a corresponding impact marker. A combat rating with a white rectangle background designates that unit has precision guided munitions.
- Engagement Rating: The numerical rating of the unit's tactical proficiency.
- Movement Rating: The number of movement points (MP) that the unit may expend in one REP Ground Movement Phase.
- Unit Type Symbol: The general type of weapons system possessed by the unit.
- Unit Identification: The historical identification of the unit.
- Unit Size: The organizational composition of the unit. Two dots: Section/Team. Three dots: Platoon. I: Company.
- Command Units: Command units have a command radius rating. Note: Command posts may not possess a command radius.
- Transport Units (Transport Capable): Units capable of transporting other units (note: there is also a helicopter transport).
- Air Defense Capable Units: Units capable of conducting ground to air attacks.
Ground Unit Types (Mobile Mechanized): Armor (French/OPFOR); Armored Cavalry; Armored Engineer; Mechanized Command Post; Convoy; Mechanized Infantry (French/OPFOR); Technical (French/Local/OPFOR); Mechanized Precision Guided Missile; Mechanized Heavy Weapons.
Ground Unit Types (Mobile Non-Mechanized): Airborne Infantry; FELIN (Note: the four F company platoons with HT in the upper left corner are the FELIN units (30.2)); Infantry (OPFOR); Airborne Heavy Weapons; Special Forces; Airborne Engineer; Airborne Command Post; Command Post (OPFOR); Air Defense (OPFOR); Guerillas/Militia (OPFOR); Gendarmes; Sniper; Precision Guided Missile (PGM); Terrorist Group (OPFOR).
Ground Unit Types (Bases): FOB (Forward Operating Base) / Guerrilla Base (OPFOR).
- Drop Zone (DZ): Represent prepared landing areas (16.0).
- Checkpoints: Represent prepared positions.
- Forward Staging Area (FSA): Used on the Strategic map, they represent REP controlled airbases and other facilities.
- Helicopters: Helicopters function as modified ground units (not air units!). Their movement rating has a red oval background indicating they use a separate movement column on the TEC. Transport helicopters have a transport symbol on their upper right corner. Types: Transport, Gunship, Helo CP.
- Heavy Weapons (HW) Units: Each heavy weapons unit has a corresponding impact marker, representing its ranged fire and ranged combat rating. Use the bracketed combat rating of all HW units when the HW unit is in the same hex as an OPFOR unit.
- Logistics Units: Logistics Units have a support radius (parenthesized number in upper left corner). Types: Forward Operating Base, Convoy. Note: Guerilla Bases (not shown) operate as a logistic unit.
- Amphibious Assault Ship (LSHD): An amphibious task force offshore of an Objective area.
Back printing:
- REP combat units (generally) have two sides. The front shows the unit combat effective. The reverse side shows the unit disrupted. The disrupted side has a white stripe across the lower part of the counter to easily distinguish units that disrupt.
- OPFOR units have two sides. The front (revealed) side shows their combat values. The reverse (concealed) shows a large question mark.
Objectives (green front, question mark on back): Represent critical targets for a mission. Each objective marker details the effect to the Crisis Index when the objective marker evacuates (24.0). Objectives are as follows: Coup, Invaders, Hostages, Warlords, Insurgents, WMD (Weapons of Mass Destruction).
Strikes: Strikes are not units per se. Instead, they represent the effects of various operational level forces. The number represents its Combat Rating. Types: Air Strikes, Drone Strikes, Air Transport.
OPFOR Special Markers (tan front, question mark on back): Ambush, Intelligence, Deception, Massacre, IED (Improved Explosive Device).
Markers:
- ISR (Intelligence, Surveillance, Reconnaissance): ISR strikes gain information on OPFOR.
- NW (Netwar): Netwar strikes increase engagement ratings and make Netwar attacks.
- 2nd REP: Place on the Mission Location Table to represent the position of the current mission.
Administrative Markers
- Battle Space: Indicates a mini-map hex where place units to resolve a combat.
- Crisis Level: Indicates the current level of international tensions.
- Elán: Indicates the current elán Index level.
- OP (Operations Points): Indicates the current number of operation points available to enhance REP actions.
2.6 Abbreviations
- F: FELIN (Fantassin à Équipement et Liaisons Intégrés) Integrated Infantryman Equipment and Communications.
- FOB: Forward Operating Base
- GCP: Groupement des Commandos Parachutistes
- GIGN: Groupe d'intervention de la Gendarmerie Nationale
- HT: High Tech
- LF: Local Force
- OPFOR: Opposition Force
- REP: Foreign (Legion) Parachute Regiment (2e Regiment etranger de parachutistes)
2.7 Definitions
- "1dr" or "2dr": Roll that number of dice. Example: "2dr" means roll two dice and total the results to provide an outcome.
- Adjacent Hex: A hex (Mission map) connected directly to another hex.
- Adjacent Zone: A zone (Strategic map) connected directly to another zone by a transit line.
- Control a Hex: A side controls a hex if it has at least one ground unit in it and there are no enemy ground units in it. A disputed hex is when both sides have ground units in a hex. If neither side has ground units in a hex, then it is uncontrolled.
- Crisis Zone: Boxes on the Strategic map outlined in red. The current crisis zone is the Mission Crisis Zone.
- Die Roll Modifier (DRM): A DRM is a number added to, or subtracted from, a die roll.
- Force: One or more units conducting a game action together.
- Friendly & Enemy: All units controlled by one side are friendly to each other; the units controlled by the other side are enemy.
- May: The player can choose to or not to take this action.
- Must: The player must (required to) take this action.
- Pick or Pick at Random: Choose without looking at a counter.
- Pool: A wide mouthed opaque container used to randomize the draw of markers.
- OPFOR: A general term for all units opposing the REP.
- REP: A general term for all REP units and support.
- Randomization: Certain actions will call for the player to choose randomly (i.e., between two different crisis zones). In this case, assign each alternative an equal number of possibilities for a six-sided die, roll the die, and then implement that path.
- Reveal: Flip a face down (concealed) OPFOR counter face up.
- Select: Choose a marker or other item intentionally.
- You: The player.
3.0 How to Win
At the end of every mission, you evaluate victory. Total your Victory Points (VP).
3.1 Mission End
You check to see if the mission has come to an end in the Staging Phase (after evacuating the objective marker per 24.0) and the Crisis Phase (because the crisis index is at 12 per 25.1).
3.2 Victory Points (VP)
VP values are on the Victory Points Chart. Total the VP gained from the mission.
- You add VP for:
- Evacuation of the Objective Marker: A REP unit has transported the objective marker back to a Staging Area.
- Eliminated OPFOR Units: Check the Eliminated OPFOR Units Display and gain the points listed in the VP Chart. Specific types of OPFOR units have different VP values.
- REP Control of Hexes: Specific hexes have different VP values.
- OPFOR Special Markers: If evacuated, may affect VP.
- You subtract VP for:
- Eliminated REP Units: Check the Eliminated REP Units Display and subtract the points listed in the VP Chart.
- Disrupted REP Units: For each disrupted REP unit anywhere on the map, subtract the points listed in the VP Chart. Units disrupted during the mission but were refit do not count.
- OPFOR Control of Hexes: Specific hexes have different VP values.
- OPFOR Special Markers: If on the map, may affect VP (22.2).
- Crisis Index: Subtract the number of points equal to the final Crisis Index level.
Note: ISR and NW markers do not count for VP.
Important: The Crisis Index subtraction means that it can be useful to end the mission by evacuating the objective as soon as possible.
3.3 Victory Evaluation
After determining the total VP (all additions and subtractions), determine the level of victory or defeat.
- 50 or higher: Glorious Victory
- 25-49: Reasonable Victory
- 0-24: Debacle
- Less Than Zero: Disgrace
Note: There is no draw, it is all or nothing! See the Campaign game for effects of victory levels (31.0).
4.0 How to Set Up the Game
Important: Throughout the rules there are rules used in the Campaign game only.
Perform the following actions in the order listed:
-
Determine the Mission Crisis Zone: Consult the Mission Location Table and roll 2d6. Total the result and cross-index that number (from 2 to 12), placing the 2 REP marker on the resulting number, which determines the Mission Crisis Zone, which is the location where the mission will take place.
-
Determine the Mission map: Consult the Mission map Table. Roll 1dr and cross reference the result with the Location determined in step one. The result is the Mission map that for the current mission. Important: The notation on the map for Desert Town should be Desert City.
-
Determine Your Mission: Consult the Mission Setup Table. Roll 1dr and cross reference the result with the line indicated. Optionally, you can place all objective markers in a pool. Pick one at random and reveal it (ignoring the negative crisis number on the marker). Use that mission line on the Mission Setup Table.
-
Mission Setup: Consult the Mission Setup Table line determined in step three and conduct the following actions: a) Place the elán marker in the "1" space on the elán Index Track (or when indicated by Next Mission instructions). b) Determine the starting crisis level by rolling 1dr and adding the modifier indicated (e.g. line 1 shows 1 plus 1dr; a die roll of 4 would result in a SCL of 5). Place the crisis level marker in the determined space on the Crisis Index Track. c) Using the Initial OPs column, add the indicated number to the current elán value. Place the OP marker in the determined space on the REP Operation Points Track.
Important: Use the Follow-on OPs Values during the execution of the mission.
Note: Modify mission set-up for missions after the first mission. See 31.0 Campaign game for the modifications.
Note: Use the Victory Bonus column on the Mission Setup Chart for the Campaign game.
-
Mobilize OPFOR Units: Place all the OPFOR units and OPFOR Special Markers in an opaque container. Determine the number of OPFOR units by using the OPFOR Units column. Roll one to three dice as indicated on the column and add the result to the current elán Index level. Pick that number of counters (do not reveal them). Then mix in the Objective marker (also concealed) with these picked counters. Use the random placement procedure (4.1) to place them on the Mission map.
-
Mobilize Initial REP Force: Expend any or all available OPs to recruit REP units using the Mobilization Chart. Deploy these recruited units in the Calvi box of the Strategic map. Place Airstrikes, Drones, ISR, and Netwar markers in the designated boxes on the REP Display (do not stage them, they are available for use once mobilized). When playing the Campaign game, REP units may deploy in a zone containing an FSA or LSHD marker.
Important: You can recruit more REP units during the game (9.0).
4.1 Random Placement
When a rule calls for random placement on the Mission map, conduct the following procedure: For each unit placed, roll two dice in sequence. The first die result is the "10s" digit, the second is the "1s" digit. Place the unit in that numbered hex on the map used for that mission. Do this for each unit picked (this may result in more than one unit per hex).
Example: You roll a "3" and then a "6". Place the unit in hex 36.
5.0 Sequence of Play
Players conduct each mission in turns (the Campaign game (31.0) consists of more than one consecutive missions). However, there is no turn track or marker or limit to the number of turns. Instead, you repeatedly execute the Sequence of Play until one of the conditions for ending the mission occurs (3.1). Each turn consists of a series of discrete steps called phases. You must follow the Sequence of Play in the order given and conduct all phases each turn. The Sequence of Play is involved, but this is necessary given the solitaire nature of the game.
A) Strategic map Stage
-
Operation Point Phase: Roll the number of dice per the Mission Setup Table on the Follow-on OPs column. Total the results and add that number to the REP Operation Points Track (8.0).
-
REP Mobilization Phase: a) REP Reinforcements (9.0): You may expend OPs to recruit REP reinforcements. b) Refit: You may refit disrupted REP units via Refitting (10.0).
-
REP Info War Phase (11.0): You may conduct ISR and Netwar operations.
-
REP Staging Phase: You may (in any order): a) Move REP units from Calvi to the Mission Crisis Zone paying the OP cost indicated in white along the blue transit lines (see 6.0). Deploy these units from the Mission Crisis Zone to the Mission map during the corresponding phase during the Mission map Stage. b) During the Campaign game you may move REP units under FSA or LSHD markers in any Strategic map box to an adjacent Mission Crisis Zone, paying the appropriate OP costs. c) Exit units from the Mission map. Exiting the objective marker ends the mission.
B) Mission map Stage
-
REP Ground Movement Phase (13.0): Move any REP ground (and helicopter) units on the Mission map (or enter them onto the Mission map).
-
OPFOR Reveal Phase: Reveal OPFOR ground or helicopter units in hexes containing REP ground and helicopter units.
-
REP Strike & Impact Placement Phase (14.0 & 18.0): Place air or drone strikes, and impact markers, on the Mission map.
-
Air Defense Phase (14.1): Execute all OPFOR air defense fires against REP airstrikes.
-
Strike & Bombardment Combat Phase: Conduct the following in the order given: a) Tactical Air Attack (14.0): Execute combat for all REP air and drone strikes against OPFOR units. b) Bombardment (18.0): Execute bombardment combat for all REP impact markers against OPFOR units.
-
REP Parachute Drop & Landing Phase (15.0): Land all REP ground units moving onto the Mission map via parachute drop and air landing.
-
REP Ground Combat Phase (17.0): Execute combat with all REP ground units in the same hexes as OPFOR units.
-
OPFOR Events Phase (26.0): You must make OPFOR event checks. Apply the results.
-
OPFOR Counterattack Phase (21.4): If there are OPFOR units in the same hex as REP ground units, then you must execute counterattack combat with OPFOR units.
-
Crisis Phase: Move the crisis marker one space higher on the Crisis Index. If it reaches 12, the mission ends.
6.0 Strategic Map & Staging Units
Initially deploy REP units in Calvi. In the Campaign game, players may place them in crisis zones (red boxes) containing forward staging area (FSA) markers or ocean zones (white boxes) containing an LSHD.
Important: Place FSAs and LSHD markers on the Strategic map only, never the Mission maps.
6.1 Deployment
When REP units on the Strategic map move to the Mission Crisis Zone, place them on the Mission map determined during setup. Each transit line displays the number of OPs (number printed in white near each line) it requires to move one air transport unit and the units it is transporting; transports may transit multiple lines.
Example: Calvi to Congo would cost 3 OPs (Calvi to Chad = 2 OP +1 OP for Chad to Congo) Do not stage markers (ISR, Net War, airstrikes and drones). They are always available.
6.2 Staging
You move REP units to or from the Mission map via staging. This occurs during the Staging Phase. This movement is not part of ground movement.
-
Air Transport: The unit must start its move on an airfield or REP drop zone marker and will move directly to the crisis zone on the Strategic map. The presence of enemy or friendly units does not affect this move.
-
Overland Movement: The unit must start on a map edge hex and will move directly to an FSA in the Mission Crisis Zone or an adjacent crisis zone on the Strategic map. (Note: when not playing the Campaign game, players may conduct Overland Movement as though a FSA exists in the Mission Crisis Zone.)
-
Amphibious Movement: The unit must start on a map edge or coastal hex and will move directly to the LSHD's current zone. The crisis zone must have a direct transit line to the zone containing the LSHD.
-
Air Movement: Use a Military Airlift Command marker (MAC). Pay the OPs cost of the transit line for each air transport marker used and move the transported units to the Mission map. The units land via (15.0): a) Parachute Landing; or, b) Air Landing.
-
Overland Movement (Campaign Only): The units must be in a zone containing an FSA marker adjacent to the Mission Crisis Zone. Pay the OP transit line cost for each moving unit and move the units to the Mission map. Note: if the FSA marker is in the Mission Crisis Zone, there is no OP cost to move units to the Mission map.
-
Amphibious Movement (Campaign Only): The units must be with an LSHD adjacent to the Mission Crisis Zone. Pay the OPs movement cost for each moving unit and move them onto the Mission map.
6.3 Entry onto the Mission Map
Units enter the Mission map in specific locations that depend on the mode of movement used.
- Parachute Landings: Can be onto any hexes on the Mission map.
- Air Landings: Can be onto any airfield or REP drop zone marker that currently contains a REP ground unit.
- Overland Movement: Place the unit(s) next to any hex on the edge of the Mission map. The hex cannot be prohibited to the unit entering.
- Amphibious Movement: Place the units next to any hex on the edge of the Mission map or on a coastal hex if the Mission map is the Mega City map. The hex cannot be prohibited to the unit entering (and need not be coastal).
6.4 Forced Entry
Units can enter the Mission map in hexes containing enemy units only via Overland Movement.
6.5 Exiting the Mission Map
REP units on the Mission map can move back to the Strategic map during the REP Staging Phase. Reverse the procedures listed in 6.3.
6.6 Strategic Map Stacking
An unlimited number of units may be in each zone. Only REP units can be on the Strategic map. Only OPFOR units can be in OPFOR Displays.
7.0 Elán
You use the Elán Index Track to display the current level of REP elán. During initial setup, elán affects OPs and the number of High-Tech units you can mobilize.
7.1 Changing Elán
The victory level at the end of a mission in a Campaign game can alter elán. The elán level cannot change during a mission. elán can never go lower than one or higher than six.
8.0 Operations Points
You use Operation Points (OPs) to initiate or enhance certain REP actions.
Important: You do not use OPs to execute most game functions; only those specifically listed.
Example: You can move and attack with units on the Mission map without expending OPs.
8.1 Recording
Record OPs on the REP Operation Points Track. Each time you use an OP, reduce the level by the number equal to the listed condition on the Staging and Refitting Charts. You can never go lower than zero. You can accumulate points from turn to turn, but the level can never exceed 29.
- Initial OPs are determined per the Mission Setup Table and players can use them during initial setup.
- Players acquire follow-on OPs each Operations Point Phase. Roll the number of dice indicated on the Mission Setup Table (Follow-on column). Add the total acquired to the current OPs available on the REP Operation Points Track.
Example: Your current OPs level is 4; the mission marker calls for two die rolls; you roll two dice with a result of "3" and "2". Add the total "5" to the current level "4". You have a total of "9" OPs available for the current turn.
8.2 Using Operations Points (OPs)
You expend OPs to do the following:
- Mobilize initial forces and reinforcements.
- Move units on the Strategic map, and onto the Mission map.
- Conduct Refit.
9.0 REP Reinforcements
In addition to mobilizing forces during setup, you can mobilize REP units as reinforcements during the REP Mobilization Phase. Each unit will cost the number of OPs listed on the Mobilization Chart.
9.1 Deployment
You place reinforcements in Calvi or, when playing the Campaign game, any zone with an FSA marker.
9.2 Two Step REP Units
Most REP units have two steps.
- The front of the counter is the combat effective side and the back is the disrupted side. Both sides function in the same manner whether full strength (front side) or reduced (back side).
- Players may restore a reduced unit to full strength via refit.
- Mobilize units in their combat effective state.
- Eliminate a disrupted unit that receives a second disrupted result.
- The number of units, strike, ISR and Netwar markers is a limit. You cannot mobilize more than are in the counter mix.
9.3 Mobilization Restrictions
- Local Forces: You can mobilize the Local Technical Company by paying the OPs and deploying it on a REP FOB. Important: Players may only mobilize the Local Technical Company as a reinforcement. You cannot select it as part of your initial setup.
- LSHD: Players can only mobilize LSHD as part of their initial forces (not as a reinforcement). Reinforcements may not deploy on a LSHD (initial forces may deploy to a just mobilized LSHD in the same initial deployment).
9.4 Hi-Tech Units
Units marked with an HT in the upper left corner of the counter are High-Technology.
- Players may only build them during initial setup.
- Do not mobilize them as reinforcements.
- You can mobilize the number of Hi-Tech units up to the current elán level.
Important: Events may provide Hi-Tech units as reinforcements, regardless of elán.
10.0 Refitting
Refitting is restoring disrupted REP ground units to combat effectiveness.
Important: Other type units do not possess a disrupted side. They cannot undergo refit.
10.1 Refit Procedure
The units must be located either on the Mission map, or, if playing the Campaign game, in a single location on the Strategic map.
- Mission map: Units on the Mission map are refit by hex. The hex must be within the support radius of a friendly logistic unit. Expend one OP for each hex containing units you wish to refit. All disrupted units in the hex are immediately flipped to their combat effective side.
- Strategic map (campaign only): Expend one OP and refit all ground units in one zone/box.
11.0 InfoWar Operations
During the Info War Phase, you can initiate ISR and Netwar Operations. You use ISR to reveal concealed OPFOR units, and Netwar to change the crisis index and affect Netwar ratings. ISR and Netwar markers do not require transport to move. Once committed to the map, they must execute a mission. Place all markers before resolving any Info War operations. They are not units and do not otherwise affect play.
11.1 ISR Recon Procedure
You place ISR markers on the Mission map in individual hexes containing concealed enemy units. You can place more than one ISR marker per hex. Resolve each ISR action individually.
- Designate one ISR marker and consult the INFOWAR Table. Roll 1dr and cross index the die roll with the results listed in the ISR column. Apply the result immediately.
- Success: Reveal all OPFOR units in the hex.
- Fail: No effect.
- Blowback: Eliminate the ISR marker.
- If the result was success or fail, return the ISR marker to the ISR & Netwar Box. Players may use the ISR marker multiple times at no additional mobilization cost.
- If the result was blowback, place the ISR marker in the Eliminated REP Units Box. Players may not purchase them again during the current mission.
11.2 Netwar Information Procedure
You commit Netwar against the crisis level.
- For each Netwar marker committed, consult the INFOWAR Table. Roll 1dr and cross index the die roll with the results listed in the Netwar column. Apply the results immediately.
- Success: Lower the crisis level by one. Return the Netwar marker to the ISR & Netwar Box.
- Fail: Eliminate the Netwar marker.
- Blowback: Increase the crisis level by one. Eliminate the Netwar marker.
- If the result was fail or blowback, place the Netwar marker in the Eliminated REP Units Box. It may not be purchased again during the current mission.
11.3 Netwar Combat Procedure
You can commit a Netwar marker to any hex on the current Mission map containing a command post or FELIN unit prior to conducting a ground combat in that hex.
- The Netwar marker increases the engagement rating of all friendly REP units in the hex by one.
- Upon completion of the combat, return the marker to the ISR & Netwar Box.
Note: Do not conduct a check on the INFOWAR Table.
12.0 Mission Maps
Mission maps represent various types of operational areas. Each has a grid overlaid with hexagons (also called hexes). The Terrain Effects Chart (TEC) gives details on the types of hexes and their effect on movement, tactical edge and combat resolution.
12.1 REP Unit Stacking
Stacking is having more than one unit per hex.
- Up to six REP ground units can be in a hex.
- You may additionally place a maximum of six REP strikes in a hex.
- Transported REP ground units do not count against stacking. When disembarked they count against ground unit stacking.
- At the end of any phase, if you have more than six REP ground or more than six strike units in one hex, all REP ground units in that hex must disrupt.
Example: Due to airborne scatter, at the end of the REP Parachute & Air Landing Phase there are seven REP ground units in one hex. All REP units in the hex are immediately disrupted.
12.2 OPFOR Stacking
There is no limit on the number of OPFOR units that may be in a hex.
Important: Both OPFOR and REP units may stack in the same hex. This will require a form of combat during the appropriate phases.
Important: There are no ZOC in the game.
13.0 REP Ground Movement
Each unit has a printed movement rating. A unit's movement rating is the number of movement points (MP) that the unit may expend in one REP Ground Movement Phase.
- In each REP Ground Movement Phase, you may move all REP ground units up to their total movement rating.
- There is no requirement to move a unit, nor are you required to expend all a unit's MP.
- MP may not transfer to other units, nor may you carry over unused MP to another phase.
- Units move from hex to adjacent hex.
- Players may move units one unit one at a time, or you may move all units stacked in the same hex as a stack.
- You move units by tracing a path of contiguous hexes through the hex grid, in any direction or combination of directions to the limits of their movement rating.
- Once a unit has moved and the player's hand removed from it, it may not move again.
- REP units with printed movement ratings of zero (0) cannot move once placed onto the map.
13.1 Movement Point Costs
When moving into a hex, a unit expends the number of MP listed on the Terrain Effects Chart (TEC) listed for the specific Mission map used.
- Certain types of terrain are listed as STOP. A unit must immediately cease its movement when it enters that type of terrain hex.
- Certain types of terrain are prohibited to certain types of units. A unit cannot enter or cross prohibited terrain.
- All non-static units can move at least one hex per Movement Phase regardless of the required MP expenditure.
13.2 Special Terrain & Unit Types
The TEC lists different movement costs for mechanized, non-mechanized and helicopters.
Errata: River hexside MP costs should indicate a "+2" not an "x2."
- If there is more than one type of terrain in a hex, use the highest single movement cost from among all the terrain involved, unless the unit is moving along a road or track.
- Terrain may run along hexsides (river and dry river). Units must add the number of MP listed on the TEC to the MP cost to enter an adjacent hex across that hexside terrain.
Example: To cross a river and enter an open terrain hex costs three MP.
Exception: If an engineer is part of a REP force using ground movement (even if transported) all units in that force ignore all river crossing penalties. This does not apply to dry riverbeds.
- If a unit crosses a river hexside to enter an enemy hex, place a river assault marker on the unit that crossed the river. This marker will affect combat.
- A unit that moves along connected road or track hexes pays the road or track cost and ignores all other in hex or hexside terrain.
13.3 Contact
Units can enter hexes containing enemy units and OPFOR Special markers. There is no additional MP cost for entering enemy occupied hexes, however it is a STOP event.
14.0 Airstrikes & Drones
During the REP Strike & Impact Placement Phase, move mobilized airstrikes and drones from the Air Strikes & Drone Box to target hexes on the Mission map. Use these units to make strike attacks against OPFOR units on the map. To conduct a strike:
- Move one or more strike markers from the Air Strikes and Drone Box to any hex on the Mission map containing revealed OPFOR units.
- If the OPFOR units are not revealed, they may not be attacked.
- Airstrikes may attack OPFOR units by themselves, or in conjunction with ground units.
- Each airstrike can perform only one attack per turn.
- Return surviving TAC airstrikes to the Airstrikes & Drones Box after completion of their attack.
- Expend all drones. After completion of the strike place all drone airstrikes in the REP Units for mobilization.
Important: Helicopter units are not airstrikes.
14.1 Air Defense
During the Air Defense Phase, OPFOR units conduct air defense attacks against airstrike markers. For each hex containing at least one TAC airstrike marker, conduct the following.
- Consult the Air Defense Combat Table. Roll 1dr.
- If there is at least one air defense capable OPFOR unit in the hex, cross reference the die roll with the Air Defense Capable Units column and implement the result.
- If there is not at least one air defense capable OPFOR unit in the hex, cross reference the die roll with the result on the All Other Units column and implement the result.
- Enemy air defense attacks do not affect drone airstrikes.
14.2 Air Defense Results
- Shootdown: Select one TAC airstrike marker and place it in the Eliminated Units Box.
- Abort: Select one TAC airstrike marker and place it in the Airstrikes & Drones Box.
- No effect: There is no effect.
14.3 Strike Combat
During the Strike & Bombardment Combat Phase, airstrikes and drones use their Combat Rating on the Kinetic Combat Results Table (CRT) to conduct their strike (17.3). CRT results do not affect airstrikes.
15.0 Airborne Operations
REP air transport units (MAC) move ground and helicopter units by air during the REP Staging Phase. This includes units making parachute drops (conducted by airborne units) and air landings (conducted by everyone else). Do not stage markers (ISR, Netwar, airstrikes and drones). They are always available.
15.1 Air Transport Procedure
During the REP Staging Phase, place the ground or helicopter unit under the MAC unit. Move the units from the Strategic map to the Mission map placing them in the desired target hex using the procedures in 6.0. All units conducting both types of drop operate normally beginning in the immediately following Ground Combat Phase (i.e. they do not move in the turn they drop).
- In the Campaign game, you may assign MAC units to the same Forward Staging Area as transported ground and helicopter units.
- Only airborne units may conduct parachute drops. Players may conduct them in any type of hex including OPFOR occupied hexes. Units conducting parachute drops must make a scatter check (15.3).
- Players must conduct air landings in a hex containing an airfield or REP drop zone marker and at least one REP unit. The hex cannot contain any OPFOR units. Any type of REP unit may conduct an air landing. Units conducting air landings do not conduct a scatter/disruption check.
- If a unit conducting a parachute drop lands in a hex occupied by any OPFOR units, the REP units must conduct an attack against the OPFOR units in the immediately following Ground Combat Phase.
- If the attack fails to clear the hex of all OPFOR units, eliminate all REP units conducting the drop and place them in the REP Eliminated Units Box.
- Return the MAC unit to the Calvi Box or, when playing the Campaign game, to any Forward Staging Area.
- MAC units do not undergo air defense combat.
15.2 Air Transport Capacities
Each MAC unit can transport one of the following per mission:
a) Three non-mechanized units b) Two mechanized units c) One mechanized and one non-mechanized unit d) One helicopter unit
15.3 Scatter Check
Resolve parachute drops during the Parachute Drop & Air Landing Phase. Each airborne unit making a parachute drop must make a drop check. Air landing units do not make a drop check. For each unit making the drop:
- Consult the Parachute Unit Drop Table and roll 1dr.
- Modify the result using the modifiers listed at the bottom of the chart.
- Cross reference the modified die roll with the type of terrain in the target hex and implement the result.
15.4 Scatter Results
- Land: Place the airborne unit in the target hex.
- Scatter: Roll 1dr and, count the hex to the immediate left of the drop hex as "1" and continue clockwise around the drop hex until reaching the die result. Place the unit in the resulting hex. If the resulting hex would be off map, roll again.
- Disrupt: Disrupt the unit and place it in the target hex.
- Scatter + Disrupt: Conduct the scatter procedure and disrupt the unit.
15.5 Moving Between Forward Staging Areas
In the Campaign game you can use MAC units to move via air landing between any Forward Staging Areas as well as Calvi and friendly airfields on the Mission map (see 6.2 to 6.5).
16.0 Drop Zones
You may place drop zone (DZ) markers in hexes on the Mission map to enhance paratrooper drops and allow air landing operations (15.0). DZ are not units. They do not count for stacking and do not block enemy movement.
- Purchase DZ markers during the REP Mobilization Phase.
- During the REP Staging Phase place DZ in any hex on the Mission map.
- REP units do not need to occupy the hex unless you will be using the DZ to conduct an air landing operation.
16.1 DZ Effects
When conducting a paratrooper drop into a hex, DZ provide a die roll modifier. DZ must be in the hex if conducting an air landing operation (plus at least one REP unit and no OPFOR). DZ markers remain in the hex for the duration of the mission unless occupied by an OPFOR unit at the end of any phase; in that case remove the DZ marker.
17.0 Ground Combat
Each ground combat unit has a combat rating and an engagement rating. Use the engagement rating to determine the order of units firing. Use the combat rating to conduct fire. Ground combat occurs during the REP Ground Combat Phase and OPFOR Counterattack Phase when there are both REP and OPFOR units in the same hex. During the REP Combat Phase, the REP force is the attacker and during the OPFOR Counterattack Phase, the OPFOR is the attacker.
Important: HW units can conduct bombardment (ranged fire) from anywhere on the Mission map (18.0). HW units in a hex containing OPFOR units cannot conduct ranged fire. They can conduct normal in hex combat the same as any other ground unit (using their bracketed combat rating).
17.1 Mandatory Combat
You must resolve combat in all hexes containing both REP and OPFOR units. You select the order, resolving combat hex by hex. Resolve each combat and then go to the next one.
17.2 Ground Combat Sequence
Each combat consists of the below steps. Conduct steps in the order given.
- Engagement Determination Step: Pick a hex to resolve combat. Take all REP and OPFOR units in the hex and place them in a convenient spot near the map (use the battle space marker as needed to mark the hex units were in). Line up the REP units from the hex in rows starting with the highest engagement rating and descending, row by row, to the lowest engagement rating (leave space between rows). Within each row, the player arranges the REP units from left to right in any order he chooses. Then check the TEC to determine which side has the tactical advantage and will fire first before placing the OPFOR units. If the REP units will fire first, place each set of OPFOR units with the same engagement rating as REP units to the right and slightly below the REP units with the same engagement rating. If the OPFOR units will fire first, place each set to the right and slightly above the REP units with the same engagement rating. In this manner, unit sets will fire in order from top to bottom by sets in engagement rating order. Resolve each set firing before the next set.
Map Errata: TEC, Who Wins the Tactical Edge Ties column. Ignore the word Ties.
- Fire Sequence Step: You fire each unit individually in each set and resolve its fire before going to the next individual unit. Fire each unit in a set before proceeding to the next set. Combat is sequential, not simultaneous. Units eliminated before they fire are not eligible to execute combat in that battle. Disrupted units fire using their reduced strength. There is no requirement to indicate the target unit until after the die roll. After firing the highest engagement rating units, proceed to the next highest engagement rating.
17.3 Combat Procedure (Firing)
Combat involves an individual ground unit firing at enemy units.
- All units with a combat rating of "1" or more can fire.
- Each unit fires separately. Consult the Kinetic CRT. Exception: See CP rule 27.4.
- Locate and apply the modifier(s) that are applicable to the firing unit (at the bottom of the CRT).
- Locate the column that equals the modified combat rating of the firing unit. Columns may have a range of strengths.
- If firing with the attacking force (17.0) determine if there are any column shifts imposed by the terrain (TEC) in the combat hex. A negative number shifts the firing column to the left by that number.
Important: Do not use terrain column shifts when the defending force is firing.
Example #1 (defenders in Brush): Three REP units with engagement ratings of 4, 3, and 2 are attacking two OPFOR units in a Brush hex with an engagement ratings of 3 and 2. Defending units with same engagement rating will fire first. Fire the REP unit with a 4 rating, followed by the OPFOR unit with a rating of 3, then the REP unit with the rating of 3, then the OPFOR unit with the rating of 2, and last, the REP unit with the rating of 2.
Example #2 (defenders in Desert): If the OPFOR units had been defending on a Desert hex, the attackers with same engagement rating would fire first. Fire the REP unit with a 4 rating, followed by the REP unit with the rating of 3, then the OPFOR unit with the rating of 3, then the REP unit with the rating of 2, then the OPFOR unit with the rating of 2.
Important: If right shifts exceed the highest column on the CRT, use the right most column. If left shifts result in less than the "1" column, use the "0" column.
- Roll 1dr, and cross reference the result with the column determined above.
- Apply the result (17.4).
- When all surviving units have fired, the round is complete. If there are surviving units from both sides in the hex, conduct another round following the procedures above.
Exception: If neither side achieved a hit (step loss or retreat in the round) the combat ends, it is a draw (19.0).
- If one side does not have any surviving units in the hex, combat resolution is complete for that hex. See 20.0 for determining the winner.
17.4 Result Explanation
Implement combat results immediately as they occur. Combat results affect units regardless of its type or strength.
- Numerical Result (#): The number on the CRT is the number of hits inflicted on enemy units.
- R: One enemy unit must retreat.
- Numerical + R (# + R): Inflict that number of hits and then retreat one enemy unit.
Note that a combat result may remove an opposing unit before it fires. In example #1, if the first REP unit eliminates or retreats the OPFOR Technical Company (the only OPFOR it could affect per 17.5), the next unit to fire would be the REP paratroop platoon.
If the REP HT paratroop unit missed, and then OPFOR Technical Company achieved a loss or retreat, the REP player chooses the unit affected, thus he could choose the already fired HT paratroop platoon in order to maximize his firepower in this combat, or he could choose one of the other two units in order to preserve the HT unit at full strength.
Important: Disrupted REP ground units may have a zero-combat strength and cannot fire, but otherwise function as REP units.
17.5 Allocation of Results
Allocate results as follows:
- REP Units: You determine the REP units that will take losses or retreats.
- OPFOR Units: For each hit or retreat, you must select the OPFOR unit with the highest engagement rating. In the event of ties, you perform a random selection.
- Retreats (both sides): The targeted side must first take the hits required using the procedure above and then choose one unit to retreat from all the units currently fired on.
17.6 Effects of Numerical Hits
A hit inflicted on a combat effective two-step unit causes the unit to flip to its disrupted side. A hit on a one-sided or disrupted unit eliminates that unit. Place the unit in the appropriate Eliminated Units Box. If a result inflicts more numerical hits than a force can absorb by step losses, ignore those additional hits.
17.7 Terrain & Combat
A Defending force benefits from the terrain in the hex it occupies. Terrain has no effect on the attacker. Attacking units that crossed an adjacent river hexside that same turn will suffer the column shift penalty for rivers. Attacking units in the combat hex that did not cross a river hexside do not suffer the penalty.
17.8 Logistics & Combat
If firing ground or helicopter units (attacking or defender) are within the support radius of a friendly base or convoy, then shift the column used on the CRT one to the right. Only one logistic shift can apply.
17.9 Special Units & Combat
- REP Engineers: An engineer unit attacking enemy units in a hex ignores penalty shifts for terrain in the hex and/or an enemy base. Other units stacked with the engineer adjust columns normally.
- REP Command Post (CP): If there is a REP CP in the combat hex, you can total all combat ratings of all REP units with the same engagement rating in the combat hex and conduct one fire instead of firing each unit individually.
- OPFOR CP: If there is an OPFOR CP in the combat hex, you total all combat ratings of all OPFOR units with the same engagement rating in the combat hex and conduct one fire instead of firing each unit individually.
- Precision Guided Munitions (PGM) Units: Units equipped with PGM display a white background behind their combat rating. They use their full strength when firing at enemy mechanized class, base units or town/city hexes. When firing at all other units they fire with a combat rating of "1".
- Bases: All units (attacking or defending) in a hex containing a friendly base ignore all retreat results (including the base itself).
17.10 Retreat
REP and OPFOR units conduct retreats in different ways.
- REP Units: Move the unit one hex. Players may not make a retreat into a hex containing OPFOR units or prohibited hexes. If there is no other alternative, eliminate all retreating units.
- OPFOR Units: Remove the unit from the Mission map and place it back in the opaque container.
17.11 Status of Eliminated Units
Eliminated units are out of play for the duration of that mission. Place the unit in the appropriate Eliminated Units Box. When playing the Campaign game, eliminated units are available for mobilization when playing follow on missions.
18.0 Ranged Combat
REP heavy weapons (HW) units can fire at OPFOR units anywhere on the Mission map.
- Each REP HW unit has a corresponding fire impact marker.
- To place an impact marker and to conduct ranged fire the HW unit must be combat effective.
- During the REP Strike and Impact Placement Phase you determine the HW unit that will conduct ranged fire.
- For game purposes, the range of a HW unit is unlimited.
- You may place impact markers in any hex on the map within the below restrictions. a) At least one revealed OPFOR unit is in the target hex; and, b) The target hex must contain a REP ground unit (including helicopters) or be adjacent to a hex containing a REP CP or FELIN unit.
Exception: During the OPFOR Counterattack Phase, conduct REP ranged fire only into hexes that contain both REP and OPFOR units.
- Conduct ranged fire during the REP Strike & Impact Bombardment Phase and OPFOR Counterattack Phase. An eligible HW unit may conduct ranged fire in both phases each game turn.
- Resolve ranged fire. Place all impact markers. Execute the ranged combat before any other fire using the impact marker combat rating.
Important: HW units in a hex containing OPFOR units cannot conduct ranged fire. They can conduct normal in hex combat the same as any other ground unit using their bracketed combat rating.
18.1 Execution
Follow the procedures in 17.3. HW units conducting ranged fire do not suffer return fire. Ranged fire cannot fire on unrevealed OPFOR units and does not cause them to become revealed.
19.0 Winning a Battle
At the end of each combat, determine the winner of the battle.
- The REP force wins if all OPFOR units (all types) in the hex eliminate or retreat from the hex.
- The OPFOR force wins if all REP ground units in the hex eliminate or retreat from the hex.
- The battle is a draw if both sides failed to achieve any hits (step loss or retreat) in a single round of combat. The combat can continue in a subsequent Combat Phase (in a subsequent turn).
20.0 Pursuit
During the REP Combat Phase if REP forces win a battle, you may conduct a pursuit with the REP forces.
- Pursuit (advance after combat) occurs immediately upon conclusion of the battle. Conduct the pursuit prior to initiating the next battle.
- During the OPFOR Counterattack Phase there is no pursuit.
- OPFOR units never pursue.
- All REP mechanized and helicopter units (including any transported units) can conduct pursuit. No other type of unit can conduct pursuit.
20.1 Procedure
You may move qualified units up to one hex.
- The hex may contain OPFOR units.
- You cannot move units into hex that would then be overstacked or into a prohibited hex.
- Transports can pick up units and conduct pursuit.
- Pursuing units cannot normally initiate another combat, however if REP units move into an OPFOR occupied hex, it would trigger an OPFOR attack in the ensuing Counterattack Phase.
Exception: If the hex pursuing units moved into contain REP units and OPFOR units, and the REP units have not previously conducted combat in the hex, the pursuing REP units must join the attack.
21.0 OPFOR
OPFOR units represent a wide range of enemy forces. The various OPFOR units within the same category may have different combat ratings and air defense capabilities.
Important: OPFOR units pay "1" MP per hex, they do not pay the cost of terrain. OPFOR Mech units are prohibited from moving into mountain and mesa terrain.
21.1 OPFOR Deployment
Place OPFOR units during initial setup (4.0) and OPFOR Events Phase (see Event Table at the end of the rules).
- Unless specifically stated, always pick OPFOR units randomly and place them in their unrevealed status (face down).
- Pick the designated number of OPFOR units from the OPFOR Reinforcement Pool.
- Place units using the Random Location Procedure (4.1).
- If there are no units in the OPFOR Reinforcement Pool, the player may not place additional units on the Mission map.
- Deploy OPFOR units in any type of terrain.
21.2 OPFOR Redeployment
A redeployment event requires you to pick up all unrevealed OPFOR units and place them in new positions on the map. This follows the same procedure as the scatter procedure.
- There is no movement across the map, just pick the units up and place them in the hex called for by the random placement. REP units may occupy the placement hex.
21.3 OPFOR Offensive Event
If this event occurs, all revealed OPFOR units (except static units) must move up to their full movement rating towards the nearest REP occupied hex. If two or more REP occupied hexes are equidistant, use random determination to pick one REP occupied hex. OPFOR units that are currently in a hex with REP units do not move.
21.4 OPFOR Counterattacks
During the OPFOR Counterattack Phase, you must initiate combat with all OPFOR units that are in the same hexes as REP units. You indicate the order in which these attacks will occur. Each combat follows the standard combat procedure (17.0), except the OPFOR force is the attacker and the REP force is the defender.
22.0 OPFOR Units
Most OPFOR units are combat units. Combat units' function per the various rules for OPFOR. When eliminated, place them in the Eliminated OPFOR Units Box.
22.1 OPFOR Static Units
Revealed OPFOR units that have a movement rating of zero (static units) cannot move or redeploy.
Important: All concealed OPFOR units can re-deploy.
22.2 OPFOR Markers
Reveal OPFOR markers in step 6, i.e. after completing all REP ground movement in step 5.
- Ambush: Roll one die, then pick that number of OPFOR units from the OPFOR Reinforcement Pool. Place those (revealed) units in the hex where the ambush counter is located. Remove the ambush marker and place it in the OPFOR Reinforcement Pool. Resolve any markers (including another ambush) until only OPFOR combat units remain.
- Deception: When revealing a deception counter, remove it from the map and place it in the OPFOR Reinforcement Pool.
- IED: If the player reveals an IED marker and there are REP ground units in the hex, roll 1dr for each REP unit. If the result is "6" disrupt the REP unit. Exception: Do not roll for REP helicopter units.
- The IED marker remains in the hex until a REP engineer unit ends its movement in the hex. At the end of the REP Ground Movement Phase, remove the IED marker and return it to the OPFOR Reinforcement Pool.
- Until the player removes the marker, any REP unit that enters the hex must immediately stop its movement. Do not conduct the die roll to determine disruption.
- Combat does not affect IED markers.
- Massacre: If a REP unit ends a Movement Phase in a hex with a revealed massacre marker, remove the marker and place it in the Eliminated OPFOR Units Box. At the end of the mission each massacre marker in that box adds one VP. If the marker is on the Mission map at the end of the scenario, subtract one VP.
- Intel. (Intelligence): Select one OPFOR occupied hex and reveal all OPFOR units in that hex. Remove the intelligence marker and place it in the OPFOR Reinforcement Pool.
23.0 Fog of War
OPFOR units are in one of two states; concealed (face down) or revealed (face up). You may not examine concealed OPFOR units, or OPFOR units in the OPFOR Reinforcements Pool, unless a game action requires a player to reveal the units. You may always examine REP units.
23.1 Revealing OPFOR Units
Once revealed, an OPFOR units remain revealed (face up) for the remainder of the mission, unless an event calls for player to conceal the units. Reveal OPFOR units:
- During the OPFOR Reveal Phase, if the hex it occupies contains a REP ground or helicopter unit, or an airstrike or drone marker.
- At the initiation of any ground combat (you cannot call off an attack once declared).
- Due to ISR operations (11.1).
- In the OPFOR Events Phase if an OPFOR unit is placed in a hex with a REP unit.
- When in the OPFOR Eliminated Units Box.
24.0 Objective Markers
You gain VP for transporting objectives back to Calvi, an FSA, or an LSHD.
24.1 Deployment
Objective markers are printed using the same names as the missions. Follow the procedures outlined in 4.0, to determine the current mission. The chosen objective marker will be mixed in with the randomly picked OPFOR units and placed on the Mission map concealed during the OPFOR setup placement. While concealed, objectives are treated as any other OPFOR unit. They are revealed in the same manner as all OPFOR units except that when revealed, three additional OPFOR units are drawn. These OPFOR units are drawn from OPFOR units not allocated to the Mission map. If the objective marker was revealed by an REP unit in the hex, the additional units are immediately revealed (and markers resolved). If the objective was revealed by Intel., the additional OPFOR units are unrevealed (but could be revealed by additional Intel or other events.
24.2 Transporting Objective Markers
Any REP unit capable of transporting other units (marked with a transport symbol in the upper right corner) can pick up an objective marker at any time it is in the marker's hex. A transport unit that is carrying an objective marker cannot transport other units. The transport unit and objective marker exits the Mission map using the same procedures outlined in 6.5. When the objective exits the Mission map, reduce the crisis level as listed on the objective marker. The mission comes to an end. Place the objective marker on the VP Chart as a reminder to score the VP for the objective marker as you add up the VPs for the just completed mission.
24.3 Combat
Objective markers are not affected by combat. When being transported by an REP transport unit, if the transport unit is eliminated, the objective marker is also eliminated.
Important: An eliminated objective marker does not garner VP.
25.0 Crisis
The crisis level represents the level of international tensions and the ability of the OPFOR to respond. The crisis level also generates events and (if too high) can prematurely end a mission.
25.1 Crisis Level
At the start of a mission, place the crisis marker per setup instructions (4.0). During the mission, the marker may move up or down on the track. Events (26.0), Netwar (11.2), objectives (24.2) and the end of a turn (5.0) will affect the crisis level. If the marker reaches the "12" box on the track, the mission immediately ends.
26.0 Events
During the OPFOR Events Phase, you must make the number of event checks equal to the OPFOR events number (the number along the lower half of the Crisis Index Track). Consult the Events Table at the end of the rules and roll 2d6. If more than one event is called for, each event is rolled and implemented prior to rolling for the next event. An event may cause the crisis level to change. If so, apply any change after all events have been rolled. An event can occur more than once per turn.
Example: the current crisis level is "7" (Medium). You would make two crisis event checks.
Important: Event explanations may supersede other game rules.
27.0 Logistics
Logistic support is provided by units with a support radius (number printed in the upper left corner in parenthesis).
27.1 Support Radius
A unit's support radius extends outwards from the unit the number of hexes equal to the printed rating. Support radius is not blocked by enemy units and/or terrain. If the unit is disrupted, its support radius could be listed as "0". In that case, the unit can only provide support in its hex.
Example: A unit with a support radius of one would provide support to its own hex and all adjacent hexes.
27.2 Convoys
Convoys are mechanized units that can provide logistical support. Expend convoys to provide support. Expended convoys may be repurchased. Place convoys eliminated due to combat in the REP Eliminated Units Box. They cannot be repurchased. You can expend a convoy to:
- Enhance movement: Expend at the start of an REP Ground Movement Phase, all REP ground units in support radius may double their available MP.
- Enhance combat: Expend at the start of an REP Ground Combat or OPFOR Counterattack Phase to provide a favorable one column shift to all REP ground units within support radius.
Important: Convoys do not affect REP helicopters and strikes.
27.3 Forward Operating Bases (FOB)
The player may place FOBs on the Mission map in any hex containing a REP engineer unit.
- Once placed they cannot move.
- They function as a normal combat unit.
- They have a support radius and function in the same manner as a convoy, except the player does not expend them when providing logistical support.
- FOB can call in ranged fire (18.0).
- They negate retreat results for REP units in the same hex.
27.4 Command Post (CP)
CP (those units with the command post symbol) do not possess logistical capabilities. They function as normal combat units. CP do not have a support radius and thus must be present in the hex to use their special capabilities.
Counter Errata: The REP Mech CP has a support radius, ignore it.
- CP can call in ranged fire (18.0).
- CP can coordinate fire (17.9).
Important: REP CP (CP-A) can only support helicopter units. It functions as a helicopter unit with the standard CP capabilities for helicopters.
28.0 Helicopters
Treat helicopters in the same manner as ground units.
- Helicopters pay one MP per hex, regardless of the type of terrain or hexside terrain. Do not increase helicopter movement when moving along roads.
- Helicopters engage in ground combat in the same manner as ground units.
- Helicopters marked with a transport symbol can transport other units.
29.0 Mission Map Transport
REP transport units can transport (move) REP mobile non-mechanized units on the Mission map. There are two types of transport units, helicopter and ground.
- Each transport unit can transport one REP mobile non-mechanized unit.
- The transport and transported unit must start the REP Ground Movement Phase in the same hex.
- The transport and transported unit may move up to the limit of the transport unit's movement rating. The transported unit cannot move on its own during the same Movement Phase.
- The transport may, at any point in its movement, drop off the transported unit. The transport can continue its movement or remain in the hex.
- Units transported by ground transport may remain embarked at the end of the Movement Phase.
- The player must disembark units transported by helicopter at the end of the Movement Phase.
29.1 Combat
While embarked, transported units cannot engage in combat. Combat results inflicted on the transport unit also affect the transported unit. If the transport unit retreats, embarked units must retreat with the transport.
29.2 Emergency Disembarkation
If the OPFOR conducts a counterattack in a hex with a transported unit, the transported units may disembark prior to the start of the combat.
30.0 Special Units
30.1 Special Forces (SF) Units
SF are paratrooper units that can move through all water hexes and do not expend additional MP when crossing river hexsides. They cannot retreat into all water hexes nor can they end their movement in such a hex.
30.2 FELIN Units
FELIN units represent units equipped with the FELIN high tech system (Fantassin a Equipement et Liaisons Integres or Integrated Infantryman Equipment and Communications). These units function as paratrooper infantry; and:
- Have limits on mobilization.
- Are better able to coordinate their attacks. You can add the combat ratings of all FELIN units of the same engagement rating and make one combined attack.
- FELIN units can call in ranged fire in their own and adjacent hexes.
31.0 Campaign Game
You can play a series of 10 missions as a Campaign game. A Campaign game is won by achieving at least nine victories (Reasonable or Glorious) with no more than one Debacle. A Disgrace or two Debacles ends the Campaign game. Players who have won a Campaign game can challenge themselves to score a perfect "10" victories as well as higher point totals.
31.1 Elán Bonus
At the end of each mission determine victory normally. If the mission ended in Disgrace, the Campaign game ends. If the mission ended in any other victory, implement the elán changes prior to beginning the next scenario and continue with the next mission using the adjusted elán level as the base elán.
- Glorious Victory: Increase elán by two.
- Reasonable Victory: Increase elán by one.
- Debacle: Decrease elán by one.
- Disgrace: The Campaign game ends, and you are drummed out of the Legion.
31.2 Victory Bonus
The victory bonus column on the Mission Setup Table gives a bonus for winning the previous mission. The bonus applies to the next mission only. A victory bonus may award a forward staging area (FSA) or LSHD (31.5). The FSA is in addition to that awarded by 31.3.
31.3 Planting the Tricolor
If you won a glorious or reasonable victory, place a forward staging area marker in the mission's crisis zone on the Strategic map.
31.4 Next Mission
Follow the procedures outlined in 4.0 with the following modifications:
- REP Units: Retain any CP units (spend one OP to refit all disrupted CP) and FSA markers. Remove all other units (including eliminated units) and markers (including the LSHD).
- Tracks and Levels: The elán level and crisis level remain as set at the end of the previous mission (including adjustments for victory). Retain remaining OP and add the next mission's initial OPs result (including adding the current elán value) to the total.
- OPFOR Units: Return all OPFOR units (including eliminated) to the OPFOR Reinforcements Pool.
- Mission Setup: For each victory previously achieved, roll once on the Increasing Opposition Table. Note the crisis level cannot increase above 10 (although it may be at 11 because of other events. If the SCL increases above 10, increase OPFOR units by three.
Increasing Opposition Table (roll 1dr):
| Roll | Result |
|---|---|
| 1 | Increase Starting Crisis Level by One |
| 2 | Decrease Initial OPs by One |
| 3 | Decrease Follow-On OPs by One |
| 4 | Decrease Follow-On OPs by One |
| 5 | Increase OPFOR Units by Two |
| 6 | Increase OPFOR Units by Three |
31.5 FSA & LSHD Units
Only use FSA and LSHD in the Campaign game. Gain and deploy FSA and LSHD markers only by victory in the previous mission (31.2 & 31.3). FSA markers may deploy in Red Crisis Zones while LSHD only deploy in white ocean boxes on the Strategic map. Place the markers at the end of the previous mission and allow REP units to deploy in their location on the Strategic map. Once placed, they cannot move. A Player may remove them at any time (allowing, for example, the removing the LSHD marker and then mobilized in a new location).
- During the REP Staging Phase, you can move units (via air transport) from Calvi or any zone containing an FSA or LSHD to any zone containing an FSA or LSHD.
- If the Mission Crisis Zone contains an FSA, you do not have to pay the OP cost for moving units onto the Mission map. Units automatically enter the Mission map on any map edge or airfield (including OPFOR occupied hexes).
- If the Mission Crisis Zone is adjacent to an ocean zone containing an LSHD, you can move units from/to the LSHD and adjoining zones in the same manner as when using an FSA. If the determined Mission map is the Mega City map, you can conduct amphibious movement with any units staged on an LSHD. REP units based on an LHSD can enter the Mission map on shore hexes at no OP cost.
- If the Mission Crisis Zone contains an FSA or is adjacent to an ocean zone that contains an LSHD, you do not have to evacuate an objective marker. During any Crisis Phase that a transport unit carrying an objective is in an airfield or drop zone hex, you may declare it evacuated.
- The counter mix limits the number of markers. If all five FSA markers are in play and the player receives another, the player may move a deployed FSA marker from one zone to another zone.
32.0 Optional Rules
Optional rules add additional realism as well as more complexity to the game.
32.1 Ground Recon
All REP ground units can perform a special recon action. During the REP Ground Movement Phase, you may select one REP unit that is in a hex adjacent to any one concealed OPFOR unit or stack of units. Roll 1dr, if the result is less than the designated REP unit's engagement rating, reveal all OPFOR units in the hex. Any other result has no effect.
32.2 Checkpoints
Checkpoint markers represent units digging in and/or conducting patrols. The player can only purchase checkpoints as reinforcements.
- A player may place a checkpoint in any hex containing a REP combat unit (not helicopter) at the end of the REP Ground Movement Phase. The hex cannot contain any OPFOR units.
- You must expend one OP to place the checkpoint.
- The REP unit cannot have moved in the phase.
- There can be a max of one checkpoint per hex.
- If a checkpoint is in the hex, REP units win ties for engagements in that hex, attacking or defending, regardless of terrain.
- Checkpoints remain in place if there is at least one REP ground unit in the hex. This does not have to be the original unit. The instant that there are no REP units in the hex, remove the checkpoint marker. Return it to the REP Units for Mobilization Pool. The player may rebuild it during the current mission.
32.3 Campaign Game Options
- First Campaign: Players may want to play six missions instead of ten, playing one of each mission type. Draw objective markers as suggested in 4.0 3) and remove the markers already played before drawing for the next mission. To have a variety of mission types in a regular 10-mission Campaign game, players can limit the mission type to twice in a Campaign game.
- Mobilizing LSHD markers: In addition to being victory bonuses, the player may mobilize LSHD markers. Mobilize a LSHD marker for one mission by expending 5 OP.
32.4 Oilfield Fires & Collateral Damage
Certain conditions will require a player to place an oilfield fire or collateral damage marker on the map. A player may place only one marker in any one hex.
Note: You may create additional oilfield fire/collateral damage markers.
- Collateral Damage: When resolving combat (of any kind) in a hex containing an oilfield symbol and any single fire inflicts a step loss, place a collateral damage marker.
- Oilfield Fire:
- When resolving combat (of any kind) in a hex containing an oilfield symbol and any single fire inflicts two or more step losses, roll 1dr. If the result is less than the step loss inflicted, place the oilfield fire marker in the hex.
- If a REP unit enters a hex containing an oilfield fire, even if via a track or road, they must immediately stop.
- Shift all combat resolution in the hex one column to the left (regardless of other terrain).
- The player may not make airstrikes, drones, and bombardments against hexes containing oilfield fires.
- A hex with an oilfield fire or collateral damage counts as zero VP.
32.5 Team Play
You can play Foreign Legion Paratrooper with more than one player. Divide commands up however players desire, the below three solutions are recommendations.
- REP Command: One player is supreme commander and each other player controls REP forces in one Sector. The supreme commander arbitrates disputes about allocation of airpower.
- Combined Operations: One player controls the REP ground units, another the REP air units.
- Alternate Command: One player runs the first mission while the other assists with OPFOR actions, then the second player runs a mission. Players can keep track of the VP totals in a Campaign game.
Important: Use the mission setup shown in 31.4.
Events Table
Roll 2d6: the first die selects the column, the second die selects the row.
| Second die \ First die | 1 | 2 | 3 | 4 | 5 | 6 |
|---|---|---|---|---|---|---|
| 1 | All Quiet | Higher Level Intelligence | Logistics Breakdown | OPFOR Offensive | OPFOR Redeploys | Shifting Intelligence Situation |
| 2 | Crisis Accelerates | Local Support | Logistics Breakdown | OPFOR Offensive | OPFOR Reinforcement | Shifting Intelligence Situation |
| 3 | Crisis Accelerates | Local Support | NATO Support | OPFOR Offensive | OPFOR Reinforcement | Friction |
| 4 |
Event Explanations
- All Quiet: No effect.
- Crisis Accelerates: Increase the current crisis level by one (but not above the max).
- Crisis Stabilizes: Decrease the current crisis level by one (but not below the minimum).
- Friction: Lose one OP.
- Higher Level Intelligence: Select one hex with concealed OPFOR units and reveal them.
- Local Support: Select one of the following: (1) Mobilize one convoy or LF unit at no cost and place it in the same hex as any REP unit; or (2) Refit one REP unit on the Mission map, regardless of location.
- Logistics Push: Roll one die and gain that number of OP.
- Logistics Breakdown: Roll one die and lose that number of OP.
- NATO Support: Mobilize one air transport unit, one drone strike, or two info war at no cost.
- Network Attack: If you immediately expend one available Netwar marker, gain one OP. If you do not, then lose two OP.
- OPFOR Offensive: Move all revealed OPFOR units to their movement factor towards the nearest REP occupied hex (see 21.3).
- OPFOR Redeploys: Redeploy all OPFOR concealed units per the scatter rule. Further, the units cannot deploy in or adjacent to hexes containing REP units.
- OPFOR Reinforcement: Pick one OPFOR unit and place it per random placement.
- OPFOR Uprising: Roll one die, pick that number of OPFOR units and place them per random placement.
- Shifting Intelligence Situation: Conceal all revealed all OPFOR mobile units (other than those in the same hexes as REP units).
- System D: Gain one OP.