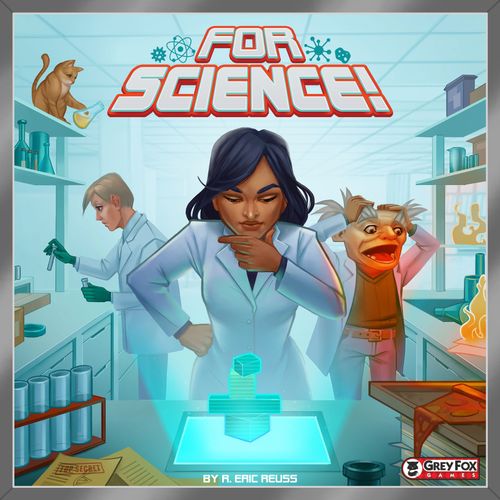
For Science!
For Science! Rulebook
Table of Contents
Table of Contents
Components
- 20 Disease Cards
- 32 Mutation Cards
- 60 Design Cards
- 16x Sectors, 12x Chevrons, 18x Trapezoids, 30x Rhombi (the four building-block shapes printed on Universal Vaccine tiles)
- 29 Event Cards
- 76 Universal Vaccine Tiles
- 15 Role and Workshop Cards
- 6 Player Aids
- 3 Insight Pawns
- 1 Lab Board
- 1 Wasted Cards Board (with a variant on the reverse)
- 12 Advanced Lab Tiles
- 6 Insight Goal Tiles
- 12 Callout Rings
- 36 Wooden Blocks: 6 cones, 6 domes, 6 cylinders, 6 rectangular blocks, 6 arches, 6 long bars
- 4 Deck Boards
Setup
- Put the Lab board, Wasted Cards board, building blocks, and Universal Vaccine tiles on the table within reach of all players. Make sure to leave the area above the Lab board clear.
- Place the 3 Insight tokens below the corresponding Insight tracks on the Lab board.
- Set the tiles showing the Insight goal.
- Each player chooses a Role and places it in front of them, with a play aid if desired. If this is your first game, choose a Role with a star. Some Roles have an icon indicating the recommended number of players in the game.
- Shuffle the Design, Disease, Mutation, and Event decks and put them on their appropriate boards. If this is everyone's first game, only use the Mutation cards with stars, and omit the Event deck.
- Draw and place 1 Disease card face-up into each of the 3 Labs. (They should be oriented vertically, so that "Incomplete" is showing on each side of them.) In Lab Alpha - the leftmost lab - also draw and place a Mutation card, since the Lab says "Mutation x 1".
- Draw one Universal Vaccine tile and put it face-up on the table, in an area with space to add more tiles.
- Launch the app, set up the MP3, or set a timer for 15 minutes.
- Confirm that everyone is ready, and begin! Each player can draw a Design card immediately because they have no Design cards in their hand. (See Design, below.)
Default Insight Required to Win
| Players | Captured Insight |
|---|---|
| 1p | 6 |
| 2p | 8 |
| 3p | 10 |
| 4p | 12 |
| 5p | 14 |
| 6p | 16 |
Before a First Play
First-time players may wish to try a few Builds before going "on the clock", to make sure they understand the Build rules (see Build, below) and to experiment with how the blocks stack best - e.g., several shapes are MUCH easier when turned sideways. A sheet titled "You Can Do It!" has some example Builds for this purpose.
Gameplay
Goal and Overview of Play
In For Science!, you race to develop a Universal Vaccine against a gaggle of nasty diseases from a rogue virus construction toolkit. You will Design Cures and Supporting Research, then Build them, and finally use the Data and Knowledge you gain to construct a Universal Vaccine.
Design: Use your hard-earned knowledge of infectious diseases and how they are cured (represented by Design cards) to assemble potential Cures in the shared Labs, or to plan Supporting Research in the individual Player Workshops.
Build: Once you have a suitable Design, assemble it with our team's advanced rapid prototyping tools (wooden blocks), following carefully the instructions on the Design cards.
Universal Vaccine: Successfully Building earns valuable Data and Knowledge for your team, in the form of Universal Vaccine tiles. Earned tiles form a puzzle that you must arrange to capture Insight. If you capture enough Insight, you win!
Verify: At each step of the way, to ensure sanitation standards, lab procedures must be carefully double-checked.
All play in For Science! is simultaneous and real-time. Everybody works together at the same time. If the timer runs out, you lose...and everyone in the world dies. No pressure.
Iconography: There is a quick reference for all the icons in the game on the back cover (see Reference, below).
Curing Diseases and Doing Research
At any time, there will be 3 Diseases you can work on: one in each Lab on the main board. You Cure a Disease by first Designing a Cure, then Building that Cure. Successfully Curing a Disease earns you Data and Knowledge to acquire Universal Vaccine tiles.
Supporting Research works like Curing Diseases, but Design cards are played into individual Player Workshops instead of the main Labs. These Designs have fewer constraints, but only earn Data.
Design
All cures must be conceived of and designed in a lab. We have a cutting-edge supply of prefab molecular and genetic libraries, but finding the right combination for each problem takes discernment and skill. (Plus coffee. Lots and lots of coffee.)
Every Disease Cure or Supporting Research starts with a Design: a column of Design Cards, long edges together, showing a pattern of interconnected shapes. (See the Design Example, below.) This abstractly represents the molecular makeup of a cure.
Players each have a hand limit of 1 Design card (unless a Role increases this limit). Whenever a player holds fewer cards than their hand limit, they may draw one. If the Design deck ever runs out, reshuffle the discards and form a new deck.
Players may play a Design card face-up into any of the three Labs or any Player Workshop, or they may Waste it (see "Wasting Design Cards" below). Players may collaborate, showing cards to each other and discussing them freely. They cannot, however, give cards to each other - their hand represents their expertise. (It's fine to set your Design card(s) face-down next to your Role if you're using both hands for other things.)
The long sides of each Design card have 1, 2, or 3 connections. Each card that you add to a Design must match connections exactly with adjacent components of that design: no line may run to empty space. The bottom card in a Cure Design is attached to the Lab tabletop (with any number of connections), while the first card added to a Supporting Research Design must match the connections in that Player Workshop. You are free to rearrange and rotate the cards in a design to make this work, but you must Waste any card that cannot be legally connected: you cannot return a card to your hand or move it to another Lab or Player Workshop.
A Design in a Lab represents a Cure for the Disease being studied there. A Design in a Player Workshop represents Supporting Research you are performing there. The basic rules for making and Building a Design are the same for both, but the constraints that determine if a Design is complete (see "Cure Design: Verify" below) as well as the rewards for Building a complete Design (see Build, below) are different.
Wasting Design Cards
You can always get rid of Design cards - from your hand, a Lab, or your Workshop - but when you do, you Waste them, putting them onto the Wasted Cards board.
If there are ever 3 or more Wasted Design cards, you've frittered away enough time and opportunity that a Disease gets harder to cure. Move all of the Wasted Design cards to the Design discard pile, draw a Mutation (see Mutations, below), and put it on the leftmost Disease without one. If all Diseases already have Mutations, instead discard 1 earned Data or Knowledge.
Whenever you earn Data, you may spend 1 to clear the Wasted cards, moving them to the Design discard pile.
Cure Design: Verify
For the Design of a Cure to be complete, it must:
- Meet all criteria specified on the Disease card (plus Mutation, if any; see the Reference section for the meaning of icons in the criteria); AND
- Have a minimum number of Design cards (its Min. Length, specified by the Lab).
Someone must Verify that the Design meets both these criteria and that all cards connect legally. They turn the Disease card 90 degrees, to reveal "Verified". The Design stays in place until the Disease has been Cured, as it shows what you need to do next! (You can rearrange or Waste cards in a Verified Design, but you must then turn the Disease card back until it is Verified again.)
Some Mutations also impose requirements on the Design for that Cure.
Supporting Research Design
Designs in Workshops do not need to be Verified. The only constraint is that they must have from 1 to 3 Design cards, and, of course, that all connections must match exactly, including connections to the Workshop itself.
A Note on Real-Time Play
Deliberately breaking the rules is, obviously, not allowed. But it's a real-time game, so what if you accidentally do so in the heat of the moment?
On your first few plays: just don't sweat it. You're learning and having fun.
Once you know the game: if you realize you've accidentally broken the rules, say "mea culpa!" and Waste a Design card. (See "Wasting Design Cards" above.) If you know the game really well, Waste 2 or 3 Design cards.
Design Example
On the left is a lab where the players are working on a cure for a Disease with a Mutation. The design in progress includes two Design cards, but it does not satisfy all of the requirements yet, so the players will need to keep working.
To create a legal design, the players (1) Waste a card that wasn't helping them, (2) rotate the other card, and (3) add two new cards.
One player Verifies that it meets all requirements:
- Minimum design length = 3 cards (from the Lab).
- Wherever two Design cards meet, the connections match.
- The design includes at least 2 green arches (from the Disease).
- The design includes an orange block connected to a yellow block, which is in turn connected to a red block (from the Mutation).
They then rotate the Disease card to the right, indicating that the Design has been Verified and is ready to (4) Build.
Build
Some cures look good on paper, but are unstable or ineffective in practice. Our accelerated biosynthesis system lets us discover catastrophic failures quickly in the lab rather than painfully in the field. Rapid prototyping with billions of lives at stake is super high-pressure, but our teams handle all panicking promptly, efficiently, and according to professional best practices.
Once you have a Design, someone may Build it using the wooden blocks depicted on the Design.
Lines on the Design cards show exactly what blocks touch each other. Wherever two blocks are directly connected by lines, those two blocks must touch. Where there is no line, those two blocks must not touch. The steel tabletop represents the table you're playing on. Between 1 and 3 blocks will have lines to it; those blocks (and only those blocks) must touch the table. (You are building a tower.)
The cards only dictate what must touch or not-touch, they do not specify "on top of", nor any other spatial relation. Blocks may be played in any orientation. You cannot add extra blocks or other materials. You may only use the 6 blocks of each type provided - this is part of the challenge, particularly at larger player counts!
(See the "You Can Do It!" sheet for several examples of Building a particular Design.)
Jumping the Gun?
You are welcome to start Building a Cure before the Design is complete, but your work might be wasted - it's only once the Design is Verified that you know it won't change again (unless you decide otherwise).
Likewise, players may start Verifying a Build while it's being constructed, but must still do a final look-over after it's done to make sure nothing's been jostled out of correctness.
Work on a block structure is always done by a single player: if the Design is for a Cure (in a Lab), anyone can do it; if it's Supporting Research (in a Player Workshop), it must be the Workshop's owner. Others may assist them by handing them blocks or checking their work, but cannot touch the Build or place blocks unless a Role power explicitly allows it. Multiple players may simultaneously Build separate structures for the same Cure, in case one of them falls or takes too long. If you discover a design is too hard, you can rearrange, Waste, or add Design cards, but for Cure builds, you must then turn the Disease card back to show that the Design needs to be Verified again.
When a player has completed a Build which they believe satisfies the Design, a second player needs to Verify the Build, checking that the Build is not being touched by any player, pointing in turn at each block in the Design, and confirming that the matching block in the structure touches exactly (and only) what it has lines to. When a mistake is caught, there is no penalty, but the Builder must fix the mistake before the Build can be Verified as correct.
Cure Builds
When Verifying a Cure Build, check to make sure the Design, Lab, Disease, and (if present) Mutation was Verified and whether the Mutation affects the Build or its Verification. After the Build is Verified, that Disease is Cured! Tear down its structure.
The builder looks along the left side of the Design to see how many Data and Knowledge they earned. (Role powers may add to the total, too.) Immediately spend these on new Universal Vaccine tiles - they can't be saved, or combined with Data/Knowledge from other Builds. (Lingering over the decision is OK, but anything unspent is lost as soon as the player starts Designing, Building, or messing around with the Universal Vaccine.) Optionally, spending 1 Data will clear all Wasted Design cards, putting them in the discard. You may also use Data for certain role powers now.
The verifier waits to make sure the builder knows what they've earned, then discards all cards (Design, Disease, and Mutation) from that Lab and re-populates the Lab with a new Disease card (and Mutation, if the Lab calls for it).
Supporting Research Builds
Builds for Supporting Research work almost the same. A Workshop Design does not need to be Verified, but the Build does. Workshop bonuses give extra Data (usually one per Design card, in addition to the total on the Design cards) but no Knowledge, and there are no Disease or Mutation cards to clean up. Some Role powers explicitly reference Cure or Workshop Builds; otherwise, they apply to both types of Builds.
Note: you must entirely take apart your block structure after Verification - leaving a partial base intact for reuse is unsanitary, and contrary to workplace safety regulations.
The Universal Vaccine
Whatever terrorist cell or nihilist crackpot brewed up these plagues re-purposed a bunch of standard biolibraries - thankfully, people obsessed with destroying humanity are rarely lucid enough to do all of their own work from scratch. If we can figure out the key biological factors that all of these diseases share, we can develop a Universal Vaccine for the whole lot of them, and finally catch enough time for a coffee break.
When you earn Data/Knowledge you can spend them on Universal Vaccine tiles. The cost for each type of tile is shown on the back. When you earn a tile, flip it face up with the other tiles you have already earned. (Remember, you start with 1 Universal Vaccine tile.) These tiles represent the data and knowledge that you have accumulated from curing diseases and performing side research. If you collect enough Universal Vaccine tiles and combine them correctly before time runs out, you can use the Insight you have gained to create a Universal Vaccine and win the game!
Earned Universal Vaccine tiles form a puzzle. Players may freely arrange and rearrange them in real-time. Tiles must touch edge-to-edge, so that the colored regions line up. Wherever two tiles touch, those regions must be the same color. Some end-caps have all three colors; these are wild and match any color. Tiles may not overlap. You can have multiple groups of arranged tiles, but only one contiguous group counts toward your development of the Universal Vaccine. If a tile is discarded (due to a special effect), put it back at the bottom of its stack.
Insight Icons: Yellow (gear icon), Blue (helix icon), Red (cell icon).
The larger tiles have Insight Icons, which represent clues about what all these diseases have in common. To take advantage of that Insight, you must arrange tiles to create fully closed regions of a single color - any Insight Icons in closed regions are Captured. Open regions do not count. Having enough Captured Insight wins you the game, but even before then, it will boost some Role powers, as your improved understanding gives you an edge.
At any time, you can count up the Captured Insight icons in a single connected group of Universal Vaccine tiles, while another player verifies your count. You then call a "Team Meeting!" Everyone stops work while you announce the new Insight totals, updating the tracks on the Lab Board. (Some numbers might go down if you've reconfigured!)
If the total Insight meets or exceeds your goal, you WIN! If not, keep playing, using these new Insight numbers for all Role powers until another Team Meeting is called.
Example: arranging tiles to capture 1 Yellow, 5 Blue, and 2 Red Insight icons earns a total Insight of 8.
Roles
A role power grants you a special ability or bonus that can be used throughout the game. Many role powers grow more impactful as you capture a particular color of Insight.
Your bonus is based off of the current Insight tracks, the value set at the most recent Team Meeting. It doesn't matter if other players have pulled the Universal Vaccine tiles apart to try a new arrangement, or if they've captured lots of new Insight - until there's a new Team Meeting, you use the prior values.
Some Roles give bonuses for Player Workshop or Cure Builds. These apply only to Builds of the appropriate type: for your own Workshop or in the common Labs.
For instance, the Quality Assurance Specialist starts off earning 1 extra Data for each Cure Build they Verify, but if the blue Insight track is at 2, they would earn 2 extra Data per Cure Build verified. Their bonus for Verifying Player Workshop Builds is not boosted and is always 1.
Data costs - some Powers say, e.g., "Spend 2 Data: Do this good thing". Using such an ability requires that you spend 2 of the earned Data from a Build you do. You can only do the good thing once per Build, even if you earn enough to pay for it multiple times.
Roles marked with a player count (e.g., "3 players+") are at their best in games with that many players. You may ignore these recommendations, but realize that your Role power may be of limited or no use.
If you have a Role that lets you ignore or alter part of a Build (e.g., the Pathological Pathologist):
- This does not change the Design of the Cure at all. It just changes what you can do with blocks in order to satisfy that Design.
- Remember to tell the person Verifying your Build where and how you have broken the normal rules, so they can Verify correctly! The game includes optional Callout Rings you can use to circle blocks which have been modified or omitted.
If you have a role that modifies what the Builder earns (e.g., the Combat Endocrinologist, or Quality Assurance Specialist), remind them of the exact bonus they get after their Build is Verified.
If you don't want to play with Role powers, you don't have to - you can ignore the special abilities and just use the Workshop half of each Role. This will make the game more difficult.
Notes on Specific Roles
A32 SEMI-SENTIENT SYNTHESIS UNIT: If you must ask a rules question, do so in a robotic voice. No, you can't use The Coffee Guy's special ability; you're not human, and don't drink coffee. Also, you cannot use sign language.
OVERWORKED LAB ASSISTANT: You can't place new blocks for the player you're helping. You can be as aggressive as you want about holding blocks up or together with that hand, though. If you are allowed to use more hands than you have, you may be creative about using other body parts.
UNCONVENTIONAL THEORETICIAN: You might discard the end-cap either because you want to open up that area for a new connection, or because you need the semi-circular piece in a Build. If the piece is nabbed for a Build by accident, it's still considered a deliberate discard - your TRUE GENIUS has gone UNAPPRECIATED by these IMBECILES.
VIRAL VIRTUOSO: If 3 or more blocks end up connected by a single line (because you've omitted a block connected to 3 or more others), every pairing of those blocks must touch each other, but they don't have to do so at the same point in space or anything ridiculous like that.
Mutations
Some Diseases you are studying have Mutated, making them harder to Cure either by imposing additional constraints on the Design or making the Build harder in some fashion. A Disease usually gains a Mutation because the Lab calls for one, but they can also be added to a Disease by accumulating too many Wasted cards (see "Wasting Design Cards" above) or if called for by an Event (see Events, below). The Mutation is specific to the Disease - when the Disease Card is discarded, so is the Mutation Card.
On the bright side, many Mutations grant extra Data when the Disease is cured! (Except for a few which lower the amount of Data. Aww. Why can't there be nice Mutations which give you superpowers or something?)
Mutations can't add new requirements to an already-Verified Design - if you get such a mutation, re-draw. (The relevant Mutation Cards have a reminder to this effect.) Mutations which change the blocks used during Build don't affect the Design at all, just like Role powers which modify Builds.
Each Mutation has one of three icons in the upper corner indicating how it changes the game:
- A document icon: alters rules or constraints, but involves no physicality.
- A hand icon: involves modest physicality - usually use of hands/arms.
- A speaking/full-body icon: involves speaking aloud or full-body physicality (e.g., getting up and moving around the table).
These have no game effect; they're for your convenience, in case you want to omit certain types due to group preference or the environment you're playing in. You can customize the Mutation deck as you like.
Notes on Specific Mutations
ALTERNATING: If both players have Role Powers that apply when they're Building a Cure, yes, they can both use them.
ELUSIVE: Yes, your hand... unless the Overworked Lab Assistant is giving you a hand and both of you consent.
INVERSE and PRIONIC: Note that these give a bonus per card in the Design.
Events
You may optionally use Events in your game. These throw a variety of monkey wrenches in your way and make the game more difficult. If you do, from time to time (see the difficulty chart in the Reference section), the soundtrack will play a "red alert" sound; if you use the app the screen will also flash. When this happens all players stop whatever they're working on until someone draws an Event card, reads its title aloud, and the instructions from the Event are obeyed.
Sometimes, the instructions will flat-out require everyone's involvement. If not, the player drawing the card can decide whether to explain what needs doing, or just do it themself (and then tell everyone else, "we're good, keep going"). A few Events impose constraints on all players until the next Event or 2 Diseases have been Cured. Players can resume working as soon as the constraint is explained to everyone.
Many Events tell you to Waste 2 Design cards if they cannot be obeyed. These Wasted cards come from the top of the Design Deck.
Feel free to customize the Event deck if you like - different playgroups find different sorts of obstacles more or less fun. The Event cards are marked with the same icons as Mutations to aid in this.
Notes on Specific Events
FUNDING ARRIVES TOO LATE: If you draw cards, you may ignore hand limits.
DEAD-END TREATMENT / SCIENCE FUNDING CUT / REACTIVE MOLECULES: There might be some Designs with no eligible discards; that's OK. So long as you make at least one discard, you don't need to Waste any Design cards. If the card you discard comes from the middle of a Design, you'll either need to rearrange the other cards so all connectors match, or Waste some of those cards.
BRING YOUR CAT TO WORK DAY / FUNDAMENTAL HYPOTHESIS SHIFT: Ignore any tiles with pieces on them.
Using Events Without the App
If you can play MP3s, then you can download some 15-minute audio tracks with periodic "Event" sound effects from greyfoxgames.com/forscienceapp
If you're playing the game with a kitchen timer (or atomic clock, hourglass, water clock, etc.), you can include Events as follows:
- For "a few Events", just before Verifying a Cure Design, draw an Event.
- For "more Events", just before Verifying a Cure Design or Build, draw an Event.
- For "loads of Events", just before Verifying a Cure Design, a Lab Build, a Player Workshop Build, or calling a Team Meeting, draw an Event.
There is a reminder card that you can put in a convenient place during play to remind you to draw an Event.
Variations
Solo Play
Playing single-player involves only one rules change: you can Verify by yourself. (So you can Verify your own Builds, and don't need a second player to verify your Insight counts in the Universal Vaccine.)
Untimed Play
Some players enjoy the game's challenges but don't like doing them under time pressure. (Or prefer super-light time pressure like "let's finish before dinnertime" rather than a hard timer.)
In this variant, your goal is to play efficiently rather than quickly - your score is the number of Design cards left in the deck, with a higher score being better. If you have to reshuffle the Design deck, you lose.
Do not use Mutations marked with the timed-play-only icon - these mostly increase challenge via raw time pressure rather than making tasks more challenging.
If you wish to use Events, again, omit ones marked with the timed-play-only icon; the other Event cards have rules effects which make things harder, and a few make building more challenging in interesting ways. Also use the rules for Using Events Without the App (above).
Stacking Horizontally
Some players enjoy the puzzle of the game, but have difficulty with the dexterity required to balance blocks. You may allow these players to stack their builds horizontally on the table, as though every block had an extra optional line to the tabletop. You still have to respect all other adjacency restrictions. Since this makes Building Cures notably easier, it is most appropriate if the dexterity elements are making the game un-fun or inaccessible for some players.
Customizing Game Difficulty
There are several ways to change difficulty, listed below from least change in feel to most change in feel.
The difficulty chart in the Reference section very roughly estimates how hard some of these different options make things. It's not exact - Events, in particular, can vary a great deal - but can serve as a general guideline. Each variable can be adjusted independently to customize difficulty. So, e.g., playing with Level 2 labs (+1 difficulty) is roughly as hard as playing to 25% more Insight (+1 difficulty), and doing both together is roughly as hard as playing with a 10-minute timer (+2 difficulty). You can lower the difficulty in one way while raising it in another - this can result in very interesting games!
Use a shorter or longer timer. A shorter timer ups the time pressure without changing what you're doing at all, though it will increase the luck of the draw.
Adjust Insight goal. Instead of playing to the default Insight goal (4 + 2/player), increase the goal by 25% (5 + 2.5/player), 50% (6 + 3/player), or even higher - you'll need to get more done in the same amount of time (round up). Compared to using a shorter timer, this smooths out the luck of the draw and amps up Insight-based Role abilities in the later portions of the game. Insight goals above 20-30 aren't recommended, as the Universal Vaccine can get unwieldy and some Role Powers get ridiculous.
Use the advanced Lab tiles. These overlay the printed Labs of the same name and make Cures harder and/or lower-reward. They change up what you're doing, and are especially good if you're finding Length 3 Cures are too simple to Build. They work best if you upgrade all 3 Labs to the same Level. If you mix-and-match, use a higher Level for Alpha Lab and a lower level for Gamma Lab. Especially in larger games, high Length requirements can cause severe block shortages if you don't plan around who's building when!
If you're not sure how you'd like to increase the difficulty, start by playing to more Insight. You can, of course, mix-and-match these to reach any desired degree of difficulty!
Some Labs show a crossed-out Universal Vaccine tile on them. That means, "when you Cure this Disease, before getting new tiles, you must discard an already-earned tile of that shape." (Abstractly, it represents invalidation of previous hypotheses.) If you don't have a tile of that exact shape, instead discard a larger tile, if possible.
Impenetrable Data. Data is harder to use. Sector tiles cost 3 Data and Chevron tiles cost 5 Data. (There is a reminder card for this.) Also use the other side of the Wasted Cards board: it costs 1 Data to discard a single Wasted card.
Play with Events. Unexpected setbacks make your task more difficult. (See Events, above.)
Multiple Roles. Play with more than one Role (and thus Power and Player Workshop) per player. This will make the game easier, but is only recommended for experienced players.
Universal Mutation. At the start of the game, pick a Mutation and put it next to the Insight Tracks. Its text applies to every Disease for the entire game. (Do not apply the "waste cards" modifier.) It is not considered a Mutation in play.
This is more about changing up the play experience than providing a precisely tuned difficulty boost, but it will increase difficulty - how much depends on the Mutation. Higher-cost Mutations will on average boost it more than lower ones, but any which require specific connections in the Design can get quite tricky.
Tips and Tricks
Roles with powers that make Building easier often have difficult Workshops - these people are better suited to Building Cures than doing Supporting Research.
Curing Diseases is great for earning Knowledge - and tiles which cost Knowledge have nearly all the Insight icons. However, Workshop Builds tend to be a much more efficient source of Data, and the Data-costing tiles have most of the endcaps which let you enclose regions. In most games, a mix of both activities will be required.
As a real-time game, For Science! does not lend itself to "quarterbacking" (where one player tells everyone else to do in excruciating and unwanted detail). If someone keeps trying anyway, let them play the Overenthusiastic Team Coach or the A32 Semi-Sentient Synthesis Unit.
Also as a real-time game, it's entirely possible to forget to use your Role Power, especially during your first play or two. Don't sweat it; remembering to use it is part of the skill of the game.
Reference
Design Requirements (Disease Cards, Mutations)
| Icon | Meaning |
|---|---|
| Shape A >= Shape B | The Design as a whole must have at least as many of the first shape as of the second. (Having 0 of both is fine.) |
| 2+ [shape] | The Design as a whole must have at least the specified number of that shape among all cards. Where multiple requirements are listed, they are separate. |
| Shape - Shape (- Shape) | The displayed connection must exist in the Design, whether on a single card or across multiple cards. The connection must be direct - no other blocks in between - and if there are more than 2 blocks shown, they must be connected in the correct order. |
Mutations and Role Powers that substitute blocks do not change the Design requirements. They just change what you must do to Build that Design.
Other Iconography
| Icon | On | Meaning |
|---|---|---|
| Cross-out with a number | Events, Mutations | Waste the shown number of Design cards - move them from the top of the deck straight onto the Wasted Cards board. |
| Document / hand / speaking icon | Events, Mutations | Indicates the type of Event/Mutation. |
| Clock icon | Events, Mutations | This card is only suitable for timed play. |
| Star icon | Roles, Mutations | Roles / Mutations recommended for a player's first game. |
| Crossed-out tile shape | Lab Tiles | After curing this Disease, before spending Data/Knowledge, you must discard an already-earned Universal Vaccine of the specified shape (returning it to the bottom of its stack). If you have none of that shape, you must discard a larger one, if possible. |
Difficulty Chart
| Difficulty Change | Labs | Insight Goal | Timer | Events |
|---|---|---|---|---|
| -1 | Lvl 0 | -25% (3 + 1.5/player) | 20 min | - |
| No change | As printed | Normal (4 + 2/player) | 15 min | - |
| +1 | Lvl 2 | +25% (5 + 2.5/player) | 12 min | 1 per 3-5 min |
| +2 | Lvl 3 | +50% (6 + 3/player) | 10 min | 1 per 2-3 min |
| +3 | Lvl 4 | +75% (7 + 3.5/player) | 8.5 min |
Default Insight Required to Win
| Players | Captured Insight |
|---|---|
| 1p | 6 |
| 2p | 8 |
| 3p | 10 |
| 4p | 12 |
| 5p | 14 |
| 6p | 16 |