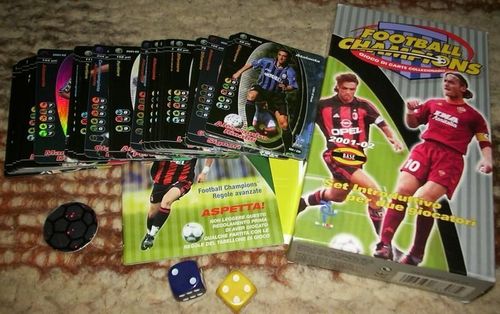
Football Champions
Football Champions Rulebook
Table of Contents
Table of Contents
- How to Use This Rulebook
- Moving Players
- Play Now!
- Action Cards
- Complete Rules
- What Do You Need to Play?
- Key to Ability Symbols
- The Pitch: Lines, Wings and Sections
- Starting the Game
- Kickoff
- Do These Steps Each Turn
- Step 1: Attacking Team Tries to Move
- Moving a Player With Action Card Arrows
- Passing the Ball
- Step 2: Defending Team Tries to Move
- Step 3: Defending Team Tries to Take the Ball
- Frequently Asked Questions
- Glossary
How to Use This Rulebook
Once you've learned the rules on the playmat, you may start adding some of the rules from this book to the game.
The first 2 rules you can learn are how to move your Players and how to use the Action cards. Of course, if you like the game the way it is now, you don't have to add anything else. Just do whatever is the most fun for you.
After "Moving Players" and "Action Cards" come the Complete Rules of the game. The Complete Rules cover everything you've learned so far, plus a few other cool things like building your own teams, taking penalties, and using Skill and Header.
Do These Steps Each Turn:
- Step 1: Attacking team tries to move. Attacking team passes.
- Step 2: Defending team tries to move.
- Step 3: Defending team tries to take the ball.
- Step 4: Take a shot?
Moving Players
The first thing you'll learn is how to roll the dice to try to move your Players. Follow the steps below every turn.
Step 1. Attacking Team Tries to Move a Player
The attacking team rolls 1 of the dice.
-
1–3: You can't move a Player this turn but you still get to pass the ball to another Player. Make the pass the same way you made passes using the rules on the playmat.
When you play using Action cards, you get the chance to use one of them to move a Player each time you roll a 1, 2 or 3. But, for now, you can't move anybody.
-
4–5: You may move 1 of your Players who doesn't have the ball. Your Player may move 1 section of the pitch in any direction. After you move 1 of your Players, pass the ball.
-
6: Rolling a 6 is good. You get a choice:
- EITHER move 2 Players who don't have the ball. Move each of those Players 1 section of the pitch. Then make a pass.
- OR Dribble: Move the Player who has the ball! You may move that Player 1 section of the pitch in any direction. Important: You don't get to pass after you dribble.
Don't crowd the sections! You can't have 3 or more of your team's Players in 1 section of the pitch. 1 or 2 is okay. 3 is too many.
Step 2. Defending Team Tries to Move a Player
The defending team rolls 1 of the dice to find out if it may move a Player this turn.
- 1–3: You can't move a Player this turn. Go to Step 3 and make a challenge.
- 4–5: If you want to, you may move 1 of your Players 1 section of the pitch. Then go to Step 3.
- 6: Move 2 of your Players 1 section of the pitch each. Then go to Step 3.
Just like the attacking team, when you play using Action cards, you get the chance to use one of them to move a Player each time you roll a 1, 2 or 3. But, for now, you can't move anybody.
Step 3. Defending Team Tries to Take the Ball
After a pass or dribble, challenge for the ball just like you did using the rules on the playmat.
Step 4. Shoot on Goal?
Shooting on goal works the same as it does in the playmat rules.
Remember that you may shoot only immediately after you've won a challenge in your Forward Line.
Do These Steps Each Turn
- Step 1: Attacking team tries to move. Attacking team passes.
- Step 2: Defending team tries to move.
- Step 3: Defending team tries to take the ball.
- Step 4: Take a shot?
Two Reasons Why You Want to Move Your Players
Two-on-one bonus: If you have 2 Players in a section where there is a challenge for the ball, and the other team has only 1 Player there, you get a +1 bonus to your challenge roll.
Attacking team wins without rolling: If the defending team doesn't have at least 1 Player in the same section as the Player with the ball, the attacking team wins the challenge automatically.
Play Now!
- Go ahead and play a few games using these movement rules combined with the rules you already learned using the playmat.
- After you've played a few games with movement, you may read the next section of the rules to learn about using the Action cards.
Action Cards
Action cards may give your Player a bonus in a challenge, make a shot better, or even give a Player a Yellow Card.
When you're ready to use Action cards, each team should take an Action deck. (The blue team takes the blue team deck. The yellow team takes the yellow team deck.)
An Action deck has 25 cards. Shuffle your deck and put it in the spot marked "Deck" on your side of the playmat.
- At the start of the game, each team draws 5 Action cards. Put your Action cards in your hand and take a look at them.
- At the end of every turn, each team draws 2 more Action cards. (Draw 2 cards no matter how many Action cards you used — or didn't use — last turn!)
Make sure you play only Action cards that may help you in the challenge. So, if you're in a Tackle challenge, don't play an Action card that gives you +1 Pace. It won't help you! Save that one for later. And if you don't want to play any Action cards, you don't have to.
Once the defending team picks the type of challenge (either Pace or Tackle), it's time to play Action cards!
- Starting with the attacking team, take turns playing 1 Action card each from your hand. If one team decides not to play an Action card, the other team may still play a card. (If both teams decide not to play cards one after the other, it's time to roll dice.)
- When both teams pass in a row, roll the dice. Add your roll and your Action card bonuses to your Player's ability.
- At the end of the challenge, bonuses your Player got from Action cards go away. Put the Action cards you used in your discard pile.
- To play an Action card, put it on the playmat. (Example shown in the manual: the Accelerate card, "Give a Player +1 Pace," played on a Player, illustrated as "9 + 1 Pace.")
Using Action Cards in a Challenge
- The defending team picks the type of challenge (Pace or Tackle).
- Starting with the attacking team, teams take turns playing Action cards.
- When both teams are done playing Action cards, each team rolls 1 of the dice. Add your roll and your Action card bonuses to your Player's ability.
Now try playing a few games with Action cards!
Complete Rules
Here are the complete rules for the Football Champions™ trading card game. You may look through them for more information about rules you already know. You may also find out things like how to use arrows on Action cards and how to take penalties.
If you want to learn how to build your own Football Champions™ fantasy football team, turn to page 29. When you're done, come back here to learn how to play.
You may use Action cards for things like making your Player better in a challenge, changing the type of challenge and helping to move or pass the ball.
There are red, blue, and green Action cards. You may use red Action cards only when you're on the attack. Use blue Action cards when you're on defence. You may use green Action cards regardless of whether or not you have the ball.
What Do You Need to Play?
First, you need somebody to play against. Each of you needs a team of 11 Players (and substitutes, if you're using them) and a 25-card Action deck. You also need 2 regular 6-sided dice, Yellow and Red Cards, and the ball marker. You'll probably want a playmat too.
Key to Ability Symbols
Each Player card lists abilities. The abilities are:
- Pace: A Player's ability to win the ball by running around his opponents. He wins possession without hitting the other team.
- Tackle: A Player's ability to win the ball by making more physical contact with his opponents.
- Shot: A Player's ability to send the ball into the back of the net.
- Skill: A Player's creativity, touch on the ball and understanding of the game.
- Header: A Player's ability to win the ball in the air and head the ball on goal.
- Attack +1: +1 in all challenges when the Player has the ball.
- Defence +1: +1 in all challenges when the Player is trying to take the ball.
- Left Side: +1 in all challenges when the Player is on the left wing.
- Right Side: +1 in all challenges when the Player is on the right wing.
- Pass +1: When a Player with the Pass +1 ability makes a pass, the Player receiving that pass gets +1 in the challenge for the ball that turn.
- Run arrows: A Player with a run arrow is more mobile than other Players. He can more easily move in the direction or directions shown by his run arrows. When you play an Action card to move a Player who has a run arrow, you can always choose to move in the direction of one of that Player's run arrows instead of the direction of the arrows shown on the Action card.
Goalkeeper Abilities
- Save: The Goalkeeper's ability to keep the ball out of the goal during play.
- Penalty Save: The Goalkeeper's ability to save penalties. Use this ability only when using advanced rules.
- Skill: Use this ability only when using advanced rules. Sometimes a Player has an extra ability on his card. If one of your Players has an extra ability, don't forget to use it! If you've got a Player with the Left Side ability, he gets +1 when he's playing on the left wing. So make sure he's playing on the left wing!
The Pitch: Lines, Wings and Sections
The pitch has 9 sections. The pitch has three different lines, each containing three sections. The pitch has two wings — a right wing and a left wing — with a centre section between the two wings.
Attacking team: This is the team that had the ball at the start of the current turn.
Defending team: This is the team that didn't have the ball at the start of the current turn.
Starting the Game
-
Put the playmat on the table between you and the other team now. Ignore this if you don't have a playmat.
-
Each team takes 1 of the dice, a set of Player cards and a 25-card Action deck. Each team shuffles its Action deck. Put Action decks where the playmat says "Deck."
-
Flip a coin to decide who gets the ball and starts as the attacking team.
-
Each team puts its Players on the playmat.
- First, put the Goalkeepers where the playmat says "Goalkeeper."
- Then both Players put their Forwards on the mat.
- Then both Players put their Defenders on the mat.
- Then the attacking team puts its Midfielders on the mat.
- Then the defending team puts its Midfielders on the mat.
If you've got a Player who may play in more than one position, you may set him up in any of those positions.
-
Each team draws 5 cards. Take your cards from the top of your Action deck. Hold them in your hand. Don't let the other team see them!
-
Kickoff: The attacking team places the ball on a Player in its Midfield Line. (The Player doesn't have to be in the centre of the Midfield Line. You could give the ball to a Player in a wing of the Midfield Line.)
Kickoff
Challenge at Kickoff: The defending team tries to win the ball by challenging the Midfield Player the attacking team picked to kickoff. The kickoff works just like a normal challenge. The defending team picks a Player in the same section as the Player with the ball. The defending team chooses Pace or Tackle.
Just like in real football, a kickoff happens at the beginning of each half and after each goal. Kickoffs after goals also give you the chance to make substitutions from your bench. See page 26 to find out how to make substitutions.
Once you finish the kickoff, follow these steps to play:
Do These Steps Each Turn
- Step 1: Attacking team tries to move. Attacking team passes.
- Step 2: Defending team tries to move.
- Step 3: Defending team tries to take the ball.
- Step 4: Take a shot?
- Step 5: Each team draws 2 cards.
When a Player in the Forward Line wins a challenge, he may immediately take a shot on goal. This happens before drawing cards or starting the next turn.
Step 1: Attacking Team Tries to Move
When it is your turn to move you may EITHER roll 1 of the dice and try to move a Player OR play an Action card for its arrow to try to move a Player for free. If you roll a 1, 2 or 3 when you roll 1 of the dice, you still get the chance to use an Action card's arrow to move the Player instead.
If you roll 1 of the dice to try to move a Player:
- 1–3: Your Player can't move for free this turn! If you want to move a Player this turn, you must use an Action card's arrow to do so. Pass the ball. Then go to Step 2.
- 4–5: Your Player may move this turn! Move a Player who doesn't have the ball 1 section forward, backwards, sideways or diagonally on the pitch. Pass the ball. Then go to Step 2.
- 6: You may move 2 Players who don't have the ball 1 section of the pitch each OR you may move the Player with the ball 1 section of the pitch. If you move the Player with the ball, you don't pass this turn. Go to Step 2.
If you roll a 1, 2 or 3, you may still use an arrow in the upper right corner of an Action card to move a Player. You may move the Player only in the direction of 1 of the arrows on the Action card. Then put that Action card in the discard pile. If the Action card has an effect for Players in challenges, ignore that effect when using it for its arrow. You can't use an Action card to move the Player with the ball.
It's usually a good idea to try to roll 1 of the dice and get a free move instead of using an Action card's arrow to move a Player. But sometimes you may have an Action card that has good effects on the game when you use it for its arrow to move a Player. If you want to play such a card, you don't have to roll 1 of the dice to try to move. Just play the card for its arrow.
Some Action cards have effects that happen when you "use them for their arrows." Be sure to check your Action card to see if it has one of these effects. If it does have one... use it!
For example, if you have an Action card with arrows like this ... [arrow diagram omitted] ... and you want to move a Player in the centre of the Midfield Line, you could move him EITHER: [arrow diagram omitted] OR [arrow diagram omitted] OR [arrow diagram omitted].
The pitch is divided into three lines — your Defensive Line, your Midfield Line and your Forward Line. Each line is divided into left wing, centre and right wing.
- You can't move a Player from the Defensive Line to the Forward Line in 1 move.
- You can't move a Player from the left wing to the right wing or vice versa in 1 move.
- You can't move the Player with the ball, unless you roll a 6 on your movement roll.
Some Players have run arrows. Players with run arrows move better in the directions shown by their arrows. Instead of rolling 1 of the dice to move a Player, you can make a Player with a run arrow move in the direction of his run arrow by discarding any Action card, no matter what arrows appear on the Action card. If you want to move the Player in a direction that's not shown on his run arrow, you have to either roll 1 of the dice and take your chances or use an Action card with an arrow showing the direction you want the Player to move.
Moving a Player With Action Card Arrows
- Like with a regular move, you may use an arrow only to move a Player who doesn't have the ball 1 section of the pitch.
- You may move the Player only in the same direction as 1 of the arrows on the Action card you use.
Passing the Ball
In the complete game, there are 2 ways to pass the ball — with and without arrows.
How to Pass Without an Action Card Arrow
Just take the ball from the Player who has it now and put it on one of your other Players. You can't pass to a Player who is more than 1 section of the pitch away from the passing Player.
How to Pass With an Action Card Arrow
Passing with an arrow works a lot like moving a Player with an arrow. Let's say you play an Action card for its arrow. It has an arrow on it pointing in the direction you want to pass the ball. The Player you pass to gets +2 on his roll in the challenge this turn.
After you give your Player +2, put the Action card in the discard pile. If the Action card has an effect for Players in challenges, ignore that effect when using it for its arrow.
Passing Sideways and Backwards
If you pass the ball sideways or backwards, you get another +1 in the challenge.
Passing for a Header!
If your Player is in your Forward Line and passes sideways, the attacking team may choose to make this a Header challenge. This works just like a normal challenge but uses both Players' Header ability. The attacking team may choose not to have a Header challenge in this situation. In that case, the defending team picks Pace or Tackle like normal.
So, if you're on the attack and passing sideways to a man who's good with his head, you might want to do a Header challenge. This is about the only time the attacker gets to pick the kind of challenge. Both Players have to use their Header, so if your man's got a better "head for the game," use it!
Where You May Pass the Ball
You may pass to any Player within 1 section of the pitch from the Player with the ball. So:
- You can't pass from the Defensive Line to the Forward Line or vice versa.
- You can't pass from the far left wing to the far right wing or vice versa, unless you use the optional rule below.
Passing From One Wing to the Opposite Wing
If you want to pass the ball from the left wing to the right wing, or from the right wing to the left wing, you may use the following optional rule: To pass from one wing to the opposite wing, play an Action card for its arrow as if you were passing to a section in the centre of the pitch. Then say that you are instead passing to a Player in the far wing. If you do this, you no longer get +2 in the challenge for using an Action card to pass.
Step 2: Defending Team Tries to Move
This works just like the attacking team move.
When it's your turn to move, you may EITHER roll 1 of the dice to try to get a free move OR play an Action card for its arrow to move a Player.
If you roll 1 of the dice to try to move a Player:
- 1–3: Your Player can't move for free this turn! If you want to move a Player this turn, you must use an Action card's arrow to do so, as explained above for the attacking team. Then go to Step 3.
- 4–5: Your Player may move this turn! Move your Player 1 section forward, backwards, sideways or diagonally on the pitch. Go to Step 3.
- 6: You may move 2 Players 1 section of the pitch each. Go to Step 3.
If you rolled a 1, 2 or 3, you may use an arrow in the upper right corner of an Action card to move a Player. If you do this, you don't roll 1 of the dice to move, but you may move the Player only in the direction of 1 of the arrows on the Action card. Then discard that Action card. If the Action card has an effect for Players in challenges, ignore that effect when using it for its arrow. Go to Step 3 when you're done.
Step 3: Defending Team Tries to Take the Ball
- The defending team picks the type of challenge: Pace or Tackle.
- Play Action cards. Starting with the attacking team, take turns playing Action cards that help you in the challenge. Keep taking turns until both teams are done playing cards.
- Roll the dice!
- Pace challenge: Each team adds its Player's Pace, Action card bonuses, other bonuses and die roll together. If the attacking Player wins, he gets the ball. If the defending Player wins, he gets the ball. Reroll if there's a tie.
- Tackle challenge: Each team adds its Player's Tackle, Action card bonuses, other bonuses and die roll together. If the attacking Player wins, he gets the ball. If the defending Player wins, he gets the ball. Reroll if there's a tie.
If there's no defending Player in the same section as the attacking Player in a challenge, then the attacking team wins the challenge.
Action Cards — Special Effects
Most Action cards give bonuses to Players in challenges. But some Action cards do other things, like "Time 2."
The first time a card with Time 2 is played in a challenge, both teams must discard 2 cards from the tops of their decks. Ignore the Time 2 effect on any other Action cards played in that challenge.
Time 2 works only if the Action card is played for its ability — not if it is played for its arrow.
Yellow Cards
The only way to give a Player a Yellow Card is to play an Action card that says it may give a Player a Yellow Card. Just as in real football, if a Player gets 2 Yellow Cards he gets a Red Card and is out of the game. A Player with a Red Card can't be substituted (see "Substitutions" on page 26).
If one of the defending team's Players gets a Yellow Card in his own Defensive Line, a penalty kick may happen. If the roll that caused the Yellow Card was:
- Even (2, 4 or 6): No penalty kick.
- Odd (1, 3 or 5): Penalty kick! (See "Penalties" on page 28.)
Step 4: Take a Shot?
You may take a shot on goal only from your Forward Line, unless you play an Action card that lets you shoot from the Midfield Line or your Defensive Line.
To take a shot on goal:
-
Use an arrow? If you use an arrow, you get +2 in the Shot challenge. The arrow you use has to point from your Player to the goal.
- If your Player is in the left wing: You need this arrow to get +2.
- If your Player is in the centre: You need this arrow to get +2.
- If your Player is in the right wing: You need this arrow to get +2.
-
Add bonuses for Action cards. Starting with the attacking team, both teams may play Action cards until both teams pass.
-
The challenge is the attacking Player's Shot or Header versus the Goalkeeper's Save. The attacking team must use its Player's Shot unless the ball was just passed sideways. In that case, the Player may instead use his Header.
-
Roll the dice and add all bonuses. If the attacking Player wins, it's a GOAL! If the Goalkeeper wins, he catches the ball. If there's a tie, a corner kick happens (see page 24).
-
If the Goalkeeper catches the ball, he may EITHER:
- Immediately give it to a Player in his Defensive Line. His team starts a new turn as the attacking team now.
OR
- Wait and kick it up to a Player in the Midfield Line. If the Goalkeeper kicks the ball up to a Player in the Midfield Line, he does this instead of his team's pass next turn. He shouldn't kick the ball until it's time for the next turn's pass. The challenge for that turn is now a Header challenge.
-
After a goal, all Players must return to their starting lines. So, set up your Players for a kickoff.
If you've got Midfielders with better Header than your opponent's, think about having your Goalkeeper kick the ball to the Midfield Line after he saves a shot. That way, you control the type of challenge!
Step 5: Each Team Draws 2 Cards
Both teams draw 2 cards from the tops of their Action decks and put the cards in their hands. If you have no more cards in your deck to draw, this half of the game is over. (If you're using Injury Time, you start Injury Time when you can't draw cards. See "Injury Time & Halftime" and "Ending the Game" on pages 26 & 27.)
Draw 2 cards even if you didn't use any Action cards in the last challenge. And even if you used 1, 2, 3, 4 or more Action cards, you still draw only 2 cards each turn.
Corner Kicks
If there's a tie on a shot attempt, the attacking team gets a corner kick. Instead of starting like a normal turn, the next turn starts with the ball out of play waiting to be kicked in.
To do a corner kick, follow these steps:
-
Attacking team tries to move (just like normal, but no dribbling).
-
Defending team tries to move (just like normal).
-
The attacking team rolls 1 of the dice to pick the section of its Forward Line in which the challenge will take place:
- 1–2: The attacking team's left wing.
- 3–4: The centre of the pitch.
- 5–6: The attacking team's right wing.
-
EITHER
- The attacking team gives the ball to a Player in the section determined from the roll above. Skip to number 5 below.
OR
- If the attacking team has no Players in that section, the defending team's Player in that section gets the ball — since there is no attacking team Player to challenge for the ball. The defending team's Player keeps the ball. His team starts a new turn as the attacking team. (Ignore number 5 below.)
OR
- If neither team has a Player in that section, the Goalkeeper gets the ball. His team starts a new turn as the attacking team. (Ignore number 5 below.)
-
Time for a challenge?
-
If an attacking team Player has the ball and the defending team has a Player in the same section as the Player with the ball, it's time for a challenge. First, the defending team chooses which Player challenges for the ball. Then, instead of letting the defending team choose the type of challenge, you roll 1 of the dice to find out what type of challenge results from the corner kick!
-
Corner kicks are unpredictable. That's why you roll to see where the challenge takes place and what type of challenge it will be. Of course, you may choose whether or not you want to use the rules for corner kicks in a game, just like with all the advanced rules. It all depends on how you like to play. Just make sure you decide whether you're using them or not before you take your first shot on goal. If you don't want to do corner kicks, then do a reroll if you are tied instead.
Substitutions
Each team may make 3 Player substitutions per game.
You may substitute Players only either at the start of a corner kick, before the attacking team has moved a Player, or just before a kickoff. The attacking team gets the first choice to make a substitution, followed by the defending team. After both teams have decided not to make any more substitutions, carry on with the game.
To make a substitution, just take 1 Player off the pitch and put his replacement in an open position on the new Player's position line. So, if you're putting a Defender in the game, he must start on your Defensive Line.
Your substitutes can't be better than your starting Players, but you might want to make a substitution to change your lineup on the pitch or to take advantage of a weak Player on the opposing team. You might also want to sub out a Player with a Yellow Card before he picks up a Red Card.
Injury Time & Half Time
When you both draw the last cards from your Action decks before half time, Injury Time begins. Whenever it's time to draw 2 cards and you can't, the defending team rolls 1 of the dice:
- 1–3: Keep playing.
- 4–6: It's halftime.
At half time, both teams may replace cards in their decks with cards from their sideboards. (You may find out about sideboards in "Team Building & Action Card Selection.") If you don't have a sideboard, just use your starting deck.
After sideboarding, shuffle your decks, return all Players to their starting lines, draw 5 cards each and begin the second half. The team that was the defending team at the start of the first half is now the attacking team.
Ending the Game
You may play either a short game or a full game. A short game ends after the first half. A full game ends after you have played 2 halves, by going through your Action decks twice.
When the teams draw their last 2 cards in the second half, Injury Time begins again. Whenever it's time to draw 2 cards and you can't, the defending team rolls 1 of the dice:
- 1–3: Keep playing.
- 4–6: The game's over.
Golden Goal Extra Time
If the game ends with a tie score, you may play 1 Golden Goal extra time. (You may also skip right to the penalty kick if you both decide you want to do so.)
To do a Golden Goal extra time:
- Each team shuffles its Action deck.
- Each team counts 15 Action cards (without looking!). Those cards become the Action decks.
- Put your other 10 Action cards aside.
- Both teams draw 5 cards and put them in their hands.
- Flip a coin to see who starts as the attacking team.
- Place your Players and do a kickoff just like in a normal game.
- Keep taking turns as usual.
If a team scores, the game ends immediately and that team wins!
If the Golden Goal extra time ends scoreless, take penalties to decide who wins the game.
Penalties
If the Golden Goal extra time ends without a goal, you may take penalties to try to break the tie! Penalty kicks may also happen when a Player gets a Yellow Card in his Defensive Line.
- To break a tie with a penalty kick, each team chooses 5 Players to shoot on goal.
- Flip a coin to see who takes the first shot. You can't use Action cards during penalty kicks.
- Starting with the team that won the coin toss, each team takes turns taking a penalty kick.
- First, the defending team picks a direction the Goalkeeper will go to try to block the shot. Turn 1 of the dice to show the direction you choose, but use a card to hide it from the other team. If you turn it to:
- 1 or 2: Your Goalkeeper goes to your left.
- 3 or 4: Your Goalkeeper stays in the centre of the goal.
- 5 or 6: Your Goalkeeper goes to your right.
- The attacking team then points in the direction his or her Player is shooting: right forward, left forward, or straight ahead. Then the defending team reveals the number on the die to show which direction the Goalkeeper went to make the save.
- If the Goalkeeper's direction doesn't match the shooting Player's direction, it's in the back of the net!
- If the Goalkeeper's direction matches the shooting Player's direction, the Goalkeeper has a chance of stopping the shot. The Goalkeeper adds his Penalty Save ability and his normal Save ability to a die roll (Save + Penalty Save + Roll). The shooting Player rolls 1 of the dice and adds the result to his Shot ability (Shot + Roll). If the shooting Player gets a higher total, it's a goal. If the Goalkeeper ties or gets a higher result, the penalty is saved. Neither Player may play Action cards.
- First, the defending team picks a direction the Goalkeeper will go to try to block the shot. Turn 1 of the dice to show the direction you choose, but use a card to hide it from the other team. If you turn it to:
- If the game is still tied after all 5 Players on each side take a shot, keep going, taking turns shooting until one team scores and the other one doesn't. (Both sides must have the same number of kicks.) Remember, no Player may take a second penalty kick until all Players on a team have taken a shot. (This even includes the Goalkeeper. To shoot a penalty with a Goalkeeper, use the Goalkeeper's Skill as his Shot ability!)
Team Building & Action Card Selection
Now that you have started playing and have an idea of which Players are better than others, you may add fantasy football-style team selection to your games with your friends.
Choosing Your Starting Eleven
Before each game, select 11 starting Players who have no more than 1,100 total points. Select your Players from the 2 different groups described below. Important: You can't spend more than 600 points on Players from one group.
- Group 1: Forwards and Midfielders (no more than 6 Forwards, and no more than 6 Midfielders).
- Group 2: Defenders and a Goalkeeper (no more than 6 Defenders, and always 1 Goalkeeper).
For example, if you spend 570 points on Forwards and Midfielders, you have only 530 points to spend on Defenders and a Goalkeeper. Even if you decide to spend only 495 points on your Forwards and Midfielders, you can still spend only 600 points on Defenders and a Goalkeeper.
Most teams have something like 2 or 3 Forwards, 3 or 4 Midfielders, and 3 to 5 Defenders. Just remember that you can have only 11 Players on the pitch, counting your Goalkeeper. Also remember that if you don't have at least 3 Midfielders to cover all 3 sections of the Midfield Line, the other team will win a free challenge against you every time it does a kickoff.
Choosing Your Bench
You may have up to 5 Players on your bench. Only 3 of them may be subbed in during one game (see "Substitutions" on page 26). No Player on your bench may cost more than the lowest-cost starting Player on your team.
Choosing Your Action Card Deck & Second-Half Sideboard
- Your Action card deck must total 25 cards.
- You can't have more than 2 copies of any 1 card in your deck.
- If you want, you may choose 6 other Action cards for your second-half sideboard. At half time, if you want, you may take out up to 6 cards from your first-half deck and replace them with cards from your second-half sideboard. You still can't have more than 2 copies of any 1 card in your deck, though.
Frequently Asked Questions
May I play the game without the playmat?
Yes. The simplest way of creating the nine sections of the pitch without using a playmat is to lay nine extra cards face down on the table. Instead of putting your Players "into" a section, any Player who is touching a particular face-down card is in that section. A Player may touch only 1 section-card at a time, so a Player is in only one section at a time, just like with the game played on the playmat.
Some Action cards say "Roll a die." Does this mean I should roll 1 of the dice?
Yes.
It's my turn to move a Player. What do I do?
- First, you roll 1 of the dice to see if you can move a Player. You might even roll a 6 and get to move 2 Players.
- If you rolled a 1, 2 or 3 and couldn't move a Player, you may use an Action card's arrow to move a Player (without the ball) one section in the direction of that arrow. (A Player with a run arrow can move 1 section in the direction of his run arrow, even if the Action card you've discarded doesn't show that arrow.)
Is "dribbling" the same thing as "moving the Player who has the ball"?
Yes.
How do I dribble?
The only way to move the Player who has the ball is to roll a 6 when you roll 1 of the dice to try to move. You can't dribble by playing an Action card for its arrow. You can't dribble using a Player's run arrow.
If I use an Action card arrow to move a Player, may I also move a Player with a run arrow?
No, because you have to discard an Action card to move the Player who has the run arrow. You get to move only 1 Player using the Action card move.
If I roll a 6 when I'm trying to move my Players, may I move the same Player twice?
No, you may either move the Player who has the ball (if you're the attacking team) or move 2 of your other Players 1 section each.
What happens if we tie when we're rolling for a challenge?
Reroll. But remember, you reroll only if your totals are the same after adding up Player abilities, Action card bonuses and the die roll.
I just won a challenge in my Forward Line after passing from a Player in my Midfield Line. May I use Header to take a shot on goal?
Not unless you play an Action card that lets you use your Header. You may normally use Header to shoot on goal only if you just made a sideways pass to the shooting Player or after winning a corner-kick challenge.
What happens if I move a Player into a section that already has 2 of my Players in it?
You can't move your Player into a section that already has 2 of your Players in it. If you want to move a Player into a section that already has 2 Players, you need to move 1 of the 2 Players out of the way first for this move, then move the other Player into that section next time you get to move.
What about a Player who has Skill 7 and the Left Side ability? If he is on the left wing of the pitch, is his Skill considered to be 8?
Yes. As long as the Player with the Left Side ability is in one of the 3 left wing sections of the pitch, all his abilities are 1 higher than printed on his card. The same is true for Players who have Attack +1 and the ball, or Defence +1 when they challenge for the ball.
May I use more than 1 Action card for its arrow when I'm passing?
No. You may give your Player only +2 using the Action card's arrow. You can't use another Action card for its arrow for each pass.
If I use an Action card for its arrow, may I also use it to help me in the challenge?
No. The only time you get to use an Action card for its arrow and for its ability is if the Action card says "When you play this card for its arrow ..." In that case, do whatever the card says to do when you play it for its arrow.
Why can't I shoot from the Midfield Line, the way some Players do in real life?
Most players who shoot from midfield don't score, but if you really want to try it, use the Action card called Long Shot!
If a Player in my opponent's Defensive Line has the ball and loses it in a challenge to one of my Players in my Forward Line, may I immediately shoot on goal?
Yes. Unless your opponent chooses to pass backwards or sideways, or to dribble in place, this probably won't happen.
My opponent plays an Action card with "Time 2" on it, and then I play an Action card with "Time 2" on it in the same challenge. Do we each discard 2 cards or 4 cards?
Time 2 makes teams discard only the first time it comes up in a challenge. So you discard only 2 cards each.
My Player has Tackle 7. Say I play an Action card that gives him +1 Tackle. Is his Tackle considered to be 8 for the rest of the challenge?
No, bonuses given by Action cards and by arrows used for passes affect only the final roll. They don't change the Player's abilities. All ability checks called for by different Action cards use the abilities printed on the Player's card.
May I pass the ball farther than 1 section of the pitch? In real life, a lot of Players may hit the ball from the Defensive Line to the Forward Line.
You may try to pass the ball from your Defensive Line to your Forward Line only if you play an Action card that lets you do that (like Long Pass). You may pass from one wing to the opposite wing if you play using the rule for passing between wings on page 19.
If I want to use the Action card Long Pass to pass just 1 section of the pitch instead of 2 sections, do I still have to roll and risk giving the ball to the opposing Goalkeeper?
Yes, even if you want to use Long Pass's forward arrow to make a 1-section pass, you still risk hoofing the ball up to the opposing Goalkeeper.
In Injury Time, do we have to roll to see if the game ends every time someone plays a "Time 2" card?
You have to roll every time you try to draw cards and can't ... but because Time 2 cards make you draw and discard 2 cards only the first time they're played in a challenge, only the first Time 2 card played in a challenge makes you roll to see if the game ends.
If I have more questions about the game, where should I go to find the answers?
Try the postal addresses, e-mail addresses, phone numbers and website listed on the last couple of pages of this rulebook.
Glossary
ability: A statistic on a Player card. The abilities are: Pace, Tackle, Shot, Skill, Header, Attack +1, Defence +1, Left Side, Right Side, run arrows, Save, and Penalty Save.
Action cards: Cards you use to change challenges and help your Players move and pass.
Action deck: A deck of 25 Action cards.
attacking team: The team that had possession of the ball at the beginning of the current turn.
ball marker: Any marker you use to represent the ball.
card number: The number in the lower right corner of a card.
challenge: A contest between 2 Players for the ball.
cost: The number of points given at the top of a Player card. If you build your own team, you select 11 starting Players who have no more than 1,100 total points. Your starting 11 Players fall into two categories, Forwards/Midfielders and Defenders/Goalkeeper. You can't spend more than 600 points on either of these two categories of Players and no more than 1,100 points total.
defending team: The team that didn't have possession of the ball at the beginning of the current turn.
full game: A game that ends after you have played 2 halves, by going through your Action decks twice.
Player cards: Cards that represent the players on your team.
playmat: The large, fold-out paper by which you learn to play the game. It includes a pitch and basic rules.
run arrow: An arrow on a Player card that allows the Player to move in specific directions easier than other Players.
section of the pitch: Forward Line, Midfield Line or Defensive Line.
short game: A game that ends after just 1 half when both teams have drawn all their cards from their Action decks and the Injury Time die roll ends the half.
sideboard: Action cards that you may exchange at half time for other cards in your Action deck. Your sideboard consists of 6 Action cards.
two-on-one bonus: A +1 bonus you get to your challenge die roll if you have 2 Players in a section where there is a challenge for the ball and the other team has only 1 Player there.
type of challenge: Pace, Tackle, Shot, Skill, Header, Save.