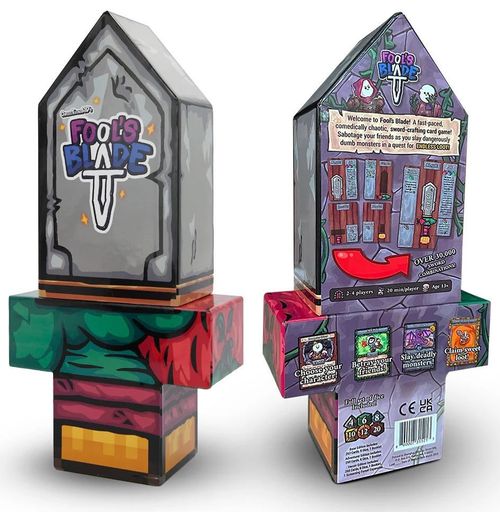
Fool's Blade
Fool's Blade Rulebook
Table of Contents
Table of Contents
Setup
We recommend laying the decks on your table with room for their respective trash piles. All Boss Cards remain in the game box until they are gathered by an Approach Card. (See: "Boss Encounters")
-
Each player takes turns rolling the d20. The player with the highest roll goes first, and turns proceed going clockwise around the table from there. If any players tie, resolve with a re-roll between any/all tied players.
-
Each player, starting with the player who goes last, and going counterclockwise around the table, chooses a Class Card to start with.
-
Shuffle all decks separately. Take the Anvil Deck, and reveal cards from the top until you reveal a Handle; pass the revealed Handle to the player who goes first, then repeat for each player in clockwise order. Reshuffle the Anvil Deck. All players must have a Handle before the game begins.
-
Each player, starting with the first player and going clockwise around the table, draws 1 card each from the Tavern, Anvil, and Quest decks. It is now the first player's turn!
Class Cards
At the start of the game, all Class Cards are laid out for the players to choose from. Each player gets to choose a single Class Card to play as, placing it in front of them and applying its effects for the duration of the game. Class Cards represent a character archetype, and each one gives the player a unique ability and playstyle.
Some classes have passive, constant-effect abilities that are always active. Others have situational abilities that you must activate. Follow the instructions on your Class Card, and as a general rule, you may use your Class Ability at any time unless stated otherwise. Choose wisely!
Turn Overview
-
Tavern. Draw a Tavern Card. All players may play Tavern Cards during any player's Tavern Phase.
-
Assembly. Use Weapon Parts from your Hand or Stash to assemble or modify your weapon. 2a) Equip Gear. Equip any number of Gear Cards from your hand by laying them face-up on the table.
-
Choose your destination. Visit the Forge, Go Questing, or Go Monster Hunting.
-
Discard. If you end your turn with more cards than the Hand Size Limit (8 by default), discard cards until you are within your current limit.
Taking a Turn
Tavern Phase
At the start of each turn, all players are gathered in the Tavern. During this phase, Draw 1 card from the Tavern Deck. During the Tavern Phase, you may play as many Tavern Cards as you desire (but other players may also play them during your turn!).
Assembly
Play any combination of Weapon Parts from your Hand or Stash face-up on the table to craft or modify your Weapon. By mixing and matching various parts, you create your one-of-a-kind weapon.
Equip your gear! Gear cards have various active and passive effects. You may lay them face-up on the table to add them to your Gear Setup.
Choose a Destination
Time to head out! Select one of these three options: Visit the Forge, Go Questing, or Go Monster Hunting.
Visit the Forge. Draw 3 cards from the Anvil Deck and lay them face-up on the table. Choose one card to add to your hand. You may optionally choose to Reforge, by discarding any Weapon Part from your hand and taking a second Weapon Part from the three cards shown. Any cards that are not taken are returned to the top of the Anvil Deck.
Go Questing. Draw 2 cards from the Quest Deck and add them to your hand. The Quest Deck contains various types of cards, and each have instructions on when/how they are used. (Curse Cards must be played immediately.)
Go Monster Hunting. Choose one of the three Monster Decks and reveal the top card. Immediately engage in Combat with the revealed monster.
Hand Size Limit
If you end up with more than 8 cards in your hand after finishing all other phases of your turn, you must Discard until you reach the Hand Size Limit (8 cards). Discarded cards are added to their respective Trash Piles. (Beware! Some cards or effects may lower your Hand Size Limit.)
End of the Game Trigger
If any player's turn ends and the Loot Deck is empty, the game is over! See the "Endgame and Scoring" section for more info.
Combat
Whenever you Go Monster Hunting and reveal a Monster Card from the top of one of the three Monster Decks, combat begins! Combat in Fool's Blade is fast and exciting. Stay on your toes as you face off against monsters, and keep an eye out for other players who might play Action Cards to sabotage you!
When Combat begins, first take note of the monster's total Strength. This is the number that you have to beat in order to win. Some monsters also have modifiers, which will be shown next to their Strength. For instance, the Activated Tomb Guard has a modifier that adds +1 d12 to its Strength. Roll a d12 and add the result to the monster's Strength.
Once you know what you're up against, add the Strength of all your Weapon Parts, Part Effects, Set Bonuses, and Gear together. You may also play any number of Action Cards and use your Class Ability if applicable. If your total combined Strength is greater than the monster's, the monster is defeated, and you apply its Win Effect and add it to your Stash. If you come up short, the monster escapes! Apply its Lose Effect and add the monster to its respective trash pile.
Beware! Any player may play Action Cards at any time. This means that your opponents may choose to foil your plans and disrupt you during combat.
Remember: Whenever you defeat a Monster, add it to your Stash! The value of slain monsters contributes to your final score.
If a player and a monster have equal Strength, it's a draw! Apply neither the Win Effect nor the Lose Effect, and place the Monster Card on the bottom of its respective deck.
You must have at least one Weapon Part to engage in Combat! You can Assemble any combination of weapon parts, as long as you only have one of each part type equipped at once.
Strength Types
Strength comes in 4 types: Neutral, Fire, Water, and Plant. Neutral Strength is always effective against any Strength type, but will never deal bonus damage. Fire, Water, and Plant strength are Elemental, and have advantages and disadvantages against each other. For instance, Fire Strength does x2 damage against Plant Monsters, but deals x0 damage to monsters with Water Strength. Remember: Water beats Fire, Fire beats Plant, and Plant beats Water!
Your weapon may be built from parts with mixed Strength types. That's okay! Simply calculate Strength using the diagram above.
For example, if your weapon has 4 Neutral Strength and 2 Fire Strength and you are fighting a Water Monster, the Fire Strength is canceled out, and only the 4 Neutral Strength counts. Likewise, if the same weapon is used against a Plant Monster, the Fire Strength would be doubled, counting as 4 Fire Strength for that encounter.
Monster Modifiers
Some monsters that you encounter may have modifiers shown next to their Strength. This means that they gain additional Strength when combat begins. The number tells you how many times to apply the effect: an image showing +1 means you apply the effect one time.
- Monster modifier: Draw Monster card(s) and add the combined Strength to the original monster.
- Anvil modifier: Draw Anvil card(s) and add the combined Strength of each Weapon Part to the monster.
- Loot modifier: Draw Loot card(s) and add the combined Value to the monster as Strength.
- Dice modifier: Roll the dice shown on the modifier and add the result to the monster's Strength. If multiple dice types are shown, roll all of them.
Modifiers never change the Strength Type of the original monster! If a modifier causes you to draw Monster or Anvil cards and add the value to the original Monster, any added Strength is treated as the same type that is shown on the original Monster Card!
Win and Lose Effects with Multiple Players
If multiple players must apply a Win/Lose Effect, the player who begins the Combat applies it first, with other players following turn order.
Your Weapon
Your weapon is your best friend! When Assembling your weapon and laying your cards face-up on the table, you can stack your cards to forge your own one-of-a-kind monster-slaying armament! Start with the Pommel on the bottom, then your Handle and Guard, finally finishing with your Blade on top. When laying your cards out this way, all important stats and effects will be visible, making it easy to calculate your weapon's total Strength and apply its effects at a glance.
- PART TYPE: A weapon is comprised of 4 part types: Blades, Pommels, Guards, and Handles. You may have one of each part type equipped at once.
- SET NAME: Each Weapon Part belongs to a Set. If all pieces of your weapon are from the same set, the Set Bonus is activated.
- SET BONUS: A Set Bonus is a powerful effect that is only activated when all four parts from the same set are Assembled into the same weapon. The Set Bonus is always shown on the Blade weapon part of the set.
- STRENGTH: A Weapon's Strength determines your success in combat. Strength comes in 4 types: Neutral, Fire, Water, and Plant.
- EFFECT: Weapon Parts may have various Effects that grant unique properties to your Weapon. When in Combat, all effects should be applied to provide the maximum benefits to the weapon's wielder.
Monster Cards
There are 3 Monster Decks, each containing stronger monsters than the last: The Forest, The Cavern, and The Dungeon. Monster Cards have a Value (indicated by the number on the gold coin), Strength, and Win/Lose effects. When you defeat a monster in combat, apply its Win Effect. When you lose to a monster, apply its Lose Effect.
The Forest is home to the least powerful monsters. This deck is marked with a single skull on the back of each card.
The Cavern contains moderately powerful monsters. This deck is marked with 2 skulls on the back of each card.
The Dungeon is the lair of the most powerful monsters you will encounter. This deck is marked with 3 skulls on the back of each card.
As a general rule, more difficult monsters have a higher Value (used when calculating the winner at the end of the game) and yield greater rewards when defeated.
If a monster defeats a player, that Monster Card is added to its respective Trash Pile unless the monster's Lose Effect states otherwise.
Monster Card Anatomy
- VALUE: If a Monster is defeated, it is added to your Stash, just like Loot. The Value of the monster determines how many points it is worth at the end of the game.
- STRENGTH TYPE: A monster's Strength determines what it takes to defeat the monster in Combat. If your total combined Strength from your Weapon, Gear, and any other effects is greater than the Monster's, the fiendish foe is defeated!
- MODIFIER: Some monsters have a Modifier, which makes them more powerful. E.g., this modifier is +1 d8, meaning that you roll one d8 and add the value to the monster's Strength.
- WIN EFFECT: When a monster is defeated in combat, apply its Win Effect, following all instructions shown on the card.
- LOSE EFFECT: When a monster defeats a player in combat, apply its Lose Effect, following all instructions shown on the card.
Boss Encounters
Inside each Monster Deck hides an Approach Card that foretells the arrival of a powerful Boss! When an Approach card is drawn, immediately lay it face-up on the table for all players to see. As long as the Approach card remains in play, no players may Go Monster Hunting (though the player who drew it may immediately choose a different destination). Each Approach Card explains how and when their respective Boss appears, and which Boss Cards to gather from the game box. That's right, cards! Bosses are epic encounters that often contain multiple cards.
Once a Boss is gathered on the table, all players must work together to defeat it and cannot choose a destination. Players proceed taking turns, choosing which parts of the Boss to battle, starting with the player whose turn it is when the Boss arrives.
As long as any Boss Cards remain in play, you must choose one and begin Combat against it. If you are victorious, that Boss Card is removed from play! If you are defeated, one Strike is incurred. After Combat against the Boss Card has ended, your turn immediately ends, and the next player begins their turn.
Fighting Bosses follows standard combat rules. On your turn, select one active Boss Card and begin Combat with it. If you can beat the Strength of the targeted Boss Card using all the power at your disposal, the targeted card is defeated and removed from play. Each Boss encounter has a limited number of Strikes shown on the Approach Card, which represents how many times the players can collectively lose against the Boss. When any player loses in combat while Boss Cards are in play, a Strike is incurred!
If the players defeat all of the Boss Cards in an encounter, the Boss is defeated, and all players apply the Win Effect shown on the Approach Card following turn order.
If the players reach the Strike limit, the Boss is victorious, and all players apply the Lose Effect shown on the Approach Card following turn order.
Boss Cards always win in the event of a tie! You must have MORE Strength than a Boss in order to defeat it. After a Boss encounter has concluded, all Boss Cards and their respective Approach Card are banished back to the game box, never to be seen again.
Approach Cards and Boss Cards
Approach Cards are found inside Monster Decks. When a player Goes Monster Hunting and discovers an Approach Card, it means that a Boss is on the way!
- STRIKES: When fighting a Boss, the players have a limited number of failed attempts during the encounter. If the players reach the Strike limit, the Boss prevails, and all players apply the Lose Effect.
- EFFECT: When an Approach Card is drawn, its effect describes which Boss Cards to gather from the game box, and when the Boss enters play.
- WIN/LOSE EFFECT: Just like regular Monsters, each Boss has a Win/Lose Effect. Depending on the outcome of the encounter, all players apply its Win or Lose Effect.
(If an Approach Card is drawn as the result of a modifier or other card effect, they are shuffled back into the Monster Deck it was drawn from and a different card is drawn instead.)
Bosses are special, extra-powerful monster encounters that have extra-powerful effects! Unlike regular monsters where you only need to worry about their Strength, Boss Cards have Boss Effects! Each Boss has unique effects that are applied in combat. Follow the instructions shown on each Boss Card, and adjust your strategy accordingly.
Approach Cards explain when and how each Boss is gathered. Once gathered, Boss Cards prevent all players from choosing a destination. As long as any Boss Cards remain in play, players must begin Combat with them. Once a Boss has been defeated, or if it prevails against the players, normal play resumes and players may once again choose their destinations during their turns.
Boss Cards have no value and are not added to a player's Stash when defeated. When they enter the fray, it's time to put your petty squabbles aside for the greater good. (Remember, you can play Action Cards at any time to turn the tide and help your fellow adventurers!)
Tavern, Quest, and Anvil Cards
Tavern Cards
Players start each turn at the Tavern and always draw 1 Tavern Card per turn. During each player's Tavern Phase, any player may play any number of Tavern Cards.
Tavern Cards have a wide variety of effects that allow you to interact with, strengthen, or sabotage yourself or other players.
Quest Cards
The Quest Deck contains Action, Gear, and Curse cards.
Action Cards may be played at any time. They are single-use cards that will usually improve your fighting style or protect you from harm.
Gear Cards grant various special abilities, and are played by laying them face-up on the table, thus adding them to your Gear Setup. Gear cards remain in play unless stolen or broken by a card effect.
Curse Cards must be played face-up on the table immediately when drawn, and confer negative effects. Curse cards have Longevity, noted by the hourglass symbol on the Curse card. Each point of Longevity equals one turn, and the Curse expires once its longevity is reached. (I.e., a Curse with a Longevity of 3 will expire and be discarded after 3 turns.)
Anvil Cards
Players who decide to Visit the Forge draw from the Anvil Deck. This deck contains the cards used to build your Weapon of choice. There are 4 types of weapon parts: Blades, Guards, Handles, and Pommels.
Trash Piles
When Tavern, Quest, or Anvil Cards are used or discarded, they are placed in their respective Trash Piles. If any of these decks run out of cards, their Trash Piles are shuffled, and all cards re-enter play as replacement decks unless otherwise specified.
Loot Cards
Loot Cards are the ultimate goal of every adventurer! Players who are bold and successful (or just plain lucky) draw from the Loot Deck, which contains valuable treasures sure to impress their friends, as well as parts of Legendary Weapons imbued with unimaginable power. When a turn ends and the Loot Deck is empty, the game is over!
There are two types of cards that you can find when you draw from the Loot Deck:
Treasure Cards are the most common type of card you'll find in the Loot Deck. Treasure Cards have no game effects, but contribute to a player's Score, which determines the winner of the game. When you draw a Treasure Card, place it face-up on the table; this pile of treasure is known as your Stash. The number shown on the treasure card indicates its Value. The player with the most valuable Stash wins the game!
The Loot Deck also contains Legendary Weapon Parts. These reside in your Stash instead of your hand when not equipped, and can be added to your weapon during the Assembly phase. Legendary Weapon parts may be stolen, but never broken.
Side Quest Variant
Want a faster game? Try the Side Quest game variant! The Loot Deck contains 30 cards by default (18 Treasure Cards and 3 Legendary Weapon sets). Instead, choose 11 Treasure Cards and 1 Legendary Set to play with. With 15 cards in the Loot Deck instead of 30, each game of Fool's Blade will be faster. Perfect for when you need to defeat your friends and foes quickly!
Endgame and Scoring
When a turn ends, and the Loot Deck is empty, the game is over! When the game ends, follow these simple instructions to calculate each player's final score. The player with the highest score wins!
-
First, add the Strength of your Assembled Weapon Parts (parts in your hand do not count). Only the Strength of the parts counts! (Part Effects do not contribute to your score.)
-
Next, add the Value of all the Monsters that you have defeated and placed in your Stash. A Monster's Value is shown on the gold coin icon on the card.
-
Finally, add the Value of all of the Loot Cards in your Stash! (Also add the Strength of any Legendary Weapon Part cards that you have in your Stash.)
FAQ
If a card says to Steal or Discard a card randomly, how do I select a card? When stealing, the player whose card is being stolen first shuffles their hand. The player who is stealing pokes a card in their victim's hand without looking at the faces of the cards. When discarding, a player shuffles their own hand, and selects another player to poke a card in their hand to discard.
What happens if a player loses to a monster but cannot resolve the Lose Effect? If a player is defeated by a monster and the Lose Effect asks them to do something they can't (such as discarding a type of card they don't have), ignore the lose effect! You got lucky!
What happens if a player uses a card to negate an effect that has an associated cost? If an effect asks a player to pay a cost and another player negates the effect, the cost remains. E.g., if the Pickpocket discards two Tavern Cards to activate their class ability and another player negates it, the Tavern Cards remain discarded.
If a card causes players to engage in combat with each other, what happens in the event of a draw? If a battle between two players ends in a draw, neither player gains any benefit nor suffers any penalty.
If a monster summons another monster during combat due to a modifier and defeats a player, are the summoned monsters added to the Trash Pile? No! Only the original monster is discarded. Any summoned monsters are returned to the bottom of their respective Monster Decks.
Dice
Know your dice! Fool's Blade uses dice with different numbers of sides. Both this guide and the cards you play with refer to the different dice by using letter d + the number of sides on the dice: d4, d6, d8, d10, d12, and d20. E.g., the 20-sided die is called the d20!
Neutral and Elemental Strength
Neutral Strength is always effective against any Strength type, but will never deal bonus damage. Fire, Water, and Plant Strength are Elemental, and have both advantages and disadvantages against each other. (Remember: Water beats Fire, Fire beats Plant, and Plant beats Water!)
Glossary
- Draw: Take a card from the specified deck and add it to your hand.
- Reveal: Take a card from the specified deck and lay it face-up on the table for all players to see.
- Discard: Take a card from your hand and send it to its respective trash pile.
- Break: Take an equipped card from the specified location (usually your Weapon or Gear Setup) and send it to its respective trash pile.
- Steal: Take a card from the specified location (usually another player) and add it to your hand.
- Pass: Take one of your cards and surrender them to another player.
Icons used in the guide: Tavern, Anvil, Quest, Monster, Loot (deck icons); Curse Longevity, Value, Set Bonus, Strike; Neutral, Fire, Water, Plant (Strength types).