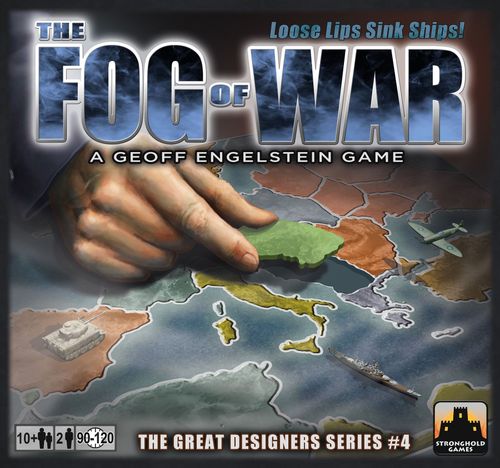
The Fog of War
The Fog of War Rulebook
Table of Contents
Table of Contents
- 1. Introduction
- 2. Setup
- 3. Sequence of Play
- 4. Province Defense
- 5. Operations (Attacking)
- 6. Battle Resolution
- 7. Supply
- 8. Naval Operations
- 9. Politics and Political Operations
- 10. Production
- 11. Intelligence
- 12. Victory
- 13. Example of Play
- Advanced Realism Rules
- Fog of War Force Manifest
- A Note About The Map
- Fog of War Reference
1. Introduction
The Fog of War is a two player game covering the European theater of World War II. One player plays the Axis forces, and the other the Allies.
Each player has a deck of cards that represents the army, fleets, and other assets of their nations.
The game is played over five years, from 1940-1944. The year ends when both players run through their decks and have no more cards in hand.
The Axis player automatically wins by accumulating 70 Victory Points by the end of the 1944 turn. The Allies win automatically if they control both Ruhr and Berlin simultaneously at any time.
If neither player wins automatically, the Axis player reveals their two Victory cards. If they control both of those Provinces they win, otherwise the Allies win.
1.1 General Course of Play
The Fog of War does not have units that move around a map. The actions of the military units are abstracted to focus on the planning and intelligence aspects of World War II.
If you control a Land or Sea Province, you defend it by placing cards face down into its Province Defense space around the edge of the map.
If you wish to attack a Land or Sea Province that is Neutral or owned by your opponent you must plan an Operation to do so, by creating one on your Operation Wheel. An Operation consists of a Province card that shows the target of the Operation, plus one or more cards to conduct the attack. All of these cards are placed face down, so your opponent does not know the target of the Operation, or the actual strength of the cards that are taking part.
Each turn, the dial on the Operation Wheel is rotated by one position. This controls when an Operation can be launched and any attack or defense bonuses that apply.
When you launch an Operation, compare your and the Defender's strength. If you have double the Defender, you win. If you have less than the Defender, you lose. If you are in between, it is a Quagmire, and the battle will continue next turn.
Intel tokens allow you to try to learn about your opponent's plans, and block their attempts to learn yours.
1.2 Components
A copy of The Fog of War includes:
- Map with 28 Provinces
- Cards - 46 Axis Action, 53 Allied Action, 28 Axis Province, 28 Allied Province, USA/Canada card, Urals card, 15 Neutrals, 6 Victory
- 2 Operation Wheels
- Year Marker, 2 Victory Markers (10x, 1x), 2 Industry Markers
- 28 Allied/Axis Control Tokens
- 6 Neutral Control Tokens
- 10 Out of Supply / Quagmire Tokens
- 20 Intel Tokens
- 1 Advantage Token
- 2 Player Mats
- This rule book
- 4 Reference Cards
1.3 Board
The map on the board consists of 23 Land Provinces and 5 Sea Provinces. Around the perimeter are Province Defense spaces, one for each Province. Players may freely look at their cards in Defense spaces.
Each Land Province is numbered to make it easy to find. The Province Defense spaces are arranged around the board in numerical order.
The board has spaces for each side to place Province decks, Victory cards, and Intel tokens.
The right side of the board holds the Turn Track, the Victory Point Tracks, and the Industry Track.
1.4 Cards
Province Cards. Each player has a deck of 28 Province cards - one for each Province. In addition, the Allied player receives two special Province cards. The USA/Canada card shows bonus Resources they receive each year. The Urals card shows bonus Resources they receive once the USSR enters the war.
Victory Cards: These are the six Land Provinces that border Germany, and tell the Axis which Provinces they must control to win if neither player has won by the end of the 1944 turn.
Action Cards: These are the cards that form each player's hands, and are used to attack and defend.
Each card is marked with when it is available:
START cards are available at the start of the game and do not need to be Produced.
Cards marked with years are available for Production in that year. During the End of Year sequence, they are placed in the OP LOSS space to show they can be purchased during Production.
Cards marked with USA or USSR represent the forces of that country and enter play when that country enters the war.
Example: The game begins in 1940. Place all cards labeled START in the Draw deck, and the cards labeled 1940 into the Loss stack, where they will be available for Production. At the start of the 1941 turn, the cards labeled 1941 will be added to any remaining cards in the Loss stack.
Action cards are several different types:
- Army Cards: These have only a Ground strength value.
- Fleet Cards: These have only a Naval strength value.
- Air Cards: These have Ground and Naval strength values.
- Fort Cards: These are treated as Army cards for all purposes, except that they only have strength if used to defend a Province.
- Dummy: May be placed into any Operation or defensive stack to fool your opponent.
- Neutral Cards: These are placed as Defenders for Neutral countries at the start of the game. When they are removed as losses in battles they are permanently removed from the game.
1.5 Operation Wheel
Each player has an Operation Wheel that is used to plan and track Operations. Players may freely look at the cards on their own Operation Wheel.
1.6 Player Mats
Player Mats have several spaces for cards. NOTE: All cards on Player Mats should be placed FACE DOWN so your opponent cannot see them:
- DRAW - Cards available for use this year.
- DISCARD - Dummies and cards from disbanded Operations are placed here. These come back to the Draw deck for free next year.
- OP WIN - Cards that the winner of a battle loses are placed here. During the Production step, half of these will go to the Discard stack and return to the Draw deck for free, and half to the OP LOSS stack, where they will need to be purchased during Production to return. This space is abbreviated Win in the rest of the rules.
- OP LOSS/QUAG - Cards that are here must be purchased during Production to return to your Draw deck. Cards that the loser of a battle loses are placed here, as are cards lost in Quagmires. Also, cards that may be purchased as reinforcements are placed here. During the Production step at the end of each year you can purchase cards from this stack. The Industry symbol is a reminder of this. This space is abbreviated Loss in the remainder of the rules.
You can always look at your own stacks on the Player Mat except for the Draw deck.
DUMMIES: Dummies are never placed in the Win or Loss stacks. If they are removed, they are always placed in the Discard stack. If they are ever found in the Win or Loss stacks, show them to the opponent and move them to Discard.
The number of cards remaining in your Draw deck is public information.
2. Setup
Each player separates their cards into several stacks:
- Province cards
- Action Cards - Individual stacks for START, 1940, 1941, etc. Note that the Axis only have 1940 cards, and Allies have 1940-1943 cards, plus USA and USSR cards.
Shuffle the Neutral cards and deal the appropriate number face down into these Province Defense spaces, as indicated on the Province space: Baltic States - 1, Kiev - 1, Odessa - 1, Scandinavia - 1, Spain - 3, Yugoslavia - 1, Greece - 1, Balkans - 2, Turkey - 3. There will be one Neutral card left over. Return it to the game box without either player looking at it.
The players remove the following Province cards and place them in front of them to create their starting tableau:
- Allies: Britain, Paris, Vichy, Morocco, Egypt, Levant, North Sea, North Atlantic, Central Atlantic, Eastern Mediterranean, USA/Canada
- Axis: Ruhr, Berlin, Poland, Italy, Libya, Western Mediterranean
These cards have a Star or Cross symbol next the to Province name to indicate they are starting Provinces.
Place Control tokens in the matching spaces on the map. No Control token is required for USA/Canada, as it is always Allied.
Place Neutral Control tokens in each of the six Minor Neutral Provinces (indicated with a red Province number).
The remaining Province cards for each player go on their Province Deck space on the map.
Each player takes their START cards and places them face down in the Draw space on their player board. Also place the 1940 cards face down in the Loss space. These do not need to be shuffled as players can select which cards to build. Cards entering after 1940 may be placed to the side. Place the USA cards in the USA space, and the USSR cards (including the Urals resource card) in the Urals space.
The Axis player starts with 5 Intel tokens. The Allied player starts with 7. Place these face up in the Available space.
Place the Year marker in the 1940 space, the Allied Industry marker in the '6' space, and the Axis Industry marker in the '8' space. Axis Victory Points start at zero.
The Axis player takes the Advantage token.
Victory Cards: The Axis player shuffles the six Victory cards, and draws three. They select two to keep, and return the other to the game box. The three not selected are shuffled and placed on the space shown on the board. The two kept by the Axis player are placed under their Player Mat. Those two cards, plus the one returned to the box may never be seen by the Allied player until the end of the game.
The Allied Player may look through their Draw deck and choose up to three cards (of any type) to place in three different Provinces they control. No Province may get more than one card. The Axis Player then does the same with their Draw deck.
After placing these cards, both players shuffle their Draw decks, and draw 3 cards each. Set each Operation Wheel so that New Operation (NEW OP) points to Operation Alpha.
The board is set up in the center of the table, facing the Axis player. Quagmire tokens, Out of Supply tokens, and Control tokens not placed on the board are set to the side for later use. Allied 1941-1943 Reinforcement cards are placed to the side until needed. Both Operation Wheels should be set with the NEW OP pointing to Operation Alpha. Remember that cards are always placed face down.
3. Sequence of Play
The game is broken up into five years. Each year ends when both players have exhausted their hands and Draw decks.
The year is broken up into a series of turns. The player with the most cards in their Draw deck takes the first turn each year. In 1940, this will be the Axis.
If there is a tie, the Axis player takes the first turn.
Players alternate turns until both Draw decks are empty and neither player has cards in hand. Then the End of Year steps are performed before starting the new Year.
3.1 Turn Sequence Summary
Each turn these steps are taken in sequence:
- Turn the Operation Wheel
- Actions (as many as desired, in any order)
- Conduct Intel at a cost of 1 Intel token
- Draw back to three cards.
Each player completes all of these steps, and then their opponent takes a turn. Turns alternate back and forth until the year ends.
3.1.1 Turn the Operation Wheel
Rotate the Operation Wheel one space clockwise.
3.1.2 Actions
There are several actions that can be conducted during a turn. These can be conducted in any order and as many times as desired.
- Add cards to Province Defense
- Launch Operation
- Disband Operation
- Add cards to an Operation
- Create a new Operation
- Add cards to a Quagmire (Quagmire Defender)
- Add cards to and Resolve a Quagmire (Quagmire Attacker)
- Conduct Intel at a cost of 2 Intel tokens
Note: All of these actions are described later.
When the active player has completed all desired actions, move on to the Intel step.
Important: All actions are optional, except that all Quagmires started by the active player must be resolved.
3.1.3 Intel Actions
The active player may conduct Intel (see "11. Intelligence"). Note that players may conduct Intel outside of this step, but it will cost an additional Intel token.
3.1.4 Draw hand back up to three
Draw cards until you have three.
When one player's Draw deck contains no cards, flip the Year marker to the Winter side. The Winter defense bonus is now in effect for both players until the end of the Year.
The Year ends when neither player has cards in their hand or Draw deck.
The number of cards in each player's Draw deck is public knowledge.
Example: The Allied player has two cards in their Draw deck, but needs to draw three cards. The player draws both, and flips the marker over to the Winter side. The Allied player will no longer draw cards until the end of the year, but will continue to play from their hand while they still have cards.
NOTE: Each turn you must play at least one card, unless your hand is empty.
Even if you have no cards in your hand or Draw deck, you continue to take your turn, as you need to continue to rotate your Operation Wheel each turn, and may want to launch Operations or conduct Intel.
3.2 Year End
When the year ends, the following steps are done, in this order:
- The Axis player scores Victory Points based on their controlled Provinces. Provinces controlled by the Axis, but in Quagmire still produce Victory Points.
- Each player shuffles their Win stack and deals one card into the Discard stack, and one into the Loss stack, alternating back and forth until all Win cards are dealt.
- Both players perform Production. The player without the Advantage token conducts Production first. See Section 10 for details. Note: At the end of the 1944 turn, the only use for Production points is for the Axis to buy Victory Points. There is no need for the Allies to perform Production.
- Each player may take any of their cards from Province Defense spaces or disband any Operations on the Operation Wheel and place them in the Discard stack. The side without the Advantage token goes first. All cards not removed stay in place. NOTE: Cards in a Quagmire may not be removed. Any Operations not disbanded simply carry over into the new year.
- Both players reshuffle their Discard stack (including cards that were just pulled from the map or Operation Wheel, or obtained during Production) to make a new Draw deck, and draw three cards.
- Advance Year marker. If the 1944 Year has been completed, the game is over.
- Place Reinforcement cards with the new year into the Loss stack on the Player Mat. (Example: At the end of the 1940 turn, place the 1941 cards into the Loss stack.)
- Begin a new year. The player with the most cards in their Draw deck takes the first turn.
4. Province Defense
You defend a Province by placing Action cards into a Province Defense space. Cards are always placed face down.
You may only place cards into Provinces that you control, or that are Neutral.
Exception: Both sides may play into a Quagmire. See "6.4 Quagmire".
There is no limit to the number of cards that may be in a Province Defense space.
Any type of card may be placed, even those that cannot assist in defense, like a Fleet card in a Land Province. Once revealed these are treated exactly like Dummies.
Once placed, cards can only be voluntarily removed during Year End.
Placing Defenders: The Allies wish to place Defenders in Paris. They have an Army/2, Army/1, and Dummy in their hand. They decide to place the Army/2 and Dummy as Defenders, and put them face down in the Paris Province Defense space. They can use the Army/1 for another action this turn, or hold it until next turn.
5. Operations (Attacking)
In order to take control of a Land or Sea Province, you must conduct an Operation. An Operation is a stack of cards in a space on the Operations Wheel. There are spots for six Operations that can be active at the same time.
Design Note: The Operation Wheel system is the heart of the game. It simulates how leaders needed to plan offensives months in advance, and marshall their forces, withholding them from the front lines, to prepare.
There is no limit to the number of cards that may be in an Operation.
An Operation can only be launched against a Province if you can trace a path of controlled Provinces to it from one of your Supply Provinces. More details about that in "7. Supply".
5.1 New Operations
New Operations must be started in the space pointed to by the New Operation (NEW OP) segment of the dial. Each turn the dial rotates one position clockwise, so the NEW OP segment points to a different Operation space each turn. Therefore you can only start one new Operation each turn.
If there are existing cards in the Operation space pointed to by the NEW OP space after the dial is turned, the Operation is Disbanded and all cards are discarded. Then you may create a new Operation.
Note: An Operation must be launched within six turns, which is one complete rotation of the Operation Wheel.
When creating an Operation, you must include:
- Province card for target
- At least one Action card
Creating a New Operation: The Axis decide to start an Operation to take Paris, and take the Paris card and place it face down in the space indicated by the NEW OP section of the Operation Wheel, which is currently the Alpha space. They must also place at least one card from their hand. Currently they are holding an Army/3, a Dummy, and an Air card. They decide to place the Army/3 and Dummy into this Operation, holding the Air card to use elsewhere, or perhaps place into this Operation in a future turn. The Army and Dummy cards are added to the Alpha space, face down.
The target for an Operation must be a Province that you do not already control, and must be available in your Province Deck. If it is in your tableau in front of you, you may NOT plan an Operation to attack that Province, even if you are confident you are going to lose it shortly. You need to wait until you actually lose the Province and return the card to your Province Deck before you can plan an Operation to take it back.
You MAY plan an Operation even if you aren't currently eligible to attack it due to Supply, as long as you have the Province card in your deck. You might want to do this, for example, if you plan to take another Province first that will allow the Operation to go forward.
Example: As the Axis player, you plan an Operation to take the Baltic States, which is next to Axis-controlled Poland. Next turn you plan an Operation against Leningrad. You are counting on the Baltic States attack to be successful, allowing the Leningrad attack to take place. If you wanted to be safer, you could wait until the Baltic States Operation is launched and see what the result is, but that would give the Allies more chance to learn about the Baltic States attack and put Defenders into Leningrad.
5.2 Adding to Operations
Each turn, players may add as many cards from their hand as they wish to each existing Operation on the Operation Wheel. You may add cards to and launch an Operation during the same turn.
5.3 Disbanding Operations
An Operation may be disbanded instead of launched. If it is, return the Province card to the Province Deck, and discard all other cards in the Operation. Normally you would only do this if you want to reuse the Province card to start a new Operation, or at the end of Year so the cards will go back into your Draw deck.
5.4 Dial Icons
Some spaces on the Operation Wheel have icons. These affect the Operation that they are currently pointing to. Since the dial rotates one space each turn, the icons that are pointing to an Operation change each turn as well.
- CANNOT LAUNCH: The Operation in this space cannot be launched.
- NO INTEL: The opponent cannot use Intel against an Operation in this space.
- (D+1): If the Operation is launched from this space, the Defender gets a +1 strength bonus.
- (A+1): If the Operation is launched from this space, the Attacker gets a +1 strength bonus.
Note: All cards on the Operation Wheel are ALWAYS face down. You may freely look at cards in your own Operations.
Each turn, rotate the dial clockwise one segment. It takes six turns to make a full revolution. A New Operation is started at Alpha when the dial is in this position.
5.5 Launching Operations
An Operation can be launched at any position on the Operation Wheel except those marked NO LAUNCH.
Launching an Operation consists of these steps:
- Announce Target Province and determine Supply
- Reveal cards
- Resolve battle
Here are the details of these steps:
5.5.1 Attacker announces Target Province and determines Supply: Attacker shows the Province card from the Operation to reveal the target and makes sure supply can be traced (see "7. Supply").
5.5.2 Attacker and Defender reveal all cards: Dummies and cards that cannot participate (like a Fleet card in a land battle) are discarded.
If at this point the Attacker has no cards with valid attack factors for the type of battle (Ground or Naval), they are automatically defeated. This is treated the same as a Rout (see "6.2 Rout").
5.5.3 Advantage Token: The player holding the Advantage Token may now choose to play it. If played, it adds a +1 bonus to their combat strength, either as Attacker or Defender.
The Advantage Token is then given to the other player, who may use it on a future battle. It may not be used immediately in the same Operation.
The +1 from the Advantage Token never carries over into a future turn if the Operation becomes a Quagmire.
5.5.4 Forts and Combat: Forts may only use their Ground strength when they are defending a Land Province. If they are used as part of an Operation they do not contribute to the attack, and are discarded as if they were a Dummy.
6. Battle Resolution
Each player adds their total combat strength:
- Cards played in the Operation
- Strength bonuses (Operation Wheel, Winter, Invasion)
- Advantage Token (+1)
Compare the totals. There are four possible outcomes for the Attacker:
- Defender greater than Attacker, but not double: Defeat
- Defender has double Attacker total: Rout
- Attacker has at least double the Defender total: Victory
- None of these apply: Quagmire
6.1 Defeat
If the Attacker does not at least equal the Defender's strength, they have lost the battle. Follow these steps:
- All Attacker cards are placed in the Loss stack. (Note: Dummies and other cards that were discarded before the start of Combat Resolution remain in the Discard stack).
- The Defender must select cards totaling the Attacker strength, including Attacker bonuses. Place these in the Win stack on the Defender's Play Mat.
- Remaining Defender cards are placed back in the Province Defense space.
6.2 Rout
If the Defender strength is double the Attacker strength or more, the result is a Rout. Follow these steps:
- All Attacker cards are placed in the Loss stack. (Note: Dummies and other cards that were discarded before the start of Combat Resolution remain in the Discard stack).
- Defender is not affected in any way. Return all Defenders to the Province Defense space.
6.3 Victory
If the Attacker has at least twice the strength of the Defender, they have won the battle. The steps are the same as Defeat, except with Attacker and Defender switched, plus a few extra steps to show the ownership change. Follow these steps:
- All Defending cards are placed on the Loss stack.
- The Attacker must select cards totaling the Defender strength, including bonuses. These are placed on the Win stack on the Attacker's Play Mat.
- Any remaining Attacker cards are placed in the Province Defense space, and are defending the newly-conquered Province.
- The Attacker places the Province card with their other controlled Provinces.
- The Defender places their copy of the card for the lost Province back in their Province Deck.
- Change the Control marker on the map to show the new ownership. Check to see if any Provinces are now Out of Supply or back in Supply, and mark accordingly.
Battle Example: The Axis launch Operation Foxtrot, which is an attack on Moscow. They reveal four Army cards, a 3, 2, and two 1's, and a Dummy, for a total of 7 strength. In addition, they launched when the A+1 space was pointing towards Operation Foxtrot, so they get one bonus strength for a total of 8. The Dummy is immediately discarded when revealed since it cannot take part in the battle. The Allies reveal a Fort/2 and an Army/1 unit for a total of 3. The Axis has at least double the Defender strength (8 to 3), and so the result is Victory for the Attacker. The defending Allied cards are placed in the Loss space on their mat. The loser had 3 strength, so the winner (the Axis) must place 3 strength points into the Win space on their mat. They could either choose the 3, or a 2 and a 1. They choose the 3, and place it on the Win space. The 2 and two 1's are placed in the MOSCOW Province Defense space. The Moscow Control token is flipped to the Axis side, and the Axis place their Moscow Province card in front of them to show they now own Moscow. The Allies take their Moscow card and place it back in their Province deck. They can now use it in a future turn to create an Operation to retake Moscow.
6.4 Quagmire
If the Attacker neither wins nor loses outright, the result is a Quagmire, and the battle will continue next turn.
Each player randomly selects half of their cards in the battle, rounding fractions down, and places those in the Loss stack on their Play Mat. These are placed face down.
If there are Neutral and Player cards both defending in a Quagmire, the number of cards to be lost is based on the total number of defending cards. However, Player cards must be lost first, then Neutrals.
Example: The Allies have placed a card into Spain, which also has three Neutral cards. The Axis attack, resulting in a Quagmire. Two defending cards out of the four must be placed in the Loss stack. The first card must be the Allied card. The second is randomly chosen from the three Neutral cards.
The cards not selected remain in the battle and are placed face down in the Province Defense space, both Attacker and Defender. The Attacker also places their Province Location card in the Defense space (face up) and a Quagmire token on the map Province as reminders that this Province is in Quagmire.
The controlling player may always look at their cards in the Quagmire. The opponent may not, unless they look via an Intel action on their turn.
On the Defender's next turn, the Defender may add cards from their hand to the Quagmire (face down).
On the Attacker's next turn, the Attacker resolves all their Quagmires during the Action step. This resolution can happen at any point, at the Attacker's option, but it must occur at some point. First, the Attacker may add cards to the Quagmire from their hand. Then, whether or not cards were added, the combat is resolved. Resolution is as normal. If the result is another Quagmire, apply the same process (select half the cards as losses, etc) and the battle will continue another turn.
NOTE: The Attacker MAY NOT add additional cards to a Quagmire the same turn after it is created or resolved. They must wait until the next turn, and then add cards and resolve.
Note that Invasion and Operation Wheel bonuses only apply during the first turn of the battle. Winter bonuses apply when applicable, and may even start in the middle of a Quagmire, or end if a Quagmire extends into a new year.
6.5 Quagmire and Supply
Supply may not be traced through a Province in Quagmire, for either the Attacker or Defender. A Supply Source in Quagmire can still be used as the start of a Supply path, and it is always considered in Supply itself for the player with the Supply symbol.
If the Attacker can no longer trace supply into the Quagmire Province when it needs to be resolved, then, after all cards are revealed, the Defender has the option of either resolving the battle as normal, or instead placing all Attackers into the Win stack, leaving all the Defenders in the Province Defense space.
Quagmire Provinces still produce Resource points and Victory Points for the controlling player as normal.
Quagmire Example: The Allies are launching an Operation against Kiev. They have an Army/3, an Air/1 card, and an Army/1 card. They also received the A+1 Operation Wheel bonus, for a total of 6. The Axis have two Army/2 cards, for a total strength of 4. The Allies would need 8 strength for a Victory, so with only 6 the result is a Quagmire. The Allies must select one card to be removed from the battle (half of three, rounded down). The Axis have two cards, so they must also select one to be removed. Both randomly select one card. The Allies are pleased to draw the Air/1 card instead of the Army/3 and the Axis draw one of their Army/2 cards. These are placed in the Loss stack. The remaining cards are placed face down in the Kiev Defense space, so players do not know which card their opponent lost. A Quagmire token is placed in the map Province.
During the following Axis turn they may add cards to the Quagmire. Unfortunately, they do not have any cards with a Ground strength, but they do have a two Dummies, which they add to the Kiev Province Defense space.
On the Allied turn, they may also add additional cards. Before the Axis added cards they knew that they had 4 strength to the Axis 2, which would be enough for Victory. But now they are not so sure, so they decide to add an Army/2 unit, and place it in the Province Defense space.
The cards are revealed, and the Axis player shows that they just have the Army/2, and discard the Dummies. The Allies now have '6', as they don't get the Operation Wheel bonus any more.
The Allies win. The Axis Army unit is placed in Loss. The Allies match it with the Army/2 card they just added and place it in the Win stack. The other two Allied cards remain in the Province as Defenders.
6.6 Invasion
If an attack is launched from a Sea Province into a Land Province, the Defender gets an Invasion Bonus of +4.
If the attack results in a Quagmire, the Defender does NOT get this bonuses in future combat resolutions.
6.7 Undefended Provinces
Undefended Provinces (Provinces with no cards in their Province Defense space) still benefit from all bonuses. So it is possible to lose or have a Quagmire when attacking a Province with no defending cards.
If the strength is zero after all modifiers, the Attacker automatically wins, but must choose a single card to place in the Win stack.
6.8 Winter
When the first player has no more cards in their Draw deck, the Year marker is turned to the Winter side.
During Winter, the Defender normally gains a bonus +1. However the Defender gets a bonus of +2 in 'Snowflake' Provinces, and no bonus in 'Sun' Provinces.
7. Supply
When an Operation is launched, the Attacker needs to trace a path of controlled Provinces from a Supply Province to the Target Province. This is called a Supply Path.
Depending on the Supply Path for the Operation, the Defender may gain bonuses, or the Operation may be cancelled.
7.1 Key Provinces
There are three important Provinces when tracing a Supply Path:
- Supply Province
- Launch Province
- Target Province
7.1.1 Supply Province: Each Major power controls several Supply Provinces, marked by these icons:
- Allied Supply Provinces - Britain, Paris, Egypt, USA/Canada, Urals
- Axis Supply Provinces - Berlin, Ruhr, Italy
The USA/Canada space is always a Supply Province for the Allies. The Urals space becomes a Supply Province when the USSR enters the war.
You may still trace a Supply Path from a Supply Province if it is a Quagmire, but not if it is enemy-controlled.
7.1.2 Launch Province: This is the Province that the attack is being launched from. It may be a Land or Sea Province, but must be friendly controlled (NOT in Quagmire) and adjacent to the target Province. The Attacker announces the Launch Province when the Operation is launched. It does not need to be pre-determined.
7.1.3 Target Province: The Province that the Attacker is trying to conquer, as determined by the Province card included in the Operation.
7.1.4 Quagmire: When resolving a Quagmire, the Target Province and the Launch Province are the same. The Attacker is already considered to be partially occupying the Quagmire Province, so that is where the attack launches from. NOTE: This means the Defender will never receive an Invasion Bonus in a Quagmire (see 7.2.1).
7.2 Supply Path
A Supply Path is traced from the Supply Province to the Launch Province. The path may only consist of a chain of adjacent, Friendly controlled Provinces, not Provinces that are enemy controlled, Neutral, or in Quagmire.
If a valid Supply Path cannot be traced the Operation is Disbanded.
NOTE: It is important to check that you have Supply before announcing your Operation. For your first play, if both players agree, if you accidentally announce an Operation that has no Supply, instead of disbanding the Operation you can simply place it back on the Operation Wheel in the hopes of establishing Supply before it must be disbanded. Of course, the element of surprise is now lost.
7.2.1 Invasion Bonus: If the Launch Province is a Sea Province and the Target Province is a Land Province, the Defender gets a +4 bonus.
7.3 Out of Supply Provinces
A Province is Out of Supply if the owner cannot trace a valid Supply Path to the Province.
If a Province is Out of Supply:
- It produces no Resource Points
- It produces no Victory Points for the Axis
Out of Supply Provinces should be marked with Out Of Supply tokens, and the owner should turn the Province card face down as a reminder. The best time to check for Out of Supply Provinces is after an Operation is resolved.
Supply Examples
Example 1: Normal Supply, Land Only. The Axis player controls Berlin, Poland, and the Baltic States. He is launching an Operation against Leningrad. The Launch Province is Baltic States. A Supply Path of connected Land Provinces can be traced back from an Axis Supply Source (Berlin) to Leningrad.
Example 2: No Supply. The same example as #1, except before the Axis are able to launch their Operation into Leningrad the Allies retake the Baltic States from Kiev. The Operation cannot be launched, as there is no way to trace from an Axis Supply Source to Leningrad.
Example 3: Normal Supply, Land and Sea. The Axis is launching an Operation against Egypt. They control Italy, the Eastern Mediterranean, and Libya. The Supply Path is Italy-E Med-Libya-Egypt.
Example 4: Invasion Bonus. The Allies are launching an Operation against Italy. They control the Western Mediterranean, the Central Atlantic, and USA/Canada. The Launch Province must be the Med. The Supply Path is USA-Central Atlantic-Western Med-Italy. The Defenders get a +4 Strength bonus.
Example 5: No Supply - uncontrolled sea zone. Same example as #4, except the Central Atlantic is a Quagmire. The Allies no longer have a Supply Path, and cannot launch the Operation.
8. Naval Operations
There are five Sea Provinces: Western Mediterranean, Eastern Mediterranean, North Sea, North Atlantic, and Central Atlantic.
Only cards with Naval strength may participate in battles in these spaces.
To defend a Sea Province, place cards into the Province Defense space as normal. Similarly, to attack a Sea Province, start a new Operation with the appropriate Province card.
Combat in Sea Provinces is conducted EXACTLY like Land Province combat, except that Naval combat strength is used instead of Ground. Battles are resolved the same way. Quagmires may be created, Winter bonuses apply, etc.
9. Politics and Political Operations
There are eight Neutral Provinces at the start of the game:
Major Neutrals:
- USSR
- USA
Minor Neutrals:
- Scandinavia
- Balkans
- Yugoslavia
- Greece
- Spain
- Turkey
9.1 Minor Neutrals
Minor neutrals enter the war only by being attacked.
Exception: The Balkans enter at the start of the 1941 turn.
Minor Neutrals begin the game with one or more Neutral defense cards, as shown by the number in their Province Defense space. These cards may be subject to Intel, as normal. If they are removed from the board by an attack, they are also removed from the game.
While they are Neutral, both players may place cards as Defenders normally into their Province Defense spaces. If Intel is conducted against a Minor Neutral with both Neutral and Allied or Axis Defenders, either the Neutral stack or the Allied/Axis stack must be chosen as the target. In other words, Intel is always conducted against a stack with the same card backs.
Minor Neutrals may be attacked by an Operation with the Minor Neutral as the target. If an Operation is launched against the Minor Neutral, the Attacker must defeat both the Minor Neutral's forces as well as any placed by their opponent. If the Attacker has cards as Defenders in a Minor Neutral they attack, they are discarded before the attack.
9.2 USSR
USSR consists of six Provinces: Baltic States, Kiev, Odessa, Leningrad, Moscow, Stalingrad.
The USSR Provinces are all Neutral until one of them is attacked by the Axis, or the end of the 1942 turn, whichever comes first.
At the start of the game, one Neutral card is placed into Baltic States, Kiev, and Odessa. These can be looked at by the Allied player without using Intel. They may never be removed from those spaces except as the result of an attack.
Some USSR cards start in the Urals space. These cards may not be moved or used until the USSR enters the war.
When it enters the war, all Neutral USSR Provinces become controlled by the Allied player. The cards in the Urals space are immediately shuffled into the Allied Draw deck.
Prior to being attacked by the Axis, the Allies can place cards into USSR Province Defense spaces, just like any Neutral.
9.2.1 Urals: The Urals space is considered adjacent to Leningrad, Moscow, and Stalingrad for the Allied player only. The Axis may not launch Operations into the Urals space, so it may never be conquered.
Once the USSR enters the war, the Allies may use the Urals as a Supply Province for the rest of the game.
9.3 France
France consists of four Provinces:
- Paris
- Vichy
- Morocco
- Levant
The first time Paris is conquered by the Axis, France falls. All four French Provinces pass to Axis control. Any Allied cards remaining in those Provinces are discarded.
If Paris is conquered after this by either the Allies, or reconquered by the Axis, the transfer of Vichy, Morocco, and Levant does NOT occur. That is a one-time event on the first conquest of Paris.
9.4 United Kingdom
The United Kingdom consists of two Provinces:
- Britain
- Egypt
The first time Britain is conquered by the Axis, the UK falls. Egypt passes to Axis control. Any Allied cards remaining in Egypt are discarded.
9.5 USA / Canada
The USA and Canada share a single Province card. It gives a different amount of resources depending on the year.
At the end of the 1941 turn, the USA enters the war on the side of the Allies. All USA cards are shuffled in as part of the Allied Draw deck.
USA/Canada may not be invaded by the Axis, and can never be conquered. The Allies may always trace supply to USA/Canada Province.
9.6 Germany
Germany consists of two Provinces:
- Berlin
- Ruhr
If both Provinces are simultaneously controlled by the Allies, Germany is defeated and the game ends.
IMPORTANT: If either Ruhr or Berlin is controlled by the Allies at the end of a year, the Axis may not use Production Points to gain Victory Points.
SPECIAL RULE: Ruhr may NOT be attacked from the North Sea. Only an overland attack may conquer Ruhr. They are otherwise considered adjacent.
Note: Ruhr and Scandinavia are adjacent overland.
9.7 The Balkans
If still Neutral at the end of the 1940 Year, the Balkans enters the war as an Axis ally. Place an Axis Control token in the Balkans. The Balkans Neutral cards remain in the Province Defense space as Defenders until removed as the result of an Allied attack.
If the Axis attack the Balkans in 1940, it joins the Allies. Any surviving Neutral cards remain in the Balkans as normal.
10. Production
Production allows you to bring new cards into your Draw deck, increase your Industry, purchase more Intel tokens, and the Axis player to gain additional Victory Points.
Production is performed at the end of each year.
Players gain Resource Points for Provinces they control. Each Province has a number of Resource symbols on it representing the number of Resource Points.
Players also have an Industry rating based on where their marker is on the Industry Track. Production Points available are the LOWER of Resource Points or Industry Rating.
Provinces that are Out of Supply do NOT produce Resource Points.
In-Supply Provinces in Quagmire still produce Resource Points for the current owner.
10.1 Using Production Points
Production Points may be spent in four ways:
- Add a card from your Loss stack to your Discard stack
- Move your Industry marker one space on the track
- Purchase two Intel tokens
- Increase Victory Points by one (Axis only)
Example: The Axis control 12 Resource Points worth of Provinces. Their Industry marker is on the '8' space, so they receive 8 Production Points. They decide to purchase 3 new cards, move the Industry marker up one space (to the 10 space), buy two Intel tokens, and three Victory Points.
10.1.1 Purchasing Victory Points: The Axis may spend up to half of their Production Points on buying Victory Points. However, if either Berlin or Ruhr are Allied-controlled at the end of the year, no Victory Points may be purchased.
11. Intelligence
You may spend Intel tokens to look at enemy Operations or defenses, or stop your opponent from looking at yours.
Intel is paid for by flipping Intel tokens to their Used side, and moving them to the Used space. At the end of each year, Intel tokens are turned back to their Available side, and additional ones may be purchased. Intel tokens are never permanently lost.
Intel is normally conducted during the Intel step, which is the final part of a player turn. It costs one Intel token to conduct Intel against any stack at the end of your turn.
If a player wishes, they may conduct Intel during the Actions step (for example, before launching an Operation, or placing cards defensively). This increases the cost by one, to two tokens.
You may conduct as many Intel Actions on a turn as you can pay for, but if Intel is successfully blocked by your opponent, you cannot attempt it against that stack again until the next turn.
11.1 Intel Targets
The following stacks may be targets of Intel:
- Province Defense
- Operations
- Quagmire
- Neutrals
- Unchosen Victory cards
11.2 Blocking Intel
When a player declares that they are conducting Intel and announces the target, their opponent may block it by spending one more Intel token than their opponent. The active player may then increase their expenditure to be one more than the block attempt. The Defender may then increase their spend to be one more than the new Attacker total. Players may continue to increase their bids until one player declines to increase, or runs out of Intel tokens. Both players then spend the tokens they bid.
Example: The Axis announce they are spending one Intel token to look at the cards in the Paris Province Defense space. The Allies wish to stop that from happening, and spend two Intel tokens to block it. The Axis say they will commit three to conduct the Intel, and the Allies increase to four to block. The Axis decide to stop at this point, so they spend three and the Allies spend four, and the Intel Action is successfully blocked. The Axis are not allowed to conduct Intel against the Paris Defenders until next turn.
You cannot conduct an Intel Action against an Operation that is in the NEW OP space, as indicated by the NO INTEL icon on the dial.
11.3 Resolving An Intel Action
- The opponent shuffles the cards and hands you the stack, including the Province card if it's an Operation.
- Draw at random half the cards, rounding fractions down to a minimum of one, and look at them secretly. (So if there's only one card in a Province Defense space you can still look at it with Intel)
- Place the cards back into the stack, shuffle it, and hand it back to your opponent.
- Stack is placed back where it came from.
The owner of the stack will not know which cards were seen.
If you do Intel against the same stack multiple times, it is shuffled in between each attempt. So you may see the same card multiple times.
12. Victory
At the end of each year, the Axis player gains Victory Points based on the Province cards they control. Add up all the Victory Points shown on the cards in the Axis tableau and add them to the Axis total.
Victory Points are not gained from Provinces that are Out of Supply. Once gained, Victory Points may never be lost.
Each side has an automatic Victory condition that ends the game immediately. If the Axis accumulate 70 or more total Victory Points at any point, they immediately win. The Axis still gains points at the end of the 1944 turn.
If Berlin and Ruhr are both Allied-controlled at any time, the Allies immediately win.
If neither of these conditions have been met by the end of the 1944 turn, the Axis reveals the two Victory cards they chose at the beginning of the game. If both of those Provinces are Axis controlled they win the game. Otherwise, the Allies win the game.
13. Example of Play
Here is an example of the first few turns of The Fog of War, to give you a better idea of the flow of the game.
This is not intended to be an example of good strategy or tactics.
After setting up the Neutral cards and all control tokens, Brian, the Axis player, selects his Victory cards. He draws Scandinavia, Poland, and Yugoslavia. He decides to discard the Poland card, and places it back into the game box, unseen by Sydney, the Allied player. The other two Victory cards are placed below his Player Mat.
For her initial placements, the Allies decide to place the Fort/2 in Paris, an Army/1 in Egypt, and forego their third placement. The Axis place Dummies in Western Med, Italy, and Libya.
The Axis player's starting hand is Army/3, Air, Dummy.
13.1 Axis First Turn
The Axis player takes the first turn. The first step is to rotate the Operation Wheel, but since there are no Operations in process this can be skipped. Now he performs actions.
He decides to try to take Paris as his first Operation. He takes the Paris Province card, the Army/3, and the Air unit, and places them into the Operation Alpha space, where the NEW OP section of the dial is pointing, all face down.
He decides to place the Dummy card into Ruhr, to try to dissuade the Allies from planning an attack there.
In the future, he will need to take Scandinavia, since that is one of his Victory Provinces. So he decides to flip one Intel token to attempt to look at the lone Neutral card there. The Allies decline to spend two to block the attempt, so the Axis looks at the card and sees that it is an Army/2.
He has no cards, and so draws three new cards: Dummy, Army/1, and Army/2.
13.2 Allied First Turn
Now the Allied player is up. Her starting three cards are Army/1, Fleet/1, Army/1. She decides to start conservatively on defense, and not start an Operation, so she places the Army/1 into the Paris Province Defense space, and the other Army/1 into Britain. She also places the Fleet into the North Sea space, to help shore up those defenses.
To end the turn, she draws three new cards, getting two Dummies, and an Air unit.
13.3 Axis Second Turn
The Axis player now takes his next turn.
He rotates the Operation Wheel one segment clockwise, so that the NEW OP segment is now pointing to Operation Bravo. Operation Alpha is now in the next segment of the dial. Since the NO LAUNCH icon is in this segment, it cannot be launched. Therefore the Axis can only add new cards, disband the Operation, or sit tight. He decides to add just the Army/2 and the Dummy, and use the Army/1 for another Operation.
He then decides to start an Operation to take Scandinavia. He adds the Scandinavia Province card and Army/1 to the Operation Bravo space, where the NEW OP segment is now located. He knows that he will need at least four strength to win outright, since Scandinavia is defended by a two strength card.
Finally, he decides to try some misdirection, and spends one Intel token to look at the North Sea Defender. The Allies, after thinking for a second, decides to take advantage of her token advantage, and block the attempt. She spends two Intel tokens. The Axis could commit two more tokens, for a total of three, to force it through, but he declines. He flips one Intel token to the Used side, and the Allies flip two. He also decides to look at Egypt, and spends one token. The Allies decline to block this one, and so the Axis sees the Army/1 in Egypt.
He draws three cards to finish up his turn, and gets an Army/2, a Dummy, and an Army/1.
13.4 Allied Second Turn
The Axis conducting Intel on the North Sea has the desired effect on the Allies. She decides that this means that Axis Operation Alpha is probably going to try to take the North Sea, and possibly Operation Bravo is invading Britain itself.
She plans her turn assuming that is the correct assumption.
The Allies have no Operations on the Operation Wheel, so once again they don't need to turn the Operation Wheel.
For Province Defense, she decides that it's best to try to stop the Germans at sea rather than on the beaches of Britain. So she adds the Air card into the North Sea Province Defense space, and places one of the Dummies into Paris, and one into Egypt.
To end her turn she uses Intel to look at Operation Alpha, to gauge the strength. The Axis decline to block. There are currently five cards in the Operation, and the Allied player will get to see two of them. The Axis player shuffles the stack and hands it to the Allies. She draws two cards, and sees an Army/2 and an Army/1.
This Operation is not going to attack the North Sea! But is it Britain? Paris? Or someplace else?
She maintains her poker face, shuffles the cards back up and gives the stack back to the Axis player, who places it back onto the Operation Alpha space.
She now regrets not spending the extra Intel token to look at this Operation before she played her cards. If she had done so, she might have placed the Air unit somewhere else.
She draws three cards.
13.5 Axis Third Turn
The Axis player rotates his Operation Wheel.
Alpha can now be launched, but the Defender will get a bonus +1 Strength.
However there's a good chance that the Allies saw the Paris card and know where the attack is going. If so, there may be lots of reinforcements going there on defense next turn. So it might be best to launch the Operation now.
To gain some extra information, the Axis decide to spend their last two Intel tokens to do it during the Action steps. The Allies use three Tokens to block the Axis, hoping the lack of information will cause them to delay launching an attack on Paris.
The Axis have six strength (an Army/3, an Army/2, and an Air), so with the Allies having three cards there, there is a good chance for a Quagmire with the +1 defense bonus.
But he decides to take a chance and try to launch the Attack now, hoping for a quick Victory. Before he launches, he adds an additional Army/2.
13.6 The Battle of Paris
Brian declares that he is launching Operation Alpha, and that the target is Paris, showing the Province card from the Operation stack.
Supply is fine, since the Axis can easily trace to Paris from Ruhr.
Now all cards are revealed. The Axis have eight strength (Army/3, 2x Army/2, and the Air, which adds one). The Allies show that they have an Army/2 and two Dummies, for a total strength of three with the bonus. The Dummy is discarded.
The Axis have at least double the Allied strength, so they are victorious! The Allied Army/2 is placed in the Loss stack. The Allies are pleased that they placed the Air unit into the North Sea instead of Paris, since it just would have ended up getting eliminated because the Axis had 8 strength.
The Axis must match '3' strength, since they must include the +1 Defender bonus. They can choose either the Army/3, or both an Army/2 and Air. They choose to take the Army/3, and place it in the Win stack.
The remaining Axis cards are placed in the Paris Province Defense space, face down.
The Axis conquer France! Per the special rules for France, the Axis immediately adds the Paris, Vichy, Morocco, and Levant Province cards to the tableau in front of them, and flips the control markers on the map. The Levant is Out of Supply since the Eastern Med is controlled by the Allies, so the Axis places an Out of Supply marker there.
The Allied player picks up those Province cards from his tableau and places them in his Province Deck.
The Axis player continues his turn by adding an Army/1 card to Operation Bravo. The Allied player sits back and licks her wounds, wondering where the next Axis Operation will strike.
Advanced Realism Rules
These rules add more realism, at the expense of some complexity. Feel free to add any or all of them at your option as you become more experienced.
1. Supply and Province Defense
Players may not place Defenders into a Province that is Out of Supply. This includes adding Defenders to Quagmires in a Province that is Out of Supply for the Defender.
2. Sea Supply and Naval Interdiction
When using this rule, players may trace supply through any number of enemy-controlled Sea Provinces. However they may not Launch from an enemy controlled Sea Province.
If supply is traced through an enemy-controlled Sea Province when an Operation is launched, the enemy may conduct Naval Interdiction. He may reveal any number of cards with Naval strength that the Province(s) Supply is traced through. For each card revealed, the Attacker must randomly select one attacking card from the Operation to be placed in the Loss stack. These cards are chosen BEFORE the attacking cards are revealed, and so may include Dummies.
Example: The Axis control Italy and Libya, but neither the Eastern or Western Mediterannean. They announce an Operation against Egypt, containing an Army/3, Army/2, Army/1, and 2 Dummies. The Allies have two cards in the Eastern Med, and three in the Western Med, so they decide to trace supply through the East. The Allies reveal that both cards have Naval strength (a Fleet/3 and Air), so the Axis has to randomly select two cards. The Army/2 and a Dummy are chosen. Dummies are never placed in Loss, so the Axis player shows it to the Allied player and puts it in the Discard stack. The other card is placed in the Loss stack, without showing it to the Allies. The Axis proceeds with their attack, with 4 strength instead of 6.
3. Invading Across Straits
The following three pairs of Provinces are considered to have a strait between them, making invasion easier:
- Britian and Paris
- Morocco and Italy
- Morocco and Spain
If a player attacks one of these Provinces from a Sea Province (an Invasion), and controls the other Land Province in the pair, the Invasion Bonus is only +2 instead of +4.
Also, if using this rule, Air cards may not be used by the Attacker in an Invasion that is not across a strait. Any Air cards included in the Operation are discarded as Dummies before results are calculated.
Example: The Allies are attacking Paris from the North Atlantic. They also control Britain. The Defenders get a +2 Invasion Bonus, and the Allies may use Air units. If Britain was not controlled by the Axis, Paris would have a +4 Invasion Bonus, and the Allies could not use Air units.
4. Shore Bombardment
Fleet cards may be used in Operations that are Invasions. When the Operation is revealed, if the Defender receives the Invasion bonus, their strength may be used.
Total all the Fleet cards and divide in half, rounding down. This strength is added to the Attacker total. However, it may not exceed the strength from Army and Air cards in the battle. Do not include any Attacker bonuses in this calculation.
Note that Air only applies its Ground strength in this case, not Naval.
If the Attacker loses or is Routed, the Fleet cards are placed in the Loss stack.
If the Attacker wins, the Fleet cards may not be chosen to be placed in the Win stack, and are not placed in the Province Defense space. Instead they are discarded.
If the result is Quagmire, the Fleet cards are placed in the Win stack before cards are chosen to be placed in the Loss stack. Since it is no longer an Invasion, no additional Fleet cards may be added.
5. Air Support
An Operation cannot only have Air cards. They must be supported by at least one Army card (when attacking a Land Province), or one Fleet card (when attacking a Sea Province). If there are only Air cards when the Operation is launched, it is disbanded instead.
Note that Shore Bombardment does not allow air units to attack by themselves.
This rule DOES apply in Quagmires. If the Attacker only has Air cards in future turns of a Quagmire, the Attacker must disband the Operation.
This rules does not affect defending. Air cards may defend by themselves normally.
6. Bidding for Sides
At the start of the game, players bid for sides. Each player secretly writes down a bid for a side, and the number of Victory Points they are willing to give to the other side.
Both players reveal their bids. If players selected opposite sides, they each play that side, and there is no adjustment to Victory Points. If they select the same side, the player who bid the higher number takes that side.
If both players select the Axis, the higher number bid is added to the points the Axis must achieve for their automatic Victory.
If both players select the Allies, the higher number bid is subtracted from the Victory Points the Axis must achieve for their automatic Victory.
If the sides and bids are tied, choose sides randomly, and apply the Victory Point modifier as noted above.
Examples: Alice bids Allies-2, and Bob bids Axis-1. Alice is the Allies, and Bob the Axis, and the Axis needs 70 VP for an automatic Victory.
Alice bids Allies-2 and Bob bids Allies-3. Bob is the Allies, Alice the Axis, and the Axis needs to get 67 VP for an automatic Victory.
Fog of War Force Manifest
| 3 Army | 2 Army | 1 Army | 3 Fort | 2 Fort | 3 Fleet | 2 Fleet | 1 Fleet | Air | Dummies | Total Cards | Gnd Strength | Nav Strength | |
|---|---|---|---|---|---|---|---|---|---|---|---|---|---|
| Axis | |||||||||||||
| Axis START | 1 |
A Note About The Map
In the interest of making the map easy to understand at a glance, many countries in Europe are not shown, and Provinces are named with some license.
We are aware that Portugal is not part of Spain, Ireland not part of Britain, and that Belgium, Albania, Tunisia, and other countries exist.
We attempted to balance having a manageable number of spaces with using geographic names that are more commonplace and reflective of the time period (for example, using 'Spain' instead of the more geographically accurate but less well-known 'Iberia')
We apologize to any residents or descendents of these countries, and appreciate your understanding.
Fog of War Reference
Turn Sequence
- Rotate Operation Wheel
- Perform Actions, in any order
- Intel (1 token per intel)
- Draw back to three cards
Actions
- Add card to Operation or Defense
- Create, Launch, or Disband an Operation
- Add cards to and resolve Quagmire (Attacker only)
- Add card to a Quagmire (Defender only)
- Intel (2 tokens per intel)
End of Year Steps
- Axis VP
- Win Discard/Loss
- Production
- Remove cards in Defense spaces, Disband Operations
- Flip Intel tokens to Available side
- Political Entry
- Add next year cards to Loss
Operation Resolution
- Attacker Reveals Target and Determines Supply.
- Reveal cards, discard Dummies and non-combatants and determine results:
Attacker 2x Defender: Victory
- All Defender cards are placed in Loss stack.
- Attacker cards matching Defender strength (including Defender bonuses) placed in Win stack.
- Attacker Cards not selected are placed in the Province Defense space.
- The Defender puts the Province card back into their Province Deck. Attacker adds Province card to their Tableau.
- Change Control marker on map. Mark any Provinces that are now Out of Supply or back in Supply.
Attacker >= Defender but not double: Quagmire
- Place half (rounded down) of Attacker and Defender cards in Loss stack, chosen randomly.
- Place all remaining cards (face down) in Province Defense space. Mark space on map with Quagmire token.
- Defender may add cards during Quagmire step on Defender turn. Attacker may add cards on NEXT Attacker turn.
- Attacker must resolve Quagmire next turn.
Defender > Attacker but not double: Defeat
- All Attacker cards are placed in Loss stack.
- Defending cards matching Attacker strength (including Attacker bonuses) placed in Win stack.
- Remaining defending cards returned to Province Defense space.
- The Attacker puts the Province card back into their Province deck so they can attack again on a future turn if desired.
Defender 2x Attacker: Rout
- All Attacker cards are placed in Loss stack.
- All defending cards returned to Province Defense space.
- The Attacker puts the Province card back into their Province Deck so they can attack again on a future turn if desired.
Special Country/Province Rules
- Paris falls: Vichy, Levant, Morocco pass to Axis.
- Britain falls: Egypt passes to Axis.
- Balkans enters at end of 1940 turn as Axis-controlled Province if still Neutral.
- USA enters at start of 1941. Cards in USA space go into Allied Draw deck. USA/Canada may never be attacked.
- USSR enters when first Province attacked or end of 1942. Cards in Urals space (except Resource card) immediately go into Allied Draw deck. Urals may never be attacked. Urals resource available when USSR enters war.