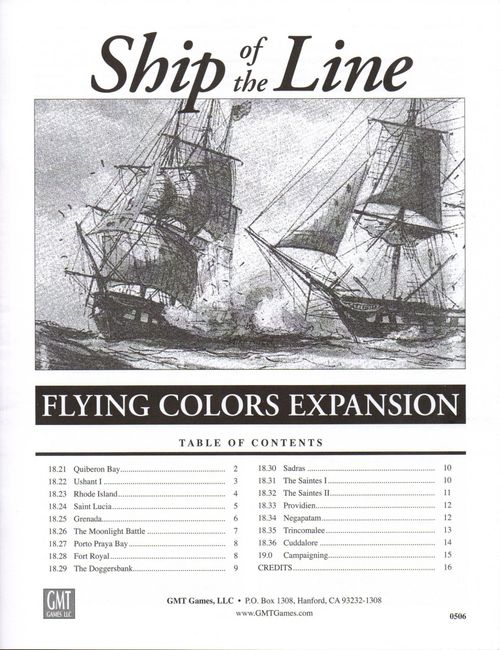
Flying Colors: Ship of the Line
Flying Colors: Ship of the Line Rulebook
Table of Contents
Table of Contents
Quiberon Bay
20 November 1759 – As part of plans for the invasion of Scotland, a French fleet under Marshal de Conflans leaves Brest on 14 November. It skirts the Brittany coast in an effort to elude a British fleet under Admiral Edward Hawke, but to no avail. In heavy winds, Hawke catches the French fleet as it attempts to put in to Quiberon Bay. The ensuing melee results in the loss of seven French vessels and a divided fleet, putting an end to French sea power during the Seven Years War.
Turns: 16, Maps: AB, Wind Direction: 1 (Breezy)
Audacity: British (2), French (0)
Shallows: Shoals B, D, J and M are in play with Automatic grounding.
British
| Ship | Counter |
|---|---|
| Union with HARDY 2-5-2 | A5219-5319 |
| Duke | A5418-5518 |
| Hercules | A5717-5818 |
| Warspite | A5520-5621 |
| Swiftsure | A5719-5820 |
| Kingston | A5822-5922 |
| Intrepid-b | A6020-6120 |
| Montagu-b | A6122-6223 |
| Royal George with HAWKE 3-8-4—Flagship | A6024-6124 |
| Magnanime | A6321-6422 |
| Torbay | A6324-6425 |
| Dorsetshire | A6523-6624 |
French
| Ship | Counter |
|---|---|
| Soleil Royal with DE CONFLANS 3-6-2—Flagship | A4432-4433 |
| Orient-b | A4233-4234 |
| Glorieux | A4633-4634 |
| Robuste | B4401-4402 |
| Dauphin Royal | B4202-4203 |
| Dragon | B4602-4603 |
| Solitaire | B4404-4405 |
| Tonnant with DE BAUFFREMONT 2-4-1 | B4205-4206 |
| Intrépide | B4605-4606 |
| Thesée | B4009-4010 |
| Northumberland-b | B4407-4408 |
| Superbe |
Special Rules
- British win the Initiative on Turn 1.
- A wind change occurs on a roll of 0 or 1.
- When firing to leeward (with the wind) and a '0' is rolled, roll the die two more times. If both of these rolls are '0' the firing ship is immediately awash and considered sunk!
Ushant I
27 July 1778—On 13 March 1778, the British government was advised that France had allied with the American cause. During the following June, the fleet of Admiral Augustus Keppel captured his first French prizes as part of this new conflict, a pair of frigates whose papers revealed a large French fleet at Brest. After acquiring reinforcements, Keppel met this fleet off the coast of the Ile d'Ouessant, engaging in the first major naval battle of the American Revolution. The action was tentative, with neither Keppel nor the French commander, the Comte d'Orvilliers, opting to engage generally. For his failure to bring a general action (and owing to some political prodding), Keppel was subject to a court martial, where he was soon acquitted of any wrong-doing.
Turns: No Limit, Maps: ABC, Wind Direction: 2 (Breezy)
Audacity: British (1), French (0)
British
| Ship | Counter |
|---|---|
| Monarch | A4809-4808 |
| Hector | A4806-4805 |
| Centaur | A4803-4802 |
The remainder enters per Special Rule #1 in the following order: Exeter, Duke, Queen-b with HARLAND 2-5-1, Shrewsbury, Cumberland, Berwick, Stirling Castle, Courageux, Thunderer, Sandwich, Valiant, Bienfaisant, Victory with KEPPEL 3-5-2 (flag), Foudroyant, Prince George, Vigilant, Terrible, Vengeance, Worcester, Elizabeth, Robust, Formidable with PALLISER 2-5-3, Ocean, America, Defiance-b, Egmont, Ramillies-b
French
| Ship | Counter |
|---|---|
| Diadème | C3223-3224 |
| Fier | C3025-3026 |
| Conquérant | C3227-3228 |
| St. Michel | C3029-3030 |
| Solitaire | C3231-3232 |
| Triton | C3033-3034 |
The remainder enters per Special Rule #2 in the following order: Intrepid, Saint-Esprit with DE CHARTRES 2-5-1, Zodiaque, Roland, Robuste, Sphinx, Artésien, Orient-b, Actionnaire, Fendant, Bretagne with D'ORVILLIERS 3-6-2 (flag), Magnifique, Actif, Ville de Paris, Réfléchí, Vengeur-b, Éveillé, Indien, Palmier, Couronne-b with DU CHAFAULT 2-4-1, Glorieux, Amphion, Bien Aimé, Dauphin Royal
Special Rules
- British enter in line through hex A4801 with at least one hex between ships.
- French enter in line through hex C3234 with at least one hex between ships.
- Ships that have not yet entered the map are assumed to be in the formation of any on-map ship within three hexes of each side's entry hex or vice-versa (if a commander has yet to enter, he can extend his formation through an entry hex).
- A wind change occurs on a roll of 0, 1, or 2.
- Decrease a ship's Rate by one when firing to leeward (with the wind).
- Map D may be added to the map if space is available. If used, the French enter through D3034.
Rhode Island
11 August 1778—A French fleet under Admiral d'Estaing arrived at Newport, Rhode Island to assist American efforts to disperse the British garrison holding the town. Upon noting the arrival of a British fleet under Admiral Richard "Black Dick" Howe, d'Estaing ordered the fleet to withdraw into Narragansett Bay. Late during the morning of 10 August, the winds turned favorably to the French and d'Estaing ordered mooring cables cut to get the fleet under way as soon as possible. The French fleet pursued the British until the weather became too heavy to allow an engagement, and broke off the chase on 11 August. This hypothetical scenario allows the fleets to engage to see what might have happened, had the weather not turned so violently.
Turns: 10, Maps: AB, Wind Direction: 3 (Breezy)
Audacity: British (0), French (1)
British
| Ship | Counter |
|---|---|
| Experiment | A5215-5214 |
| Cornwall | A5218-5217 |
| Eagle with HOWE 3-7-3—Flagship | A5221-5220 |
| Somerset | A5224-5223 |
| Renown-b | A5227-5226 |
| Isis | A5028-5027 |
| Phoenix | A5031-5030 |
| Ardent | A5034-5033 |
| Nonsuch | B5003-5002 |
| Preston with HOTHAM 2-5-2 | B5006-5005 |
| Roebuck | A5402-5401 |
| St. Albans | A5405-5404 |
French
| Ship | Counter |
|---|---|
| Protecteur | B1133-1034 |
| Guerrier | B1432-1332 |
| Fantasque | B1730-1631 |
| Sagittaire-b | B2027-1927 |
| César with DE BROVES 2-5-2 | B2029-1929 |
| Marseillais | B2325-2226 |
| Languedoc with D'ESTAING 3-7-2—Flagship | B2624-2524 |
| Vaillant | B2920-2821 |
| Hector | B2922-2823 |
| Tonnant with DE BREUGNON 2-6-1 | B3219-3119 |
| Zélé | B3517-3418 |
Saint Lucia
15 December 1778—Within months of declaring their alliance with the American cause, French forces acted swiftly. Before the British could fortify, a French force landed on and quickly captured the island of Saint Lucia. The British counter-attacked by sending a landing force under Admiral Samuel Barrington to retake the island. While the assault was underway, French Admiral d'Estaing proposed to strike the British fleet at anchor. If he could destroy it, the ground forces would be isolated and would have to surrender. Before d'Estaing could bring his fleet to bear, the British had taken two fortified positions overlooking their fleet, making their defensive position that much stronger. The French fleet made two passes in an attempt to dislodge the British ships, but to no avail. Saint Lucia was firmly back in British hands.
Turns: 5, Map: A, Wind Direction: 1 (Calm)
Audacity: British (1), French (0)
Shallows: Shoals H (–1), M (–1) are in effect. Shoals A and D are impassible and block LOS. The British ships ignore shoals H and M (no grounding rolls are required).
British
| Ship | Counter |
|---|---|
| Isis | A1728-1727 |
| Boyne | A1725-1724 |
| Nonsuch | A1722-1721 |
| St. Albans | A1719-1718 |
| Preston | A1817-1916 |
| Centurion | A2115-2215 |
| Prince of Wales-b with BARRINGTON 2-6-1—Flagship | A2414-2513 |
French
Enter per Special Rule #3 in the following order: Tonnant with DE BREUGNON 2-6-1, Vaillant, Zélé, Languedoc with D'ESTAING 3-7-2 (flagship), Hector, Sagittaire, Marseillais, César with DE BROVES 2-5-2, Guerrier, Protecteur, Fantasque
Special Rules
- Play the scenario twice, retaining any damage sustained during the first round.
- British start at Anchor and remain in command while anchored. The French fleet may not anchor.
- The French player must select a hex between 2034 and 7034 through which the French line will enter. Ships that have not yet entered the map are assumed to be in the formation of any on-map ship within three hexes of the entry hex or vice-versa (if a commander has yet to enter, he can extend his formation through the entry hex).
- During set up, the British roll a die. A roll of 0-2 adds Shore Batteries (1/34) to hexes 2613 and 1731.
- Victory is based solely upon victory points. Fleets do not make Break checks.
- Option: Add Map B to allow the British to raise anchor and fight an open water battle (one 10-turn play).
Grenada
6 July 1779—Early in 1779, Admiral John Byron arrived from Rhode Island to take command of the British fleet in the West Indies. After assessing the situation, he determined to strike the French at Grenada, a British possession under siege by Admiral d'Estaing. The French caught wind of Byron's arrival and raised anchor during the night of 5 July. Both fleets sighted each other while forming for battle. Byron called for a general chase, before realizing that the French fleet was superior to his own in numbers. His precipitate action led to the rear of his line being isolated and subject to attack by nearly the entire French fleet. Given the damage and disorder of his fleet, Byron was forced to withdraw. Byron's loss was considered the greatest British naval disaster in nearly 100 years. Soon after, Byron was relieved of command in the West Indies.
Turns: 20, Maps: AB, Wind Direction: 2
Audacity: British (1), French (0)
Shallows: Shoals B and C are in play with automatic grounding.
British
| Ship | Counter |
|---|---|
| Sultan | A3224-3225 |
| Prince of Wales-b with BARRINGTON 2-6-1 | A3227-3228 |
| Boyne | A3230-3231 |
| Stirling Castle | A3233-3234 |
| Elizabeth | B3202-3203 |
| Grafton | B3205-3206 |
| Princess Royal with BYRON 3-6-2—Flagship | B3208-3209 |
| Albion | B3211-3212 |
| Fame | B3214-3215 |
| Royal Oak | B3217-3218 |
| Lion | B3017-3018 |
| Nonsuch | B3319-3320 |
French
| Ship | Counter |
|---|---|
| Zélé | B4616-4615 |
| Fantasque | B4613-4612 |
| Magnifique | B4610-4609 |
| Tonnant with DE BREUGNON 2-6-1 | B4607-4606 |
| Protecteur | B4604-4603 |
| Fier-b | B4601-4634 |
| Dauphin Royal | A4632-4631 |
| Provence | A4629-4628 |
| Fendant | A4626-4625 |
| Artésien | A4623-4622 |
| Fier | A4620-4619 |
| Hector | A4617-4616 |
Rear Squadron (see Special Rule #2): Sphinx, Diadème, Amphion, Marseillais, César with DE BROVES 2-5-2, Vengeur-b, Réfléchí, Annibal
Special Rules
- No Anchoring is allowed.
- At start of each turn, the French rolls for the arrival of his Rear squadron. It arrives on a roll less than or equal to the current turn number. For each ship in the squadron, roll a die and add 40 (re-rolling duplicates). This determines the Map A hex number (xx01) the ship enters, facing Direction 4.
The Moonlight Battle
16 January 1780 – Admiral Rodney received intelligence early in the month that a Spanish fleet was cruising off of Cape St. Vincent. Under full sail, the British fleet met the Spanish during the early afternoon of the 16 January. That day, Rodney was confined to his bed with a bad case of gout. This is significant as the actions of the British on that day were decidedly not "Rodney-like," which leads some scholars to question whether battle orders were issued by Rodney or his flag captain, Walter Young. The British fleet bore down on the Spanish in line abreast, hitting the rear of their line and "leap-frogging" up the Spanish line. This maneuver was performed dangerously close to the coastline, to make sure the Spaniards were unable to escape into port. The entire action lasted several hours, well past midnight. Of the nine Spanish ships that began the action, six were taken and one, the Santo Domingo, exploded early during the fight.
Turns: See Special Rule #2, Maps: BC, Wind Direction: 4
Audacity: British (2), Spanish (0)
Shallows: Shoal E is in play with a –2 grounding modifier.
British
| Ship | Counter |
|---|---|
| Monarch | B2205-2204 |
| Cumberland | B2202-2201 |
| Royal George with ROSS 2-5-1 | B2208-2207 |
| Invincible | B2211-2210 |
| Marlborough | B2413-2312 |
| Montagu | B2714-2614 |
| Terrible | B3016-2915 |
| Sandwich with RODNEY 3-7-2—Flagship | B3317-3217 |
| Ajax | B3619-3518 |
| Bienfaisant | B3920-3820 |
| Bedford | B4107-4007 |
| Defence | B4110-4010 |
Spanish
| Ship | Counter |
|---|---|
| San Lorenzo | B5207-5206 |
| Princessa | B5213-5212 |
| San Justo | B5210-5209 |
| Monarca | B5216-5215 |
| San Genaro | B5219-5218 |
| San Julián | B5222-5221 |
| San Domingo -b | B5225-5224 |
| Diligente | B5228-5227 |
| San Augustín | B5231-5230 |
| San Eugenio | B5234-5233 |
| Fénix with LÁNGARA 3-6-2—Flagship | C5203-5202 |
Special Rules
- Roll a die at beginning of each turn. On a roll of 4 or less, wind speed becomes Breezy.
- Play until no non-sunk and non-struck Spanish ships remain on the map.
- Rodney's Command Quality is a '0' for the duration of the battle (he's sick in bed).
- The British gain the initiative automatically on the first turn.
Porto Praya Bay
16 April 1781—At the outset of Britain's war with Holland, the decision was made to capture the Cape of Good Hope in order to control commerce moving into the Indian Ocean. A fleet under Commodore James Johnstone was dispatched for this purpose. The French, hearing of this plan, dispatched a fleet under Admiral Suffren to foil them. Upon reaching the Cape Verde Islands, Suffren decided to put into Porto Praya Bay for provisions. Upon reaching the bay, Suffren was surprised to discover that Johnstone had the same idea and had anchored his fleet there! Suffren immediately chose to attack. He sailed into the bay and anchored among the British ships. After a very brief scuffle, Suffren determined that his attack had failed and quickly abandoned his position for the safety of the high seas.
Turns: 12, Map: D, Wind Direction: 5 (Calm)
Audacity: British (0), French (1)
Shallows: The following shoals are in play with grounding modifiers noted: H (–2), E-R-T (Automatic)
British
| Ship | Counter |
|---|---|
| Romney with JOHNSTONE 2-6-3—Flagship | D2513-2514 |
| Hero | D3012-3013 |
| Monmouth | D3315-3316 |
| Jupiter | D2115-2116 |
| Isis | D3717-3718 |
French
| Ship | Counter |
|---|---|
| Héros with SUFFREN 3-7-4—Flagship | D5725-5826 |
| Annibal | D6027-6127 |
| Artésien | D6328-6429 |
| Sphinx | D6630-6730 |
| Vengeur-b | D6931-7032 |
Special Rules
- British start at anchor. Anchoring is allowed in any hex.
- To win, the French must damage more ships than they sustain. A sunk or struck ship counts as two ships for this purpose. Fleets do not make Break checks.
- The French suffer one attack from a 'G' rated ship at the end of any turn if within three hexes of any anchored British ship (fire from East Indiamen). Use the range from the British ship to the French target when determining the firepower of the attack.
Fort Royal
29 April 1781—At the end of January 1781, Admiral Rodney received reports of a large French fleet headed for the West Indies. He ordered Admiral Hood out to intercept the attackers and Hood soon discovered that the reports were false. Upon his return, Hood was ordered to blockade Fort Royal on the island of Martinique. Hood objected to this order as it would place his fleet downwind of enemy approaches, but Rodney insisted. Unfortunately, Hood was correct in his evaluation. On 28 April, De Grasse arrived off Martinique along with a supply convoy. Since Hood was out of position, De Grasse easily put to on the opposite side of the island. The following morning, Hood had managed to get his fleet close enough to Fort Royal to begin a long-distance cannonade with De Grasse's ships as they came up around the south side of the island. Hood's poor position and De Grasse's maneuver around the island allowed several French ships, previously blockaded, to join the end of De Grasse's line which now outnumbered Hood. With concern for the safety of his convoy, De Grasse never pressed Hood and the latter could not get up wind. The battle remained little more than several hours of ineffective cannonades.
Turns: 12, Maps: BCD, Wind Direction: 3
Audacity: British (1), French (0)
Shallows: Shoal E is in play with a –1 grounding modifier.
British
| Ship | Counter |
|---|---|
| Alfred | B4217-4218 |
| Belliqueux | B4220-4221 |
| Alcide | B4223-4224 |
| Invincible | B4226-4227 |
| Monarch | B4229-4230 |
| Barfleur with HOOD 3-7-4—Flagship | B4232-4233 |
| Terrible | C4201-4202 |
| Princessa | C4204-4205 |
| Ajax-b | C4207-4208 |
| Resolution | C4210-4211 |
| Montagu | C4213-4214 |
| Gibraltar with DRAKE 2-5-3 | C4216-4217 |
French
| Ship | Counter |
|---|---|
| Languedoc | C2604-2605 |
| Citoyen | C2607-2608 |
| Glorieux | C2610-2611 |
| Auguste with BOUGAINVILLE 2-4-2 | C2613-2614 |
| Souverain | C2616-2617 |
| Diadème | C2619-2620 |
| Zélé | C2622-2623 |
| Scipion | C2625-2626 |
| Northumberland | C2628-2629 |
| Ville de Paris-b with DE GRASSE 3-7-3—Flagship | C2631-2632 |
| Sceptre | C2634-2601 |
| Hector |
The Doggersbank
5 August 1781—On his way back to England through the Baltic Sea, Admiral Hyde Parker crossed paths with a Dutch fleet under Admiral Arnold Zoutman. Both fleets were escorting convoys. Until recently, Hyde had been Rodney's second in command in the West Indies, but a censure from Rodney and a rebuke from the Admiralty had landed him with new duties. Quick to show he was eager to fight, he signaled his convoy to make for home and drove forward to engage the enemy. Both fleets held their fire until within close range. Action was hot, but mostly ineffective, with both fleets withdrawing without serious losses (although the Dutch lost a ship the following day).
Turns: 16, Map: A, Wind Direction: 3
Audacity: British (1), Dutch (0)
British
| Ship | Counter |
|---|---|
| Berwick | A2901-2801 |
| Dolphin | A2702/Dir 3 |
| Buffalo | A2904-2804 |
| Fortitude with PARKER, H. 3-4-1—Flagship | A2906-2806 |
| Princess Amelia | A2908-2808 |
| Preston | A2910-2810 |
| Bienfaissant | A2912-2812 |
Dutch
| Ship | Counter |
|---|---|
| Erfprins | A4916-4917 |
| Admiraal Generaal with ZOUTMAN 3-6-2—Flagship | A4919-4920 |
| Argo | A4922/Dir 1 |
| Batavia | A4924-4925 |
| Admiraal De Ruijter with KINSBERGEN 2-4-2 | A4927-4928 |
| Admiraal Piet Hein | A4930-4931 |
| Hollandia | A4933-4934 |
Special Rules
The British vessels were old and not properly armed during this battle. Because of this, the British do not gain any Carronade bonuses.
Sadras
17 February 1782—In early March 1779, Admiral Edward Hughes sailed for the Indian Ocean to secure trade and to assist in combating Hyder Ali, the Sultan of Mysore, with whom Britain was at war. For several years, Hughes sailed the Indian Ocean and Bay of Bengal without interference. This calm ended when a French fleet under Admiral Suffren sailed into view on 15 February 1782. Hughes' fleet raised anchor and pursued the French fleet. Two days later the fleets engaged for what would be the first of several engagements between these two admirals.
Turns: 12, Maps: AB, Wind Direction: 6
Audacity: British (1), French (0)
British
| Ship | Counter |
|---|---|
| Monmouth | B2609-2608 |
| Burford | B2606-2605 |
| Eagle | B2603-2602 |
| Worcester | A2634-2633 |
| Superb with HUGHES 3-7-3—Flagship | A2631-2630 |
| Hero | A2628-2627 |
| Isis | A2625-2624 |
| Monarca | A2622-2621 |
| Exeter | A2619-2618 |
French
| Ship | Counter |
|---|---|
| Héros with SUFFREN 3-7-4—Flagship | B5202-5201 |
| Orient-b | A5233-5232 |
| Sphinx | A5230-5229 |
| Vengeur-b | A5227-5226 |
| Hannibal | A5224-5223 |
| Annibal | A5221-5220 |
| Bizarre | A5218-5217 |
| Sévère | A5215-5214 |
| Ajax | A5212-5211 |
| Flamand | A5209-5208 |
| Artésien | A5206-5205 |
| Brillant | A5203-5202 |
The Saintes I
9 April 1782—In early April 1782, Admiral De Grasse approached the islands of Dominica and Guadeloupe. His large fleet was accompanying a supply convoy to be used in the planned conquest of Jamaica. As the French headed into the gap between the two islands and near a smaller cluster of islands called the Saintes, the van of Admiral Rodney's British fleet was spotted. The British van, under Admiral Hood, had become separated from the rest of the fleet and was vulnerable to attack. Rather than commit his entire fleet towards Hood's destruction and possibly leave his convoy vulnerable to attack, De Grasse dispatched 15 ships under Admiral Vaudreuil to force the British to withdraw. Hood's ships stood in line, keeping station so as to not draw further away from the rest of the British fleet. Vaudreuil swung his line up from the south and engaged Hood's line from its rear to its front, tacking in a continual clockwise circle. Vaudreuil kept his distance for fear of the British carronades. The battle continued for several hours until Hood was reinforced. After the battle, Hood's ships hove to for repairs that they would need for the battle to come!
Turns: 16, Map: A, Wind Direction: 5
Audacity: British (1), French (0)
British
| Ship | Counter |
|---|---|
| Royal Oak | A2705-2706 |
| Alfred | A2708-2709 |
| Montagu | A2711-2712 |
| Yarmouth | A2714-2715 |
| Valiant | A2717-2718 |
| Barfleur with HOOD 2-6-4—Flagship | A2720-2721 |
| Monarch | A2723-2724 |
| Warrior | A2726-2727 |
British Reinforcements (per Special Rule #1):
| Ship | Counter |
|---|---|
| Belliqueux | A2734/D1 |
| Centaur | A3334/D1 |
| Magnificent | A3034/D1 |
| Prince William | A2434/D1 |
French
| Ship | Counter |
|---|---|
| Jason | A3630-3730 |
| Destin | A3931-4032 |
| Citoyen | A4232-4331 |
| Dauphin Royal | A4530-4630 |
| Ardent | A4829-4928 |
| Triomphante with VAUDREUIL 2-6-2—Flagship | A5127-5227 |
| Neptune-b | A5426-5525 |
| Bien Aimé | A5724-5824 |
| Caton | A6023-6122 |
| Brave | A6321-6421 |
| Bourgogne | A6620-6719 |
| Pluton | A6918-7018 |
Special Rules
- Roll a die at the beginning of each turn to see if the British reinforcements arrive. A roll less than or equal to the current turn allows their entry. Reinforcements enter through the hex noted.
- Any British ships that exit the map are worth twice their victory point value.
The Saintes II
12 April 1782—After the melee on 9 April, Rodney ordered Hood's squadron to the rear of the fleet where they could best make repairs while the chase of De Grasse continued. De Grasse had made good time, but difficulties conspired to force a battle. During the chase, several French ships collided and these damaged ships fell behind to the mercy of the approaching British. De Grasse was forced to slow his movement to cover the damaged vessels. The two fleets met on parallel tacks, the French from the north and the British from the south, and passed each other to starboard. When the British van met the French rear, Rodney ordered a general melee and the British split the French line in two places. The melee continued for several hours, resulting in the capture of Admiral De Grasse. With the French flagship and commander-in-chief captured, Rodney ordered the British fleet to hold position, allowing the remainder of the French fleet (now under Vaudreuil) to escape. Rodney's decision met with strong criticism by his own commanders, particularly Hood, who felt that the entire French fleet could have been taken the following day had they not stopped. This battle, known as "The Saintes" by the British or "Dominica" by the French was the largest naval action fought during the American Revolution and the last major engagement fought in the West Indies.
Turns: No Limit, Maps: ABC, Wind Direction: 5
Audacity: British (1), French (0)
British
Enter per Special Rule #1 in the following order: Marlborough, Arrogant, Alcide, Nonsuch, Conqueror, Princesa with DRAKE 2-5-3, Prince George, Torbay, Anson, Fame, Russell, America, Hercules, Prothée, Resolution, Agamemnon, Duke, Formidable with RODNEY 3-7-2 (flagship), Namur, St. Albans, Canada, Repulse-b, Ajax, Bedford, Prince William, Magnificent, Centaur, Belliqueux, Warrior, Monarch, Barfleur-b with HOOD 2-6-4, Valiant, Yarmouth, Montagu, Alfred, Royal Oak
French
Enter per Special Rule #1 in the following order: Hercule, Souverain, Palmier, Northumberland, Neptune-b, Auguste with BOUGAINVILLE 2-4-2, Ardent, Scipion, Brave, Citoyen, Hector, César, Dauphin Royal, Languedoc, Ville de Paris with DE GRASSE 3-7-3 (flagship), Couronne-b, Éveillé, Sceptre, Glorieux, Diadème, Destin, Magnanime, Refléchi, Conquérant, Magnifique, Triomphante with VAUDREUIL 2-6-2, Bourgogne, Duc de Bourgogne, Marseillais, Pluton
Special Rules
-
- The ships of both fleets enter through a single hex. For the British, this hex can be between C4234 and C7034 and for the French, between A1001 and A3101. The selected entry hex for each fleet may not change. The British ships enter facing Direction 1 and the French facing Direction 4. Ships entering the map must move straight ahead and may not alter course. Ships entering the map may not end their initial move adjacent to the ship entering ahead of them. Players must burn as many initial movement points off-map prior to entry to ensure this does not happen.
- If enough room is available, add Map D and enter the British fleet through any single hex between D4234 and D7034 (Dir 1).
Providien
12 April 1782—In the month after their first engagement, Suffren and Hughes returned to their respective ports to refit. Both of their missions continued, Hughes in his fight against Hyder Ali and Suffren in his attempts to disrupt British operations. In early April, Suffren learned of two ships arriving from Europe to reinforce Hughes, the Sultan and Magnanime. Suffren sailed out to intercept the reinforcements before they could join Hughes, but when he spotted the British fleet, he discovered he was too late. Hughes turned his ships to engage Suffren for the second time. The two fleets approached on the same westerly tack to within gunshot. The two commanders, eager to engage each other, ordered their flagships to within pistol shot of each other, resulting in each fleet taking opposing arc formations, tied in melee in their centers with most action involving two British ships (the Superb and Monmouth) and three French ships (Héros, Orient and Brillant). The battle lasted for roughly four hours, with these five ships taking the brunt of the damage in one of the bloodiest actions to date.
Turns: 30, Maps: AB, Wind Direction: 6
Audacity: British (0), French (1)
British
| Ship | Counter |
|---|---|
| Exeter with KING 2-4-2 | B4502-4503 |
| Sultan | B4505-4506 |
| Eagle | B4508-4509 |
| Burford | B4511-4512 |
| Monmouth | B4514-4515 |
| Superb with HUGHES 3-7-3—Flagship | B4517-4518 |
| Monarca | B4520-4521 |
| Magnanime-b | B4523-4524 |
| Isis | B4526-4527 |
| Hero | B4529-4530 |
| Worcester | B4532-4533 |
The printed counter IDs for Isis and Hero carry a stray leading period (".B4526-4527", ".B4529-4530"); the period is dropped here.
French
| Ship | Counter |
|---|---|
| Vengeur-b | A6034-6001 |
| Artésien | B6003-6004 |
| Hannibal | B6006-6007 |
| Sphinx | B6009-6010 |
| Héros with SUFFREN 3-7-4—Flagship | B6012-6013 |
| Orient-b | B6015-6016 |
| Brillant | B6018-6019 |
| Sévère | B6021-6022 |
| Ajax | B6024-6025 |
| Annibal | B6027-6028 |
| Flamand | B6030-6031 |
| Bizarre | B6033-6034 |
Negapatam
6 July 1782—The battle of Providien was costly. Both enemy fleets put into friendly ports to recover and continue operations where possible. While in Negapatam, Hughes discovered Suffren was a short distance north, where he had captured several British transports. On 5 July Suffren sailed into view and Hughes put out to attack. They met in similar formation to that at Providien, but this time with their vans clashing first. During the melee, several ships from both sides got turned around. As their respective fleets withdrew to safer distance, these ships remained locked in melee; the Burford and Sultan against the Sévère and the Worcester and Eagle against the Brillant. During the action, the Sévère lowered her colors. As her opponents ceased fire and backed away, she caught a fresh wind, raised her colors again and promptly raked the Sultan in support of Brillant. Both fleets managed to withdraw in reasonable order, but again with heavy casualties. The Brillant alone had lost 47 killed and 136 wounded, over one-third of her crew!
Turns: 10, Maps: AB, Wind Direction: 3 (Breezy)
Audacity: British (1), French (0)
British
| Ship | Counter |
|---|---|
| Hero | A2833-2832 |
| Exeter with KING 2-4-2 | A2830-2829 |
| Isis | A2827-2826 |
| Burford | A2824-2823 |
| Sultan | A2821-2820 |
| Superb with HUGHES 3-7-3—Flagship | A2818-2817 |
| Monarca | A2815-2814 |
| Worcester | A2812-2811 |
| Monmouth | A2809-2808 |
| Eagle | A2806-2805 |
| Magnanime-b | A2803-2802 |
French
| Ship | Counter |
|---|---|
| Flamand | B5202-5201 |
| Annibal | A5233-5232 |
| Sévère | A5230-5229 |
| Brillant | A5227-5226 |
| Héros with SUFFREN 3-7-4—Flagship | A5224-5223 |
| Sphinx | A5221-5220 |
| Artésien | A5218-5217 |
| Hannibal | A5215-5214 |
| Vengeur-b | A5212-5211 |
| Bizarre | A5209-5208 |
| Orient-b | A5206-5205 |
Special Rule
The French ship Ajax enters play on Turn 2 via hex 5201, (Direction 4) with three Rigging hits already sustained.
Trincomalee
3 September 1782—After Negapatam, initiative in the Bay of Bengal turned decidedly to the French. Suffren met up with two additional ships carrying 600 troops to affect the capture of Trincomalee. This they accomplished by the end of August 1782. Hughes, who was in port in Madras, was informed of the French intent, but did not act upon the knowledge immediately. When he arrived with his fleet at Trincomalee, he found the port in French hands and Suffren's fleet ready to sail. With the clear knowledge that he wouldn't be anchoring at Trincomalee, Hughes wore off back to sea. Suffren followed, his fleet still in disorder as it exited its anchorage. Both commanders were somewhat confused by each other's actions. Hughes kept away from Suffren, but made no attempt to run. Suffren would move in and then fall back. Finally, during the afternoon of 3 September, Suffren made his move and ordered his fleet, still in disorder, to close on Hughes. This proved a tragic miscalculation as much of his fleet could not get into formation before Hughes surrounded and raked it at both ends. Casualties were fairly even between the two fleets, but the French suffered substantially more damage to their vessels, including the Héros, who lost her mainmast late in the day. With both fleets seriously damaged, daylight failing and the threat of monsoons, Suffren returned to Trincomalee and Hughes to Madras.
Turns: 14, Maps: AB, Wind Direction: 6 (Breezy)
Audacity: British (1), French (0)
British
| Ship | Counter |
|---|---|
| Exeter | A3027-3028 |
| Isis | A3030-3031 |
| Hero with KING 2-4-2 | A3033-3034 |
| Sceptre | B3002-3003 |
| Burford | B3005-3006 |
| Sultan | B3008-3009 |
| Superb with HUGHES 3-7-3—Flagship | B3011-3012 |
| Monarca | B3014-3015 |
| Eagle | B3017-3018 |
| Magnanime-b | B3020-3021 |
| Monmouth | B3023-3024 |
| Worcester | B3026-3027 |
French
| Ship | Counter |
|---|---|
| Artésien | A5732-5833 |
| St. Michel | B5702-5803 |
| Héros with SUFFREN 3-7-4—Flagship | B5712-5813 |
| Illustre with BRUGERES 2-5-2 | B5714-5815 |
| Ajax | B5718-5819 |
| Sphinx | B5811-5911 |
| Flamand | B5917-6018 |
| Annibal | B5921-6022 |
| Bizarre | B5923-6024 |
| Vengeur-b | B5927-6028 |
| Sévère | B6002-6102 |
| Orient-b | B6006-6106 |
Cuddalore
20 June 1783—During the winter, both fleets remained relatively passive, waiting for the threat of monsoons and hurricanes to diminish. During this lull, two important events occurred. First, Hughes was substantially reinforced, now having advantage in numbers and quality over his French counterpart. Second, the dreaded Hyder Ali had died in early December. This latter event provided the British with the impetus to recover their losses in the region and set about to recapture Cuddalore. This operation began in earnest in early June, with Hughes' fleet providing support. Suffren, anchored in Trincomalee, set out immediately upon learning of the British activities and sighted the British fleet on 13 June. For several days monsoon winds kept Suffren from bringing action against Hughes. Hughes moved off, trying to gain the weather gauge in the tricky monsoons. Finally, on 20 June, the winds held steady enough for Hughes to accept Suffren's invitation for one final battle, the victor of which would determine the fate of Cuddalore. Action continued hotly for several hours with high casualty rates among the crews, but relatively little rigging damage. No ships were taken during the fight. Eventually, Hughes was forced to break off and return to Madras, owing to shortages in both men and water. Cuddalore, and the British forces trying to recapture it, was left in the hands of the French. This was the final naval battle fought during the period of the American Revolution.
Turns: 10, Maps: AB, Wind Direction: 6
Audacity: British (0), French (1)
British
| Ship | Counter |
|---|---|
| Defence | A3716-3717 |
| Isis | A3719-3720 |
| Gibraltar with BICKERTON 2-5-1 | A3722-3723 |
| Inflexible | A3725-3726 |
| Exeter | A3728-3729 |
| Worcester | A3731-3732 |
| Africa | A3734-3701 |
| Sultan-b | B3703-3704 |
| Superb with HUGHES 3-7-3—Flagship | B3706-3707 |
| Monarca | B3709-3710 |
| Burford | B3712-3713 |
| Sceptre | B3715-3716 |
French
| Ship | Counter |
|---|---|
| Sphinx | A4916-4917 |
| Brillant | A4919-4920 |
| Fendant | A4922-4923 |
| Flamand | A4925-4926 |
| Ajax | A4928-4929 |
| Hannibal | A4931-4932 |
| Argonaute | A4934-4901 |
| Héros—Flagship | B4903-4904 |
| Illustre with BRUGERES 2-5-2 | B4906-4907 |
| St. Michel | B4909-4910 |
| Vengeur-b | B4912-4913 |
| Sévère | B4915-4916 |
Special Rules
- Héros is the French flagship for DRM purposes.
- Place the Cleopatre within Suffren's Command Range of the Héros.
Campaigning
Campaigns are a series of connected scenarios where players complete each and a final tally of victory points determines the victor. In between each battle, players may be given the opportunity to repair and reinforce their fleets for the upcoming engagement.
When playing out a battle as part of a campaign, no break checks are made and there is no turn limitation. At the end of any turn, when break checks are normally determined, each player has the option of withdrawing any ship that is greater than ten hexes away from any opposing ship. The side with the lower Audacity rating has the first option. Players then alternate removing a ship from the board. If a player passes on the option to remove a ship, no ships may be removed during that turn. When the last ship from one side has been captured, sunk, struck or removed from the game, the scenario is over and the side remaining is considered the battle victor.
When the battle is completed, victory points are tallied (for ships captured, sunk and/or damaged). The winner adds 10 points to his total. These point totals are used to refit a side's fleet. A captured vessel may be added to the captor's fleet by replacing it with a similarly armed friendly ship marker with statistics no better than the captured ship.
When repairing a ship (even a captured one), one victory point restores ten Rigging hits or eight Hull hits. Any additional unused victory points may be used to roll on the Reinforcement Table or banked toward victory. Banked victory points may not be used after later battles. They are a gamble towards final victory.
Reinforcement Table #1
| Die Roll | Result |
|---|---|
| 0-3 | No Result |
| 4-6 | One scheduled reinforcement |
| 7-8 | Two scheduled reinforcements |
| 9 | Roll on Table #2 |
Reinforcement Table #2
| Die Roll | Result |
|---|---|
| 0 | No Result |
| 1-3 | One scheduled reinforcement |
| 4-6 | Two scheduled reinforcements |
| 7-8 | Three scheduled reinforcements |
| 9 | Any 2nd or 3rd Rate ship |
Each additional unused victory point may be used to check for reinforcements between each battle as indicated in the scenario schedule. A die is rolled on Reinforcement Table #1 to determine how many reinforcements are received, if any. These reinforcements may only be selected from the ships listed. A roll of nine allows a subsequent roll on Reinforcement Table #2. If another nine is rolled, a player may select any 2nd or 3rd Rate ship from his nationality's counter mix (this is the only exception to the reinforcement selection restrictions). If no reinforcements are listed for a side, players may still roll on the tables and hope for double-nine results.
New leaders arrive as scheduled between scenarios. Leaders may be placed on any ships as desired. If a leader is killed, any subordinate is raised to "Fleet Admiral" for the next battle and the deceased leader is replaced with his same counter, but with his Command Quality and Radius decreased by one.
Subsequent battles are set up as indicated. Ships may be shifted to empty set-up hexes to fill gaps caused by missing reinforcements as desired.
After the final battle in a campaign has been fought, tally all victory points earned during that battle and add in any banked victory points from prior battles. The player with the greatest number of victory points is the campaign victor.
Campaign: Suffren v. Hughes
The British send Admiral Sir Edward Hughes to the East Indies to advance their war against Hyder Ali, the Sultan of Mysore. To hinder those plans, the French send a fleet ultimately under the command of the Admiral Pierre-André de Suffren Saint-Tropez. The result is a string of naval battles that will determine the control of the East Indies.
Scenario Schedule
1) Sadras
After Action Reinforcements:
- British: Sultan, Magnanime-b
- French: none
2) Providien
After Action Reinforcements:
- British: none
- French: none
3) Negapatam
After Action Reinforcements:
- British: Sceptre
- French: Illustre, St. Michel, Consolante
4) Trincomalee
After Action Reinforcements:
- British: Cumberland, Bristol, Africa, Inflexible, Gibraltar, Defence
- French: Fendant, Argonaute, Hardi, Cleopatre
5) Cuddalore