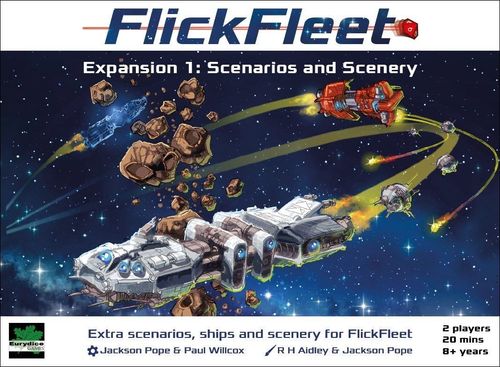
FlickFleet Expansion 1: Scenarios and Scenery
FlickFleet Expansion 1: Scenarios and Scenery Rulebook
Table of Contents
Table of Contents
Components
Additional Imperium (grey) and Uprising (red) acrylic ships:
Capital Ships
- Stealth ship (inc. cloaked form) - grey, "ISS Phantom"
- Mine Layer - grey, "ISS Bastion"
- Ram - red, "Piledriver"
Wings
- 2 fighter wings (red)
Other acrylic components:
- Asteroids: 1x large ring asteroid, 2x medium ring asteroid, 5x small ring asteroid, 1x wedge asteroid
- Objective tokens (four: Target, Extra Shield "+1", Nanobots, Power Core)
- Civilian ships (four designs)
- 4 Mines
- 1x Mine blast template
In addition there are:
- 3 ship dashboards - one for each Capital Ship, and a round counter track and marker
- Wooden discs representing ship locations - 6 defence grid (red), 2 shield generators (white), 3 engines (blue), 1 stealth drive (green), and 1 mine bay (orange)
- Wooden cubes representing ship status - 3 shields (white), 7 hull (grey)
- One purple wooden cube per capital ship, civilian ship and wing (9)
- This rulebook
New Rules
The Scenario Pack Expansion for FlickFleet contains a number of components which introduce new rules:
Asteroids
Asteroids are static pieces of scenery that provide cover from enemy fire and block movement. Asteroids come in two forms: rings and wedges. Ring asteroids can have 1, 2 or 3 rings. Wedge asteroids are made of six wedges that form a rough circle when placed together.
(Diagram: ring asteroids and wedge asteroid.)
When firing weapons, if a die hits an asteroid first, remove the outermost ring or the wedge that was hit, nothing else hit by the die is damaged.
If a ship collides with an asteroid (either the asteroid hits the ship or the ship hits the asteroid), remove the two outermost rings or the wedge that was hit. If the ship's shields are up (there is at least one shield cube on its dashboard) remove all shield cubes from the ship's dashboard and the disc from its Shield Generator. Otherwise roll a D6 and the ship receives two damage on that location, as if hit by Nukes.
Civilian Ships
Civilian ships represent neutral ships that are weaker than warships. They can be added to your scenarios as a target to attack or something to protect. They can either be under AI control (e.g. moving in a fixed way) or under the control of one of the players.
Each ship has two hits (place a grey hull cube on them when bringing them into play). The first hit will remove the hull cube (regardless of die result) and the second will destroy them (again, regardless of die result). If they collide with an asteroid, another ship, or are rammed, they are destroyed. If they are moving under player control give them an activation cube as normal and they can only perform one action per turn: moving by flicking one of the back three surfaces.
Mines
Mines are passive nuclear devices that will detonate damaging anything nearby when anything gets too close to them. You may not use the mine blast template to check whether any piece is in range of it during the game, only at the point the mine detonates.
When activating the Mine Bay location of a ship with mines (such as the ISS Bastion), take a mine from the ship's supply and place it touching the launching ship. Then flick the mine away from the ship. Mines are launched un-primed: if during the initial flick it collides with anything it is destroyed without dealing any damage - remove the mine from the table and return it to the box, it cannot be re-used this game.
Mines example: Konrad launches a mine by placing it touching the ISS Bastion and flicking it towards the Piledriver and attacking fighter wing. It doesn't hit anything during the launch action, so it is now primed.
After the launch action is complete (the mine has stopped moving) it is primed. Once primed, if any game piece touches the mine it detonates. Place the mine blast template on top of the mine in its final resting place. Any Asteroids or Objectives that overlap with the blast area template are destroyed and removed from play. Any ships that overlap with the template suffer a hit from Nukes: roll a D6 for each ship and do two damage (shields first, if any) to the location shown by the die result. Then remove the mine and the mine blast template from play.
Konrad then fires at the mine and hits it [1], causing it to detonate. The mine blast template is placed on top of the mine [2] and overlaps the Piledriver, the fighter wing and the Objective. The Objective is destroyed, the fighter wing loses two pieces and the Piledriver takes two damage. A Roll of 6 means it loses its engines and one hull cube.
Objective tokens
Objectives represent items in the field of battle that give a benefit to the first ship to reach them. The first Capital Ship to collide with the Objective will pick it up and gain its benefit - remove the Objective from the map and place it on the colliding ship's dashboard. If the Objective touches a Wing, an Asteroid or is the first item hit by a die, remove it from play and no benefit is awarded.
There are four Objectives: Target, Extra Shield, Nanobots and Power Core.
The Target Objective is used in some scenarios as a goal to win the scenario; typically a ship must dock with the Target Objective and then escape or survive.
The Extra Shield Objective grants an additional shield cube to the ship which picked it up - its maximum shield strength is increased by one (+1) for the rest of the game.
The Nanobots Objective allows the ship which picked it up to take two Engineering actions when you select the Engineering location - either: restoring two discs (which can be in different locations), two hull cubes, or one of each. This lasts until the end of the game.
The Power Core Objective allows the ship which picked it up to take three actions every turn for the rest of the game - including the turn it collects it. All three actions must be different.
Stealth Drive
The ISS Phantom introduces the Stealth Drive location which allows a ship to cloak, making it significantly harder to hit. The Stealth Drive location allows the ship to switch between cloaked and decloaked forms: swap the opaque ship model for the transparent one or vice versa. The replacement model must be placed in the same location and facing the same direction.
While decloaked the ship is represented by a normal opaque ship model and the usual rules apply.
While cloaked a ship is represented by a transparent model and cannot fire any weapons, but is harder to hit: an attack die only damages the ship if it ends up touching (including on top of) the transparent acrylic model - if the die is so close you cannot slide a ship dashboard between them without moving the die or the ship it counts as touching. A hit that bounces off and ends up not touching is considered a miss. While cloaked the ship also cannot be rammed.
If the ship's Stealth Drive location is damaged while it is cloaked, decloak the ship (replace the transparent model with the grey one).
New Ship definitions
Mine Layer (10 points)
Shield cubes: 2, Hull cubes: 0
Locations:
- No number: Engineering: Repair a damaged location
- 1, 2: Defence Grid: Flick fire one D10 attack die per remaining disc
- 3, 4: Mine Bay: Launch a mine (four in total)
- 5: Shield Generator: Restock 1 white shield cube
- 6: Engines: Move by flicking one of the back three edges
See page 4 for mine rules.
Stealth (12 points)
Shield cubes: 1, Hull cubes: 0
Locations:
- No number: Engineering: Repair a damaged location
- 1, 2: Defence Grid: Flick fire one D10 attack die per remaining disc
- 3, 4: Stealth Drive: Cloak or Decloak
- 5: Shield Generator: Restock 1 white shield cube
- 6: Engines: Move by flicking one of the back three edges
See page 5 for stealth drive rules.
Ram (10 points)
Shield cubes: 0, Hull cubes: 3
Locations:
- No number: Engineering: Repair a damaged location or return a hull cube
- 1, 2: Defence Grid: Flick fire one D10 attack die per remaining disc
- 3, 4, 5: No discs
- 6: Engines: Move by flicking one of the back three edges
Special rules: The Ram has been specifically strengthened for ramming other ships. It has lost its Shield Generator as a result. If the Ram declares a ramming attempt and hits its target, the Ram loses one of its hull cubes instead of being destroyed. If there were no hull cubes remaining it is destroyed.
Scenarios
The Killing Fields
The Guerrilla is being stalked through a mine field by an invisible foe. They've called for backup, but the ISS Phantom is expecting reinforcements too...
Fleets
The Uprising player starts the game with a destroyer and will get a carrier in round 3 and the Piledriver in round 4. The Imperium player starts with the ISS Phantom and will get the ISS Bastion in round 3 and a destroyer in round 4.
Setup
Place four mines in a diagonal line across the centre of the play area about 25cm (10") apart. Place the Uprising destroyer with its rear edge 5cm (2") from the edge of the play area in line with one end mine. Place the ISS Phantom with its rear edge 5cm (2") from the opposite edge of the play area in line with the other end mine.
(Diagram: Uprising set-up area and Imperium set-up area.)
Special rules
When one of the initial four mines is destroyed place it on the ISS Bastion's dashboard - the Bastion can launch it during the game. After launching by the Bastion a mine cannot be reused - the Bastion can only launch four mines during the game.
At the beginning of round 3 place an Uprising carrier in the Uprising set-up area with its rear edge 5cm (2") from the edge of the play area and the ISS Bastion in the Imperium set-up area with its rear edge 5cm (2") from the edge of the play area.
At the beginning of round 4 place the Piledriver in the Uprising set-up area with its rear edge 5cm (2") from the edge of the play area and an Imperium destroyer in the Imperium set-up area with its rear edge 5cm (2") from the edge of the play area.
Objectives
The first player to destroy their opponent's ships wins.
Tech Transfer
With the research station at Psyen-S under threat, the Imperium have evacuated the scientists and their technology. This is our chance to get our hands on loads of cutting edge Imperium tech. The Liberty has been dispatched to liberate as much as they can.
Fleets
The Imperium player has three fighter wings and the four civilian ships.
The Uprising player has a carrier (with two fighter wings and a bomber wing ready to launch).
Setup
The Uprising player sets up their carrier 5cm (2") from one corner. Then the Imperium player sets up the first civilian ship touching the edge opposite approximately 10cm (4") from the edge to its side. Additionally, they place three fighter wings arranged around the civilian.
(Diagram: convoy track.)
Special rules
Each round all the civilian ships move along the convoy track approximately 30cm (12") and a new civilian ship is added at the point where the first one started. If their way is blocked place them as near as possible to the intended position, but at least 2.5cm (1") from the nearest object. When a civilian is destroyed replace it with an Objective token drawn at random. If the Uprising carrier collides with an Objective it collects it (and gains the benefit if there is one). If a civilian ship makes it all the way along the convoy track and off the edge of the play area (it has survived for three turns), give the Imperium player an Objective drawn at random - this one has been safely delivered.
Objectives
The Uprising player wins if they collect three Objectives, otherwise the Imperium player wins. However, if the Imperium player destroys an Objective they lose.
The Sky is Full of Rocks!
A small Uprising force is sheltering amidst an asteroid belt. An attack force has been dispatched to annihilate them.
Fleets
The Uprising player has two destroyers and a fighter wing.
The Imperium player has the ISS Phantom, a destroyer and a fighter wing.
Setup
Set up the asteroids and fleets as shown in the diagram to the right.
Special rules
None.
Objectives
The first player to destroy their opponent's ships wins.
Bombers vs. Mines
The ISS Bastion is laying mines ahead of an assault. A small Uprising fleet has been tasked with clearing a path.
Fleets
The Uprising player has two destroyers and a bomber wing.
The Imperium player has the ISS Bastion [1], a destroyer [2] and two fighter wings.
Setup
Set up two mines and the fleets as shown in the diagram to the right.
(Diagram: fleet positions 1 and 2.)
Special rules
When one of the initial two mines is destroyed place it on the ISS Bastion's dashboard - the Bastion can launch it during the game. After launching by the Bastion a mine cannot be reused - the Bastion can only launch four mines during the game - the two it starts with plus the two in play if they are destroyed.
Objectives
The first player to destroy their opponent's ships wins.
Escort Duty
Uprising Two has been rescued and needs to be safely transported to Sector 275. We've hidden her in a small flotilla of civilian ships, we need to get her through the asteroid belt and past the Imperial blockade.
Fleets
The Imperium player has two destroyers.
The Uprising player has all four civilian ships and three fighter wings.
Setup
Spread the asteroids in a narrow band across the centre of the play area. On one side place the two Imperium destroyers with their rear edges 5cm (2") from the edge of the play area. On the other side place the four civilian ships in a tight group with their rear edges 5cm (2") from the edge of the play area. Array the Uprising fighter wings around them.
Special rules
At the beginning of the game the Uprising player secretly writes the number of the civilian ship (as denoted by the number of triangles shown at its back) that contains Uprising Two. This is kept secret from the Imperium player. The Uprising player needs to get that ship off the opposite edge of the board (the one where the Imperium destroyers are initially). If they do that, they win. The Uprising player has full control of the Civilian Ships and can move them at any point during their turn as with any other ship.
Objectives
The Uprising player needs to get the Civilian Ship whose number they wrote down at the beginning of the game off the opposite edge of the table, if they do that, they win. If that Civilian Ship is destroyed then the Imperium player wins.
Scenario Ideas
In addition to the scenarios described above, here are a few ideas you could design scenarios around:
- A ship that defects to the Uprising mid-game,
- First player to pick up the Target Objective token and carry it off the play area wins,
- Mined asteroids that detonate like a mine when hit,
- A race to touch all four Objectives (leave them in place) when they are hidden in an asteroid field,
Want more scenarios? You can find more scenarios for the base game and this expansion at: www.eurydicegames.co.uk/games/flickfleet/scenarios.html
The designers' contact email printed in the "Scenario Ideas" section has been omitted.
Quick Reference
Asteroids (page 3)
If a die hits an asteroid first, remove the outermost ring or the wedge that was hit, nothing else hit by the die is damaged.
If a ship collides with an asteroid, remove the two outermost rings or the wedge that was hit. If the ship's shields are up, remove all shield cubes from the ship's dashboard and the disc from its Shield Generator. Otherwise roll a D6 and the ship receives two damage on that location, as if hit by Nukes.
Civilian Ships (page 3)
Each ship has two hits (give them a hull cube). The first hit will remove the hull cube and the second will destroy them (regardless of die result). If they hit another model they are destroyed. Under player control they can only move.
Mines (page 4)
To launch a mine place it touching the launching ship. Then flick the mine away from the ship. Mines are launched un-primed - if during the initial flick they collide with anything they are destroyed without dealing any damage.
After the launch action they are primed: if any game piece touches the mine it detonates. Place the mine blast template on top of the mine. Any Asteroids or Objectives that overlap with the mine blast template are destroyed. Any ships that overlap with the template suffer a hit from Nukes.
Objective tokens (page 5)
The first Capital Ship to collide with the Objective will pick it up and gain its benefit. If the Objective is hit by anything else, remove it from play and no benefit is awarded.
Stealth Drive (page 5)
While cloaked a ship cannot fire any weapons, but is harder to hit: an attack die only damages the ship if it ends up touching the transparent acrylic model. While cloaked the ship also cannot be rammed.
If the ship's Stealth Drive location is damaged while it is cloaked, decloak the ship (replace the transparent model with the grey one).
Ram ramming rules (page 6)
If the Ram successfully rams another ship, remove one of its hull cubes. If it had no hull cubes remaining it is destroyed.