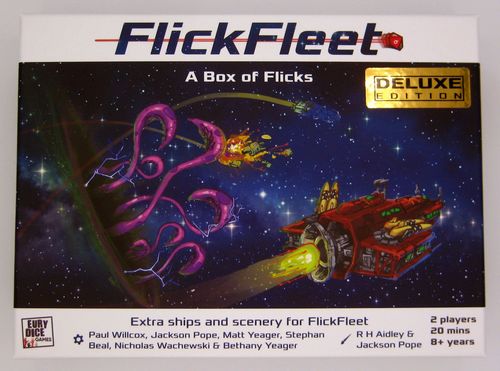
FlickFleet: A Box Of Flicks 2
FlickFleet: A Box Of Flicks 2 Rulebook
Table of Contents
Table of Contents
Components
Uprising Ships
- Railgun Cruiser
- ECM Platform, with ECM Field token and ECM Field template
- Missile Corvette
- Salvage Vessel
- Smart Missiles (2x)
Pirate Ships
- Reaver
- Dancer
- Gunboats (2x)
- Assault Barge
- Weapons Barge
- Interceptors (6x)
- Ownership discs (2x)
Imperium Ships
- Railgun Cruiser
- Ion Cannon Frigate (2x)
- Phase Frigate, with Phase Beacon token
- Missile Corvette
- Smart Missiles (2x)
In addition there are:
- 15 ship dashboards - one for each Capital Ship
- 12 Aged Ship spanners
- 5 Wreckage Markers
- 6 Nebula pieces (3x)
- 6 Rift tokens (numbered 1 to 6)
- Hyperspace Kraken tentacle
- 3 Comets and measurement stick
- 6 Nebula bases (2x and 4x)
- 12 wooden Technicians (x2 in deluxe version)
- 69 wooden discs representing ship locations - 24 red, 15 blue, 11 white, 10 black, 3 orange, 3 green, 2 purple, and 1 yellow
- 68 wooden cubes - 29 purple, 21 grey, and 18 white
- 1 purple (2 in deluxe) twelve-sided die (D12)
- This rulebook
New Rules
Box of Flicks 2 introduces two new rules:
- Ship Categories
- Obstacles - which simplify the rules for new and existing scenery items.
In addition there are several optional rules that can be included or not, either individually or together:
- Salvage, which requires the Salvage Vessel or Pirate ships in play,
- Technicians,
- Aged Ships,
- Nebulae,
- Comets,
- Hyperspace Kraken.
Plus some new ships for the existing factions and a new fleet of ships: the Space Pirates that can be played alongside either fleet or as a faction on their own.
Ship Categories
Capital ships are categorised by their cost as shown on the dashboard. Wings (fighters, bombers, and pirate interceptors) do not fit into these categories.
- Small ships are those that cost 1-20 points
- Large ships are those that cost 21-40 points
- Huge ships are those that cost more than 40 points (currently none!)
Obstacles
Scenery within the game is considered an obstacle. Obstacles can be mobile or static and also permanent or temporary.
Static obstacles cannot be moved. Static obstacles moved by a die, ship or player are returned to their original position. Examples: neutron stars, planets, moons, nebula, rift tokens.
Mobile obstacles can be moved. Mobile obstacles moved by a die or a ship are left in their new location. If a player accidentally moves a mobile obstacle, return it to its previous location. Examples: asteroids, wreckage, comets.
Permanent obstacles cannot be damaged. A ship that hits a permanent obstacle is instantly destroyed. Dice that hit a permanent obstacle first do no further damage to other things they hit. Permanent obstacles cannot be damaged by area effects such as mines. Examples: neutron stars, planets, moons, nebula, rift tokens, comets.
Temporary obstacles can be damaged. If a ship collides with a temporary obstacle, the temporary obstacle takes two damage - usually denoted by removing pieces from play. The ship's turn ends and the ship either:
- If the shields are up (there is at least one shield cube on its dashboard), the ship loses all shield cubes and the disc from the Shield Generator location.
- Otherwise, roll a D6 and the ship takes two damage to that location as if hit by nukes.
If a die hits a temporary obstacle first, it deals damage to the temporary obstacle as normal, and then does no further damage to anything it hits. Temporary obstacles are damaged by area effects such as mines. Examples: asteroids, wreckage markers.
Salvage
Salvage rules are used if one player has pirate ships with Salvage Drones (Weapons Barge, Reaver or Behemoth) or the Uprising player has a Salvage Vessel. Salvage rules require you to play with the wreckage markers.
Wreckage Markers
When a capital ship is destroyed inside the play area, its owner places wreckage markers around it so they touch the model and no other piece, then they remove the model. If there are any discs remaining on the destroyed ship's dashboard, move these onto the wreckage markers, sharing them out as equally as possible.
The number of wreckage markers placed depend on the ship's category (see page 4):
- Small ships generate 1 wreckage marker
- Large ships generate 2 wreckage markers
- Huge ships generate 3 wreckage markers
Example: The Sure Shot has been destroyed. It's a large ship, so add two wreckage markers touching it (1), then remove the ship (2). It has two black discs, a red disc, and a blue disc left - so place two discs on each wreckage marker (3).
If a wreckage marker takes any damage (from being hit first by a die or from an area effect), remove it and any discs on it from play.
Salvage Drones
Note: Pirate Salvage Drones don't have discs and can always be used.
As long as there is a disc on the Salvage Drones location on the ship's dashboard, the Salvage Drones location can use it to do one of two things:
- Salvage useful materials from the field of battle. Remove an asteroid piece or a wreckage marker from anywhere in play and turn it into useful resources. The resources gathered in this way can be either: used immediately to repair or fortify the active ship, or stored in the Storage Bay for later use (any excess above the Storage Bay capacity is discarded). The Storage Bay cannot be used if its disc is currently missing.
- An asteroid piece turns into a hull cube
- A wreckage marker turns into a hull cube and any discs that were present on top of it.
- Repair damaged ship. Move hull cubes and/or discs from the Storage Bay to one other ship's dashboard. Hull cubes can be used to repair damaged hull cubes that have been removed from a ship's dashboard. In addition, one extra salvaged hull cube can be added to a ship's dashboard, so a ship that doesn't normally have hull cubes may get one (and only one), and a ship with hull cubes may be given one more than the complement shown on its dashboard. The extra hull cube gained in this way cannot be repaired by an Engineering action, though it can be replaced by another salvaged cube if lost.
Note: when both repairing itself or another ship, discs can only be used to replace discs lost to damage, i.e. the target ship must have a missing disc of the correct colour.
Storage Bays
Storage Bays can store 2-4 items - either hull cubes or discs. Check the ship's dashboard to see its capacity. When the location is damaged, its contents are destroyed - remove any hull cubes or discs in the Storage Bay from the game. You cannot add items to a damaged Storage Bay until it has been repaired.
Example: This Storage Bay can hold two discs of any colour, two hull cubes, or one disc and one hull cube.
Technicians
Technicians are excellent technical crew who have a flair for repairing their chosen system. They are represented by wooden people tokens in a range of colours, each representing a ship's system.
If you choose to play with Technicians, when building your fleets you may add at most one technician to each ship with an Engineering location. Adding a technician to a ship increases its cost by 2 points. Choose a technician and place the wooden person token on the ship's Engineering location.
During the game, ships with a technician gain a benefit when they take engineering actions. When taking an engineering action, the player may optionally replace a single disc on the dashboard that matches the colour of the technician for free, in addition to replacing a disc or hull cube as usual. So a ship with a red technician can repair a red disc and another disc or a red disc and a hull cube as a single Engineering action.
The technician will remain in play for as long as their ship is in play and cannot be removed or destroyed.
Aged Ships
Aged ships represent old and battle-worn ships that still see service. These ships are liable to experience technical difficulties during the game.
If you choose to play with Aged Ships, when building your fleets you may designate some or all of your ships as Aged Ships by placing an orange spanner on their dashboards. An aged ship is cheaper than normal - reduce its points cost according to its Ship Category (see page 4):
- Small ships are 2 points cheaper
- Large ships are 4 points cheaper
- Huge ships are 6 points cheaper
During the game, aged ships suffer unexpected system failures. At the start of each round, roll a D10 for each aged ship. If the ship has one or more discs on a system corresponding to the die roll, remove one of those discs from the dashboard. If the last shield disc is removed, also remove all shield cubes, if the last storage bay disc is removed, also remove all items in the storage bay. The disc can be repaired as normal. If the die roll does not match a location with a disc it has no effect (ships cannot lose hull cubes or be destroyed in this way).
Nebulae
A nebula provides a safe haven but makes moving and firing more difficult.
If you choose to play with a nebula, at the beginning of the game create a nebula in the centre of play by placing the clear base discs on the surface and then slotting the nebula pieces in upright with the small pegs at each end in the holes on the bases.
During the game the nebula is a static, permanent obstacle (see page 4), with a special rule: ships that collide with the nebula are undamaged but their turn ends immediately.
Ships can move through the nebula by passing through the gaps underneath the larger pieces, but dice cannot.
Comets
Comets are a dangerous obstacle that moves across the field of play at high speed.
If you choose to play with one or more comets, at the beginning of the game place them against an edge of the play area with their pointed end touching the edge.
During the game a comet is a static, permanent obstacle (see page 4), with a special rule: it will move at the end of each round.
At the end of the round, each comet moves in a straight line. Place the comet measuring stick touching the front of the comet and then move the comet so that its back end touches the other end of the stick. Any item that would be touched by the comet as it moves between the two positions is destroyed.
Example: When the comet (1) moves at the end of the round to its new position (2), ships at least partially within the shaded area will be destroyed. So the ISS Nova (3) is destroyed but the ISS Fury (4) is safe.
Hyperspace Kraken
Scanners have detected weak spots between normal space and hyperspace. Moving near these spots is extremely dangerous. Energy projections have been detected that severely damage nearby ships. It is unclear what causes these projections, but the few survivors are calling it the 'Hyperspace Kraken'.
If you choose to play with the Hyperspace Kraken, at the beginning of the game place the Rift tokens near the centre of play but at least 17cm (short box edge) apart.
Rift tokens are static permanent obstacles (see page 4) with a special rule: ships that collide with a Rift token suffer no damage.
During the game a player rolls a D6 at the beginning of each round. Place a purple activation cube on the Rift token shown by the die result. If anything hits a Rift token, and the token doesn't already have an activation cube on it, place an activation cube on it. Exception: If the Phase Beacon hits a Rift token the Rift token is not activated.
At the end of the round, Rift tokens with activation cubes on them will activate in numerical order. To activate a Rift token, place the tentacle over it and then holding the Rift token static with a finger, sweep the tentacle round in a full circle - any ships or items touched by the tentacle are damaged as if they collided with a temporary obstacle (lose shields and Shield Generator disc if shields are up, or roll a D6 and do two damage to the location corresponding to the die result - see page 5). Ships or items moved by the tentacle remain in their new positions.
Example: In the example to the left the Rift token in the centre has been activated. The tentacle (1) is placed over it and is swept round in a circle (2). The Uprising Missile Corvette (3) is out of range and undamaged, but the Imperium Ion Cannon Frigate (4) is hit, taking two damage and getting slightly moved by the tentacle as it goes round.
New Ships
Box of Flicks 2 introduces several new ship types, as well as new weapons and offensive and defensive capabilities.
Ion Cannon
The Ion Cannon is an experimental new weapon which overloads shields and can damage systems, but does no physical damage.
In the game an Ion Cannon is represented by a twelve-sided die (D12). Flick the die from the top of the ship as normal and if it hits a capital ship first and stays in play, then remove up to two shield cubes from the hit ship. Then, if the die result corresponds to a location on the ship with a disc on it, remove a disc too, regardless of whether or not shield cubes remain. If the Shield Generator is damaged in this way, remove any remaining shield cubes too. The Ion Cannon cannot destroy ships or remove hull cubes and does no damage to wings, obstacles or other items if it hits one of them first.
Railgun
The Railgun is a precision targeting weapon.
When firing the Railgun, take the D6, choose which face you want on the top and then place the die on the table surface in the Railgun aperture with a little room behind it so you can flick it.
Flick the die as normal and the first item it hits takes two damage to the location shown by the die result, as long as the die remains in play when it stops moving.
Because there are three separate Railgun locations on the ship it is possible to fire two Railguns in a turn - but you must use different ship locations (and hence Railgun apertures).
ECM Field
The Electronic Counter Measures (ECM) Field provides a field that interferes with targeting systems.
To activate the ECM Field, place the ECM Field token against the ship and flick it away from the ship. If the token touches anything during its move the token is destroyed with no effect. If it stops moving without touching anything, place the large clear ECM Field template on top of the token, so the token is in the centre of the template. If it's not possible to do this (because, for example, there's a nebula too close), remove the token from play.
Example: The ECM Field token is flicked between the destroyer and fighter wing to provide cover for the damaged destroyer (1). It didn't hit anything during the flick, so the ECM Field template is placed on top of it (2).
Any die that hits the template first will deal no damage. If the template or token are moved during the turn, return them to their original position. A ship that is wholly under the ECM Field template cannot fire until it moves at least partially out - the firing die must be placed on the firing ship. If necessary, the template can be temporarily removed to allow a ship under it to move and then replaced afterwards.
Example: Denied a shot at the destroyer, the Imperium Missile Corvette (1) fires at the fighter wing instead. Unfortunately, the die hits the ECM Field template (2) before it hits the fighter wing (3), so it deals no damage.
At the end of the round remove both the ECM Field token and template from play - they can be used again next round.
Phase Generator
The Phase Generator allows the ship to travel short distances through hyperspace allowing the traversal of dangerous territory.
To activate the Phase Generator place the Phase Beacon token against the ship and flick it away from the ship. If the token touches anything during its move nothing happens to the token or any item(s) it collides with. When the token stops moving, the ship may, as part of the same action, optionally move so that its rear surface is touching the token. The token is then removed, regardless of whether the ship moved to it or not.
Example: The ISS Tempest wants a firing solution on the Haven, so it fires its Phase Beacon (1). The Phase Beacon bounces off the Haven (2) dealing no damage and the Rift token (3) which doesn't activate, before stopping in the perfect place (4). The ISS Tempest may now move to the Phase Beacon.
Smart Missiles
Smart missiles are homing missiles that track a target over two turns.
Flick fire a D6 from the top of the ship as normal, but if it doesn't hit anything, remove the die from the table and replace it with a 15mm Smart Missile disc. This disc remains in play unless anything collides with it, when it is destroyed (dealing two damage to the item that hit it).
At the start of the next round, place an activation cube on the smart missile disc. When you activate the disc, place a D6 on top of it and flick fire again, then remove the disc from play. The second shot can be at any ship, and acts like a normal Nukes shot, if you miss the second time it is not replaced by the disc again.
Interceptors
Some pirate ships carry a fleet of Interceptors. These are treated as wings and behave in the same way as the central piece of a fighter wing - they can move and/or fire a D10 on their turn. They are launched in pairs, both starting with an activation cube on top of them. Ships that carry them have a complement of 6, and when one is destroyed it is placed back in the box it cannot be used again this game. An individual Interceptor is worth 2 points.
New Ship Stats
The new ships are shown below:
Uprising
Salvage Vessel (12 points)
- Shield cubes: 1, Hull cubes: 0
- Locations:
- No number: Engineering: Repair a damaged location
- 1: Defence Grid: Flick fire one D10 attack die
- 2, 3: Salvage Drones: Salvage an asteroid or wreckage marker, or repair a friendly ship
- 4: Storage Bay: Holds four hull cubes or discs
- 5: Shield Generator: Restock 1 white shield cube
- 6: Engines: Move by flicking one of the back three edges
- Special rules: See page 5 for salvage rules
ECM Platform (15 points)
- Shield cubes: 2, Hull cubes: 0
- ECM Shield token
- Locations:
- No number: Engineering: Repair a damaged location
- 1, 2: Defence Grid: Flick fire one D10 attack die per remaining disc
- 3, 4: ECM Field: Flick launch the ECM Field token
- 5: Shield Generator: Restock 1 white shield cube
- 6: Engines: Move by flicking one of the back three edges
- Special rules: See page 10 for ECM Field rules.
Railgun Cruiser (29 points)
- Shield cubes: 3, Hull cubes: 1
- Locations:
- No number: Engineering: Repair a damaged location
- 1: Railgun: Flick fire one D6 attack die from the table
- 2: Railgun: Flick fire one D6 attack die from the table
- 3: Railgun: Flick fire one D6 attack die from the table
- 4: Defence Grid: Flick fire one D10 attack die
- 5: Shield Generator: Restock 1 white shield cube
- 6: Engines: Move by flicking one of the back three edges
- Special rules: See page 10 for Railgun rules
Missile Corvette (13 points)
- Shield cubes: 1, Hull cubes: 0
- Locations:
- No number: Engineering: Repair a damaged location
- 1, 2: Defence Grid: Flick fire one D10 attack die per remaining disc
- 3, 4: Smart Missiles: Flick fire one D6 attack die
- 5: Shield Generator: Restock 1 white shield cube
- 6: Engines: Move by flicking one of the back three edges
- Special rules: See page 12 for Smart Missiles rules
Imperium
Ion Cannon Frigate (15 points)
- Shield cubes: 2, Hull cubes: 0
- Locations:
- No number: Engineering: Repair a damaged location
- 1: Defence Grid: Flick fire one D10 attack die
- 2, 3: Ion Cannon: Flick fire one D12 attack die
- 4: Weak Spot: The ship is instantly destroyed
- 5: Shield Generator: Restock 1 white shield cube
- 6: Engines: Move by flicking one of the back three edges
- Special rules: See page 10 for Ion Cannon rules
Phase Frigate (15 points)
- Shield cubes: 1, Hull cubes: 0
- Phase Beacon token
- Locations:
- No number: Engineering: Repair a damaged location
- 1, 2: Defence Grid: Flick fire one D10 attack die per remaining disc
- 3, 4: Phase Generator: Flick launch the Phase Beacon token
- 5: Shield Generator: Restock 1 white shield cube
- 6: Engines: Move by flicking one of the back three edges
- Special rules: See page 11 for Phase Generator rules
Space Pirates
Box of Flicks 2 also introduces a new Space Pirates faction with new ships. The Space Pirates can be used as mercenaries alongside an Uprising or Imperium fleet, or alternatively as a fleet by themselves. Note that the pirate ships do not have an Engineering location and cannot repair like Uprising or Imperium ships, instead they use salvaged bits to repair themselves or other friendly ships. The Salvage Drones on those pirate ships that have them are all that stands between their fleet and certain death, so these locations are heavily armoured - as a result they cannot be damaged without destroying the ship.
Reaver (8 points)
- Shield cubes: 0, Hull cubes: 2
- Locations:
- No number: Salvage Drones: Salvage an asteroid or wreckage marker, or repair a friendly ship
- 1, 2, 3: Defence Grid: Flick fire one D10 attack die per remaining disc
- 4: Weak Spot: No location disc
- 5: Storage Bay: Holds two hull cubes or discs
- 6: Engines: Move by flicking one of the back three edges
- Special rules: See page 5 for Salvage rules
Dancer (8 points)
- Shield cubes: 0, Hull cubes: 0
- Locations:
- 1, 2: Defence Grid: Flick fire one D10 attack die per remaining disc
- 3, 4: Evade: No damage dealt
- 5, 6: Engines: Move by flicking one of the back three edges
- Special rules: The Dancer is incredibly manoeuvrable. In addition to die results of 7-10 dealing no damage, it is also not damaged on a die result of 3 or 4. A die that hits it but has a result of 3 or 4 deals no damage as if the die had missed.
Assault Barge (20 points)
- Shield cubes: 0, Hull cubes: 3
- Locations:
- 1, 2: Defence Grid: Flick fire one D10 attack die per remaining disc
- 3, 4, 5: Interceptor Bays: Launch two Interceptors (carries 6 in total)
- 6: Engines: Move by flicking one of the back three edges
- Special rules: See page 12 for Interceptor rules
Weapons Barge (20 points)
- Shield cubes: 0, Hull cubes: 4
- Locations:
- No number: Salvage Drones: Salvage an asteroid or wreckage marker, or repair a friendly ship
- 1, 2: Defence Grid: Flick fire one D10 attack die per remaining disc
- 3, 4: Defence Grid: Flick fire one D10 attack die per remaining disc
- 5: Storage Bay: Holds three hull cubes or discs
- 6: Engines: Move by flicking one of the back three edges
- Special rules: See page 5 for Salvage rules. Because the Weapons Barge has two Defence Grid locations it can do two Defence Grid actions, firing four shots in a round if neither is damaged.
Gunboat (3 points)
- Shield cubes: 1, Hull cubes: 0
- Locations:
- No Engineering: Cannot be repaired
- 1: Nukes: Flick fire one D6 attack die
- 2, 3, 4: Weak spot: The ship is instantly destroyed
- 5: Shield Generator: Restock 1 white shield cube
- 6: Engines: Move by flicking one of the back three edges
- Special rules: Two gunboats can be carried by a Carrier, Dreadnought, Assault Barge, or Behemoth (see page 18) instead of either its two Fighter Wings, a Bomber Wing, or 6 Interceptors. Together they cost 6 points instead of 12 (for 2 Fighters or 6 Interceptors) or 8 (for a Bomber Wing) so adjust the ship points total accordingly.
Optional Extras
The following two ships are not included in Box of Flicks 2, but are optional extras that were available at the same time. Their rules are included here for completeness.
Option 13 (40 points)
- Shield cubes: 4, Hull cubes: 2
- Locations:
- No number: Engineering: Repair a damaged location
- 1, 2: Nukes: Flick fire one D6 attack die per remaining disc
- 3, 4: Nukes: Flick fire one D6 attack die per remaining disc
- 5: Shield Generator: Restock 2 white shield cubes
- 6: Engines: Move in any direction from one end of the measuring stick to the other
- Special rules: Assemble the model by slotting the two big blue circles together at 90 degrees to each other using the cut out slots. Then place the vertical piece with the projection at the bottom into the clear base. Option 13 can be played by any faction - add an ownership marker for the relevant faction to the hole in the base.
Movement can be in any direction, but is done using the blue measurement stick. Place the measurement stick against the edge of the base and then move the Option 13 so its base is touching the other end of the stick. When firing, place the die on the raised platform and flick it from there at the target.
Because Option 13 has two Nukes locations it can do two Nukes actions, firing four shots in a round if neither is damaged.
Behemoth (30 points)
- Shield cubes: 0, Hull cubes: 4
- Locations:
- No number: Salvage Drones: Salvage an asteroid or wreckage marker, or repair a friendly ship
- 1, 2, 3: Defence Grid: Flick fire one D10 attack die per remaining disc
- 4: Interceptor Bays: Launch two Interceptors (carries 6 in total)
- 5: Storage Bay: Holds four hull cubes or discs
- 6: Engines: Move by flicking one of the back three edges
- Special rules: See page 5 for Salvage rules and page 12 for Interceptor rules.
Scenario Ideas
Here are a few ideas you could design scenarios around:
- Can your band of scrappy Uprising fighters and bombers take down the might of the Imperium Option 13?
- There are rich pickings in the debris field of the Battle of Recka-G. Seed the play area with wreckage markers loaded with discs, who can salvage the most discs?
- In a play area cluttered with asteroids, wreckage, and a nebula, can the Phase Frigate get away from a pursuing force?
- Can the ECM Platform protect a salvage vessel carrying vital supplies from attack as it threads its way slowly through an onslaught of comets?
We'd love to see your scenario designs and include them on the Eurydice Games website, please email you scenarios to [email protected].
You can find more scenarios for FlickFleet at: www.eurydicegames.co.uk/games/flickfleet/scenarios
Quick Reference: Obstacles
The final pages restate the obstacle and salvage rules in condensed form. Transcribed as printed.
Static obstacles cannot be moved. Static obstacles moved by a die, ship or player are returned to their original position.
Mobile obstacles can be moved. Mobile obstacles moved by a die or a ship are left in their new location. If a player moves a mobile obstacle, return it to its previous location.
Permanent obstacles cannot be damaged. A ship that hits a permanent obstacle is instantly destroyed. Dice that hit a permanent obstacle first do no further damage. Permanent obstacles cannot be damaged by area effects such as mines.
Temporary obstacles can be damaged. If a ship collides with a temporary obstacle, the temporary obstacle takes 2 damage. The ship's turn ends and the ship either:
- If the shields are up, the ship loses all shield cubes and the disc from the Shield Generator location.
- Otherwise, roll a D6 and the ship takes 2 damage to that location.
Dice that hit a temporary obstacle first deal damage to the temporary obstacle as normal, then do no further damage. Temporary obstacles are damaged by area effects such as mines.
Quick Reference: Salvage
Before removing a destroyed capital ship from play, place wreckage markers around it so they touch the model and no other piece, then remove the model. Small ships (see Ship categories on page 4) generate 1 wreckage marker, large ships 2 and huge ships 3. Share out any discs remaining on the destroyed ship's dashboard as equally as possible between the wreckage markers.
Salvage Drones can do one of two things:
- Salvage useful materials from an asteroid (1 hull cube) or a wreckage marker (1 hull cube and any discs that were on top of it). Salvaged resources can either be added to the active ship immediately or stored in a Storage Bay. The Storage Bay cannot be used if it requires a disc and the disc is currently missing.
- Repair damaged ships: Move hull cubes and/or discs from the Salvage Bay [sic] to one other ship's dashboard.
Note, in both cases (repairing itself or another ship) there is a maximum of one hull cube above its normal complement and discs can only be added where normally allowed but missing.