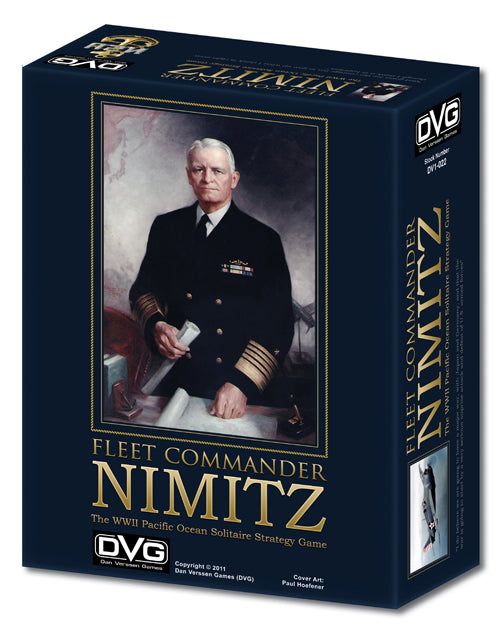
Fleet Commander: Nimitz – The WWII Pacific Ocean Solitaire Strategy Game
Fleet Commander: Nimitz Rulebook
Table of Contents
Table of Contents
- Campaigns
- Victory
- Solitaire Decisions
- Components
- Force Counters
- Force Descriptions
- Ship Forces
- Aircraft Forces
- Infantry
- Set-Up
- Sequence of Play
- Battle
- Battle Set-Up
- Move US Forces to the Battle Map
- US Force Placement
- Carrier Aircraft Placement
- Move Japanese Forces
- Japanese Ship Placement (Carriers and Island Forces)
- Japanese Ship Placement (Aircraft Carriers)
- Japanese Ship Placement (Island Forces)
- Japanese Submarine Placement
- Carrier Aircraft Placement (Japanese)
- Roll for Battle Turns
- Determine Japanese Battle Plans
- Combat
- Post Battle
- Next Turn
- Special Campaign Rules
- Linked Campaigns
- Expansions
Campaigns
You take on the role of Admiral Nimitz and command the American Forces and their allies in each Campaign. Game mechanics and die rolls control the Japanese Forces.
The US and Australian Forces are referred to as "US" or "American" Forces for simplicity in the game.
Each Campaign Set-Up Sheet details your Objectives for the Campaign. To secure these Objectives, you must move your Forces to the Objective Areas and Hold them.
Victory
At the end of the Campaign, your level of victory is based on the number of Objectives you Hold.
Campaign Objectives
Example: If you Hold 7 Objectives at the end of the 1942 Campaign, you earn a "Good" evaluation.
Holding an Area
There are many named Island Areas on the Campaign Map.
You Hold an Area if it meets all 3 of the following conditions:
- You have Infantry or Land-Based Aircraft Ashore.
- There are no Japanese Infantry or Land-Based Aircraft Ashore.
- The Area is In-Supply.
If an Area does not meet all 3 conditions, then you do not Hold the Area.
Solitaire Decisions
There will be times during the game when you need to make game decisions for the Enemy Forces. The rules provide you with procedures to guide your decision making. If the rules leave you with more than one equally valid option, you are free to choose from the available options.
Example: You inflict 1 Hit on Japanese Ships in an Area. There are several Ships in the Area with the same value. You get to decide which Ship to Damage.
Components
Campaign Map
The Campaign Map shows the Sequence of Play, Japanese Movement Orders and other information you need to play each Campaign.
The Map includes a network of Movement lines. The Japanese Forces use the Movement lines when they are given Orders to Move.
Battle Sheet
Use the Battle Sheet to resolve Battles.
Move all the Forces from the Campaign Map Area where a Battle is taking place to this Sheet to resolve the Battle.
This Sheet also contains the Battle Turn Track and Battle Sequence of Play.
Set-Up Sheets
Each Campaign Set-Up Sheet details the Campaign Year, starting Area for each Force in the Campaign, your Supply Points, the Objectives, and Carrier-Based Aircraft details.
Player Log
Photocopy your Player Log and use it to record your Campaign information.
You can also download and print the Player Log from the www.dvg.com website.
Die
Roll a single 10-sided die whenever a die roll is required. The die generates results from 1 to 10. Some dice are numbered 0 to 9. Treat the 0 as being a 10.
Counters
The game uses counters to represent military forces and for various record keeping game functions.
US Counters have a blue background and Japanese Counters have a red background.
Forces
Force counters represent ships, soldiers, and aircraft in the game.
US Supply Points
Find the Supply counters and place them off to the side. The numbers on the Supply counters indicate their worth in Supply Points. The counter mix does not limit game play.
Japanese Resupply
The position of the Resupply counter on the Japanese Resupply track affects Japanese Orders, and the number of Reinforcements Japan receives each Campaign Turn.
US Scouting
Use Scouting counters to predict Japanese Force movement before you move your Forces each Turn.
Campaign Turn
Move this counter along the Campaign Turn track to show which Turn you are resolving.
Battle Turn
Move this counter along the Battle Turn track to show which Turn you are resolving.
US and Japanese Battle Plans
Battle Plan counters give Forces advantages in Battle.
Japanese Battle Plan Quantity
Use these counters to record the number of Battle Plan counters the Japanese draw each Turn of a Battle.
Japanese Movement Order
Place this counter on the Japanese Orders Movement chart.
Japanese In Transit
These counters show where Scouted Japanese Forces will move during the Movement step.
Japanese Moved
These counters show which Japanese Forces cannot Move, or have already Moved, during the Movement step.
Battle Location
Use this counter to mark the Campaign Map Area where the current Battle is taking place.
Airfield Capacity
These counters show the value of Airfields each side has on the Island during a Battle. One Land-Based Aircraft counter can operate from each Airfield.
Objectives
These counters designate the Campaign's Objective Areas. Use the blue side to show Objectives Held by the US, and the red side to show Objectives that are Uncontrolled or Held by Japan.
Force Counters
Nationality
The stripe along the counter's edge identifies the nationality of the Force.
You control the US and Australian Forces. Each of your Force counters have the noted stripes along their right edge (US, Australia).
Throughout this Rulebook, Japanese Forces will be referred to as Japanese Forces or Enemy Forces. Each of the Japanese Force counters have the noted stripe along their left edge.
Front and Back of Counters
Force counters have a full strength side and a Damaged side.
The Damaged side has red slashes through the counter.
When placing new Forces on the Map, place Forces with their full strength side face up.
When a Force suffers a Hit, it is Damaged, flip it to its Damaged side.
If a Damaged Force suffers a Hit, it is Destroyed, remove it from play.
Carrier-Based Aircraft
Carrier-Based Aircraft have a dark blue strip across the bottom of their counters.
After a Battle, move all full, Damaged, and Destroyed Carrier-Based Aircraft counters off to the side for later re-use. Japan and the US freely use these counters when Carrier-Based Aircraft counters are needed to equip their Aircraft Carriers at the start of a Battle.
Japanese Battalions
After a Battle, return all Destroyed Japanese Battalion counters to the Battalion box on the Campaign Map. Freely use these counters as needed during a Campaign.
Force Descriptions
There are three types of Forces: Ship, Infantry, and Aircraft.
Force Information
Campaign Year. The Year on a Force counter identifies the Campaign the counter is used in.
Example: "42" means the counter is used in the 1942 Campaign.
Buy Cost. You must pay its Cost in Supply Points when purchasing a Force.
Example: This Ship costs 3 Supply Points.
The backside of counters includes an abbreviation noting the Force's starting position in the Map.
Force Type. This is the Force's military designation.
Example: "BB" is a Battleship, "DD" is a Destroyer, etc.
Force Name. Some Ship counters have two names. Both ships were historically present during the Campaign.
Example: This counter represents the Battleships Colorado and Maryland.
Ship Forces
The term "Ship" refers to both Ships and Submarines unless a rule states otherwise.
Attack values
Ships use their Attack values when performing attacks.
For each Attack, you must roll the Attack value or lower to inflict 1 Hit on an opposing Force.
Ship's use their AAA (Anti-Aircraft Artillery) value to Attack enemy Aircraft.
Aircraft Carriers have a Superior Attack value, noted with a superscript on their AAA Attack value. If you roll the Attack value or lower, you inflict 1 Hit. If you roll the Superscript value or lower, you inflict a second Hit.
Example: An Aircraft Carrier has a AAA value of 4/2. If you roll a 5 or higher, you inflict 0 Hits. If you roll a 3 or 4, you inflict 1 Hit. If you roll a 1 or 2, you inflict 2 Hits.
Ships use their Surface Attack value to attack enemy Ships, Infantry, and Airfields.
Submarines cannot Attack Infantry and Airfields.
Ships use their Depth Charge Attack value to attack enemy Submarines.
Example: If the Colorado/Maryland performs a AAA Attack against Japanese Aircraft, you must roll a 3 or lower to inflict 1 Hit. If the Ship counter is firing a Surface Attack at a Japanese Ship or Forces on an Island, you must roll a 4 or lower to inflict a Hit. If the Ship is attacking a Submarine, you must roll a Depth Charge Attack of 2 or lower.
There are several types of Ship Forces in the game. For game purposes, larger Ships are assumed to have several escort ships built into their counters.
CV (Fleet Carriers)
CVL (Light Carriers)
CVE (Escort Carriers)
BB (Battleships)
CRU (Cruisers)
DD (Destroyers)
SS (Submarines)
Transports
Aircraft Forces
There are several types of Aircraft Forces in the game.
Attack values
Aircraft Forces use their Attack values when performing attacks.
For each Attack value, you must roll the value or lower to inflict 1 Hit on an opposing Force.
Aircraft use their Dogfight value to attack enemy Aircraft. If you roll the Attack value or lower, you inflict 1 Hit. If you roll the Superscript value or lower, you inflict a second Hit.
Aircraft use their Ground Attack value (brown square) to attack enemy Infantry and Airfields.
Aircraft use their Ship Attack value (blue square) to attack enemy Ships. Aircraft cannot attack Submarines.
A Bomber is any aircraft with the ability to drop bombs, even if it also has a Dogfight value.
A Fighter is any aircraft with a Dogfight value and no Bomb values.
Land-Based Aircraft
US Carrier-Based Aircraft
Japanese Carrier-Based Aircraft
Infantry
Infantry counters represent ground combat forces.
Attack values
Infantry Forces use their Ground Attack value when performing Attacks against enemy Infantry and Airfields.
Infantry cannot attack Ships or Aircraft.
For each Attack, you must roll the Ground Attack value or lower to inflict 1 Hit on an opposing Force.
There are several types of Infantry in the game. They all use the Infantry rules.
US and Japanese Army
US Marines
US and Japanese Battalions
Set-Up
To begin, select the Campaign Set-Up Sheet for the Campaign you want to play.
We recommend starting with the 1942 Campaign.
Each Campaign has its own Set-Up Sheet, information, and Force counters.
All Campaigns use the same Campaign Set-Up procedures. The Set-Up section of each Campaign Set-Up Sheet lists the year of the Campaign, and provides you with all the information you need to get started.
Only use the Force counters for a Campaign that have the same year as the Campaign.
Place each Force on the Map in the Area indicated by the Campaign Set-Up Sheet.
Example: In the 1942 Campaign, place the (DD) DESRON 2 in the West Coast Area of the Map.
Campaign Turn
Place the Campaign Turn counter on the "Start" box of the Campaign Turn Track.
Battle Plans
Place the Enemy Battle Plan counters in an opaque cup for later drawing.
Place the US Battle Plan counters next to the Battle Sheet to choose from later.
Forces
All Force counters begin the Campaign on the Map in a designated Area specified by the Campaign's Set-Up Sheet. Each Force also has an abbreviation on its backside noting its starting position on the Map.
| Abbv | Position | Abbv | Position |
|---|---|---|---|
| AK | Alaska | NC | New Caledonia |
| AU | Australia | NG | New Guinea |
| BO | Borneo | OK | Okinawa |
| CI | Caroline Islands | PH | Philippines |
| EA | East Asia | SA | Samoa |
| GI | Gilbert Islands | SI | Solomon Islands |
| HI |
Battalion counters do not have a specific Year. Each Campaign specifies where to place them. Place the extra Japanese Battalions in the Battalions box on the Map.
Objective Counters
Place Objective counters in the Map Areas designated by the Set-Up instructions.
When an Infantry starts a Battle on the Island, or moves from a Transport to the Beach, it is "Ashore". All Land-Based Aircraft in an Area are always "Ashore".
Example: In the 1942 Campaign, place Objective counters on: Alaska, Hawaiian Islands, Midway Island, Gilbert Islands, Samoa, Solomon Islands, New Guinea, and New Caledonia.
If the US has the only Infantry or Land-Based Aircraft Ashore at an Objective, place the blue side of the counter face up. The blue side indicates the Objective is Held by US Forces.
If there are any Japanese Infantry or Land-Based Aircraft Ashore at an Objective, or if there are no Forces from either side Ashore, place the red side of the counter face up. The red side indicates the Objective is Held by Japanese Forces.
Resupply Counter
Place the Resupply counter on the "0-" position on the Japanese Resupply counter track.
Sequence of Play
During each Campaign Turn, play the game using the following steps. You may not go back to a step once it has been completed. Perform all steps in the order they are shown.
Advance Turn Counter
Move the Campaign Turn counter one space to the right along the Campaign Turn Track.
The Campaign ends when you move the counter past the "Nov/Dec" space on the Campaign Turn Track.
US Resupply
Supply Points. During each Campaign Turn, you gain the number of Supply Points listed on the Campaign's Set-Up Sheet. Move the indicated value of Supply counters to the US Supply Points box.
You do not begin the Campaign with Supply Points. You gain them each Turn during the US Resupply step.
Place your Supply Point counters in the box next to the West Coast.
You spend Supply Points to Purchase Forces, purchase Scouts and Battle Plans, and repair Damaged Forces.
You can save Supply Points to use on a future Turn.
To purchase a Force, pay the Force's Cost in Supply Points. Place US Forces in the West Coast. Place Australian Forces in Australia.
Aircraft Carriers have a special purchase cost. Instead of paying the cost in brackets, pay the cost in parenthesis. The cost in brackets is used when allocating Hits in Battle.
Example: The Lexington costs "(5)" Supply Points to purchase. The "[1]" is used when allocating Hits in Battle.
Repair Forces. You may Repair your Damaged Forces during the US Resupply step.
You may spend Supply Points to flip each of your Damaged Forces to its full strength side. Pay 1/2 the Cost of the Force, rounding down, with a minimum cost of 1.
Examples: A Force costing 5 has a Repair cost of 2. A Force costing 1 has a Repair cost of 1.
Example: To repair the CV Lexington, pay 2 Supply Points (1/2 of 5, rounding down).
US Scouting
Placing Moved Counters. Place a "Moved" counter on each Area that has only 1 Japanese Infantry or Land-Based Aircraft. The exceptions are Japan and East Asia. The Japanese can Move the last Force out of those Areas. The last Infantry or Land-Based Aircraft Force in an Area cannot Move, even if additional Japanese Forces move into their Area during the Movement step.
Replace all In Transit counters with Moved counters.
Japan cannot Move its Infantry out of Areas that also contain US Forces. Place a Moved counter on them. Do not roll an Order for these Forces, and ignore them if you are rolling Orders for other Forces in their Area.
Example: An Area has Japanese Infantry and Ships, as well as US Forces. The Japanese Infantry cannot Move, but you still roll Orders for the Ships as normal.
Scouting. Each Campaign Turn, US Ships must Move before Japanese Ships, however if you use Scouting counters you can see which Orders Japanese forces will receive before you Move your US Ships.
During the Scouting phase, you can pay 1 Supply Point to place a Scouting counter on any Area with Enemy Forces. Once all Scouting counters are placed, roll Japanese Orders once for each Scouting counter.
You can place more than one Scouting counter on an Area if you want to make more than one Japanese Orders roll for that Area. The number of Scouting counters do limit the number of times you can Scout each Turn.
When rolling Scouting Orders, use the noted dice rolls on the Japanese Resupply track on the Strategic Map. Do not adjust the Japanese Resupply counter during Scouting rolls.
Example: You are Scouting during 1942, roll two 10-sided dice, add 2 to the roll, and reference the Japanese Orders to see which Order is performed.
Example: You are Scouting in 1945, roll two 10-sided dice and subtract 3 from the roll.
Forces in Objectives. When you first Scout Japanese Forces in each Objective perform a "Hold" Order for the Area, and then roll a normal Order using the Scouting modifiers.
Example: You assign 2 Scouts an Objective Area with 12 Japanese Ships, 5 Infantry, and 9 Land-Based Aircraft. For your first Scout, they first perform a Hold Order: 6 Ships, 1 Infantry, and 3 Land-Based Aircraft stay in the Area. You roll for the first Scout, and get a Withdraw: 2 Ships, 1 Infantry, and 2 Land-Based Aircraft will Move 1 closer to Japan. For your Second Scout roll, you get a Support: 3 Ships, 1 Infantry, and 2 Land-Based Aircraft will move to an Area where there are Japanese Forces Ashore.
In Transit Counters. Flip each Scouting counter to its In Transit side after you roll its Japanese Orders and move the Japanese Forces to their destination. Place the counter on top of the Japanese Forces that were affected by the Japanese Order roll.
Use the standard Movement rules to Move the Japanese Forces during the Scouting step.
US Movement
Prohibited Areas. US Forces may move to any Map Area except Japan and East Asia. Japanese Forces may move to any Map Area except the US West Coast and Australia.
US Movement. It is free to move your Forces.
US Land-Based Aircraft Movement Restriction. Land-Based Aircraft may only move to an Area that started the Movement step with US Infantry or Land-Based Aircraft already in the Area.
Example: Midway Island started the Movement step with a US Infantry counter already present. You can move Land-Based Aircraft to Midway.
Example: Iwo Jima started the Movement step with only Japanese Land-Based Aircraft present. You cannot move Land-Based Aircraft to Iwo Jima.
Example: Wake Island started the Movement step with both US and Japanese Infantry on the Island. You can move Land-Based Aircraft to Wake.
Most Areas designate the maximum Airfield value the Area can support. You cannot place more US Land-Based Aircraft on an Area than the number designated for that Area.
Example: You can place up to 6 US Land-Based Aircraft on the Solomon Islands.
The West Coast, Hawaiian Islands, and Australia can have an unlimited number of Land-Based Aircraft.
Airfield values do not restrict Japanese Land-Based Aircraft.
US Infantry Movement. If a US Infantry Force is moved to an Area, place it on a Transport ship. This will make it easy to remember which Infantry Forces are not yet Ashore and which started the Battle already Ashore.
You do not purchase Transport Ships. Take them as needed. Place them off to the side as soon as the Infantry move to the Island.
You cannot Move US Infantry out of an Area that contains Japanese Forces.
Example: You have Infantry, Ships, and Land-Based Aircraft in the Solomon Islands. Japan has 1 Ship also present in the Solomons. You cannot Move your Infantry out of the Solomons.
Australian Movement Limitation. Any Forces with the Australian flag down their right side can only move to an Area with the Australian flag.
Example: You can move an Australian Force to New Guinea, but not to Midway.
Submarine Raiding Mission. You can move US Submarines into the Raiding box next to Japan. Each Submarine reduces Japan's Reinforcement roll by 3.
It is free to Move Submarines to the Raiding box.
Japanese Orders
Orders Chart. The Japanese Orders chart is located on the Campaign Map. Roll a die to determine what the Enemy Forces in each Area will do.
If there are a large number of Japanese Forces in an Area, you might need to roll several times to determine the Orders for all the Japanese Forces in the Area.
Perform the Japanese Movement Orders in order from the Area with the fewest total Japanese Forces to the Area with the most Japanese Forces. Only count Forces that have not yet Moved this Turn.
The last Japanese Infantry or Land-Based Aircraft Ashore in an Area will not move out of the Area, regardless of the Order rolled. The exceptions are Japan and East Asia. The Japanese can Move the last Force out of those Areas. Move the Forces in order of: Ships, then Infantry, then Land-Based Aircraft.
Example: An Area with 1 Ship, 1 Infantry, and 2 Land-Based Aircraft receives a Reinforce Order. You move 1 Ship, 1 Infantry, and 1 Land-Based Aircraft, but the 2nd Land-Based Aircraft does not move because it is the last Japanese Infantry or Land-Based Aircraft in the Area.
Japanese Forces may only move once each Turn. When Forces move to another Area, place a Moved counter on the Forces to designate they have already moved.
Resupply Counter Track. Move the Resupply counter to the "0-" square on the Japanese Resupply track at the start of the Japanese Orders step each Campaign Turn.
Adjust the Orders die rolls according to the Resupply counter's position on the track, as well as the Year of the Campaign.
Example: If the counter is in the "5" position in a 1942 Campaign, add 2 to the next Orders die rolls.
Example: If the counter is in the "12" position in a 1943 Campaign, add 8 to the next Orders die rolls.
Some Orders advance the Resupply counter along the track. When you roll one of these orders, modify the roll as noted, perform the Order, and then advance the counter the number of positions noted in the "Re" column.
Example: You roll a 1 in a 1944 Campaign, and the Resupply counter is in the "9" position. In 1944, the counter being in the "9" position adds 3 to the roll, increasing the roll of a 1 to a 4, which is a "Refit" Order. You perform the Refit Order, and then advance the Resupply counter 2 positions to the 11.
Some Orders retreat the Resupply counter backwards down the track. When you roll one of these orders, modify the roll as noted in the "Re" column of the Orders chart, perform the Order, and then retreat the counter.
Do not move the counter past the "15+" or "0-" positions on the track.
Transports. If a Japanese Infantry is moved to an Area with US Forces, place it on a Transport ship. This will make it easy to remember which Infantry Forces are not yet Ashore and which started the Battle already Ashore.
The Japanese do not purchase Transport Ships. Take them as needed. Place them off to the side for re-use as soon as the Infantry move to the Island.
Forces in Objectives. The first Order given to Japanese Forces in each Objective is always a "Hold" Order.
If the Japanese Forces in an Objective already have a "Hold" Order due to Scouting, roll their Orders as normal and ignore this automatic "Hold" Order.
No Forces Moved. If no Forces move as a result of the Order, some Orders have an "If Cannot" instruction. Follow the instruction. If the Order does not have an "If cannot" instruction, or the Forces cannot follow the "If cannot" instruction, treat the die roll as being a Hold Order.
Example: You are rolling for Forces in Japan, and the Order roll is a "Refit". The Forces are already in Japan, so none move. "Refit" does not have an "If cannot" instruction, so you treat the die roll as being a "Hold" Order, and 6 Ships, 1 Infantry, and 3 Land-Based Aircraft perform a Hold Order.
Example: You are rolling for Forces in New Guinea and they receive a "South" Order. They cannot follow the Order. "South" has an "If cannot" instruction of: "East", so 4 Ships, 1 Infantry, and 2 Land-Based Aircraft perform the "East" Order.
Example: The Forces are supposed to perform an "East" Order, but the adjacent Areas that are 1 closer to the Hawaiian Islands do not have any Japanese Forces Ashore. Roll a die to determine if the Order becomes a "Sortie", move to "Alaska", or a "Offensive".
Not Enough Infantry. When Japanese Forces are Moving to an Area with US Forces they may not always be able to take the maximum number of Infantry specified by the Order. If the Japanese Move fewer Infantry than are called for by the Order, take 1 Japanese Battalion from the Battalion area on the Map for each Infantry that was not available to move.
Example: An Order calls for 2 Infantry to move from an Area, but the Area does not have any Infantry. Take 2 Battalions from the Battalion Area and add them to the moving Forces.
Example: An Order calls for 2 Infantry to move to Japan, but they are in an Area with US Forces. Do not add 2 Battalions to Japan because they are not Moving to an Area with US Forces.
Example: The Area being moved from only has 1 Infantry and the Order calls for 2 Infantry to move. Add 1 Battalion to the moving Forces.
Example: The Area being moved from has US Forces and the Order calls for 1 Infantry to Move. The Infantry cannot Move due to the presence of US Forces. Add 1 Battalion to the moving Forces.
Multiple Destinations. When performing a movement, if there are more than one valid destinations, move the Forces to the valid Area with the fewest Japanese Forces present in the Area. Count all the Japanese Forces present at the time of the roll. This includes Forces that have not yet moved, as well as Forces that have already moved.
If an Order gives Japan a choice of two or more equally valid movement destinations, randomly determine which Area the Forces move to.
Example: Forces in the Caroline Islands roll a South Order. They can move to either New Guinea or the Solomon Islands. Both Areas have 5 Japanese Forces present. Roll to see which of the two they move to.
Japanese Movement Orders
Hold Order. Their Forces do not Move. Randomly select 6 Ships, 1 Infantry, and 3 Land-Based Aircraft to remain in the Area.
Example: The Area has 5 Ships, 3 Infantry, and 0 Land-Based Aircraft. All 5 Ships and 1 of the Infantry would Hold. You then roll another Order for the remaining Infantry.
Each time Enemy Forces receive a Hold Order, advance the Resupply counter 4 positions on the Japanese Resupply track.
Refit Order. Randomly select 3 Ships, 1 Infantry, and 3 Land-Based Aircraft to Move to the Japan Area. They cannot perform this Order if you are rolling for Forces in Japan, and the Area instead performs a Hold Order. Advance the Resupply counter 2 positions.
Withdrawal Order. Randomly select 2 Ships, 1 Infantry, and 2 Land-Based Aircraft to Move 1 Area closer to the Japan Area. They cannot perform this Order if you are rolling for Forces in Japan. If they cannot perform this Order, the Area instead performs a Hold Order. Advance the Resupply counter 1 position.
Support Order. Randomly select 3 Ships, 1 Infantry, and 2 Land-Based Aircraft to an Area with Japanese Forces Ashore, except for the Japan and East Asia Areas. If they cannot perform this Order, the Area instead performs a Hold Order. Advance the Resupply counter 1 position.
If the destination Area has at least 1 Japanese Infantry or Land-Based Aircraft Ashore, they also move up to 1 Land-Based Aircraft, if it does not, move the 1 Aircraft to Japan.
South Order. Randomly select 3 Ships, 1 Infantry, and 2 Land-Based Aircraft to Move 1 Area closer to Australia. If the destination Area has at least 1 Japanese Infantry or Land-Based Aircraft Ashore, they also move up to 2 Land-Based Aircraft.
The Forces cannot perform this Order if they are already adjacent to Australia. If the no Forces Move, the Area instead performs an "East" Order.
East Order. Randomly select 4 Ships, 1 Infantry, and 2 Land-Based Aircraft to Move 1 Area closer to the Hawaiian Islands that has Japanese Forces Ashore.
The Forces cannot perform this Order if there is not an adjacent Area that is 1 Area closer to Hawaii and Japanese Held. If no Forces Move, roll a die and consult the die roll table to determine which Order to perform instead for the Area.
Battle Order. Randomly select 4 Ships, 1 Infantry, and 2 Land-Based Aircraft to move to an Area that has both US and Japanese Forces. If the destination Area has at least 1 Japanese Infantry or Land-Based Aircraft Ashore, they also move up to 2 Land-Based Aircraft, if it does not, move the 2 Aircraft to Japan.
Ignore Areas where Submarines are the only US Forces present.
The Forces cannot perform this Order if there are no Areas with both US and Japanese Forces. If they cannot perform this Order, the Area instead performs a Hold Order.
Reinforce Order. Randomly select 4 Ships, 1 Infantry, and 3 Land-Based Aircraft to an Objective that has at least 1 Japanese Infantry or Land-Based Aircraft Ashore.
The Forces cannot perform this Order if there are no Objectives that have Japanese Infantry or Land-Based Aircraft Ashore. If they cannot perform this Order, the Area instead performs a South Order.
Sortie Order. Randomly select 5 Ships, 2 Infantry, and 2 Land-Based Aircraft to move to an Area with both US and Japanese Forces Ashore. If they cannot perform this Order, the Area instead performs an "Offensive" Order.
Retreat the Resupply counter 4 positions.
Offensive Order. Randomly select 7 Ships, 3 Infantry, and 0 Land-Based Aircraft to the Objective that is closest to the Area, and has no Japanese Forces Ashore, and is adjacent to an Area that has Japanese Force Ashore. If the Area cannot perform this Order, the Area instead performs a "Battle" Order.
Retreat the Resupply counter 8 positions.
Alaska. Move the indicated Forces to Alaska.
Example: You roll an "East" Order, and the Forces cannot perform the Order. You roll a 10-sided, and get a result of "Alaska". You move 4 Ships, 1 Infantry, and 2 Land-Based Aircraft to Alaska.
Hawaiian Islands. Move the indicated Forces to the Hawaiian Islands.
Midway Island. Move the indicated Forces to Midway Island.
Done Moving. Once you have Moved all the Japanese Forces, remove the Moved counters.
Resolve Battles. You must resolve a Battle for each Area containing both US and Japanese Forces.
Example: You must resolve the Battle for the Solomon Islands because there are both US and Japanese Forces present in the Area.
Choose a Battle you would like to resolve. You can resolve the Battles in any order.
Continue to the Japanese Reinforce step after you have resolved all Battles.
Battle
Battle Turn Sequence
Use the Battle Turn Sequence listed on the Battle Sheet to resolve each Battle.
Battle Set-Up
Move US Forces to the Battle Map
Relocate all the US Forces from the Area you are resolving to the Battle Sheet.
As you move the Forces to the Battle Sheet, mark the Location of the Battle on the Campaign Map by placing the Battle Location counter.
The Battle Sheet is divided into 4 Areas: Japanese Ocean, Coastal, Island, and US Ocean.
US Force Placement
Once placed, Ships cannot move during the Battle.
Place all US Aircraft Carriers in the US Ocean. This is the only place a US Aircraft Carrier can be placed.
You may place the other US Ships in either the US Ocean or Coastal Area as you see fit.
US Submarines can be placed in any Area with Japanese Ships. If there are no Japanese Ships present, the Submarines do not take part in the battle.
Place Land-Based Aircraft on the US Island Airfields. Place a value of Airfield counters on the Island equal to the number of US Land-Based Aircraft counters.
Example: The US has 6 Land-Based Aircraft. Place Airfield counters totalling 6.
If US Infantry are already on the Island, place them on the US Foxholes.
Place Transport Ships carrying US Infantry in the Coastal Area. You can place more than 1 Infantry counter on a Transport.
Carrier Aircraft Placement
Place the Carrier-Based Aircraft counters assigned to each Carrier next to their Carriers. If you run out of counters, use other counters as stand-ins. The counter mix does not limit game play.
Find the Carrier Aircraft types on the Campaign Sheet.
Example: The Lexington is a value 5 CV. At the start of a Battle, place 1 F4F, 2 SBDs, and 1 TBD counter next to the Carrier's counter.
Move Japanese Forces
Place Land-Based Aircraft on the Japanese Island Airfield. Place a value of Airfield counters on the Island equal to the number of Japanese Land-Based Aircraft counters.
If Japanese Infantry are already on the Island, place them on the Japanese Foxholes.
Place Transport Ships carrying Japanese Infantry in the Coastal Area. You can place more than 1 Infantry counter on a Transport.
Japanese Ship Placement (Carriers and Island Forces)
Use this rule section if there are Japanese Aircraft Carriers present, and at least one of the following:
- There are Japanese Infantry on Transports
- There are Japanese Infantry Ashore
- There are Land-Based Aircraft from either Japan or the US on the Island.
Place all Japanese Aircraft Carriers (CVs, CVLs, and CVEs) in the Japanese Ocean Area.
Step #1 - Place 1 Japanese Escort (BB, CRU, or DD) with the lowest Surface Attack value in the Japanese Ocean Area.
Step #2 - Place 1 Japanese Escort with the highest Surface Attack value in the Coastal Area.
Repeat the 2 steps until there are a number of Escorts in the Japanese Ocean equal to the number of Aircraft Carriers, then place all remaining Escorts in the Coastal Area.
Example: There are 3 Japanese Aircraft Carriers in the Japanese Ocean Area. There are 8 Japanese Destroyers, Cruisers, and Battleships in the Battle. Place 3 Escorts in the Ocean Area, and 5 Escorts in the Coastal Area.
Japanese Ship Placement (Aircraft Carriers)
If there are Japanese Aircraft Carriers present, but no Japanese Infantry on Transports, Japanese Infantry Ashore, or Land-Based Aircraft from either nation on the Island, place all Japanese Ships in the Ocean area.
Japanese Ship Placement (Island Forces)
If there are no Japanese Aircraft Carriers present, place all Japanese Ships in the Coastal Area.
Japanese Submarine Placement
Use these rules if there are Japanese Submarines present.
If there are US Aircraft Carriers, place all the Japanese Submarines in the US Ocean Area.
If there are no US Aircraft Carriers, but there are US Ships in the Coastal Area, place all the Japanese Submarines in the Coastal Area.
If there are no US Aircraft Carriers, and no US Ships in the Coastal Area, place all the Japanese Submarines in the Japanese Ocean Area.
Carrier Aircraft Placement (Japanese)
Place types of Aircraft assigned to each Carrier next to their Carriers. If you run out of counters, use other counters as stand-ins. The counter mix does not limit game play.
Find the Carrier Aircraft types on the Campaign Sheet.
Example: The Kaga is a CV. Place 1 A6M, 1 D3A, and 1 B5N counter next to it.
Roll for Battle Turns
Roll a 10-sided die and consult the Battle Turn numbers on the Battle Turn track to determine the duration of the battle.
Example: You roll a 9. The Battle lasts for 4 Turns.
Place the Battle Turn counter on the Turn Track.
Even after adjustments, all Battles have a 1 Turn minimum.
Determine Japanese Battle Plans
To determine the number of Battle Plans Japan draws each Battle Turn, count the number of Japanese Forces present in the battle. Only count Forces that were transferred from the Campaign Map. This includes Infantry on Transports. Do not count Carrier-Based Aircraft or Transport ships.
Example: The Japanese have 3 Ships, 2 Infantry, 1 Land-Based Aircraft, 3 Carrier-Based Aircraft, and 1 Transport in the Battle. They have 6 Forces (the Carrier-Based Aircraft and Transport do not count). With 6 Forces, the Japanese get 2 Battle Plans each Battle Turn.
| Forces Present | Battle Plans |
|---|---|
| 1 to 4 | 1 |
| 5 to 9 | 2 |
| 10 to 16 | 3 |
| 17+ | 4 |
Place a Battle Plan Quantity counter with that number in the Battle Plan Quantity box.
As the Japanese suffer losses during the Battle, do not recalculate their Battle Plan Quantity.
Select US Battle Plans
You get to choose your Battle Plans at the start of each Battle.
A Battle Plan can only be used once each Battle.
Example: You purchase the Furball Battle Plan. You can only use the counter once during the Battle to inflict an extra Dogfight Hit.
The Battle Plan Point cost for each Battle Plan is found on the Battle Plan counter in parentheses.
Example: AAA costs 2 Battle Plan Points.
You receive 3 Battle Plan Points to freely use during each Battle. You can also spend Supply Points to add to your Battle Plans. You receive 3 Battle Plan Points for each Supply Point you spend.
Example: If you spend 2 Supply Points, you can select up to 9 Battle Plan Points.
Place your selected Battle Plan counters to the side of the Battle Sheet. Place the others off to the side. You will not use them during the Battle.
US Battle Plans
AAA (2). When one of your Ships successfully inflicts a Hit with a AAA Attack, you can discard this counter to inflict 1 additional Hit on Japanese Aircraft in the Area.
Anti-Aircraft (1). During the AAA step of any Battle Turn, discard this counter to roll an extra AAA Attack. Use the AAA value of any of the Attacking Ships in the Area.
ASW (3). You may discard this counter to roll Depth Charge Attacks before Submarines make their Surface Attacks.
Artillery (2). You may only use this Plan if you have an Infantry Ashore. During the Infantry Attack step, discard this counter to inflict 1 Hit as if the Hit was inflicted by an Infantry counter.
Barrel Roll (2). You can discard this counter to stop 1 Hit being inflicted on any 1 of your Aircraft by Dogfight or AAA, at the time of the Hit.
Charge (1). During the Infantry step of any Battle Turn, discard this counter to roll an extra Infantry Attack. Use the Attack value of any of the Infantry in the US Foxholes.
Damage Control (4). You can discard this counter to stop 1 Hit being inflicted on any 1 of your Forces, at the time of the Hit.
Diving Attack (3). When one of your Aircraft successfully Hits with a Bombing Attack, you can discard this counter to inflict 1 additional Hit to the Forces in the Area.
Engaged (3). Discard this counter at the end of a Battle Turn to add or subtract 1 Turn from the Battle.
Envelop (1). Discard this counter to negate the roll of any US Infantry's Attack and immediately re-roll the Attack for a new result.
First Light (2). Roll a die at the start of a Battle Turn. If you roll a 7 or higher, you can select the Carrier-Based Aircraft from any 1 of your Carriers to conduct their Ground and/or Ship Attacks and return to the Carrier before Japan Moves its Aircraft. The Aircraft you select do not Move and Attack during the normal US Move Aircraft step.
If you roll a 6 or less, save this counter and roll to use it again. Keep saving until you succeed during the Battle, then discard this counter.
The Group does not suffer Japanese Dogfight Attacks, but it does suffer AAA Attacks as normal.
After the First Light Action, proceed with the normal Turn for the other Japanese and US Aircraft.
If Japan also draws a First Light Battle Plan, discard both counters without effect.
Furball (1). You can discard this counter when one of your Aircraft successfully Hits with a Dogfight Attack, to inflict 1 additional Hit on the Japanese Aircraft Forces in the Area.
Leathernecks (0). If you have a Marine Ashore in the Battle, discard this counter to stop 1 Hit being inflicted on any 1 of your Infantry Ashore or Airfields, at the time of the Hit.
Ranging Shots (1). When one of your Ships successfully Hits with a Surface Attack, you can discard this counter to inflict 1 additional Hit on the Japanese Forces in the Area.
Seabees (2). You can discard this counter to stop 1 Hit being inflicted on your Airfields, at the time of the Hit.
Sonar (1). Discard this counter to negate the roll of any US Force's Depth Charge or Torpedo Attack and immediately re-roll the Attack for a new result.
Combat
Perform the following steps each Battle Turn.
Draw Japanese Battle Plans
Draw a number of Japan's Battle Plans from the cup equal to their Battle Plan Quantity. If there are no more Battle Plans remaining in the cup, return the previously drawn Battle Plans and keep drawing.
If you draw a second copy of a Battle Plan that you have already drawn for the Battle, place it with the previously used Battle Plans, and draw a replacement Battle Plan.
Place them to the side of the Battle Sheet for easy reference.
Japanese Battle Plans
Air Combat. Increase the Dogfight and Bomb chances of success for all Japanese Aircraft by 3 and any Superior Attack rolls by 2. If an Aircraft does not have a Superior Attack value, they will Attack with a Superior Attack value of 2. If an Aircraft cannot Bomb or Dogfight, it still cannot Bomb or Dogfight.
Example: If an Aircraft has Dogfight 4/2, it has 7/4 during the Battle Turn.
Example: If an Aircraft Bombs Ships on a 4, it Bombs on a 7/2 during the Battle Turn.
Artillery. If Japan has Infantry Ashore during the Infantry Attack phase, the US takes 1 Hit to an Infantry or Airfield.
Attack Plan. Increase all Japanese Attack roll chances of success by 1.
Example: If a Japanese Ship has a Surface Attack of 4, it has a 5 during the Battle Turn.
Carrier Attack. All Carrier-Based and Land-Based Bombers are assumed to roll a 10 (US Ocean) for their Attack Area.
Damage Control. The first Hit inflicted on a Japanese Force during the Battle Turn is stopped.
Duration. At the end of the Battle Turn, if Japan has more Forces on the Battle Sheet than the US, increase the Battle Turn duration by 1. If Japan has fewer Forces on the Battle Sheet than the US, decrease the Battle Turn duration by 1. If they have the same number of Forces, this Battle Plan has no effect. Count all Forces, including Carrier-Based Aircraft and Infantry on Transports.
First Light. The Japanese Aircraft Carrier with the most Aircraft immediately performs Air Attacks. The Group automatically receives an Area roll of a 10. Hits that Damage a US Aircraft Carrier will eliminate the Aircraft on that Carrier before the Aircraft can be Moved for the Turn. Hits that Damage Airfields take effect on Aircraft before they can Attack for the Turn.
The Group does not suffer US Dogfight Attacks, but it does suffer AAA Attacks as normal.
After the First Light Action, proceed with the normal Turn for the other Japanese and US Aircraft.
Infantry Combat. Increase the chances of success for all Japanese Infantry Attacks by 3 and add a Superior Attack roll of 2.
Example: An Infantry has an Attack value of 2. With this Plan, it has a 5/2.
Battalion. Move a Battalion from the Battalion box on the Campaign Map to the Japanese Foxholes.
Kamikaze Attacks. This counter has no effect when drawn during a 1942 or 1943 Campaign. All Ship and Land-Based Bombers are assumed to roll a 10 (US Ocean) for their Attack Area. All Bombers inflict 1 extra Hit if they Attack a Ship.
If there are no US Ships in the Battle, this Battle Plan has no effect.
Then, destroy the Aircraft participating in the Attack against Ships.
Example: Three Bombers each have a Ship Attack value of 4. You also drew an Air Combat this Turn. The Bombers now each Attack with a 7/2. If a Bomber rolls an 8 to 10, it inflicts 1 Hit. A roll of 3 to 7 inflicts 2 Hits. A roll of 1 or 2 inflicts 3 Hits. All three Aircraft are then Destroyed.
No Contact. The US may not send Aircraft to the Japanese Ocean this Battle Turn.
If the US has a Submarine in the Japanese Ocean, the Submarine cannot Attack this Battle Turn.
Screening Ship. The first Hit inflicted on a Japanese Aircraft Carrier is stopped. If Japan does not have an Aircraft Carrier, this Battle Plan has no effect.
If no Aircraft Carriers were Hit during this Battle Turn, the Battle Plan is saved and used the next time an Aircraft Carrier is Hit during the Battle.
Japan still draws the designated number of Battle Plans during future Battle Turns.
Ship Combat. Increase the chances of success for all Japanese Ship Surface Attacks by 3 and add a Superior Attack roll of 2.
Example: A Ship has a Surface Attack value of 4. With this Plan, it has a 7/2.
Example: A Carrier has a AAA Attack value of 4/2. With this Plan, it has a 7/4.
This Battle Plan does not affect Attacks by or against Submarines.
Submarine Warfare. Increase the chances of success for all Japanese Submarine and Depth Charge Attacks by 4 and add a Superior Attack roll of 2.
Move US Aircraft
Move each US Aircraft to any Area on the Battle Sheet.
Move Japanese Aircraft
Aircraft that have Bomb values are Bombers, even if they also have a Dogfight rating.
All the Bombers on a Japanese Aircraft Carrier are considered to be 1 Group.
All the Japanese Land-Based Bombers are considered to be 1 Group.
A Bomber is any aircraft with the ability to drop bombs, even if it also has a Dogfight value.
A Fighter is any aircraft with a Dogfight value and no Bomb values.
All the Fighter Aircraft on each Japanese Aircraft Carrier are considered to be 1 Group.
All the Japanese Land-Based Fighter Aircraft are considered to be 1 Group.
Japanese Aircraft Movement
Roll a die for each Group to determine which Area each Group moves to.
Example: You roll a die to determine where the Kaga's Bomber Group is Moving. You then roll for the Kaga's Fighter Group (which only has one Fighter).
When an Aircraft Group moves, roll a die and compare it to the Location numbers on the Battle Sheet.
A Roll of 1-2 moves the Group to the Japanese Ocean Area.
A roll of 3-5 moves the Group to the Island Area.
A roll of 6 moves the Group to the Coastal Area.
A roll of 7-10 moves the Group to the US Ocean Area.
Example: You roll a 5 for a Group. Those counters move to the Island.
Any roll that places Japanese Aircraft in an Area that does not have a US target, gets increased to the next higher Area.
Example: You roll a 2 for the Japanese Bomber Group, but there are no US Ships in the Japanese Ocean. The Bombers are moved to the next higher movement number (3-5), placing them on the Island.
Example: A roll of 6 would place Bombers in the Coastal Area, but there are no Ships in the Coastal Area, so the Bombers Move to the next higher Location, which would be the US Ocean.
If Aircraft cannot be placed in any of the higher numbered Locations, they will move down the list to the next appropriate lower location.
Example: You roll a 6 for a Bomber Group. The US does not have any Ships in the Coastal or US Ocean Areas. The Bombers move to the Island.
All Aircraft Carriers have a value of 1, so they are always the first Ships to suffer Attacks in an Area.
Example: You inflict 3 Bomb Hits on the Ships in the Japanese Ocean Area. They have a CV (value 1), as well as 2 Destroyer Groups (value 2). The first 2 Hits must Damage and Destroy the CV. The next Hit will Damage the Destroyer Group of your choice.
Each Hit inflicted on a Transport inflicts 2 Hits on the Infantry counters it is carrying.
Example: There are 3 Infantry on a Transport with no other Japanese ships in the Coastal Area. Your Bombers inflict 2 Hits. You Damage and Destroy 2 Infantry counters.
If a Group has no legal Areas to move to, they remain on their Aircraft Carrier or Airfield.
Example: All the US Aircraft and Japanese Bombers have been Destroyed. The Japanese Fighters remain on their Aircraft Carrier or Airfield.
Japanese Bomber Movement. All the Bombers in a Group move to the same Area during the Move Japanese Bombers step.
Bombers can only Move to an Area if it meets one of the following conditions:
- There are US Ships in the Area (do not count Submarines), or
- The Island has US Land-Based Aircraft Ashore, or
- The Island has US Infantry Ashore, as well as either Japanese Infantry or Land-Based Aircraft Ashore
Example: If you roll a 6, and there are no US Ships in the Coastal Area, the Bomber Group cannot move to the Coastal Area.
Example: There are US Infantry on the Island, but there are no Japanese Infantry or Land-Based Aircraft on the Island. Bombers will not Move to the Island.
Example: There are US Infantry and Land-Based Aircraft on the Island, but there are no Japanese Infantry or Land-Based Aircraft on the Island. Bombers will Move to the Island.
Japanese Fighter Movement. Japanese Fighters can only Move to an Area with Japanese Aircraft or US Aircraft.
Allocating Hits
Apply all Hits to the lowest cost Force in the Area you are attacking. When allocating Hits to Japanese Forces, apply a second Hit to Destroy one Force before allocating a Hit to Damage a new Force.
You may allocate Hits to your US Forces any way you like in order from lowest to highest value.
Continue allocating Hits until no Hits remain to be allocated, or until no Forces that are allowed to suffer the Hits remain in the Area.
Example: The US inflicts 7 Bomb Hits to the Japanese Island Forces. The first 2 Hits Damage and Destroy a 0 value Battalion. There are no more Battalions. There are 4 value 1 Infantry as well as 5 value 1 Airfields on the Island. You decide to apply 3 Hits on the Airfields, and 2 on an Infantry to Damage and Destroy it.
Dogfight. Whenever both sides have Aircraft in an Area and at least one Aircraft has a Dogfight rating, roll for their Dogfight Attacks.
Aircraft use their Dogfight value to Attack enemy Aircraft. If you roll the Attack value or lower, you inflict 1 Hit. If you roll the Superscript value or lower, you inflict a second Hit.
Dogfight Attacks can only inflict Hits on Aircraft currently in the Air.
Example: The First Light Battle Plan was drawn, and the Aircraft that participated in the Attack have returned to their Carrier. When Aircraft Attack that Area, they cannot Dogfight the Aircraft on the Carrier.
Allocating Dogfight Hits. When you inflict a Hit, apply it to the lowest Cost Aircraft in the Area you are attacking.
One Hit flips a full strength Force to its Damaged side, or Destroys a Damaged Force and removes it from play.
Example: There are US and Japanese Fighters and Bombers in the Coastal Area. You roll for the US Fighter Dogfight Attacks and inflict 2 Hits. You roll for the Japanese Dogfight Attacks and inflict 3 Hits. You now inflict losses to both sides. You must inflict the 3 Hits on US Aircraft in the Area, going from lowest to highest value. You must inflict 2 Hits on the Japanese Aircraft in the Area, going from lowest to highest value. You must Destroy a Damaged Japanese Aircraft, before you can Damage a full strength Japanese Aircraft.
Example: The US inflicts 4 Dogfight Hits in the Island Area. There is only 1 Japanese Aircraft in the Island Area. You Destroy the Japanese Aircraft. The remaining Dogfight Hits are ignored. They do not carry over to the Japanese Infantry and Airfields on the Island.
AAA
Ships Attack opposing Aircraft in their Area with their AAA value. Roll the AAA value or lower to inflict 1 Hit on an opposing Aircraft.
If the Ship has a Superior Attack value, and you roll that number or lower, inflict a second Hit.
Escort Ships. Divide the Ships in an Ocean Area into Aircraft Carriers (CVs, CVLs, CVEs), and Escorts (BBs, CRUs, DDs).
Place the Escorts in one row and the Carriers in a second row.
Resolve the AAA Attacks for the Escorts, and then resolve the AAA attacks for the Carriers.
Each Aircraft can only be Attacked by AAA once from each row. If there are more Ships than Aircraft, roll for the Ships with the highest AAA ratings.
Example: The Japanese have 1 Aircraft Carrier and 2 Escorts in their Ocean Area. 3 US Aircraft Attack the Japanese Ocean Area. Roll a AAA Attack for the BB and DD. Then roll a AAA Attack for the CV.
Example: 1 US Aircraft Attacks the same fleet. Roll a AAA for the BB and the CV. Because there is only 1 Aircraft, only 1 Escort and 1 Aircraft Carrier get a AAA Attack.
Example: There are 6 ships in the Coastal Area, targeting 3 Aircraft. Only 3 ships can roll a AAA Attack.
No Island AAA. Aircraft Attacking Infantry and Airfields do not suffer AAA Attacks.
Bomb Runs
Bombers now Attack the Land or Naval Forces in their Area. Roll the Aircraft Surface Attack value or lower to inflict 1 Hit.
Use the Attack value with the blue square when Attacking enemy Ships. Use the Attack value with the brown square when Attacking enemy Infantry or Airfields.
Torpedoes
Submarines Attack Surface Ships using their Surface Attack value. Roll the Surface Attack value or lower to inflict 1 Hit on an opposing Ship.
Submarines can only Attack Ships. They cannot Attack Infantry or Airfields.
Depth Charges
Ships and Submarines use their Depth Charge Attack value to Attack an enemy Submarine in their Area. Roll the Depth Charge Attack value or lower to inflict 1 Hit on an opposing Submarine.
Each Submarine can only be Attacked by Depth Charges once. If there are more Ships than Submarines, roll for the Ships with the highest Depth Charge ratings.
Roll the Depth Charge Attack value or lower to inflict 1 Hit on an opposing Submarine in the Area.
Example: There is a Japanese Submarine in the US Ocean Area with 6 US Ships. Since it is only 1 Submarine, roll only 1 Depth Charge Attack against the Submarine.
Naval Guns
Each Ship in the Coastal Area can Attack enemy Ships in the Coastal Area and enemy Island Forces. Roll the Surface Attack value or lower to inflict 1 Hit on an opposing Force. Apply any Hits inflicted to legal targets in order from lowest to highest value.
Example: There is a US Ship and Japanese Ships in the Coastal Area. There are also Japanese Infantry and Land-Based Aircraft and US Infantry Ashore on the Island. If the US Ship rolls a successful Surface Attack, apply the Hit to a Japanese Ship, Land-Based Aircraft, or Infantry with the lowest value.
Infantry
Infantry Forces can Attack opposing Infantry or Airfields on the Island. Roll the Infantry's Attack value or lower to inflict 1 Hit on an opposing Force.
Only Infantry or Battalion Forces in Foxholes can Attack during the Combat Infantry phase.
Infantry can only Attack Infantry Ashore and Airfields.
Attacking Island Forces.
Allocating Island Hits. When Infantry inflict Hits, apply the Hits as normal, except do not apply the Hits against opposing Airfields if there are opposing Infantry in Foxholes. Apply the Hits against the Infantry in Foxholes.
Example: Infantry attack and inflict Hits. On the Island, there are opposing Infantry (Cost 2) in Foxholes and Airfields (Cost 1). Even though the Airfields are Cost 1, and the Infantry in the Foxholes are Cost 2, first apply the Hits against the Infantry in the Foxholes.
Aircraft and Ships can only target Infantry if there are friendly Land-Based Aircraft or Infantry already Ashore.
Example: It is Turn #1 of a Battle. The Japanese have Infantry and Land-Based Aircraft on the Island. You have Infantry on Transports in the Coastal Area. You do not have Land-Based Aircraft or Infantry on the Island. You cannot inflict Hits on the Japanese Infantry. You may inflict Hits on their Airfields.
Example: There is a US Ship and Japanese Ships in the Coastal Area. There are also Japanese Infantry and Land-Based Aircraft Ashore on the Island. If the US Ship rolls a successful Surface Attack, apply the Hit to a Japanese Airfield or Ship (but not Infantry since the US does not have Infantry or Land-Based Aircraft on the Island.)
Example: You have Infantry Ashore on the Island. You inflict a Hit from one of your Ships targeting the Island. Allocate the Hit against the lowest Cost opposing Infantry or Airfield on the Island.
Enemy Airfield. Each Hit allocated to Airfields Destroys 1 Airfield.
Example: The US Airfield counter has a value of 5. The Japanese inflict 3 Hits on the Airfield. Replace the Airfield counter with a value 2 Airfield.
Infantry Advance. Move Infantry on the Beach to the Foxholes.
Move Infantry on a Transport to the Island Beach.
Move Marines directly from Transports to Foxholes.
Return Aircraft
Land-Based Aircraft. Return Land-Based Aircraft to their Island Airfields.
Carrier Aircraft. Return Carrier Aircraft to their Aircraft Carriers.
You can only place the number of Aircraft on an Aircraft Carrier equal to the original number of Aircraft the Aircraft Carrier held.
You cannot place Carrier Aircraft counters on a Damaged Aircraft Carrier.
When Aircraft Carriers are sunk or Damaged, there may not be enough space on the remaining Aircraft Carriers to land all the returning Carrier Aircraft.
Japanese Carrier-Based Aircraft. If there are too many Carrier Aircraft to land on Japanese Aircraft Carriers, Destroy the Carrier Aircraft one at a time until all the remaining Aircraft can land.
Destroy Damaged Aircraft in order from lowest value to highest value.
Destroy full strength Aircraft in order from lowest value to highest value.
US Carrier-Based Aircraft. If US Aircraft Carriers are Damaged or Destroyed, you are free to choose which US Carrier-Based Aircraft to land and which to Destroy.
Inflict Airfield Losses
Compare the number of US Land-Based Aircraft counters to the number of US Airfields. If there are more Aircraft than Airfields, Destroy Aircraft until the number of Aircraft equals the number of Airfields.
Do the same for the Japanese Land-Based Aircraft and Airfields.
Example: At the start of the Battle, the Japanese had 7 Land-Based Aircraft, so you placed an Airfield "7" counter on the Island for them. After the first Turn of Battle, they have 6 Aircraft, and their Airfields suffered 3 Hits, reducing them to 4 Airfields. They have 2 more Aircraft than Airfields, so you must Destroy 2 of their Aircraft.
Japanese Airfield Losses. First, Destroy Damaged Aircraft in order from lowest value to highest value.
Then, Destroy full strength Aircraft in order from lowest value to highest value.
Move all Destroyed Japanese Aircraft to the Japanese Reinforcements Land-Based Aircraft area of the map.
US Airfield Losses. You are free to allocate Airfield Hits to your Land-Based Aircraft however you want.
Move all Destroyed US Aircraft to the US Reinforcements Land-Based Aircraft area of the map.
Remove all of the US/Japanese Airfields if the US/Japan no longer have Land-Based Aircraft on the Island.
Advance Battle Turn Counter
Advance the Battle Turn Counter down the Turn track by one space.
End of the Battle
The Battle ends if the Battle Sheet only contains Japanese or US Forces, or when you move the Turn Counter off the Track.
Return all the remaining Forces to the Area on the Map where they came from. The Area should be marked by the Battle Location counter.
Japanese Battalions. Return all Destroyed Japanese Battalions to the Battalion box of the Map. Re-use them as needed.
Post Battle
Japanese Reinforces
Roll a die and compare that roll to the New Japanese Forces Table on the Campaign Map.
Add the Resupply counter's position on the track to the die roll.
Example: You roll a 5 and the Resupply counter is in the 7 position on the track. The roll becomes a 12.
Subtract 1 for each Damaged Japanese Force currently on the Map. Do not subtract 1 for Damaged Infantry that are in the same Area as US Forces.
Subtract 3 for each Submarine you placed in the Raiding box on the Map during the US Movement step.
Move the indicated number of Ships, Infantry and Land-Based Aircraft counters from their Reinforcement boxes to the Japan Area of the Map.
If the Japanese do not have enough Forces to meet their Reinforcement needs, replace each counter they are short with 2 Battalion counters.
Example: You roll a 7 for Japanese Reinforcement. They have 6 Resupply counters. You have 2 Raiding Submarines. The end result is a roll of a 9. Japan receives 2 Ships, 2 Infantry, and 1 Land-Based Aircraft. It is late in the Campaign, and they do not have any Land-Based Aircraft remaining in Reinforcements, so they receive 2 Battalions instead.
Reset the Resupply counter to the "0-" position on the track.
Japanese Repair
Move any Damaged Japanese counters to the bottom of the Reinforcement stack for that type of Force.
When you move the Force, flip it to its Full side. That Force can now be drawn as an upcoming Reinforcement counter.
Do not move Damaged Japanese Infantry that are in Areas with US Forces.
Do not move the last Japanese Infantry or Land-Based Aircraft from an Area, even if it is Damaged.
US Return to Port
You must move all the US Ships not in the Hawaiian Islands Area to the Hawaiian Island's Return to Port boxes. Australian Ships return to Port to Australia.
There is a series of 3 Return to Port boxes located next to the Hawaiian Islands.
If you are playing a 1942 Campaign, you only use the "1942 to 1945" box.
If you are playing a 1943 Campaign, you use the "1942 to 1945" and the "1943 to 1945" boxes.
If you are playing a 1944 or 1945 Campaign, you use all 3 boxes.
During the Return to Port step, advance each stack of Ships one box closer to Hawaii. Move the Ships in the "1942 to 1945" box to the Hawaiian anchor to show they are available for action during the next Campaign Turn.
Example: You are playing a 1943 Campaign. You move the Ships from the 1942 box to Hawaii. You move the Ships in the 1943 box to the 1942 box.
Move all the US Ships from the other Areas of the Map to the last box you are using.
Example: In your 1943 Campaign, you move your Ships from Wake, Midway, Borneo, and the Solomon Islands to the 1943 to 1945 box.
US Supply Check
You must check to make sure each of your Areas with Infantry or Land-Based Aircraft is In-Supply.
To be In-Supply, you must be able to trace an uninterrupted path of US Held Areas starting from the US West Coast and leading up to the Area.
If an Area is not In-Supply, inflict 1 Hit to each Infantry and Land-Based Aircraft in the Area.
Example: You Hold the Hawaiian Islands and Midway Island. There are both US and Japanese Forces on Wake Island. You also have 3 Infantry and 1 Land-Based Aircraft on the Mariana Islands. Wake happens to be your only link to the Mariana Islands. You do not Hold Wake, but you do Hold the Islands leading to it, so Wake is In-Supply. You do not Hold a continuous path of Islands leading to the Mariana Islands, so your Forces on the Mariana's are not In-Supply. Inflict 1 Hit to each of the 3 Infantry and the Land-Based Aircraft on the Mariana's.
Defeat Check
"Replaced" Defeat Condition. If the US is reduced to Holding the number of Objectives listed for the "Replaced" evaluation level at the end of any Campaign Turn, you immediately lose the Campaign.
Example: You are playing the 1942 Campaign. If you are reduced to Holding 3 or fewer Objectives at the end of a Campaign Turn, you get Replaced and immediately lose the Campaign.
Hawaiian Islands Defeat Condition. If the US does not Hold the Hawaiian Islands at the end of a Campaign Turn, you immediately lose the Campaign.
Next Turn
This concludes one Campaign Turn. Return to the start of the Sequence of Play and resolve the next Turn. Continue to do so until the end of the Campaign.
Special Campaign Rules
1944 Japanese Infantry
During the 1944 Campaign, draw 2 extra Japanese Infantry counters during each Japanese Reinforcements phase.
US Strategic Bombing Movement
The 1944 and 1945 Campaigns include US B-29 Bomber Wing Land-Based Aircraft counters. The counters have a "BW" Unit Name.
Bomber Wings not in the Mariana Islands engage in combat as normal. Bomber Wings in the Mariana Islands may engage in combat, or perform Strategic Bombing against Japan.
To perform Strategic Bombing, move one or more Bomber Wing counters (that started the Movement step in the Mariana Islands) from the Mariana Islands to the "BW" Strategic Bombing box located next to the Mariana Islands. Pay 1 Supply Point for each counter you move.
At the start of the Japanese Orders step, Destroy 1 random Ship, or 1 random Infantry, or 1 random Land-Based Aircraft at from their Reinforcement box. Continue to Destroy counters until you have moved a number of counters equal to the number of your Strategic Bombers in the Strategic box. If you Destroy a Battalion, move it to the Battalion box. Do not Destroy it.
Example: You have 4 Bomber Wings in the Mariana Islands. You pay 4 Supply Points and move all 4 to the Strategic Bombing box. At the start of the Japanese Orders step, you decide to Destroy 1 random Ship, and then 1 random Infantry, and then another random Infantry (which turns out to be a Battalion, so you move it to the Battalion box), and finally 1 random Land-Based Aircraft.
Move the Strategic Bombers back to the Mariana Islands at the end of the Battle step.
If a Battle takes place in the Mariana Islands, count the Bomber Wing counters performing Strategic Bombing when calculating your Airfield value. If the Japanese inflict Hits on your Airfields, allocate Hits to the Strategic Bombing Aircraft as normal.
1945 Japan Invasion Movement
This rule section only applies to the 1945 Campaign. In preparation for the possible invasion of Japan, the US started reserving forces to conduct the invasion.
At the start of each US Movement step, you may move up to 7 Force counters from the Hawaiian Islands and West Coast to the 1945 Japan Invasion box. It is free to Move these Forces.
At the end of the Campaign, add up the Buy Cost of all the Forces in the box to determine the number of Objective Points they earn toward Victory.
Example: The Cost of the Forces in the box total 82 points. This counts as 2 Objectives toward Victory. If you also Hold 13 of the 16 Objective Areas on the Campaign Map, you have 15 Objectives, which is a "Historical" Evaluation.
1945 Iwo Jima and Okinawa
During the 1945 Campaign, do not roll Japanese Orders for the Forces on Okinawa and Iwo Jima.
1945 Early Campaign Ending
During the 1945 Campaign, end the Campaign after the "Jul/Aug" Campaign Turn.
Linked Campaigns
Instead of playing each Campaign as a stand-alone game, you can link them into a series of linked Campaigns stretching from 1942 through 1945.
Play each Campaign and record the number of Objectives you Held at the end of the Campaign on the Player Log. If a Campaign ends with a Replaced Evaluation, or ends immediately due to Japanese Forces in the Hawaiian Islands, do not continue with the Linked Campaign.
When you have finished playing all 4 Campaigns, compare your total Objectives Held to the following chart:
| Objectives Held | Evaluation |
|---|---|
| 50 to 51 | Great |
| 45 to 49 | Good |
| 35 to 44 | Historical |
| 26 to 34 | Poor |
| 25 or less | Dismal |
Expansions
If an Expansion rule or component is in conflict with a core game rule, the expansion takes priority.