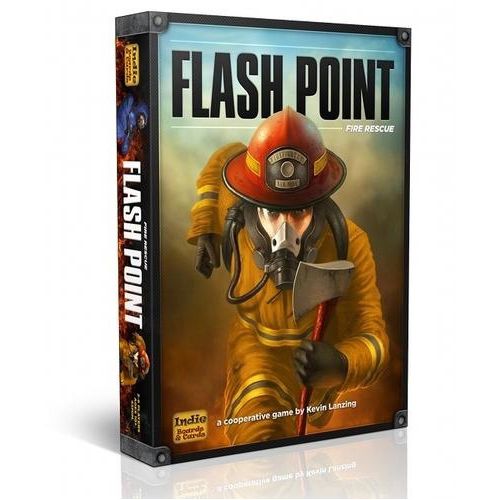
Flash Point: Fire Rescue
Flash Point: Fire Rescue Rulebook
Table of Contents
Table of Contents
Object of the Game
Flash Point: Fire Rescue is a cooperative game. All the players are on the same team and everyone either wins or loses together. To win, the players must rescue the victims trapped inside a burning building before the fire gets out of control or the building collapses.
Components
- 6 Firefighters
- 1 Board (dual sided)
- 33 Threat markers (Fire on one side, Smoke on the other)
- 18 Points of Interest (POI) markers: 6 False Alarms, 12 Victims
- 24 Damage counters
- 8 Door markers (Closed on one side, Open on the other)
- 24 Hot Spot markers
- 6 Player cards
- 8 Specialist cards
- Other markers: 21 Action markers, 3 Heal markers, 6 Hazmat markers
- 2 Vehicles: Engine, Ambulance
- Dice: 1 red six-sided die, 1 black eight-sided die
- Player Aids
Learning the Game
Flash Point: Fire Rescue has two different sets of rules. Family rules are for learning the game and/or playing with younger children, and the Experienced rules are for more seasoned players. The rules are quick to read, and you can even play the game by yourself before teaching it to others.
Included in the game are Player Aids; these make teaching the game to new players easy and are a helpful reminder for those that have played before.
The Game Board
The game board has two sides; each side represents a different building. The area outside the building consists of spaces with numbers, die faces and four corner spaces. These outside spaces can be used in the game.
Each space inside the building has a grid coordinate, marked in the lower right of each space. The symbols show the grid location of the space and correspond to the dice. Many times in the game you will roll dice to determine where to add markers (for example when the fire advances, or where Victims are placed for you to rescue). The red symbol represents the red, six-sided die. The black symbol represents the black, eight-sided die. Together these symbols mark a board location.
Adjacent Spaces
Any reference in the game to Adjacent spaces means those spaces that are up, down, left, or right from a space. Diagonal spaces are not Adjacent.
Closed Doors and Walls prevent spaces from being Adjacent, unless the Wall segment is Destroyed. A Wall segment with two Damage Markers is Destroyed. A Wall segment with one Damage marker is Damaged.
Family Game Setup
- Place the Board in the center of the table within easy reach of all players. It is recommended that you start your first game using the front side of the game board.
- Place the Door markers with the Closed side up in each of the eight doorways.
- Place Fire markers on the board in the ten starting Fire spaces as shown on the setup diagram.
- Remove 2 Victim markers and 1 False Alarm marker. Place them in the box; they will not be used in this game. Flip the remaining 10 Victims and 5 False Alarms markers so that the "?" side is up. Shuffle and place one POI marker with the "?" side up on the board in each of the three starting POI spaces shown on the setup diagram.
- Place the Damage and Action Point markers, remaining POI and Threat markers, and dice near the board where everyone can reach them.
- Each player takes the Player card and Firefighter in the color of their choice. Place remaining Firefighters and Player cards in the box.
- Place Heal, Hazmat and Hot Spot markers, Specialist cards and Engine/Ambulance tokens back in the box.
- Each player places their Firefighter on any of the board spaces outside of the building.
- The players collectively decide who goes first. If no decision can be made, the youngest goes first.
Your goal is to rescue 7 victims before the building collapses.
Setup Summary
- Put back in the box: 2 Victim Markers, 1 False Alarm, Heal markers, Hazmat markers, Hot Spots, Specialist cards, and the unused Vehicle token.
- Place on the board: 8 Closed Doors, 10 Fire Markers, 3 POI Markers.
- Give each player: 1 Firefighter, 1 Player Card.
- Place within easy reach: 12 POI Markers, 24 Damage Counters, 23 Fire/Smoke Markers, 21 Action Markers, Dice.
A Game Turn
From the start player, play proceeds clockwise around the table with each player taking turns in order until the game ends. Each turn the current player must:
- Take Action — Spend Action Points moving, fighting fires, chopping down walls, etc.
- Advance Fire — Roll for Smoke.
- Replenish POI markers.
1. Take Action
A player gets 4 Action Points (AP) to spend on their turn. Each Action has a corresponding AP cost to perform. A player may select from any of the available Actions in any order and spend the appropriate AP to perform it. An action may be performed more than once per turn, so long as the AP cost is spent each time that Action is performed.
Players may pass. Unspent AP are saved from turn to turn. A player may save a cumulative maximum of 4 AP at the end of their turn. Take an Action marker for each saved AP. On subsequent turns you may spend these Action markers as additional AP to perform Actions.
Actions
Move — Move your Firefighter to an Adjacent space:
- Move to a space without Fire: 1 AP
- Move to a space with Fire: 2 AP
- Carry a Victim to an open space or space with Smoke: 2 AP
If you Move into a space with a POI marker, flip that marker to reveal either a Victim or a False Alarm. If you revealed a False Alarm, place it on the Rescued space at the edge of the board. Revealing a POI is a no-cost (0 AP) action.
If you Carry a Victim outside of the building, you have rescued them. Place the Victim marker on the Rescued space at the edge of the board.
You may move through a Destroyed Wall (a Wall segment with two Damage counters). You may not Carry a Victim into a space with Fire. You may not end your turn on a space with Fire.
Open/Close Door — Flip a Door marker in your space: 1 AP
Extinguish — Use your gear to fight the fire in the Firefighter's space or an Adjacent space:
- Remove a Smoke marker from the Board: 1 AP
- Flip a Fire marker to Smoke: 1 AP
- Remove a Fire marker from the Board: 2 AP
It is usually best to completely Extinguish Fire (2 AP); Smoke is liable to reignite.
Chop — All Firefighters carry an axe, used to demolish walls, quickly reach trapped victims or create an escape route from the building.
- Place a Damage marker on a Wall segment in your space: 2 AP
A Wall segment with two Damage markers is Destroyed. Firefighters (and Fire) can pass through a Destroyed Wall segment as if that Wall was not there. Be careful: if there are no Damage markers remaining, the building collapses, killing everyone still in it.
2. Advance Fire
After taking Actions, the current player must roll the dice to Advance the Fire. Place a Smoke marker on the board in the Target Space corresponding to the numbers rolled on the dice. After you place the Smoke marker, check to see if any of the following situations are created:
- If the Smoke is placed on an existing Smoke — Flip one Smoke to a Fire and remove the other Smoke marker from the board. (Smoke + Smoke = Fire.)
- If the Smoke is placed Adjacent to a Fire — Flip the Smoke to Fire. (Smoke Adjacent to Fire = Fire.)
- If the Smoke is placed on an existing Fire — You have just caused an Explosion.
Explosions
When the fire Advances into a space that is already on Fire, an Explosion occurs. Explosions spread fire quickly, can damage walls or doors, Knock Down Firefighters and even kill Victims.
An explosion radiates in all four directions (up, down, left, right) from the Target space (your dice roll). Place a Fire marker in each Adjacent space without Fire, or flip the Smoke marker to Fire in a Smoke filled space — even if that space is outside of the building. Place a Damage marker on any Wall(s) that borders the Target space. Remove any Door marker(s) that borders the Target space.
If the Adjacent space in any direction is already on Fire, a Shockwave is created. The Shockwave continues to travel in its respective direction, passing through all the spaces that are on Fire until it either encounters an Open space, Smoke filled space, Wall or Closed Door. What happens with a Shockwave depends on what it hits first:
- Open Space (without Fire or Smoke) — Place a Fire marker on the Open Space, even if that space is outside of the building.
- Smoke Filled Space — Flip the Smoke marker to Fire.
- Wall — Place a Damage marker on the wall. (A wall that already had two Damage markers is Destroyed and will not stop a Shockwave.)
- Closed Door — Remove the Door marker from the board; it has been Destroyed. A Doorway with no Door marker is treated as a Destroyed Wall. Do not place any Damage markers on the Destroyed Door.
A Shockwave travels through Destroyed Walls and Open Doors. If a Shockwave travels through an Open Door, remove that Door marker from the board; the Door has been Destroyed. Do not place any Damage markers on the Destroyed Door.
Secondary Effects
After the fire has Advanced and Explosions have been resolved, you need to check to see what, if any, damage has occurred.
Flashover — Flip any Smoke marker in a space Adjacent to Fire to Fire. Repeat this step as many times as you can; there should be no Smoke Adjacent to Fire at the end of a turn. (Smoke Adjacent to Fire = Fire.)
Any Firefighters in a space with Fire are Knocked Down.
Any Victims or POI in a space with Fire are Lost. Place the POI or Victim marker on the Lost space at the edge of the board. If a POI was not identified, Reveal (flip over) the POI then place it on the Lost spot.
Remove any Fire markers that were placed outside of the building.
Knocked Down
A Firefighter is Knocked Down when Fire advances into their space; this could be from an explosion or being in a Smoke filled space that ignites. A Firefighter that is Knocked Down needs to go to the Ambulance to recover.
When a Knock Down happens, take the Firefighter from its space and place it on the closest (as the crow flies) Ambulance Parking Spot outside the building. If two Parking Spots are equally distant, choose one. Leave the Fire marker in the space.
If the Knocked Down Firefighter was carrying a Victim, that Victim is Lost. Place the Victim marker on the Lost space at the edge of the board.
3. Replenish POI
Before your turn is over you need to replenish any POI markers that were Lost, Victims that were Rescued or Lost, and/or False Alarms that were identified.
There should be 3 POI markers on the board (inside or outside of the building) at the end of every turn. Total the unidentified POI markers and Victims on the board. If fewer than three, replenish POI marker(s) on the board by rolling the dice and placing a randomly selected POI marker "?" side up on the Target space (your dice roll).
- If the Target space has a Fire or Smoke marker, remove that Fire/Smoke marker before placing the POI marker.
- If the Target space has a Firefighter, immediately reveal (flip) the POI marker and remove it if it is a False Alarm.
- If the Target space has a POI marker, reroll.
Turn End
After all POI markers have been replenished, your turn is over. The player to your left now begins their turn. Keep taking turns until the game ends.
Game End
The game ends when the building collapses, the players have won (7 Victims Rescued) or the players have been defeated (4+ Victims Lost).
- Building Collapse — The game ends immediately as the building collapses when all 24 Damage markers have been placed on the board. Place any remaining Victims or POI (inside or outside of the building) on the Lost space at the edge of the board.
- Victory — The players are victorious when seven Victims have been rescued. If you like, you can continue to play to see if you can rescue all ten Victims for a perfect game.
- Defeat — The players are defeated when four or more Victims have been lost.
This is the end of the Family rules.
Experienced Game
The Experienced game introduces several new gameplay features: a random setup, multiple difficulty settings, vehicles, vehicle actions, Firefighter specialties, hazardous materials and Hot Spots. Additionally, the rules for Secondary Effects and POI Replenishment are slightly modified.
Knowledge of the family game rules is assumed. If a rule is not specifically mentioned as being modified in the Experienced game, then the family game ruling still applies.
Experienced Game — Setup
- Place the Board in the center of the table within easy reach of all players.
- Place the Door markers with the Closed side up in each of the doorways.
- Choose a difficulty level (Recruit is similar in difficulty to the Family game, Veteran is hard, and Heroic is very hard):
- Recruit — 3 Initial Explosions, 3 Hazmats
- Veteran — 3 Initial Explosions, 4 Hazmats
- Heroic — 4 Initial Explosions, 5 Hazmats
- Remove unused Hazmat markers from play.
- First Explosion: Roll the black, eight-sided die to determine the Target space (each of the 8 faces maps to a designated space per the setup key). Place a Fire and Hot Spot marker and resolve an Explosion in the Target space.
- Second Explosion: Roll both dice to determine the Target space. If the Target space is already on Fire, roll again. Place a Fire and Hot Spot marker and resolve an Explosion in the Target space.
- Third Explosion: Flip over (to show the opposite face) the black die from the previous roll and re-roll the red die to determine the Target space. If the Target space is already on Fire, roll just the red die again. Place a Fire and Hot Spot marker and resolve an Explosion in the Target space.
- If playing at the Heroic level, roll both dice to determine the Target space for the fourth Explosion. If the Target space is already on Fire, roll again. Place a Fire and Hot Spot marker and resolve an Explosion in the Target space.
- Roll to place the Hazmat markers. If the Target space has a Fire marker, roll again. Place a Hazmat marker in the Target space.
Vehicles
The Experienced game introduces two Vehicles, the Engine and the Ambulance. Each Vehicle is represented by a token that is placed on one of 4 Vehicle parking spots located outside of the building for that Vehicle. Vehicles may be driven by the Firefighters, but only to their respective parking spot. Vehicles give the Firefighters additional actions that they can perform when they are located in one of the Vehicle spaces. Note: Each Vehicle occupies two spaces.
Rescuing Victims in the family game was no sweat; just carry them outside and you are done. In the Experienced game, Victims must be carried to the Ambulance to be Rescued.
Take Action — Vehicle Actions
Drive — Use the Engine or Ambulance to get around the building quickly.
- Drive a Vehicle: 2 AP
Firefighters can only Drive the Engine when in the same space as the Engine. Using their radios, a Firefighter can cause the Ambulance to Drive without having to be in the same space as the Ambulance. The Firefighter that Drives the Engine must go with the Engine. It is optional for a Firefighter to go with the Ambulance.
Vehicles can be Driven in either direction, clockwise or counter-clockwise around the building. Vehicles must always start and stop in their respective Parking Spot. Driving a Vehicle to the Parking Spot on the opposite side of the building takes two Drive Actions (4 AP).
Firefighters that are in the Vehicle Parking Spot of a Vehicle while it is being Driven can Ride the Vehicle for 0 AP. Riding is optional, and any number of Firefighters may Ride a Vehicle at one time. After Riding, Firefighters may choose to exit the Vehicle in either space of the Vehicle's Parking Spot.
If the Ambulance is Driven to a Parking Spot with a Victim, that Victim is rescued at 0 AP cost.
Fire the Deck Gun — Use the Engine's powerful hose to Extinguish Fires quickly.
- Fire the Engine's Deck Gun: 4 AP
The Engine's Deck Gun can extinguish large masses of Fire in one burst. The Deck Gun is aimed at one of the board's Quadrants. Quadrants are delineated with dotted red lines on the board.
- Firefighters can only Fire the Engine's Deck Gun when in the same space as the Engine.
- The Deck Gun can only be Fired at the Quadrant that borders the Engine's current Parking spot.
- The Deck Gun can only be Fired at a Quadrant where no Firefighter is present.
Roll the dice to determine the Deck Gun's Target space. Because the full range of the dice rolls are not in the target Quadrant, the numbers on the dice may not be in the Quadrant you aimed at. Flip over (to show the opposite face) any dice that are "out of range" (not in the target quadrant) to determine the Deck Gun's Target space for any roll.
The Deck Gun Extinguishes all Smoke and Fire in the Target space and Splashes Over into each Adjacent space, completely extinguishing any Fire or Smoke. Splash Over can extend beyond the Quadrant boundary. Splash Over has no effect on Firefighters, POI, Victims, or Hazmat.
Specialists
The Experienced game introduces Firefighters with special abilities. At the beginning of the game, each player takes a Specialist card. Each Specialist has unique abilities that make you particularly suited to certain situations. Players may choose their Specialists, or select them randomly.
Paramedic — 4 AP per turn.
- Treat: Resuscitate a Victim: 1 AP. Place a Heal marker under the Treated Victim to denote this change in status. A Treated Victim can be Moved by any Firefighter without having to Carry them. Moving with a Treated Victim incurs no AP penalty. A Firefighter can only lead one Treated Victim at a time. They may Carry a Victim and lead a Treated Victim concurrently at the normal Movement cost to Carry a Victim (2 AP). A Treated Victim may still not be Moved into a Fire space.
- The Paramedic pays double AP costs to Extinguish Fire and/or Smoke.
Fire Captain — 4 AP plus 2 free Command AP per turn.
- The Fire Captain can use their AP to Command any other Firefighter to Move and/or Open/Close Doors on the Fire Captain's turn. Commanded Firefighters may be Carrying Victims or Hazmat, or Move with Treated Victims. The Fire Captain spends AP at the cost that the Commanded Firefighter would normally have paid for that movement.
- Free Command AP cannot be saved.
- No more than 1 Command AP may be spent on the CAFS Firefighter per turn.
Imaging Technician — 4 AP per turn.
- Identify: Flip a POI marker anywhere on the board: 1 AP.
CAFS Firefighter — 3 AP plus 3 free Extinguish AP per turn.
- Free Extinguish AP cannot be saved.
Hazmat Technician — 4 AP per turn.
- Dispose: Remove a Hazmat from the Firefighter's space and place in the Rescued spot: 2 AP.
Generalist — 5 AP per turn.
- No special abilities or actions.
Rescue Specialist — 4 AP plus 3 free Movement AP per turn.
- Chop: 1 AP.
- The Rescue Specialist pays double AP costs to Extinguish Fire and/or Smoke.
- Free Movement AP cannot be saved.
Driver/Operator — 4 AP per turn.
- Fire the Deck Gun: 2 AP.
- When Firing the Deck Gun, the Driver can reroll one or both dice. After rerolling one die, he may then choose to reroll the other, but is limited to a single reroll for each die. The second roll always replaces the first.
Take Action — Crew Change
Crew Change — Change Specialists while in the heat of the action.
- Crew Change: 2 AP
A player may swap their existing Specialist card with any Specialist card not currently in play. The player's Firefighter has the AP (less the 2 AP required for a crew change) and special abilities of the newly selected Specialist for the entire turn. Firefighters must start their turn in the same space as the Engine to complete the Crew Change action. The Crew Change action must be completed as a player's first action of their turn.
Advance Fire (Experienced)
Hazmat
The Experienced game introduces Hazmat, an improperly stored flammable material that is liable to cause an explosion. After checking for and resolving all Flashovers, any Hazmat in a space with Fire causes an Explosion in that space. Multiple Explosions can be triggered by (different) Hazmat in the same phase; if this happens the players can choose which Explosion to resolve first. Remove the Hazmat marker and add a Hot Spot marker in the space of the exploded Hazmat.
Hazmat can be carried for the same costs, and with the same restrictions, as a Victim (2 AP to carry, only carry one item at a time, cannot move into a Fire space). Hazmat can be Disposed by carrying it outside of the building. Disposed hazmat is removed from play and placed in the Rescued spot on the board.
Hot Spots & Flare Ups
Real fires get harder to fight the longer they are burning. The Experienced game introduces Hot Spots and Flare Ups to simulate this progression.
When the Target Space of the Advance Fire roll contains a Hot Spot, you have triggered a Flare Up and will roll to Advance the fire an additional time. First complete the current Advance Fire, then roll the dice again and Advance the Fire. A turn is not limited to one, two, or even three Flare Ups. Keep adding rolls every time the Advance Fire Target Space contains a Hot Spot.
Flare Ups also increase the number of Hot Spots, making it easier for more Flare Ups to happen later in the game. After resolving the Flare Up(s), add a Hot Spot marker to the Target Space of the last Advance Fire roll. Note: Only one Hot Spot is added in a turn. Hot Spot markers are taken from those placed on the small yellow circles at the beginning of the game. If no Hot Spot markers remain, then no further Hot Spots will be placed.
Hot Spots do not have any effect on Smoke or Fire markers. Hot Spots are not removed from the board once placed; they cannot be extinguished.
Knocked Down (Experienced)
When a Firefighter is Knocked Down, the Firefighter is placed in one of the two spaces of the Ambulance's current Parking Spot.
Order of Resolution
In the Experienced game the Advance Fire phase has a number of different steps. The order in which the steps should be completed is:
- Roll for and resolve the Advance Fire.
- Resolve any Explosions if needed.
- Resolve any Flashovers if needed.
- Resolve any Hazmat explosions if needed.
- Add a Hot Spot marker to the Hazmat space if there was a Hazmat Explosion.
- Resolve Flare Ups if needed. (Repeat this process from step 1.)
- Add a Hot Spot marker to the Advance Fire Target space if there was a Flare Up.
- Resolve Knock Downs, Lost POI or Victims.
Replenish POI (Experienced)
In the Experienced game, a POI may only be placed in a space without a Threat marker (Fire or Smoke), Firefighter or another POI.
If the POI Replenishment Target space is invalid, then use the redirect diagram on the board: begin in the Target space and follow the path created by the arrows until you reach a valid space. If there are no valid spaces on the path, reroll.
This is the end of the Experienced rules.
Frequently Asked Questions
Is there a simple way to remember what happens in an Explosion with Shockwaves? Yes, an Explosion always causes one (and only one) of these three outcomes in each direction:
- Add a Fire marker
- Add a Damage Marker
- Remove a Closed Door marker
I want to play the Family game again, do I have to use the same set-up? You can, or you can randomize the set-up. The simplest way to randomize the set-up is to roll and resolve three explosions (without placing any damage markers) and then roll to place the three starting POI. As an alternative you can follow steps 4-6 and step 9 of the Experienced Game Set-up.
Can I play the Family game on the back side of the board? Yes. You can either use the same set-up as shown in the Family rules, or use the recommended random set-up described above.
There are a lot of new rules in the Experienced game, can I play with only some of them? Yes. One way to gradually introduce the Experienced rules is to start with Specialists and Hazardous Materials. When you are ready, add Vehicles (Vehicle Actions, new Knock Down rules, and changes to Rescue) and finally incorporate Hot Spots.
What happens if I run out of Fire markers? That is bad; the fire is out of control and you'll likely cause a building collapse soon. If you find yourself in this position, you don't add any Fire or Smoke, but you will continue to add damage markers if an Explosion occurs.
I don't understand Hot Spots, what do they do? Hot Spots simply cause multiple rolls in the Advance Fire phase — adding more fire & smoke to the board. If you roll a space with a Hot Spot, first add Smoke/Fire/Explosion to that space, then roll again and add more. Keep rolling until you get a space without a Hot Spot, then add Smoke/Fire/Explosions and a Hot Spot to that final space.
Changing the Rules
A great thing about Flash Point: Fire Rescue is the flexibility of the rules. Feel free to change any of the rules, or create new rules of your own. Here are a couple of rule changes to try:
A Lone Engine Company — Your volunteer firefighter crew has to respond quickly with the limited resources on hand.
- Initial Set-up: Randomly select Specialist cards.
- The Crew Change action is not available for the entire game.
Unmarked Hazards — You never know what lies beneath the "?" mark.
- Initial Set-up: Start the game with no Hazmat markers on the board.
- False Alarms: When a False Alarm is revealed, place a Hazmat marker in its space. If the False Alarm was revealed during the Advance Fire phase, resolve an Explosion in the space.
Murphy Strikes — A broken water main hampers structural firefighting.
- The Deck Gun action is not available for the entire game.