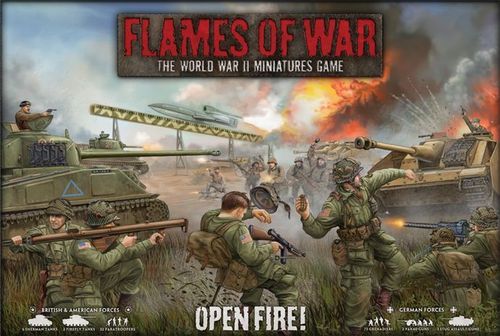
Flames of War: Open Fire!
Flames of War: Open Fire! Rulebook
Table of Contents
Table of Contents
- What is Flames Of War
- Playing the Game
- Companies and Platoons
- Team Characteristics
- Tank against Tank
- Difficult Targets
- Firing on the Move
- Flank Shots
- Who Gets Hit?
- Infantry against Infantry
- Infantry Moving
- Pinned Down by Fire
- Infantry against Tanks
- Anti-tank Guns
- Allocating Hits
- Staying in Command
- Infantry Assaults
- Defensive Fire
- Fighting in Assaults
- Counterattacks
- Breaking Off and Consolidating
- Infantry Assaulting Tanks
- Assault Armour Saves
- Tank Assault
- Tanks Assaulting
- Anti-tank Guns in Assaults
- Checking Morale
- Winning the Game
- Free-for-All Mission
- Building Your Army
- Advanced Rules
- Armoured Squadron (Armoured Company)
- British Arsenal
- Special Rules
- Grenadierkompanie (Infantry Company)
- German Arsenal
- Rules Summary
What is Flames Of War
Flames Of War allows you to re-fight the decisive battles of the Second World War. You take charge of Patton's spearhead or Monty's Desert Rats. Can you out-fox Rommel, the Desert Fox? Flames Of War lets you recreate history to find out.
This rulebook is your guide to fighting historical battles in miniature. With it you can take command of a company of soldiers and pit yourself against cunning opponents on the field of battle. You will see for yourself what made the Tiger tank so feared by every Allied soldier. You will find out if you have the guts to stop a massed infantry charge, or the cold-blooded ruthlessness to launch one!
Flames Of War combines the joys of painting and modelling your own miniature army with the challenge of facing off against your opponent across a gaming table in a social setting, and you'll get to recreate history, or change it!
Playing the Game
In Flames Of War the two sides take turns to move and fight with all of their troops. In each turn a player goes through the Starting, Movement, Shooting, and Assault Steps. Once they have finished their turn, the other player takes a turn. They alternate their turns until one side or the other wins by taking their objective.
- Starting Step. At the start of each turn a player checks to see if they have won (or whether their opponent managed to foil them in their intervening turn). If they haven't won, the player tries to rally troops pinned down by enemy fire and bring their reserves into the battle.
- Movement Step. In the Movement Step a player moves any or all of their troops, advancing to close with the enemy or to take up better firing positions. Troops that don't move generally shoot better, while troops that move through rough terrain risk getting stuck.
- Shooting Step. Once the player has moved all of their troops that they want to move, they go on to the Shooting Step, in which they shoot with any or all of their troops. Shooting has three components: a roll to hit, a roll to save, and a roll to destroy.
- Assault Step. After shooting, the player can launch assaults, attempting to storm the enemy position. The enemy responds with a volley of defensive fire, trying to drive off the assault before it can close. If they succeed, the assault is over. Every team that reaches the enemy rolls to hit the enemy. Hand-to-hand combat is deadly, so only armoured vehicles get saves. The enemy then rolls a die to see if they will charge back into the fray, or whether they will break off and run from the fight. The fighting continues back and forth, not stopping until one side or the other either breaks off or is destroyed. The winner of the fight consolidates the position of their troops, then the assaulting player launches their next assault with another platoon.
The Opponent's Turn. Once all of a player's assaults are over, their opponent takes their turn, running through their Starting, Movement, Shooting, and Assault Steps with their troops.
Learning the Rules
While Flames Of War follows a set turn order, it is often easier to learn the parts out of sequence. The next section teaches you the basics of the game, starting with shooting and movement, then bringing in assaults, then at the end, it will go back over the starting step. The last two pages present a summary of the rules in their proper order.
Companies and Platoons
Although the heroic acts of a few individuals are always glorified by the media back home, in reality a soldier never does anything on their own. Soldiers are trained to operate as a team, and it is this teamwork that keeps them alive. In Flames Of War your miniature soldiers also operate in teams, platoons and companies.
Teams
- Tank teams: Tanks and assault guns combine armour, mobility, and firepower.
- Infantry teams: Riflemen, machine-gunners, and bazooka men fight as infantry teams.
- Gun teams: Heavy machine-guns, mortars, and anti-tank guns support the infantry.
Platoons
- Infantry platoons gather infantry and gun teams into a unit to maximise their combined strength.
- Tank platoons group two to five tank teams into a powerful armoured fist.
Companies
A Flames Of War force is usually a company of three or more platoons and a company HQ fighting as a whole to outmanoeuvre and outfight the enemy.
Team Characteristics
Teams are the basic elements in Flames Of War. A team is a group of up to five individual soldiers or a vehicle, each represented by one miniature on the table, and by a set of characteristics in the rules. These characteristics are laid out in each country's arsenals (see pages 38 and 46).
The arsenal entries for two British tanks are shown below. Vehicles and their weapons are described together in arsenals. The first line describes the vehicle. The second line in italics describes its main weapon.
| Name | Mobility | Front | Side | Top | Equipment and Notes |
|---|---|---|---|---|---|
| Sherman V | Standard Tank | 6 | 4 | 1 | Co-ax MG, Hull MG, Tow hook. |
| Firefly VC | Standard Tank | 6 | 4 | 1 | Co-ax MG, Tow hook. |
| Weapon | Range | ROF | Anti-tank | Firepower | Equipment and Notes |
|---|---|---|---|---|---|
| Sherman V: M3 75mm gun | 32"/80cm | 2 | 10 | 3+ | Semi-indirect fire, Smoke. |
| Firefly VC: OQF 17 pdr gun | 32"/80cm | 2 | 13 | 3+ | No HE, Semi-indirect fire. |
Vehicle Characteristics
- Name: Name and model of the vehicle.
- Mobility: A vehicle's mobility determines the distance it can move each turn and how well it can force its way through rough terrain.
- Armour: A tank's armour protects it against the enemy. Front and side armour protect against enemy shooting, while top armour protects against assaulting infantry and artillery fire.
- Equipment and Notes: Additional weapons, strengths, and weaknesses.
Weapon Characteristics
- Weapon: The vehicle's primary weapon.
- Range: The maximum distance the weapon can shoot.
- Rate of Fire (ROF): The maximum number of shots the weapon can take in one turn.
- Anti-tank: The armour penetration of the weapon.
- Firepower: The ability of the weapon to destroy a tank after penetrating its armour or to knock out a dug-in position.
- Equipment and Notes: Special abilities or rules of the weapon.
Motivation and Skill
As important as their weapons are the qualities of the soldiers using them. In Flames Of War every platoon is rated for its motivation and skill. They range from fearless veteran troops like the American paratroopers, to reluctant soldiers who have seen too much fighting and conscripts who, although willing to fight, have been thrown into battle with no training.
Motivation levels: Reluctant, Confident, Fearless. Skill levels: Conscript, Trained, Veteran.
Tank against Tank
The easiest way to learn the shooting rules is to start with a one-on-one engagement between two tanks, in this case a British or US Sherman tank and a German StuG G assault gun. To keep things simple we'll assume that they are sitting in the open at short range blasting away at each other. Place the tank and assault gun about 12"/30cm apart facing each other, then read on to see how to shoot.
Score to Hit
In Flames Of War, the score to hit depends on the target's skill rating: the more skilled the target, the harder they are to hit. Veteran soldiers use fire and movement tactics to avoid getting shot. Raw recruits just blunder along, hoping to survive.
| Target's Skill Level | Score Needed to Hit |
|---|---|
| Veteran | 4 or higher |
| Trained | 3 or higher |
| Conscript | 2 or higher |
The Sherman Shoots...
The M3 75mm gun (Range 32"/80cm, ROF 2, Anti-tank 10, Firepower 3+) on the Sherman tank has a ROF (Rate of Fire) of 2, so the player rolls two dice when shooting. The score needed to hit the enemy depends on their skill rating. The German StuG assault gun is rated as Veteran, so is hit on a roll of 4+. The Sherman rolls a 2 and 5, scoring one hit!
Weapons. Weapons have a number of characteristics in the game that affect how they perform.
- Range gives the maximum distance that they can shoot.
- ROF (Rate of Fire) is how fast it shoots.
- Anti-tank describes its ability to penetrate another tank.
- Firepower gives its ability to destroy an armoured or bulletproof target it penetrates.
The arsenals on pages 38 and 46 list the weapons used in this book.
...And Hits the StuG
The StuG G is Confident Veteran, with Front Armour 7 and Side Armour 3. Having been hit, the StuG assault gun needs to take an armour save to see if its armour will bounce the shot. The German player rolls a die and adds their armour rating to see what happens.
The armour save is Front Armour + Die Roll, compared with the shooting weapon's anti-tank rating (here the M3 75mm gun's anti-tank rating of 10). The Firepower Test columns are the roll against the weapon's Firepower (3+ here): "1 or 2" is a failed firepower roll, "3 to 6" is a successful one.
| Armour + Die Roll | Firepower Test 1 or 2 | Firepower Test 3 to 6 |
|---|---|---|
| 11 or more | No Effect | No Effect |
| Exactly 10 | No Effect | Bailed Out |
| 9 or less | Bailed Out | Destroyed |
A roll of 4 gives a total of 11, which exceeds the M3 75mm gun's anti-tank rating of 10, so the shot bounces off the assault gun's armour and has no effect.
The StuG Shoots Back...
The 7.5cm StuK40 gun (Range 32"/80cm, ROF 2, Anti-tank 11, Firepower 3+) of the StuG shoots back. It too rolls two dice for its ROF of 2. The Sherman is Trained, so is hit on a roll of 3+. The StuG rolls a 1 and a 6 to score one hit back!
...And Hits the Sherman
The Sherman V (Confident Trained; Front Armour 6, Side Armour 4) now takes an armour save. As with the German StuG, roll a die and add that to the Sherman's front armour, and compare the total to the StuG's anti-tank rating.
| Armour + Die Roll | Firepower Test 1 or 2 | Firepower Test 3 to 6 |
|---|---|---|
| 12 or more | No Effect | No Effect |
| Exactly 11 | No Effect | Bailed Out |
| 10 or less | Bailed Out | Destroyed |
The Sherman is unlucky and rolls a 3 giving a total of just 9, less than the 7.5cm StuK40 gun's anti-tank rating of 11, so the shot penetrates! The StuG then rolls a die and compares it with their firepower rating of 3+. A roll of 5 is more than enough to destroy the British tank.
Destroyed Tanks. If a tank is destroyed, it is blown up or burning and is out of the game.
Bailed Out Tanks. The crew bail out when their tank is penetrated, not waiting to see whether it will blow up or not. A bailed out tank can't do anything until the crew remount in the Starting Step. Being Confident, they gather their courage and remount on a roll of 4+. If they fail, they can try again next turn.
Having read this example, try it out for yourself. Grab a couple of models and some dice and fire away! You'll probably notice that the Sherman is a bit outclassed, so try it again with a Firefly VC with its long-barrelled 17 pdr gun instead of the 75mm on the Sherman V. The characteristics for the Firefly are given below.
Firefly VC. Realising that the Sherman was falling behind in the race for bigger guns and better armour, the British fitted some with their excellent OQF 17 pdr anti-tank gun. These new 'Firefly' tanks gave British tankers a much-needed first-rate tank killer. OQF 17 pdr gun: Range 32"/80cm, ROF 2, Anti-tank 13, Firepower 3+. Front Armour 6, Side Armour 4.
Difficult Targets
Not every target is a short-range shot against an obliging opponent sitting in the open. Mostly, gunners are trying to hit targets that are taking cover, trying to hide behind hedges and buildings, or firing at long ranges. These factors make a difference in Flames Of War too.
To Hit Modifiers
Add +1 to the score needed to hit for each of the following:
- Target is more than 16"/40cm away.
- Target is concealed by terrain.
Concealed Targets
Taking up a concealed position adds +1 to the score needed to be hit. The veteran StuG assault guns are concealed by the hedge, increasing the score needed to hit them from 4+ to 5+.
Mixed Targets
The score to hit is always based on the easiest team to hit in the platoon. The Shermans only need a 4 to hit the Veteran StuG assault guns as the StuG in the open gives away the position of the rest of the platoon.
Long-range Shooting
Hitting a target at long range is difficult. Add +1 to the score needed to hit if the range is more than 16"/40cm. The Sherman tank is more than 16"/40cm from the nearest visible StuG, so adds +1 to hit for long range, needing a 5+ to hit. A Sherman cannot shoot further than its range of 32"/80cm.
Anti-tank rounds lose effectiveness at long range, so tanks also add +1 to their Armour Save rolls.
Long Range and Concealed
The Firefly tank can only see the concealed StuG that is more than 16"/40cm away, so it adds +1 for a concealed target and +1 for long range, needing a 6 to hit.
Firing on the Move
Tanks don't just sit there pounding away at each other in real battles. They manoeuvre to get better shots and seek out weak spots in their opponent's armour, all the while using terrain to avoid getting hit themselves. Allowing our tanks to move adds tactics to the slugging match.
Movement
Sherman tanks and StuG assault guns can move up to 12"/30cm in the Movement Step before shooting in the Shooting Step. A Sherman tank that does not move rolls two dice using its full ROF. A tank that moves only rolls one die when shooting, having its ROF reduced to 1.
Tanks can bog down
When a tank crosses rough terrain there is a chance that it'll throw a track or get stuck in the mud, bogging down. Once bogged down, a tank can't do anything until it frees itself in the Starting Step of its next turn. If it fails, it tries again each turn until it gets free. The Trained British crews can free their vehicle on a roll of 4+. The Veteran German crews free their vehicle on a roll of 3+.
Movement Distance
| Terrain | Speed | Difficulty | Bogging Check |
|---|---|---|---|
| Road | 12"/30cm | Easy | - |
| Cross country | 12"/30cm | Easy | - |
| Hedge | 8"/20cm | Difficult | 2+ |
| Woods | 8"/20cm | Difficult | 2+ |
| Building | 8"/20cm | Very Difficult | Skill Test |
Rough Terrain
Tanks crossing rough terrain slow to 8"/20cm and risk bogging down. Tanks moving across difficult going, like a hedge, bog down on a roll of 1. A roll of 3 allows the tank to cross the hedge safely.
Tanks moving in very difficult terrain, like a building, bog down on a roll of 1 or 2 if a Veteran StuG assault gun, or 1, 2, or 3 if a Trained Sherman tank. A roll of 2 forces the tank to stop as it enters the building, becoming bogged down.
Flank Shots
Most tanks have weaker armour on the sides than they have on their front, after all they plan to fight facing the enemy. Of course, this means that the enemy wants to get flank shots to hit their weaker side armour!
Hitting the Front
The Sherman tank is in front of a line drawn across the front of the StuG, so hits its front armour (Front Armour 7).
Hitting the Side
The Sherman tank has moved behind the line, so its shots will hit the thinner side armour (Side Armour 3).
Tactical Tip. Sometimes you may find it better to move around your opponent to get one flank shot that has a good chance at penetrating than to sit still and take multiple shots that have a poor chance of doing any damage.
Field of Fire
Unlike Sherman tanks that can shoot in any direction, an assault gun like the StuG lacks a turret, so must move to bring its gun to bear against targets behind a line drawn across its front. Rotate the team or its turret so that its weapons are pointing at its target before it shoots. The Sherman tank has a turret, so it can shoot at targets to its side, not just those facing its front armour.
Hitting the Hull or Turret
If a shot could hit the front or side armour, depending on which part of the tank it hits, roll a die to see which part is hit.
| Score | Area Hit |
|---|---|
| 1, 2, or 3 | Hull |
| 4, 5, or 6 | Turret |
The StuG assault gun is facing the front of the Sherman tank's turret, but the side of its hull. It needs to dice to see which it hits. The StuG moved to bring the Sherman tank into its Field of Fire, reducing its ROF to 1. It hits and rolls to see where. On a 6, it hits the turret armour of the Sherman tank, so the Sherman will use its Front armour rating.
So now you are ready for some serious tank-on-tank action. Set up some terrain and place a StuG G assault gun and a Sherman V tank (or Firefly VC tank for variety) where they cannot see each other and try hunting each other around and through the terrain. Swap sides and try it again to see who can do better.
Who Gets Hit?
In the rush of battle, soldiers lack the time to identify specific targets. They just shoot at whatever tanks they happen to see, going for the easy targets first. As a result, the target player gets to decide which tanks have been hit by enemy fire, with a requirement to pick close targets and side shots first.
Target Player Chooses
The two StuG G assault guns score three hits on the Sherman platoon. The target player then allocates the hits evenly across valid targets in their platoon.
Allocating hits. Hits must be allocated in the following order:
- Operational tanks before bailed out or bogged down tanks.
- Tanks within 16"/40cm before those further away.
- Tanks showing their side armour before those showing their front armour.
In the example: the operational Sherman tank within 16"/40cm of the shooting team must be allocated the first hit. The tank showing its side armour must be allocated a hit before the one showing its front armour. The Firefly tank at long range showing its front armour gets the third hit. The Bailed Out Sherman tank can't be allocated a hit until all operational tanks have been hit, even though it is the closest and side on.
Picking Out Gun Tanks
Sometimes you really need to eliminate a particularly dangerous foe. You can try and pick it out by rolling an additional die per hit. Every roll of 5+ must be allocated to the chosen type of tank. Of the three hits, two rolls of 5+ means that two of the hits must be allocated to the Firefly. The remaining hit is allocated to the Sherman tank within 16"/40cm as usual.
Time for a promotion! This time pit a German assault gun platoon of three StuG G assault guns against a British armoured platoon of three Sherman V tanks and one Firefly VC tank. Try out different tactics and see what works.
Infantry against Infantry
Having fought it out with tanks, it's time to get man-to-man with some infantry combat. As with tanks, the easiest way to learn the rules is to set up a simple engagement between two infantry platoons. Set up a US Parachute Rifle Platoon and a German Grenadier Platoon 12"/30cm apart and start shooting. Use some terrain if you want, as the Difficult Targets modifiers apply for infantry as well.
Grenadiers Shoot...
Infantry shoot in the same way that tanks do. The German Rifle/MG team (Range 16"/40cm, ROF 2, Anti-tank 2, Firepower 6) has a ROF of 2, so roll two dice. As with tanks, the score needed to hit depends on the target's skill rating. The American paratroopers (Fearless Veteran) are Veteran, so are hit on a roll of 4+. The grenadiers roll a 4 and 5, scoring two hits!
Use the Easiest Target. A team always uses the easiest target in the enemy platoon for its score to hit regardless of which teams are actually hit as the more easily spotted teams give away the positions of their concealed comrades. The grenadiers can see both the teams moving across the gap and the one behind the wall, so they are not concealed and there is no penalty to hit.
...And Hit the Paratroopers
Distribute Hits. All of the hits scored by a shooting platoon are distributed evenly across the target teams.
Having been hit, the American teams need to take infantry saves, needing a 3+ to survive.
Infantry Saves. Infantry do not have heavy armour, instead when under fire, they hit the dirt. This gives them a 3+ save regardless of what hits them. If they pass, they are safe and unharmed. If they fail, they are destroyed unless they are in bulletproof cover.
The second team rolls a 2, failing its save, and is destroyed. The first team passes its save on a roll of 4.
Infantry Weapons
| Weapon | Range | ROF | Anti-tank | Firepower |
|---|---|---|---|---|
| Rifle | 16"/40cm | 1 | 2 | 6 |
| Rifle/MG | 16"/40cm | 2 | 2 | 6 |
| MG | 16"/40cm | 3 | 2 | 6 |
| SMG | 4"/10cm | 3 | 1 | 6 |
German Grenadier Platoon
The German Grenadier platoon's combat experience is unequalled, giving them a Veteran status. Their squads are armed with bolt-action Kar 98k rifles and an MG42 machine-gun (MG), known as 'Hitler's Buzzsaw' for its high rate of fire. This combination makes them Rifle/MG teams. Sometimes the platoon command group grab an extra MP40 submachine-gun (SMG) or two, making them an SMG team instead.
US Parachute Rifle Platoon
The American paratroopers are extremely well trained, determined, and combat hardened giving them a rating of Fearless Veteran. Their rifle squads make excellent use of their M1 Garand semi-automatic rifles and M1919 .30 cal MGs and are Rifle/MG teams. The mortar squad adds the punch of an M2 60mm mortar, while the headquarters is often reinforced with a bazooka for tackling tanks.
Paratroopers Shoot Back
In their turn, the Americans shoot back with their Rifle/MG teams and their 60mm mortar. The Veteran Germans (Confident Veteran Grenadiers) are concealed, so the paratroopers will need to roll 5+ to hit them. The Rifle/MG teams score three hits. The mortar scores one hit.
The German infantry teams take their 3+ saves, failing a save against a Rifle/MG hit and the mortar team's hit. Because they are in bulletproof cover, the paratroopers need to pass a firepower test to destroy them.
Bulletproof Cover and Firepower Tests. Infantry in bulletproof cover are very hard to dislodge. Only heavy weapons, or lucky shots, can harm them. Hits on teams in bulletproof cover need to pass a firepower test to destroy the target. Roll the shooting weapon's firepower rating or better to destroy the team. If the roll is less, the team is unharmed. Keep track of which type of weapon hit the team so you know which firepower rating to use.
With a firepower of 6, the Rifle/MG team needs to roll a 6 to destroy the team it hit. On a roll of 4, the grenadiers survive unharmed.
The M2 60mm mortar (Range 24"/60cm, ROF 2, Anti-tank 1, Firepower 3+) has a firepower of 3+. A roll of 4 destroys the team that it hit.
Return Fire Hits the Mortar
When the surviving Germans shoot back, they score a hit on the 60mm mortar. As a gun team it has a 5+ save.
Gun Saves. While infantry can scatter to find cover, a gun crew have to cluster around their weapon, making them more vulnerable to enemy fire. Guns have a 5+ save when hit. If they fail, they are destroyed unless they are in bulletproof cover, in which case the enemy need to roll their firepower or better to destroy them.
Infantry Moving
Infantry may not be fast, but they can go anywhere. Once they hit the dirt though, infantry can be hard to hit, and if they dig in as well, they are very resilient to enemy fire. Throw some terrain on the table and try it out!
Infantry Movement
Infantry teams move 6"/15cm and are not slowed by rough terrain. Man-packed guns like the M2 60mm mortar move like infantry. Unlike tanks, infantry teams do not bog down in rough terrain.
Going to Ground
Teams that do not move or shoot are gone to ground, and are harder to hit if they are also concealed. Tanks and anti-tank guns need to be concealed by terrain to benefit from going to ground.
Infantry teams are always concealed if they do not move, even in the open. If they don't move or shoot, they are also gone to ground.
Sometimes it is better to keep your head down and stay alive than to shoot at the enemy. A team that is concealed adds +1 to the score needed to hit it. If the team is also gone to ground, it adds another +1 for a total of +2 to hit. Teams that are gone to ground, but not concealed, are no harder to hit.
Digging In
When a platoon digs in, the soldiers dig foxholes and slit trenches to protect themselves from enemy fire. Mark the platoon with a dug in marker, or place a sculpted dug in marker with each team.
A platoon can dig in instead of moving. They need to pass a skill test to do so. If a platoon shoots after digging in, it does so as if it moved. A platoon can dig in while pinned down, but cannot shoot if it does. The paratroopers are Veteran, so need a 3+ to dig in. They pass, and now the whole platoon is in bulletproof cover.
Pinned Down by Fire
Attacking may win battles, but infantry don't always have that option. It's hard to advance on a hostile battlefield when heavy fire pins them to the ground.
Pinned Down by Five Hits
A platoon that is hit five times in a step is pinned down, stopping it advancing and reducing its ability to fire. It cannot move towards the enemy until they rally in the Starting Step of their next turn. If they fail, they try again the following turn. The Fearless US paratroopers rally on a roll of 3+. The Confident grenadiers rally on a roll of 4+.
An infantry platoon that takes five hits in a shooting step is pinned down. The grenadiers score five hits, so the paratroopers are pinned down.
Rallying
At the start of their next turn the Fearless paratroopers will take a motivation test to rally, needing a score of 3+.
Shooting while Moving or Pinned Down
If a team shoots while moving or pinned down, it halves its rate of fire. Infantry and guns cannot move closer to visible enemy teams while pinned down, but can move away from the enemy. A team that moves while pinned down cannot shoot.
Shooting on the move is not as effective as sitting still and taking careful aim, so teams halve their Rate of Fire (ROF) when shooting on the move. Likewise, infantry and gun teams halve their ROF when Pinned Down. Troops that move while Pinned Down cannot shoot at all.
Rate of Fire while Moving or Pinned Down
| Team | ROF | Moving ROF | Pinned Down ROF |
|---|---|---|---|
| Rifle team | 1 | 1 (+1 to hit) | 1 (+1 to hit) |
| Rifle/MG team | 2 or 3 | 1 | 1 |
| MG team | 3 | 1 | 2 |
| SMG team | 3 | 3 | 1 |
- Rifle Teams: Weapons with ROF 1, such as a Rifle team, do not reduce their ROF when moving. Instead, they add +1 to the score they need to hit.
- Rifle/MG Teams: Most infantry squads have a mix of rifles and machine-guns making them Rifle/MG teams with a ROF 2.
- MG Teams: MG teams have a ROF of 3, but due to their effectiveness in defence shoot at ROF 2 when pinned down.
- SMG Teams: Using lightweight assault weapons, SMG teams can fire on the move with their full ROF of 3.
OK soldier, listen up! The enemy are holed up in the woods and your job is to get around their flank and clear them out. Set up some terrain and try manoeuvring your infantry platoon to get the best shots while minimising the effectiveness of the enemy's shooting.
Infantry against Tanks
Tanks are big, scary monsters, immune to a rifleman's bullets, but with their bazookas and their German equivalents, the Panzerschreck (Tank Terror) and Panzerfaust (Armoured Fist), the infantry are far from helpless against them. Tanks' main guns are overkill unless the infantry are dug in, so they usually return fire with their machine-guns.
Bazookas against Tanks
The Parachute Rifle Platoon has a Bazooka team, giving it a deadly anti-tank weapon.
| Weapon | Range | ROF | Anti-tank | Firepower |
|---|---|---|---|---|
| Bazooka | 8"/20cm | 1 | 10 | 5+ |
Like a Rifle team, the Bazooka has a ROF of 1, so it suffers a penalty of +1 to hit when moving or pinned down.
Schürzen. The StuG G assault gun has Schürzen, skirting, on the sides to protect it against anti-tank rifles and bazookas. Schürzen gives an extra 4+ save if the assault gun fails its armour save when hit in the side by a bazooka. It has no effect on shots hitting its thicker front armour.
Panzerfaust and Panzerschreck
A Grenadierkompanie has anti-tank teams equipped with two Panzerschreck anti-tank rocket launchers each. German command teams are equipped with Panzerfaust anti-tank weapons. These cannot be fired if the team moves.
| Weapon | Range | ROF | Anti-tank | Firepower |
|---|---|---|---|---|
| Panzerfaust | 4"/10cm | 1 | 12 | 5+ |
| Panzerschreck | 8"/20cm | 2 | 11 | 5+ |
Tank Machine-guns
| Weapon | Range | ROF | Anti-tank | Firepower |
|---|---|---|---|---|
| Vehicle MG | 16"/40cm | 3 | 2 | 6 |
Tank machine-guns have ROF 3, whether they are moving or not.
No HE. The Firefly VC is a specialist tank hunter. It has no HE (high explosive) ammunition, so can only use its co-ax machine-gun against infantry.
Hull Weapons
A Sherman tank has a co-ax machine-gun mounted beside the main gun and a hull machine-gun. It can fire both at the same time, but the second weapon only has ROF 1. The tank can also fire both machine-guns while firing the main gun, but then both machine-guns have ROF 1.
The StuG G assault gun has a hull-mounted main gun and a hull-mounted machine-gun, so can only fire one or the other each turn.
Anti-tank Guns
The infantry's anti-tank guns are always a nasty surprise for tanks. They pack the punch of a tank gun, but are cheap to make and easy to hide. No wonder the infantry love them!
Guns Shooting
| Team | Range | ROF | Anti-tank | Firepower |
|---|---|---|---|---|
| 7.5cm PaK40 | 32"/80cm | 2 | 12 | 3+ |
Guns shoot just like tanks, so the 7.5cm PaK40 rolls two dice to hit for its ROF 2. It needs 3+ to hit the Trained Sherman tank, so scores one hit. The Sherman rolls a 3 and adds its Front armour of 6 for a total of 9, less than the PaK40 anti-tank rating of 12. The 7.5cm PaK40 rolls a Firepower test, scoring a 4 to destroy the Sherman tank.
Moving Guns
The crew can push their gun up to 4"/10cm each turn. They can still shoot with ROF 1 when they move.
The 7.5cm PaK40 does not have a turret, so like the StuG G assault gun, its field of fire is limited to targets in front of its base.
Like a tank, the gun will bog down on a roll of 1 in Difficult Going. Guns cannot move through Very Difficult Going.
Gun Saves
Guns have a 5+ save when hit. If they fail, they are destroyed unless they are in bulletproof cover, in which case the enemy need to roll their firepower or better to destroy them. If a gun has gone to ground rather than moving and shooting, it has a 3+ save instead of the usual 5+.
Gun Shields and Concealment
Shots hitting the front of a 7.5cm PaK40 need to pass a firepower test to destroy it as its gun shield gives it bulletproof cover.
Like infantry, the guns can dig in on a roll of 3+. Medium guns like the 7.5cm PaK40 are concealed if they are dug in.
It's time to put it all together and fight a big battle with tanks and infantry. Set up a table with a variety of terrain and pit some tanks and infantry from each side against each other. Throw in some guns for more excitement!
Allocating Hits
Most soldiers simply blaze away at muzzle flashes or enemy soldiers glimpsed as they dash from cover to cover. Hitting the enemy is as much luck as skill, so even if a machine-gunner or bazooka man is hit by an unlucky shot, the commander can usually find another soldier to pick up the weapon.
Target Player Chooses
Once a platoon has finished rolling to hit, the target player allocates the hits evenly across the valid targets. The player being shot at allocates the hits from a shooting platoon evenly across the platoon they are shooting at, in the following order. Hits must be allocated to:
- Other teams before those that are gone to ground.
- Operational tanks before bailed out or bogged down tanks.
- Teams within 16"/40cm before those further away.
- Unprotected teams before those in bulletproof cover.
- Tanks showing their side armour before those showing their front armour.
In the example, the Sherman platoon scores a hit with their M3 75mm guns and two hits with their machine-guns. Teams that are gone to ground are the last to be hit, so despite being unprotected and at short range, one team is not hit. Teams more than 16"/40cm away are hit after those that are closer, so even though it is unprotected, one team isn't allocated any hits. Unprotected teams are always hit before those in bulletproof cover, so two teams take machine-gun hits. The team in the building gets the next hit. As it is in bulletproof cover, it gets the 75mm shell lobbed its way!
One Target per Tank
Although a tank can fire its main gun and machine-guns together, it must fire them all at the same platoon. A single tank can't shoot at both the assault gun and the grenadiers, but the platoon can split their fire, with one tank shooting at the assault gun platoon and one at the grenadier platoon.
Staying in Command
There's no point in an officer giving orders if there's no one around to carry them out. Platoons need to stick together if they are going to fight as a unit instead of a bunch of individuals. You need to bear this in mind when you move your platoons across the table.
Sticking Together
If teams that are out of command move, they must get back into command when they do so.
Command Distance
Teams close to the command team can relay orders to other teams within 6"/15cm and so on down the chain to the far end of the platoon.
Experienced soldiers often know what to do without being told, and they are good at passing on orders when they need to as well. Raw conscripts on the other hand need to be well supervised if they are to avoid making stupid mistakes.
| Skill | Tanks | Others |
|---|---|---|
| Veteran | 8"/20cm | 6"/15cm |
| Trained | 6"/15cm | 4"/10cm |
| Conscript | 4"/10cm | 2"/5cm |
Veteran infantry need to stick within 6"/15cm of their command team to hear orders. Tanks have radios to pass on orders, so they can spread out more. The veteran StuG G assault guns can be up to 8"/20cm apart, while the Trained Shermans need to stay within 6"/15cm.
Stay Here and Cover Me
The platoon commander must take at least half of the platoon with them when they move. The commander can leave the Firefly VC tank-killer to engage the German assault guns from the front while the rest of the platoon moves to outflank them. As the Firefly doesn't want to follow the rest of the platoon, it can't move at all.
Infantry Assaults
It seems incredible that infantry survive on a battlefield under the fire of tanks and machine-guns, but once they take cover and dig in, they are remarkably tough. Sometimes the only way to dig them out is to launch an all-out infantry assault with bayonets and hand grenades. Set up two infantry platoons 4"/10cm apart, pick one to launch an assault and sound the charge!
The Paratroopers Charge: Step 1
After all shooting is complete, a platoon with a team within 4"/10cm of the enemy can launch an assault. Assaulting teams within 8"/20cm of an enemy team charge 4"/10cm towards the enemy. Start by moving teams within 4"/10cm into contact with the enemy.
Assaulting teams must shoot on the move. They cannot assault if they remained stationary to shoot at their full ROF.
Cover Me! Teams don't have to assault. They can remain stationary, firing at full ROF, to pin down the enemy before the rest of the platoon assault them.
Short, Sharp and Bloody! Assaults are the deciding factor in many battles, as witnessed by the number of medals won by soldiers charging machine-gun nests and stalking tanks.
Step 2
Teams more than 8"/20cm away from the enemy cannot charge and take no part in the assault. Teams remaining within 8"/20cm can move 4"/10cm towards the enemy. If they choose not to move they become non-assaulting teams and take no part in the assault.
Gun teams like the M2 60mm mortar cannot charge, even if they moved. They usually remain stationary to cover the assaulting teams.
Defensive Fire
When the enemy charges, the defenders open fire with everything they've got, blazing away to try and stop the assault. If they can put out enough firepower, the assaulting troops will hit the deck before they get close enough to do any damage.
While the Grenadiers Try to Stop Them
Once the enemy has charged into contact, all defending teams within 8"/20cm of an assaulting team shoot. It doesn't matter which platoon a team is from, if it is within 8"/20cm, it shoots.
The defenders always shoot from the halt, even if they moved in their previous turn, so it's a good idea to pin them down before assaulting them.
Hits from defensive fire must be allocated to assaulting teams within 8"/20cm.
The grenadiers score four hits on the assaulting Paratroopers. Assaulting teams never benefit from bulletproof cover, so the team that failed its infantry save is destroyed with no firepower test needed.
Fall Back!
An assaulting platoon must fall back if it takes five or more hits from defensive fire, regardless of how many teams are actually destroyed. The assaulting teams fall back until they are more than 2"/5cm from the enemy. If the paratrooper platoon had taken five hits it wouldn't make it into the assault, falling back until it is more than 2"/5cm away from the defending teams instead.
Tactical Tip. Use your supporting troops to pin down the enemy platoon while your assault group moves into position to deliver the fatal strike.
Fighting in Assaults
Once the enemy get close, there's nowhere to hide, so it's fight or die. Casualties are heavy with little chance of survival other than to kill the enemy before they kill you.
Score to Hit in Assaults
Unlike shooting, the score to hit in assaults is based on the assaulting team's skill. In the bloody fighting of assaults, it comes down to who's fastest on the draw. Veterans of many combats find raw conscripts easy meat to their onslaught.
| Assaulting Team's Skill Level | Score Needed to Hit |
|---|---|
| Veteran | 3 or higher |
| Trained | 4 or higher |
| Conscript | 5 or higher |
The Paratroopers Fight...
Every team within 2"/5cm of the enemy rolls one die to hit in an assault. Teams outside 2"/5cm have to wait until they get closer to be able to fight. Unlike shooting, the score to hit depends on the assaulting team's skill, not the target's skill, so Veteran paratroopers hit on a 3+. There are no saves for infantry in assaults, so the paratroopers' two successes destroy two German teams.
...But Haven't Won Yet
The assaulting platoon wins the assault if there are no enemy teams within 4"/10cm. Since the paratroopers haven't won, the defending grenadiers roll to counterattack. Being Confident, they will counterattack on a roll of 4+, while the Fearless US paratroopers would counterattack on a roll of 3+. The Grenadiers roll a 4+, so they can counterattack!
Multiple Platoons
The assaulting platoon can find itself fighting several platoons at once. When this happens, roll a single die to counterattack and use that score for all of the platoons. As the infantry and anti-tank guns are Confident, they will both either counterattack, or break off. If the Germans assaulted an American parachute rifle platoon and some British tanks at the same time, a score of 3 would see the Fearless paratroopers counterattacking, while the (clearly not so) Confident British tanks break off.
Counterattacks
If the defenders' courage holds, the survivors pile in, seeking victory for themselves.
The Grenadiers Counterattack
Any counterattacking grenadiers within 8"/20cm of the assaulting teams charge 4"/10cm towards them. Gun teams like the 7.5cm PaK40 cannot move to counterattack. There is no defensive fire against counterattacks, so the grenadiers go straight in.
Counterattacking platoons can only charge the original assaulting platoon. They cannot drag new platoons into the fight.
The three teams within 2"/5cm of the paratroopers roll to hit (Veteran, 3+), destroying two American teams.
The Paratroopers Counterattack Back
The paratroopers roll to counterattack, scoring a 4, allowing them to counterattack. Teams that did not charge in the initial assault cannot do so now, but will fight back if the enemy comes within 2"/5cm of them. The surviving paratroopers within 8"/20cm of the enemy charge into contact with the Grenadiers. The Americans roll two more hits, destroying another pair of grenadier teams.
Then the Grenadiers Counterattack Again
Determined not to lose the fight, the grenadier platoon rolls a 6 to counterattack again. After charging into contact again, the Grenadiers roll their two attacks, destroying one more team.
Keep Going!
In Flames Of War assaults continue with each side counterattacking back and forth until one side or the other wins or breaks off. With a roll of 2, the Americans cannot counterattack again, and break off.
Breaking Off and Consolidating
A platoon losing the fight breaks off, trying to get away from the enemy. The victors either pursue them or establish their own defensive position ready for any counterattack.
The Survivors Break Off...
Every team in the losing platoon within 8"/20cm of a team from a winning platoon may move up to their full move away from the enemy (6"/15cm for infantry), and become pinned down. Any teams remaining within 4"/10cm of the victors after this move are captured and destroyed.
The mortar team decides to stay where it is, while the paratroopers retreat 6"/15cm back towards their non-assaulting teams.
...and the Victors Consolidate
Every team in a winning platoon can move up to 4"/10cm. The German grenadiers can either retreat, stay where they are, or advance to exploit their victory.
If a victorious team consolidates to within 2"/5cm of a losing team, the losing team must move until more than 2"/5cm away.
Pinned Down
At the end of an assault both sides are exhausted, making them pinned down. The exception is that a victorious platoon that won so completely that it never took a hit does not become pinned down. If the winning platoon took any hits in the assault, it is also pinned down.
Infantry Assaulting Tanks
Tanks are huge steel monsters, and any sensible infantryman prays never to meet one up close. If they have that misfortune, they rely on cunning, luck, and sheer bravery to take them out. Work through an assault by a platoon of US paratroopers on a German platoon of assault guns as you read the next few pages.
Tank Terror!
A platoon within 6"/15cm of an enemy tank needs to make a tank terror test to launch an assault. Being fearless, the paratroopers pass on a roll of 3+. The paratroopers roll a 5, so are willing to launch the assault. Confident grenadiers would pass on a roll of 4+.
Counterattack against Tanks
Normally a platoon that didn't take any hits from the enemy automatically passes their roll to counterattack. However, platoons fighting tanks need to roll, even if they didn't take any hits.
Sneaking up on Tanks
Tank teams that are contacted by teams that did not move or shoot cannot conduct defensive fire. Teams that did not move or shoot, and then assaulted from concealment can sneak up on a tank and blind it with a smoke grenade, flour bomb, or even a spare coat over the optics before it can defend itself. The tank cannot shoot in defensive fire, although it can fight as normal in the assault.
The team behind the wall did not move or shoot, so the StuG it charged cannot defensive fire. The other teams moved earlier in the turn, so do not prevent defensive fire.
The Assault Guns' Defensive Fire
Tanks shoot machine-guns and turret weapons in defensive fire. With one StuG unable to shoot, the rest only score three hits, not enough to make the infantry fall back, so the paratroopers take their infantry saves and continue the assault and roll to hit.
Assault Armour Saves
Assaults are harsh, dealing to tanks nearly as cruelly as they do to infantry. A tank's armour still protects it somewhat, but any weakness is exploited to the full.
The Paratroopers Assault
When assaulting, the paratroopers need a 3+ to hit the German assault guns, the same roll they'd need to hit infantry. The Bazooka and a Rifle/MG hit the German assault guns. Unlike infantry, tanks have an armour save in assaults using their top armour rating. Assaulting teams use their tank assault rating and don't need to roll against their firepower if the tank fails its save. Just like shooting, use different dice for each type of weapon.
Bailing Out One Tank...
The StuG hit by the Bazooka rolls a 3 and adds its top armour of 1, for a total of 4. This equals the Bazooka team's tank assault rating of 4, so it is bailed out.
| Top Armour (1) + Die Roll | Result (Bazooka, Tank Assault 4) |
|---|---|
| 5 or more | No Effect |
| Exactly 4 | Bailed Out |
| 3 or less | Destroyed |
...and Destroying Another
The other StuG rolls a 1, adding its top armour for a total of just 2. Being equipped with Gammon bombs, the paratroopers have a tank assault rating of 3, so the assault gun is destroyed.
| Top Armour (1) + Die Roll | Result (Gammon Bombs, Tank Assault 3) |
|---|---|
| 4 or more | No Effect |
| Exactly 3 | Bailed Out |
| 2 or less | Destroyed |
Having weathered the paratrooper's attack, the assault gun platoon rolls to counterattack as normal. If they fail to counterattack, the tanks will fall back and the bailed out StuG is abandoned and destroyed.
Tank Assault
The inability of a rifle to penetrate a tank no longer matters once the infantry get close enough. Now all that matters is the ingenuity of the soldier in working out how to disable a tank with the tools at hand.
Infantry have a tank assault rating reflecting their capabilities in close combat with tanks.
Top Armour. To an infantryman, the thickness of a tank's armour doesn't matter much. What matters is how vulnerable it is to a grenade in the right place. As a result, tanks use their top armour rating against infantry assaults.
German Tank Assault Weapons. German grenadiers using their hand grenades only have tank assault 2, so they have to rely on specialist tank-hunters who have tank assault ratings of 5 or 6 against tanks. Rifle/MG: Tank Assault 2. Panzerschreck: Tank Assault 5. Panzerfaust: Tank Assault 6.
American Tank Assault Weapons. American paratroopers use Gammon bombs full of plastic explosives giving them tank assault 3 against tanks, while their bazookas have tank assault 4. Paratroopers are armed with Gammon bombs that are ideal for close-in anti-tank work. These give them a tank assault rating of 3.
Anti-tank Weapons
| Weapon | Range | ROF | Anti-tank | Firepower | Tank Assault (against Top Armour) |
|---|---|---|---|---|---|
| Rifle/MG | 16"/40cm | 2 | 2 | 6 | 2 (3 with Gammon Bombs) |
| Bazooka | 8"/20cm | 1 | 10 | 5+ | 4 |
| Panzerschreck | 8"/20cm | 2 | 11 | 5+ | 5 |
| Panzerfaust | 4"/10cm | 1 | 12 | 5+ | 6 |
(The first four columns are used when shooting; Tank Assault is used in assaults.)
Tanks Assaulting
Despite the power of their guns, there are times when crushing the enemy under its tracks is the best tactic for aggressively-handled tanks. Tanks assault in the same way that infantry do, but with a few changes. Grab some Sherman tanks and launch an assault on a grenadier platoon backed by some anti-tank guns.
The Shermans Charge into Contact
Like infantry, tanks within 8"/20cm of the enemy charge 4"/10cm into contact with the enemy, taking bogging checks as normal. Since the PaK40 anti-tank gun is behind a stone wall, one Sherman needs to take a bogging check, and fails!
Defensive Fire against Tanks
Once the Shermans have finished their charge, the Grenadiers conduct their defensive fire. The defenders are able to target weak points in the armour of charging tanks, so defensive fire always hits the side armour. The PaK40 (Anti-tank 12) and the Panzerschreck (Anti-tank 11) score a hit each. Against the Sherman's Side Armour of 4 they easily penetrate.
The Tanks Fall Back
Platoons that have two or more tanks destroyed or bailed out by defensive fire fall back until they are 2"/5cm from the defenders. The defenders destroyed one tank and bailed out another, forcing the tanks to fall back.
The bailed out tank falls back 2"/5cm to where it was actually hit, remaining bailed out. The bogged down tank also falls back. Since it never actually reached the wall, it is no longer bogged down.
Anti-tank Guns in Assaults
Anti-tank guns are most effective at range, but if assaulted, will keep shooting to the last. The guns bark, hurling armour-piercing shot after shot as long as they have a target. When outflanked and threatened with being crushed under the tracks of a tank, the gunners use hand grenades to drive the tank off.
Guns in Assaults
Guns cannot charge into contact with the enemy, but will still fight back if charged, rolling to hit in the same way as infantry and tanks. The Shermans assault the anti-tank guns, rolling to hit in the same way that infantry do. Any hits on guns destroy them, but the tanks are unlucky and miss both guns. In return, both of the counterattacking anti-tank guns score hits on the assaulting tanks.
Anti-tank Guns Against Tanks
In assaults, anti-tank guns roll one die to hit like infantry. The crew can then choose to either attack the tank using their tank assault rating of 2 against the tank's top armour, or if the tank is in their field of fire, they can use their normal Anti-tank rating against its Side armour rating.
Anti-tank guns like the 7.5cm PaK40 have a tank assault rating of 2, but can use their normal anti-tank rating against the tank's side armour instead.
This PaK40 has no tanks in its field of fire within 2"/5cm, so the crew use their tank assault rating of 2 instead. The tank (Top Armour 1) rolls a two for its armour save, easily avoiding harm.
This PaK40 can use its normal anti-tank rating of 12 against the tank's side armour of 4, which will automatically penetrate. Unlike hits on top armour, hits on Side armour require the gun to pass a Firepower test to have any effect.
| Side Armour (4) + Die Roll | Firepower Test 1 or 2 | Firepower Test 3 to 6 |
|---|---|---|
| 13 or more | No Effect | No Effect |
| Exactly 12 | No Effect | Bailed Out |
| 11 or less | Bailed Out | Destroyed |
Checking Morale
Most soldiers fight bravely, but everyone has their limits. As their comrades fall around them, even the bravest start considering the option of running away. If your platoons take too many casualties from shooting or assaults, they may just retreat, effectively putting them out of the battle.
Checking Platoon Morale
At the end of the Shooting and Assaults Steps, any platoon that has more teams dead than alive and took a casualty in that step must roll to continue fighting. On a roll of 4+, Confident troops (3+ for the Fearless paratroopers) continue to fight. On a lesser roll, the platoon is destroyed.
At the end of an assault, the German grenadier platoon has just three teams left, so must check its platoon morale. It rolls a 3, not enough, so is destroyed.
Your Company command team can join a platoon within command distance, allowing it to re-roll a failed platoon morale check (or a roll to remount bailed out tanks or rally a pinned down platoon). If the platoon fails its re-roll and retreats, the company command team retreats with them and is destroyed.
Ignoring Bogged Down and Bailed Out Tanks
Tank platoons do not count bogged down and bailed out tanks when deciding if they have more teams dead than alive. Bogged down and bailed out tanks are not treated as either dead or alive for platoon morale checks, they are simply ignored.
A British armoured platoon has one bogged down and has lost one tank destroyed and one bailed out by the time the Germans finished shooting at it. However, it ignores the bailed out tanks, so with effectively one tank dead and one alive, it still has more teams alive than dead, and does not need to check its platoon morale.
Winning the Game
There are two ways of winning a battle. The simplest, but hardest to accomplish, is to destroy your opponent completely. The more subtle way is to simply take your objectives.
Checking Company Morale
If you start any of your turns with more platoons destroyed than still fighting, your company commander must roll a die. On a roll of 4+, your company continues to fight. Otherwise, your company's morale breaks and the game is over.
If your company command team has been destroyed, the 2iC command team can roll instead. If both are destroyed and you have more platoons destroyed than still fighting, the game is over.
With only one grenadier platoon left, the German company must check their company morale at the start of their next turn, rolling a 5. The Grenadiers fight on, for a while at least.
Objectives
Flames Of War is usually played with missions that set two objectives for each player, although you only need to capture one to win the game. Objectives are 2½"/63mm wide by 2"/50mm deep. Some players prefer simple objectives showing their force's symbol. Others model destroyed vehicles or supply dumps as their objectives.
Taking Objectives
You take an objective and win the game if you have a team within 4"/10cm of your objective at the start of your turn and the enemy does not.
- Pinned down platoons can take and hold objectives.
- Bogged down and bailed out tanks cannot take or hold objectives.
The Allied player only has a bailed out Sherman tank within 4"/10cm of the objective. The Pinned German Grenadier platoon has teams within 4"/10cm, so they win the game.
Free-for-All Mission
Flames Of War is most commonly played using missions that set objectives for your troops to take or hold. Free-for-all is a basic mission in which you must seize one of your objectives before the enemy seizes one of theirs. Set up a table and choose sides, then follow the instructions below.
- Step 1: The German player places two Objectives anywhere in the box at the Allied end of the table (the strip of the Allied Deployment Area at the Allied player's table edge). They can not be closer than 16"/40cm to the centre of the table or within 8"/20cm of the sides of the table.
- Step 2: The Allied player places two Objectives anywhere in the corresponding box at the German end of the table. They can not be closer than 16"/40cm to the centre of the table or within 8"/20cm of the sides of the table.
- Deployment: The Allied player deploys their troops anywhere behind a line 12"/30cm from the centre of the table (the Allied Deployment Area). The German player deploys their troops anywhere behind a line 12"/30cm from the centre of the table on their side (the German Deployment Area).
- Step 3: Players alternate placing platoons in their deployment areas, starting with the German player.
- Step 4: Roll a die to see who has the first turn. The player rolling highest goes first. The other player's teams all start the game gone to ground.
Winning the Battle. Any player starting their turn in control of an objective in the enemy deployment area wins the game.
Setting Up a Table
Your troops will need a battlefield to fight on before they can claim victory! For smaller games, like pitting the forces from Open Fire against each other, a kitchen table or 4'x4' (120cm x 120cm) table is a good size. Once you add a few more units to each side you'll want to increase your playing area to 6'x4' (180cm x 120cm).
Woods, wall, buildings, roads and hills give your troops something to fight over. Use the cardboard terrain from the Open Fire box to get you started, adding things around the house, such as boxes for hills. After a few games, you will want to collect pre-painted terrain like the Battlefield in a Box range.
Building Your Army
The intelligence briefings in the next section and in the various Flames Of War battle books show you how to build your army.
The company diagram for your force tells you which platoons you can choose from. Each box represents a platoon that is available to your company. The black boxes show compulsory platoons, so the British Armoured Squadron must take:
- an Armoured Squadron HQ and
- two Armoured Platoons.
The grey boxes show additional platoons that you can add to this core. For example you could add:
- two more Armoured Platoons,
- a Recce Patrol,
- an Anti-tank Platoon (SP), and
- Air Support.
Each platoon has a points value, and often has options for fielding it at different strengths. For example, an Armoured Platoon of 3 Sherman V and 1 Firefly VC costs 280 points; 2 Sherman V and 1 Firefly VC costs 215 points. To build a force, simply agree on a points limit with your opponent and add platoons until you reach this limit. This should ensure that you and your opponent have equivalent forces.
An Armoured Platoon is made up of a Subaltern (Command Sherman V, HQ Tank), a Sergeant (Sherman V, Tank), a Corporal (Sherman V, Tank) and a Lance Corporal (Firefly VC, Tank).
Advanced Rules
The rules that you have just read give you the basics for playing your first few games. After you've played a few games you'll be ready to move on to the Flames Of War rulebook, which expands on what you already know and adds rules for specialist units to give you endless variation to your games, including:
- Artillery,
- Aircraft,
- Reconnaissance,
- Engineers and Fortifications,
- National Special Rules,
- twelve more missions,
- and much, much more.
Armoured Squadron (Armoured Company)
Tank Company. Motivation and skill: Confident Trained.
Armoured squadrons spearheaded the British offensives to capture the V-1 buzz-bomb launch sites and the crossings over the Rhine River in late 1944. As they fought their way to the bridges at Nijmegen and Arnhem, the tanks linked up with American paratroopers holding Hell's Highway.
You can form your own Armoured Squadron using this intelligence briefing. Start with your headquarters and the platoons shown in black, then add platoons shown in grey until you reach the agreed points limit.
Company Organisation
- Headquarters (compulsory): Armoured Squadron HQ.
- Combat Platoons: Armoured Platoon (compulsory, two required), plus two more Armoured Platoons (optional).
- Weapons Platoons: Recce Patrol (Reconnaissance; optional).
- Divisional Support Platoons (optional): Anti-tank Platoon (SP), Royal Artillery; Rifle Platoon (Infantry); US Parachute Rifle Platoon (Infantry, US Allies); Field Battery (SP), Royal Artillery (Artillery); Air Support (Aircraft).
US Allies. US Parachute Rifle Platoons fought alongside British Armoured Squadrons on Hell's Highway on the way to Arnhem in September 1944.
Headquarters
Armoured Squadron HQ. Company HQ with: Company Command Sherman V, 2iC Command Sherman V and 2 Sherman V: 135 points.
Combat Platoons
Armoured Platoon
- 3 Sherman V and 1 Firefly VC: 280 points
- 2 Sherman V and 1 Firefly VC: 215 points
Armoured platoons are the heart of an armoured squadron. Their combination of speed, armour, and firepower, especially with the extra anti-tank punch of the Firefly VC, enable them to tackle any opposition.
Structure: Subaltern (Command Sherman V, HQ Tank), Sergeant (Sherman V, Tank), Corporal (Sherman V, Tank), Lance Corporal (Firefly VC, Tank).
Weapons Platoons
Recce Patrol
- 4 Stuart V or VI: 160 points
- 3 Stuart V or VI: 120 points
Recce Patrols are Reconnaissance Platoons, which use all of the Reconnaissance special rules found in the Flames Of War rulebook. Stuart light tanks scout ahead of the armoured platoons, seeking out enemy ambushes, and locating enemy anti-tank guns.
Structure: Subaltern (Command Stuart V, HQ Tank), Corporal (Stuart V, Tank), Sergeant (Stuart V, Tank), Corporal (Stuart V, Tank).
Support Platoons
Aircraft
- Priority Air Support, Typhoon Flight (Flight Lieutenant): 220 points
- Limited Air Support, Typhoon Flight (Flight Lieutenant): 170 points
Anti-tank Platoon (SP), Royal Artillery
- 4 M10C 17 pdr SP: 260 points
- 2 M10C 17 pdr SP: 130 points
The Royal Artillery's self-propelled (SP) anti-tank platoons pack the punch needed to knock out heavy German Panther and Tiger tanks. They are ideal for covering the armoured platoons' advance.
Structure: HQ Section (Subaltern, Command M10 17 pdr SP) and Anti-tank Section (Sergeant, M10 17 pdr SP) with further M10 17 pdr SP.
Field Battery (SP), Royal Artillery
- HQ Section with OP Sherman, Command Rifle team (Major), and
- 4 Sexton: 195 points
- 2 Sexton: 110 points
The Sexton self-propelled 25 pdr guns are the armoured squadron's artillery support. Using their Sherman observation post (OP) to spot targets for them, they can bombard anything on table. They are perfect for softening up anti-tank guns and infantry before the armoured platoons close and finish them off.
Structure: HQ Section (Major, OP Sherman, Command Rifle team) and Gun Sections (Sergeants, Sexton self-propelled guns).
Rifle Platoon
- HQ Section with 3 Rifle Squads: 140 points
- HQ Section with 2 Rifle Squads: 105 points
The armoured platoons are powerful, but they are vulnerable in towns and woods. That's when they need the infantry to take the lead. With the tanks providing covering fire, the infantry assault German infantry and guns trying to block the squadron's advance.
Structure: HQ Section (Subaltern, Command Rifle/MG team, PIAT team, Light Mortar team) and Rifle Squads (each a Corporal with Rifle/MG teams).
US Support Platoons
Parachute Rifle Platoon
- HQ Section and Mortar squad with 3 Rifle Squads: 265 points
- HQ Section and Mortar squad with 2 Rifle Squads: 205 points
American paratroopers are excellently trained and battle hardened. They are rated as Fearless Veteran. Structure: HQ Section (Command SMG team), Rifle Squads (Rifle/MG teams) and a Mortar squad (M2 60mm mortar).
British Arsenal
Tank Teams
| Name / Weapon | Mobility / Range | Front / ROF | Side / Anti-tank | Top / Firepower | Equipment and Notes |
|---|---|---|---|---|---|
| Stuart V or VI | Light Tank | 4 | 2 | 1 | Co-ax MG, Hull MG, Recce. |
| M6 37mm gun | 24"/60cm | 2 | 7 | 4+ | |
| Sherman V | Standard Tank | 6 | 4 | 1 | Co-ax MG, Hull MG, Tow hook. |
| M3 75mm gun | 32"/80cm | 2 | 10 | 3+ | Semi-indirect fire, Smoke. |
Infantry and Gun Teams
| Infantry Team | Range | ROF | Anti-tank | Firepower | Notes |
|---|---|---|---|---|---|
| Rifle team | 16"/40cm | 1 | 2 | 6 | |
| Rifle/MG team | 16"/40cm | 2 | 2 | 6 | Gammon bombs with Tank Assault 3 for US paratroopers. |
| SMG team | 4"/10cm | 3 | 1 | 6 | Full ROF when moving. |
| Light Mortar team | 16"/40cm | 1 | 1 | 4+ | Smoke, Can fire over friendly teams. |
| Gun Team | Mobility | Range | ROF | Anti-tank | Firepower | Notes |
|---|---|---|---|---|---|---|
| M2 60mm mortar | Man-packed | 24"/60cm | 2 | 1 | 3+ | Can fire over friendly troops. |
| Firing bombardments | 32"/80cm | - | 1 | 6 |
Aircraft
| Aircraft | Weapon | To Hit | Anti-tank | Firepower |
|---|---|---|---|---|
| Typhoon | Cannon | 3+ | 8 | 5+ |
| Rockets | 3+ | 6 | 3+ |
The Hawker Typhoon provides close air support, rocketing enemy tanks and guns ahead of advancing British tanks and infantry.
Sexton
Front Armour 1, Side Armour 0, Top Armour 0, Movement: Standard Tank. OQF 25 pdr gun: Range 24"/60cm, ROF 2, AT 9, FP 3+. Firing bombardments: Range 80"/200cm, AT 4, FP 5+. Notes: AA MG, Hull mounted, Smoke bombardment. The Sexton self-propelled 25 pdr gun is the armoured brigade's artillery of choice.
Special Rules
Flames Of War uses special rules to bring out the character of each country's army. The British for instance, have a British Bulldog special rule to reflect their dogged determination to hold on to any ground they took. In a similar vein, the Germans have a Mission Tactics special rule that allows them to replace destroyed command teams.
Some tanks and guns have special rules too, such as the Semi-indirect Fire rule that allows stationary tanks to re-roll their misses at long range and the wide tracks rule that makes them less likely to become bogged down. Once you are familiar with the basic rules, you can look up the special rules in the rulebook and add them to your games.
British Tank Profiles
- Sherman V: Front Armour 6, Side Armour 4, Top Armour 1, Standard Tank. M3 75mm gun: Range 32"/80cm, ROF 2, Anti-tank 10, Firepower 3+. Notes: Co-ax MG, Hull MG, Semi-indirect fire, Smoke. The American-built Sherman V is a good all-rounder, combining good mobility with an effective gun and armour.
- Firefly VC: Front Armour 6, Side Armour 4, Top Armour 1, Standard Tank. OQF 17 pdr gun: Range 32"/80cm, ROF 2, Anti-tank 13, Firepower 3+. Notes: Co-ax MG, No HE, Semi-indirect fire. The Sherman Firefly VC is a standard tank re-armed with a deadly, long-barrelled 17 pdr anti-tank gun, perfect for knocking out enemy tanks.
- Stuart V: Front Armour 4, Side Armour 2, Top Armour 1, Light Tank. M6 37mm gun: Range 24"/60cm, ROF 2, Anti-tank 7, Firepower 4+. Notes: Co-ax MG, Hull MG, Recce. The Stuart V light tank is exceptionally fast, making it useful for scouting. If it bumps into anything big, it can outflank it with ease.
- M10C 17 pdr SP: Front Armour 4, Side Armour 2, Top Armour 0, Standard Tank. OQF 17 pdr gun: Range 32"/80cm, ROF 2, Anti-tank 13, Firepower 3+. Notes: .50 cal AA MG, No HE, Slow traverse. The M10C mounts the same 17 pdr anti-tank gun as the Firefly on a lightly-armoured tank destroyer chassis, making it ideal for anti-tank defence.
Grenadierkompanie (Infantry Company)
Infantry Company. Motivation and skill: Confident Veteran.
The humble grenadier is the heart of the German Army. Day after day, battle after battle, they stand their ground, holding back the rising Allied tide. They fortified every village, typically with a force of a company of grenadiers, a couple of anti-tank guns, and a platoon of assault guns or tanks.
If the British drive them from their positions, the grenadiers counterattack to recapture the village with the support of heavy Tiger tanks.
You can form a Grenadierkompanie from this intelligence briefing. Start with your headquarters and the platoons shown in black, then add platoons shown in grey until you reach the agreed points limit.
Assign the anti-tank section from the company headquarters to whichever of your grenadier platoons needs extra protection from tanks.
Company Organisation
- Headquarters (compulsory): Grenadierkompanie HQ: Company Command Panzerfaust SMG team, 2iC Command Panzerfaust SMG team, and an Anti-tank Section (Unteroffizier, Panzerschreck team).
- Combat Platoons: three Grenadier Platoons (all compulsory).
- Weapons Platoons (optional): Grenadier Machine-gun Platoon (Machine-Guns), Grenadier Mortar Platoon (Artillery), Grenadier Anti-tank Gun Platoon (Anti-tank).
- Divisional Support Platoons (optional): Panzer Platoon (Armour), Heavy Tank Platoon (Armour), Artillery Battery (Artillery), Heavy Anti-aircraft Gun Platoon (Anti-aircraft).
Headquarters
Grenadierkompanie HQ: 70 points.
Combat Platoons
Grenadier Platoon
- HQ Section with 3 Grenadier Squads: 165 points
- HQ Section with 2 Grenadier Squads: 120 points
The infantry were awarded the title of 'Grenadier' by Hitler in recognition of their skill and bravery. Armed with MG42 machine-guns and Panzerfaust anti-tank launchers, they are ready for any opposition.
Structure: HQ Section (Leutnant, Command Panzerfaust SMG team) and Grenadier Squads (each an Unteroffizier with Rifle/MG teams).
Weapons Platoons
Grenadier Machine-gun Platoon
- HQ Section with 4 MG42: 135 points
- HQ Section with 2 MG42: 70 points
Grenadier Machine-gun Platoons may make Combat Attachments to Combat Platoons using the rules found in the rulebook.
Structure: HQ Section (Leutnant, Command SMG team) and Machine-gun Sections (Unteroffizier, MG42 HMG teams).
Grenadier Mortar Platoon
- HQ Section with 6 8cm GW34: 180 points
- HQ Section with 4 8cm GW34: 125 points
- HQ Section with 2 8cm GW34: 65 points
Mortars are the infantry's artillery, providing them with instant firepower on call. They can drop bombardments anywhere along the front line to reinforce the grenadiers, lay a smoke screen to blind the enemy, or provide direct fire support against gun nests.
Structure: HQ Section (Leutnant, Command SMG team, Unteroffizier with Observer Rifle teams) and Mortar Sections (8cm GW34 mortars).
Grenadier Anti-tank Gun Platoon
- HQ Section with 4 7.5cm PaK40: 205 points
- HQ Section with 3 7.5cm PaK40: 155 points
- HQ Section with 2 7.5cm PaK40: 105 points
The 7.5cm PaK40 anti-tank gun is incredibly powerful yet small enough to be easily hidden, making it perfect for protecting infantry from marauding tanks. Against small numbers of tanks, they can be bold, using their firepower to annihilate the enemy. Faced with greater numbers, they need greater cunning, staying hidden until the enemy enter their killing zone.
Structure: HQ Section (Leutnant, Command SMG team) and Anti-tank gun Sections (Unteroffizier, 7.5cm PaK40 gun).
Support Platoons
Heavy Anti-aircraft Gun Platoon
- HQ Section with 2 8.8cm FlaK36: 180 points
- HQ Section with 1 8.8cm FlaK36: 90 points
The dreaded '88' instills fear in Allied tankers and pilots alike. Neither tanks nor aircraft last long once the 88's open fire on them.
Artillery Battery
- HQ Section with 4 10.5cm leFH18: 210 points
- HQ Section with 2 10.5cm leFH18: 115 points
- HQ Section with 4 15cm sFH18: 310 points (Heavy Artillery Battery)
- HQ Section with 2 15cm sFH18: 160 points (Heavy Artillery Battery)
Structure: HQ Section (Hauptmann, Command SMG team, Staff team, Leutnant with Observer Rifle teams) and Gun Sections (Howitzers). (The guide prints the heavy battery as "15cm leFH18"; the arsenal gives the heavy howitzer as the 15cm sFH18.)
Panzer Platoon
- 5 StuG G: 475 points
- 4 StuG G: 380 points
- 3 StuG G: 285 points
- 5 Panther A: 940 points
- 4 Panther A: 750 points
- 3 Panther A: 560 points
StuG G assault guns are the infantry's armour. They are an ideal mobile reserve, hunting tanks that break through the infantry's defences and counterattacking to regain lost positions. When the grenadiers attack, the assault guns advance with them, knocking out enemy machine-gun nests and strongpoints to cover the infantry's advance.
By Allied standards, the Panther tank, weighing in at 45-tonnes, is a heavy tank. For the Germans though, it is just their latest battle tank, like the American Sherman tank, and is produced in large numbers for the panzer divisions. The Panther's gun easily penetrates Allied tanks, while its thick front armour bounces most Allied guns with ease. When the Panthers counterattack with the grenadiers, the Allies run for cover!
Structure: Command tank (Leutnant, HQ tank) and Panzer Sections (Unteroffizier, Tanks).
Heavy Tank Platoon
- 4 Tiger I E: 860 points
- 3 Tiger I E: 645 points
- 2 Tiger I E: 430 points
- 1 Tiger I E: 215 points
- 3 Königstiger (Henschel): 1035 points
- 2 Königstiger (Henschel): 690 points
- 1 Königstiger (Henschel): 345 points
The legendary 56-tonne Tiger tank mounts the dreaded '88' gun and armour thick enough to shrug off most guns, even from the flank where other tanks are vulnerable. Their power and near invulnerability allows Tiger crews to rack up dozens or even hundreds of tanks destroyed for each of their own losses.
Only the best candidates are selected to crew Tiger tanks. To reflect their extraordinary performance, you can use the Tiger Ace Skills rules found in the rulebook.
The new Königstiger (King Tiger) is even heavier at 72 tonnes, with thicker armour and a longer, more powerful gun, ensuring that nothing can stand up to it in a one-on-one duel.
Structure: HQ Section (Leutnant, Command Tank) and Heavy Tank Section (Unteroffizier, Tanks).
German Arsenal
Tank Teams
| Name / Weapon | Mobility / Range | Front / ROF | Side / Anti-tank | Top / Firepower | Equipment and Notes |
|---|---|---|---|---|---|
| StuG G | Standard Tank | 7 | 3 | 1 | Hull MG, Protected ammo, Schürzen. |
| 7.5cm StuK40 gun | 32"/80cm | 2 | 11 | 3+ | Hull mounted. |
| Panther A | Standard Tank | 10 | 5 | 1 | Co-ax MG, Hull MG, Wide tracks. |
| 7.5cm KwK42 gun | 32"/80cm | 2 | 14 | 3+ |
Gun Teams
| Weapon | Mobility | Range | ROF | Anti-tank | Firepower | Notes |
|---|---|---|---|---|---|---|
| MG42 HMG | Man-packed | 24"/60cm | 6 | 2 | 6 | ROF 3 when pinned down or moving. |
| 8cm GW34 mortar | Man-packed | 24"/60cm | 2 | 2 | 3+ | Smoke, Minimum range 8"/20cm. |
| Firing bombardments | 40"/100cm | - | 2 | 6 | Smoke bombardment. | |
| 7.5cm PaK40 gun | Medium |
Infantry Teams
| Team | Range | ROF | Anti-tank | Firepower | Notes |
|---|---|---|---|---|---|
| Rifle/MG team | 16"/40cm | 2 | 2 | 6 | |
| SMG team | 4"/10cm | 3 | 1 | 6 | Full ROF when moving. |
| Panzerschreck team | 8"/20cm | 2 | 11 | 5+ | Tank Assault 5. |
| Observer Rifle team | 16"/40cm | 1 | 2 | 6 | Observer. |
Additional Training and Equipment
| Weapon | Range | ROF | Anti-tank | Firepower | Notes |
|---|---|---|---|---|---|
| Panzerfaust | 4"/10cm | 1 | 12 | 5+ | Tank Assault 6, Cannot shoot in the Shooting Step if moved in the Movement Step. |
10.5cm leFH18 Howitzer
Immobile. 10.5cm leFH18: Range 24"/60cm, ROF 1, AT 10, FP 2+. Bombardment: Range 72"/180cm, AT 4, FP 4+. Notes: Breakthrough gun, Gun shield, Smoke bombardment. The 10.5cm leFH18 light field howitzer is the workhorse of the German artillery. It is powerful enough to knock out tanks as well as dug-in infantry.
15cm sFH18 Howitzer
Immobile. 15cm sFH18: Range 24"/60cm, ROF 1, AT 13, FP 1+. Bombardment: Range 80"/200cm, AT 5, FP 2+. Notes: Bunker buster, Smoke bombardment. The 15cm sFH18 howitzer is the German's heavy hitter, throwing a massive 15cm (6") shell weighing 44kg (95 lb) more than 13km (8 miles).
German Tank and Gun Profiles
- Tiger I E: Front Armour 9, Side Armour 8, Top Armour 2, Slow Tank. 8.8cm KwK36: Range 40"/100cm, ROF 2, Anti-tank 13, Firepower 3+. Notes: Slow traverse, Co-ax MG, Hull MG, Protected ammo, Wide tracks. Nothing made an Allied tanker sweat more than the thought of facing a Tiger tank.
- Panther A: Front Armour 10, Side Armour 5, Top Armour 1, Standard Tank. 7.5cm KwK42: Range 32"/80cm, ROF 2, Anti-tank 14, Firepower 3+. Notes: Co-ax MG, Hull MG, Wide tracks. The Panther outgunned every Allied tank, had armour thick enough to bounce a Sherman tank's shots with ease, yet was still highly mobile.
- StuG G: Front Armour 7, Side Armour 3, Top Armour 1, Standard Tank. 7.5cm StuK40 gun: Range 32"/80cm, ROF 2, Anti-tank 11, Firepower 3+. Notes: Hull MG, Protected ammo, Schürzen, Hull mounted. The StuG G assault gun mounted a powerful 7.5cm gun on the chassis of the old Panzer III tank, creating a superb infantry-support weapon.
- Königstiger: Front Armour 15, Side Armour 8, Top Armour 2, Slow Tank. 8.8cm KwK43 gun: Range 40"/100cm, ROF 2, Anti-tank 16, Firepower 3+. Notes: Slow traverse, Co-ax MG, Hull MG, Overloaded. Not satisfied with the 56-tonne Tiger tank, the Germans built the even more powerful 72-tonne Königstiger (King Tiger) heavy tank.
- 7.5cm PaK40 anti-tank gun: Medium mobility, Range 32"/80cm, ROF 2, AT 12, FP 3+. Notes: Gun shield. The low-slung 7.5cm PaK40 is remarkably small for its capabilities. Firing from ambush, it will penetrate any Allied tank with ease.
- 8.8cm FlaK36 gun: Top Armour 2, Immobile, Range 40"/100cm, ROF 3, AT 13, FP 3+. Notes: Gun shield, Heavy anti-aircraft, Turntable. Every German gun was an '88' to Allied soldiers who were terrified of its long-range tank-killing capability and its air-burst ammunition.
Rules Summary
You now know the basics of the rules. It's time to gather your forces and play a complete game. To make this easy, here's a summary of everything you've learned so far in the order in which you'll use it in a turn.
Motivation Tests and Skill Tests
Two of the most common die rolls in the Flames Of War rules are Motivation Tests and Skill Tests. These tables give the scores needed based on the Motivation and Skill ratings of the troops taking the test.
| Motivation | Score Needed |
|---|---|
| Fearless | 3+ |
| Confident | 4+ |
| Reluctant | 5+ |
| Skill | Score Needed |
|---|---|
| Veteran | 3+ |
| Trained | 4+ |
| Conscript | 5+ |
Starting Step
In the Starting Step you check the status of your force and attempt to rally your troops.
- Check Company Morale (page 31): Pass a Motivation Test to continue fighting if your company has more platoons destroyed than still fighting.
- Check Victory Conditions (page 31): Win the game if you have taken an objective.
- Rally Pinned Down Platoons (page 15): Pass a Motivation Test to rally a pinned down platoon.
- Re-mount Bailed Out Tanks (page 7): Pass a Motivation Test to re-mount a bailed out tank.
- Free Bogged Down Tanks (page 9): Pass a Skill Test to free a bogged down tank.
Movement Step
In the Movement Step you move any or all of your platoons into better positions.
- Moving tanks (page 9): Tanks move 12"/30cm in easy terrain, but slow to 8"/20cm in rough terrain. Tanks crossing Difficult or Very Difficult Going must pass a Bogging Check to avoid bogging down.
| Terrain | Speed | Difficulty | Bogging Check |
|---|---|---|---|
| Road | 12"/30cm | Easy | - |
| Cross country | 12"/30cm | Easy | - |
| Hedge | 8"/20cm | Difficult | 2+ |
| Woods | 8"/20cm | Difficult | 2+ |
| Building | 8"/20cm | Very Difficult | Skill Test |
- Moving Infantry (page 14): Infantry and man-packed guns (like a 60mm mortar) move 6"/15cm through any terrain and never bog down. If infantry and man-packed guns don't move (aside from digging in), they are always concealed, even in the open.
- Moving Guns (page 17): Medium guns (like the 7.5cm PaK40) move 4"/10cm and need to roll to avoid bogging down in Difficult Going. They cannot move in Very Difficult Going.
- Command Distance (page 19): Moving teams must remain within command distance of their platoon command team or within command distance of another team in its platoon that is in command.
| Skill | Tanks | Infantry and Guns |
|---|---|---|
| Veteran | 8"/20cm | 6"/15cm |
| Trained | 6"/15cm | 4"/10cm |
| Conscript | 4"/10cm | 2"/5cm |
- Digging In (pages 14, 17): Infantry and guns can dig in instead of moving. If they pass a Skill Test they are now dug in. Infantry, and man-packed and medium guns are concealed if they are dug in.
Shooting Step
In the Shooting Step you shoot with any or all of your platoons, trying to pin down and destroy the enemy.
- Select a Target Platoon (pages 8, 10, 18): You shoot with one platoon at a time, although each team can shoot at a different enemy platoon if you wish. The target must be in range and in the weapon's field of fire.
- How many Dice (pages 6, 7, 9, 12, 15, 16): Each team rolls one die for each point of ROF. Tanks can shoot their turret-mounted gun and machine-guns at the same time, but the machine-guns only have ROF 1. If they don't shoot their main guns, one machine-gun has ROF 3, the others ROF 1. Moving teams reduce their ROF by half, unless vehicle machine-guns or SMG teams. Pinned down infantry or gun teams also reduce their ROF by half, except that MG teams have ROF 2. Pinned down teams cannot shoot while moving.
| ROF | Moving ROF | Pinned Down ROF |
|---|---|---|
| 1 | 1 (+1 to hit) | 1 (+1 to hit) |
| 2 or 3 | 1 | 1 |
- Going to Ground (pages 14, 17): Teams that do not move (aside from digging in) or shoot have gone to ground.
- Roll to Hit (pages 6, 7, 8, 12): The score needed for a team to hit depends on the easiest target in the platoon it is shooting at.
Source note on completeness: the downloadable PDF ends here. The second page of the printed rules summary (continuing the Shooting Step, then the Assault Step) is not present in the file; the corresponding rules are given in full in the sections above (Allocating Hits, Infantry Assaults, Defensive Fire, Fighting in Assaults, Counterattacks, Breaking Off and Consolidating, Tank Assault, Checking Morale).