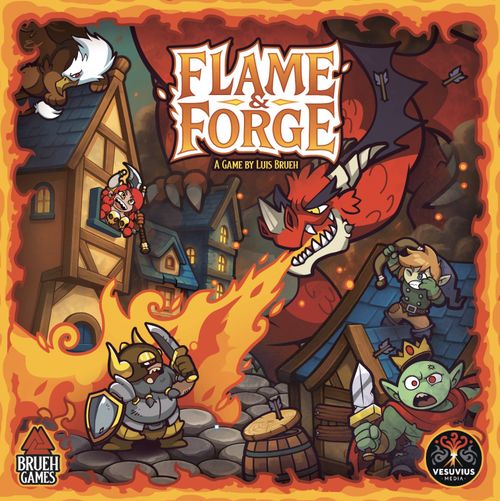
Flame & Forge
Flame & Forge Rulebook
Table of Contents
Table of Contents
Game Contents
Meeples: Dwarf (7), Alchemist (1), Dragonrider (1), Warrior (1), King (1), Guardian (1). Dwarfs per color: blue, red, yellow and green. Monster (3).
Cards: Starting gang (28), Monsters (24), Dragon (20), Scenario (?), Items (44), Events (24).
City Tiles: Outskirts (7), Valley (7), Wastelands (7).
Other components: Player boards (4), Dragon's Castle (1), Library Board (1), Tokens — Book (12), Fire (25), Yellow gem (25), Blue gem (20), Red gem (16), Advanced Research (?), Dragon ability (?).
Warning
Every time you see the Warning symbol, read carefully the conditions written in the sign before proceeding to the next paragraph (or page) of the Rulebook.
Within this expansion you will find Unlockable packs of cards. These cards are not listed on the components section. Unlocking this content will require you to play the game and sometimes to win scenarios in a specific way. If the packs are opened too early, it may spoil your fun. Once unlocked the cards (and rules) should be applied to ALL scenarios you play, even if you decide to replay earlier scenarios.
Unlockable packs: Card quantities are listed inside each pack, instead of in the components section.
Game Setup
- The City: Place the Dragon's Castle on the table, and then setup the rest of the tiles as shown in the relevant scenario you are playing. Please notice that the play area is divided into 3 territories (Outskirts, Valley and Wastelands), while each territory has 2 lines of tiles (one with 4 tiles and one with 3).
- The Dragon's Hoard: Separate the Gems in three piles (one per colour), and the fire tokens. Place them on the table in easy reach of the players. This area is called the Supply. When you discard any of these tokens they will return to the Supply.
- The Forge: Shuffle all the item cards and place them face down. Reveal the top three items and place them face up creating the "Forge".
- The Library: Place the library board on the table. Separate the advanced research tokens into three piles based on their type, shuffle each pile separately and place it face down above the library board. Unless you're told otherwise use Library side "A".
- The Monsters: To create the Monster deck first shuffle all the monsters with 2VP and place them face down on the table. Then shuffle all the 1VP monsters together, take 3 per player, and place them face down at the top of the monster deck. Return the rest of the 1VP monsters to the box (they will not be used in this game).
- The Dragon: To create the Retaliation deck, shuffle the Dragon cards (the ones with no symbol). If there are any specific scenario-based changes you need to apply to the Retaliation deck, check the scenario rules and apply them now. Finally, draw and resolve one card for each territory (Wastelands then Valley then Outskirts).
Resolving a Retaliation Card
A Retaliation card always shows the 7 tiles of a territory. In every Retaliation card there will always be a monster and also other elements you will need to place on its depicted tiles such as fire, gems, etc. To place the monster on the city, first draw the top card from the monster deck, place it face up next to the target territory and place the monster token on the tile marked with the monster symbol, that's where the new monster is located. Keep the monster card by its territory until it is defeated. Then, place any other relevant tokens/cards on the tiles marked.
Every time a monster is defeated, immediately reveal and resolve a new Retaliation card on that territory placing the relevant tokens and revealing the new monster from the top of the monster deck. After you resolve a Dragon card, place it at the bottom of the dragon deck.
In this example, the retaliation card positioned the monster in the top left corner of the outskirts territory and two fire tokens in the bottom adjacent tiles.
- The Dwarfs: the youngest player becomes the First Player, then in turn order, each player picks a colour and takes the matching 12 meeples (7 dwarfs and 5 special dwarfs), their player board, their starting challenge cards, the 3 book tokens and a heart token.
7.1 Equal or Unique? All dwarfs are skilled miners, but each band has its own specialties. Each player can decide the side they want to use for the game, but we recommend for your first play that all players use the "Miner" side of the player board.
Miner: All dwarfs are miners. Instead of a baby rattle, I got my first pick-axe before I could walk. Like we always say: if it doesn't clang, it doesn't count!
Pro Tip: The miner side of the player board is very adaptable and allows for you to react to the game state more easily. It also gives you a balanced set of special classes with a lot of freedom for experimenting and room to make mistakes.
The Guilds: The guilds side of the player boards allow for min-maxing and exploiting certain mechanics of the game as it changes your regrouping action and the abilities of the special dwarfs you can upgrade.
Runechart Keepers: Their mastery of forgotten knowledge fuels their craft, each new discovery sharpening their tools and empowering their kin.
Pro Tip: Your special dwarfs give you far more research actions, take advantage of this from the very beginning of the game and maximize your advance on the Library board.
Anvil Brotherhood: Forged in fire, the Anvil Brotherhood are natural blacksmiths. Their time in the forges has made them nearly fireproof and quick to haste in battle.
Pro Tip: upgrading both your berserker warrior and king can make you an unstoppable force! But make sure to forge as many healing cards as you can as you will need it...
Tankard Brigade: Their cold ale & warm meals mend more than wounds... The heal spirits worth them by war and toil.
Pro Tip: Take advantage of your improved healing and your special dwarfs abilities to retire cards to become stronger in battle faster!
Gemstone Syndicate: Measure worth by the weight of gold and the shine of gems. Whether mining veins or lending coin, their hoards grow ever larger.
Pro Tip: Upgrade your special dwarfs as soon as possible to increase your gem income then try recruiting monsters that charge gems instead of giving you damage!
7.2 Health: You start the game with 7 health, use a heart token to mark this. Use the health bar to track your health throughout the game. When you lose or gain health move the heart token up or down the relevant number of times. You can never have more than 7 health or lower than 0.
7.3 Workers: Each player places their dwarfs on their player board's campfire spots and the special dwarfs in their stash.
7.4 Ride or die: Each player shuffles their 7 starting allies and places them face down on the right of their player board. This is their challenge deck. Leave room next to your player board for its discard pile.
7.5 Basic Knowledge: Each player places one of their book tokens at the first level on the Library board.
7.6 Bonus Gems: The second player gets 1 yellow gem. 3rd player gets 2 yellow gems, 4th player gets 3 yellow gems. Place these bonus gems next to your player board, this becomes your stash.
Starting last it's not that bad! sometimes you can even get a special dwarf in your first turn or forge an item with your bonus gems...
The blue player decided for the miner side of their player board, then they took all of their dwarfs, their heart token, and starting allies to organize their player area. However, as they are the first player, they will not receive Bonus Gems on step 7.6.
- The Events: To create the event deck, first separate all event cards by type and shuffle them separately, then based on the number of players and the difficulty you want to play, look at the table below and find the number of "S", "D" and "T" type cards you need to add. Choose that many randomly and add them to the Event Deck. Return all unused event cards to the box. You will not have an event active in the first turn of a game.
Stare cards: standard difficult cards. Treasure cards: more of these cards make the game easier. Danger cards: more of these cards make the game harder.
| Players | Easy | Medium | Hard |
|---|---|---|---|
| 1 | 10x S, 6x T, 2x D | 12x S, 4x T, 3x D | 12x S, 2x T, 4x D |
| 2 | 10x S, 6x T, 1x D | 12x S, 4x T, 2x D | 12x S, 2x T, 3x D |
| 3 | 9x S, 6x T, 1x D | 10x S, 4x T, 2x D | 10x S, 3x T, 3x D |
| 4 | 8x S, 6x T, 1x D | 10x S, 6x T, 2x D | 10x S, 4x T, 2x D |
The above are the recommended amount of cards for playing the game in the various settings — Feel free to adjust according to your group's experience level — either making it easier by adding more "T" cards and/or reducing "S" cards, or harder, by adding more "D" cards than the suggested amounts.
Game Overview
Flame & Forge is a worker placement, deck-building, push-your-luck game about marching into a city on flames to raid resources, forge weapons to defeat the Red Dragon who is terrorizing our kingdom! The game ends in victory if you win a battle against the dragon or in defeat if 7 city tiles are scorched.
Player turn: Starting with the First Player and moving clockwise, each player takes their turn until end game is triggered. A player turn is divided into the following phases in order:
Phase 1: Resolve an Event → Phase 2: Draw a new Event → Phase 3: Place a Dwarf → Phase 4: Check for endgame and Pass the turn
Phase 1: Resolve an Event
If there is no active event card, then you skip this phase.
If there are active events, look at the rightmost (top) active event card and find the action on it that will be resolved. To do so, first look at each action's Event Counter and find the one that matches the number of active event cards. For example "1-2" means that this action is executed only if there are either 1 or 2 active event cards.
Next, look at the right of the action. You will see a number of small diamonds. Their count shows which is the target territory of this action:
- If it is 1 diamond, the target tile must be the Outskirts.
- If it is 2 diamonds the target tile must be in the Valley.
- If it is 3 diamonds the target tile must be in the Wastelands.
- The fourth action doesn't have any diamonds, and its target may be any valid territories on the city.
Now that we know the target territory, you need to find the target tile in it. To do that, find the one that has the same building as the one shown in the action. If there is no building in the action but there is a monster icon, then the target tile must have a monster on it.
Once you know the tile you resolve the action icon accordingly: If there are more than one icons in the action, place them one at a time. If there are more than one possible target tile, you may divide the icons among the possible tiles as you see fit.
- Fire icon: Place a fire on the target tile. You can't place fire on Scorched tiles.
- Gem icon (yellow/blue/red): Place a gem on the target tile. This gem can be picked up by a dwarf later.
- (Unlockable icons): To be unlocked!
Anytime you are placing fire on a tile
If there is a monster on the tile: the monster is defeated and is added to the Dragon's horde (the dragon will score them at the end of the game), then resolve the top card of the Reaction deck.
If there is a Dwarf on the tile: Dwarfs entering a tile with fire will take damage, however if there is already a dwarf in the tile, they will not take damage from the added fire.
If this is the 3rd Fire on the tile: if at any point a tile has 3 fires on it, it gets scorched. Immediately discard the 3 fire tokens and flip the tile to it's scorched side. If there are any gems or the cart on the tile, they remain on the scorched side. If at any point you have 7 scorched tiles in the city, you lose the game.
If the target tile is Scorched already: You can't place fire tokens on Scorched tiles. If a scorched tile is the only valid place to place fire, ignore the fire icon.
When a tile gets it's third fire token it's now scorched! Remove the fire tokens and flip it to the scorched side.
Phase 2: Draw a New Event
Draw and reveal the top card from the Event Deck. Place the newly revealed Event card in the rightmost slot of the Event pile. Unless you manage to Discard this event during your turn this event will be resolved before the next player takes their turn.
Make sure to leave enough space so the conditions to discard an Event remain visible as you may discard as many events as you are able to during your turn.
BEWARE! Events can pile up really fast and having 7+ events active will lose you the game very quickly. Plan your moves ahead so you can clear 2-3 events after every couple of actions you take.
Phase 3: Place a Dwarf
Your main action consists of you choosing one of your dwarfs from your campfire and placing it on a free spot either on your player board (Regroup) or on a valid city tile (City Raid). However, if you are at zero health you cannot place a Dwarf from your campfire to a city tile, instead you MUST perform a Regroup action.
City Raid: Take a dwarf from your campfire and then place it on the leftmost empty spot of the chosen tile and then resolve it, provided you follow the rules below:
The first of your dwarfs on a City Raid must be placed on the bottom line of the outskirts, on future turns the next dwarf you place must be adjacent to the top tile where you already have a dwarf but one line above, closer to the Dragon's Castle. You can't place other dwarfs in the same line, move a dwarf or place a dwarf on a tile below.
The Dragon's Castle is adjacent to all 3 upper tiles in the Wastelands.
In two players only: instead of placing the dwarf in the leftmost empty spot, place it on the leftmost empty spot with an available action to constrict you.
To resolve a raid, after placing your dwarf perform the following in order:
- First you perform your special dwarf's ability (if applicable).
- Then immediately take one damage per fire on the tile. For each damage you took this way, remove one fire token from the tile. For example if you only have 1 health left and there are 2 fire tokens, you take 1 damage and remove 1 of the fire tokens from the city tile. You still resolve everything else on the tile even if your health just became zero.
- Finally resolve the tile actions in any order you choose:
- When resolving the tile's spots, you perform all action one at a time left to right, starting from the spot you just placed your dwarf on. If a spot has an action on it and it doesn't have a dwarf from another player, you perform the action.
- Pick up Gem tokens on the tile.
- If there is a monster present on the tile, you may choose to challenge it. Read the 'Resolving a Challenge' rules on page 13 for more information.
In this example, the blue player place dwarf from their campfire to the yellow gem's spot. As there's fire on the tile, they will first lose 1 health, and remove the fire token. Then they will gain 1 yellow gem and 1 blue gem. They do not gain the yellow gem as that is covered by the red player's dwarf.
...During their next turn, the blue player could either place a dwarf on the tavern to heal or go challenge the monster at the blacksmith. They decided to go challenge, but first they went and got a yellow gem and spent their gems to forge a weapon!
Through the course of 7 turns the blue player raided the city all the way to the dragon castle! He could have get there a bit sooner if they had the King!
Regroup: Place a dwarf from your campfire on the leftmost free spot on your player board, following the rules below in order:
First resolve the special dwarf ability (if applicable).
Then perform the action of the spot you placed the dwarf on and the rest of the available actions on the right of this spot.
The blue player chooses to place their dwarf on their player board. They place the dwarf in the first left-most free spot, and they execute all the actions left to right, getting a red gem, a blue gem and finally healing by 1 point.
Retreat: If you do not have any dwarfs in your campfire to play, OR if you have no possible placements left, then, BEFORE you take an action, you must first retreat. Retreating does not count as an action, you will still resolve your action afterward normally. When you retreat perform the following in order:
- Return all of your dwarfs to your campfire. Be careful and to NOT move other player's dwarfs on city tiles you remove dwarfs.
- Perform the top level of your campfire action and/or your advanced research action if they have the campfire icon.
- keep a max of 7 gems in your stash. If you have more, you choose and discard until you have 7.
The blue player used their last dwarf, their king, to raid the castle and challenge the dragon. While they didn't win, their King gave them a haste action, but as all of their dwarfs are already out, they first retreat all of their dwarfs to their campfire. So they placed their king again on a regroup action getting a final haste action.
Later on, somehow the blue player regrouped 3 times and then got to ZERO health in a challenge, as they have no more possible moves, their next action will start with a Retreat and then they may place a dwarf afterward.
Haste: If, when you placed a dwarf you gained haste, first resolve the current actions completely and only afterward place a new dwarf. Resolve in the extra "Place a dwarf" exact same way, this action may even award you Haste again and you may do this multiple times if able but you need to fully resolve one bonus action before performing the next one.
Actions Overview
The following actions are the most common in the game and you may resolve them often, either when you place a dwarf to go on a raid, regroup or retreat, during a challenge or as pending actions after a challenge, etc. While some of these actions are more complex and will be explained in greater detail later, we included their abridged version here in case you have questions while resolving your first few Challenges.
- Gem icons (yellow/blue/red): Take the relevant gem from the supply.
- Heart icon: Gain 1 Health.
- Tankard icon: Retire a card from your deck or discard pile.
- Anvil icon: Spend gems to Forge an Item. You may refresh the market once before you Forge.
- Upward arrow with gem icon: Spend a gem to perform a research action and/or exchange gems.
- Bow and arrow icon: Challenge any monster on the city or the dragon!
- Meeple with upward arrow icon: You may upgrade one of your dwarfs to a special dwarf from your stash.
- Fire icon (grey): Remove a fire token from either the current city tile, or any tile adjacent.
- Red footprint icon: Can be placed in any tile of the next line on a city raid not needing to be adjacent.
- Grey meeple with up arrow: Place (and resolve) one additional dwarf after you complete resolving this one.
- Axe icon: Adds one success to a Challenge.
- Red burst icon: You must take one damage immediately.
- Gem exchange (red arrow) icon: Spend the gem to perform the actions. If you don't have the gem, lose 1 health to perform the actions.
Resolving a Challenge
When you start a challenge against a monster or the red dragon, reveal cards from your challenge deck, one at a time, until you either decide to: abandon the challenge or you pass out by dropping to 0 health or defeat the adversary.
When you reveal a card from your challenge deck, you MUST resolve from left to right ALL symbols on it.
If you need to pay a cost for an action and you do not have the exact gem type, then you take 1 damage instead and still perform the actions on the card.
Pending actions: If an action has a small hourglass at their bottom then this icon is resolved after the end of the challenge and only if you survived it (either if you win it or if you flee) but NOT get these actions is you drop to 0 health.
If you do not have any more cards left, but there are cards in your discard pile, you shuffle your discard pile, create a new challenge deck and continue drawing.
The blue player challenged the monster and needs 4 successes to win this challenge. Their first card gives them 2 successes but also requires them 2x Battle Frenzy... They draw two extra cards to pay the Battle Frenzy and win the challenge!
Battle Frenzy: If a card requires you to play a Battle Frenzy card, then you place the revealed card in a separate pile. You MUST keep drawing cards until you satisfy all Battle Frenzy requirements, even if you have dealt enough damage to defeat the adversary. The only time you are allowed to not satisfy the Battle Frenzy requirements is if you have no more cards to play.
A challenge ends one of three ways:
You flee: you decide to abandon the challenge while still having at least 1 health and you do not owe any battle frenzy cards. Resolve all the pending actions in cards that you played then move all the cards you used during the challenge to your discard pile.
You passed out: Your health reaches zero, in which case you immediately lose the challenge (even if you scored enough successes to defeat the monster). All cards you played are moved to your discard pile without resolving pending actions.
You Won: You have at least 1 health, you scored enough successes to overcome the adversary and you do not owe any battle frenzy cards. This means that you won the Challenge! The challenge immediately ends and you now add the monster card to Challenge discard pile. If possible, remove one active event card that has a discard condition Win a Challenge. If there are more than one such events active, you choose which one to discard. Gain one Health per Event you discard back to the bottom of it's deck. You also need to immediately draw the top of the Dragon deck and resolve it. Then finally you may resolve all the cards that you played and then move them to your discard pile.
Add the defeated monster to your discard pile. Then resolve any pending actions. Discard resolved events to the bottom of the event deck. Gain one health for each event discarded this way. Draw and resolve a Reaction card placing a new monster in the territory.
WARNING: You do NOT shuffle your challenge deck at random. You shuffle ONCE during setup, and then, during the game, ONLY when you resolve a Retire action or you run out of cards during a challenge. In this case you shuffle your attack's deck discard pile to create a new challenge deck, and keep on fighting. Your discard pile is open information but not your deck.
Forge
When you perform a forge action, choose an item from the market and pay its cost to acquire it. If you are not interested in any of the available items, you may refresh the offer once placing all items in the bottom of the deck and revealing new ones.
To forge you need to spend the exact gems that match it's cost from your stash. You can NOT exchange gems during a forge action, so make sure you have the ones you need. When you forge an item, take the card and place it in your discard pile. Immediately draw a new item from the top of the market deck and place it face up refilling the empty spot in the offer.
Using their pending forge action from the outcome of the previous challenge the blue player decided to try to clear as many events as possible. Out of the 3 items, they only have the gems to afford the helmet, but it's actually perfect. So they spend a yellow, a blue and a red gem to forge it!
For each gem that is part of the forging cost, discard one matching Event. You do that whether you paid the gem from your stash or if you got a multicolor gem as a bonus for an action. If there are more than one valid options, you choose which event to discard. Gain one Health per Event you discard back to the bottom of it's deck.
Discard the required gems to forge the item... Then add the item you forged to your discard pile... For each gem on the item cost discard one matching event to the bottom of the event deck. Gain one health for each event discarded this way.
Retire
When you perform the retire action, combine your discard pile with your challenge deck, then choose any one card to retire, and place that card face up under your playboard's right side. After you finish retiring your card, you can shuffle your challenge deck and place it face down next to your player board, ready for the next challenge to begin!
Based on the number of cards you retire you also gain extra victory points at the end of the game:
- 0-4 cards: 0
- 5 cards: 3
- 6 cards: 4
- 7+ cards: 5
You can maximize the effectiveness of your deck, by removing cards that are weaker or deal more damage to you and keeping cards that align with your strategy!
Research
When performing a research action you can spend one gem matching the funding cost to advance one of your book tokens to the next step on the research subject.
For each Research action you may also transmute gems using any one of the exchange rules shown at the bottom of the Library's board.
For this example Blue player raided the library on the wastelands and got 3x Research library actions! At that point they had 2x yellow gems and 3x blue gems in their stash.
In their first research action they decided to spend one yellow gem to advance on the Legends track upgrading one of their dwarfs in their campfire to the alchemist.
In their 2nd research action they spent one blue gem to advance on the Healing track. From now on, every time their dwarfs retreat they will heal by two.
For their final research action they transmute a blue and a yellow gem into a red gem to advance on the relics track immediately forging one item for free!
The Library board has three tracks: Legends, Relics, and Healing, each with its own gem funding cost per step.
Legends Track
When you advance in the Legends track you study the stories of the heroes of the past, their legendary feats and almost supernatural abilities, these stories, eventually will inspire new heroes.
Once you reach a spot with a upgrade a dwarf action in the Legends track, immediately replace one of the dwarfs in your campfire for one of the special dwarfs in your stash. Each time a special dwarf raid the city or regroup they will perform their bonus action before resolving the tile. The below examples are based on the miner side of the player boards:
- Guardian: Increase your Health by 3.
- Alchemist: perform a research action.
- Dragonrider: Can raid on any tile on the above line, not needing to be placed adjacent.
- Warrior: Adds one success for a challenge and removes two adjacent fire tokens.
- King: gives you a haste action to be resolved after you fully resolve his actions.
Relics Track
When you advance in the Relics track you study the lore on mythic artifacts and magical weapons.
Once you reach a spot with a forge icon in the Relics track, immediately perform a forge having one ore more multicolor gems for free. This bonus is immediate and will not affect items you forge in the future. However, items forged this way may Discard events as normal.
The blue player got a forge action and 3 multicolor gems... They forge this sword for free and add it to their discard pile... For each gem on the item cost discard one matching event to the bottom of the event deck. Gain one health for each event discarded this way.
Healing Track
When you advance on the Healing track, you study medicine, potions, and concoctions becoming far more capable of treating injuries.
Once you reach a spot with a campfire icon in the Healing track you now improved your camp, from now on, every time their dwarfs retreat they will heal based on the topmost ability you have in this track plus any advanced research token if applicable.
The blue player now heals 2 every time they retreat.
Advanced Research
Knowledge is power. Once you reach the peak of a subject, it's time to write your own grimoire.
When a player reaches the top level of a research subject, they draw the top 3 tokens of that subject then choose one to keep and place the rest at the bottom of its pile. The token they chose goes on the appropriate slot on their player board and can be used once a turn given the right circumstances. When they do so, they resolve the book actions and then flip it face down on their player board to mark it as used. This token will flip face up at the beginning of their next turn.
Peak 3 tokens... And choose one placing it on their player board... From now on, every time they place a special dwarf in a city raid or regroup they may flip this tile to get an extra blue gem!
If a player manages to acquire more than one such tokens, they choose one of them to keep active on their player board and the rest remain in their stash. A player may switch the active advanced research token any time their dwarfs regroup or retreat.
Phase 4: Check for Endgame and Pass the Turn
During this phase, check the following in order:
Was the dragon defeated this turn? If yes congratulations, you all win! The game ends immediately. Proceed to endgame scoring to see how well you did. If not, continue.
Are 7 city tiles scorched? Oh no! the city is destroyed and you lose the game. But don't worry... we'll defeat the beast next time! If not, continue.
Otherwise: There's still time to fight! Pass the turn to the next player in clockwise order.
End Game Scoring
When the game ends, if you managed to win the Dragon's challenge, then you calculate your team's and the dragon's points, calculate the difference and find out how well you all performed.
To calculate the Dragon points do the following:
Destruction: First count how many scorched tiles exist in the city. Add 1 point per scorched tile to the Dragon's total.
Followers: Then add to the Dragon's total the Victory Points of each Monster in his horde.
Rivals: Finally multiply the total with the number of players. That's the Dragon's score.
Total Dragon's points: (6+4)x4= 40 points
Each player calculates their personal score by adding:
Strength: Add all the VP from cards in their Challenge Deck.
Prestige: Add the highest VP amount reached for each research subject in the library to your score.
Hoard: Transmute all the gems in your stash to red ones using the Library's exchange rules. Score 1 point per red gem you end up having.
Glory: Add the VPs & Bonus for the cards your Retired.
Fame: If they were the one that defeated the Dragon, then they also add the Dragon Challenge's Victory Points.
Blue Player points: 32 points
To find the total score for the Dwarf team, add all the players' scores together and then subtract the Dragon's score, this gives you your final total score. Check the table on the right to find out how well you did.
| Rank | Score range |
|---|---|
| Rookie | 0 to 10 |
| Guardian | 10 to 20 |
| Warrior | 20 to 30 |
| King | 30 to 40 |
| Hero | 40+ |
Before the Fall
Long ago, dwarfs ruled these lands. Our kingdoms were grand, our craft unmatched, and our rivalries... legendary! And we had dragons! We fed them, raised them, and trained them for every kind of work. At the time, it all sounded great. Who wouldn't want to ride to school in a flying wagon, or roast sausages in seconds? Dragons even made evicting ogres remarkably easy: one blast of fire and problem solved! True, you might need to rebuild a house afterward—but such is life.
Then, one fateful day, everything changed. No one knows the reason, but a red dragon larger than a mammoth descended on a dwarf settlement and reduced it to ashes. It spared only the gems. Worse still, with every raid its hunger grew — and so did it — each battle making it bigger, until the Dragon was vast as a mountain.
One by one, the kingdoms fell, and with each victory the Dragon's hoard grew beyond imagining. Facing their inevitable end, the last surviving dwarfs hid deep into the crystal mines, sealing themselves away to endure the dark, waiting for the day they would rise again and reclaim what was once ours.
Scenario 01 - The Dragon Sleeps
They say the hoard of a thousand kingdoms sits inside the castle. And the beast? Asleep on top of it, snoring through the last few weeks, at least according to our scout's latest report. If there was ever a perfect moment to join forces and strike, it's now.
I know what you'll say: it sounds too good to be true. But we need a win. The last few years have been rough, and those of us still fighting aren't getting any younger. So I sang to the runestones and called on the other guilds. It's time to walk the abandoned paths and raid the ruins of our once-great city for resources before our glorious battle. The forges will be lit once again, and the weapons reforged.
The plan was simple: sneak in, stay silent, strike fast. Step one went great... Right up until a helmet rolled downhill like a runaway barrel and the loudest dwarf chased it yelling: "COME BACK, YOU COWARD!"
Additional Rules
Bored Beast: Place the "12 strength" token on the Castle. For this scenario, every time a player places one of their dwarfs in the dragon's castle, they will take one damage AND get one automatic success.
Sleeping Dragon: Shuffle the 3x "Sleeping Dragon" cards (marked with the number 1) and place them on top of the Dragon cards to create the Retaliation deck.
Well Rested: For the first scenario, all players start with a research token on slot 4 "Heal 2 when you retreat to your campfire".
When You Defeat the Dragon, Open Pack "A"
The dragon was defeated! Or... was it? It almost felt too easy. Either way, we're dragonslayers now.
Dragonslayers: Before the beginning of the game, shuffle the dragonslayer cards and give two to each player, each player then selects one to keep and discards the other back to the game box. Hero cards are one use only. At any moment during the game (even in another player's turn) you may discard your dragonslayer card to perform it's abilities giving the active player it's effects.
In this example, the blue player had only one hp and were likely to lose the fight to the bear even though they needed only one last success to beat it so the red player used their hero card to give them a heal and the final success winning the battle.