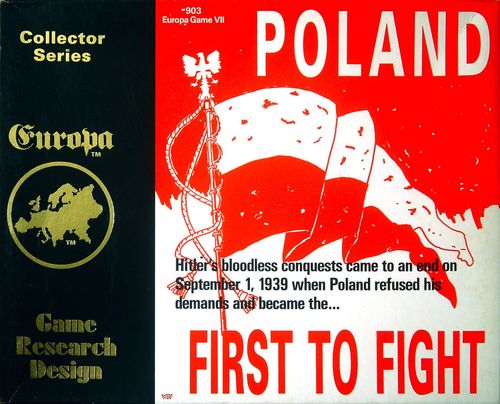
First to Fight
First to Fight Rulebook
Table of Contents
Table of Contents
- Part One: Europa Boot Camp Rules
- Part Two: First to Fight Boot Camp Supplemental Rules
- Appendix: First to Fight Errata and Q&A (13 September 1994)
Part One: Europa Boot Camp Rules
Basic Training
Rule 1 - Introduction
Welcome to Europa Boot Camp. If you are new to the Europa system, these rules will assist you to learn to play an Europa wargame. Since these rules are generic, they can be used with most existing Europa games. While providing much of the flavor of the Europa system, the Boot Camp rules are streamlined and designed to be learned quickly and easily. You will learn the important features of the system, including combined arms, logistics, air power, and the special value of armor. While the Boot Camp rules do not provide as much realism as the standard rules set, remember that the goal here is simply to learn to play an Europa wargame and to have fun. When you are ready for more detail, you can step up to the standard rules and charts for a fuller view of World War II.
When using the Boot Camp rules, start with those listed under the Basic Training section. After you are comfortable with them, add on the rules in the Advanced Training section.
The Boot Camp rules are written to cover as wide a range of Europa games as possible. To play a specific Europa game, use the Boot Camp supplemental rules for that game. These rules contain all the additional information you need for play.
Rule 2 - Components
The components necessary for playing each game (maps, counters, charts, etc.) are specified in the Boot Camp supplemental rules for that game.
Rule 3 - General Game Concepts
Here are some of the basic concepts and definitions used throughout these rules.
A. Units
When the term units is used by itself, it refers to ground units only and does not include naval units or air points. The term forces refers to ground units, naval units, and air points collectively.
Units are differentiated by size and type, as shown on the Unit Identification Chart (UIC):
- Divisional Unit: Any unit with the division, divisional grouping, or corps symbol, except for headquarters. All other units (brigades, regiments, battalions, batteries, cadres, and headquarters) are non-divisional units.
- Artillery: All unit types listed on the Unit Identification Chart as artillery. Note that for game purposes antiaircraft and antitank units are not considered artillery.
- Combat/Motorized: Any unit type listed on the UIC as combat/motorized or which has the motorized symbol (two wheels) used in conjunction with its unit type symbol. Note: Combat/motorized is abbreviated 'c/m' in these rules. 'Non-c/m' refers to units that are not combat/motorized.
(Illustration caption: "This is the 2nd Motorized Infantry Division. It is a c/m unit.")
B. Game Mechanics
- Fractions. Unless otherwise stated, always retain fractions when halving. For example, half of 7 is 3 1/2.
- Cumulative Effects. Unless otherwise stated, all effects to units' strengths and all modifications to die rolls are cumulative. For example, a unit halved in strength twice is quartered in strength.
- Die Rolls. All rolls made using two dice are specifically identified as such in the rules. All other rolls are made using only one die.
- Accumulation. Each player receives various abilities which he may use on a turn-by-turn basis (such as moving units by rail). These abilities may not be accumulated from turn to turn unless the rules specifically allow them to be accumulated.
C. Ownership
A player owns a hex if: 1) his units occupy the hex or 2) his units were the last to occupy the hex.
D. Major City
A major city is any partial hex, full hex, or multi-hex city. A major city hex is any hex of a major city.
E. Sides
- Axis. The Axis player controls the forces and owns the territory of the Axis nations in the game.
- Allied. The Allied player controls the forces and owns the territory of the Allied nations in the game.
- Neutral. Some nations are neutral and are controlled by neither player. A nation that joins one side during play has its forces controlled and territory owned by that side's player.
Rule 4 - Sequence of Play
The game is played in a series of game turns. Each game turn consists of a first player turn followed by a second player turn.
A. Sequence
Each player turn consists of the following phases:
- Initial Phase. The phasing player receives reinforcements and replacements. Both players determine the supply status of their units.
- Movement Phase. The phasing player moves his ground units.
- Air Phase. Players allocate bomber and fighter points.
- Combat Phase. The phasing player resolves attacks made by his units.
- Exploitation Phase. The phasing player may move his c/m units again.
B. Phasing
During the first player turn, the first player is the phasing player and the second player is the non-phasing player. During the second player turn, these roles are reversed.
C. Restrictions
Unless otherwise noted, activities may not be conducted outside this sequence. The activities mentioned above are explained in detail in the rules which follow.
Rule 5 - Zones of Control
The zone of control (ZOC) of a unit represents the control a unit exerts over the surrounding terrain. ZOCs affect many activities in the game, as covered in the appropriate rules.
Only divisional units have ZOCs. A unit's ZOC is exerted through the six hexsides of the hex the unit occupies into the six surrounding, adjacent hexes. A unit prohibited from entering a specific terrain type or crossing a specific type of hexside does not exert a ZOC into that hex or through that hexside. For example, no unit exerts a ZOC through an all-sea hexside.
Rule 6 - Movement
A. General
Any or all phasing units may move during the movement phase. A unit's movement rating is the number of movement points (MPs) the unit may normally spend in a movement phase. A unit may move up to the limit of its movement rating, as restricted by terrain, ZOCs, and supply. The phasing player moves his units voluntarily; a unit is never required to move.
Each unit spends MPs as it moves from hex to hex. It spends a varying amount of MPs for each hex entered; this MP cost depends upon the type of terrain in the hex being entered and, in some cases, on the type of terrain of the hexside being crossed. The movement effects column on the Terrain Effects Chart states the MP costs for the various terrain types. The MP cost to cross a hexside is in addition to the cost to enter a hex; it is indicated by a plus sign (+) in front of the cost. The notation "prohibited" means that type of terrain may not be entered or crossed by a unit (such terrain is called "prohibited terrain").
A unit must stop as soon as it enters an enemy ZOC and may move no further that phase (Exception: Advanced Rule 13 - Overruns). Note that a unit that starts its movement in an enemy ZOC may move directly from one enemy ZOC to another enemy ZOC, but must then stop immediately.
There is no movement point cost to enter or leave an enemy ZOC.
In general, a unit may not enter a hex occupied by an enemy unit. Exceptions to this are covered in the appropriate rules.
A unit may always move a single hex (except into or across prohibited terrain) in a phase in which it may move. The unit may enter an adjacent hex, even if the cost to enter the hex exceeds the number of MPs the unit has available that phase or if the unit is moving directly from one enemy ZOC to another. The unit must then end its movement.
A unit with a movement rating of '0' may not move from the hex it occupies for any reason. If forced to retreat due to a combat result, it is eliminated instead.
Overruns (Advanced Rule 13) may occur during movement. Special forms of movement, such as rail movement, are covered in separate rules.
Weather may affect movement and is covered on the Terrain Effects Chart or by special weather rules contained in the supplemental rules for each game.
B. Exploitation
In the exploitation phase, all phasing c/m units are allowed to move again, following the movement rules presented in Rule 6A above. C/m units begin this phase with a full movement allowance (as modified for supply) and may move normally, including conducting overruns. They may use road movement. They may not use rail movement. Note that a unit's supply state for the entire player turn, including the exploitation phase, is determined in the initial phase of that player turn.
Rule 7 - Transportation Lines
There are two types of transportation lines: railroads and roads. A unit may use the transportation line movement rate only when moving in hexes directly connected to one another by the line. Both road and railroad movement may be combined with regular movement during the same movement phase. A unit may participate in combat after moving on a transportation line.
A. Railroads
All units pay 1/5 MP per hex to move by railroad. A usable railroad consists of friendly-owned, connected rail hexes. Units moving by rail must stop upon entering an enemy ZOC; units moving by railroad may not move through enemy ZOCs. The number of units a player may move by railroad per turn is specified in the supplemental rules for each game.
Some games have high and low capacity rail lines. Both types are "railroads" in the Boot Camp rules and do not differ from one another.
B. Roads
A unit moving along a road pays the MP cost for clear terrain for each hex it enters; the actual terrain costs for hexes entered and hexsides crossed are ignored. Movement along a road is subject to the same limitations as regular movement. For example, a unit moving along a road must stop upon entering an enemy ZOC.
Roads may be used in both the movement and exploitation phases.
Each railroad may also be used as a road. So, even when a unit is prohibited from using a railroad in a hex, it may still use the rail line there as a road.
Movement Example: In clear weather an 8 MP cavalry unit enters a woods hex across a minor river hexside (3 MPs = 2 MPs for the woods hex and +1 MP for crossing a minor river hexside), then a wooded-swamp hex along a road (1 MP = same as clear), and then a forest hex (2 MPs). Although the unit has 2 MPs remaining, it decides to voluntarily end its movement in the forest hex.
Rule 8 - Stacking
A. Stacking Limit
Only a limited number of units may stack in a hex. Up to six units of any type (including artillery), no more than three of which may be divisional units, may stack in a hex. In addition to these six units, two non-divisional artillery units or one artillery division may also stack in the hex. So, the maximum possible stacking limit is eight units in a hex.
B. Effects
Units may not voluntarily end any phase, except the initial phase, in excess of the stacking limit. If, as a result of combat, a unit is forced to retreat in violation of stacking, it must continue to retreat until the stacking limit is no longer violated. If it cannot do so, it is eliminated instead. The stacking limit is not in effect at the end of the initial phase (i.e., over stacked reinforcements and replacements are not eliminated before they have a chance to move).
Rule 9 - Combat
During the combat phase, the phasing player's units may attack adjacent enemy units. However, no unit may attack into or across terrain prohibited to that unit. Attacking is voluntary; units are never required to attack.
A. Combat Procedure
- Modify the attack (combat) strengths of all units attacking into an adjacent enemy-occupied hex due to terrain, weather, supply, and support as appropriate. Total the attack (combat) strengths involved, and add any offensive air support bomber points to the total.
- Modify the defense (combat) strengths of all units in the attacked hex due to supply and support, as appropriate. Total the defense (combat) strengths involved, and add any defensive air support bomber points to the total.
- Compare the total attack strength to the total defense strength in the form attacker:defender to obtain a combat ratio. Round this ratio down in favor of the defender to correspond to a combat odds ratio on the Combat Results Table. For example, an attack strength of 34 attacking a defense strength of 9 is 34:9, which rounds down to 3:1.
- Roll one die, and modify the number rolled by any terrain effects and by any special effects (such as armor effects). Cross-index the adjusted die roll with the odds column to obtain a combat result. The combat result affects the units involved in the combat; implement it immediately.
B. General Restrictions
- No unit may attack or be attacked more than once per combat phase.
- All units defending in a hex must be attacked collectively, with their defense strengths combined. Units in a hex may not be attacked individually.
- Each attack must be directed against the units occupying a single hex. Two or more enemy-occupied hexes may not be attacked in a single attack.
- Units stacked in the same hex may attack into different hexes, but each hex attacked must be resolved as a separate combat.
- A single unit may not split its attack strength so as to attack more than one hex.
- The attacker determines the order in which the attacks are resolved.
- Any attack at odds in excess of the highest odds on the Combat Results Table (CRT) is resolved at the highest odds on the table. Any attack at odds less than the lowest odds on the CRT is an automatic AE (attacker eliminated) result.
C. Combat Results
Consult the Boot Camp Combat Results Table for an explanation of the potential combat results.
D. Losses
All combat losses are calculated using the printed strengths of the involved units. Terrain, weather, supply, and support may modify strengths for combat resolution, but these factors are not considered when assessing losses. When determining losses, always use the attacker's attack strengths and the defender's defense strengths.
Bomber points may aid units in combat. However, the bomber points are not included when determining combat losses. Bomber points themselves are never affected by ground combat resolution.
E. Cadres
Various divisional units are able to take losses in combat and remain in play at reduced strengths. These units have cadres printed on the backs of their counters. When such a unit is eliminated in combat, it is reduced to its cadre instead of being removed from play. When calculating the total strength loss in a combat, the strength of a divisional unit reduced to a cadre is counted fully. For example, a 7 strength point division reduced to a 3 strength point cadre is counted as a strength loss of 7, not 4.
F. Movement After Combat
- Retreats. When a unit is required to retreat, the owning player must move it one hex away from the hex it occupied during combat. A unit must be retreated in accordance with the following priorities: 1) to a hex not in any enemy ZOC and not in violation of stacking; 2) to a hex not in any enemy ZOC, but in violation of stacking; 3) to a hex in an enemy ZOC (regardless of stacking). When a unit violates the stacking limit, it must continue to retreat, in accordance with the above priorities, until the stacking limit is no longer violated. If it cannot do this, it is eliminated. A unit which retreats to a hex in an enemy ZOC is reduced to a cadre; if it does not have a cadre (or already is a cadre) it is eliminated. A unit with no retreat route except into or across prohibited terrain or into an enemy-occupied hex is totally eliminated, even if it has a cadre.
Defending units which retreat into a friendly-occupied hex which is subsequently attacked in the same combat phase contribute nothing to the defense of the hex. These units are affected by all combat results achieved against the hex, but their combat strengths are not counted at all for any exchange purposes.
German c/m units (only) may ignore enemy ZOCs when retreating if they retreat to a friendly-occupied hex. If they retreat to a hex unoccupied by friendly units, they are affected by enemy ZOCs as normal.
Note: Only German c/m units have this special retreat ability. All other units, including units stacked with German c/m units, do not have this ability.
- Advances. Advance after combat is voluntary. If an attacked hex is cleared of defending units, the attacking units may occupy the hex, up to the stacking limit. The advance must be performed immediately upon resolution of the attack, before any other attack is resolved. Defending units may not advance after combat.
G. Zero Strength Units
A unit with an attack strength of 0 may not attack by itself. It may voluntarily be included in an attack made by other units, whereupon it is affected by the results of the attack (including advance after combat). A unit with a defense strength of 0 is automatically eliminated when attacked, unless it is stacked with at least one unit with a defense strength greater than 0.
H. Terrain Effects
The terrain of the defender's hex and the terrain of the hexside across which an attack is made may affect combat resolution. The combat effects column on the Terrain Effects Chart summarizes these effects. The references to AEC refer to armor capabilities, as explained in Rule 10. Terrain is rated by its effect on units attacking into such a hex or across such a hexside. Die roll modifications (e.g., -1) apply to the die roll used to resolve the attack.
Rule 10 - Armor Effects
All divisional c/m units have Armor Effects Capability (AEC) and provide an AEC bonus in combat. For each attacking divisional c/m unit, the attacker adds 1 to the die roll, up to a maximum of +4. For each defending divisional c/m unit, the defender subtracts 1 from the die roll, up to a maximum of -3.
Example: An attacker has five armored divisions and two infantry divisions participating in a combat. He gets a +4 die roll modifier. The defender has one armored division, one motorized division, one armored regiment, and an infantry division. He gets a -2 die roll modifier (for the armored and motorized divisions only; the armored regiment is not counted for purposes of AEC). The net AEC effect on the die roll will be +2 (i.e., +4 - 2 = +2).
AEC bonuses may only be used in clear and frost weather. Note that AEC bonuses are cancelled by some terrain types, such as swamp. Note: ATEC (Antitank Effects Capability) is not used in the Boot Camp rules.
Rule 11 - Support
All units possess an intrinsic combat ability as given by their printed combat strengths. However, some units, termed 'unsupported' units, are unable to use their strengths fully due to lack of supporting arms. Most units have supporting arms:
- All divisional units.
- All artillery units.
- All units with a supported symbol (a dot) in the upper left hand corners of their counters.
All other units are unsupported. An unsupported unit has its combat strength halved as long as it remains unsupported.
Units with supporting arms may provide support to unsupported units. When defending, any of the three types of units with supporting arms provide support for all units stacked with them. When attacking, the unit providing the support must participate in the same attack as the units it is supporting, as well as being stacked in the same hex with them.
Rule 12 - Supply
The effectiveness of units is affected by supply conditions. Units operate to their full extent if they are in supply; they operate less effectively if they are out of supply.
A. Supply Lines
The supply condition of a unit is determined by the tracing of a supply line. A supply line may not be traced into a hex occupied by an enemy unit, into a hex in an enemy ZOC unless the hex is occupied by a friendly unit, into a prohibited terrain hex, or across a prohibited terrain hexside.
B. Tracing Supply
The supply status of all units of both sides is checked during the initial phase of each player turn, after any reinforcements or replacements appear. Units out of supply at this time are out of supply throughout the entire player turn.
A unit is in supply if an overland supply line can be traced from the unit to a supply source, or to a friendly railroad or road that leads any length to a supply source. An overland supply line may be 7 hexes in length in clear weather; 3 hexes in length in mud, rain, poor, or winter weather; and 4 hexes in length in snow or frost weather.
(Illustration: "An Example of Tracing a Supply Line." The German 1st Pz XX (9-10) traces a supply line seven hexes to a railroad which is connected by friendly-owned rail hexes to a friendly supply source. Overland hexes are numbered O-1 to O-7, followed by rail hexes marked R, leading to the supply source.)
C. Supply Sources
Each side has its own supply sources, as listed in the supplemental rules. A supply source may be used only by its own side, and only if that side owns it.
D. Effects
A unit in supply has its full combat strength and movement allowance available. A unit out of supply has its combat strength and movement rating halved.
You have just completed Basic Training. You may now move on to the supplemental rules and play a game of Europa. When ready, return for Advanced Training.
Advanced Training
Rule 13 - Overruns
Overruns may occur during the movement and exploitation phases. The phasing player performs an overrun by moving units into a single hex adjacent to the enemy units to be overrun; the overrunning units may not exceed the stacking limit of this hex. The overrunning units must have a total attack strength sufficient to achieve 10:1 odds or more against the enemy units being overrun. Overrun odds are computed in the same way that combat odds are, taking all terrain, weather, supply, and support modifications into account, including hexside effects. For example, non-artillery units would be quartered when performing an overrun across an unfrozen major river hexside. Special Case: Offensive and defensive bomber points are ignored for overrun purposes.
All units performing an overrun must be able to enter the hex being overrun; each overrunning unit must spend 2 extra MPs for the overrun, plus the MPs normally required to enter the hex.
Units performing an overrun may ignore the ZOCs of units in the hex being overrun. However, they may not ignore the ZOCs of other enemy units, and must stop immediately when entering the ZOC of an enemy unit that is not being overrun.
Enemy units in the hex being overrun are completely eliminated and removed from play (even if they have cadres).
The units performing an overrun must enter the hex being overrun. They may continue moving if they have sufficient MPs remaining and are not in an enemy ZOC. If they are in an enemy ZOC, they must stop moving unless they or other friendly units overrun the enemy unit exerting the ZOC.
In both Example #1 above and Example #2 at the top of the next column, the German 1st Pz XX overruns the Polish 44th Inf cadre. In both examples, the 1st Pz XX must enter the hex containing the 44th Inf cadre and end its movement, as it will be in the ZOC of an enemy unit (8th Inf XX) not being overrun.
(Illustrations: Example #1 shows a German 1st Pz XX 11-6-10 adjacent to a Polish 44th Inf cadre 1-6 hex, with a Polish 8th Inf XX 6-6 in an adjacent hex; ZOC hexes are marked. Example #2 shows the same overrun made directly from one enemy ZOC to another.)
Note that overruns may be made directly from one enemy ZOC to another provided that all the overrunning units begin the phase adjacent to the enemy hex being overrun and have sufficient MPs to enter the hex, including the 2 additional MPs for the overrun. An example of this case is shown in Example #2 above.
A unit with insufficient MPs to pay the full MP costs to enter the hex being overrun may not participate in the overrun, even if it has not moved at all in the phase.
Overrunning units may use the road movement rate when executing an overrun if all other considerations for road movement are met.
Rule 14 - Special Rules
A. Engineers
- Construction Engineers. Construction engineers and other construction units have a variety of construction abilities, as described below.
A construction unit may build a fort in any hex, except one already containing a fort or fortress. The construction unit begins building a fort during its initial phase and must be in supply. (Place a fort counter on the unit to show the construction.) It takes one game turn to build a fort in clear or rough terrain and two game turns to build a fort in any other terrain. For example, if a fort in a woods hex is begun during the Axis initial phase of the Sep I 41 turn, it will be completed in the Axis initial phase of the Oct I 41 turn. (When completed, place the fort counter at the bottom of the stack.) If the construction unit leaves the hex at any time before the fort is completed, the fort counter is removed from the map.
A construction unit may build a permanent air field in any clear, rough, woods, or wooded rough hex (including such hexes containing other features such as reference cities or forts), except one already containing a permanent airfield. A permanent air field is built in the same manner as a fort, taking one turn to build in a clear or rough hex and two turns to build in a woods or wooded rough hex.
a. Weather. Poor weather (mud, frost, winter, poor, rain, and snow) affects construction abilities. All construction costs are doubled. Example: Two turns are required to build a permanent airfield in clear terrain during poor weather.
b. Construction Limits. The number of airfields and forts that a side may build is specified in each set of Boot Camp supplemental rules.
- Combat Engineers. Combat engineers are construction units. Also, when at least two of the units attacking a major city, fortress, fortified hexside, or fort are combat engineers, the combat resolution die roll is modified by +1.
- Assault Engineers. Assault engineers are not construction units. They do have the special combat abilities of combat engineers. In addition, an assault engineer attacking a major city, fortress, fortified hexside, or fort has its combat strength doubled. For example, a 1-8 assault engineer battalion attacking a fort would have an attack strength of 2 and would be counted as one combat engineer unit toward the two necessary to receive a +1 die roll modifier.
- Maximum Modifier. The maximum modifier for combat and/or assault engineer units in combat is +1 no matter how many of these units are present.
- Railroad Engineers. Railroad engineers have no special abilities when using the Boot Camp rules.
B. Divisional Breakdowns
Divisions are not allowed to break down or assemble when using the Boot Camp rules.
C. Rail-Only Units
A unit with a printed movement rating of 'R' may not move except by using rail movement. In combat, it may attack any adjacent hex; however, it may not advance after combat. A rail-only unit required to retreat may retreat only to a hex it could enter using rail movement. If there is no such hex available, the unit is eliminated instead.
D. Fortifications
When an enemy unit captures a hex containing a fort, the fort in the hex is destroyed. Forts may be built during the game by engineers (see Rule 14A1).
Fortresses and fortified hexsides are printed on the maps. When captured by the enemy, the fortification effects of these hexes are immediately and permanently lost. A fortress or fortified hexside may not be built or repaired during the game.
E. Weather
Weather may affect many activities in the game, as covered in the appropriate rules. Rules for determining weather conditions, and any special effects they may have on play, are specified in the supplemental rules for each game.
Rule 15 - Air Rules
A. Air Phase Sequence
Activity within the air phase occurs in the following sequence:
- Phasing Player Bomber Point Allocation.
- Non-Phasing Player Fighter Point Allocation.
- Reduction of bomber points due to fighter point allocation.
- Reduction of bomber points due to AA fire.
B. Bomber and Fighter Points
No air unit counters of any type are actually placed on the map. Instead, the supplemental rules for each game specify the number of bomber and fighter points each player has available. These points may be used by that player in each of his turns.
Transport air units and gliders are removed from play when using the Boot Camp rules.
C. Air Concepts
- Allocation. A player allocates his bomber points during his air phase. He allocates his fighter points during the enemy player's air phase.
- Bomber Points. A player allocates his bomber points to specific hexes as offensive air support (OAS) or defensive air support (DAS) during his Air Phase. Each bomber point allocated as OAS adds 1 to a player's attack strength against the designated hex during the following friendly combat phase. Each bomber point allocated as DAS adds 1 to a player's defensive strength in a predesignated hex during the following enemy combat phase. Suggestion: Write down the allocation of bomber points for reference.
OAS may never contribute more than the printed attack strength of the attacking ground units. DAS may never contribute more than the printed defense strength of the defending ground units. Additional bomber points may be allocated to anticipate reductions due to enemy fighters and/or AA fire.
Each player has a limited number of bomber points, as explained in section B above. Each bomber point may be used only once per player turn. A bomber point allocated as OAS may not also be allocated as DAS in the same player turn, or vice versa.
- Fighter Points. A player may allocate his fighter points during the enemy's Air Phase to specific hexes to negate enemy OAS or DAS. Each fighter point allocated to a hex negates 1 enemy bomber point.
Each player has a limited number of fighter points as explained in section B above. Each fighter point may be used only once per player turn.
- Losses. Bomber or fighter points are never lost due to combat during the course of the game.
- Weather. Weather has no effect on fighters. In rain, mud, poor, snow, and winter weather, the number of bomber points allocated to a hex is halved. This halving is done after reductions due to enemy fighter points and AA have been applied.
- Terrain. Terrain has no effect on bomber points.
D. Air Reinforcements
Air reinforcements are received in most Europa games. The corresponding increase in the number of bomber and fighter points for each side and when they are available will be listed in the supplemental rules for each game.
- Withdrawals. In some games air power must be transferred to another battle front during the course of the game. The corresponding decrease in the number of bomber and fighter points for each side and when they are no longer available will be listed in the supplemental rules for each game.
- Other. Ignore any air replacements or conversions of air units that may be listed on the various orders of battle.
Rule 16 - Airbases
Major city hexes, dot cities, fortresses, and permanent airfields are airbases.
A. Airbase Capacity
Air points are allocated from airbases. All airbases have a capacity of 10 bomber points and 10 fighter points (i.e., you can allocate no more than 10 bomber points from Base A in your turn and no more than 10 fighter points from Base A in your opponent's turn).
Air points may be allocated from one or more airbases to the same target hex. Air points may be allocated to more than one target hex from the same airbase. Any number of bomber and fighter points may be allocated to a hex, limited only by the number of airbases in range and the total points available.
B. Allocation Range
Bomber points may be allocated to any hex within a 15-hex range of a friendly-owned airbase. Fighter points may be allocated to any hex within a 5-hex range of a friendly-owned airbase.
C. Airbase Capture
Enemy airbases may be captured and used. An enemy airbase is captured when a friendly ground unit gains ownership of its hex. A captured airbase immediately becomes friendly-owned and may be used from the instant of its capture.
D. Airbase Removal
During his turn a player may abandon any of his permanent airfields. Remove abandoned airfields from the map. The airbase capacity of cities and fortresses may never be abandoned or diminished.
Rule 17 - Antiaircraft
Various units and locations have antiaircraft (AA) strengths and are able to reduce enemy air support.
A. Capabilities
- Combat AA Units. A combat AA unit is any unit with the AA symbol, a unit size, and a combat strength. A combat AA unit has its AA strength printed in the upper left corner of its counter.
- Position and Naval AA Units. These units are removed from play when using the Boot Camp rules.
- Intrinsic AA. All fortresses and major city hexes have an intrinsic AA strength of 2 points. All dot cities and permanent airfields have an intrinsic AA strength of 1 point. This AA strength is never lost or diminished, regardless of changes in ownership.
B. Effectiveness
All AA strength points in a hex may fire upon enemy bomber points allocated to that hex. Every strength point of AA negates one enemy bomber point. Note: AA may not be fired against the non-phasing player's defensive air support during the phasing player's turn.
You have now completed Advanced Training. You may again use the supplemental rules and play a game of Europa. When you are ready, you may move on to the standard rules set for a more detailed look at WWII.
Part Two: First to Fight Boot Camp Supplemental Rules
Rule 1 - Introduction
On 1 September, 1939 Germany unleashed a potent surprise offensive against Poland, introducing the world to the Blitzkrieg and igniting World War II in Europe. First to Fight recreates this event using a map superimposed with a hexagonal grid to regulate the movement and placement of cardboard counters, which represent the opposing military forces.
These supplemental and special rules are used when playing First to Fight with the Europa Boot Camp rules set. The supplemental rules supersede any conflicting basic or advanced Boot Camp rules.
Europa is normally played using turns representing a time span of two weeks. First to Fight turns, however, represent a time span of only three days.
Rule 2 - Components
- Rules. Use the Boot Camp rules booklet.
- Orders of Battle, Counters, and Map. Use the Orders of Battle booklet, the counters, and map 37 provided in First to Fight.
- Charts. Use the Terrain Effects Chart and the Turn Record/Map Legend Chart from the standard game. The other charts and tables to be used with the Boot Camp rules are printed on the last two pages of the supplemental booklet (reproduced below).
Rule 5 - Zones of Control (Modification)
Every unit (regardless of size) has a ZOC, except artillery units.
Rule 7A - Transportation Lines (Addition)
The Germans may move no more than 5 units per turn by rail. The Poles may move no more than 3 units per turn by rail. The Soviets may move no more than 3 units per turn by rail, and only along rail hexes in the Soviet Union.
Rule 12C - Supply Sources (Addition)
1. Full Supply Sources
Any and all units of a player may use a full supply source of that player, without restriction. Full supply sources are:
- a. German: Any unisolated, friendly-owned major city in Germany. The city of Konigsberg is also a full supply source for the German player.
- b. Polish: Any unisolated, friendly-owned major city in Poland.
An unisolated major city is a major city that can trace a line of friendly-owned rail hexes to another friendly-owned major or dot city.
2. Restricted Supply Sources
- a. Polish: Up to three non-divisional units or one divisional unit may be considered supplied if stacked in Hel (37:1609) and the fortress is undestroyed.
- b. Soviet: Soviet units are only considered supplied if they can trace a supply line no longer than seven hexes in length to a hex in the Soviet Union which is adjacent to the Polish-Soviet border. Note that Soviet units may not extend this 7-hex supply line by using railroads or roads.
Rule 19 - Special Rules
A. Soviet Intervention
The Soviet Union may intervene against Poland during play. If at the end of any German player turn the two hexes of Warszawa are isolated (see Supplemental Rule 12C) or German-owned, the Soviets may intervene. If this condition is met, the German player rolls one die. On a roll of 5 or 6, the Soviets intervene. An intervention die roll is made at the end of each German player turn that the above condition is met, until intervention occurs or the game ends.
During the game turn that intervention occurs, a special Soviet player turn is inserted, prior to the next Polish player turn. The German player controls and moves Soviet forces during this special turn.
Thereafter Soviet forces move and attack during the German player turn under the direction of the German player.
Soviet forces may only operate in the Soviet Union and Eastern Poland. Eastern Poland consists of all hexes in Poland on or east of the 37:3100 hex column. Soviet forces may not move or attack outside of this area. They may never combine with German forces in combat. Soviet units may not stack with German units.
So long as German units are in Eastern Poland, Soviet units may not attack Polish units. Once Soviet intervention has occurred, no additional German units may enter Eastern Poland. German units in Eastern Poland may leave, although they are not required to do so.
The capture of Lwow, Brzesc-nad-Bugiem, and Polish forts by the Soviet Union is treated for all game purposes the same as capture by Germany.
B. Polish Withdrawal
If, at the start of any Polish player turn, all Polish major city hexes and fortresses are German owned, Polish forces may withdraw into Hungary and/or Romania by moving into any hex of those nations during a Polish movement or exploitation phase. Such units are removed from play.
C. Neutrals
All nations and territories other than Germany, Slovakia, the Danzig Free City zone, Poland, and the Soviet Union are neutral. Note: The Soviet Union is neutral until it intervenes.
Units may not enter a neutral nation. Exception: Polish units may withdraw per Rule 19B.
D. Fortifications
All units (except engineers and artillery) attacking fortresses or across fortified hexsides are halved. There is no AEC bonus for c/m divisions attacking a fort, fortress, or across a fortified hexside.
E. Construction
Forts or airfields may not be constructed during the game.
F. Weather
The weather is clear the entire game.
Rule 20 - Reinforcements
A. Reinforcements
Each side receives new units during the course of the game. Reinforcements are placed on the map during the initial phase of the owning player's turn, in accordance with the instructions on his order of battle. They may move and operate normally on the turn that they are placed.
B. Conversion
The Polish order of battle specifies when the Polish player may convert units, changing them from one type, size, or strength to another. The Polish player may convert the indicated units in any of his initial phases on or after the turn the conversion is specified on the order of battle. He may convert a unit if it is in supply and not in an enemy ZOC. In those cases where two units are required for the conversion, the two units must also be stacked in the same hex. A converted unit may move and attack normally in the turn that it is converted.
Example: In the initial phase of the Polish player turn of game turn 3 (or any turn thereafter) the Polish player may convert 1x 2-6 Inf Cadre 33 and 1x 2-6 Bdr III Wilno to 1x 5-6 Inf XX 33. In order to perform this conversion the two specified units must be stacked together in the same hex, in supply, and not in an enemy ZOC. If all of these conditions are met, remove the two converting units and place the 5-6 Inf XX in their hex.
C. Mobilization
Certain Polish units may mobilize during the game. A Polish division may mobilize if its cadre, as listed on the Polish order of battle, is in play. Simply flip the cadre to its full strength side when the division mobilizes. Unlike converting units, a mobilizing division may be out of supply or in an enemy ZOC. A mobilized division may move and attack normally in the turn that it is mobilized.
Rule 21 - Preparing for Play
Use the Polish Campaign orders of battle printed in the Orders of Battle booklet. Note these modifications to the orders of battle:
- All fortresses and fortified hexsides are considered to be improved.
- Use the rail capacities in Supplemental Rule 7A.
- Ignore references to the Intrinsic AA Chart, German intrinsic defense, and air unit repair.
- Ignore references concerning the placement of air units, using instead the air points listed below.
- Use Option B for the 7th Flieger Division.
- Do not use the German Optional Reinforcements.
The Polish player deploys his units. Then, the German player deploys the Soviet units. Finally, the German player deploys his units, and moves first.
First to Fight Initial Bomber and Fighter Point Totals:
- Poland: 8 bomber points and 8 fighter points.
- Germany: 96 bomber points and 27 fighter points.
- Soviet Union: 12 bomber points and 7 fighter points.
Air Reinforcements and Withdrawals:
- Poland: Turn 3: Increase bomber point total by 2.
- Germany: Turn 3: Increase bomber point total by 3. Turn 6: Reduce bomber point total by 3.
Rule 22 - Victory
A. Game Length
The game starts with the German player turn of game turn 1 and ends when one of the following conditions is met.
- When one player concedes defeat.
- When Poland surrenders. Poland surrenders at the end of any Polish player turn that all Polish major city hexes and fortifications (counters and printed on the map) are German owned.
- At the end of game turn 10.
B. Victory Determination
If a player concedes, the other player is declared the decisive winner.
Otherwise, the victor is determined by counting victory points (VPs). VPs are earned by the Polish player based on his achievements during the game. At the end of the game the Polish player totals his VPs. Compare the total achieved to the following table to determine the winning player and his level of victory.
Victory Point Chart
| Points | Action |
|---|---|
| 5 | Each German c/m division reduced to cadre |
| 5 | Each German c/m cadre eliminated |
| 1 | Each other German c/m unit eliminated |
| 2 | Each German non-c/m division or any Soviet divisional unit reduced to cadre |
| 3 | Each German non-c/m cadre eliminated |
| 3 | Each Soviet division that has no cadre, or each Soviet cadre eliminated |
| 2 | Each Soviet parachute unit eliminated |
| 2 | Per Polish division or cadre withdrawn to Hungary or Romania (up to six) |
| 1 | Per Polish division or cadre withdrawn to Hungary or Romania (over six) |
| 4 | Per turn that Poland has not surrendered (awarded at the end of each turn) |
| 30 |
| Points | Level of Victory |
|---|---|
| 33 or less | German Decisive Victory |
| 34-49 | German Marginal Victory |
| 50-81 | Draw |
| 82-95 | Polish Marginal Victory |
| 96 or more | Polish Decisive Victory |
Charts
Unit Identification Chart (Boot Camp)
Unit types (symbols not reproduced). AEC = Armor Effects Capability (divisional units only).
Combat/Motorized (AEC: Yes for all)
- Tank, Armored (Arm), Panzer (Pz)
- Light Armored/Panzer (Lt Arm/Lt Pz), Recon
- Motorized (Mot), Motorized Infantry (mot Inf)
- Motorcycle (M/C)
- Mechanized (Mech)
- Other Motorized (mot) units (see note 1)
Non-Motorized (AEC: none)
- Rifle, Infantry (Inf)
- Mountain (Mtn)
- Machine Gun (MG)
- Static, National Guard (NG)
- Static Machine Gun (Static MG)
- Fortress (Fort)
- Border, Border Defense, Border Guard (Bdr)
- Naval Troops (Nvl Trps)
- Parachute (Para)
- Air Landing (Air Lndg)
- Cavalry (Cav)
- Antitank (AT)
- Heavy Antiaircraft (hv AA)
- Light Antiaircraft (lt AA)
- Police
- Combat Engineer (Eng) (see note 3)
- Assault Engineer (Aslt Eng)
- Construction Engineer (Cons) (see note 3)
- Railroad Engineer (RR Eng)
- Commando (Cmdo)
Artillery (Arty; AEC: none)
- Field Artillery (Art)
- Siege Artillery (Siege Art)
Notes:
- Units of other types that also have the motorized symbol are combat/motorized. For example, an artillery unit with the motorized symbol is combat/motorized.
- Arty: Artillery.
- Construction engineer unit.
- Divisional units only.
- Division identification appears on the left side of the unit type box; identification of units smaller than a division appears on the right side.
Markers: Permanent Airfield, Fort, Fort (under construction), National Capital.
Unit Size Designations: Divisional units: XXX Corps, XX Division. Non-divisional units: X Brigade, III Regiment, II Battalion, CADRE Cadre.
Counter layout: A ground unit shows its unit size, unit identification, unit type, combat strength and movement rating (e.g. 7-10). A unit with a supported indicator (a dot) shows unit size, unit type, attack strength, defense strength and movement rating (e.g. 4-3-8). A combat antiaircraft unit shows its antiaircraft strength in the upper left, with combat strength and movement rating (e.g. 0-8).
Combat Results Table (Boot Camp)
Ground Combat Results Table
| Die Roll | 1:4 | 1:3 | 1:2 | 1:1 | 1.5:1 | 2:1 | 3:1 | 4:1 | 5:1 | 6:1 | 7:1 | 8:1 | 9:1 |
|---|---|---|---|---|---|---|---|---|---|---|---|---|---|
| -1 | AE | AE | AE | AE | AE | AE | AH | AR | AS | AS | HX | DR | DR |
| 0 | AE | AE |
Note: Die rolls modified above the highest number or below the lowest number on this table are treated as the highest or the lowest numbers respectively. For example, a modified die roll of 9 is treated as an 8.
Explanation of Combat Results
- AE: Attacker Eliminated / DE: Defender Eliminated. Eliminate all affected units: reduce any unit with a cadre strength to its cadre strength; remove from play all other units. Retreat units reduced to cadre.
- AH / DH: Attacker / Defender Half Eliminated. Eliminate units so that at least half of the total strength (attack strength for the attacker, defense strength for the defender) of the affected units is eliminated. All surviving units must retreat.
- AS: Attacker Stopped. The attack is inconclusive; neither side takes losses or retreats.
- AR: Attacker Retreats / DR: Defender Retreats. Retreat all affected units.
- HX: Half Exchange. Eliminate the side with the lower printed combat strength (or the defender if both sides are equal in strength). Retreat units reduced to cadre because of this result. From the other side, eliminate units so that the total strength loss at least equals one half the total strength loss of the eliminated side. Example: An attack of 15 attacking strength points against 8 defending strength points results in an HX result. The defender, being the weaker side, eliminates his 8 strength points. The attacker must eliminate at least 4 attack strength points.
- EX: Exchange. Eliminate the side with the lower printed combat strength (or the defender if both sides are equal in strength). Retreat units reduced to cadre because of this result. From the other side, eliminate units so that the total strength loss at least equals the total strength loss of the eliminated side. Example: An attack of 15 attacking strength points against 8 defending strength points results in an EX result. The defender, being the weaker side, eliminates his 8 strength points. The attacker must eliminate at least 8 attack strength points.
Example of Combat Odds Determination
This example assumes you are using both the basic and advanced Boot Camp rules, and that the weather is clear. The attacking units consist of a 7-10 mot Inf XX, two 7-6 Inf XXs, a 2-5 Inf X, and two 2-3-8 Art IIIs. These units are attacking across a minor river hexside into a woods hex which contains an enemy 5-6 Inf XX and a 1-6 Art X. The attacker allocates 4 bomber points from one airbase in range and 6 points from another. The defender allocates 2 fighter points from one of his airbases within range. The attacker has a modified attack combat strength of 15.5 ground (all units except the artillery are halved due to the minor river) and 8 bomber points for a total of 23.5 points. The final odds are 23.5 : 6, or 3:1. The defender receives a -1 woods die roll modifier and the attacker receives a +1 AEC bonus. Thus the combat die roll is made on the 3:1 column with no modification.
Appendix: First to Fight Errata and Q&A (13 September 1994)
This errata and Q&A was issued for the standard First to Fight rulebook and its Orders of Battle booklet. Rule numbers cited below (for example Rule 28D) refer to that standard rulebook, not to the Boot Camp rules above. Reproduced as published.
Counters
The Luftwaffe counter He 123A should be Hs 123A as per the German order of battle.
Maps
Map 37: Hex 0801 (Kalmar) is missing its minor port symbol. (The corresponding hex on map 13A is okay.)
Map 13A: Hex 2106 (Stolpmunde) should be a wooded swamp, vice clear terrain hex. (The corresponding hex on map 37 is okay.)
Orders of Battle
Slovakian Europa Draft Order of Battle, Regular Reinforcements, Dec I 39: -Full: 1x 2-1-10 Tank III 1 should be 1x 1-8 Tank II 1.
Polish Europa Order of Battle, High Command Reserves, Page 16: The unit ID of the 1-8 mot hv AA II should be the 11th, vice the 1st.
First to Fight Q&A
Q. (Polish Campaign, Polish Order of Battle, turn 2 reinforcements) Why is the mobilization of the 24th Infantry Division listed apart from the other three mobilizations, when all the units in question have the same strengths? A. This was just an oversight when compiling the OB; it has no play implications.
(The Polish Campaign, German OB) Q. Army Group South Reserves are to set up at least 3 hexes from the Polish border. Does this mean a unit can set up in hex 37:2934? In other words, is this distance inclusive or exclusive of the hex the unit is placed in? A. The 4th paragraph of Rule 29 on page 22 gives an example of this procedure. Based strictly on setting up "at least 3 hexes from the Polish border," your placement in hex 37:2934 would be legal. BUT... there are other considerations. The AG South Reserves must be placed in the 8th, 10th, and 14th Armies areas, and the easternmost hexrow of these areas is hexrow 37:2233-1835. Hex 37:2934 lies outside these areas, so units of the AG South Reserves may not deploy there. In actual play, the easternmost hex available for deployment of AG South Reserves is 37:2034. However, note that only the mountain divisions of the AG South Reserves may deploy there, since the hex is in Slovakia (see the deployment instructions on page 5 of the OB booklet).
(German Orders of Battle) Q. What, exactly, are "any" units? A. "Any" units are 2-10 mot hv AA III and 0-6 Railroad Engineer III. For example, when deploying the Army Group South Reserves, you select any one (1) Railroad Engineer III and any one (1) mot hv AA III from the units listed in the "Other Forces" section of the OB.
(The Polish Campaign, German OB) Q. The Germans must withdraw a JU 86G air unit on turn 6. What if this air unit is flying an air mission (such as defensive air support) at that time? A. It is removed from play during the German initial phase of turn 6, regardless of where it may be on the board or what it might be doing.
Q. (Rule 3A2) Is a motorized artillery unit a c/m unit or artillery unit? A. It is a c/m unit and an artillery unit.
Q. (Rule 6A) Entering enemy ZOC costs +5 MPs for c/m and +3 MPs for all other units. Does this mean that it costs 5 MPs for a c/m unit to enter an enemy ZOC, or that it costs 5 MPs to enter the ZOC of an enemy c/m unit? A. Europa makes no distinction between the ZOCs of c/m units and the ZOCs of other types of units. The costs listed in the ZOC Movement Costs Table are the MPs paid by the moving unit. Therefore, a phasing c/m unit would pay +5 MPs to enter any enemy ZOC, and all other units would pay +3 MPs.
Q. (Rule 7A1) A unit may move by rail only in friendly-owned rail hexes. Must such hexes be owned at the start of the movement phase? A. No, only at the instant of rail movement.
Q. (Rule 7A3) Suppose the Polish player captures a cleared rail hex in turn 2; in German turn 3, the German player recaptures, but does not clear the hex. In the Polish movement phase of turn 3, the Polish player again regains ownership of the hex. Can the hex now be used for Polish rail movement in the remainder of the Polish movement phase? A. Yes.
Q. (Rule 9F) A German Inf XX in 37:2927 is attacked by a Polish Inf XX in 2826, another Inf XX in 2926, and two units (w/o ZOC) in 3027 and 2928. The combat result is an EX. The German division is cadred, the Polish division in 2826 is also cadred and the Polish unit in 2928 is eliminated. Can the German cadre retreat to 2928 or 2827? A. No, defending units must take losses and retreat before attacking units take losses and advance. Therefore, the German cadre is eliminated, since at the time it retreats it must retreat through ZOC.
Q. (Rule 12B) Restricted supply sources for the Poles supply a limited number of REs. When the Poles mobilize cadres into divisions, REs are gained. For restricted supply purposes, are such mobilized units counted as 1 RE or 3 REs? A. The unit would mobilize before supply is checked, and so it would count as 3 REs.
Q. (Rule 13) A supplied 10-point stack of German c/m units is in hex 37:2225. The Polish player moves 5-6-6 Inf XX into 2224 and 2226, and 1-8 MG II into hexes 2325 and 2326. Can the German c/m units in hex 2225 overrun either of the units in hexes 2325 or 2326? A. No, the German units would spend 2 MPs for leaving a ZOC, 5 MPs for entering a ZOC, 3 MPs for the overrun and 1 MP for the hex. This totals 11 MPs, making the overrun impossible.
Q. (Rule 14A2) Can combat engineers achieve a +1 combat resolution die roll modifier against fortified hexsides? A. No.
Q. (Rule 14B1) What is the rail movement allowance of a unit with an "R" movement rating? A. It may move 40 hexes.
Q. May rail-only artillery units enter enemy ZOC? A. Yes, as per Rule 7A1.
Q. When a rail-only artillery unit moves, does it count against the rail capacity of its side? A. Yes.
Q. (Rule 20D1) When a transferring air unit is successfully patrol attacked, where may it land? A. At any friendly airbase within 3 times its printed movement rating.
Q. Can it land at its originally-intended target hex? A. Yes.
Q. (Rule 20F) Exactly when does the phasing player commit his air units to ground support, harassment, or defensive support missions? A. Air units flying defensive support must announce this during the mission resolution step prior to AA fire, since AA fire against them occurs later. All other missions are announced in the mission resolution step after AA is fired.
Q. (Rule 20F2d): Is it the units in the hex that are being harassed or is it the hex itself? In other words, do only the units starting in the hex pay extra MPs when they leave the hex, or do any units traveling through the hex pay extra MPs? A. A harassment hit affects every enemy ground unit leaving the hex. This would include those that start in the hex, as well as those that move through the hex from other hexes.
Q. (Rule 27A5) If the German player captures a city on turn 1, by what turn must it be garrisoned to avoid a victory point penalty? A. A Polish city captured on game turn 1 would incur a victory point penalty starting with the German initial phase of turn 3 if lacking its garrison at that time.
Q. Does this mean that cities captured on turn 9 or later would not need to be garrisoned, as the lack of a garrison would not incur a victory point penalty during the time frame of the game? A. Yes. This isn't in the spirit of the rules, but isn't a big enough problem to worry about.
Q. Must Soviet units garrison Polish cities they capture? If they fail to do so, does the German player lose victory points? A. Polish cities captured by Soviet units must be garrisoned per the guidelines of Rule 27A5, except that the garrisoning units are Soviet, and not German. Failure to adequately garrison such cities with Soviet units results in the VP penalties for the German player, as stated in the rule. Also note that the capture of Polish cities and fortresses by Soviet units counts towards several German player VP awards.
Q. May Soviet units assume the garrison duties of German units, and thus release them for other assignments? A. Yes. The German player must garrison captured Polish cities with units he controls; thus, the garrisons may consist of either German or Soviet units (except position AA units).
Q. (Rule 27B2) When Polish air units evacuate by flying to any airbase in a neutral nation, what type air mission is this? May the evacuating Polish air units be patrol attacked? May they be intercepted? A. Polish air units evacuate by flying the transfer mission to any airbase in a neutral country. German fighters may patrol attack an evacuating Polish air unit only in non-neutral hexes. If returned due to a patrol attack, an evacuating Polish air unit may treat neutral airbases as friendly airbases during the air return step. Interception is not possible, as it would require the German fighters to fly over one or more hexes of the neutral nation to reach the target hex, and they are not allowed to do so per Rule 27E.
Q. Does the Polish player get Victory Points for evacuating the French air unit? A. Yes. Per Rule 27D2 if the French air unit appears in the game, it is treated the same as other Polish air units.
Q. (Rule 28D) When the Polish order of battle calls for a unit to be mobilized, does it have to be the exact unit listed in the Polish reinforcement schedule? Specifically, on turn 2 the Polish player is allowed to mobilize the 24th Infantry Division from its 2-6 cadre strength to its full 5-6-6 divisional strength. Suppose the 6th Infantry Division was reduced to cadre and the 24th Infantry Cadre was eliminated in the German player turn of game turn 2. May the Polish player "mobilize" the 6th Infantry Division in place of the 24th or is this mobilization lost? A. First, players may ignore unit designations when playing the game, as they are for historical interest only. If this has been done during set up, then the 24th Infantry Division may already be somewhere on the board at its full 5-6-6 strength. So when ignoring unit designations, clearly one could mobilize any 2-6 Infantry cadre in play to its 5-6-6 divisional side. Second, visualize mobilization in First to Fight as follows: a group of hastily assembled reservists rush to the front to be attached to a unit in dire need of warm bodies. Normally, this would be the understrength unit listed in the order of battle. However, if the unit is unavailable, or if there are pressing needs elsewhere, it is logical to assume that these reservists would be assigned to another unit. In answer to the specific question, it is okay to mobilize any Polish 2-6 Infantry cadre possessing a 5-6-6 full-strength side to its divisional strength and not just the 24th Infantry Division. For example, it would be okay to flip over the 6th Infantry Division.
Q. Rule 28A states that reinforcements unable to enter play as specified are eliminated instead. Rule 28C states a conversion may be made in any friendly initial phase on or after the turn the conversion is specified in the order of battle. But Rule 28D does not state what happens if mobilization must be delayed. For example, in the Polish order of battle four infantry divisions are slated to be mobilized from their 1-6 cadre strength to full 4-5-6 divisional strength on game turn 3. Suppose that there are only three 1-6 infantry cadres on the board. Is the fourth mobilization lost, or may it be accumulated until one of the three remaining divisions is again reduced to cadre, and then used to build that division back up to its 4-5-6 strength? A. As explained above, the men are available and waiting for an opportunity to be used. So it is okay to accumulate the unused mobilization until there is again a 1-6 cadre on the board during a subsequent Polish initial phase. As an optional rule to simplify this process (and add variety), try the following: Each mobilization listed in the order of battle may be used to flip one Polish cadre (regardless of strength) to its full-strength side. A mobilization may be used in any Polish initial phase on or after the turn that it is specified in the order of battle. Note that this treatment of the rule benefits the Polish player.
Q. (Rule 30B) Does the Polish player earn VPs for eliminated Slovakian units? A. Yes, treat as German units per Rule 3B1.
Q. (Rule 31B2) The German commando unit has special abilities when operating in Western Poland. Does this unit have the same abilities when operating in Germany? East Prussia? Danzig Free City Area? A. No, only in western Poland, as defined in the rule.