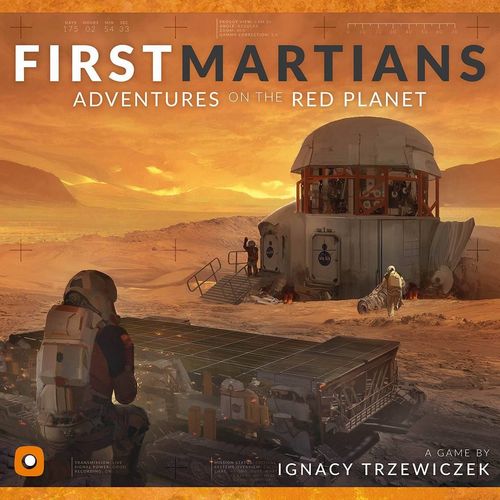
First Martians: Adventures on the Red Planet
First Martians: Adventures on the Red Planet Rulebook
Table of Contents
Table of Contents
Components
- 1 game board
- 1 HUB (= Habitable Units Block) miniature, the Scorpio rover miniature, the Froggy rover miniature — 3 miniatures in all
- 4 player ID boards
- 13 Facility tiles
- 8 "ring 1" tiles, 8 "ring 2" tiles, 3 "ring 3" tiles — 19 ROI tiles (ROI = Region of Interest)
- 3 Trackers
- 38 Modifier tokens (12 red, 8 orange, 6 black backs/fronts)
- 26 Objective tokens
- 18 Morale tokens
- 8 Shutdown tiles (4 energy and 4 oxygen)
- 9 POI tokens (POI = Point of Interest)
- 7 Energy Connectors, 7 Oxygen Filters, 7 Hardware, 7 CPU — 28 Spare Parts tokens
- 1 First Player token
- 12 Condition tokens
- 3 double-sided mission sheets
- 2 campaign booklets
- 8 Upgrade tiles
- 4 Multiplication tiles
- 4 envelopes with secret mission info — DO NOT OPEN UNLESS INSTRUCTED!
- 40 Working Block Malfunction cards, 28 Living Block Malfunction cards, 26 System Block Malfunction cards
- 8 Upgrade cards
- 14 Facility cards
- 6 Research cards
- 4 double-sided Profile cards
- 8 Direction cards
Introduction
Modes of Play
As you begin your adventure with the game, you can choose either a standalone mission or a campaign. Standalone missions are single, unique experiences with a high amount of replayability. Choose a mission depending on which skills you want to focus on: exploration, research, or building. In the box you will find three double-sided mission sheets — they provide details about each mission.
A campaign is a chain of missions that tell a riveting story — you will unravel it as you go along, making decisions and completing various tasks. Thanks to the accompanying app, you will save your game after each mission so you can easily go back to where you stopped playing last time. This way you can set up the next mission while retaining the continuity of your actions from the previous missions.
One of the campaigns has elements of a legacy game (see The Campaign Mode section on p. 20 for details).
In both modes of play, First Martians: Adventures on the Red Planet uses the same core mechanics, which are explained in this rulebook. Gameplay changes, if any, are described on particular mission sheets.
The App
The accompanying app is free for you to download. We support Android and Apple devices as well as PCs. Get your version from Google Play, App Store, or www.portalgames.pl.
The app has a in-built manual, and on our website you can find the PDF version along with a video tutorial on how to use this app.
Goal of the Game
Whether it is a standalone mission or part of a longer campaign, your goal is always to meet the victory conditions for a given mission within the specified number of rounds (sols) and all of your astronauts must remain alive. Each mission sheet provides you with the information on how to win the game (in the Mission Objectives section of the sheet). During a mission, the app keeps track of your progress. Throughout each round, the app displays a menu, from which you can access your Mission Log.
There are two types of goals you can achieve: mandatory goals and optional goals — and they are all listed in the Log. Whenever you achieve any goal, click its checkbox to mark it complete. In order to win, you need to achieve all the mandatory goals before time runs out. The app informs you when your mission ends (no later than the last round of a given mission) — at that point, your mandatory objectives must be completed. In a standalone mission, optional objectives are there to bring you closer to your goal or improve your current situation (for example, by giving you spare parts or more food). This works differently in a campaign and is described in The Campaign Mode section.
Some missions also have a Threshold value. If it is provided on the mission sheet, meeting that Threshold is always mandatory. It may refer to things like a number of broken parts in the HUB. When the mission ends, you must be at or below that Threshold in order to win.
Astronauts' Health. Your astronaut can sustain 5 wounds before they die. If any astronaut dies, the mission is immediately lost.
Astronauts
In the game, your astronaut is represented by a player ID board and the 2 action pawns of your color. Your ID board provides information about your astronaut's profession, base skill, and health.
Action pawns represent the time you take to perform your actions. To use them, place them on an action you want to take. For how this works, see the Action Pawns box on p.11.
Skills allow you to spend your Morale tokens in order to perform a unique feat, such as rerolling a die or gaining a sample. Each skill can only be used once per round. Your astronaut's base skill is printed on your player ID board and is available to you in every game. Additionally, each astronaut has a set of three Skill cards. In a standalone mission, these are available from the beginning of the game; during a campaign, you need to unlock them first.
Health. Your ID board has a health track — use it to mark your astronaut's current number of wounds. The player ID board also shows your astronaut's base skill and health track.
Wounds and Conditions
When a mission begins, insert a red marker in the leftmost slot of your health track (on the astronaut's portrait). Whenever your astronaut suffers a wound, move the marker on your health track 1 space to the right.
Note that the health track has some condition icons on it. Every time that icon is passed as a result of moving the marker to the right, you also gain a condition: Draw 1 random Condition token from the stack and resolve it (a player may gain more than one condition during a round). When you are healed (and the marker is moved to the left), do not resolve the effects of passing the condition icon.
Each round has 6 phases, and you can get Condition tokens in phases 1-5. If you get your token in the Action phase (eg., after a bad roll), this token's effect does not apply to your other actions this round. If you get a token in, say, the Morale phase (because you got wounds for not having enough Morale tokens to discard), this token's effect applies to your actions this round. So the timing is important. If you draw a Condition token during phase N, its effect applies in phase N+1 (and later ones).
Your astronaut can have multiple conditions at a time, but no more than one of each type (for example, you cannot have two Migraine tokens at the same time). If you draw a condition you already have, keep drawing until you get one that is different from the ones you currently have, then shuffle the unused tokens back into the stack.
Skills
Each astronaut has a base skill and a set of three Skill cards. Each skill can be used only once per round, but at any time during that round. When you use your base skill, put a black marker on its text to indicate you used it this round. When you use a skill from a Skill card, flip that card over.
Skills have immediate effects — for example, when the Geologist spends 2 Morale tokens to gain 1 sample, that sample is available for research immediately after it was gained.
To unlock a skill during a campaign, you must make a Discovery. Whenever you move a researched sample to the Discovery space, each astronaut chooses one of their Skill cards and places it near their ID board. That skill is immediately ready to use.
Board & Facility Tiles Anatomy
If a status marker is red, the part shown to the left is broken and the cost/penalty shown to the right applies.
They tell you which part is broken (and what part you need to repair it): Energy Connectors, Oxygen Filters, Hardware, CPU.
Setup
Standalone missions fall into one of three categories: Explore, Research, and Build. When you begin your game, choose a mission you want to play based on what actions and skills you want to focus on. For each mission (including those that are part of a campaign), you can choose your preferred difficulty level. This affects how damaging (or rewarding) the consequences of various Events are.
Enter your preferences into the app to adjust the gameplay experience to your expectations and needs.
We suggest you begin your adventure with the Make Yourself at Home introductory mission.
The instructions below provide a general overview of how to prepare your game (if there are fewer than 4 players, see p. 19). Details vary from mission to mission (especially during a campaign, where the setup of the next mission is affected by what happened earlier). Check that you are making any necessary adjustments and preparations to these setup instructions as required and always follow any specific instructions given by the app. Mission-specific rules override the general setup instructions.
-
Prepare the Board a. Place the board in the middle of the gameplay area. b. Place 1 white marker on the 0 space of the Morale track. c. Place 1 white marker on the 00 space of the Stress track. d. Place 1 white marker on the icon space of the Round Order track.
-
Place the Miniatures. Place the HUB miniature at the center of the map. Place the 2 rover miniatures in the Depot.
-
Choose Your Astronauts. Each player chooses an astronaut to play with (Scientist, Geologist, Engineer, or Medic). Take the accompanying ID board and 2 action pawns in the color of your choice. Insert 1 red marker in the slot on your astronaut's portrait.
-
Prepare the App & Mission a. Launch the app on your device. You can place the device you're using on the AUX DEVICE space on the board. b. Input into the app whether you are playing a standalone mission or starting/continuing a campaign. Choose the mission type (for standalone missions) and your preferred difficulty level. c. Unless you're continuing a campaign, add your chosen astronauts to the Flight Crew Debriefing panel. The names are given randomly, but you can customize them. d. Click Next and select a mission from the list. e. Find the chosen mission sheet and place it near the board. Put 1 white marker on the leftmost space of the sol counter.
-
Prepare the Facilities & Supplies a. Place all 13 Facility tiles on their respective spaces on the board. The top row (left to right): Oxygenator 01, Oxygenator 02, Solar Panel 01, Solar Panel 02, Farm. The middle row (left to right): A Quiet Place, Crew Quarters, Med Lab, Control Center. The bottom row (left to right): Garage Hall, Probe Bay, Lab, Working Bay. b. Insert white markers in the top slots of the Oxygenators and Solar Panels productivity tracks. Insert 1 black marker in the Farm's Greenhouses column for each astronaut in the game — you have that many Greenhouses currently built. Then, add 1 white marker next to each built Greenhouse. Insert 1 green marker in each slot of the status markers column (for each Facility). c. Place 1 red marker on the 0 space of each Block's Malfunction track. d. Separate the Malfunction cards by their backs into three Malfunction decks. Shuffle each deck separately and place it face down to the right of the respective Malfunction track. e. Place the oxygen, energy, and food trackers on the appropriate spaces of the general supply track. The app tells you the exact starting amount of oxygen, energy, and food reserves for that mission.
Other components. You'll notice that after setting up the game, some components are still left in the box. Don't worry - the app will tell you when to use them.
Gameplay: Events
Round Overview
A game of First Martians is played over a series of rounds. Each mission sheet has a sol counter to indicate how many rounds there are (1 sol = 1 round).
Each round consists of 6 phases, resolved in the following order:
- I. EVENTS. The First Player reads aloud the Event presented by the app and resolves its effect. Sometimes Events have one-off effects, sometimes they affect the entire round, some will even stay with you longer.
- II. MORALE. The First Player (only) resolves the effects of the current Morale level.
- III. PRODUCTION. Resources (oxygen, energy, food) are produced and used. The effects of Stress and broken parts in the Working Block are resolved.
- IV. ACTIONS. The players act together to create and execute the best plan of action for this round.
- V. MALFUNCTION. The First Player rolls the Malfunction dice and resolves the results.
- VI. CLEAN-UP. Update the tokens and markers on the board.
When the Clean-Up phase is over, the First Player token is passed clockwise to the next player. Advance the marker on the sol counter to the next space and move the white marker back to the top of the Round Order track. A new round begins.
The following sections describe each phase in detail.
I. Events
First, you need to advance Malfunction (see below). Then the app displays an Event. How you resolve it depends on the Event's type.
Advancing Malfunction. As time goes on, the HUB's condition deteriorates. Before the Event for the round, the app tells you to advance one of the Malfunction tracks by 1. Move the corresponding marker up 1 space and resolve any consequences (see p. 18).
Mission Events. Mission Events are crucial to the gameplay and push the story forward. Read the story text and the Event description; resolve its effects immediately. The Event action follows — if you don't take it this round, you open yourself up to a possibility of negative consequences (more on that in the Actions section on p.14).
After you've read all the new information provided by the app, this phase ends; move the white marker on the Round Order track down 1 space and proceed to the Morale phase.
Adventure Events and Follow-Up Events. The app will only show one Mission Event per round, but some additional Events may occur as a result of what happened in the past or what action you did or did not take in previous rounds. These extra Events are either Adventure Events or Follow-Up Events. Why they occur is explained on pp. 13-14. When the app presents you with such an Event, follow the instructions on the screen.
The story text provided by an Adventure or an Event might be a clue for you as to its possible consequences. Adventure and Follow-Up Events, if any, always happen before a regular Mission Event in a given round.
Gameplay: Morale & Production
II. Morale
Although the Morale level reflects the mood of the entire crew, only the First Player resolves its effects in each round. The Morale track ranges from -2 (you are feeling in despair) to +3 (you have the power and vigor to go on). Morale can never go beyond these limits.
When resolving the effects of the group's Morale, the First Player gains or discards Morale tokens as indicated by the current Morale value (for example, they gain 2 Morale tokens if Morale is at +2 or they discard 1 Morale token if Morale is at -1).
Whenever the First Player has to discard more Morale tokens than they have, they discard as many as they have, then suffer 1 wound for each token they lack. No one can ever choose to suffer wounds instead of discarding Morale tokens. If the group's Morale is at 0, nothing happens.
After resolving the consequences of the Morale level, move the white marker on the Round Order track down 1 space and proceed to the Production phase.
The First Player. The First Player token indicates who the First Player is in this round. The First Player is the one who:
- Resolves and experiences the effects of the Morale phase.
- Resolves any disputes among the players.
Also, some in-game effects refer specifically to the First Player.
III. Production
In this phase, calculate and adjust the amount of oxygen, energy, and food, as well as your Stress level and broken parts in the Working Block.
Oxygen, energy & food. Oxygen, energy, and food are your essential resources. Food is produced by the Farm (Greenhouses 01-05), oxygen by Oxygenators 01 and 02, and energy by Solar Panels 01 and 02. These resources are produced every round; additionally, you may have some reserves at your disposal when you start the mission (when you set up a mission, the app always provides details on what and how much you have in the general supply).
The resources are then spent: Oxygen refills the HUB, energy is used to power the Facilities, and food is consumed.
Oxygenators. There are two Oxygenators in the HUB. A white marker indicates the current productivity of each of them (min = 1, max = 4). Add up the values from both Oxygenators — the sum tells you how much oxygen you produce this round, and therefore how many Facilities you can refill with breathable air. The Facilities which need a constant oxygen supply are the ones that have the oxygen icon to the left of the status markers column. These are: The Farm, Crew Quarters, Med Lab, Control Center, Garage Hall, Probe Bay, Lab, and Working Bay. Green/red status markers in these Facilities do not indicate that oxygen should or shouldn't be supplied (only that what's been supplied can or cannot be used - for example, a red status marker may mean that oxygen is supplied but there is a leak inside a given Facility).
If you produce more oxygen than you spend, add half of that surplus (rounded up) to the general supply (move the oxygen tracker accordingly). Should you not produce enough air, some Facilities will become unavailable. See the Not Enough Oxygen/Energy box on how this is handled (see p.10).
Solar Panels. There are two sets of Solar Panels in the HUB. A white marker indicates the current productivity of each of them (min = 1, max = 5). Add up the values from both Solar Panels — the sum tells you how much energy you produce this round and how many Facilities you can power. The Facilities which need a constant energy supply are the ones that have the icon to the left of the status markers column: both Oxygenators, the Farm, Crew Quarters, Med Lab, Control Center, Garage Hall, Probe Bay, Lab, and Working Bay. Green/red status markers in these Facilities do not indicate that energy should or shouldn't be supplied (only that what's been supplied can or cannot be used - for example, a red status marker may mean that energy was supplied to a Facility but a short circuit occurred).
If you produce more energy than you spend, add half of that surplus (rounded up) to the general supply (move the energy tracker accordingly). If you cannot power all Facilities, some Facilities will become unavailable. See the Not Enough Oxygen/Energy box on how this is handled (see p. 10).
Not Enough Oxygen/Energy
If you produce less oxygen/energy than you need, you will have to make some Facilities unavailable. Sometimes, an in-game effect tells you exactly which Facilities to shut down. At other times, you will decide for yourself — but you can never have more operational Facilities than your current oxygen/energy production allows for. For example, 10 Facilities need a constant energy supply. If the total Solar Panels productivity is 8, there must be 2 Energy Shutdown tiles lying on 2 of those 10 HUB Facilities. No Facility can have more than 1 energy Shutdown tile and 1 oxygen Shutdown tile lying on it at any given time. Such Facilities cannot be used for anything else other than removing Shutdown tiles.
When you shut down a Facility, place a random oxygen/energy Shutdown tile face down on that Facility. And as long as this tile remains on the board, resolve its +2 Stress effect every round in the Production phase. If you want to make that Facility functional again, you must place 1 pawn on that tile in the Action phase and then flip the tile over at the end of that Action phase. Resolve the effect on the front of the tile immediately. Each Shutdown tile provides an instruction on what to do to discard it. Shuffle a discarded Shutdown tile back into its stack.
IMPORTANT: When an oxygen Shutdown token is lying on a Facility, that Facility may still consume energy. When a power Shutdown token is lying on a Facility, that Facility may still consume oxygen.
REMEMBER: This is a different effect than a red status marker which, for example, forces you to spend energy/oxygen from the general supply as an additional cost of your action!
Note: You can never choose to shut down a Facility in order to gain more oxygen/energy in your general supply, to prevent the negative effects of a malfunctioning Facility, etc.
Note: Facilities that are shut down are immune to other effects targeting them — directly or indirectly (for example, if a Malfunction card has the Probe Bay keyword but the Probe Bay Facility is shut down, discard this card without resolving it.)
Farm
First, if you have a new seed planted (see Planting New Seeds on p.17), growth occurs — move its marker up 1 space on the Growth track. If it was already on the top space (#6) on this track, move it to an empty Greenhouse.
Then, you produce as many food portions as you have plants in your Greenhouses. Finally, each astronaut must eat 1 food portion. If there is not enough food produced, you must use food reserves, if you have any in the general supply. If there is not enough food for everyone, you must decide who will not eat. Each astronaut that does not eat suffers 1 wound for each food portion they should have eaten.
(Each Greenhouse can house a plant or a growing seed; each provides 1 food portion in every Production phase; no more can be planted (there can never be more white markers than black markers on the Farm).)
In rare cases, if you produce more food than you eat, add half of that surplus (rounded up) to the general supply (move the food tracker accordingly).
Wilting. When Energy Connectors or Oxygen Filters on the Farm are not working (there is a red status marker next to their icon), your plants and seeds will wilt. When this happens, no growth occurs. Instead, move all markers on the Growth track down 1 space (discard a marker if you cannot move it down any further) and move 1 previous fully grown plant marker back to Growth track slot #6.
This can be deadly, so to counter this effect in the Production phase, you can spend 1 energy and/or oxygen from the general supply (whatever your Farm lacks) to halt the process of wilting for this round.
Stress
The more people are crammed into the confined space of the HUB, the more stressful conditions become.
To track the growing tension, use the Stress track. In the Production phase, move the white marker on this track 1 space for each astronaut in the game (additional effects may increase Stress, too). Whenever that marker reaches space #18 (or would move beyond it), the tension becomes unbearable and a fight takes places. These consequences must be resolved:
- Each astronaut suffers 1 wound.
- The group's Morale goes down by 1.
Then reset the track to #00.
Working Block: Red. Resolve the effects of active penalties indicated by red status markers in the Working Block (if a Facility is shut down, the penalty is not active):
- Roll the green Wound die. If you roll a wound result, Froggy is damaged — put a Blocked Modifier token on the Froggy x space. Froggy cannot be used this round or in any subsequent rounds until it has been repaired. You must take the Build action on that rover to discard that token (see Repairing Rovers on p. 17).
- Remove 1 chosen sample from any ROI.
- Increase the Stress level by 1.
- Put the token on the Working Bay ! space.
After the Production phase has been fully resolved, move the white marker on the Round Order track down 1 space and proceed to the Action phase.
General Supply
Your general supply is where you keep track of your reserves of oxygen, energy, and food. Place the trackers on the appropriate spots to indicate how much you have in your reserves. Adjust the trackers accordingly as you gain and spend the resources.
Gameplay: Actions
IV. Actions
Performing actions inside the HUB and outside it (during what is called an EVA — extravehicular activity) is the main part of the game. Players discuss together which actions to take, then assign their action pawns to their chosen actions. A given Event action can be taken only once; all other actions can be taken multiple times in the same round. Finally, the players resolve those chosen actions in the order below.
Your action pawns can be assigned to one or more actions. You must use both of your action pawns (unless an in-game effect tells you otherwise). You may use additional pawns, if you have any. You assign the pawns to the chosen actions by placing them in the appropriate places on the board or the mission sheet.
You can assign your pawns to:
- EVENTS – to prevent negative consequences of an Event; unless stated otherwise by the Event itself, its action cannot be taken more than once.
- A QUIET PLACE – to gain Morale tokens.
- CREW QUARTERS – to increase Morale or reduce Stress.
- MED LAB – to heal wounds or conditions.
- CONTROL CENTER – to decrease the Malfunction level.
- GARAGE HALL – to explore new ROI tiles.
- PROBE BAY – to gather samples.
- LAB – to take the Research action and to plant new seeds on the Farm.
- WORKING BAY – to repair equipment, build upgrades, etc.
After all pawns are assigned, they will be resolved in the order above and once all the chosen actions have been resolved, move the white marker on the Round Order track down 1 space and proceed to the Malfunction phase.
Note: The order of resolving actions depends on the action types (for example, all Research actions are resolved in the same step). Actions that do not belong to one of the types above are resolved at the end of the Action phase (in any order).
Action pawns. Action pawns represent the way the astronauts perform actions.
When you perform an action, you can dedicate all of your time to it by using both of your pawns. This means you will be automatically successful (unless no other modifiers apply) when resolving this action. Alternatively, you could assign only one pawn to an action, meaning you can potentially get more actions done. However, this means you need to roll the dice to determine whether the action is successful or not.
Action types, costs & penalties
In addition to basic requirements described in the following sections, actions will often have a modified cost or a penalty - for example, because of red status markers in a Facility.
The cost of an action is what you need to have in order to declare an action (for example, having to spend oxygen from the general supply). A penalty is the consequence of resolving this action (for example, suffering a wound). If you cannot pay the action cost (for example, you have no oxygen in the general supply) or cannot deal with its penalty (for example, your astronaut will die if they suffer that wound), you cannot take that action.
Sometimes an action will be referred to by a certain type — for example, when you're instructed to "take the Research action". Then, you must apply the costs and penalties of that given action and, additionally, the costs and penalties of that action type. For example, planting a new seed on the Farm is a Research action (it is identified by the Research icon). Therefore, when you take that action, you must apply all costs and penalties from the Lab — the Facility for Research actions.
FOR TOKENS LYING ON FACILITY TILES: If you use a Facility or its action type, add the costs/penalties only for the tokens on the ! space of that Facility.
FOR TOKENS LYING IN THE ROVER AREAS: If you use a rover, add all the costs/penalties for the tokens on the x space of that rover.
Mission actions
Mission sheets may offer special actions that can be taken during that mission. A mission sheet will tell you where, when, and which action to perform in order to get a particular result; apply all the modifiers affecting that type of action (for example, if you're asked to take a special Build action, take into account all effects that currently influence the Working Bay or Build actions directly).
How many pawns do I need? Additional requirements. Actions can either be automatically successful or resolved through rolling dice.
You need only 1 pawn to be automatically successful in resolving this action, OR you may use 1 pawn and roll the action dice to determine the result or use 2 pawns for the action to be automatically successful.
The numbers of pawns shown in the picture are the base requirements for a given action. They are often modified by many in-game effects. For example, you need 1 extra pawn on a given action for each token affecting that action.
AOMs
AOMs (Automated Operating Machines) give you additional pawns you can use in your actions. These pawns are color-coded and can only be used for their specific actions.
They can be used to assist other pawns or to take an action on their own. Whenever an AOM is used, the player who uses it takes its card to indicate they are the operator. If necessary, the operator rolls the dice for their AOM and resolves the results.
You can combine an AOM and a rover to assist you in one action.
IMPORTANT: If an action has no type (for example, has the icon only), you can use AOMs for that action, too.
Rovers
You have two rovers at your disposal to aid you in your actions. They do not perform any actions on their own — at least one pawn is needed to operate each of them (whether it's an AOM pawn or an astronaut pawn). When a rover assists you in action, take its miniature and place it together with the pawns declared for that action. You cannot combine both rovers when performing a single action.
You may use a rover with multiple pawns. There is no limit to how many pawns you can send with a rover, but only the pawn on the top of the stack resolves the consequences of the action; the other ones are only assisting.
FROGGY. You can treat Froggy as 2 additional pawns during an Explore action. These two pawns cannot be split up between different explorations.
SCORPIO. Scorpio gives you 1 additional pawn for an Explore/Gather/Research/Build action of your choice, as long as this action is taken outside the HUB (you can't drive your rover inside the Facilities!).
After resolving an action in which a rover was assisting, place its miniature back in the Depot.
When a rover has a Blocked token on it, it cannot be used until repaired (p.17). A rover can have more than 1 Blocked token in its area — you need separate Build actions to discard each of them.
If your action requires anything else, you must have that extra item available when you declare that action:
- If you need a spare part, place it together with the pawns. If the action is successful, discard that spare part. If the action is unsuccessful, put that part back where it came from.
- If you need to use reserves from the general supply, adjust the trackers when you declare that action. These supplies are spent whether the action is successful or not.
Placing the pawns
Action pawns of one or more players may be used when planning an action, in which case these pawns are stacked. The pawn on the top of the stack indicates who is taking the action (gaining the benefits, suffering the consequences, etc.); the others are only assisting.
The pictures below show some examples of attempting the Build action.
- This is one action and no dice are rolled. The red pawn is taking the action (resolving its effects), the yellow pawn is only assisting.
- These are two separate actions; roll dice for each attempt. Whether the action is successful or not depends on the roll.
- This is the same action taken twice. The yellow player is automatically successful. The red player needs to roll the dice to determine the outcome.
REMEMBER: Each stack of pawns is a separate action!
In First Martians: Adventures on the Red Planet, you will declare many different actions and sometimes it may be difficult to remember which pawns were assigned to which actions. Therefore, place your pawns where it reminds you what action you are taking.
For example:
- When you take a mission-specific special Research action, place your pawns and any additional resources on the mission sheet (instead of on the Lab — the normal place for Research actions).
- When you take the Gather action to pick up a sample outside the HUB, place your pawns on the ROI you want to gather from (instead of the Probe Bay — the normal place for Gather actions) and put the sample you want to gather on top of your pawns.
- When you repair a broken part of a Facility, place your pawns next to the status marker you wish to replace (instead of on the Working Bay — the normal place for Build actions).
REMEMBER: No matter where the pawns are, always remember that the actions are resolved in a fixed order (1-9 on p. 11): If you placed your pawns on the Med Lab to repair one of its broken parts through the Build action, you do not resolve this action in the "Med Lab" step, but in the "Working Bay" step.
Rolling Dice
If an action is not automatically successful, you have to determine its outcome by rolling the matching action dice. Action dice come in sets of three. The sets are color-coded and correspond to one of the following actions: Explore (green), Gather (gray; also for the Unwind action), Research (blue; also for the Heal action), and Build (brown; also for the Manage action). Each set contains:
A SUCCESS DIE:
- Success! Apply the action's effect;
- No success — gain 2 Morale tokens instead.
A WOUND DIE:
- Suffer 1 wound;
- Nothing happens.
AN ADVENTURE DIE:
- Resolve an Adventure;
- Nothing happens.
If you roll more than one die, the results are independent (for example, if you rolled a success, your action was successful even if you need to resolve an Adventure; if you rolled a wound, you must suffer it even if you were successful in your action, etc.). Resolve the effects of your roll in any order before you carry on with your action.
Adventures
Adventures are triggered by some in-game effects, such as rolling an Adventure result on an action die. Adventures are similar to Events (they must be resolved when they happen and they may have negative consequences.) However, they differ in that more than one Adventure can take place in a round, and they often only affect one player.
Adventures are action-specific and color-coded: Things that may happen to you when you explore new areas are obviously different from what may occur when you install a Facility Upgrade. Adventures are always represented by the Adventure icon. When you must resolve an Adventure, click the corresponding color-coded button in the app, depending on the action you were taking. Resolve the Adventure by following the instruction presented by the app.
Adventures either have one-time consequences that you resolve when the Adventure occurs, or they have delayed effects that will or will not take place later in the mission (this happens randomly). When that delayed effect occurs, follow the instruction provided by the app.
Resolving actions
If your action was successful, take back your pawns and discard any additional resources that were spent during that action. Apply the action's effect.
If your action was unsuccessful, take back your pawns and return any unspent additional resources that were required for the action back to where you took them from. Do not apply the action's effect.
REMEMBER: Supplies from the general supply paid as the action cost are spent even if your action was unsuccessful.
Actions in detail
The following sections describe the actions you can take. Remember that there are no player turns in this game. You all cooperate to decide which actions to perform.
Here you can also find a detailed description of the specific requirements you need to fulfill, when DECLARING the action. After all actions have been declared, RESOLVE the actions you chose in the following order, as indicated by their Resolve description:
1. Events
To take an Event action, do what the Event description in the app tells you to do. It always specifies how many pawns you need and if you have to fulfill any additional requirements (such as spending spare parts). Event actions may reward you with Morale tokens, improve Morale, etc. Also, they prevent an Event's delayed consequences from happening.
Delayed Event consequences. When you decide whether to take an Event action or to skip it, bear in mind that each Event may have future consequences if it is left unattended. The game retains each Event for three consecutive rounds — as long as it's in the Mission log and you choose not to take its action, you may face the consequences. An Event disappears from the Mission Log after three rounds or after its consequences occurred (whichever happens first); when the app discards an Event, you can no longer take its action, but you are also protected from its consequences (unless they've already occurred).
The Follow-Up mechanism. In addition to regular delayed consequences, some Events have Follow-Ups. A Follow-Up is a unique, player-specific Event that may occur in the future as a result of one of the Events that happened in the past. Players' actions don't influence whether it occurs or not. A Follow-Up is not explicitly given by the app when the original Event is presented, but it is always a related part of that history (can be positive or negative) to immerse you more in the story.
DECLARING. Take the necessary pawns and any other resources, and place them on the Current Event Action space of the board (in the AUX DEVICE box). If you decided not to take this action during this round, click Skip. You'll have two more chances to complete it later in the game.
RESOLVING. When you successfully resolve this action, do whatever the app instructs you to do in the Event description, then click Completed.
Event actions that were neither completed nor discarded by the app can be viewed in the Mission Log. Each entry on this list reminds you what to do and how many rounds are left before this Event becomes unavailable. When you decide to take a past Event action, place the pawns and any additional resources on the Past Event Action space (there is only one such space on the board but you may take more than one past Event action). When you resolve such an action successfully, click Completed.
2. A Quiet Place (REST)
This action is used to gain Morale tokens, which are needed to pay for skills. Also, the First Player may have to discard them during the Morale phase.
DECLARING. The Rest action requires 1 pawn. Place it on A Quiet Place.
RESOLVING. When you successfully resolve this action, gain 1 Morale token. Place it near your ID board.
Note: No in-game effect can force you to roll dice or resolve Adventures in this Facility.
3. Crew Quarters (UNWIND)
Unwind in your Crew Quarters to improve Morale or lower your Stress.
DECLARING. The Unwind action requires 1 pawn. Place it on the Crew Quarters.
RESOLVING. When you successfully resolve this action, choose whether to increase Morale by 1 or reduce Stress by 6.
4. Med Lab (HEAL)
In the Med Lab you will heal wounds and conditions. Unless you have the Auto-scanner Upgrade installed, the Medic pawn must assist in the Heal action.
DECLARING. Place 1 of your pawns on the Med Lab assisted by 1 Medic pawn. If you have the Auto-scanner Upgrade, you do not need to be assisted. The Medic herself needs only 1 of her pawns to take this action.
RESOLVING. When you successfully resolve this action, choose whether to heal your wound or condition. If your wound is healed, move the red marker on your health track 1 space to the left (ignore the icon when you skip it). When your condition is healed, shuffle its token back into the stack.
POI tokens
POI (Point of Interest) tokens are special finds that you can discover on newly explored ROIs (the POI icon). Each POI token has its effect written on it or there is one of these icons (referring to mission-specific finds); consult the mission sheet to see what effect a given POI token has.
When you gain a POI token, put it in the Available area of the Cargo Bay — they are immediately ready to use.
Unless stated otherwise, each POI token can be used only once — discard it when used. When a POI token gives you something — a sample or a spare part, for example — you can replace it for that thing at any time.
Distances & Movement
During a mission, you may want to or need to move around the map. You do not need to move to perform actions in the HUB. However, if you want, for example, to collect a sample or explore a new ROI, you must get to that place first. Although movement is not considered a separate action, getting to a far off place comes at a cost.
Unless this is changed by an in-game effect, you always start your movement at the HUB — and this is where you return after you resolve your actions. To get to a particular ROI tile/space, you need an uninterrupted and explored path leading to that tile/space. If there is more than one way, you decide which one to take. The cost of movement and its additional requirements depend on the chosen route. An ROI tile/space may require, for example, taking a wound or using an additional pawn. You must resolve the effects of all the tiles/spaces along the way — including the one you end your movement at, and also the one you start your movement from (unless it's the HUB).
Note that all tiles and spaces have at least one pawn penalty: the farther you go, the more pawns you need.
In the example below, you want to build a mission item in the area marked yellow, R2-NW. Let's assume you have the required spare parts. A regular Build action in the Working Bay would cost you 1 pawn (and rolling brown dice to determine the outcome) or 2 pawns (and the action would be automatically successful). So far, not many tiles are explored and there is only one way to get there. There are three modifiers on your way and a wound icon. You must add these to the regular action requirements: The action costs you 1 wound and 4 pawns (if you want to roll the brown dice) or 1 wound and 5 pawns (if you want your action to be automatically successful). Remember you can use Scorpio to help you in the Build action outside the HUB - this way you need 3 or 4 pawns respectively.
5. Control Center (MANAGE)
This action allows you to keep the danger of Malfunction at bay (to some degree, at least…).
DECLARING. The Manage action requires 1 pawn. Place it on the Control Center.
RESOLVING. When you successfully resolve this action, move a red marker on a chosen Malfunction track down 1 space.
6. Garage Hall (EXPLORE)
The Garage Hall allows you to take the Explore action and uncover new ROIs (Regions of Interests) on the map. You can only explore accessible spaces: All spaces around the HUB and all spaces adjacent to already explored tiles are accessible. Spaces/tiles are considered adjacent when they share an edge.
Whenever you wish to explore a new space, you need to establish a route of accessible tiles leading to that space. If there is more than one route, you can choose which one you'll take. Every time you attempt an action outside the HUB you are affected by all the tiles, spaces, and effects on your way, including the place you're starting from and the place you want to explore (see the Distances & Movement sidebar).
DECLARING. The Explore action requires 1 pawn (if you want to roll the green dice to determine the outcome) or 2 pawns (if you want your action to be automatically successful). Add any additional pawns for distance (see the Distances & Movement box). Place these pawns on the space you want to explore.
RESOLVING. When a space is successfully explored, draw a random ROI tile from the corresponding stack (ring 1, 2, or 3) and place it face up on that space. Each tile may provide new opportunities (e.g., samples to be gathered) and threats (e.g., difficult terrain which hinders movement). Place as many samples on that ROI as there are sample icons. If there is a POI icon, draw 1 POI token and put it in the Available area of the Cargo Bay. The ROI's terrain's effect (if any) does not affect you when that ROI is explored and the tile is placed, but it applies in all future rounds. The icon found on some ROI tiles is only used for some mission-specific effects.
In this example, you want to explore the ROI marked yellow, R3-NW. The white route is shorter, but the yellow one is potentially safer — you do not have to drive near the Geysers, which saves you from suffering a wound. There are three modifier icons on the previously explored tiles on your way and a fourth one on the space you want to explore. So to take this action, you can use 5 pawns and roll the green dice, or use 6 pawns to succeed automatically without rolling the dice. Because you move through the Chasm, the player whose pawn is at the top of the stack must also resolve an Adventure (the assisting players do not).
Direction cards
A deck of 8 Direction cards is used to generate random directions. They may be used, for example, to determine where a signal came from. Whenever you're asked to draw a Direction card, draw it and check the direction. Then, shuffle the card back into its deck. Unless otherwise instructed, whenever you're asked to draw multiple cards, draw one, look at it, shuffle it back into the deck, and only then draw another one.
Don't worry about the "Easy", "Medium", and "Heavy" words on these cards. They will be used for some rare in-game effects, and you'll be told exactly when and how to use them.
7. Probe Bay (GATHER)
The Probe Bay allows you to take the Gather action, collecting samples by moving them from an ROI to the Cargo Bay. Also, some missions may instruct you to perform the Gather action to obtain resources, spare parts, and other useful materials. You cannot gather from unexplored ROIs.
DECLARING. The Gather action requires 1 pawn (if you want to roll the gray dice to determine the outcome) or 2 pawns (if you want your action to be automatically successful). Add any additional pawns for distance if this is done outside the HUB. Place your pawns next to what you want to gather.
RESOLVING. When you successfully resolve this action, take whatever you gathered and place it in the Pending area of the Cargo Bay. It becomes available to you at the end of the round.
8. Lab (RESEARCH & PLANTING)
The Lab allows you to take the Research action — you can examine the samples you previously gathered. A Research action also allows you to plant a new seed.
Research cards. A deck of 6 Research cards is used to generate random numbers: percentages from 15% to 50% and numbers from 01 to 06. They may be used, for example, to generate the number of an Objective token or the amount of what you extract. Whenever you're asked to draw a Research card, draw it and consult the number or percentage — the effect that instructed you to draw that card will tell you which value you're after. Then, shuffle the card back into its deck. Unless otherwise instructed, whenever you're asked to draw multiple cards, draw one, look at it, shuffle it back into the deck, and only then draw another one.
Research Actions. When you take a Research action using a sample, you examine it or make discoveries.
DECLARING. The Research action requires 1 pawn (if you want to roll the blue dice to determine the outcome) or 2 pawns (if you want your action to be automatically successful). Add any additional pawns for distance if this is done outside the HUB. When you declare this action to examine a sample, use the Research box on the board:
If you want to examine a sample for the first time: Take 1 sample from the Cargo Bay and place it on the left space of the topmost empty Research track together with your pawns.
If you want to examine a sample for the second time: Place your pawns on the research track where that sample is.
RESOLVING. When you successfully resolve the Research action, move the examined sample to the Examined space (if it was examined for the first time) or to the Discovery space (if it was examined for the second time).
In the campaign mode, you need Discoveries to gain new skills for your astronauts.
Note: The number of Research tracks is unlimited. If you need more than 3 tracks, place your next samples below the Research box.
Planting New Seeds
Your Farm consists of up to 5 Greenhouses — a black marker in a Greenhouse slot indicates that Greenhouse is built. Both seeds and plants are represented in the game by white markers. A white marker in a Greenhouse (the 1-5 track on the left) is a fully grown plant (each Greenhouse can have 1 plant). A white marker on the 1-6 Growth track on the right is a growing seed; it does not provide any food until it is fully grown and moved to an empty Greenhouse.
If the Farm is not full already (there are less white markers than black markers), you can plant a new seed. Eventually, it will grow into a plant and provide an additional food portion.
DECLARING. This action requires 1 pawn (if you want to roll the blue dice to determine the outcome) or 2 pawns (if you want your action to be automatically successful). Add any additional pawns for distance if this is done outside the HUB. When you declare this action, take 1 seed from the Cargo Bay and place it with your pawns on the Research action space of the Farm. You can take only one such action per round.
RESOLVING. When you successfully resolve this Action, insert 1 white marker into slot #1 of the Growth track. There can only be one seed in any one slot of the Growth track, but more than one seed may grow on this track at the same time, as long as you have enough Greenhouses built to accommodate them.
In 6 rounds, the seed you planted will be fully grown and will provide an additional food portion.
9. Working Bay (BUILD)
The Working Bay allows you to take the Build action. You may use this action to repair broken equipment, install upgrades, or to create mission-specific items.
Repairing broken equipment. If you want to repair broken equipment (replace a red status marker with a green one), you can do this in two ways: you can either use a spare part or switch matching parts between Facilities. The repaired equipment becomes fully operational at the end of the Action phase during which it was repaired.
DECLARING. This action requires 1 pawn (if you want to roll the brown dice to determine the outcome) or 2 pawns (if you want your action to be automatically successful). Add any additional pawns for distance if this is done outside the HUB. Together with the pawns, place any additional resources required for that Build action:
If you use a spare part: Take a corresponding spare part from the Cargo Bay and place it together with your pawns where you want to make the repair.
If you switch parts between Facilities: Take the green marker from where the working part is being removed and place it with your pawns where you want to make the repair. Note: The part you took the marker from is immediately considered broken (its cost/penalty applies), but the part you repaired becomes operational only at the end of this Action phase. See example in the box below.
RESOLVING. When you successfully resolve this action:
If you used a spare part: Replace the red marker with a green one where you did your repairs. Discard the spare part token.
If you switched a part between Facilities: Move the red marker from what you repaired to where you took the corresponding working part from. Put the green marker (the one you had with your pawns) in place of that red one.
Example: Switching parts between Facilities. You want to replace the broken Energy Connectors in the Garage Hall with the working Energy Connectors from the Lab. When you declare your action, you place your two pawns and a green status marker from the Lab on the Garage Hall. As other actions are resolved this round, the Garage Hall is not yet repaired (cannot use power and needs 1 modifier whenever it's used) and the Lab is already broken (you took the green marker out of this Facility, so it needs 1 modifier whenever it's used, too). When you successfully resolve your Build action to repair the Garage Hall, move the red status marker from the Garage Hall to the Lab, and insert your green marker in the empty slot in the Garage Hall. The Energy Connectors in the Garage Hall will become operational at the end of this Action phase.
In case you chose to use 1 pawn less and roll the brown dice to determine the outcome: If you roll no success, simply put the green marker (the working Energy Connectors) back to where you took it from.
Disassembling
Each Upgrade card (see p. 18) has two spare-part symbols printed on it. If a given Upgrade card is available to you but you don't intend to install it, you can return it to the box and take the two indicated spare parts instead. Place them in the Available area of the Cargo Bay — you can use them right away. This can be done at any time during a round and is not considered an action.
You can also replace a green status marker in any of the Facilities for a red one — take the corresponding spare part and place it in the Available area of the Cargo Bay — you can use it right away. This is not an action but can only be done at the beginning of the Action phase.
Repairing rovers
You can use the Build action to discard any one token from the Depot.
DECLARING. This action requires 1 pawn (if you want to roll the brown dice to determine the outcome) or 2 pawns (if you want your action to be automatically successful). Place your pawns in the Depot, next to the rover you want to repair.
RESOLVING. When you successfully resolve this action, discard 1 chosen token from the x space of that rover.
Gameplay: Malfunction
Upgrades
Facilities can be upgraded. The game comes with many Upgrade cards, but not all of them may be available in a given mission. When you set up a mission, the app specifies how many and which upgrades are available during that mission.
Each upgrade is compatible with only 1 Facility (as indicated by the icon in the bottom right corner of each card). The effect of installing a given upgrade is always printed on that Upgrade card.
DECLARING. This action requires 1 pawn (if you want to roll the brown dice to determine the outcome) or 2 pawns (if you want your action to be automatically successful). Place the pawns on the Upgrade card you wish to install.
RESOLVING. When you successfully resolve this action, remove the Upgrade card from the game. Place the corresponding Upgrade tile in the Pending area of the Cargo Bay. It becomes operational during the Clean-Up phase.
V. Malfunction
In the Malfunction phase, you roll the Malfunction dice and resolve their effects, adding them to the current Malfunctions.
There's a Malfunction track on the right of each Facility Block. Each track has 6 spaces numbered 0-5. The Malfunction box in the bottom right corner of the main board tells you which Facilities are in danger of malfunction.
To resolve the Malfunction phase:
First, assemble your pool of Malfunction dice for this round. Consult the mission sheet to see which Malfunction dice (if any) must be rolled. Then, check the Malfunction box to see which dice to add to the pool — unless they are already in that pool (a red marker = add that die; a green marker = don't add that die).
Roll all dice from this pool.
Then, for each Block: add +1 for each active penalty in that Block to what you rolled on the corresponding die. If you didn't roll a given die, the base result for that Block is 0, but you must still add all active penalties from that Block.
Next, accordingly - move the markers up their tracks by the number rolled on the corresponding dice.
Finally, resolve the effects of the Malfunction tracks, if any were triggered. Whenever Malfunction reaches or should pass 5, draw 1 Malfunction card from the corresponding Malfunction deck, resolve its effect, put the card on a face-up discard pile next to its deck, and reset the track to 0. Additionally, if the next Block in sequence has a green marker in the Malfunction box, change it to red: Working Block -> Living Block -> System Block -> Working Block. For example, if Malfunction lands at 5 on the Living Block Malfunction track and the System Block has a green status marker in the Malfunction box, change that status marker to red.
If you ever run out of Malfunction cards in any deck, shuffle the corresponding discard pile to form a new deck.
After resolving the consequences of the Malfunction phase, move the white marker on the Round Order track down 1 space and proceed to the Clean-Up phase.
Resolving keywords
Each Malfunction card has a pair of keywords on it (for example: Complication. Lab). When you're asked to resolve a card with a certain keyword, draw cards one by one until you encounter the one you need. For example, if you need to resolve 1 Living Block Obstacle card, draw successive Living Block Malfunction cards until you encounter one with the Obstacle keyword on it. Resolve that card, discard all the others.
Malfunction dice colors
Malfunction dice, just like action dice, are color-coded. This helps you quickly identify which die corresponds to which Facility Block.
But there is more to it than that. Yellow, orange, and red indicate increasingly more deadly consequences of the respective Block's Malfunction. If you can, attend to the System Block first — if these Facilities remain broken, the dangers can quickly become too much to handle.
Gameplay: Clean-Up, End of the Game
VI. Clean-Up
In the Clean-Up phase:
- In each Facility: Discard the tokens (if any) from the ! space and move the topmost token (if any) from the >> space to the ! space.
- Move everything from the Pending area of the Cargo Bay to the Available area of the Cargo Bay. If there are any Upgrade tiles here, move them to their respective Facilities.
- Move the white marker on the Round Order track back to the top space.
- Discard all black markers from the skills used this round; any Skill cards used are flipped back face up.
- Pass the First Player token clockwise to the next person.
- Move the white marker to the next space of the Sol Counter on the mission sheet.
The First Player clicks the Next Round button in the app and it will tell you if the mission has ended. If it didn't, a new round now begins.
Modifier tokens
Modifier tokens trigger a number of in-game effects. They can, for example, force you to use an additional pawn, or to reroll a success die. All the icons on the Modifier tokens are explained in the table at the end of the rulebook.
Whenever an effect introduces a new Modifier token into play, you will be instructed where to put this token. Modifier tokens do not act retroactively — they cannot influence an action that was already declared even if it hasn't been resolved yet. They do apply, however, to all future actions until the end of the round in which they've been discarded.
Ending the Game
Players win and lose together. There are several possibilities:
Victory. You succeed in your mission if you complete all the mandatory mission objectives before the end of the game. If the mission has a Threshold value, you must be at or below that Threshold. The app then declares you winners.
Defeat. You all lose when:
- At least one of the astronauts dies.
- You run out of time: You failed to complete all of the mandatory mission objectives by the end of the mission.
- You do not meet the Threshold value at the end of the mission (if a mission requires a Threshold).
Objective tokens
Objective tokens are mission-specific. They are used to track your progress in the mission. Generally, red tokens indicate mandatory objectives, the orange ones are optional objectives, and the black ones are used in other cases.
When you gain an Objective token, place it where the mission sheet tells you to. If no place is specified, put it in the Pending area of the Cargo Bay and treat it as anything else you gather.
When an Objective token gives you something — for example, a sample or a spare part — you can replace it for that thing at any time after gaining that token, unless instructed otherwise.
Note: The numbers on the tokens do not reflect the hierarchy of goals.
1-3 Players
The following changes are introduced when there are fewer than four astronauts in play:
- Begin the game with the Auto-scanner Upgrade tile already in play. Discard the Auto-scanner Upgrade card (so that you don't draw it during setup).
- If there are 3 astronauts in play, for each mission you can choose 1 AOM to help you. Take its card and its pawn.
- If there are 2 astronauts in play, for each mission you can choose 2 AOMs to help you. Take their cards and pawns.
- If you play solo, use 2 chosen astronauts. All AOMs are available to help you, but in each round you can use no more than 2 of them. You may choose them during each round, as you see fit.
Campaign Mode
The Campaign Mode
The first few months saw you performing all the activities more or less on schedule. However, making sure that all the facilities are up and running, and keeping them maintained, proved more difficult on Mars than your training back on Earth.
Astronauts, however, do not lack stamina. You doubled your efforts to keep the HUB in good condition while continuing with your enterprise. More weeks came and went. The little, unexpected adversities and everyday tension became increasingly difficult to bear. What was planned as an exploratory operation is now slowly turning into a survival mission. However, the most dramatic events are yet to unfold.
ONLY READ THE INFORMATION ON THE COVER OF A CAMPAIGN BOOKLET. IF YOU DON'T WANT TO SPOIL YOUR EXPERIENCE, DO NOT EVEN BROWSE THROUGH THE BOOKLET UNTIL YOU ARE READY TO START PLAYING.
In addition to standalone missions, First Martians: Adventures on the Red Planet offers you a thrilling campaign mode. A campaign is a series of five missions with a captivating overarching story for you to discover. There are two campaigns in the box. We suggest you play The Labyrinth of the Night first. The other one — Welcome to Mars — is a legacy-style one: There are some special components you will use only once. Each mission in a campaign takes about 60-90 minutes to play.
The campaigns are independent of each other — they tell different stories.
When you are ready to begin a campaign, set up its first mission. Choose your astronauts wisely, because you won't be able to change them later in the campaign. Each mission in a campaign follows normal rules for a standalone mission. If there are any gameplay changes, they are provided by the mission sheet or through the app.
Winning and losing in a campaign
When you lose a mission during The Labyrinth of the Night campaign, the app will give you an option to replay that failed mission or restart the entire campaign. The Welcome to Mars campaign is a legacy one and none of its missions can be replayed.
When you win a campaign mission, the app will reward you with some bonuses, according to how many objectives you managed to complete within the time limit. It is strategically wise to try to complete as many objectives as you can. Otherwise, your future missions may be more challenging.
Saving the game
The consequences of your actions from the previous missions are carried over to the next, so in order to continue with the campaign, you must record the current situation. When the app asks you to save the game status after a successful mission, click Begin and closely follow the instructions on the screen.
Once you've recorded all the necessary information, you can proceed to the next mission — either right away or later, whenever you're ready. The saved game allows you to recreate the campaign's status at any time.
Resuming the Game
When you click the Continue Campaign button in the app's main menu, you will see a list of previously saved gameplays. Select the one you wish to continue with. As you click through subsequent screens, you will recreate the state of things as they were at the end of the chosen mission. When this has been done, start the next mission.
Setting up the next mission in a campaign is different from setting up a standalone mission; the setup relies on the state from the end of the previous mission. If the app does not specifically tell you to change a game element, that element remains in its place (don't discard your conditions; don't repair the Facilities; whatever you explored remains explored; the skills you unlocked remain available; the supplies you used are not replenished, etc.). Adventures whose consequences have not yet been resolved may still surface in this mission.
About the campaigns
First Martians: Adventures on the Red Planet offers two campaigns which are distinctly different from standalone missions. We cannot give you too many details at this stage, but we want you to remember a couple of things.
-
First and foremost, the campaigns are designed to provide you with an opportunity of immersive, emotionally engaging experiences. The basic mechanics you used in standalone missions are now expanding to accommodate for a story they need to tell. The plotline and your choices are the most important elements of the campaigns.
-
You will need to make more decisions than during standalone missions. For example, it now becomes much more important to care for your astronauts. It's not enough to scrape through one mission, leaving your astronauts barely alive, because there are more tasks ahead of you! If you don't attend to your astronauts now, they will likely die in the missions to come.
-
The supplies you have, your spare parts and reserves, are not to be used immediately. Remember, you might need them later on. What you have is given to you for the entire campaign, so decide carefully whether to spend a resource or not.
-
Plan ahead. Growing a plant from a seed takes time. Unlocking skills requires making Discoveries (see the Skills box on p. 5). You will often find yourself having less time than you need, but there are some important actions you should take early on. The further you are in the campaign, the more devastating the consequences of your past delays may become.
-
All the missions within one campaign are best played with the same gaming group. This is to ensure the feeling of owning the choices from the previous missions.
FAQ
The most recent FAQs are accessible through the app. Find answers to your questions easily on your device.
Q: When Objectives tokens are referred to by a range (e.g. #1-3), do you mean "#1, #2, and #3" or "#1, #2, or #3"?
A: Whether a particular statement refers to one Objective token or many, depends on how it's worded. "Objective tokens #1-3" means three Objective tokens (#1, #2, and #3) whereas "an Objective token #1-3" means one Objective token (#1, #2, or #3).
Q: When multiple effects copy the same result, do I have to resolve that result multiple times?
A: Only spare-part tokens add up. Apart from that, other tokens, cards, costs, and penalties cannot multiply a single effect (for example, you never resolve more than 1 Adventure per action and you never need to reroll a success die more than once).
Some examples: If you're asked to put the sample token on an ROI with the Chasm on it, ignore that instruction — the Chasm already has the effect. If you're asked to put a token on a given ! space and there already is a token there, ignore that instruction. However, if you're asked to place a token on a given >> space, you must always do so — this is because none of these tokens is active; when you move the top token to the corresponding ! space, only one such token will be active at a given time.
Q: When an effect allows me to redraw a particular type of card, what exactly am I supposed to do?
A: If you're unhappy with what you drew, you can discard this card and draw another one. You must resolve the new card.
Q: When I shut down a Facility, can I still use that Facility Upgrade?
A: No. As long as a Shutdown tile is on that Facility, you cannot use its actions and upgrades (for example: if the Lab is shut down, you cannot plant new seeds; if the Crew Quarters are shut down, you do not gain an additional Morale token in the Production phase).
Q: Concentration Difficulties. If there are multiple pawns assigned to one action and among those pawns there are two astronauts with Concentration Difficulties, do I have to resolve that condition's effect twice?
A: No, because only the effects of tokens add up.
Q: I flipped a Shutdown tile and it tells me to add +1 to my production of energy/oxygen, but my current production is already at its peak. What do I do?
A: Nothing. Shutdown tiles cannot boost production beyond your maximum production capacity.
Q: Can each action taken in the Control Center during the same round target a different Malfunction track?
A: Yes.
Q: If the game tells me to place a token but there are none left, what do I do?
A: Markers and tokens (save for Condition tokens) are not limited to the components in the box. For example, if you need to place a token on the board but there are none left, use a multiplication tile. If you need to use a red marker to indicate a broken part but there are no red markers left, use anything else as a substitute. Running out of markers or tokens does not mean you cannot or should not apply their effects.
Q: When I get a condition token for passing the icon on my health track, then I get healed and then suffer another wound, do I get another condition for skipping that same icon again?
A: Yes. The rules say, "Every time that icon is passed…", not "The first time that icon is passed...".
Q: If an action has a modifier penalty, why would I ever use more than the minimum number of pawns necessary to perform that action?
A: Let's assume there are no other modifiers currently active, and 1 pawn on a given action means rolling dice and 2 pawns mean a sure success. The penalty in question only refers to the die, so if you use 2 pawns, you roll only that one die; but if you use 1 pawn, you still need to roll all three dice (risking a wound and/or an Adventure) — of course, you don't roll the Adventure die twice.
Q: When I want to flip over a Shutdown tile, do I have to take into account the costs/penalties of the Facility that tile is on?
A: No. You always need only 1 pawn to flip a Shutdown tile over.
Q: How do Complication cards work exactly?
A: When you draw a Complication card, check the other keyword to identify the Facility it refers to. The icon shown on the card tells you which part is now broken. In that Facility, change the corresponding green status marker to a red one. If that part is already broken, discard this card.
Q: When I have the red marker in the last slot of the health track, is my astronaut dead or alive?
A: Alive. The astronaut will die if you have to move the marker beyond your ID board.
Q: If I produce less energy/oxygen than I need but I have reserves in the general supply, can I use them to make up for the difference?
A: No. If you produce less than you need, you must use Shutdown tokens to switch off Facilities you can't supply with energy/oxygen - these Facilities become unavailable. Reserves from the general supply are used to pay for the cost of broken parts of available Facilities: If there is a red marker next to that cost and you want to take that Facility's action, you must then pay that cost by spending reserves from the general supply.
Player Aid
The last page of the rulebook is a two-page reference card summarizing each round's phases and the meaning of every icon used in the game. It is reproduced here in text form; icons are rendered as their named meaning.
Round Summary
I. EVENTS
- The First Player advances Malfunction.
- Players resolve their Adventures (if any).
- The First Player reads aloud the story and resolves the Mission Event.
II. MORALE
The First Player discards/gains Morale tokens according to the current Morale level. If they don't have enough to discard, they suffer 1 wound for each lacking token.
III. PRODUCTION
- Check your oxygen and energy production. If you produce less than you use, place Shutdown tiles to level out the difference. If you produce more than you use, add half of the surplus (rounded up) to the general supply.
- Move any seeds you have up 1 space. Produce as many food portions as you have fully grown plants. Consume as many food portions as there are astronauts. If there is not enough food, players decide who will not eat and suffer 1 wound for each lacking food portion.
- Increase Stress by the number of astronauts (and other effects).
- Resolve penalties of broken parts in the Working Block.
IV. ACTIONS
Players decide together which actions to take. The chosen actions are always resolved in this order:
- Events: Event action requirements are provided by the app. Take the current Event action or one of the past Event actions if it's still in the Mission log. Each Event action can be taken only once.
- A Quiet Place: 1 pawn -> gain 1 Morale token.
- Crew Quarters: 1 pawn -> +1 Morale or -6 Stress.
- Med Lab: 1 pawn + Medic/Auto-scanner -> heal 1 wound or 1 condition. The Medic heals herself.
- Control Center: 1 pawn -> -1 Malfunction on a chosen Malfunction track.
- Garage Hall: 1 pawn and green dice, or 2 pawns -> place a new ROI tile. Add samples and POI tokens (if any). That ROI's terrain effect does not apply this round.
- Probe Bay: 1 pawn and gray dice, or 2 pawns -> take 1 sample from where you gathered and move it to the Pending area of the Cargo Bay. It becomes available at the end of the round.
- Lab: 1 pawn and blue dice, or 2 pawns -> examine/discover samples using the Research box. Discoveries unlock Skills in the campaign mode.
- Working Bay: 1 pawn and brown dice, or 2 pawns -> repair equipment (replace red status markers with green ones), repair rovers (discard tokens from the rover area), or install upgrades (place the Upgrade tile on the board and discard its card).
The minimum requirements given above are modified by relevant tokens, distance, etc. You can only take an action if you can pay the cost and handle its penalties.
V. MALFUNCTION
The First Player:
- Assembles the pool of Malfunction dice for this round.
- Rolls the pool of Malfunction dice. Adds all red penalties from a corresponding Block to what they rolled.
- Moves the markers up the corresponding Malfunction tracks.
- Resolves Malfunction effects.
VI. CLEAN-UP
- In each Facility: Discard tokens from the ! space, move the topmost token from the >> space to the ! space.
- Move everything from the Pending area to the Available area of the Cargo Bay.
- Move the white marker back to the top of the Round Order track.
- Discard black markers from used Skills. Flip over used Skill cards.
- Move the white marker to the next space of the Sol Counter.
- Pass the First Player token clockwise.
List of Icons
Action costs & penalties
- In the Malfunction phase: move the marker on the corresponding Malfunction track up 1 space.
- Put the token on the Working Bay ! space.
- You must suffer 1 wound to take this action (does not affect assisting players).
- Whenever you use a rover, roll the green Wound die at the end of the Action phase. If you rolled a wound result, that rover is damaged — add 1 Blocked token to the x space of that rover. You must take the Build action on that rover to repair it.
- If you needed to roll a Success die for this action and rolled an Adventure result, you must reroll it once. Only the result of this second roll applies.
- Green: Explore; gray: Gather, Unwind; blue: Research, Heal; brown: Build, Manage — the die color that corresponds to that action (does not affect assisting players).
- Spare parts tokens (Energy Connectors / Oxygen Filters / Hardware / CPU) used for various mission-specific purposes.
ROI effects
- Your plants are dying — resolve the effects of wilting (p. 10).
- No rover can assist in Explore actions.
- To take this action, you must spend 1 spare part. You don't get it back if the action was unsuccessful.
- Even if you used enough pawns for the action to be automatically successful, you must roll the corresponding action die. If you don't roll a success, that action is unsuccessful.
- (In the Garage Hall) Whenever you use Froggy, roll the green Wound die. If you roll a wound result, Froggy is damaged - put a Blocked Modifier token on the Froggy x space. Froggy cannot be used this round or in any subsequent rounds until it has been repaired. You must take the Build action on that rover to repair it (p. 17).
- The outer edge of this ROI is impassable — you can go left or right, but you cannot go directly to a more external ring from this ROI.
- Whenever you go to or through this ROI, resolve an Adventure (does not affect assisting players).
- Whenever you go to or through this ROI, decrease Morale by 1.
- Whenever you go to or through this ROI, suffer 1 wound (does not affect assisting players).
- You need 1 pawn more for any action involving this ROI.
- Whenever a rover drives to or through this ROI, roll the green Wound die at the end of the Action phase. If you rolled a wound result, that rover is damaged — add 1 Blocked token to the x space of that rover. You must take the Build action on that rover to repair it.
Facility Parts
- Energy Connectors
- Oxygen Filters
- Hardware
- CPU
Tokens
- Blocked. This Facility or rover cannot be used this round.
- 1 token of this kind counters 1 pawn on this action.
- Resolve a corresponding Adventure when you take this action (does not affect assisting players).
- Remove 1 chosen sample from any ROI.
- Increase the Stress level by 1.
Other Icons
- condition
- Morale
- Stress
- Sample
- Malfunction
- Morale token
- wound
- Energy/oxygen/food from the general supply
Conditions
- ANEMIA — In each round's Production phase that astronaut must eat 2 food portions instead of 1. As usual, they get 1 wound for each portion they cannot eat.
- ANXIETY ATTACK — Decrease the group's Morale by 1. Resolve this effect immediately, then shuffle this token back into the stack.
- CARDIAC DISORDER — One pawn of that astronaut can only be used to take the Heal action in order to heal that condition. The other pawn of that astronaut can be used to take any action.
- CONCENTRATION DIFFICULTIES — If the astronaut with this condition token takes an action, they must resolve an Adventure. If they only assist in that action, the astronaut whose pawn is on top of the stack for this action must resolve an Adventure.
- MIGRAINE — That astronaut cannot use skills, but can spend Morale tokens for other purposes.
- POISONING — Whenever that astronaut should suffer any number of wounds, they suffer twice as many.
Index
- Action pawns — pg. 4, 11
- Action pawns (placing) — pg. 12
- Actions — pg. 8, 11
- Actions in detail — pg. 14
- Mission actions — pg. 11
- Resolving actions — pg. 13
- Successful action — pg. 13
- Unsuccessful action — pg. 13
- Adventure — pg. 13
- Adventure events — pg. 8
- Delayed event — pg. 14
- Follow-up events — pg. 8
- AOMs — pg. 12
- App — pg. 4
- A Quiet Place — pg. 11, 14
- Astronauts — pg. 4
- Aux device — pg. 14
- Blocked token — pg. 12
- Build — pg. 17
- Repairing broken equipment — pg. 17
- Upgrades — pg. 18
- Campaign — pg. 4, 20
- Campaign booklet — pg. 20
- Clean-up — pg. 8, 19
- Conditions — pg. 5
- Control center — pg. 11, 15
- Costs — pg. 11
- Crew quarters — pg. 11, 14
- Defeat — pg. 19