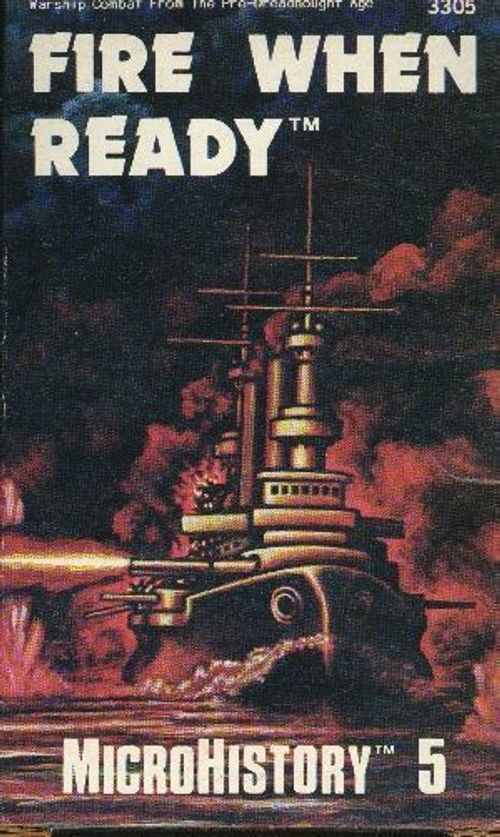
Fire When Ready
Fire When Ready Rulebook
Table of Contents
Table of Contents
A. Components
MAP: The map represents a small area of the sea's surface imposed on a hexagonal grid. Each hex is equivalent to about 400 yards from side to side.
COUNTERS: Are numbered for easy identification. Each counter represents one warship, abbreviated as follows: Battlewagon: B; Cruiser: C; Destroyer: D; Torpedo Boat: T. Movement and combat factors are not represented since these vary with each scenario.
SHIP RECORDS: Players must keep data on each ship on scratch paper where initial and subsequent damage values are noted. Notes must also be kept on ship movements to be executed in the movement phase.
B. Basic Game
B.1 Turn Sequence
Players plot, i.e. note, ship movements on scratch paper and then execute movement and combat phases simultaneously, according to the following sequence.
B.11 Combat:
A. Select targets for gunnery fire (both players, simultaneously).
B. Announce targets and resolve gunnery fire (both, simultaneously).
B.12 Movement:
A. Plot movement (both, simultaneously).
B. Execute movement (both, simultaneously).
C. Resolve any collisions which occurred during movement (see B.7 STACKING and B.8 COLLISION).
B.2 Ship Characteristics
Each ship type has five characteristics: speed, armor rating, victory point value, primary battery strength, and secondary battery strength. These characteristics are given on Table B-2 and explained in the sections that follow.
B.3 Gunnery Combat
B.31 Batteries: Bs and Cs mount one primary and one secondary battery. Ds and Ts mount one secondary battery only. See Table B-2 for battery strengths.
B.32 Procedure: All battery fire is simultaneous. Each attack (fire by one battery against one target ship) is calculated as follows:
-
The firing player cross-indexes the type of battery firing with the range in hexes to the target (count target's hex but not firer's hex) on Table B-2, Gunnery Strength section, to obtain the battery's Gunnery Strength.
-
Subtract the target's current Armor Rating from Gunnery Strength to get a Combat Differential.
-
The firing player rolls one die and consults rule B.5 TRAINING to determine whether an automatic miss results. If so, he ends this procedure.
-
The firing player rolls two dice, cross-indexing the result with the Combat Differential on Table B-3: Gunnery Combat Results Table. Any result of a capital letter ("A", "B", and so on) indicates a hit for damage.
-
The firing player consults Table B-4: Gunnery Damage Table and applies any damage inflicted AT THE END of the gunnery fire phase. Targets that have not fired resolve their fire before applying damage.
EXAMPLE: A B with a training level of three fires its primary battery at an enemy B six hexes away. Both ships are undamaged. The Combat Differential is (7-8=-1). The firing player rolls a two on one die. Checking the training rule, he finds an automatic miss does NOT result. He then rolls a 7 on two dice under the Combat Differential column for -1, producing an "A" (superstructure) hit. Referencing Table B-4, target B loses one point from its secondary battery strength in future turns.
B.33 Restrictions: A single battery may fire against only one target. Ships with primary and secondary batteries (all Bs and Cs) may fire both at the same or different targets during the same combat phase. Batteries reduced to strength "0" may fire; batteries reduced BELOW "0" may NOT fire.
B.34 Primary Battery Depression: A primary battery MAY NOT fire on Ds and Ts at a range of THREE or less. (The guns cannot depress low enough.)
B.35 Battlewagon Armor: Any hit on a B by a SECONDARY battery is automatically treated as an "A" hit. Small guns can't seriously damage thick armor.
B.4 Damage
B.41 Damage to Guns: Damage to primary and secondary batteries reduces their gunnery strengths below those indicated on Table B-2.
B.42 Damage to Speed: Damage to speed lowers the number of movement factors available to a ship. A ship with no movement factors may not move. Further damage to speed of a ship with no movement factors remaining does NOT result in any other damage.
B.43 Damage to Armor: Damage to armor lowers a ship's armor rating. When that rating drops BELOW zero, the ship is sunk and removed from play. A ship with ZERO armor rating is NOT sunk.
EXAMPLE: A previously undamaged B receives an "E" (explosion) hit. Its secondary battery strength is reduced by three, so any future secondary battery attacks at a two hex range will be at a strength of two, not five. Its primary battery strength is reduced by two. Future primary attacks at a range of five hexes will be at strength six, not eight. Its armor rating is cut from eight to six. Its speed is reduced from three to two movement factors.
B.5 Training
During this era training was decisive. An outgunned and outarmored force with good training might defeat a superior force with poor training.
B.51 Procedure: As noted in step three of the combat resolution procedure (rule B.32 above) the firing player must roll one die. If this die roll is LESS THAN OR EQUAL TO the training level of the firing ship, as specified in the scenario, proceed to the next step of combat resolution. If the die roll is greater than the firing ship's training level, an AUTOMATIC MISS results.
B.6 Movement
B.61 General Case: Each hex costs one movement factor to enter. All ship types may only move into the hex their bows point to. "Side-slipping" or moving in reverse are never allowed. Ship movement and speed are "plotted", i.e. noted, on scratch paper, see B.12(A) of the Turn Sequence.
B.62 Momentum: A ship may only increase or decrease its speed by one movement factor per turn.
EXAMPLE: A ship with a movement factor of 4 that moved two hexes last turn may only move one, two, or three hexes this turn.
B.63 Turning Restrictions:
-
Bs may turn only once per movement plot. They spend one movement factor to turn one hexside. Bs may never turn more than one hexside within a hex.
-
Cs may turn once for every new hex entered during movement. They spend one movement factor to turn one hexside. Cs may never turn more than one hexside within a hex.
-
Ds may turn once for every new hex entered. They spend one movement factor to turn either one or two hexsides. Ds may never turn more than two hexsides (for example, reverse course) within a hex.
-
Ts may turn once for every new hex entered. They spend NO movement factors to turn one, two, or three hexsides within a hex.
B.64 Turning in Place: Bs and Cs may never turn in place or begin their moves by turning, but must enter a new hex before having the option to turn. Ds and Ts may turn in place at the start of their moves by spending one movement point to turn one hexside. They may not turn in place more than one hexside.
B.7 Stacking
B.71 General Case: If more than one ship occupies a hex a collision may result. If ships of the same or opposing sides PASS THROUGH OR END MOVEMENT in the same hex at the same instant, by accident or intent, the player(s) MUST use the collision procedure (see rule B.8). Ships are determined to have occupied the same hex at the same instant by retracing the movement of such ships and considering the time element of that move.
EXAMPLE: In the diagram below, a T, moving at a speed of four, uses its second movement factor to enter hex "Z". A B, moving at a speed of two, uses its first movement factor to enter hex "Z". Since hex "Z" was occupied by both ships during the first half of each ship's movement, the players involved must perform the collision procedure.
[Diagram: a T and a B approaching hex "Z" from adjacent hexes, with the movement factors marked.]
B.8 Collision
B.81 General Case: Whenever more than one ship passes through or ends movement in the same hex at the same instant, use this collision procedure.
B.82 Procedure:
-
Determine the Approach Angle of the ships.
-
Determine which player has the choice of trying to EVADE collision or cause one by RAMMING.
-
Determine if a collision occurs by consulting the correct section of Table B-8: Collision Table.
-
Consult Table B-86 to determine the number of times each ship in collision must roll for waterline damage. Then consult Table B-87 to assess the results of any waterline damage rolls.
B.83 Approach Angle Determination: Determine from which hex the ships entered the collision hex to determine the angle of approach. The four possible approach angles are: bow on, bow quarter, stern quarter, and stern on.
[Diagrams: four hex-grid illustrations, one each for bow on, bow quarter, stern quarter and stern on.]
B.84 Evade or Ram Option: One player will usually have the option to EVADE collision, to try to reduce its chances of occurring, or RAM, to increase those chances. The following priority order determines which player has the option.
-
The player whose ship has the HIGHER movement allowance may choose to evade or ram.
-
If the ships have identical movement allowances the player with the SMALLER ship chooses (B is biggest, then C, and D, with T smallest).
-
If movement allowance and size are identical, the player whose ship has the highest TRAINING level may choose.
-
If movement allowance, size, and training are all the same, players use the EVEN option on Table B-8: Collision Table.
B.85 Collision Determination: Cross-index the appropriate line of B-8 Collision Table for the angle and option with the largest ship involved. The player who had the option to choose rolls two dice, one die preferably colored red or some other shade to distinguish it from the other die. Read the colored die as the "tens" result and the white die as the "ones" result. If the result is equal to or less than the number shown on Table B-8, a collision has occurred.
EXAMPLE: In the example under rule B.7 above, involving a B and a T, the players first determine that the approach angle is "Stern Quarter". The player owning the T has the faster ship; it can move 4 to the B's 3, and he selects the "Evade" option. Cross-indexing the "Stern quarter--evade" line with the largest ship involved, a B, gives a number of 21. The T player rolls a three on the red die and five on the white for a 35, no collision occurs. Had the T player elected to ram, a collision would have occurred since the "Stern quarter--ram" line gives a number of 36.
B.86 Collision Damage: Consult Table B-86: Collision Damage Table for each ship involved. The number indicated is how many times that ship must roll on Table B-87: Waterline Damage. If an asterisk appears on the table in place of a number, Table B-87: Waterline Damage is not consulted. Instead, the player rolls one die. If an odd number is rolled, he assesses one armor hit to his ship involved. If an even number is rolled assess no hits.
EXAMPLE: In the example above, under rule B.85, if the B and T do collide, each must consult Table B-86. The B collides with a T, so the B's result is an asterisk on the table. The T collides with a B so T's result is a "1" on the table. The T's result must be rolled once on Table B-87: Waterline Damage. The B need not consult the table. The player owning the B rolls one die, incurring one armor hit if the roll is odd, none if even.
B.87 Special Case: Difficult Angles: Some difficulty may arise in determining the approach angle if ship(s) have been plotted to turn in the collision hex. In this case, the player who has the option of selecting "evade" or "ram" may declare whether the ship or ships plotted to turn have completed the turn(s) or not at the instant they undergo the collision procedure. If the "even" option is being used, roll a die for each ship plotted to turn. On an even roll, the ship completes its turn, on an odd roll, it has not yet turned when the collision procedure is used. Adjust the approach angle accordingly.
B.88 Special Case: More Than Two Ships: If more than two ships occupy the same hex at the same instant players should determine which ship will have first choice in choosing the "ram" or "evade" option. The player of this ship then chooses which other ship he wishes his ship to be involved with and repeats the procedure with this new pairing. These pairings continue until all possible pairings in the hex have been resolved. If a ship is sunk in any collision, it does NOT become involved in any subsequent pairing for the collision procedure.
C. Basic Game Scenarios
C.1 Revenge for Fashoda (Hypothetical)
During pre-dreadnought times, Britain and France engaged in a naval race. They never came to blows, and became allied against Germany in 1914. But, there were times when they might have fought.
One such was Britain's unilateral occupation of Egypt in the mid-1880's. Another came during the Fashoda Crisis, when British and French troops faced each other on the banks of the Nile, upriver from Cairo. This scenario assumes that war resulted.
A battle-ready portion of France's Mediterranean Fleet has sailed from Marseilles to intercept a British squadron which has passed through Gibraltar, hurrying toward Cairo. The forces are evenly matched. Each commander has been ordered to inflict maximum damage on the enemy vessels since the first battle could be of decisive importance at the negotiating table once hostilities are over.
C.11 Forces: The British player has 4 Bs (Royal Sovereign, Resolution, Revenge, and Empress of India), 2 Cs (Endymion and Edgar), and 4 Ds (Shark, Surly, Spitfire, and Swordfish).
The French player has 4 Bs (Charles Martel, Carnot, Jaureguiberry, and Massena), 2 Cs (Bruix, Chanzy), and 4 Ds (Levrier, Casabianca, Cassini, and D'Iberville).
C.12 Training: All ship training levels are five.
C.13 Set Up: The French enter anywhere on the west edge, the British from any hex on the east edge.
C.14 Special Rules: None.
C.15 Ending the Scenario: The game ends when ONE of the following conditions is met: a) all of one player's ships are sunk, b) twelve turns have passed since the first hit was scored by either player's ships (reflecting ammunition limits), or c) no ships of opposing sides are within eight hexes of each other for three consecutive turns.
C.16 Winning: The player with most victory points wins. For each enemy ship sunk, score the number of victory points indicated on Table B-2. Score two victory points for each ARMOR hit inflicted on any enemy ship not sunk.
C.2 The Battle of Manila Bay (Historical, solitaire)
Admiral Dewey's victory in Manila Bay will probably remain unsurpassed in its magnitude. Dewey annihilated the entire Spanish fleet, losing no ships and, more remarkably, with no American sailors killed. Most of the Spanish ships were in miserable shape, but they were not altogether toothless, as players will discover. This scenario is excellent for a quick introduction to the mechanics of FIRE WHEN READY, in addition to its challenge to meet or surpass the record of Dewey.
C.21 Forces: The (active) American player has 4 Cs (Olympia, Baltimore, Boston, Raleigh) and 2 Ds (Concord, Petrel). The Spanish force has 7 Cs (Reina Christina, Isla de Cuba, Isla de Luzon, Don Antonio de Ulloa, Don Juan de Austria, Castilla, Velasco) and 3 Ts (Marques del Duero, General Lezo, El Cano).
C.22 Training: American ships have a two training level, Spanish ships have a one training level, except for Reina Christina at two.
C.23 Set Up: All Spanish ships are set up in the easternmost hexrow of the board, facing north. The better Spanish C (Reina Christina) sets up exactly twelve hexes from the southern edge of the board in that eastern hexrow. The 3 Ts set up in column directly to the south of this C (that is, exactly eleven, ten, and nine hexes from the south edge of the board, in the easternmost hexrow). The remaining Spanish ships set up from one to eight hexes from the south edge in that eastern hexrow in any order the player wishes. The American ships enter the map on turn one from the north map edge.
C.24 Special Rules:
-
Any ship attempting to exit the map off the west, east, or south edges runs aground in the last hex before exiting. Immediately roll once on Table B-87: Waterline Damage. After assessing damage, it must remain in that hex for the rest of the game.
-
American ships may exit off the north edge without penalty and may re-enter anywhere on the north edge after spending four turns off the map.
-
The six "poor" Spanish cruisers NEVER move, being either under repair or raising no steam.
-
The good Spanish C (Reina Chr.) and Ts MAY move the turn after any Spanish ship suffers an armor hit. The C moves on a die roll of 1-6. Roll one die for each T. A T moves on a roll of 1-4 but can't move for the rest of the game on a 5 or 6.
-
Once the Spanish ships are activated, the Turn Sequence is adjusted: Move the American ships first, then move the Spanish ships according to these priorities: a) a Spanish ship may never be run aground, and b) a Spanish ship will move so as to bring it as close as possible to an American ship. If two American ships are equally nearby, determine which the Spanish ship moves toward randomly. c) If possible, the Spanish C will try to collide with an American ship. The Spanish Ts will move into zero hex range but will always choose to evade during the collision procedure.
-
Moving or not, ALL Spanish ships fire at American ships according to these priorities: a) at the nearest American ship within range as soon as it is able; b) continue to fire at that same American ship as long as that ship is in range (avoiding training penalties if advanced rule D.4 is being used), and c) if one or more American ships are the same distance, fire is at the target with lower armor rating. If armor ratings are even, determine the target randomly.
C.25 Ending the Scenario: The game ends when all Spanish ships are sunk. Compute your performance as follows: ADD the number of turns in which any American ship fired on any Spanish ship, PLUS the number of armor hits suffered by the American ships DOUBLED, PLUS ten for each American ship sunk. Compare the numerical result to the table below.
C.26 Winning the Scenario:
- 1-5: Run for president: you've beaten Dewey's record.
- 6-9: National Hero - you've equalled Dewey.
- 10-14: A solid victory with odds in your favor.
- 15-20: A victory, but foreign naval observers are not impressed with your performance.
- 21-30: A Pyrrhic victory and possible court-martial.
- 31+: Disaster - head for the Philippines' jungle before news reaches home.
C.3 Dewey Fights Again (Hypothetical)
Soon after Dewey's victory in the Philippines, various European powers sent squadrons-of-observation to Manila Bay, eager to see whether, and if, the United States would keep the ex-Spanish colonies. One of the more provocative powers was Germany. Historically, nothing came of the situation and the German squadron was never very powerful.
This scenario assumes that the German Kaiser has elected to risk war over the Philippines and sent heavy units to Germany's Asiatic Fleet. That fleet has blockaded Dewey inside the bay. Dewey, in turn, has been reinforced by the battlewagon Oregon (which this scenario assumes was ordered to him instead of steaming "around the Horn" as it did historically) escorted by the cruiser Marblehead and some destroyers. Dewey has learned that a convoy of American troopships is now bound for Manila. He must leave the bay and rendezvous with it.
C.31 Forces: The German player has 2 Bs (Brandenburg, Wilhelm), 6 Cs (Bussard, Seeadler, Condor, Geier, Irene, Prinzess Wilhelm) and 2 Ds (Wolf, Iltis). The American player has 1 B (Oregon), 5 Cs (Olympia, Baltimore, Boston, Raleigh, Marblehead), and 6 Ds (Concord, Petrel, Yorktown, Bennington, Dolphin, Bancroft).
C.32 Training: All German ships' training level is four. All American ships' level is five.
C.33 Set Up: German ships set up in any hex which is three or fewer hexes from the west map edge. American ships enter from any hex on the east edge of the map on turn one. They enter in column, each ship behind the next, even if all American ships will not be able to enter the map right away.
C.34 Special Rules: None.
C.35 Ending the Scenario: The game ends when one of the following conditions is met: a) all of one player's ships are sunk, b) fourteen turns have passed since the first hit was scored by either player's ships, or c) all American ships not sunk have exited off the west map edge.
C.36 Winning: The player with most victory points wins. For each enemy ship sunk, score the number of points indicated on Table B-2. Score two points for each armor hit inflicted on any type of enemy ship not sunk. The American player receives 8 points per B exited from the west map edge by game's end, 4 points per C, and 1 point per D, regardless of damage suffered by any ship.
D. The Advanced Game
D.1 Advanced Turn Sequence: The Advanced Game retains the simultaneous nature of play, but a slightly more complex sequence is necessary with the addition of new rules.
I. Gunnery Combat:
A. Select targets for gunnery fire (both players, simultaneously).
B. Announce targets and resolve gunnery fire (both, simultaneously).
II. Movement and Torpedo Combat:
A. Plot movement and torpedo attacks (both, simultaneously).
B. Execute movement and announce torpedo attacks (both, simultaneously).
C. Resolve any collisions which occurred during movement (see rules B.7 Stacking and B.8 Collision).
D. Resolve torpedo attacks (see rule D.6 Torpedo Attacks).
D.2 Advanced Ship Characteristics: Table B-2 of the Basic Game describes gunnery strengths, speeds, armor ratings, and so on of the typical B, C, D, and T. Often, ships did not conform to these standard descriptions. Accordingly, for every scenario there is a chart showing how the ships involved differed from the standard design. These charts MUST be used in the advanced scenarios (See Rule E.0 [sic] Advanced Scenarios). They MAY be used in the basic scenarios to add flavor and variety.
D.21 How to Use the Scenario Charts: Victory point values remain as shown on Table B-2. Scenario chart speed and armor ratings OVERRULE Table B-2. Scenario chart primary and secondary gunnery strengths MODIFY the values given in Table B-2. The scenario chart shows a positive modifier if the ship had more or larger guns and a negative modifier if the ship had fewer or smaller guns than standard designs in Table B-2. If the scenario chart shows an "X" for a battery's strength, that ship does not possess ANY gunnery strength for that battery.
EXAMPLE: Scenario chart E-12, describing forces for the Battle of the Yalu, gives the following values for the Chinese B: the Chen Yuan: Primary battery: -2, Secondary battery: -4, Armor Rating: 5, Speed: 3. This means that the Chen Yuan has an armor rating of 5, not the standard rating of 8 for a B. It does have a speed of 3, like a standard B. Its guns are weaker. At a range of two hexes, the Chen Yuan fires its primary battery at a strength of six, not the usual eight, and its secondary battery at a strength of one, not the usual five.
D.3 Advanced Combat - Arc of Fire and Split Fire:
D.31 Purpose of Rules: The Basic Game assumed that a ship could use its full battery strength at any target within range, regardless of whether that target was off the firing ship's bow, stern, or broadside (see diagram below). In fact, not all guns could be brought to bear in all directions. In addition, ships sometimes would split the fire of their batteries. To reflect these restrictions and opportunities, use the following procedures according to battery type.
[Diagram: a hex-grid illustration of a ship's bow, stern, port broadside and starboard broadside arcs.]
D.32 Primary Batteries: Ships with a primary battery may fire that battery at two targets. One target may be in the bow arc and one in the stern, or one target may be in the port (left-hand) broadside and one in the starboard, or any of the above combinations except the following: Ships may NEVER fire at FULL primary strength at a target in the bow arc or stern arc. When ships elect to split fire, each fire must be resolved at half primary gunnery strength. Round fractions down. Ships may NEVER use this split fire option to fire the same battery twice (each fire at half strength) at a single target.
D.33 Secondary Batteries: Ds and Ts may never use the split fire option. They may always use their full secondary battery strengths at any target in range, regardless of which arc the target is in. Bs and Cs may use the split fire option for their secondary batteries.
In the Advanced Game, each B and C possesses TWO secondary batteries, one to port and one to starboard. The port secondary battery may never fire at any target in the starboard arc, nor the starboard battery at any target in the port arc. Each battery may fire at FULL strength at a target in its own arc. Instead of this full-strength fire, each secondary battery may elect to fire at a target in either the bow arc or stern arc at a gunnery strength of ZERO, regardless of the full strength of the battery at the instant of fire. A ship MAY have both its secondary batteries use this zero-strength fire at the same ship in the same fire phase.
D.34 Training Effect on Split Fire: When a ship's primary or secondary battery or batteries utilize split fire, the firing ship's training level is considered as one lower than stated in the scenario. This penalty does NOT apply if the ship's primary battery fires at ONE target and its secondary battery or batteries at ONE different target.
EXAMPLE: White's B in the diagram below elects to use the split fire option for its primary battery and secondary batteries. All its guns are at full strength. It fires its primary battery at the enemy B in its bow arc and the enemy C in its starboard arc. Since each fire is at half strength, it fires at the enemy B with a strength of four and at the enemy C with a strength of two. Now, it fires its port secondary battery at the enemy D in its port arc. This fire is at full strength, namely five. And it fires its starboard secondary battery at the enemy T in its stern arc. This fire is automatically at strength zero. Since both primary and secondary batteries used the split fire option, all these attacks would receive the training penalty.
[Diagram: hex-grid illustration of White's B and the enemy B, C, D and T in the arcs described.]
D.4 Advanced Combat: Gunnery Accuracy
D.41 Purpose: The Basic Game assumes accuracy was constant from the very first salvo. In fact, a few salvos were used to zero-in a target. Only with continued fire would accuracy increase. Ships rarely switched targets once they were engaged.
D.42 Zeroing-in: In the first gunnery phase a battery fires at a specific target, TWO is subtracted from the firing ship's training level. The second phase the battery attacks the same target, ONE is subtracted. Subsequent consecutive attacks on the same target are made normally.
D.43 Switching Targets: If a battery fires on a new target, the zeroing-in process must be repeated. If the battery later returns to a target it had attacked before, that target is nevertheless considered a NEW target and the zeroing-in process must be repeated.
D.44 Special Case - Split Fire and Accuracy: A ship may fire at two targets with the same battery and later end split fire and concentrate the unified battery against one of those old targets. The first such unified attack subtracts only ONE from its training level. Second and subsequent unified attacks are normal. If a unified battery splits fire, that half of the battery remaining with the old target suffers no training penalty.
D.5 Advanced Combat: Blocked Gunnery Fire
D.51 Purpose: Ships, especially the larger ones, were obstacles to fire in battles. Ships sometimes used this fact to screen themselves from enemy fire.
D.52 Procedure: A ship may not fire its primary or secondary batteries at a target if its line of sight, drawn from the middle of the firing ship's counter to the middle of the target ship's counter, passes through the ship SILHOUETTE (not counter) of any intervening ship of the same type or larger than EITHER the firing or target ship.
EXAMPLE: In the diagram below, ship three wishes to fire at ship one. Assume both ships are Cs. If ship two is a D or T, the fire is allowed. If ship two is a B or C, it is not.
[Diagram: three C counters in a row, numbered one to three, with ship two between ship one and ship three.]
D.6 Advanced Combat - Torpedo Attacks:
D.61 Purpose: During the age of iron and coal, self-propelled torpedoes were first designed and used in naval combat. These first torpedoes had limited range and rarely hit moving targets. When they did strike home, however, they could be deadly to ships designed primarily to resist shell from above the waterline, not "fish" from below.
D.62 Torpedo Launch Procedure: Unless stated otherwise in the scenario chart, ALL ships carry torpedoes. Each ship may make one torpedo attack PER GAME. All torpedoes are fired at a target exactly one hex away from the firing ship. Torpedoes launched at zero, two or more hexes automatically miss. Torpedoes are fired during the "Execute Movement" phase. They may be fired at ANY time during movement, so long as the distance requirement is met. If in doubt, players should retrace ship movements. Torpedo attacks are resolved in the "Resolve torpedo attacks" phase.
D.63 Resolving Torpedo Attacks: With only minor changes, the collision procedure is used to resolve torpedo attacks.
-
Determine the approach angle of the torpedoes to the target ship.
-
The firing player rolls one die and consults rule B.5 Training to determine whether an automatic miss results. If so, end the procedure.
-
Torpedoes have a speed of six, so the firing player always may elect to "ram" the target ship. Consult the correct section of B-8: Collision Table and roll two dice.
-
If a collision occurs, determine the damage caused by the successful torpedo attack.
D.64 Torpedo Damage: For each torpedo hit, the firer rolls TWICE on B-87: Waterline Damage Table and inflicts the resulting armor hits on the target ship. Any ship suffering five or more armor hits due to a single torpedo attack may not fire ANY batteries for the rest of the game, simulating the heavy side list which a severe torpedo attack would cause, making these guns useless.
D.7 Advanced Combat: Ram Attacks
D.71 Purpose: Successful torpedo attacks are difficult. Officers of the time knew the problem. One solution was the ram, a large torpedo fixed either in front of a ship's bow, or as a reinforced ram-bow. The ram was to be the answer to delivering a torpedo attack with more accuracy. In battle, the ramship would literally ram its target, either detonating the torpedo or inserting the ram-bow.
D.72 Adding Rams: Before playing any scenario, players may agree to include ramships. ANY ship type may have a ram added to it. With a ram each B is worth three additional victory points, each C two more points and each D or T one more point if sunk.
D.73 Ram Attack Procedure: The ramship must: 1) successfully collide with the target ship (see rule B.8 Collision), 2) must have the option to select the "evade" or "ram" option in that collision and 3) must have selected the "ram" option.
D.74 Ram Attack Damage: The ramship is IMMUNE to normal collision damage as a result of a ram attack. Instead, it rolls one die. On an odd number it suffers one armor hit, on an even roll it suffers no hits. The ship struck by a successful ram attack must roll TWICE on Table B-87: Waterline Damage. If it suffers five or more armor hits as a result, it may not use its guns for the rest of the game.
D.75 Restrictions on Ram Attacks: Ramships involved in any normal collision may not use their ram capability afterwards. Ramships may make only one ram attack per game. In all collisions after a ram attack, the ramship must undergo normal collision procedure.
D.76 Special Case - Multiple Ramships: If BOTH ships involved in a collision are ramships, the ship able to satisfy the second condition in rule D.73 above rams the other ship. In cases when an "even" option must be used, no ram is possible UNLESS both players declare they wish to ram. In this case, each rolls a die. Add to this roll the training level of the ship involved. The player rolling the higher number after training rams the other ship. In a tie, roll again until the tie is broken.
D.8 Advanced Damage - Critical Hits:
D.81 Purpose: In unusual cases, a lucky shell might explode in some vital area of the target ship, causing greater than normal damage.
D.82 Procedure: A critical hit occurs when the die roll for training (step 3 of gunnery combat, rule B.32) and the two dice rolled for the Gunnery Combat Results Table (step 4 of gunnery combat) all read the same number (all twos, all fives, etc.) AND a regular gunnery, not Torpedo, hit has been inflicted on the target ship. If these two conditions are met, determine the critical damage inflicted on the target ship.
D.83 Critical Damage: Roll two dice, one preferably red or some other color, and one white. Consult Table B-83: Critical Damage Table. (The printed table heading reads "Table D-83: Critical Damage"; rule D.83 cites it as Table B-83. The table is reproduced below as "Table D-83".) Any Critical Damage is assessed AFTER normal gunnery damage and is in ADDITION to normal damage.
D.9 Multi-Player Battles
D.91 Purpose: During the age of the coal-burning warship, before smokeless gunpowder was widely used in naval engagements, communications among ships of the same side often became difficult. In multi-player games, players can experience these difficulties and their resulting dangers firsthand.
D.92 Procedure: Each player on each side selects which ships of his side he will command. Common practice put Bs and Cs into divisions of four ships each, although this varied. Ds and Ts usually had a single commander who determined when they would be committed to the fray. Each player designates one of his ships as his flagship. Play commences according to the scenario rules. Each player plots movement and declares attacks for his ships only.
D.93 Inter-Player Communication: Players may NEVER communicate verbally or non-verbally regarding movement plots, attacks or other game data. Communication by "flag" is allowed under certain conditions. At the start of each turn, each player may write any TWO words on a small piece of paper (in the game, he is hoisting several signal flags above his flagship). Each such player rolls one die. If the die roll is less than or equal to his flagship's training level, he may show the paper to the other players on his side (the ships in the other friendly divisions were able to make out his signal flag). If the roll is greater than the flagship's training level, the player's attempt to signal his allies has failed. He will have to wait until the next turn to try again.
D.94 Transferring the Flag: If a player's flagship is sunk, he may transfer his flag to any other ship in his command, making it his new flagship. He may hoist no signal flags during the turn that he actually makes the transfer. Also, all subsequent attempts to signal his allies are at one training level BELOW that of the new flagship.
E. Advanced Game Scenarios
E.1 The Battle of the Yalu (Historical)
E.11 Description: In the early 1890's, friction developed between the dying Empire of China and the rising sun of Japan over control of the "Hermit Kingdom" of Korea. The Chinese traditionally had received tribute from the Koreans, but their grip was loosened by a series of Chinese defeats at the hands of the newly-come Europeans. Japan, however, had acquired western technology and built up her power, including the infant Imperial Navy.
The Chinese had bought many large, modern warships from the West, but their sailors had poor morale and poorer training. Japanese morale and training were excellent. In terms of ships, the two lumbering battlewagons Ting Yuen and Chin Yuan (as printed; Chart E-12 lists this ship as "Chen Yuan") gave China the edge in guns and armor. War broke out in 1894 when Japan invaded Korea. Soon after, the Chinese sent a convoy to reinforce their garrison. The Japanese sent their small force to intercept.
E.12 Forces: The Japanese player has 1 B, 9 Cs, 1 D, and 1 T. The Chinese player has 2 Bs, 8 Cs, 2 Ds, and 2 Ts. Consult Chart E-12 for data.
E.13 Training: See Chart E-12 for each ship.
E.14 Set Up: The Chinese fleet enters on turn one in column (even if all ships can't enter on this turn) on the westernmost hex of the map's north edge. The Japanese fleet enters on turn two in column on the easternmost hex of the map's south edge.
E.15 Special Rules: None.
E.16 Ending the Scenario: The game ends when one of these conditions is met: a) all of one player's ships are sunk, b) twenty turns have passed since the first hit was scored by either player's ships, or c) EITHER the Chinese player's ships have exited off the map's south edge OR the Japanese player's ships have exited off the north edge. This last condition simulates the dual mission of the two fleets: the Chinese to raid Japanese sea lines to Korea, the Japanese to intercept the Chinese convoy.
E.17 Winning: The player with most victory points wins. For each enemy ship sunk, score the number of points indicated on Table B-2. Score two points for each armor hit inflicted on any enemy ship not sunk. In addition, each player adds up the total number of ARMOR points for his ships that exited the proper map edge before the end of the scenario. Use the armor rating of each exited ship at the instant it left the map, NOT its original armor rating. This total is multiplied by FOUR to yield the number of points awarded that player. (Players will note that if both sides simply exit the opposite edges without firing a shot, the Chinese player will win. This simulates the orders of the Japanese commander to, primarily, seek out and destroy the Chinese fleet.)
E.2 The Battle of Santiago (Historical, solitaire)
E.21 Description: The Battle of Santiago was almost as uneven as Manila Bay. Spanish Admiral Cervera's squadron of four modern cruisers was blockaded in Santiago harbor by three American battlewagons. Knowing the city would soon fall, Cervera made a desperate dash for the high seas. His counterpart, Admiral Sampson, was determined to sink the Spanish squadron before it fled.
E.22 Forces: The (active) American player has 4 Bs, 2 Cs, and 1 D. The (dummy) Spanish player has 4 Cs and 2 Ds. Consult Chart E-22 for data.
E.23 Training: Consult Chart E-22 for data.
E.24 Set Up: The American ships begin anywhere on the map, but not more than eight hexes from the south map edge. At the start of each turn, the American player rolls one die. If he rolls a 1 - 4, no Spanish ships enter the north map edge that turn (the turn is not skipped, however, even if no Spanish ships are currently on the map, the American ships may move during the movement phase). If he rolls a 5 or 6, he must determine which Spanish ship will enter the map edge. Roll the die again. On a roll of 1, both Spanish destroyers enter. On any other roll, one Spanish cruiser, chosen at random, enters. If all Spanish cruisers have entered, the destroyers will enter on the next 5-6 die roll.
E.25 Special Rules:
-
When any Spanish ship is on the map, ship movement is not simultaneous. The American player moves his ships first. He then moves the Spanish ship(s) according to these priorities: a) all Spanish Cs move at full speed toward the south map edge and try to exit. If there are two hexes equally close to the south edge, the C moves to the hex furthest away from the closest American ship. b) Spanish Ds move at full speed toward the American ship nearest them at the start of their move. They execute a torpedo attack as soon as they fulfill the requirements. After launching the torpedo attack, they obey the cruiser rules for movement priorities.
-
Spanish ships are immune from collisions. A collision automatically does NOT occur if a Spanish ship is involved. American ships in the same hex must perform normal collision procedure.
-
Spanish ships fire at American ships according to the following priorities: a) Spanish ships fire at the nearest U.S. ship within range as soon as possible, b) a Spanish ship will continue to fire at that same U.S. ship as long as that ship is in range (avoiding training penalties in rule D.4 for subsequent fire), c) Spanish ships select the lowest armor rated target when targets are equidistant. If these are even, determine its target randomly.
E.26 Ending the Scenario: The game ends when one of the following conditions is met: a) all of one side's ships are sunk, or b) all Spanish ships not sunk have exited the south edge of the map.
E.27 Winning: For each Spanish ship sunk, score the number of points indicated on Table B-2. Score one point for every armor hit inflicted on a Spanish ship not sunk. Score one point for every Spanish D that did not get within twelve hexes of the south map edge and two points for every C that failed.
SUBTRACT two victory points for every armor hit suffered by an American B and one for every armor suffered by an American C or D. For each U.S. ship sunk, subtract DOUBLE the point value on Table B-2. For each Spanish ship that exits the south map edge, subtract double the ship's point value REGARDLESS of the damage to the ship at the instant of exit. Compare the resulting number to the table below:
| Victory point total | Result |
|---|---|
| 40 or more | You're a national hero (historical victory) |
| 32 - 39 | Knowledgeable observers are unimpressed (moderate victory) |
| 21 - 31 | President McKinley is unhappy (marginal victory) |
| 11 - 20 | You've been relieved of command (strategic draw) |
| 1 - 10 | You've been court-martialed (defeat) |
| 0 or less | You've just lost Miami (strategic defeat) |
E.3 The Battle of Tsushima Straits
E.31 Description: The Battle of Tsushima was a fitting conclusion to the pre-dreadnought era. It was a stunning defeat for Russia at the hands of Japan. In 1904, Japan attacked the Russian Pacific Fleet at Port Arthur, China, before declaration of war, foreshadowing Pearl Harbor. Russia responded by sending their Baltic Fleet on a round-the-world voyage to avenge the initial setback. In May, the fleet steamed into the Straits of Tsushima between Japan and Korea, hoping to reach the Russian port of Vladivostok safely. Across its path lay the Imperial Japanese Navy. In the battle that followed, the Baltic Fleet was obliterated. It was the first time an Oriental power had inflicted a major defeat on a European power at sea.
E.32 Forces: This scenario may be played (see E.35: special rules) as Standard Tsushima or Grand Tsushima. In Standard Tsushima, the Japanese player has 4 Bs and 8 Cs and the Russian player has 11 Bs and 1 C. In Grand Tsushima, the Japanese have 4 Bs, 13 Cs, and 10 Ds; the Russians have 11 Bs, 9 Cs, and 9 Ds. Consult Chart E-32 for data.
E.33 Training: Consult Chart E-32 for data.
E.34 Set Up: Set up for Grand Tsushima is given in the special rules below (E.35). Set up for Standard Tsushima is as follows: On turn one the Japanese ships enter in column from any hex on the north edge of the map within four hexes of the west map edge. On turn two, the Russian ships enter in column from any hex on the south edge of the map.
E.35 Special Rules: Standard Tsushima recreates the most critical clash of that battle. In addition, each side had several light ships which, while not participants in the main battle lines, still saw action in a different corner of the ocean. Players who wish to incorporate these ships in Grand Tsushima, advised for multi-player gaming sessions, should use the following special rules:
- Enlarge the standard game map by obtaining three additional copies of that map (photocopies work fine). Keeping all the directional arrows pointed in the same direction, trim and connect these maps to produce a large map as shown below. Label each map section accordingly:
| A | B |
|---|---|
| C | D |
-
In Grand Tsushima, the Russian main line (the ships used in Standard Tsushima) does NOT enter the map on turn two. Instead, it begins the scenario on map "C", in column formation, anywhere on map "C" so long as its lead ship is no closer than two hexes from the south edge of map "A".
-
The additional Russian ships (the extras included in Grand Tsushima) enter in column on turn three from any hex on the south edge of map "C".
-
The Japanese main line (ships used in Standard Tsushima) enters exactly as it does in the standard scenario. See E.34 Set Up, as above.
-
The Japanese additional ships enter in column on turn one from any hex on the south edge of map "D" within six hexes of the east edge of map "D".
-
Up to half (round down) of each side's Ds may be assigned to the main lines before the start of the scenario. Both players secretly note how many destroyers will be assigned to their main lines.
E.36 Ending the Scenario: The game ends when one of the following conditions is met: a) all of one side's ships are sunk, b) eighteen turns have passed since the first hit was scored by either side, or c) all Russian ships not sunk have exited from the north map edge. In Grand Tsushima the scenario may end as above or, d) all Russian ships have exited from EITHER the north edge of maps "A" and "B" OR the south edge of maps "C" or "D".
E.37 Winning: The side with most victory points wins. The Japanese side scores the number of points indicated on Table B-2 for each Russian ship sunk. For the Russians, victory point values are DOUBLED for Japanese ships sunk. The Japanese score two points for each armor hit on any enemy ship not sunk, the Russians score four. The Russians also receive FOUR TIMES the total number of armor points remaining in Russian ships which exited the north map edge. Use the current armor ratings of the exited ships, not original armor ratings. The Russians receive NO points for any ships exited from the south edge of the map (these ships are fleeing for their hides). (NOTE: Alternatively, players may agree before the scenario to use the victory point conditions above without doubling sunk and armor hit points for the Russians. This is more accurate historically, but gives the Russians little chance of winning. In reality they had little chance.)
Scenario Charts
These charts describe warships participating in the six scenarios. In Basic Game Scenarios, their use is optional. In Advanced Game Scenarios, use is required. The letters in the "Codes" column provide additional information on each ship as relevant. This information can be ignored or incorporated into play upon the mutual agreement of the players. Rule D.21 explains how to use these charts.
Chart C-12: Revenge for Fashoda
| Ship Name and Type | Primary Battery | Secondary Battery | Armor Rating | Speed | Training | Codes |
|---|---|---|---|---|---|---|
| BRITAIN | ||||||
| Royal Sovereign (B) | 0 | +1 | 8 | 3 | 5 | a |
| Resolution (B) | 0 | +1 | 8 | 3 | 5 | a |
| Revenge (B) | 0 |
Chart C-22: Manila Bay
| Ship Name and Type | Primary Battery | Secondary Battery | Armor Rating | Speed | Training | Codes |
|---|---|---|---|---|---|---|
| UNITED STATES | ||||||
| Olympia (C) | 0 | 0 | 3 | 3 | 5 | - |
| Baltimore (C) | 0 | -1 | 3 | 3 | 5 | e |
| Boston (C) | -1 |
Speed values in parentheses are printed that way in the source chart.
Chart C-32: Dewey Fights Again
| Ship Name and Type | Primary Battery | Secondary Battery | Armor Rating | Speed | Training | Codes |
|---|---|---|---|---|---|---|
| GERMANY | ||||||
| Brandenburg (B) | 0 | -1 | 8 | 3 | 4 | d |
| Wilhelm (B) | 0 | -1 | 8 | 3 | 4 | d |
| Bussard (C) | X |
Chart E-12: Battle of the Yalu
| Ship Name and Type | Primary Battery | Secondary Battery | Armor Rating | Speed | Training | Codes |
|---|---|---|---|---|---|---|
| JAPAN | ||||||
| Matsushima (C) | -1 | 0 | 2 | 3 | 5 | g |
| Hashidate (C) | -1 | 0 | 2 | 3 | 5 | h |
| Itsukushima (C) | -1 |
Note printed with the chart: The Fuso (B*) is a modified battlewagon. Ships attacking any B* class ship may IGNORE rule B.35: Battlewagon Armor. Gunnery results of greater than "A" are NOT reduced to "A" hits.
Chart E-22: Battle of Santiago
| Ship Name and Type | Primary Battery | Secondary Battery | Armor Rating | Speed | Training | Codes |
|---|---|---|---|---|---|---|
| UNITED STATES | ||||||
| Indiana (B) | 0 | +1 | 8 | 2 | 4 | f |
| Oregon (B) | 0 | +1 | 8 | 3 | 4 | f |
| Iowa (B) | 0 |
Gloucester is printed with an asterisk ("*(D)") and the source carries no footnote for it.
Chart E-32: Battle of Tsushima
| Ship Name and Type | Primary Battery | Secondary Battery | Armor Rating | Speed | Training | Codes |
|---|---|---|---|---|---|---|
| RUSSIA | ||||||
| Knjaz Suvarov (B) | 0 | 0 | 7 | 3 | 4 | - |
| Orel (B) | 0 | 0 | 7 | 3 | 3 | - |
| Alexander III (B) | 0 |
Note printed with the chart: three Russian Bs are modified battlewagons (B*). Ships attacking any B* ship may IGNORE rule B.35: Battlewagon Armor. Gunnery results of greater than "A" are NOT reduced to "A" hits. All nine Russian destroyers have the characteristics given on the (D) line. Names are: Buini, Bravi, Buistni, Blestyashtchi, Bodri, Byedori, Bezuprechni, Gromki, and Grozni.
| Ship Name and Type | Primary Battery | Secondary Battery | Armor Rating | Speed | Training | Codes |
|---|---|---|---|---|---|---|
| JAPAN | ||||||
| Mikasa (B) | 0 | 0 | 8 | 3 | 5 | f |
| Asahi (B) | 0 | 0 | 8 | 3 | 5 | f |
| Shikishima (B) | 0 |
Note printed with the chart: all ten Japanese destroyers have the characteristics given on the (D) line. Names are: Asashio, Sirakamo, Akatsuki, Kasumi, Murakumo, Kagero, Shinonome, Shiranu, Usugumo, and Yugiri. Japanese records are unclear as to which destroyers participated in the Battle of Tsushima at various times. These are ships that either did or might have participated.
Scenario Charts Code Key
- a: Ship receives a modifier of +2 on its secondary battery fire at a zero or one hex range.
- b: Ship has a ram-bow, see rule D.7.
- c: Ship's secondary battery may not fire on targets in ship's bow or stern arcs, see rule D.3.
- d: Ship's primary battery gets a +2 modifier for unified, not split, fire on broadside arc targets.
- e: Ship has no torpedo tubes and can't make such attacks under rule D.6.
- f: Ship gets a +1 modifier for secondary battery fire at a zero or one hex range.
- g: Ship may not fire primary battery at bow arc targets, see rule D.3.
- h: Ship may not fire primary battery at stern arc targets, see rule D.3.
- k: Ship may not fire secondary battery at bow arc targets, see rule D.3.
- m: Ship may not fire secondary battery at stern arc targets, see rule D.3.
Reference Tables
Table B-2: Ship Characterization
| Ship Type | Speed | Armor Rating | Victory Point Value |
|---|---|---|---|
| Battlewagon (B) | 3 | 8 | 32 |
| Cruiser (C) | 3 | 3 | 10 |
| Destroyer (D) | 4 | 1 | 3 |
| Torpedo (D) (printed this way; the row is the torpedo boat, abbreviated T) | 4 | 0 | 1 |
Primary Battery Strengths at Given Range
| Range | 0 | 1 | 2 | 3 | 4 | 5 | 6 | 7 | 8 | 9-10 | 11-12 | 13+ |
|---|---|---|---|---|---|---|---|---|---|---|---|---|
| Battlewagon (B) | 0 | 4 | 8 | 8 | 8 | 8 | 7 | 5 | 3 | 2 | 1 | n.a. |
| Cruiser (C) | 0 | 2 | 2 | 2 | 2 |
Secondary Battery Strength at Given Range
| Range | 0 | 1 | 2 | 3 | 4 | 5 | 6 | 7+ |
|---|---|---|---|---|---|---|---|---|
| Battlewagon (B) | 5 | 5 | 5 | 4 | 3 | 2 | 1 | not allowed |
| Cruiser (C) | 5 | 5 | 5 | 4 | 3 | 2 | 1 | not allowed |
| Destroyer (D) | 3 | 3 | 2 | 2 |
Table B-3: Gunnery Combat Results
Cross-index the die roll (two dice) with the Gun to Armor Differential. A capital letter is a hit for damage (see Table B-4). "-" is no hit.
| Die Roll | -6 | -5 | -4 | -3 | -2 | -1 | 0 | 1 | 2 | 3 | 4 | 5 | 6 | 7 | 8 |
|---|---|---|---|---|---|---|---|---|---|---|---|---|---|---|---|
| 2 | C | B | C | C | C | A | F | F | G | A | G | E | C | D | E |
NOTE A: Differentials less than -6 are resolved as -6; resolve differentials greater than 8 as 8.
NOTE B: By rule B.35, ALL hits by secondary batteries against battlewagons are automatically reduced to "A" hits.
Table B-4: Gunnery Damage
| Hit Type from Table B-3 | Secondary Battery | Primary Battery | Armor Rating | Speed |
|---|---|---|---|---|
| A - Superstructure | 1 | - | - | - |
| B - Armor plate | - | - | 1 | - |
| C - Deck | 1 | - | 1 | - |
| D - Penetrating | 2 | 1 | 1 | 1 |
| E - Interior explosion | 3 | 2 | 2 | 1 |
Table B-8: Collision
Cross-index the angle of approach and the option selected with the largest ship involved. Roll two dice (red = tens, white = ones); a result equal to or less than the number shown is a collision.
| Angle of Approach | Option Selected | B | C | D | T |
|---|---|---|---|---|---|
| a) Bow on | Evade | 15 | 14 | 12 | 11 |
| Even | 22 | 16 | 15 | 14 | |
| Ram | 24 | 23 | 21 | 16 | |
| b) Bow quarter | Evade | 32 | 31 | 26 | 23 |
Table B-86: Collision Results
| Ship collides with: | B | C | D | T |
|---|---|---|---|---|
| Battlewagon collides with | 3 | 2 | * | * |
| Cruiser collides with | 2 | 1 | * | * |
| Destroyer collides with | 1 | 1 | 1 | * |
| Torpedo boat collides with | 1 | 1 | * | * |
NOTE: A number shows how many times the player affected must roll on Table B-87 to determine total damage. An asterisk requires the player affected to roll one die. On an odd number, he must assess one armor hit to his ship. On an even roll, he assesses no hits.
Table B-87: Waterline Damage
| Die Roll | 2 | 3 | 4 | 5 | 6 | 7 | 8 | 9 | 10 | 11 | 12 |
|---|---|---|---|---|---|---|---|---|---|---|---|
| Armor hits ship takes | 8 | 5 | 2 | 3 | 1 | 1 | 2 | 3 | 4 | 6 | 7 |
NOTE: If a ship takes five or more armor hits as a result of a torpedo or ram attack, it may no longer use any guns for the remainder of the game.
Table D-83: Critical Damage
Roll the colored die (rows) and the white die (columns). The letter is the critical effect (see the key below). "X" is no critical hit.
| Colored die \ White die | 1 | 2 | 3 | 4 | 5 | 6 |
|---|---|---|---|---|---|---|
| 1 | X | H | B | X | X | G |
| 2 | E | A | H | X | B | X |
| 3 | X | B | H | B | X | D |
| 4 | A | B | H |
- A = Loss of Power: The target ship has a movement factor of zero for the number of turns rolled on one die. This ship may not turn in place. On the turn this effect ends, the ship moves normally.
- B = Gunnery observers suppressed by exploding fragments: Halve all primary and secondary gunnery attacks made by the target ship next turn. Round fractions down.
- C = Turret explosion: Permanently lose half ship's primary battery strength, round fractions up. Ships without primary batteries are unaffected.
- D = Bridge hit: The ship moves the number of turns rolled on one die, insofar as it is able, exactly according to its movement plot for this turn. The plot cannot be altered.
- E = Magazine conflagration: Lose three more primary strength factors, and one movement factor.
- F = Engine room hit: Lose two more armor factors and ALL movement factors. The target ship is dead in the water for the remainder of the game.
- G = Wildfire explosion: Ship sinks immediately.
- H = Deck fires: Target loses half of its secondary battery factors, round up. Also, during every plot phase thereafter, the player affected must roll one die. If he rolls the affected ship's training level or lower, the fires are put out by damage control parties and there are no further effects. For rolls higher than the ship training level, the fires burn. For each turn the fires burn, the ship loses one armor factor permanently and may not fire ANY secondary batteries.
- X = No critical hit: Normal gunnery damage only.
Metagaming MicroHistory #5. Game design, editing, art and copyright credits are omitted from this transcription.