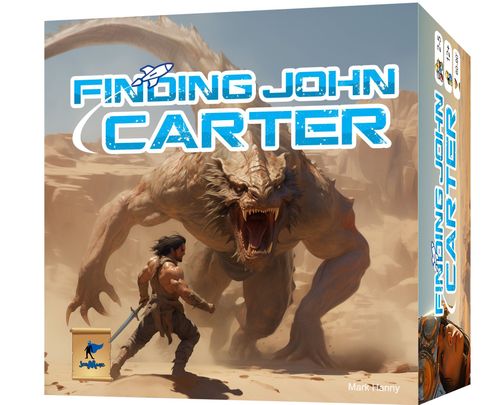
Finding John Carter
Finding John Carter Rulebook
Table of Contents
Table of Contents
Components
- 5 Player Colors: 75 Player Tokens, 15 each color
- 5 Player Draw Bags
- 5 Starting Ship Hulls
- 5 Ship Lounges
- 6 Advanced Hull Tiles
- 8 Thruster Tiles
- 24 Mission Tiles
- 50 Gold Tokens
- 175 Crew Cubes - 15 each type
- 36 Crystals - 13 each type
- 24 Specialist Meeples - 12 each type
- 15 Fuel Tokens
- Board
Note: the printed component counts are transcribed as printed. The listed crew cube types (7 types at 15 each) and the crystal and specialist counts do not add up to the printed totals; the game's rules refer to the types listed here.
Set Up
Randomize the thrusters and advanced hulls with the number "5" side up for hulls and "1" side up for thrusters. Place them in the shipyard on matching spaces. Players can look through these tiles during the game but keep them in the same order.
Give each player his color of player tokens and draw bag.
Each player places one starting hull and one ship lounge adjacent to each other on the table. The hull will have the number "2" side face down.
All players place 5 white cubes (crew), 2 green cubes (merchants), 1 black cube (officer), and 1 pink cube (mechanic) in their bags.
Randomly choose a starting player and place player tokens in clockwise order on the board on the circles of the turn order section.
The following additional cube is placed in players' bags in turn order:
- 1st Player
- 2nd Player
- 3rd Player
- 4th Player
- 5th Player
These cubes are your crew: white tokens are unskilled crew members, green are merchants, black are officers, pink are mechanics, brown are smugglers, purple are navigators, red are gunners.
Give each player 5 gold tokens.
Sort mission tiles in stacks according to the numbers shown on the board. Randomize each stack and place 4 of them face down on each matching board space. For example: All mission tiles showing 2 to 5 points are placed in the same stack, randomized, and 4 are placed face down on the board on each of the mission spaces showing "2-5." Turn the top tile of each stack face up. If the "Find John Carter" tile appears on top, reshuffle the 11-21 tiles and place again.
The Round
At the beginning of each round players draw 5 random cubes from their bag and place them on the table. This is that player's current crew.
Players will do 2 things on their turn:
- Place a player token on a turn space, either on the board or on their hull.
- Place a crew cube associated with that action in the lounge. (Note: a gray cube means a cube of any color.)
A player may choose to pass and take no action. He/She retains all cubes not used for the next round. To pass a player moves his player token on the turn area of the main board to the open green arrow farthest to the left. Once a player passes he/she may take no more actions this round. After all players have passed each player removes all player tokens from the board except in the mission and pass spaces and draws 5 cubes from the bag then puts all cubes from the lounge into the bag. If there are not 5 cubes to draw, after drawing what is in the bag, the player puts all cubes from the lounge into the draw bag and keeps drawing until there are 5 cubes drawn. If in the rare event a player has less than five cubes total, that player draws the number he or she has.
Then all players move their player tokens straight up on the turn order. This sets the new turn order for the next round.
The Turn
On a player's turn that player will place a player token on a round space on the board or hull and take the corresponding action. Each action shows the cost the player must pay and the item or crew member the player will receive. Example: The first space shown in the Academy shows a cube of any color followed by a green cube (merchant). In that case the player places any cube on the lounge and gains a merchant that goes in the draw bag. All gained crew (cubes) go to the draw bag when gained. All fuel, money, crystals, and specialists go on the table and can be used the turn they are gained - cubes (crew) cannot be used the same turn unless they are drawn during the round. The square frame around the cube on the board represents the ship lounge.
A symbol shown on a space (a cube with an upward arrow) allows the player to draw a cube from the bag. It can be used in the current turn.
The Ship
Each player's ship consists of a hull and ship's lounge at the start of the game. Each round space on the ship's hull is available to that player for player token placement. The same rules apply as on the board except a player may only play tokens on his own ship and can only use each ability once per round.
The Shipyard
These tiles can help improve your ship so you are better equipped to achieve the missions. There are 2 spaces in the shipyard: advanced hulls and thrusters. To improve your ship's hull you must place a player token on the circle space and pay the required resources shown. Your starting ship hull can be turned over to use immediately or a new hull can be gained and added to your ship. Any player tokens currently on the hull are returned to your own supply. The spaces available on the new hull are all immediately available for use. The "5" on the advanced hull shows points you get at the end of the game. When gaining a new hull it must start with the "5" side up.
Once gained, both thrusters and advanced hulls can be turned over to the opposite side by playing a token and paying the cost on the corresponding ship yard space.
Thrusters are the only space where you play an extra player token on a turn. The thruster shows a bonus received for choosing an action in one area of the main board. One time each round a player may place a player token on a board space, spend the required resources, gain resources, and then place a second player token on the thruster and gain the bonus shown. As always cubes gained this way go to the draw bag.
The second line of actions in the shipyard are available only in a 4-5 player game. If a player wants to take the same action that has already been taken in the shipyard that player may pay extra and do so. The second player places a player token on top of the first, spends an extra fuel and takes the action. Other players (including those already on the space) can do the same. To perform the action players must pay the number of extra fuel equal to player tokens on the stack, then place their player token on the stack.
In a 2-3 player game, players act as if there is already one player token on all spaces of the shipyard, cantina, academy, and market.
The Market
The market is where player's gain resources needed to accomplish other tasks and missions. Each space shows the cost and reward gained for a turn.
If a player wants to play on the same space already taken by another player, that player must pay one gold for each player token already on the space before taking the action.
The Academy
The academy is where players send crew members to gain skills needed to fulfill missions. This is also where highly educated specialists can be recruited for missions. Specialists will only work on your crew for one mission then they leave your crew. The upside is that they can be used the same turn in which they are gained.
If a player wants to play on the same space already taken by another player, that player must add one cube of any color to the lounge for each player token on the space.
The Cantina
Sometimes a mission requires the ability to avoid the law and stealth of a smuggler. These can be gained in the cantina.
If a player wants to play on the same space already taken by another player, that player must lose one non-white cube for each player token on that action space. This cube can either be in the lounge or on the table waiting to be used - it cannot come from the bag. It is common to lose skilled crew members when engaging in unlawful activities.
The Black Market
Player's may trade items they have for one item or crew member. The player must place a smuggler in the lounge, plus pay gold shown on the space to the general supply. The values of crew and items are shown on the board. You can trade any amount or combination of items for one single item. The value of what is paid must equal or exceed the item gained. No change is given.
Mission
There are four mission tiles in each stack in the mission area of the board. These are tasks that when completed will eventually lead you to find John Carter. Each task shows the number of points each mission is worth and the cost to complete the mission at the bottom of the tile. The player pays the cost to the lounge and/or general supply and places a player token on the left-most open circle space next to the mission. The player draws cubes from his/her draw bag as shown at the start of that row. That player takes the tile and places it face-down on the table - the points and agency symbol can only be seen and tracked by that player after it is gained even though before that all players could see it.
Each tile also shows a symbol of the space agency that commissioned your ship to complete the task. At the end of the game there is an agency bonus for matching symbols on a player's tiles. Points will also be gained by the player with the most completed missions in a row - shown at the end of the row.
Pass
A player may choose to pass on any of his or her turns. The player places a player token on the left-most arrow of the pass spaces. Once a player passes, that player may take no actions in the round and is skipped by other players.
End of Game
The end of the game is triggered by a player revealing the "Find John Carter" mission tile. (The source prints this as "Fine John Carter" in this paragraph; read as "Find John Carter.") Once that is revealed all players continue their current turn until all have passed. The "Find John Carter" tile need not be claimed by a player to end the game. Then all players total their scores and the one with the most points is the winner. If there is a tie, the tying player who has completed the most missions is the winner.
Scoring
Points come from:
- Points shown on ship hulls.
- Points shown on mission tiles you have completed.
- Specialist Bonus: Each specialist is worth 1 point, plus one point for each set of 3 different specialists. (Specialist types: red, white and green meeples.)
- Crew Bonus: Each full set of crew members is worth 3 points. (A full set is one crew member of each type: crew, merchant, officer, mechanic, smuggler, navigator and gunner.)
- Crystal Bonus: Each crystal is worth 1 point, plus one point for each set of 3 different crystals. (Crystal types: red, yellow and cyan.)
- Mission Bonus: A player gains points for each type (color and symbol) of bonus completed according to this chart. For example: if you have 3 gold missions completed at game's end, you get 5 points.
Mission Bonus chart (the three types are the gold, magenta and cyan agency symbols). Each entry is missions completed of one type / points gained:
- 2 missions / 3 points
- 3 missions / 5 points
- 4 missions / 8 points
- 5 missions / 12 points
- 6 missions / 17 points
- 7 missions / 21 points
- 8 missions / 28 points
- Mission Row Bonus: A player gains points for having the most missions in a single row. This is shown on the board. For example: The player with the most completed missions from the top row (2-5 stack) gains 4 points. A player must have at least 2 player tokens in a row to gain the bonus. In the case of a tie, the tying player that placed the last player token in a row gains the points. Player tokens are placed on mission spaces from left to right.