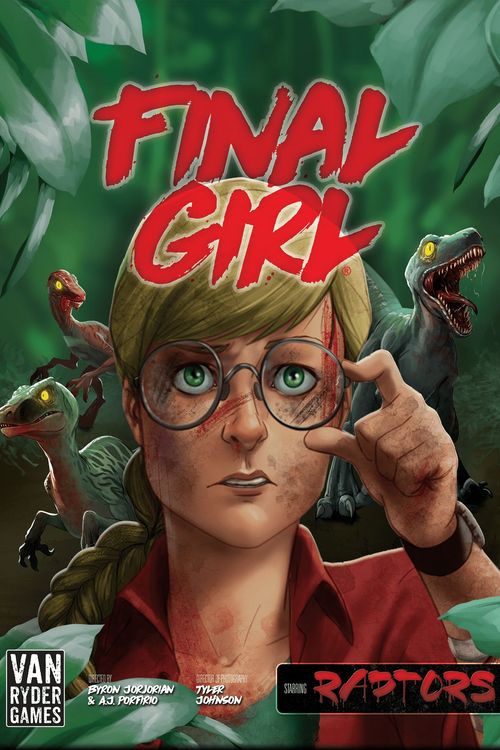
Final Girl: The Raptor Games
Final Girl: The Raptor Games Rulebook
Table of Contents
Table of Contents
The Raptors
Components
- 3 Finale cards
- 1 Epic Finale card
- 3 Dark Power cards
- 1 Epic Dark Power card
- 16 Terror cards
- 2 Final Girl cards (Christina, health 5; Maud, health 6)
- 1 Killer board
- 1 Raptors card
- 6 Raptor meeples
- 1 Pack meeple
- 8 Spawn cards
Special Setup
- Shuffle the Spawn cards and form a face-down deck. Place it near the play area along with the Raptors card and place the Raptor meeples on the Raptors card.
- Place the Pack meeple on the Killer starting space indicated on the Setup card. It is used instead of the Killer meeple from the Core box.
Special Rules
The Pack
The Pack meeple represents a large and coordinated group of Raptors. The Pack is considered a Killer for all purposes.
The health of the Pack represents the number of Raptors in the Pack. Health starts the game at 5 (one Final Health token and 4 Health markers), but there is no upper limit. The Attack Value on the Killer board represents how much damage the Pack does in a single attack, regardless of the size of the pack.
When the Pack is eliminated, you win, even if there are still individual Raptors on the board.
Individual Raptors
Individual Raptors are represented by the Raptor meeples. When a card refers to "Raptor(s)" for an effect, that effect does NOT include the Pack, only the individual Raptors. Similarly, when a card refers to "Pack" for an effect, it does not include individual Raptors.
Raptors are considered Minions for all purposes (familiarize yourself with the Minion rules on pg. 32 of the Core Rulebook).
- Individual Raptors have 1 Health.
- They use the Movement Value on the Killer board.
- Individual Raptors don't attack very often, but when they do, they EACH attack individually for 1 [damage icon].
Joining the Pack
Raptors are generally trying to move to, and join, the Pack. When you see the [Pack icon] icon, the Raptors are targeting the Pack for movement.
Raptors know they are at risk when not with the Pack, so when moving they will stop any time they enter (or begin movement in) a space with you or a Victim. This is reflected by the [stop icon] icon as a reminder.
Note! Location Terror cards will not have this icon, but it still applies when individual Raptors resolve the [Killer moves icon] icon!
When targeting the Pack, the Raptors will take the shortest path to reach it. If there are multiple equidistant paths, the Raptors will choose the path that gets them as close to the Pack as possible before having to stop their movement.
When individual Raptors are in the same space as the Pack, they automatically and immediately join it. Simply remove the individual Raptors and add one Health marker to the Pack's health for each one that joins.
When Raptor meeples are removed from the board, place them on the Raptors card to be used again for future spawns.
Spawning Raptors
When you resolve a [Spawn icon] icon, you must draw a Spawn card and spawn the indicated number of individual Raptors. The space they spawn in is determined by rolling a die and referring to the spawn table on the Raptors card. If there are multiple legal spawn spaces, you may choose where to spawn the Raptors. Then, discard the Spawn card.
- Spawns cannot occur in spaces that are no longer accessible.
- If there are not enough Raptor meeples to resolve the spawn, the Raptor closest to the Pack immediately joins it, and then use that Raptor meeple for the spawn. Repeat this until the Spawn card is fully resolved.
- If you ever need to draw a Spawn card and none remain, shuffle the discard pile to create a new deck and then draw.
- The final effect on the Bloodlust track will also spawn a Raptor. Resolve this as if you had drawn a Spawn card with a value of 1.
Note! If a Raptor spawns during the Killer phase, it will not activate until the NEXT Killer phase.
The Raptors Card
The Raptors card carries the spawn table and the Raptor's own text.
Raptors will not move if they start with you or a Victim in their space.
Raptors will stop any time they enter a space with you or a Victim.
1 [Health icon] [Movement icon] * is equal to the Pack's Movement Value.
| Result | Spawn Location |
|---|---|
| 1 | Your space |
| 2 | Closest [icon] space to the Pack |
| 3 | Closest [icon] space to the Pack |
| 4 | Furthest [icon] space from the Pack |
| 5 | Furthest [icon] space from the Pack |
| 6 | Furthest space from you |
Spawn Cards
Each Spawn card shows the number of individual Raptors to spawn. Roll a die and check the spawn table on the Raptors card for the spawn location.
Killer Board
The Killer board carries a per-level table of icons and numbers alongside its Bloodlust track.
Not transcribed: the Killer board's per-level table is embedded in the source sheet at a resolution too low to read reliably, so its numbers and icons are not given here. Consult the physical board for those values.
Finale Cards
The text printed on the Finale cards is:
- Claws Like Knives (Finale): "The first damage from each attack is [icon]."
- Deadly Quick (Epic Finale): "When revealed, immediately place the Pack in your space and lose 4 Health."
Dark Power Cards
- Blood Thirsty (Dark Power): "Each time the Pack kills a Victim, [icon]."
- Scaly Hide (Epic Dark Power): "The Pack and Raptors ignore all damage from Reaction cards."
Terror Cards
"Did You Hear That?" (Terror): "If there are no Victims on the board, discard and draw the next Terror card. Otherwise:"
Pack only: [Victim icon] ▶ [Killer moves icon] ▶ [Killer attacks icon].
Not transcribed: the Final Girl cards' Victim-save spaces and rewards, and the action rows on the Finale cards, are shown only as icons on the sheet and are not transcribed. Only the printed card text above is given.
Isla Lagarto
Isla Lagarto: An island of prehistoric proportions. Let the games begin!
Components
- 1 Location board
- 10 Event cards
- 5 Setup cards
- 16 Item cards
- 8 Terror cards
- 1 T-Rex card
- 3 Lava cards
- 4 Lava tokens
- 6 various tokens
- 1 T-Rex Action token
- 1 Electric Fence die
- 3 Electric Fence markers
- 1 T-Rex meeple
Special Setup
- Place Electric Fence markers in the green sections indicated on the Setup card. Do not place Electric Fence markers in the red sections.
- Shuffle the 3 Lava cards and create a face-down deck. Place the Lava tokens next to the deck.
- Place the T-Rex card near the play area and place the T-Rex meeple on the start space.
The Setup card shows the fence sections as an example: if this was the Setup card drawn, you would place an Electric Fence marker on section A and section C. Section B would remain empty.
Special Rules
Electric Fences
The power to each electric fence fluctuates to keep the games exciting!
There are three Electric Fences (A, B, and C).
While an Electric Fence marker is present, movement on the path is blocked and the spaces on either side of the fence are NOT considered adjacent.
- Panic: if anyone panics in a direction blocked by a fence, they simply stay in their current space.
- Farthest/Closest: when determining distance to a space or target, only use paths that are not blocked by Electric Fence markers. If all markers are on the board and the only space or target is on the other side of the fences, determine distance as if there were no Electric Fence markers.
- Enemy Targeting: if there is no unblocked path between an Enemy and its target, then the Enemy will not move as part of that action. Attack icons will still be resolved in the Enemy's space.
- Placing someone: effects that place someone are not affected by fences.
During each Upkeep phase, the fence power fluctuates. Roll the Electric Fence die to determine which fence is affected. If there's an Electric Fence marker already there, remove it from the board. If there isn't an Electric Fence marker there, place one.
T-Rex
The T-Rex begins the game secured in the Dino Pen but it may eventually break free!
When you see the [T-Rex advance icon] icon, move the T-Rex meeple one space to the right on the T-Rex card. When the T-Rex reaches the "Break Out!" space, place the T-Rex meeple on the board in the Dino Pen, and place the T-Rex Action token below the Killer Action on the Finale card. Ignore any subsequent [T-Rex advance icon] icons as the T-Rex is now in play.
The T-Rex is NOT considered a Killer or a Minion and cannot be attacked, damaged, or killed. After resolving the Minion and Killer Actions on the Finale card, resolve the T-Rex Action.
Victims will not follow you into the T-Rex's space (unless there is an effect that allows them to follow you into the Killer's space). During the Panic phase, everyone in the T-Rex's space panics, regardless of whether or not a Victim was killed that turn.
Moving: The T-Rex's Movement Value is on the T-Rex card (it's a 2). While moving, the [ANY icon] icon means the T-Rex will stop moving as soon as it reaches a space with ANYONE (e.g. you, Victims, Enemies, etc.). It will also NOT move if anyone is in its starting space.
Killing: The T-Rex doesn't attack like a normal Enemy. Instead of doing damage, the T-Rex instantly KILLS one target in its space! If there are multiple targets, it will kill ONE of them using the following priority: Victim; Minion; You; Killer. If you or the Killer were attacked by the T-Rex, you (or they) are instantly killed; do not reveal any Final Health tokens.
Note! For Enemies made up of multiple coordinated units (i.e. Raptor Pack, Zombie Horde, etc) the T-Rex kills ONE unit, which is equivalent to dealing 1 damage to that Enemy.
Volcano
The first time you resolve a [Volcano icon] icon, the volcano erupts! Follow these steps:
- Everyone at the Volcano takes [Health icon].
- Anyone left in the space panics.
- Place the Volcano Lava token in that space on the board. It is no longer accessible to anyone!
When you resolve subsequent [Volcano icon] icons, the lava from the volcano will spread to an adjacent space. Draw a Lava card to determine which space and follow the instructions on the card.
After all 4 Lava tokens are on the board, ignore any subsequent [Volcano icon] icons. Spaces with Lava tokens are no longer accessible to anyone.
Special Spaces
The 3 spaces at the corners of the Location board marked with this [Beach icon] icon are Beach spaces (some card effects will refer to these spaces).
The 2 spaces at the edges of the Location board marked with this [Cliff icon] icon are Cliff spaces (some card effects will refer to these spaces).
Cards
Event Cards
Power Surge (Event): "Place all Electric Fence markers on the board. Do not roll the Electric Fence die during the next Upkeep phase." Discard this card at the end of the next Upkeep phase.
Item Cards
Tranquilizer Gun (Item): Use anytime to deal 1 [damage icon] to an Enemy in an adjacent space. If the Enemy was moving, end its movement.
Terror Cards
"Holy Mosasaurus!" (Terror): The [icon] space with the most Victims and/or Enemies gets attacked by a Mosasaurus and everyone in that space takes [damage icon]. If you did not take damage and no Victims were killed, [icon].
Lava Cards
Lava (Lava card): Everyone at the North Beach takes [Health icon]. Everyone left in this space panics until they leave the space. Place the North Beach Lava token.
T-Rex Card
The T-Rex card shows the T-Rex Kill Priority: [Victim icon] ▶ [Minion icon] ▶ [You icon] ▶ [Killer icon]. It also shows the T-Rex Movement Value (2), a track running from Start to "Break Out!", and the [T-Rex advance icon] icon described above.
Notes
The sheet uses icons for several effects. Where a glyph could not be made out from the source, it is shown as [icon] above: the first and last effects on "Holy Mosasaurus!", and the Volcano and Lava damage glyphs (a red heart and a heart with flame, shown here as [Health icon]). The die faces of the Electric Fence die are pictorial on the sheet and are not described in the text. The six various tokens are pictured on the components page but not described.