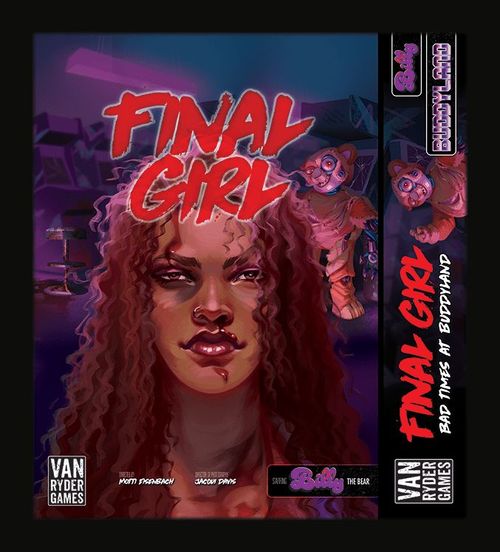
Final Girl: Bad Times at Buddyland
Final Girl: Bad Times at Buddyland Rulebook
Table of Contents
Table of Contents
Components
Buddyland Location
- 1 Location board
- 10 Event cards
- 5 Setup cards
- 16 Item cards
- 8 Terror cards
- 6 Various Tokens
Billy the Bear Killer
- 3 Finale cards
- 1 Epic Finale card
- 2 Final Girl cards (Gwynn and Rena)
- 3 Dark Power cards
- 1 Epic Dark Power card
- 5 Buddy cards
- 2 Special Buddy cards
- 16 Terror cards
- 1 Killer board
- 20 Various Tokens
Special Setup
Buddyland Location
There are no special setup rules for this Location.
Billy the Bear Killer
- Before revealing the Setup card, place 4 Power Source tokens on their Active side, in four separate spaces so that no Power Source token is in a space adjacent to any other Power Source token. Set aside the 5th Power Source token as it may come into play later.
- Take the two types of Bloodlust Track tokens (the purple token and the blue token) and shuffle them face down by type (with only the backs showing).
- Place 6 Bloodlust Track tokens face down on the Killer board (in Bloodlust track spaces corresponding to their color and icon). The remaining Bloodlust Track tokens (1 of each type) will not be used and should not be revealed.
- Shuffle the five Buddy cards face down to form the Buddy deck.
- Set aside the two Special Buddy cards. They may come into play later and follow the same rules as other Buddies once they are in play.
- Spawn a Buddy (see rules on Spawning a Buddy below).
Special Rules
Arcade
The 4 spaces in the middle of the Location board marked with the Arcade icon are Arcade spaces (some card effects will refer to these spaces).
Bloodlust Track Tokens
When Bloodlust increases to a level with a Bloodlust Track token, reveal the token and apply its effects.
Power Source Tokens
When Deactivating a Power Source, flip the token to the Inactive side. You may Deactivate a Power Source by spending an hourglass icon while in the same space as the token, even if you are just moving through the space. If an Inactive Power Source is ever Activated, flip it back to the Active side.
The Active side of a Power Source token shows a green battery with a plus sign. The Inactive side shows a red battery with a slash through it.
Resolving
When you see the green battery icon, Billy recovers one Health as long as at least one of the Power Sources is Active. Ignore this effect if none are Active.
Billy's Buddies
Buddies are Minions and follow normal Minion rules (familiarize yourself with the Minion rules on pg. 32 of the Core Rulebook).
Each Buddy card represents an animatronic with their own Health, Attack Value, and Movement Value.
Spawning a Buddy
When an effect says to "Spawn a Buddy", reveal the top card of the Buddy deck. Place the card in the play area and place the indicated number of Health markers on top of the Buddy card. Place the Buddy's token in any space adjacent to Billy, choosing a space that does not already have a Buddy if possible.
Note! If Billy is no longer in play the effect is ignored (no Buddy spawns).
Activating Buddies
Each Buddy card has an Initiative number found in the circle in the top right corner of the card. When resolving Minion Actions and/or Terror card effects, resolve them in the order of the Initiative number from lowest to highest.
Note! If a Buddy spawns during the Killer phase, it will not activate until the NEXT Killer phase.
Killing Buddies
When a Buddy is killed, remove the Buddy's token from the board. Take the Kill Reward indicated on the Buddy's card and then remove the card from the game. If a Buddy is killed in a phase other than the Action phase, take the reward at the beginning of the next Action phase.
Attacking Billy
IMPORTANT! Buddies will protect Billy at all costs. This means that Billy cannot be attacked while there is a Buddy in his space.
Card Notes
Buddyland Location Cards
- Event cards: the card shown on the sheet is "Playtime Shenanigans" (Event), with the caption "How'd they get lost in THERE?" Its text reads: "Place 2 new Victims in the Ball Pit and 2 new Victims in the Jungle Gym. Discard this card."
- Setup cards: the card shown on the sheet is "Hide and Seek" (Setup). It is a board-layout card; its text and spawn numbers are not legible at print resolution and are not transcribed.
- Terror card: the card shown on the sheet is "How'd they sneak in?" (Terror). Its text reads: "Roll 3 dice and place one Victim for each die result as follows: 1-2: Jungle Gym; 3-4: Dining Area; 5-6: Party Room."
- Item cards: the card shown on the sheet is the Arcade Token (Item), with the caption "I love Qbert!" Its text reads: "Discard while in a space to spend 3 [icon] for 3 [icon]." (The two icons are not legible at print resolution and are not transcribed.)
Billy the Bear Cards
- Finale cards: the card shown on the sheet is "It's Showtime!" Its text reads: "You may not play Reaction cards if more than one Enemy is in your space." The faces of the other two Finale cards are not legible at print resolution and are not transcribed.
- Epic Finale card ("Power Surge"): "When revealed, spawn Boris. You must kill both Billy and Boris to win."
- Dark Power card ("Deathlust"): "Add +1 to Billy's Movement and Attack values."
- Epic Dark Power card ("Merciless Minions"): "For the Minion Action on the Finale card, add a [icon] before the [icon]." (The two icons are not legible at print resolution and are not transcribed.)
- Final Girl cards: Gwynn (5 Health) and Rena (6 Health). The only legible text on the Final Girl cards is on Rena's card, which reads "Take a Guard Card", "Take any top Item Card", and "Move 1 Space" in its reward spaces. Gwynn's reward spaces and the rest of Rena's card are not legible at print resolution and are not transcribed.
- Buddy card, Toby: Health 3, Initiative 4, Attack Value 1, Movement Value 1. Text: "If Toby kills a Victim, +[icon]." Kill Reward: 2 [icon]. (The icons in the text and in the Kill Reward are not legible at print resolution and are not transcribed.)
- Special Buddy card, Billy Jr.: Health 2, Initiative 6, Attack Value 1, Movement Value 0. Text: "Always in the same space as Billy." Kill Reward: [icon] to Billy. (The Kill Reward icon is not legible at print resolution and is not transcribed.) The face of the second Special Buddy card is not legible on the sheet.
- Terror card, "Do the Splits": three rows, one marked "Buddies only:" and two marked "Billy only:". Each row's effect is printed as icons that are not legible at print resolution and are not transcribed.
Killer Board
The printed values on the Killer board (Billy's starting Health, Attack Value and Movement Value, and the Bloodlust track layout) are not legible at print resolution on the sheet and are not transcribed. Use the Killer board in the box for these values.