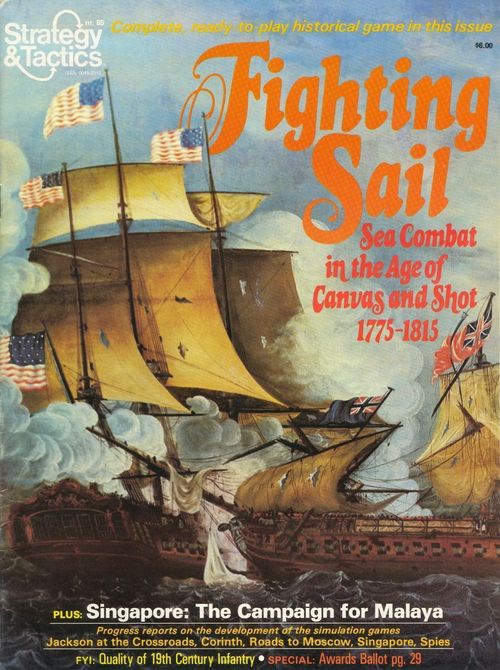
Fighting Sail: Sea Combat in the Age of Canvas and Shot 1775-1815
Fighting Sail: Sea Combat in the Age of Canvas and Shot 1775-1815 Rulebook
Table of Contents
Table of Contents
- Read This First
- Outline of the Rules
- [1.0] Introduction
- [2.0] Game Equipment
- [3.0] Glossary
- [4.0] Sequence of Play
- [5.0] Wind
- [6.0] Commands
- [7.0] Movement
- [8.0] Drift
- [9.0] Fire Combat
- [10.0] Damage
- [11.0] Melee Combat
- [12.0] Striking Colors
- [13.0] The Strategic Cycle
- [14.0] Recording Information
- [15.0] Scenarios
- Map Restrictions
- Summary of Modifiers to Fire Values
- Game-Turn Sequence
Read This First
The rules of this SPI simulation game are organized in a format known as the Case System. This system of organization divides the rules into Major Sections (each of which deals with an important aspect of play). These Sections are numbered sequentially as well as being named. Each of these Major Sections is introduced by a General Rule, which briefly describes the subject of the Section. Many times this General Rule is followed by a Procedure which describes the basic action the Player will take when using the rules in that Section. Finally, the bulk of each Major Section consists of Cases. These are the specific, detailed rules that actually regulate play. Each of these Cases is also numbered. The numbering follows a logical system based upon the number of the Major Section of which the Cases are a part. A Case with the number 6.5, for example, is the fifth Primary Case of the sixth Major Section of the rules. Many times these Primary Cases are further subdivided into Secondary Cases. A Secondary Case is recognizable by the fact that it has two digits to the right of its decimal point. Each Major Section can have as many as nine Primary Cases and each Primary Case can have as many as nine Secondary Cases. The numbering system is meant as an organizational aid. Using it, Players can always easily tell where a Case is located in the rules. As a further aid, an outline of the Major Sections and Primary Cases is given at the beginning of the rules.
How the Section and Case Numbers Work:
Major Section Number
  Primary Case Number
    Secondary Case Number
    ↓ ↓ ↓
  [6.53]
The preceding example would be the number of the third Secondary Case of the fifth Primary Case of the sixth Major Section of the Rules.
How to Learn to Play the Game:
Familiarize yourself with all of the components. Read all of the General Rules and Procedures and read the titles of the Primary Cases. Set up the game for play (after reading the pertinent Section) and play a trial game against yourself referring to the rules only when you have a question. This procedure may take you a few hours, but it is the fastest and most entertaining way to learn the rules short of having a friend teach them to you. You should not attempt to learn the rules word-for-word. Memorizing all that detail is a task of which few of us are capable. SPI rules are written to be as complete as possible — they're not designed to be memorized. The Case numbering system makes it easy to look up rules when you are in doubt. Absorbing the rules in this manner (as you play) is a much better approach to game mastery than attempting to study them as if cramming for a test.
Outline of the Rules
1.0 Introduction
2.0 Game Equipment
- 2.1 The Game Map
- 2.2 The Playing Pieces
- 2.3 Inventory of Game Parts
3.0 Glossary
4.0 Sequence of Play
- 4.1 The Game-Turn
- 4.2 Game-Turn Sequence Outline
5.0 Wind
- 5.1 The Map
- 5.2 Sailing
6.0 Commands
- 6.1 How Commands are Chosen and Revealed
- 6.2 Command Restrictions
7.0 Movement
- 7.1 How Movement Allowances Are Determined
- 7.2 The Weather Gauge
- 7.3 Ahead, Port, and Starboard Commands
- 7.4 Tack and Wear Commands
- 7.5 How Ships Expend Movement Points
- 7.6 Being Taken Aback
- 7.7 Backing Sail
- 7.8 Fouling
- 7.9 Heaving To
8.0 Drift
- 8.1 Drift Due to Being Taken Aback
- 8.2 Drift Due to Failed Commands
- 8.3 Drift Due to Avoidance of Fouling
- 8.4 Drift Restrictions
9.0 Fire Combat
- 9.1 Restrictions
- 9.2 Rates
- 9.3 How Ships Fire
10.0 Damage
- 10.1 Hull Damage
- 10.2 Rigging Damage
- 10.3 Critical Hits
- 10.4 Dead in the Water
11.0 Melee Combat
- 11.1 Fire Combat When Ships Are Fouled
- 11.2 Melee
- 11.3 Unfouling
12.0 Striking Colors
- 12.1 Striking and Abandonment
- 12.2 Prizes
- 12.3 Re-capturing Prizes
13.0 The Strategic Cycle
- 13.1 Swell
- 13.2 Fires
- 13.3 Studding Sails
14.0 Recording Information
15.0 Scenarios
- 15.1 "Don't Give up the Ship!"
- 15.2 Wasp vs. Frolic
- 15.3 "Beat to Quarters": Lydia vs. Natividad
- 15.4 "Old Ironsides"
- 15.5 "Old Ironsides" Last Fight
- 15.6 Action Off Venice
- 15.7 "I Have Not Yet Begun to Fight!"
- 15.8 "We Have Met the Enemy and They Are Ours!"
- 15.9 The Battle of Santo Domingo
[1.0] Introduction
Fighting Sail is a simulation of naval warfare during the age of sail. Nine scenarios are presented in the game, dealing with small-scale naval actions from the American Revolution to the Napoleonic Wars and the War of 1812.
[2.0] Game Equipment
Cases:
[2.1] The Game Map
The map is simply a numbered 22" x 34" square grid, representing an unspecified ocean locale.
[2.2] The Playing Pieces
The cardboard counters represent actual ships that participated in the given scenarios. Each counter contains information that is vital to play.
[2.21] How to Read the Counters
The countermix includes forces from various nationalities. Each nationality is portrayed by a color and a two-letter code unique to that force. BR = British; FR = French; US = United States; PA = Panamanian.
[2.22] Sample Units
Command Chit, Front: a square bearing a large letter (here "A"), with the Sailing Value shown alongside.
Command Chit, Back: the four Movement Allowances (9, 3, 4 and 2) are printed around the chit, with the Command (here PORT) in the center.
Ship (British), Front: the ship's name (here "Serapis"), with the Fire Value, Sailing Value, Rate, Crew Value and Nationality printed on the counter. The sample reads 53-A-5-8 BR: Fire Value 53, Sailing Value A, Rate 5, Crew Value 8, Nationality BR.
Ship (British), Back: the same ship's reverse side, reading 0-A-5-8 BR (Fire Value 0, Sailing Value A, Rate 5, Crew Value 8).
Wind Direction Marker: an arrow counter showing the direction the wind is blowing.
Ariel (US) sample: two counters of the same ship, reading 43-A-7-6 US on the front and 0-A-7-6 US on the back.
[2.23] Summary of Unit Types
Command Chit (Front): letter "C" in a box. Command Chit (Back): the "TACK" side of a command chit.
[2.3] Inventory of Game Parts
Each copy of Fighting Sail should include the following components:
- One "22 x 34" mapsheet
- One sheet of 140 die-cut playing pieces
- Two six-sided dice (not included in S&T edition)
- One game box (not included in S&T edition)
If any of these parts are missing or damaged, fill out the Complaint Card enclosed in the game (not in S&T edition) and return it to SPI with the appropriate items checked on the card.
Those who have the S&T edition of Fighting Sail should address their complaints to SPI Customer Service.
Note: The process used in the manufacturing of the die-cut counters used in SPI games sometimes results in colors from one counter overlapping the color of a neighboring counter, or in the slightly off-center printing of the letters and/or numbers on a counter. SPI cannot replace counters displaying these minor manufacturing inaccuracies. Only counters that are illegible can be replaced by SPI.
[3.0] Glossary
Command Chit. A command chit is an order that is secretly issued to each ship by the owning player during the Command Decision Stage. This command may be either ahead, port, starboard, wear, or tack.
Drift. A state in which a ship may not move voluntarily nor fire for the duration of the Game-Turn. Drift may be caused by being taken aback or by failing to perform an issued command.
Fouling. A state in which two ships (enemy or friendly) occupy the same square. Fouled ships cannot move.
Rate. A classification of a ship's strength in terms of weight and guns. The lower the Rate number, the more powerful the ship in question.
Sailing Value. A quantification of the relative mobility of a vessel. Ships classified as Sailing Value A are the most mobile, and those classified as Sailing Value C are the least mobile.
Striking. Surrendering a ship. Ships that have struck are considered prizes of the enemy player.
Taken Aback. A state in which a ship must drift because it is facing directly into the wind.
Weather Gauge. An abstract indicator of a position of advantage in relation to the direction of the wind for one player or the other.
[4.0] Sequence of Play
Cases:
[4.1] The Game-Turn
Fighting Sail is played in Game-Turns, each of which represents approximately 7½ minutes. Each Game-Turn comprises several Stages plus a single Cycle that takes place only once every eight Game-Turns.
[4.2] Game-Turn Sequence Outline
Each Game-Turn must proceed strictly according to the following outline.
A. Strategic Cycle (All Game-Turns divisible by 8.)
- Swell Phase. Both players determine the effects of swell on their ships that are dead in the water (see 13.1).
- Fire Phase. Both players must determine if their ships that are on fire blow up (see 13.2).
- Studding Sail Phase. Players may deploy or take in studding sails (see 13.3).
B. Command Decision Stage
Both players secretly issue commands to all of their ships (see 6.0).
C. Action Stage
- Command Revelation Phase. Both players reveal all their issued commands.
- Movement Allowance Determination Phase. All ships receive a Movement Allowance (see 5.22).
- Weather Gauge Phase. The player who possesses the Weather Gauge must be determined (see 7.2).
- Movement Phase. According to the whim of the player with the Weather Gauge, each ship's Movement Allowance is expended to the fullest extent possible (see 7.5).
D. Melee Stage
- Fire Phase. Fouled ships may perform fire combat against one another (see 11.1).
- Melee Phase. Melee combat takes place between enemy ships fouled together (see 11.2).
E. Unfouling Stage
Fouled ships may attempt to unfoul (see 11.3).
F. Terminal Stage
All ships on the map should be flipped to their front countersides (see 9.13). The Game-Turn is ended, and a new Game-Turn is begun.
[5.0] Wind
General Rule:
The relationship between a ship's heading and the direction in which the wind is blowing determines this vessel's Movement Allowance throughout a given Game-Turn. (see 5.2).
Cases:
[5.1] The Map
The game map is divided into squares. There are eight possible directions in which the wind may blow (or a ship may face): through any of the four square sides or through any of the four square angles.
[5.2] Sailing
[5.21] Each ship possess a Sailing Value: either A (fastest), B, or C (slowest).
[5.22] Depending on its orientation in relation to wind direction, a ship receives a given Movement Allowance that it may use throughout the remainder of the Game-Turn. There are five possible positions of a ship relative to the wind (see display on next page). In order to determine a ship's Movement Allowance in a given Game-Turn, its orientation in relation to wind direction must be determined while checking its Sailing Value.
[5.22] Movement Allowance Table (Wind Orientation Key)
The key below shows the five positions of a ship relative to the wind. Each position lists the Movement Allowance for Sailing Value A / B / C, in that order. The sample counters shown are the Frolic (52*A-6-8 BR) and the Lydia (53-A-5-9 BR).
- Taken Aback: (0/0/0)
- Beating: (3/3/3)
- Beam Reach: (4/3/3)
- Broad Reach: (6/5/4)
- Running: (4/4/3)
Example: A ship possessing a Sailing Value of A that is broad reaching would have a Movement Allowance of 6. In the same position, a Sailing Value B ship would have a Movement Allowance of 5, and a Sailing Value C ship would have a Movement Allowance of 4.
[6.0] Commands
General Rule:
The method by which each ship fulfills its calculated Movement Allowance is determined by commands. Commands are issued to each ship secretly by the owning player in the Command Decision Stage. Each command requires a given ship to fulfill certain actions in the Movement Phase.
Cases:
[6.1] How Commands are Chosen and Revealed
During the Command Decision Stage, both players must place a command chit on each of their ships that is neither fouled (see 11.0), nor dead in the water (see 10.4), nor taken aback (see 5.22). Chits are placed on ships upside down so the enemy player is not aware of their meanings.
[6.11] There is a separate pool of command chits for each Sailing Value of ships: A, B, and C. A ship may only receive a command chit that bears the same letter as the Sailing Value of the ship in question.
[6.12] There are five available commands that may be issued to a ship: ahead (A), port (P) [left], starboard (S) [right], wear (W), or tack (T).
[6.13] Only a single command may be issued per ship in each Command Decision Stage.
[6.14] In the Command Revelation Phase, all issued commands are revealed to both players by flipping the command chits over.
[6.2] Command Restrictions
[6.21] If a ship has received a wheel critical hit (see 10.32), it is necessary to determine if its issued command succeeds or fails as soon as it is revealed in the Command Revelation Phase.
[6.22] Each ship possesses a Crew Value (see 10.12). A ship may not be issued a tack command if its current Crew Value is 5 or less. A ship may not be issued a wear command if its current Crew Value is 4 or less.
[7.0] Movement
General Rule:
During the Movement Phase, all ships possessing command chits must fulfill their complete Movement Allowances and the requirements of their particular commands. Ships with a Movement Allowance are required to move as far as is possible. Note that each ship counter has a bow (front) and stern (rear). Each ship must always have its bow oriented toward one of eight directions: toward one of either the sides or angles.
Procedure:
During the Movement Phase, ships are moved one at a time according to the whim of the player who possesses the Weather Gauge.
Cases:
[7.1] How Movement Allowances are Determined
During the Movement Allowance Determination Phase, each ship that has been issued a command must have a Movement Allowance determined for it according to the instructions of Case 5.22. When this allowance has been determined, the ship's command chit should be oriented such that the proper numeral on this chit is facing toward the bow of the vessel.
Example: The counter Felicite (44-A-5-6 FR) is broad reaching with a port command. Since Felicite is sailing Value A, its Movement Allowance is 6 (see 5.22). Thus, the numeral 6 is oriented to face the bow of the ship.
[7.2] The Weather Gauge
During the Weather Gauge Phase, the player who possesses the Weather Gauge must be determined. The player who possesses the Weather Gauge controls it for the duration of the Game-Turn.
[7.21] The Weather Gauge is determined as follows:
- a. The players examine the Movement Allowance of the ships on the map, determining the highest allowance that appears (even if it is shared among many ships).
- b. Each player determines how many (if any) of his ships possess this highest Movement Allowance as calculated in Step a.
- c. The player who has the most ships on the map possessing this allowance is considered to possess the Weather Gauge. If both players have the same number of ships with this allowance, they both roll a single die, higher die roll indicating the possession of the Weather Gauge.
[7.22] The player with the Weather Gauge controls the order of movement of all ships possessing commands. This player must declare which player (either himself or his opponent) will perform a move with one of his ships in the following circumstances:
- a. At the beginning of the Movement Phase.
- b. After any enemy or friendly ship has expended Movement Points to enter a new square as a result of a command.
- c. After any enemy or friendly ship has tacked.
[7.23] When the player with the Weather Gauge has stated which player will make the next move, the indicated player must perform the move of one ship of his own choice. After this movement is completed, the Weather Gauge player is obligated to declare which player will make the next move (see 7.22). This process continues until there are no more ships on the map with uncompleted command chits. (If one player has completed the movement of all his ships, the enemy player completes the movement of all his ships without restriction.)
[7.24] Optional, suitable for scenarios consisting of 7 or more ships. A player must move ships that possess the highest Movement Allowance on the map before moving ships with lower Movement Allowances. The player with the Weather Gauge must comply with this restriction when declaring who will perform the next move (see 7.22).
Weather Gauge Example: HMS Guerriere is beam reaching with a Movement Allowance of 4. USS Constitution is beating with an Allowance of 3. Thus, Guerriere possesses the Weather Gauge. The British player decides to commence the Movement Phase by moving Guerriere one square, reducing its Movement Allowance to 2. He then declares that the US player should make the next move. This is performed, completing Constitution's command. Then, Guerriere completes the Movement Phase by fulfilling its command.
[7.25] The Movement Phase is completed when all ships on the map have completed their movement and their command chits have been removed.
[7.3] Ahead, Port, and Starboard Commands
[7.31] If a ship possesses an ahead command, it must go directly ahead as far as its Movement Allowance will allow throughout the Movement Phase. It may make no changes of facing as it is moving. (Exception: See 7.84.)
[7.32] If a ship possesses a port command, it must end the Movement Phase facing at least 45° counterclockwise its original facing at the start of the Phase. It may never make a turn to starboard during the Phase. There is no specific requirement as to when or in what square the turn to port is made (see 7.34).
[7.33] If a ship possesses a starboard command, it must end the Movement Phase facing at least 45° clockwise from its original facing at the start of the Phase. It may never make a turn to port during the Phase. There is no specific requirement as to when or in what square that turn to starboard is made (see 7.34).
[7.34] Assuming it possesses enough Movement Points, a ship must always enter the square it is facing. (Exception: See 7.4 and 7.83a.) A ship must move into an adjacent square before a turn may be initiated.
[7.35] Turns are made in increments of 45°. Each square consists of 360°. There is 45° between each square-side and adjacent square-angle, and 90° between adjacent square sides and between adjacent square angles. In order to turn, a ship's bow is simply altered the desired number of degrees, subject to the restrictions of Cases 7.34 and 7.36.
[7.36] Due to a port or starboard command, a ship may turn 45° or, at most, 90° within a given square. (However, it is permitted to turn more than 90° to port or starboard during the course of an entire Movement Phase.) There is no Movement Point cost to turn.
[7.37] Since a ship may be moved at different times during the Movement Phase, it may be difficult to remember if a ship has fulfilled the requirements of a port or starboard command. It is suggested that a ship's command chit be placed on the stern of the vessel before its command has been fulfilled and on the bow of the ship after it has been fulfilled.
[7.4] Tack and Wear Commands
(Diagram captions on this page: "Port Turn" (example counter Alexandre, 52-A-3-6 FR); "Starboard Turn" (example counter Jena, 41-B-6-6 FR); "Note that each turning increment is 45°"; a compass key of the eight facings.)
[7.41] If a ship possesses a tack command, it must expend its entire Movement Allowance to turn 135°, 180°, or 225° in the square it occupies. (Exception: See 7.43.)
[7.42] If a ship possesses a wear command, it must expend its entire Movement Allowance to turn 135°, 180°, or 225° one square to leeward (i.e., away from the wind; see accompanying display). (Exception: See 7.43.) When performing a wear command, a ship never transits any intervening squares; it is simply picked up and placed with its desired directional change in its proper square. (Also, see 7.44.)
(Diagram captions: "Wind coming from port" and "Wind coming from starboard" showing the wear maneuver.)
[7.43] A ship may never complete a tack or wear command by being taken aback (that is, by facing directly into the wind).
[7.44] If a ship with a wear command is running (i.e., with the wind from directly astern), it may complete its command by turning 135° or 225° either in the square directly to port or in the square directly to starboard.
[7.5] How Ships Expend Movement Points
[7.51] During a Movement Phase, a ship's Movement Allowance must be expended to the fullest extent possible.
[7.52] A ship always enters the square it is facing when moving. (Exception: See 7.4.) As it enters this new square, the Movement Points required to perform this move are immediately deducted from the ship's current Movement Allowance by re-orienting its command chit such that the numeral representing its new Movement Allowance is facing the bow (see 7.53).
[7.53] To enter an adjacent square through a square side costs 2 Movement Points. To enter an adjacent square through a square angle costs 3 Movement Points.
(Diagram captions: "2 MP," showing the Natividad (43-B-4-6 PA) entering through a square side; "3 MP," showing the Mamelouck (35-C-7-6 FR) entering through a square angle.)
[7.54] In order to enter an adjacent square, a ship must have enough Movement Points remaining in its allowance. If a ship does not have enough Movement Points to enter the square it faces, its command chit is removed and its movement for the Phase is terminated. If any ship has fewer than 2 Movement Points remaining, its command chit is automatically removed (it could not possibly enter an adjacent square).
[7.55] Movement Points may never be loaned from ship to ship, nor may they be accumulated from Phase to Phase.
[7.6] Being Taken Aback
A ship is considered to be taken aback when it is facing directly into the wind (see 5.22).
[7.61] A ship that begins the Command Decision Stage taken aback may not be issued a command. Instead, it must drift (see 8.0).
[7.62] If at any point during the fulfillment of a port or starboard command a ship is taken aback, its command chit is immediately removed and its movement is terminated for the current Phase. In addition, the ship must drift (see 8.0). Such a ship would no longer be required to fulfill the requirements of its command.
(Diagram captions on this page: "Permissible" and "Not Permissible" examples showing Imperial (61-B-1-6 FR), Mercure (41-A-6-6 FR) moving through square sides and angles; "Wind coming from starboard" showing Diomede (51-B-3-6 FR).)
[7.63] A ship with a tack command may turn "through" the wind so long as the vessel does not complete its command by being taken aback.
[7.7] Backing Sail
[7.71] If a ship that possesses a command chit begins the Movement Phase beating or beam reaching (see 5.22), the owning player may declare that he is backing sail instead of moving. To back sail, the owning player simply removes the ship's command chit and leaves his vessel positioned in the same square it occupied at the beginning of the Movement Phase with the same bow orientation (in other words, the ship is not moved at all). The ship is under no obligation to fulfill its given command chit.
[7.72] Backing sail is considered normal movement even though no physical movement takes place. After backing sail is performed, the player with the Weather Gauge must state who will make the next move normally (see 7.2).
[7.73] After a ship backs sail, it is eligible to fire (see 9.0).
[7.74] A ship may never back sail in two consecutive Movement Phases.
[7.8] Fouling
In order to be able to carry out its movement functions, a ship must be the only vessel to occupy a given square at any given moment.
[7.81] At the moment a ship enters a square occupied by another vessel (enemy or friendly), both ships are immediately fouled (see 11.0). Fouled ships may not move until they have become unfouled (see 11.4). Fouled ships have their command chits removed and are under no obligations to fulfill their former commands.
[7.82] A maximum number of 4 ships may occupy the same square. Facing is irrelevant when ships are fouled; they should simply be placed on top of one another.
[7.83] Ships may avoid fouling under the following circumstances:
- a. If a ship has no alternative but to foul another vessel by fulfilling its command, the owning player may make a free 45° turn to port or starboard immediately before performing the movement of his ship. If, after this free turn is completed, it is still impossible to avoid fouling, this fouling cannot be avoided if the ship must move. (Exception: See 7.83b.)
- b. If it is impossible for a ship to avoid fouling with a stack of 4 ships, the vessel immediately drifts (see 8.0).
[7.84] Ships with port or starboard commands that are performing free turns to avoid fouling may make this free turn in any direction, regardless of the ship's original command.
[7.85] If a ship makes a free turn and, as a result, is taken aback, it immediately drifts (see 8.0) and its movement is terminated for the remainder of the Phase.
[7.9] Heaving To
[7.91] If a ship that possesses a command chit begins the Movement Phase beating (see 5.22), the owning player may declare that he is heaving to instead of moving. To heave to, the owning player simply re-orients the bow of his ship 45° to port (if the wind is coming from the ship's starboard side) or 45° to starboard (if the wind is coming from the ship's port side). The ship remains in the square it occupied at the start of the Movement Phase and its command chit is removed.
[7.92] Heaving to is considered normal movement, even though the ship does not enter a new square. After heaving to is performed, the player with the Weather Gauge must state who will make the next move normally (see 7.2).
[7.93] After a ship heaves to, it is eligible to fire (see 9.0).
[8.0] Drift
General Rule:
If a ship is taken aback or fails to perform a command after having suffered a wheel critical hit (see 10.32), it must drift. A ship that has drifted may not move voluntarily for the remainder of the Game-Turn, nor may it perform fire combat.
Procedure:
When a ship drifts, the owning player must immediately roll a single die in order to determine the direction of drift. If a 1 or 2 is rolled, the ship is unaffected and remains oriented as before. If a 3 or 4 is rolled, the ship's bow is reoriented 45° to port in the same square. If a 5 or 6 is rolled, the ship's bow is reoriented 45° to starboard in the same manner.
Cases:
[8.1] Drift Due to Being Taken Aback
[8.11] If a ship begins the Command Decision Stage taken aback, it may not be issued a command. At the end of this Stage, both players must determine drift for all of their ships that are taken aback.
[8.12] If a ship with a port or starboard command is taken aback in the process of fulfilling its command, its command chit is immediately removed and the ship drifts.
[8.2] Drift Due to Failed Commands
[8.21] At the moment a ship receives a wheel critical hit (see 10.32), its command chit is immediately removed and the ship drifts.
[8.22] If a ship fails to perform a command after having suffered a wheel critical hit, its command chit is removed and it immediately drifts.
[8.3] Drift Due to Avoidance of Fouling
If it is impossible for a ship to avoid fouling a stack of 4 ships, its command chit is removed and it immediately drifts.
[8.4] Drift Restrictions
A ship that drifts may not fire for the remainder of the Game-Turn (it should be flipped over to indicate this status). In addition, it may not move voluntarily during the remainder of the current Movement Phase.
(Diagram on this page: a column of four counters of the Victorious (62-B-3-9 BR) at squares A, B, C and D, with arrows. Caption: "A ship begins the Movement Point Phase with an ahead command and a Movement Allowance of 6. It could initiate fire immediately after having entered square B or square C or square D.")
[9.0] Fire Combat
General Rule:
Each ship that has not drifted may fire once per Game-Turn. As in turning, fire may be performed only by a ship immediately after it has entered a new square during movement. (Exception: See 11.1.) Fire is not simultaneous; only one ship fires at a time.
Procedure:
When a ship fires, the owning player must declare a target and verify that this target is within range, field of fire, and line of sight. He then rolls one large and one small die and reads the result as a two-digit number, the large die being the first digit and the small die being the second digit (e.g., if the large die show a 4 and the small die a 6, the result would be read as 46). This two-digit number is then compared to the ship's Fire Value (which may be modified due to various factors). A dice roll equal to or lower than this Fire Value results in a varying number of hits. A dice roll higher than the Fire Value indicates no effect.
Cases:
[9.1] Restrictions
[9.11] A ship may fire only once per Game-Turn, assuming eligibility. Fire takes place only during the Movement Phase (Exception: See 11.1), and is completely voluntary. As in turning, a ship may perform fire combat only immediately after it has entered a new square (or tacked) in the Movement Phase. No other ship on the map except the one which has just completed a move may fire. If the owning player decides to initiate fire, he must resolve that fire immediately before the Weather Gauge player declares who will make the next move. If fire is not declared (or is not possible), the Weather Gauge player must state who will make the next move.
[9.12] A ship is not eligible to fire if it has struck (see 12.1) or if it has drifted during the course of its movement (see 8.0).
[9.13] As soon as a ship resolves a fire attack, it should be flipped over to its reverse counterside. This side indicates a zero Fire Value, indicating that the ship may not fire again for the duration of the Game-Turn. In the Terminal Stage, all ships on the map should be flipped to their front countersides, indicating their original Fire Values.
[9.14] If a ship is turning due to a port, starboard, wear, or tack command, fire takes place after the vessel has completed its desired turn. [Text continued on printed page 31.]
[Continued from printed page 26.]
[9.15] A ship may fire only its port or starboard broadside in a given Game-Turn, not both.
[9.16] At 6 or fewer Range Points (see 9.31), a firing ship may choose any enemy ship as its target. At 7 or more Range Points, a firing ship must attempt to choose an enemy target ship that possesses a Rate number (see 9.2) equal to or less than its own if at all possible. If this is impossible, any enemy target ship within this range may be chosen as a target.
[9.2] Rates
Each ship possesses a Rate, which is an indicator of the size and number and caliber of the guns she carries on board. The lower the Rate number, the bigger the ship.
[9.3] How Ships Fire
[9.31] When a ship fires, it must fire at a single enemy target ship that is within range, field of fire, and line of sight.
- a. Range. The maximum range of all fire is 20 Range Points. Range Points are identical to Movement Points. They are traced across square sides (2 Range Points) and square angles (3 Range Points) from firing to target ship exactly as if movement were being performed.
(Diagram caption: "The range from Ship A to Ship B is 6 Range Points, from Ship A to Ship C is 5 Range Points, and from Ship A to Ship D is 4 Range Points.")
- b. Field of Fire. Each ship has a field of fire for both its port and its starboard broadside. No target may ever be fired at outside this field. In the following displays, all shaded squares are within the fields of fire of the indicated ships (note that the field extends hypothetically beyond the scope of the displays).
(Diagram captions on this page: field-of-fire displays labelled with the ship's "Bow," "Blind," "Side" and "Stern" areas; and a line-of-sight display with counters labelled with their Fire Values, e.g. 0-A-4-9 US and 0-B-5-4.)
- c. Line of Sight. The firing player must connect the center of the square occupied by the firing ship with the center of the square occupied by the target ship by using a straightedge. If this line passes through any square that is occupied by a friendly or enemy ship, no fire may take place. If the line does not pass through any occupied squares, fire may take place. (Note: A line of sight is not blocked if it passes directly through a square angle of an occupied square.)
(Diagram caption: "Ship A may not fire at Ship C because it is blocked by Ship B. However, it may fire at Ship D. Ship B may fire at Ship E, because its line of sight passes directly through the angle of the square occupied by Ship F.")
[9.32] When a fire attack is declared, it must be specified as hull or rigging fire.
[9.33] When calculating a fire attack, the firing ship's Fire Value is modified according to the following schedule:
- a. Rates. The Rate of the firing ship is subtracted from the Rate of the target ship. If the result is zero, there is no modification. If the result is a positive number, it is multiplied by 10, the product indicating the amount that is added to the firing ship's Fire Value. If the result is a negative number, this number is also multiplied by 10, the product indicating the amount that is subtracted from the firing ship's Fire Value.
- b. Range. The number of Range Points from firing to target ship is divided by 4 (drop fractions). The result is multiplied by 10, the product indicating the amount that is subtracted from the firing ship's Fire Value.
- c. Damage. The number of hull hits inflicted on the firing ship is divided by 2 (drop fractions). The result is multiplied by 10, the product indicating the amount that is subtracted from the firing ship's Fire Value.
- d. Rigging Fire. If rigging fire is being attempted (see 9.32), 10 is subtracted from the firing ship's Fire Value, if this fire is being attempted at 6 Range Points or fewer.
- e. Tacking. If the firing ship has just performed a tack command, 10 is subtracted from the firing ship's Fire Value.
- f. Rakes. If the firing ship is performing a stern rake on the target (see 9.35), 20 is added to its Fire Value. If it is performing a bow rake, is added to its Value.
[9.34] After a firing ship's final Fire Value has been determined, the owning player rolls one large and one small die, reading a two-digit result (see Procedure). This result is compared to the firing ship's final Fire Value. A result greater than this Value indicates no effect. A result equal to or up to 40 less than this Value indicates one hit on the target ship. A result between 41 and 80 (inclusive) less than this Value indicates two hits on the target ship. A result of 81 or more less than this Value indicates three hits on the target ship. Note that on any doubles dice roll that also results in at least one hit, a critical hit (see 10.3) is inflicted on the target.
[9.35] A stern rake occurs when the firing ship is in the stern blind-side area of the target ship (see 9.31b). A bow rake occurs when the firing ship is in the bow blind-side area of the target ship.
[9.36] All ships possess a field of fire ("broadside") to their port and to their starboard sides. The first time a ship's port or starboard broadside is fired, the firing player is obligated to record this fact on a separate sheet of paper (see 14.0). If this first broadside is delivered at 7 or more Range Points, it has no beneficial effect on the firing ship's Fire Value and is considered wasted. However, if it is delivered at 6 or fewer Range Points, it adds to the firing ship's Fire Value (see 9.33g). No more than one port and one starboard broadside may be delivered by a ship in any one game.
[9.37] A ship may not fire both its port and starboard broadsides in the same Game-Turn.
[9.38] All ships whose Fire Values are followed by an asterisk are carronade-armed. Such ships have a maximum range of 8 Range Points. At ranges of 3 Range Points or fewer, 10 is automatically added to these ships' Fire Values.
Example of Fire Combat: HMS Shannon (Fire Value 55, Rate 5) is firing at USS Constitution (Rate 4) at 6 Range Points. This is Shannon's first port broadside, and the fire is determined to be a stern rake. Hull fire is declared. 10 is subtracted due to the difference in Rates between the two ships, and an additional 10 is lost due to the range. However, the first port broadside adds 10, while the stern rake adds 20, yielding a final Fire Value of 65 for Shannon. The British player rolls two dice and obtains a 15 result. Since this is 50 less than Shannon's Fire Value, two hull hits are inflicted on Constitution.
[10.0] Damage
General Rule:
A ship may suffer either hull or rigging damage due to successful enemy fire. In addition, in some circumstances, a ship may suffer a critical hit. Whenever a hull, rigging, or critical hit is inflicted on a ship, the owning player must record this fact on a piece of scrap paper (see 14.0).
Cases:
[10.1] Hull Damage
All hits caused by hull fire are considered hull hits. Hull hits may never be repaired.
[10.11] The number of hull hits a ship possesses may affect its Fire Value (see 9.33c).
[10.12] For every hull hit a ship possesses, its Crew Value is reduced by one.
[10.13] A variable number of hull hits may cause a ship to strike (see 12.1).
[10.2] Rigging Damage
All hits caused by rigging fire are considered rigging hits. Rigging hits may never be repaired. If a ship has received at least two rigging hits, its maximum Movement Allowance is 4, regardless of its Sailing Value. If it has received at least four rigging hits, its maximum Movement Allowance is 3, regardless of its Sailing Value.
[10.3] Critical Hits
During fire combat, any doubles dice roll that also results in a hit indicates a critical hit on the target vessel in addition to its normal damage. The firing player immediately rolls a single die. On a die roll of 1, 2, or 3, a wheel critical hit is inflicted (see 10.32). On a die roll of 4 or 5, a mast critical hit is inflicted (see 10.31). On a die roll of 6, the die is rolled again. A roll of 1, 2, or 3 on this subsequent die roll indicates a mast critical hit. A 4, 5, or 6 indicates a fire critical hit (see 10.33).
[10.31] A mast critical hit indicates the loss of a mast. A given ship may lose no more than three masts (further mast critical hits after this point are converted to no effect). If a ship has lost one mast, its maximum Movement Allowance is 4 if Sailing Value A or B, or 3 if Sailing Value C. If a ship has lost two masts, its maximum Movement Allowance is 3, regardless of Sailing Value. If a ship has lost three masts, it is considered dead in the water (see 10.4). Note: If a ship has lost any number of masts in addition to possessing two or more rigging hits (see 10.2), it is dead in the water.
[10.32] At the moment a wheel critical hit is received, the target ship has its command chit (if any) removed and it immediately drifts (see 8.0). In addition, at the end of every Command Decision Stage, the owning player must roll a single die for each of his ships that have been issued commands that possess a wheel critical hit. On a die roll that is greater than the current Crew Value of such a ship, the ship's command chit is immediately removed and the ship drifts (see 8.0). On a die roll equal to or less than the Crew Value, the command "succeeds" and the ship is unaffected. Note: If a ship receives a wheel critical hit after having received one earlier in the game, it is converted to a mast critical hit.
[10.33] If a ship receives a fire critical hit, one hull hit (see 10.1) is immediately inflicted on it. In addition, during the Fire Phase of the Strategic Cycle, the owning player must roll a single die for each of his ships that is on fire in order to see if it blows up (see 13.2). For each Fire Phase in which a ship on fire does not blow up, it receives one hull hit. Fires may not be put out. Note: If a ship receives two fire critical hits, it automatically blows up and is removed from the map.
[10.4] Dead in the Water
[10.41] A ship is considered dead in the water under the following circumstances:
- a. It has lost three masts.
- b. It has lost any number of masts in addition to two or more rigging hits.
- c. If the ship is a prize (see 12.0).
- d. If the ship has been abandoned (see 12.0).
- e. If the ship is fouled (see 7.8).
[10.42] Ships that are dead in the water may not receive commands, nor may they move voluntarily. During the Strategic Cycle, ships that are dead in the water may be affected by swell (see 13.1).
[11.0] Melee Combat
General Rule:
Fouled ships (see 7.8) may participate in melee combat during the Melee Stage. Fouled ships may never receive commands until they have become unfouled.
Cases:
[11.1] Fire Combat When Ships Are Fouled
During the Fire Phase, fouled ships may perform fire combat, but only against enemy ships that are stacked with them in the same square. Fouled ships perform combat according to the same restrictions listed in Section 9.0. Unfouled ships may not fire into a square that is occupied by fouled ships.
[11.11] Within a given square, fouled ships fire in order of their current Crew Values (if there is a tie, both players roll a single die, highest roll firing first).
[11.12] If there is more than one enemy ship fouled with a friendly vessel in a square, the friendly vessel may choose to fire at any one of the enemy ships.
[11.13] Field of fire and line of sight restrictions are not taken into account when performing fire combat between fouled ships. The range between firing and target ships is considered to be one Range Point.
[11.14] Rigging fire may not be attempted when ships are fouled.
[11.2] Melee
Melee combat is mandatory between enemy ships that occupy the same square during the Melee Phase.
[11.21] Melee combat is performed according to the following procedure:
- a. Both players determine the Boarding Values (see 11.22) of their fouled ships. If a player has more than one ship in the square, the Boarding Values are added to produce a single sum. (Exception: See 11.23.)
- b. Both players roll a single die and add this die roll to their Boarding Value as determined in Step a. Note: If the Boarding Value is a negative number, that number is subtracted from this die roll.
- c. The sums of both players are compared. If one sum is larger than the other by 150% or more, the player with the higher sum has taken all enemy ships in the square as prizes (see 12.2). If one sum does not exceed the other by 150%, melee has had no effect (although melee may take place in ensuing Melee Phases). The ships remain fouled and are considered dead in the water. Note: If one player's sum is zero or a negative number and the other player's sum is positive, then all of the first player's ships in the square become prizes. If both players have a negative sum (or zero), then melee has had no effect.
[11.22] A ship's Boarding Value is equal to its current Crew Value minus its Rate. This may be a positive or negative number or zero.
[11.23] If all of a player's ships that are performing melee combat within the same square have a negative Boarding Value, then only the highest of these Boarding Values is considered for melee resolution.
[11.3] Unfouling
Fouled ships must remain stacked in the same square until they unfoul during the Unfouling Stage (even if all the fouled ships are friendly).
[11.31] At the beginning of the Unfouling Stage, both players may declare that any or all of their fouled ships will attempt to unfoul. Unfouling is voluntary, but each ship may only attempt it once per Unfouling Stage. Unfouling attempts may be made in any order the players desire.
[11.32] If the square in which a fouled ship attempts to unfoul has no enemy vessels in it, the ship unfouls on a die roll of 1, 2, or 3. If the square in which it attempts to unfoul has at least one enemy vessel in it, the ship unfouls on a die roll of 1 only. If a ship does not successfully unfoul, it remains fouled in the same square.
[11.33] If a ship unfouls, the owning player removes it from the fouled stack and places it in any unoccupied adjacent square (if no adjacent square is unoccupied, the ship may not unfoul). The ship may be faced in any desired direction by the owning player.
[11.34] If an enemy ship unfouls and a friendly ship finds itself alone in a square it formerly occupied with this enemy vessel, the friendly ship may be freely adjusted by the owning player to face any desired direction.
[12.0] Striking Colors
General Rule:
Ships may be obligated to strike colors (surrender) as a result of melee combat or due to certain levels of hull damage. Once a ship strikes, it is considered a prize of the enemy player. A prize is considered friendly to the player who has captured it.
Cases:
[12.1] Striking and Abandonment
[12.11] A ship is considered abandoned at the moment it receives a number of hull hits equal to 10 minus its Rate. Example: USS Constitution (Rate 4) is abandoned at the moment it receives its sixth hull hit. An abandoned ship does not automatically strike; it is considered dead in the water, but is still controlled by its original owner. It may neither fire nor receive commands.
[12.12] Rigging fire never causes abandonment.
[12.13] An abandoned ship automatically strikes if at the moment it is abandoned an enemy vessel occupies the same square or any adjacent square.
[12.14] An abandoned ship automatically strikes at the moment an enemy ship enters any of the eight adjacent squares.
[12.15] Note that a ship may also strike and be taken as a prize through melee combat (see 11.2).
[12.2] Prizes
If a ship strikes (see 12.13 and 12.14), it is immediately considered a prize of the enemy player. Prizes are owned by the player who has captured them, although they may never fire nor receive commands.
[12.21] All prizes have a Crew Value of 1 and maintain their original Rate.
[12.22] If a ship is taken as a prize during melee combat, it is still considered fouled with the ships that captured it. If the owning player desires it, these ships may attempt to unfoul normally (see 11.3), although they are considered friendly to one another.
[12.23] Prizes may never be chosen as targets of fire combat.
[12.3] Re-capturing Prizes
[12.31] A prize may be re-captured by its original owner, but only through melee combat. This combat is performed normally (see 12.21), and if the original owner obligates the prize to strike (see 11.2), it reverts back to his control. Prizes may be captured and re-captured an unlimited number of times.
[12.32] A re-captured prize is considered a prize itself — that is, it automatically has a Crew Value of 1 and maintains its original Rate.
[13.0] The Strategic Cycle
General Rule:
The Strategic Cycle occurs on all Game-Turns that are divisible by 8 (i.e., every hour of real time). On all other Game-Turns, this Cycle is skipped.
Cases:
[13.1] Swell
Only ships that are dead in the water (see 10.4) are affected by swell.
[13.11] During the Swell Phase, each player rolls a single die for each of his ships that is dead in the water. (Exception: See 13.12.) A die roll of 1 or 2 indicates no effect; the ship remains in the hex it occupies. A result of 3, 4, 5, or 6 indicates that the ship is immediately moved one square to leeward, maintaining the same facing. This means that the ship is moved into the adjacent square toward which the wind is blowing directly.
(Diagram caption: "Ships A and B are both dead in the water and have been affected by swell. Thus, during the Swell Phase, they are moved by the owning player as shown.")
[13.12] If, at the beginning of the Swell Phase, the adjacent leeward square of a ship that is dead in the water is currently occupied by a friendly or enemy ship, the player owning the ship that is dead in the water is not obligated to roll the die in order to determine the effects of swell; it is exempt from the restrictions of Case 13.11.
[13.13] During the Swell Phase, ships that are fouled are not rolled for individually. Instead, either player rolls a single die at this time in order to determine the effects of swell on all of the fouled ships within a square.
[13.2] Fires
[13.21] During the Fire Phase, a player must roll a single die for each of his ships that is on fire (see 10.33). On a die roll of 1, the ship blows up and is removed from the map immediately. On any other die roll, the ship simply receives one hull hit.
[13.22] If the addition of one hull hit to a ship on fire (see 13.21) reduces that ship to abandonment level (see 12.11), the ship immediately blows up and is removed from the map.
[13.23] The only way a ship can sink (and thus be removed from the map) is through fire (see 10.33, 13.21, and 13.22).
[13.24] All vessels that are fouled with a ship that blows up are considered blown up as well.
[13.3] Studding Sails
[13.31] During the Studding Sail Phase, each player may declare that any of his ships on the map will employ studding sails for the next eight Game-Turns. If studding sails are employed by a ship, the owning player must record this fact on a separate sheet of paper. In addition, if studding sails are already being used by a ship at the beginning of this Phase, the owning player may declare that he is taking in these sails at this time, thereby permitting the ship to operate normally again.
[13.32] If a ship using studding sails is fired upon by an enemy vessel employing rigging fire, there is no negative modifier to this enemy's Fire Value due to the use of rigging fire (see 9.33d).
[13.33] During the Movement Allowance Determination Phase, a ship using studding sails is affected as follows:
- a. If it is beating, it is considered to be beam reaching instead.
- b. If it is beam reaching, it is considered to be running instead.
- c. If it is running, it is considered to be broad reaching instead.
Note: If a ship is broad reaching, there is no additional effect on its Movement Allowance.
[14.0] Recording Information
General Rule:
Before the start of play, each player should take a piece of scrap paper and list the names of his participating vessels down the left side. During the course of the scenario, certain information must be recorded on this paper which may affect the capabilities of the affected ship.
- a. Each time a hull or rigging hit (see 10.0) is received by a ship, the owning player must record this fact next to the appropriate vessel's name.
- b. Each time a ship fires its first broadside on its port or starboard side (see 9.36), this fact must be recorded by the owning player next to the appropriate vessel's name.
- c. Each time a critical hit (see 10.3) is received by a ship, the owning player must record this next to the appropriate vessel's name.
[15.0] Scenarios
General Rule:
There are nine scenarios in Fighting Sail. Each is presented in the following manner:
- a. Notes. The historical background of the engagement is described.
- b. Wind. The direction from which the wind is coming is listed (e.g., NW indicates that the wind is coming from the northwest, blowing toward the southeast). Place the wind marker facing in the appropriate direction in any squares on the map (the direction of the wind does not change for the duration of the scenario). Note that there is a compass rose on the map, indicating directions.
- c. Deployment, Player A. The names of one player's participating ships are listed, followed by their square number of placement and bow orientation.
- d. Deployment, Player B. The same information is provided for the second player.
- e. Game-Length. The number of Game-Turns to be played is listed.
Game-Length: Scenarios with 6 or fewer ships only. A game ends at the moment one player has lost all his participating vessels as prizes or due to fire. However, a game may also end when a point is reached in play where it is no longer possible for either player to inflict damage on the other due to fire combat. If such is the case, the game is a draw. Finally, a scenario may be terminated upon mutual consent of both players. There is no definitive game-length for scenarios involving six or fewer ships; they may last as long as the aforementioned restrictions allow.
Victory Conditions: At the end of the game, the winner is the player who has accumulated the most Victory Points. Victory Points are awarded only for capturing and retaining prizes (see 12.2). (Exception: If a ship blows up, it is considered a prize of the enemy player for Victory Point purposes.) A ship is worth a number of Victory Points equal to 10 minus its Rate. If both players possess an equal number of Victory Points (or none at all), the game ends in a draw.
Map Restrictions
It is suggested that the area of play be strictly limited to the square grid as presented on the map. That is, it should be prohibited for a ship to "exit" the map at any time during the scenario. However, upon mutual consent of both players, it may be decided to allow ships to move off the square-grid at will, hypothesizing that the grid continues indefinitely in all directions. Players will have to draw their own grids to tie onto the existing map in this circumstance.
Scenario Cases:
[15.1] "Don't Give Up the Ship"
a. Notes. USS Chesapeake (38, Capt. James Lawrence) and HMS Shannon (38, Capt. Philip Bowes Vere Broke) clashed on 1 June 1813 in one of the classic frigate confrontations of the War of 1812. In a 20-minute engagement, Shannon battered Chesapeake with fire, boarded her, and took her as a prize, although Captain Lawrence's battle cry of "Don't give up the ship!" became a rallying-call of the US Navy for years to come.
b. Wind. NW. c. Deployment, US. Chesapeake (0807, SE). d. Deployment, British. Shannon (0811, E). e. Game-Length. See 15.0.
[15.2] Wasp vs. Frolic
a. Notes. USS Wasp (18, Captain Jacob Jones) engaged HMS Frolic (19, Captain Thomas Whinyates) on 18 October 1812 in rough seas off the mouth of the Delaware River. In a 43-minute battle, both vessels were battered, but Wasp won the upper hand by successfully boarding her antagonist. Ironically, a few hours after the engagement, Wasp herself fell prey to the British ship-of-the-line HMS Poitiers (74), which arrived on the scene as the battle was coming to a close.
b. Wind. N. c. Deployment, US. Wasp (0805, S). c. Deployment, British. Frolic (1108, W). (Printed as "c." in the source.) e. Game-Length. See 15.0.
Note: Both Wasp and Frolic are carronade-armed (see 9.38).
[15.3] "Beat to Quarters": Lydia vs. Natividad
a. Notes. On 20 July 1808, HMS Lydia (36, Captain Horatio Hornblower) brought the Panamanian two-decker, Natividad (50, Vice Admiral Don Cristobal de Crespo), to battle off the Pacific coast of Panama. In a furious engagement that occupied the better part of a day, Lydia pummeled her opponent into a wreck. Natividad finally caught fire and sank.
b. Wind. W. c. Deployment, British. Lydia (0615, NE). d. Deployment, Panamanian. Natividad (1115, N). e. Game-Length. See 15.0.
Note: This scenario is taken from C.S. Forester's novel, Beat to Quarters (published in Britain as The Happy Return).
[15.4] "Old Ironsides"
a. Notes. On 19 August 1812, the most famous warship in American history, USS Constitution (44, Captain Isaac Hull), fought her first and most renowned action against the British frigate, HMS Guerriere (38, Captain James Dacres). In an engagement that lasted approximately 90 minutes, Constitution was handled flawlessly, repeatedly raking her opponent. Guerriere put up stiff resistance, but finally fell prey to American boarders.
b. Wind. W. c. Deployment, US. Constitution (0610, SE). d. Deployment, British. Guerriere (1009, S). e. Game-Length. See 15.0.
Note: This scenario is balanced in favor of the American player, so it is suggested that the player with more experience play the role of the British.
[15.5] "Old Ironsides'" Last Fight
a. Notes. On 20 February 1815, "Old Ironsides" (now under command of Captain C. Stewart) was cruising off the Rock of Lisbon, preying on British merchantmen in Portuguese waters. Stewart encountered two British sloops, HMS Cyane (34, Captain Gordon Falcon) and HMS Levant (21, Captain Hon. George Douglass). In 40 minutes of brilliant maneuvering, Constitution engaged the British ships in detail, forcing Cyane to strike after exchanging numerous broadsides, and then taking Levant in a running gun-duel.
b. Wind. S. c. Deployment, US. Constitution (0712, E). d. Deployment, British. Cyane (0509, E), Levant (0808, E). e. Game-Length. See 15.0.
[15.6] Action Off Venice
a. Notes. On 21 February 1812, the British ship-of-the-line, HMS Victorious (74, Captain John Talbot) and the brig HMS Weazel (18, Commodore John Andrew) were patrolling in the Adriatic Sea off Venice. Early in the morning, a French squadron under the command of Commodore J.B. Barre exited Venice harbor and formed a line of battle in the direction of Pola. This force consisted of the new ship-of-the-line Rivoli (74), and the brigs Jena (18), Mercure (18), and Mamelouck (10). In an extended engagement, Rivoli was battered into a wreck by Victorious, while Weazel successfully engaged the three French brigs, blowing up Mercure and driving Jena and Mamelouck away.
b. Wind. W. c. Deployment, British. Victorious (1112, NE), Weazel (0512, E). d. Deployment, French. Rivoli (1008, E), Jena (0705, E), Mercure (0508, E), Mamelouck (0503, E). e. Game-Length. See 15.0.
[15.7] "I Have Not Yet Begun to Fight!"
a. Notes. On 23 September 1779, a mixed American-French squadron under the command of Commodore John Paul Jones was cruising in the North Sea, searching for British Baltic-bound convoys. At 3:00 p.m., Jones sighted a huge convoy of 44 sail, protected by two British warships, HMS Serapis (50, Captain Richard Pearson) and HMS Countess of Scarborough (10, Captain Thomas Piercy). Jones offered battle with his force, which consisted of the Old East Indiaman Bonhomme Richard (40, under Jones), the frigate Alliance (36, Captain Pierre Landais), and the sloop Pallas (32, Captain Denis Cottineau). In a battle that has gone down in the annals of American folklore, Richard took Serapis in a violent engagement, although Richard herself sunk later in the day — Jones having transferred his flag to the captured Serapis.
b. Wind. NE. c. Deployment, US. Bonhomme Richard (1510, NW), Pallas (1811, NW), Alliance (2112, NW). See special rule below. d. Deployment, British. Serapis (0909, SE), Countess of Scarborough (0606, SE). e. Game-Length. See 15.0.
Note: Alliance is considered to possess a wheel critical hit at the start of the game (see 10.32). If it receives a wheel critical hit during play, it is considered a mast critical hit.
[15.8] "We Have Met the Enemy and They Are Ours!"
a. Notes. During the War of 1812, control of the Great Lakes assumed great strategic importance. On the southern shore of Lake Erie, Captain Oliver Hazard Perry constructed an American naval force virtually from scratch, while on the northern shore British Captain Robert Heriot Barclay performed a similar feat with limited resources. Perry brought Barclay to battle on the lake on 10 September 1813. Although forced to shift his flag from the battered Lawrence to Niagara at the opening of the engagement, Perry's squadron forced Barclay's entire force to strike its colors by the end of the day.
b. Wind. N. c. Deployment, US. Scorpion (1907, SE), Ariel (1706, SE), Lawrence (1606, SE), Caledonia (1404, SE), Niagara (1304, SE), Somers (1203, SE), Porcupine (1002, SE), Tigress (0802, SE), Trippe (0602, SE). d. Deployment, British. Chippeway (2012, E), Detroit (1812, E), Hunter (1612, E), Q. Charlotte (1412, E), L. Prevost (1212, E), Belt (1012, E). e. Game-Length. 12 Game-Turns.
Notes: Ignore Case 9.33g. Instead, 10 is added to a ship's Fire Value if its first broadside is delivered at 3 Range Points or fewer. At more than 3 Range Points, no bonus is awarded.
[15.9] The Battle of Santo Domingo
a. Notes. In the aftermath of Trafalgar, the French Brest fleet evaded the British blockading squadron under the command of Admiral William Cornwallis and proceeded westward across the Atlantic Ocean. The French split into two squadrons, one of which entered the Caribbean Sea under the command of Admiral Corentin Urbain Leissegues. On 4 February 1806, this force encountered a strong British squadron under the command of Admiral Sir John Duckworth. In a sharp engagement off the coast of Santo Domingo, the French fleet was completely dispersed, losing three ships-of-the-line as prizes.
b. Wind. NW. c. Deployment, British. Acasta (1111, S), Kingfisher (1010, S), Epervier (0909, S), Magicienne (0808, S), Superb (1209, S), Northumberland (1108, S), Spencer (1007, S), Canopus (1204, S), Donegal (1103, S), Atlas (1002, S), Agamemnon (0803, S). d. Deployment, French. Felicite (1813, W), Comete (1912, W), Diligente (2011, W), Alexandre (1711, W), Imperial (1810, W), Diomede (1909, W), Jupiter (2008, W), Brave (2107, W). e. Game-Length. 16 Game-Turns.
[Scan gap: printed rules page 35 is missing from the source file used for this transcription. It falls between the end of the scenarios on printed page 34 and the Summary on printed page 36. Its content could not be read and has not been reconstructed or inferred. Scenario 15.9 as printed on page 34 is complete through part e. Any text that printed on page 35 is not included.]
Summary of Modifiers to Fire Values
See 9.33.
- Rate. Subtract Rate of firing ship from Rate of target ship and multiply by 10. See 9.33a.
- Range. Divide number of Range Points from firing ship to target ship by 4 (drop fractions). Multiply by 10 and subtract from the firing ship's Fire Value.
- Damage. Divide number of hull hits possessed by firing ship by 2 (drop fractions). Multiply by 10 and subtract from firing ship's Fire Value.
- Rigging Fire. If rigging fire is being attempted at 6 Range Points or fewer, subtract 10 from firing ship's Fire Value.
- Tacking. If tack has just been performed, subtract 10 from firing ship's Fire Value.
- Rakes. If a bow rake is performed, add 10 to firing ship's Fire Value. If stern rake is performed, add 20 to firing ship's Fire Value.
- First Broadside. If a first broadside is performed at 3 Range Points or fewer, add 20 to firing ship's Fire Value. If a first broadside is performed at between and Range Points (inclusive), add to firing ship's Fire Value.
Game-Turn Sequence
Each Game-Turn must proceed strictly according to the following outline.
A. Strategic Cycle (All Game-Turns divisible by 8.)
- Swell Phase. Both players determine the effects of swell on their ships that are dead in the water (see 13.1).
- Fire Phase. Both players must determine if their ships that are on fire blow up (see 13.2).
- Studding Sail Phase. Players may deploy or take in studding sails (see 13.3).
B. Command Decision Stage
Both players secretly issue commands to all of their ships (see 6.0).
C. Action Stage
- Command Revelation Phase. Both players reveal all their issued commands.
- Movement Allowance Determination Phase. All ships receive a Movement Allowance (see 5.22).
- Weather Gauge Phase. The player who possesses the Weather Gauge must be determined (see 7.2).
- Movement Phase. According to the whim of the player with the Weather Gauge, each ship's Movement Allowance is expended to the fullest extent possible (see 7.5).
D. Melee Stage
- Fire Phase. Fouled ships may perform fire combat against one another (see 11.1).
- Melee Phase. Melee combat takes place between enemy ships fouled together (see 11.2).
E. Unfouling Stage
Fouled ships may attempt to unfoul (see 11.3).
F. Terminal Stage
All ships on the map should be flipped to their front countersides (see 9.13). The Game-Turn is ended, and a new Game-Turn is begun.