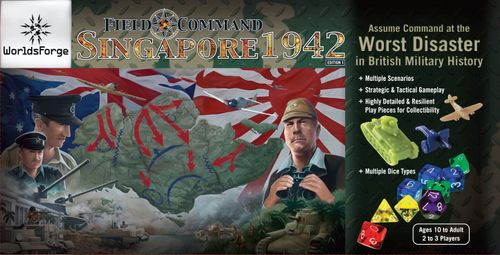
Field Command: Singapore 1942
Field Command: Singapore 1942 Rulebook
Table of Contents
Table of Contents
- Welcome
- A Note on This Edition of the Rules
- A Note on Historic Accuracy
- Components
- How to Use This Rulebook
- Section Guide
- Training Section
- Basic Rules Quick Reference
- Doctrines Section
- Rules for the Combat Board & Combat Board Scenarios
- 5. Doctrine: Direct Strikes
- 6. Doctrine: Mapboard
- 7. Doctrine: Time
- 8. Doctrine: Order of Play
- 9. Doctrine: Ground Unit Movement
- 10. Doctrine: Air Unit Movement & Usage
- 11. Doctrine: Artillery Range & Usage
- 12. Doctrine: Combat Results
- 13. Doctrine: Withdrawal of Ground Units from a Battle
- 14. Doctrine: Supply
- 15. Doctrine: Situation Cards
- 16. Doctrine: Victory Conditions
- Field Operations Manual
- Hall of Fame & Hall of Shame
Welcome
Thank you for purchasing a set of Field Command: Singapore 1942. We have designed this game to be both fun and historically authentic.
You assume field command at a crucial moment in history - the juncture before the Fall of Singapore during the Second World War. You can now find out if you can do better than the historical field commanders, Lieutenant-General Arthur Ernest Percival of the British Empire, Major-General Henry Gordon Bennett of the Dominion of Australia and Lieutenant-General Tomoyuki Yamashita of the Japanese Empire.
A Note on This Edition of the Rules
The purpose of this new edition of the rulebook is to provide a consolidated reference of all the Field Command: Singapore 1942 rules, for the convenience of our gamers.
The rules presented in this document are a collation of the rules in Rulebook Edition I and the rule clarifications and errata found in the Field Command website FAQ. Except in a very few instances, none of the rules presented in this edition is meant to revise or contradict these earlier sources.
If an error or contradiction or missing information is found, please either email [email protected] or fill in the form shown at the bottom of the following webpage: http://www.worldsforge.com/fieldcommand/sg1942_rulesreference.php#new_question.
A Note on Historic Accuracy
We have tried to make the game as accurate as possible. We have taken effort to include information beyond what is needed for the game, so as to provide a deeper and richer experience for you, our player. For instance, the number of units in play mirrors the actual effective unit strength available to the historic commanders. The equipment used was researched to provide accurate relative strengths. The victory conditions reflect the pressures the historic commanders were under.
However, this game is not intended as a pure historical simulation. We have to balance the researched information with creating an enjoyable game and with launching the product on time. Hence, if you do find any historic inaccuracies, we ask for your understanding.
If you have any comments and information that can make our game more accurate, please visit our website at http://www.worldsforge.com/fieldcommand/ to contact us with your views and findings.
Components
The Field Command: Singapore 1942 box set should contain the following items (the rulebook shows each as an illustration; the labels are listed here):
- Infantry, Armour, Artillery (Field), Artillery (Fixed) British Units, Aircraft (Fighter) unit counters
- Infantry (Elite), Tank (Field) Japanese Units, Artillery (Field), Aircraft (Bomber), Aircraft (Fighter) unit counters
- Infantry (Volunteer), Infantry, Armour, Artillery (Field), Artillery (Fixed) Australian Units counters
- Player Story Background
- Deployment Order charts
- Scenario and Full Campaign Scenarios booklets
- Dice: 4 sides, 6 sides, 8 sides, 10 sides, 12 sides
- Rulebook
- Combat Board and Combat Board Scenarios
- Fog-of-War Screens
- Mapboard
- Japanese, British and Australia Territory Markers
- Hall of Fame and Hall of Shame sheet
- Supply Token, Grey Supply Token and White Supply Token
- Unit Strength & Direct Strike Chart
- Supply & Reinforcement Order Chart
How to Use This Rulebook
We have designed the game so that most of the information you need are on the game boards and the game components themselves. Therefore, the best way to learn the game is to play it.
If you have never played this game before, it is best to start with the TRAINING SECTION. The TRAINING SECTION is broken up into tutorials that teach the rules progressively, in increasing complexity. You can jump straight into the first tutorial Company Commander on the next page and start playing. This way, you and your fellow players can get right into the game without too much studying.
The first three tutorials (Company Commander to Regiment Commander) teach the game for the Combat Board Scenarios, which requires 2 players.
The next three tutorials (Brigade Commander to Corps Commander) teach the game for the Full Campaign Scenarios, which requires 2 to 3 players. On the Commonwealth side are the British (beige pieces) and the Australians (dark blue pieces). This side can be played by 1 player or 2 players. The Japanese (khaki pieces) forms the opposing side and is played by 1 player.
Once you've done all the tutorials from Company Commander all the way through to Corps Commander, then you have learnt the full game! Only when you encounter more complex rule situations do you need to refer to the DOCTRINE SECTION (starting Page D-01).
The BASIC RULES QUICK REFERENCE is a convenient summary of all the main rules for use during gameplay or if you are returning to the game after a long break.
Finally, and perhaps most importantly, you can check the WorldsForge website for the latest rule clarifications and updates. The website address is http://www.worldsforge.com
Once you're ready, turn to the first training tutorial for a Company Commander.
Section Guide
- TRAINING SECTION (page T-01): for players who have never played a WorldsForge Field Command game or are not experienced with wargames.
- BASIC RULES QUICK REFERENCE (page R-01): a refresher of the main rules for players who have played this game before.
- DOCTRINES SECTION (page D-01): for experienced gamers who want all the rules at once, or who have encountered an unusual situation not covered in the Training Section.
Training Section
Company Commander (T-01 to T-05)
Learning Basic Combat
This is your first experience of the battlefield. Good luck.
Combat refers to fights between the units of the opposing sides with the possibility of either side being defeated. Resolving combat is the crux of the game. As a Company Commander, you command a single unit in combat.
Order of Battle. Equipment used: Player 1 is the Attacker (Japanese). Player 2 is the Defender (British).
Objective: Winning Conditions. The player with a unit left on the Combat Board at the end of the battle wins.
Engage! Gameplay
Overview. The purpose of this training tutorial is simply to show you the basic way that units "fight" in this game. This basic mechanic is fundamental to the whole game.
Phase 1 - Determine Unit Strengths
- Each player refers to their respective Unit Strength Charts on the Combat Board. This is the chart showing silhouettes of units and columns of dice. The Attacker's chart is always Red and the Defender's chart is always Blue.
- Once you have found the chart, look for the unit silhouette on it that matches your unit. It is important to match both the colour and the shape of your unit.
- Now, observe the column of dice below your chosen unit in the chart. This set of dice represents your unit chosen unit's strength in combat (either in attack or in defence) and you roll this set of dice during combat resolution.
As can be seen from the charts, the Attacker's Japanese Elite Infantry unit rolls a green 8-sided die and a blue 6-sided die, while the Defender's British Vehicle unit rolls two blue 6-sided dice and a yellow 4-sided die.
BASIC RULE 1: Before a fight, match the unit's colour & shape to the Unit Strength Chart on the Combat Board to find out what dice to roll. Use the colour of the die in the Chart to easily identify the die to roll.
Phase 2 - Resolve Combat
- The Attacker now rolls a green 8-sided die and a blue 6-sided die representing his Japanese Elite Infantry unit strength. The Defender rolls two blue 6-sided die and a yellow 4-sided die representing his British Vehicle unit strength.
- Now compare the highest die rolled by each player. Do not add the results. Just compare the highest die rolled. The unit with the higher result wins.
BASIC RULE 2: In a fight, compare the highest die each player rolls. Higher result wins. Adding is not required.
The printed page shows several worked examples of this comparison (each lists the Highest Roll of each player and the Result, with the higher highest roll marked as the winner). The examples are shown as dice graphics and are not reproduced here; the rule is as stated above.
Phase 3 - Determine Combat Results
- If a unit wins by 2 points or less, the defeated unit is suppressed. If a unit wins by 3 points or more, the defeated unit is eliminated. The suppressed and eliminated results are important in more advanced play. For now, just know that getting eliminated is worse than getting suppressed.
- If both units have the same highest result, then the combat ends in a draw. An Attacker's unit can only attack a maximum of 2 times before it becomes fatigued. Since the Attacker has already attacked once, it gets to attack exactly 1 time more. Repeat Phase 2. If this second attack also ends in a draw, then the Attacker's unit is fatigued and must be set aside leaving the Defender's unit left on the Combat Board. Remember that the Defender's unit is never fatigued.
BASIC RULE 3: If the winner wins by 3 or more, the loser's unit is eliminated. If not, then it is suppressed.
BASIC RULE 4: Each Attacker's unit (red side) can only attack 2 times. Each Defender's unit (blue side) can keep defending until it loses a fight.
Battalion Commander (T-06 to T-10)
Learning Advanced Combat
Now that you've survived your first battle, you are ready to move on to command more units.
Combat are usually not fought between single units. Instead they are usually fought between groups of units, also known as formations in military parlance.
Order of Battle. Attacker: Japanese. Defender: Australian.
Air Superiority or Air Supremacy? Air superiority and air supremacy are similar concepts referring to air power dominance, differing only in degree. Air superiority is having decisive control over the airspace above a limited territory through the dominance of one side's air force over the opposing side's air force for that territory. Air supremacy is the ultimate form of air power dominance and air superiority, whereby one side's air force has such complete control of the airspace over the entire theatre that the opposing side's air force can no longer effectively interfere.
Deployment / Setup. The Defender deploys his or her units first before the Attacker deploys his or her units. The Defender deploys first, arranging units in any sequence; the Attacker deploys last, arranging units in any sequence.
Engage! Gameplay (Battalion Commander)
Phase 1 - Determine Unit Strengths and Phase 2 - Attacker Choose Tactic
Each player's first unit on the combat axis (the unit that fights) is called the point unit. The Attacker's next unit in line is called the supporting unit.
Determine the strengths of your units by referring to the Unit Strength Charts as explained in the Company Commander tutorial.
- Before combat is resolved between the Attacker's and the Defender's point units, the Attacker chooses the tactic to use for that attack. The three choices are:
- General Assault - requires 1 Attacker unit only.
- Force Concentration - requires 2 Attacker units (a point unit and a supporting unit).
- Flanking Manoeuvre - requires 2 Attacker units (a point unit and a supporting unit).
General Assault is the standard fight between 1 Attacker unit and 1 Defender unit, as learnt in the Company Commander tutorial.
Force Concentration pits 2 Attacker units against 1 Defender unit. The Attacker's supporting unit helps out the Attacker's point unit by contributing the highest die from its own unit strength to the Attacker's point unit's unit strength. Hence, the Attacker gets to roll one additional die in the combat round.
BASIC RULE 5: If the Attacker uses Concentrate, the Attacker rolls 1 die more. Attacker chooses which die to add from the supporting unit's set of dice.
Flanking Manoeuvre also pits 2 Attacker units against 1 Defender unit. The Attacker's supporting unit helps out by distracting the Defender's point unit. The effect of this is that the Defender's point unit loses its lowest die from its unit strength. Hence the Defender gets to roll one fewer die in the combat round.
BASIC RULE 6: If the Attacker uses Flanking, the Defender rolls 1 die less. The Defender chooses which die to lose.
It is important to note the following additional rules:
- Using Force Concentration or Flanking Manoeuvre uses up 1 attack from the point unit and 1 attack from the supporting unit per combat round.
- Only one tactic can be used at a time. Flanking Manoeuvre and Force Concentration cannot be used at the same time, even if the Attacker is prepared to commit two supporting units.
- Once a tactic has been chosen for a unit, its tactic cannot change. The point unit (and any supporting unit) must keep using the chosen tactic until all its (or their) 2 attacks are used up. For example, a point unit using a General Assault cannot decide to change to Force Concentration after using up one attack, even if the player is willing to bring up a supporting unit. It must use General Assault for both its attacks. This reflects real combat where units cannot simply change their tactical role as they wish in the short duration of a skirmish. As a commander, choose your tactics wisely.
Phase 3 - Resolve Combat
- Resolve combat as you have learnt as a Company Commander. If you are using Force Concentration or Flanking Manoeuvre, remember to modify the number of dice rolled by the Attacker or the Defender, as appropriate. There is no change to the combat resolution mechanic of comparing the highest final results rolled for the opposing units.
Phase 4 - Determine Combat Results
- If the Defender's unit wins, then all the Attacker's units involved in that combat round are defeated and share the same combat outcomes. Hence, if the Attacker is using Force Concentration or Flanking Manoeuvre, the Attacker risks losing both his or her point unit and supporting unit to a successful defence. For instance, if the Defender manages to eliminate the Attacker's point unit, then the Attacker's supporting unit is also eliminated.
- Whenever a point unit is defeated, the next unit in line becomes the new point unit. A new Attacker's point unit allows the Attacker to change tactics.
- Repeat Phases 2 to 4 until one player has no units left on the board. Remember that an Attacker's unit can only attack a maximum of 2 times before it becomes fatigued.
Regiment Commander (T-11 to T-19)
Learning Combined Arms Combat
You are now ready to move on to more complex operations, involving artillery and air units. In warfare, the ability to coordinate units of different capabilities is crucial to a commander's success in the field.
Order of Battle. Attacker: Japanese (Player 1). Defender: British (Player 2).
Deployment / Setup. The Defender deploys his or her units first, and the Attacker deploys last. Each player arranges units in any sequence that they like. The Defender places units in the Field Artillery Area, the Air Units Area and the Fixed Artillery Area, and the Attacker places units in the Field Artillery Area and the Air Units Area as indicated on the Combat Board.
The Commonwealth side refers to the British and the Australians together. (The Battle of Singapore's defence strategy was an exclusively British affair with Australian input, and the older grouping both belonged to was the British Commonwealth.)
Objective: Winning Conditions. The player with no unit left along the combat axis of the Combat Board (in other words, no infantry unit and no vehicle unit left) at the end of the battle loses. The other player with at least one unit left along the combat axis of the Combat Board (in other words, at least one infantry or vehicle unit left) at the end of the battle wins.
BASIC RULE 7: Keep fighting until one player has no units left on the combat axis. This player loses and the other player wins!
Engage! Gameplay
Overview & Definitions. This game is played in the same way as in the Battalion Commander training tutorial, except that both players can now use a new kind of attack - the Direct Strike.
A Direct Strike, also known as a strike, is a kind of supporting attack where a player's unit gets to fire at his or her opponent's unit. In a strike, the firing unit just rolls to see if it hits or misses. Unlike combat, there is no opposed roll, in that the target unit does not get to fight back and never rolls any die. The target of a strike must always be a unit along the combat axis, in other words, a combat unit.
A unit able to use strikes is known as a strike unit. Only artillery units and aircraft units can be strike units and they both function the same way. A strike unit is always placed outside of the combat axis. It cannot be attacked or be a target of strikes. On the downside, its presence also does not count towards victory in the battle. A player with no units left on the combat axis loses, even if he has many unused strike units left.
| Combat Unit | Strike Unit | |
|---|---|---|
| Deployment | Always in Combat Axis | Never in Combat Axis |
| Maximum Number per Battle | 6 per Side | Unlimited |
| Attacking Method | Combat Tactics Only | Direct Strike Only |
| Can Be Attacked via Combat? | Yes | No |
| Can Be Targeted by Strikes? | Yes | No |
| Type of Die Rolled | (see Unit Strength Chart) | Purple 12-sided die (Basic Rule 11) |
| Count Towards Battle Victory? | Yes | No |
Phase 1 - Conduct Air Combat
The purpose of this phase is to determine local air superiority. This is determined when only one player has air units left on the Combat Board.
BASIC RULE 8: Air combat happens before any ground combat happens. Each round, each player chooses any 1 aircraft unit to do the fighting. Keep fighting using aircraft units until one player has no aircraft units left.
- The Defender chooses an air unit. Any air unit may be chosen. After the Defender has made his or her choice, the Attacker chooses an air unit. Similarly, any air unit may be chosen.
- The chosen air units now fight using the standard combat resolution mechanism (in other words, the one-on-one General Assault tactic). No other tactic may be used. Just like ground combat, the air unit that rolls the highest die result wins.
- If both players still have air units left on the Combat Board, then repeat Phase 1 from Step 1. Both players may choose a new air unit to dogfight. There is no limit to the rounds of combat. Combat continues indefinitely until one side has no air units left.
- The air units left on the Combat Board will now function as strike units (in other words, mobile artillery), in a similar fashion to ground artillery, in the upcoming ground combat.
Example (air combat): the printed example shows four rounds of air combat between a Defender and an Attacker air unit. Round 1 and Round 2 and Round 3 each show a winner or loser, and in Round 4 the Attacker gains local air supremacy. The rolls are shown as dice graphics.
Phase 2 - Attacker Choose Tactic
- After local air superiority is determined, ground combat is conducted in exactly the same way as learnt earlier in the Battalion Commander training tutorial. The first step is for the Attacker to choose a tactic to use and bring up a supporting unit as necessary.
Phase 3 - Conduct Strikes
- At this point, since a new pair of units is facing off, both players may now attempt to strike at (in other words, fire at) his or her opponent's point unit and supporting unit. It is important to note that strikes can only be declared whenever a new pair of point units faces off and before combat is resolved (in other words, before any die for the combat round is rolled).
- Each player decides how many and which strike units (if any) he or she is committing to conduct a Strike. The Defender declares first. Their decision is final and they are not allowed to change this decision (either to add or remove units) once they have decided and the units are committed. In other words, they are not allowed to see the result of a strike then decide to declare more strikes or to cancel some strikes.
BASIC RULE 9: Before a new pair of ground units fight, decide & declare how many strike units you want to fire. Once this decision is made, you cannot add or cancel strike units, until all the firing is done.
- The target of a strike is always a single unit and must always be a point unit or a supporting unit. The Attacker's target is assumed to be the Defender's point unit, as that is the only legal choice. If the Attacker is using Force Concentration or Flanking Manoeuvre, then the Defender can choose to target either the Attacker's point unit or supporting unit.
BASIC RULE 10: Each strike unit can only fire once. It can only target the point unit or the supporting unit along the combat axis. It cannot target another strike unit.
- Both the Attacker and Defender roll to resolve the strikes against their chosen targets. Strikes are conducted by simply rolling a purple 12-sided die and referring to the Direct Strike Chart on the Combat Board for the outcome. The aim is to roll as high as possible, as certain die results will cause the target to be either suppressed or eliminated. This distinction is important for the Full Campaign Scenarios later. The target's Unit Strength has no effect on the outcome, since the target never gets to roll any die. Hence, strikes are commonly used against stronger units.
Once the strikes are declared, it does not matter whether the Attacker or the Defender rolls first, since the result of a strike does not affect the result of any other strike or the opponent's roll. However, by convention, the Attacker rolls first.
BASIC RULE 11: To fire a strike unit, roll a purple 12-sided die and refer to the Direct Strike table on the Combat Board.
- Each strike unit can only strike once in each battle. Once both the Attacker and Defender have completed all their committed strikes, set aside all the strike units that have fired. Following this, normal ground combat resumes between the combat units, assuming all the units survived the strikes. However, if the strikes result in a point unit being defeated, then a new point unit moves up to the front and new strikes may be called.
- Combat is conducted in exactly the same way as in the Battalion Commander training tutorial. Remember to add or remove dice as appropriate for the Attacker's tactic. Do also remember that an Attacker's combat unit can only attack two times each battle, after which they must be set aside.
- Repeat Phases 2 to 3 until one player has no units left on the board.
Example (Regiment Commander): the printed example walks through three rounds of ground combat with Attacker units A1 to A4 against Defender units D1 to D3, including a Defender Direct Strike by artillery on the Japanese Light Tank (A3) that scores hits, and an Attacker Force Concentration that brings in A4. The example is a diagram-driven illustration of the steps above and is not reproduced further here.
Round Follow-Through (Regiment Commander example). The printed example continues the Regiment Commander battle across Rounds 1 to 3: a point unit that is defeated is replaced by the next unit in line; when a new pair of point units faces off that is a continuation of the same combat round, no new Strikes may be declared; and a unit that has already attacked twice drops out of combat as fatigued. The example is diagram-driven and its rolls are shown as dice graphics.
Order of Play: Battle (Training summary, page T-19)
Setup
- Defender deploys all units.
- Attacker deploys all units.
Air Combat 3. Defender chooses a point air unit. 4. Attacker chooses a point air unit. 5. Defender & Attacker resolve air combat. 6. If both Defender & Attacker still have air units left, go back to Step 3.
Ground Combat 7. Attacker chooses tactic. 8. Defender & Attacker declare strikes. 9. Defender & Attacker resolve strikes. 10. Defender & Attacker resolve combat until one unit is eliminated, suppressed or fatigued. 11. Defender or Attacker bring up a new point unit as appropriate. 12. If both Defender & Attacker still have ground units left along the combat axis, go back to Step 7.
Wrap Up 13. Defender & Attacker withdraw all unused strike units.
Brigade Commander (T-20 to T-31)
Learning Operational Warfare
A battle is basically warfare at an operation level to achieve specific objectives and is the next level up from tactical combat. Winning tactical engagements is necessary but insufficient to win a battle. A battle is won through the careful application of available strength to exploit the weaknesses of your enemy. A good field commander knows which battles to fight and which battles to avoid, which battles to win and which battles to lose.
You will now test your skills by deploying units & planning strategies on the mapboard.
Order of Battle. This tutorial uses the Full Campaign Scenario with three players: Player 1 is the Japanese army (Japanese Control Markers, Japanese Units, Historic Scenario Impregnable Fortress Japanese Deployment Order); Player 2 is the Australian army (Australian Control Markers, Australian Units, Australian Deployment Order); Player 3 is the British army (British Control Markers, British Units, British Deployment Order). The British and Australian armies are on the same side and may be collectively referred to as the Commonwealth. If there are only 2 players instead of 3, then one player controls both the British & the Australian armies.
Deployment / Setup.
- To tell which cards are relevant to a specific scenario, look at the scenario printed on the left or right edge of a card. The scenario that you will be playing is Historic Scenario Impregnable Fortress.
- Each player should have the relevant Deployment Order for his or her army. Make sure each player uses the correct one.
- Refer to the miniature mapboard on a Deployment Order. There are little unit icons printed on the sectors and axes-of-attack. The type and number are clearly shown. Place the units on the actual Mapboard as indicated by these icons.
Time Chart. The passage of time in the game is represented by the calendar-like chart on the Supply & Reinforcement Order. There are two time periods on the calendar: Day and Night. The first time period is on 8 February 1942 Night and the last time period is on 18 February 1942 Night. Place a grey token on the first time period, over the square with the Japanese flag. The order in which the armies take their turns is shown in the upper right corner. The Time Marker is moved forward as each time period is completed.
Objective: Victory Conditions (for this game; the conditions under Decisive Victory and Total Victory are for more advanced play):
- The Japanese player wins if he or she captures at least 2 Strategic Objectives before the last turn (i.e. Night of 18 February 1942).
- The British player wins if the Commonwealth holds on to at least 2 Strategic Objectives until the end of the last turn (i.e. until the end of the British turn on the Night of 18 February 1942).
- The Australian player wins if he still has twelve units left by the end of the last turn.
Engage! Gameplay
Overview & Definitions. This is the first full game that you will play, where you command a whole army and deploy your troops to achieve specific strategic objectives. What you have learnt in the earlier training tutorials (from Company Commander to Regiment Commander) on conducting a battle on the Combat Board will be used repeatedly in this game as battles are fought across the battlefield.
Turn Order. The players take their turns in the following order: Japanese, as the aggressor, goes first; Australians, responding to the Japanese landings, go next; British go last.
Overview of Each Turn. Each turn is divided into phases in the order shown in the table below. Each army goes through all the phases each turn.
Order of Play: Campaign Turn (Basic)
Planning Stage
- Refuel Aircraft Units
- Deploy Aircraft Units
- Move Ground Units & Declare Attacks
- Declare Offensive Artillery Barrages
- Declare Defensive Artillery Barrages (by Defender of any contested sector)
Execution Stage 6. Change Sector Status 7. Resolve Battles
Supply Stage 8. Collect & Deploy Reinforcements 9. (not used) 10. (not used) 11. (not used)
Ending a Turn 12. Check for Victory 13. Progress Time (if this is the last army for the time period)
Phase 1 - Refuel Aircraft Units
- Return all the aircraft units that are on missions back to a friendly airfield. Return all the aircraft units that are in the Aircraft Repair Box back to a friendly airfield. These units will take one full turn to refuel and so cannot be deployed on a mission this turn. If there are no friendly airfields for the aircraft units to land at, then the aircraft units are eliminated instead. Do note that the Japanese army has an off-map airfield, which cannot be captured, so its aircraft units will always be able to land.
Phase 2 - Deploy Aircraft
- Aircraft units that did not just land and did not just complete repairs may be deployed to any sector on the Mapboard. This is because the theatre of operations for Field Command: Singapore 1942 is Singapore island, which is less than 70 kilometres across and well within the operating range of all aircraft deployed in the theatre at that time. An aircraft unit may take part in an attack or assist in defence of a sector. This is carried out simply by moving the aircraft unit to the sector.
BASIC RULE 23: Aircraft units can move anywhere.
Phase 3 - Move Ground Units & Declare Attacks
- Move any ground units that you wish, as long as it is within their movement range. The movement range is indicated on the Movement Chart on the left side of the Mapboard.
It is important to note the following additional rules:
- Each ground unit must choose either on-road or off-road movement. Off-road movement just means movement between sectors without needing to follow roads. On-road movement means that the unit must start in a sector with a road and must drive along that road to enter and exit sectors throughout its movement. A unit cannot move partially using on-road movement and partially using off-road movement.
- Among the ground units, only infantry units can cross water, unless there is a road (bridge) across the water. If there is a road, then all ground units can cross. It is assumed that the other ground units (such as vehicle units and artillery units) crossed by moving along the bridge.
- Each ground unit must stop when it enters a sector with at least 1 enemy ground unit. Moving ground units into an uncontested sector with at least 1 enemy ground unit is the equivalent of declaring an attack and will result in a contested sector.
BASIC RULE 21: Each ground unit must choose either on-road or off-road movement. A unit moving by on-road movement must follow a road.
BASIC RULE 24: Each ground unit must stop when it enters a sector with at least 1 enemy ground unit. A unit must stop if it enters an enemy-held sector or a sector with an on-going battle.
BASIC RULE 22: Only infantry units can cross water, unless there is a road (bridge) across the water.
BASIC RULE 23: Fixed artillery units cannot move.
BASIC RULE 16: Complete all movement (including attacks) before rolling any dice.
- British & Australian units cannot move into an Axis-of-Attack. They cannot attack an Axis-of-Attack in any way. In effect, an Axis-of-Attack stays Japanese-controlled throughout the entire game.
BASIC RULE 17: British & Australian units cannot enter or attack Japanese Axis-of-Attack arrows.
BASIC RULE 18: British and Australian units cannot share a sector, even though they are on the same side. This applies to both air units and ground units. However, they can pass through each other's sectors.
BASIC RULE 19: A sector can have a maximum of 6 ground units (infantry, vehicle, artillery) from each side in it. So the maximum is 12 ground units (6 Japanese + 6 British or Australian). This is known as a stacking limit. An axis-of-attack has no limit on the number of units in it. In other words, it does not have a stacking limit.
BASIC RULE 20: A sector can have any unlimited number of air units in it. There is no restriction on the number of aircraft units in a sector.
- Do note that you must make all your movements and declare all your attacks before resolving any battles. Once combat for any sector starts, no further units can be moved.
Phase 4 - Declare Offensive Artillery Barrages
- Declare the artillery units that will be supporting the various contested sectors and sectors that just got attacked. Be clear which artillery unit is supporting which sector. Do note that an artillery unit that just moved in Phase 3, cannot fire. There is no limit on the number of artillery units that can fire into a sector.
Phase 5 - Declare Defensive Artillery Barrages
- For any army that is defending a sector being attacked by the army now taking its turn, the defending army may declare the artillery units that will be supporting these contested sectors. Be clear which artillery unit is supporting which sector. There is no limit on the number of artillery units that can fire into a sector from outside.
Phase 6 - Change Sector Status
- All uncontested sectors that have attacks declared on them in Phase 3, now have their status changed simultaneously from uncontested sectors to contested sectors. A contested sector is any sector occupied by ground units from two opposing sides.
Phase 7 - Resolve Battles
- Combat is now resolved separately for every contested sector where the current army is the Attacker. Each such battle must take place and you cannot choose to skip any battle.
- Transfer all the units in a contested sector, as well as all supporting artillery units on to the Combat Board for battle. Do remember that artillery units in a contested sector cannot strike, but must participate in combat like other ground units.
The rules and mechanics of the battle are the same as what you have learnt earlier in the Regiment Commander training tutorial. The only difference is that the various combat outcomes, such as fatigued or suppressed, now have additional rules on what happens to the affected unit. This is as follows:
| Conditions | Outcome | What Happens? |
|---|---|---|
| Attacker's ground unit has attacked 2 times | Fatigued | The fatigued unit stays in the sector and continues the battle on the Attacker's next turn. |
| A unit is defeated by a difference of 3 or more | Eliminated | The eliminated unit is immediately & permanently removed from play. |
| A unit is defeated by a difference of less than 3 | Suppressed | The suppressed unit must immediately move to an adjacent friendly uncontested sector. However, it cannot move into a sector already occupied by units of an allied army. |
- If a sector remains contested at the end of the battle (usually due to some of the Attacker's units being fatigued and remaining in the sector), then the battle is continued during the Attacker's next turn. The battle does not continue during the Defender's turn, although the Defender can move more troops in on his or her turn to reinforce.
Example: The Japanese army launched an attack on the British-controlled Kranji sector, but did not manage to capture it when the battle ended. When it is the British army's turn, it may reinforce Kranji sector, but combat does not continue. Combat resumes only when it is the Japanese army's turn again.
Phase 8 - Collect & Deploy Reinforcements
- When all the battles have been resolved, collect new units as indicated on the Supply & Reinforcement Order chart. Place these new units in the sector or the axis-of-attack as indicated in the Special Rules of the Deployment Order chart.
For the Historic Scenario, which is played in this tutorial, only the Japanese army receives reinforcements. This happens only once, on the night of 10 February. Place these new Japanese tank units on Axis-of-Attack C.
Phases 9 to 11 are not used in this training tutorial.
Phase 12 - Check for Victory
- Check to see if your army has fulfilled the victory conditions as set out in its Deployment Order chart. If it has, then the game ends. If not, the game continues.
Phase 13 - Progress Time
- When all the armies have had their turns (in other words after the Japanese army, the Australian army and the British army have all had their turn), advance the time marker by one time period to the next calendar square on the Supply & Reinforcement Order chart.
Phase 14 - Next Army's Turn
- It is now the turn of the next army, starting again from Phase 1.
Division Commander (T-32 to T-38)
Learning Supplies & Logistics
Napoleon Bonaparte once said, "An army marches on its stomach." This holds true even for modern armies. No true field commander can ignore the importance of keeping his forces properly supplied with items ranging from the most advanced munitions to fuel, the lifeblood of a modern army, to the mundane field rations consumed by the common rifleman. Poorly supplied units quickly become demoralised. Properly managed logistics is a critical factor for an army's success in the field.
Order of Battle. Except for the Fog-of-War Screens and supply tokens, this is the same equipment as for the earlier Brigade Commander training tutorial. Japanese: 40 Supply Tokens and a Japanese Fog-of-War Screen. Australian: 20 Supply Tokens and an Australian Fog-of-War Screen. British: 20 Supply Tokens and a British Fog-of-War Screen.
Deployment / Setup. Set up the game as described in the earlier Brigade Commander training tutorial (Page T-20). Then collect the number of supply tokens specified in the Deployment Order chart of the respective armies. The white tokens represent 1 supply, while the grey tokens represent 10 supplies.
The number of tokens for each army is:
- Japanese: 40 tokens (2 grey and 20 white)
- Australian: 20 tokens (1 grey and 10 white)
- British: 20 tokens (1 grey and 10 white)
Each player places the supply tokens collected behind their respective Fog-of-War Screens, so that the other players cannot see how many supplies he or she has.
It is important to note that supplies cannot be transferred between armies, even if they are on the same side. This applies throughout the entire game.
Objective: Winning Conditions. The game is won in the same way as in the Brigade Commander training tutorial on Page T-20, except as follows: The Australian player wins if he still has twelve units left in supply (in other words, each unit can trace a supply line back to a friendly supply point) by the end of the last turn. There is no change to the winning conditions for the Japanese player or the British player.
Engage! Gameplay
Overview & Definitions. The purpose of this training tutorial is to teach the mechanics of using supplies. In all other aspects, the game is no different from what you have learnt in the Brigade Commander training tutorial.
With supplies, the game becomes more challenging as you will learn that attacks cannot be launched and guns cannot be fired without supplies. This means that the Japanese army cannot win by simply launching massive multi-sector assaults every turn and the British and Australian armies cannot win by simply keep firing their guns unceasingly. Good planning and careful resource management is now crucial.
Turn Order. There is no change from the turn order learnt in the Brigade Commander training tutorial: Japanese, as the aggressor, goes first; Australians go next; British go last.
Overview of Each Turn. Each turn is divided into phases in the order shown in the Order of Play: Campaign Turn in the Brigade Commander tutorial (T-24). Each army goes through all the phases each turn.
Order of Play: Campaign Turn (Intermediate) (T-35)
Planning Stage
- Refuel Aircraft Units
- Deploy Aircraft Units
- Move Ground Units & Declare Attacks
- Declare Offensive Artillery Barrages
- Declare Defensive Artillery Barrages (by Defender of any contested sector)
Execution Stage 6. Change Sector Status 7. Resolve Battles
Supply Stage 8. Collect & Deploy Reinforcements 9. Collect Supplies 10. (not used) 11. (not used)
Ending a Turn 12. Check for Victory 13. Progress Time (if this is the last army for the time period)
The phases are carried out in exactly the same way as in the Brigade Commander training tutorial, except as modified and explained below.
Phase 1 - Refuel Aircraft Units
- There is no change to this phase. No supply is needed to refuel aircraft.
Phase 2 - Deploy Aircraft
- There is no change to this phase. No supply is needed to deploy aircraft.
Phase 3 - Move Ground Units & Declare Attacks
- Pay 1 supply for each ground unit that enters a sector with at least 1 enemy ground unit. This applies regardless of whether the sector is currently contested or not. This also applies regardless of whether the current army is the Attacker or the Defender of a contested sector. In other words, this applies even if an army controls a contested sector and is merely reinforcing his position.
BASIC RULE 12: Before a battle, pay 1 supply for each unit attacking. Units defending get to defend for free!
No supply is needed for a unit already in a contested sector to continue fighting. This applies to the units of both the Attacker and the Defender of the contested sector.
No supply is needed to attack and capture an unoccupied enemy-controlled sector. It is sufficient to move into or through the sector.
- At the point of paying the supply, you must first check to see whether the unit using the supply is connected to a supply point, which is denoted by the symbol of a crate on the Mapboard. The connection is known as a supply line. A unit with such a connection is known as being in supply. A unit is in supply if there is a continuous chain of friendly sectors between the unit's sector and a supply point. Needless to say, the supply point must also be in a friendly sector.
It is important to note the following additional rules:
- A supply line can be of unlimited length, can take circuitous routes and need not follow roads, but cannot cross water except via a road. This chain may be traced through a contested but friendly sector. The chain may terminate in a contested enemy-controlled sector.
- A supply line starting from an axis-of-attack may be traced across water for its first step (in other words, the first normal sector that it enters). Subsequent sectors must follow the normal rules for tracing supply lines and cannot cross water as per normal.
- A supply point can be linked to an unlimited number of units without affecting its effectiveness.
Phase 4 - Declare Offensive Artillery Barrages
- Pay 1 supply for each artillery unit firing into another sector. Remember to check that each unit firing has a supply line back to a friendly supply point, as per Step 4 above. No supply is needed for air units.
BASIC RULE 13: Before a battle, pay 1 supply for each artillery unit firing.
BASIC RULE 14: Aircraft units get to fight for free! No supply is needed for air units. This applies even when an air unit conducts a strike during the battle later. Both Attacker and Defender must pay to fire artillery units.
Phase 5 - Declare Defensive Artillery Barrages
- The defending armies pay 1 supply for each artillery unit firing into another sector. Remember to check that each unit firing has a supply line back to a friendly supply point, as per Step 4 above. No supply is needed for air units. This applies even when an air unit conducts a strike during the battle later.
Phase 6 - Change Sector Status
- There is no change to this phase. No supply is needed to change the status of a sector, although supplies are needed to move ground units into a contested sector as noted in Phase 3.
Phase 7 - Resolve Battles
- There is no change to this phase. No supply is needed during the resolution of a battle.
- If an army loses control of a sector with a supply point, it must transfer supply tokens worth the total of the dice rolled, capped at half of its total supplies rounded down, to the capturing army. (The printed example: an army with 20 supplies rolls dice totalling 8; this is less than half of its total supplies, which is 10, so it passes 8 supplies worth of tokens to the opponent's army.)
This rule applies regardless of whether the capturing army's capturing unit is itself in supply or not at the moment of capture. Following the capture, the capturing army's units are now linked to the newly captured supply point and hence are now in supply.
Phase 8 - Collect & Deploy Reinforcements
- There is no change to this phase. No supply is needed to collect or deploy reinforcements.
Phase 9 - Collect Supplies
- Collect the number of supply tokens as indicated in the calendar square of the current time period in the Supply & Reinforcement Order chart. Do note that the number of supplies to collect varies with each army. The number for each army is indicated in the sub-division of the calendar square that has the flag of the respective army in the background.
BASIC RULE 15: Don't forget to collect supplies at the end of your turn!
An army with no supply points still receives supplies as per normal at the end of its turn. However, in accordance with Rule 14.3.2, the army cannot use them as no supply line can be traced, because there is no originating supply point. Hence, the army cannot take any actions that require supplies, including launching an attack.
Example: If the Japanese army captures Tiong Bahru, Keppel and Queenstown sectors from the Commonwealth armies, the Commonwealth armies will still receive supplies but cannot use them until they re-capture at least one supply point. This may prove impossible if the re-capture requires the launching of an attack.
Phases 10 to 11 are not used in this training tutorial.
Phase 12 - Check for Victory
- There is no change to this phase. There is no supply-related rule when checking for victory.
- However, do note that there is a change in the victory condition of the Australians as noted under Objectives above.
Phase 13 - Progress Time
- There is no change to this phase. There are no supply-related rules for the progression of time.
Corps Commander (T-39 to T-46)
Learning to Adapt to the Uncertainty & Chaos of War
War is notorious for being chaotic, with very few battles following the textbook or even going according to plan. Thus, true combat is never a deterministic process, based simply on good generalship, the number of troops and the weapons they use. Another important class of factors of a successful commander are adaptability to unexpected circumstances, inspired tactics and, in some cases, plain luck.
In Field Command: Singapore 1942, this element of uncertainty is simulated by Situation Cards, which are available in an add-on expansion to the main game. Without uncertainty, seasoned field commanders will find that the game is merely a set-piece battle. On the other hand, with the cards, the players can expect the unexpected and the ability to adapt to new situations will differentiate the skilful player from the merely experienced.
Order of Battle. Except for the Situation Cards, this is the same equipment as for the earlier Division Commander training tutorial. Japanese: 40 Supply Tokens, a Japanese Fog-of-War Screen and a Japanese Deck of 36 Situation Cards from the Field Command: Singapore 1942 Cards Expansion (with the British Army). Australian: 20 Supply Tokens, an Australian Fog-of-War Screen and a Commonwealth Deck of 36 Situation Cards (shared with the British Army). British: 20 Supply Tokens, a British Fog-of-War Screen and a Commonwealth Deck of 36 Situation Cards (shared with the Australian Army).
Deployment / Setup. Set up the game as described in the earlier Brigade Commander training tutorial (Page T-20). Collect supplies as described in the earlier Division Commander training tutorial (Page T-32).
Divide the cards from the Field Command: Singapore 1942 Cards Expansion into the Japanese deck and the Commonwealth deck. Shuffle each deck separately and place them beside the Mapboard.
Each side draws the number of cards from their respective decks as follows: Japanese, 2 cards; Commonwealth, 2 cards. The players for the British & Australian armies collectively draw 2 cards, then decide how to split up the 2 cards drawn. It is permissible for one army to have no cards at the start of the game.
If an Event Card is drawn, play it immediately and draw a new card to replace it.
It is important to note that cards cannot be transferred between armies, even if they are on the same side. This applies throughout the entire game.
The following is the summary for the Historic Scenario Impregnable Fortress and Scenario 01 The Almost Naked Island:
- Japanese army: starts with 2 cards; draws 1 card per turn; maximum hand 3 cards.
- Australian and British armies: start with 2 cards, split between the British & Australian armies; they draw 1 card per turn at the end of the British turn, split between the British & Australian armies; maximum hand 2 cards each.
Objective: Winning Conditions. The game is won in exactly the same way as in the Division Commander training tutorial on Page T-32.
Engage! Gameplay
Overview & Definitions. The purpose of this training tutorial is to teach the mechanics of using the Situation Cards (also known simply as cards) from the Field Command: Singapore 1942 Cards Expansion. In all other aspects, the game is no different from what you have learnt in the Brigade Commander & Division Commander training tutorials.
With cards, the game becomes more unpredictable. Your opponent may disrupt your carefully laid plans with a well-played card or use an unexpected tactic or strategy assisted by cards. Your own plans for playing certain cards may also be upset, since cards are drawn at the end of your turn, but can only be played on your next turn after the other players have had their turns. Hence, as a field commander, you will need to keep adapting to new situations.
The printed card layout shows a Card Power (a quick visual reference of the card's effects; always read the text on the card for the full explanation), a Card Type, and a Card Target (what the card affects).
Basics of Playing Cards. A player can play as many cards as he or she wishes, as long as the cards are played during the correct army's turn and during the correct phase in the turn. The turn and phase that the cards can be played on is summarised as follows:
| When to Play | Phase to Play | Notes |
|---|---|---|
| On Your Army's Turn Only | Play before any Battle Starts | Usually targets a Sector |
| When Your Army is a Combatant of a Battle | Applies only to units involved in the Battle & lasts for 1 Battle Only | Play at the start of the battle |
| On Your Army's Turn Only | Play after all Battles have ended for your turn (although some Sectors may remain Contested) | |
| On Your Army's Turn Only | Must be played immediately when drawn; player then draws another card as a replacement | |
| When Your Army is the Target of a Card or Opponent Plays a Card or Takes an Action that can be Negated | Play whenever | Negated card is discarded |
All bonuses, penalties and effects stack unless otherwise indicated. There is no limit to the number of cards that can be played at any one time. The only exception is that cards that are exactly the same cannot be played on the same target at the same time.
Example: For the first card expansion used for the Historic Scenario Impregnable Fortress, two Coastal Searchlight cards cannot be played during the same battle, as they are exactly the same card and affect the same battle. However, it is permissible to play both a Coastal Searchlight card and an Effective Machine Gun Placement card at the same time. It is also permissible to play a Coastal Searchlight card on one battle and another Coastal Searchlight card on another battle, although both battles are happening in the same turn.
Turn Order. There is no change from the turn order learnt in the Brigade Commander & Division Commander training tutorials: Japanese, as the aggressor, goes first; Australians, responding to the Japanese landings, go next; British go last.
Overview of Each Turn. Each turn is divided into phases in the order shown in the table below. Each army goes through all the phases each turn.
Order of Play: Campaign Turn (Advanced)
Planning Stage
- Refuel Aircraft Units
- Deploy Aircraft Units
- Move Ground Units & Declare Attacks
- Declare Offensive Artillery Barrages
- Declare Defensive Artillery Barrages (by Defender of any contested sector)
Execution Stage 6. Change Sector Status 7. Resolve Battles
Supply Stage 8. Collect & Deploy Reinforcements 9. Collect Supplies 10. Draw Cards 11. Discard Excess Cards
Ending a Turn 12. Check for Victory 13. Progress Time (if this is the last army for the time period)
The phases are carried out in exactly the same way as in the Brigade Commander & Division Commander training tutorials, except as modified and explained below.
Phase 1 - Refuel Aircraft Units. 1. You may play a Deployment Card during this phase. Your opponent may counter any card you play with a Negation Card.
Phase 2 - Deploy Aircraft. 2. You may play a Deployment Card during this phase. Your opponent may counter any card you play with a Negation Card.
Phase 3 - Move Ground Units & Declare Attacks. 3. You may play a Deployment Card during this phase. Your opponent may counter any card you play with a Negation Card.
Phase 4 - Declare Offensive Artillery Barrages. 4. You may play a Deployment Card during this phase. Your opponent may counter any card you play with a Negation Card.
Phase 5 - Declare Defensive Artillery Barrages. 5. You may play a Deployment Card during this phase. Your opponent may counter any card you play with a Negation Card.
Phase 6 - Change Sector Status. 6. Once this phase begins, no more Deployment Cards can be played. 7. There is no change to this phase. No cards can be played during this phase. There is no cards-related rule when changing the status of a sector.
Phase 7 - Resolve Battles. 8. You may play a Combat Card during this phase, as long as you are a combatant in a battle. It need not be your army's turn. The Combat Card must be played at the start of the battle before any dice are rolled. Your opponent may counter any card you play with a Negation Card. Once a battle begins, no more Combat Cards can be played.
Phase 8 - Collect & Deploy Reinforcements. 9. Once this phase begins, no more Combat Cards can be played. 10. You may play a Supply Card during this phase. Your opponent may counter any card you play with a Negation Card.
Phase 9 - Collect Supplies. 11. You may play a Supply Card during this phase. Your opponent may counter any card you play with a Negation Card.
Phase 10 - Draw Cards.
- Draw for each army as follows:
- The Japanese army simply draws 1 card.
- The Australian army and the British army collectively draw 1 card at the end of the British army's turn. The players then decide which army gets to keep the card, just as they have done at the start of the game. Once a card has been assigned to an army, it cannot be transferred to another army, even if they are on the same side.
- Immediately play any Event Card that is drawn. Generally, Event Cards are in effect for 1 full turn until the end of the player's next turn. In other words, all players are affected by an Event Card for exactly one turn each. Draw an additional card to replace each played Event Card.
Phase 11 - Discard Excess Cards.
- Each army can only hold a certain maximum number of cards at the end of its turn. Check this after drawing the cards in Phase 11. The maximum for each army is as follows:
- Japanese Army: Maximum 3 Cards
- Australian Army: Maximum 2 Cards
- British Army: Maximum 2 Cards
If you have exceeded the maximum allowed, you can decide which card to discard. The excess cards must be discarded immediately.
Remember that an Event Card must be played immediately when it is drawn and that it is illegal to discard an Event Card.
Phase 12 - Check for Victory. 15. There is no change to this phase. No cards can be played during this phase. There is no cards-related rule when checking for victory.
Phase 13 - Progress Time. 16. There is no change to this phase. No cards can be played during this phase. There are no cards-related rules for the progression of time.
Basic Rules Quick Reference
The following are the key rules to remember.
Combat
- Before a fight, match the unit's colour & shape to the Unit Strength Chart on the Combat Board to find out what dice to roll. Use the colour of the die in the Chart to easily identify the die to roll.
- In a fight, compare the highest die each player rolls. Higher result wins. Adding is not required.
- If the winner wins by 3 or more, the loser's unit is eliminated. If not, then it is suppressed.
- Each Attacker's unit (red side) can only attack 2 times. Each Defender's unit (blue side) can keep defending until it loses a fight.
- If the Attacker uses Concentrate, the Attacker rolls 1 die more. Attacker chooses which die to add from the supporting unit's set of dice.
- If the Attacker uses Flanking, the Defender rolls 1 die less. The Defender chooses which die to lose.
- Keep fighting until one player has no units left on the combat axis. This player loses and the other player wins!
Strikes
- Before a new pair of ground units fight, decide & declare how many strike units you want to fire. Once this decision is made, you cannot add or cancel strike units, until all the firing is done.
- Each strike unit can only fire once. It can only target the point unit or the supporting unit along the combat axis. It cannot target another strike unit.
- To fire a strike unit, roll a purple 12-sided die and refer to the Direct Strike table on the Combat Board.
Air Combat
- Air combat happens before any ground combat happens. Each round, each player chooses any 1 aircraft unit to do the fighting. Keep fighting using aircraft units until one player has no aircraft units left. The other player's remaining aircraft units can now be used to strike (similar to artillery units).
Supplies
- Before a battle, pay 1 supply for each unit attacking. Units defending get to defend for free!
- Before a battle, pay 1 supply for each artillery unit firing. Both Attacker and Defender must pay to fire artillery units.
- Aircraft units get to fight for free!
- Don't forget to collect supplies at the end of your turn!
Mapboard
- Complete all movement (including attacks) before rolling any dice.
- British & Australian units cannot enter or attack Japanese Axis-of-Attack arrows.
- British and Australian units cannot share a sector, even though they are on the same side.
- A sector can have a maximum of 6 ground units (infantry, vehicle, artillery) from each side in it. So the maximum is 12 (6 Japanese + 6 British or Australian).
- There is no restriction on the number of aircraft units in a sector. There is also no restriction on the number of artillery units that can fire into a sector from outside.
Movement
- If a unit is moving by driving (using on-road movement), the movement must follow a road.
- Only infantry units can cross water, unless there is a road (bridge) across the water.
- Fixed artillery units cannot move. Aircraft units can move anywhere.
- A unit must stop if it enters an enemy-held sector or a sector with an on-going battle.
Doctrines Section
A. Important Basic Information
A.1 Important Information
A.1.1 Multiple Scenarios. This game consists of a spectrum of scenarios of varying setup and complexity. Some scenarios are single-battle scenarios, which are played solely on the Combat Board. Other scenarios are campaign scenarios, which are played on both the Mapboard and the Combat Board. Scenario specific information can be found on the Combat Board Scenario charts or the Deployment Order charts of the various scenarios.
A.1.2 Learning the Game. The easiest way to learn the game is to go through the TRAINING SECTION (starting Page T-01) which consists of structured tutorials that teach the rules in order of increasing complexity. If this is the first time you are playing a Field Command game by WorldsForge, then it is strongly recommended that you learn the rules using the TRAINING SECTION, so that the game can be properly enjoyed.
A.2 Combat Board Scenario Gameplay Information
A.2.1 Number of Players. A Combat Board Scenario requires 2 players - an Attacker and a Defender.
A.2.2 Setup. A Combat Board Scenario consists of a single Combat Board Scenario chart. The setup information is shown on the chart.
A.2.3 Order of Play. The full order of play for a Combat Board Scenario can be found on Page D-08.
A.2.4 Winning. A player who has no units left on the combat axis of the Combat Board loses. The other player wins.
A.2.5 Relevant Rules. Doctrines 1 to 5 (starting Page D-01) capture all the rules relevant to a Combat Board Scenario.
A.3 Full Campaign Scenario Gameplay Information
A.3.1 Number of Players. A Full Campaign Scenario requires 2 or 3 players, depending on the scenario played. Each player commands an army. The Historic Scenario Impregnable Fortress requires 3 players.
A.3.2 Setup. A Full Campaign Scenario consists of a Supply & Reinforcement Order chart and one Deployment Order chart for each army. Please refer to Rule 8.2 for more details.
A.3.3 Order of Play. The full order of play for a Full Campaign Scenario can be found on Page D-23.
A.3.4 Winning. The winning conditions for each army are shown on its respective Deployment Order chart for the scenario played. These winning conditions are called victory conditions.
A.3.5 Relevant Rules. Doctrines 6 to 16 (starting Page D-16) capture all the rules relevant to a Full Campaign Scenario. The rules for a Combat Board Scenario are also relevant. It is recommended that you learn to play a Combat Board game before you try to play a Full Campaign game.
B. Rules Precedence
B.1 Rules are found on a number of game components. Some rules may seem to contradict each other. For clarity, the order of rules precedence is as follows:
- General Rules found in this rulebook are the regular rules.
- Unit Special Capabilities Rules concerning the ability of each unit type supersede the General Rules.
- Card Rules written on the Situation Cards supersede all other rules above.
- Scenario Special Rules written on the charts of a specific scenario supersede all other rules above.
Rules for the Combat Board & Combat Board Scenarios
1. Doctrine: Dice Types
1.1 There are 5 types of dice used in the game:
| Die Colour | Number of Sides |
|---|---|
| Yellow | 4 sides |
| Blue | 6 sides |
| Green | 8 sides |
| Red | 10 sides |
| Purple | 12 sides |
1.2 Dice Icons. In this rulebook and on the game components, the number and type of dice to roll is directly represented by dice icons. You can easily identify the type of dice by looking at the colour or the shape or the number shown in the icon, which signifies the number of die facets.
1.3 Dice Nomenclature. The arrangement of the dice icons show how to obtain a result after rolling the dice. In most cases, you will be required to pick the highest die result. Very rarely will you be required to add the die results.
- Picking the Highest Number: If you see [X][Y], it means you roll an X-sided die and a Y-sided die and pick the highest result. (The printed examples show the notation for one six-sided die and two four-sided dice, where the highest number is picked; and for two eight-sided dice, where the highest number is picked.)
- Adding the Numbers: If you see [X] + [Y], it means you roll an X-sided die and a Y-sided die and add the results. (The printed examples show one eight-sided die plus one six-sided die added together; three six-sided dice added together; and one six-sided die and one four-sided die, where the highest is picked and then added to the result of one ten-sided die.)
1.4 Reading the 4-sided Die. After a 4-sided die comes to rest, the number that is at the apex and that is upright is the die result.
1.5 Reading the 10-sided Die. A 10-sided die is read normally. However, a result of 0 actually means 10. (The reason for this anomaly is that multiple standard 10-sided dice are sometimes used in other games to generate higher factor results. For instance, two 10-sided dice can be used to generate a result ranging from 1 to 100, represented by double zeroes. Three 10-sided dice can be used to generate a result ranging from 1 to 100, represented by triple zeroes.)
2. Doctrine: Unit Types
2.1 Basic Types. There are 4 basic types of units:
- Infantry Units
- Vehicle Units
- Artillery Units (Field & Fixed)
- Aircraft Units (Fighter & Bomber)
2.2 Collective Types. For ease of reference, the basic types of units are sometimes grouped using the following collective terms:
- Ground Units - Infantry Units, Vehicle Units, Artillery Units.
- Air Units - Aircraft Units.
- Combat Units - Units attacking using normal combat. Always deployed along the combat axis of the Combat Board. Typically Infantry Units & Vehicle Units. Sometimes Artillery Units.
- Strike Units - Units attacking using Direct Strikes. Always deployed outside of the combat axis of the Combat Board. Typically, Artillery Units & Aircraft Units.
2.3 Attributes.
2.3.1 Each unit has a number of attributes as follows:
- Attack Strength
- Defence Strength
- Movement (on-road & off-road)
- Range
- Special Capability
2.3.2 Units that look similar, but that have a different colour or a different base colour, generally have different values for their respective attributes.
3. Doctrine: Combat Board
3.1 Combat Board Features.
3.1.1 The Combat Board is divided into two sides. The Defender's units are placed on the side coloured blue, while the Attacker's units are placed on the side coloured red.
3.1.2 The Combat Board has two charts with outlines of each unit type and columns of dice. These are the Unit Strength Charts - one for Defence Strength (for the defenders) and one for Attack Strength (for the attackers).
3.1.3 Below each Unit Strength Chart is another chart with the symbol of a purple 12-sided dice on the left. These are the Direct Strike Charts.
3.2 Placement of Aircraft Units.
3.2.1 All aircraft units are placed in the area of the Combat Board where outlines of aircraft units are found.
3.2.2 No Placement Limit. Although there may be a limited number of outlines on the Combat Board, this does not restrict the number of aircraft of each type that can be brought into the battle. Just place all the extra aircraft units in the area with the aircraft outlines as per normal.
3.3 Placement of Artillery Units.
3.3.1 Artillery units are placed on the Combat Board as follows:
- 3.3.1.1 For Combat Board Scenarios: All artillery units are placed away from the combat axis, where outlines of artillery units are found. It is important to match the type of artillery placed with the outlines on the Combat Board (for instance, a 15 gun play-piece to a 15 gun outline) as guns of different calibres have different effectiveness.
- 3.3.1.2 For Full Campaign Scenarios (Artillery Units Outside Contested Sector): Artillery units firing in from outside the contested sector are placed away from the combat axis, where outlines of artillery units are found. It is important to match the type of artillery placed with the outlines on the Combat Board (for instance, a 15 gun play-piece to a 15 gun outline) as guns of different calibres have different effectiveness. They can only use their direct strike ability.
- 3.3.1.3 For Full Campaign Scenarios (Artillery Units Inside Contested Sector): Artillery units that are inside the contested sector are no different from infantry units & vehicle units. They are placed along the combat axis and defend as normal ground units. They may not use their direct strike ability. Please refer to Rule 3.4.1.
3.3.2 No Placement Limit. Although there may be a limited number of outlines on the Combat Board, this does not restrict the number of artillery of each type that can be brought into the battle. Just place each extra gun next to a gun of the same calibre, so that the calibre of the extra gun is clear.
3.4 Placement of Infantry Units & Vehicle Units.
3.4.1 All infantry units & vehicle units are placed in the circles along the combat axis. Following from Rule 3.3.1.3, for a Full Campaign Scenario, any artillery units inside the contested sector where the battle is taking place are also placed in the circles along the combat axis. It is important to note that the order of placement does matter as the units placed closest to the centre fight first.
3.4.2 All the units placed along the combat axis are known as combat units. All the units not placed along the combat axis are known as strike units.
3.4.3 Once a battle starts, the player cannot swap the order of any combat unit placed along the combat axis. The player is committed to this unit order for the rest of the battle.
3.4.4 No Placement Limit. Due to the stacking limit in a Full Campaign Scenario only 6 ground units are normally allowed in each contested sector. Hence, a battle normally has at most 6 units from each army. However, if more than 6 units are allowed for whatever reason, just deploy them along the combat axis as per normal. The extra units are not restricted by the circles printed on the Combat Board.
4. Doctrine: Combat & Tactics
Order of Play: Battle (as printed on the Doctrine page D-08; the step numbers 1 to 13 are as printed, including the printed numbering of Steps 3 and 4 in the air combat block)
Setup
- Defender deploys all units.
- Attacker deploys all units.
Air Combat 3. Defender chooses a point air unit. (printed as "6.") 4. Attacker chooses a point air unit. 5. Defender & Attacker resolve air combat. 6. If both Defender & Attacker still have air units left, go back to Step 3.
Ground Combat 7. Attacker chooses tactic. 8. Defender & Attacker declare strikes. 9. Defender & Attacker resolve strikes. 10. Defender & Attacker resolve combat until one unit is eliminated, suppressed or fatigued. 11. Defender or Attacker bring up a new point unit as appropriate. 12. If both Defender & Attacker still have ground units left along the combat axis, go back to Step 7.
Wrap Up 13. Defender & Attacker withdraw all unused strike units.
4.1 Definitions.
4.1.1 Point Unit. The first unit of each player on the combat axis is the point unit. If the point unit is defeated, the next unit along the combat axis becomes the new point unit.
4.1.2 Supporting Unit. The unit that is next in line can sometimes be used to support the point unit in the execution of certain tactics (see Rule 4.4 to 4.7). When used in this way, the unit is called a supporting unit.
4.1.3 Determining Attacker & Defender. For a Combat Board Scenario, the Attacker and the Defender are indicated on the Combat Board Scenario chart. For a Full Campaign Scenario, the Attacker is the army that is attacking the contested sector where the battle is taking place, while the Defender is the army that is defending the same contested sector. Another way to describe this is that the Attacker is the army trying to gain control of the contested sector, while the Defender is the player who currently has control of the contested sector.
4.1.4 Battle. The complete resolution of all combat on the Combat Board for a particular contested sector during a particular turn is known as a battle. Although a sector may remain contested over a few time periods, a battle ends when all combat is resolved for that particular turn. As such, a battle always lasts exactly one turn. This is important when determining the duration for effects due to Situation Cards that last for one battle. The definitions of a turn and a time period are given in Rule 7.1.
4.2 Order of Placement of Units.
4.2.1 The Defender always places all his units first.
4.3 Combat Resolution Mechanic.
4.3.1 Basic Mechanic. When two units engage in combat, each player looks up his or her respective unit's Attack Strength or Defence Strength on the Unit Strength Chart on the Combat Board. Each player then rolls the dice representing their respective unit's strength and chooses the highest result. There is no need to add the numbers. The players compare their respective highest number and the one with the higher number wins. The defeated unit is moved off the combat axis. If no player has a higher number then it is a draw.
Example: The Attacker uses a Japanese Infantry unit and rolls dice with the results 3, 2 & 6. The highest die roll for the Attacker is 6. The Defender uses an Australian Armoured Car and rolls dice with the results 5 and 4. The highest die roll for the Defender is 5. Comparing the results, the Attacker wins by 1 point (6 - 5 = 1).
4.3.2 Modifiers. Often, one or more units may have a bonus or a penalty due to the terrain or to specific circumstances. Add these modifiers to the highest result as appropriate. The unit with the highest final result, after taking into account all these modifiers, wins.
4.3.3 Combat Results. If a unit wins by 3 points or more, the defeated unit is eliminated. If a unit wins by less than 3 points, then the defeated unit is suppressed. An eliminated or suppressed unit is moved off the combat axis. For a Full Campaign Scenario, the effects of both results are further explained in Rule 12.2 & 12.3.
4.3.4 Attacker's Fatigue. Each of the Attacker's units along the combat axis can only attack exactly 2 times. Each time is called an attack. If an Attacker's unit remains undefeated after two rounds of combat, then it is fatigued. A fatigued unit is moved off the combat axis. For a Full Campaign Scenario, the effect of being fatigued is further explained in Rule 12.4.
4.3.5 No Defender's Fatigue. A Defender's unit is never fatigued and can defend indefinitely as long as it continues to be successful until defeated.
4.3.6 Order of Dice Rolling. For each combat round, either the Defender or the Attacker may roll his or her dice first, since the probability does not change. However, if there is a dispute, then by convention either the Attacker rolls first or both players roll simultaneously.
4.4 Tactics Overview.
4.4.1 The Attacker with at least two units along the combat axis has three tactical options:
- General Assault
- Force Concentration
- Flanking Manoeuvre
4.4.2 No Tactic Switching. A unit is committed to a chosen tactic until all its attacks are used up. A unit cannot switch tactics in the course of a battle. It is important to note that General Assault is also a tactic and hence cannot be switched.
Example: A player has chosen General Assault as the tactic for his point unit. After using up one attack resulting in a draw, the player cannot then decide to switch to Flanking Manoeuvre by bringing up a supporting unit. The point unit must complete all its attacks using General Assault for this battle.
Example: A player has chosen Flanking Manoeuvre as the tactic for his point unit and brings up a supporting unit accordingly. After using up one attack (from both units) resulting in a draw, the player cannot then decide to switch to Force Concentration, although Force Concentration similarly requires a supporting unit. Both the point unit and the supporting unit must complete all its attacks using General Assault for this battle.
4.4.3 One Tactic at a Time. Only one tactic may be used at any one time. A player cannot use both Force Concentration and Flanking Manoeuvre at the same time by committing 2 supporting units.
4.4.4 No Role Swapping. A player cannot swap the roles of a point unit and its supporting unit. Therefore, it is important to place your units in the correct order at the start of the battle.
4.4.5 Effect of Elimination. In a tactic requiring both a point unit and a supporting unit, if either of these units is eliminated (for instance, due to an artillery strike), then the remaining unit must complete all its remaining attacks using the General Assault tactic as the point unit. This is the only circumstance whereby a supporting unit can become a point unit.
4.5 Tactic 1: General Assault.
4.5.1 In this tactic, combat is resolved between the Attacker's point unit and the Defender's point unit, as per the Combat Resolution Mechanic described in Rule 4.3.
4.6 Tactic 2: Force Concentration.
4.6.1 This tactic requires a supporting unit (in other words, the unit next in line). This tactic uses up one attack from the point unit and one attack from the supporting unit. Combat is then resolved between the Attacker's point unit and the Defender's point unit, as per the Combat Resolution Mechanic in Rule 4.3.
4.6.2 The advantage of this tactic is that the Attacker gets to include 1 die from the supporting unit to the point unit during combat. The Attacker gets to choose which die to include, although under normal circumstance, it is assumed that the Attacker will include the strongest die type.
Example: The Attacker's point unit is a light tank that normally rolls its tank dice for attack. The Attacker's supporting unit is an infantry unit that normally rolls its infantry dice for attack. By using Force Concentration, the Attacker can now roll a total of three dice for attack; the additional die is contributed by the supporting unit. The Attacker now has a much higher chance of getting a high number like 5 or 6. Remember, the highest die is the result. Do not add the results of each die. (The dice are shown as icons in the printed example.)
4.6.3 The disadvantage of this tactic is that, if the Defender wins, then both the Attacker's point unit and the Attacker's supporting unit suffer the same combat result. For instance, if the result is an elimination then both the Attacker's point unit and the Attacker's supporting unit are eliminated.
4.7 Tactic 3: Flanking Manoeuvre.
4.7.1 This tactic requires a supporting unit (in other words, the unit next in line). This tactic uses up one attack from the point unit and one attack from the supporting unit. Combat is then resolved between the Attacker's point unit and the Defender's point unit, as per the Combat Resolution Mechanic in Rule 4.3.
4.7.2 The advantage of this tactic is that the Attacker gets to force the Defender to remove 1 die from the Defender's point unit during combat. The Defender chooses which die to remove as a result of being flanked, although under normal circumstance, it is assumed that the Defender will remove the weakest die type.
Example: The Attacker's point unit is a light tank unit that normally rolls its tank dice for attack. The Attacker's supporting unit is an infantry unit that normally rolls its infantry dice for attack. The Defender's point unit normally rolls its defence dice. By using Flanking Manoeuvre, the Attacker still rolls the tank dice for attack. However, the Defender now rolls only one fewer die for defence. The Flanking Manoeuvre has caused the Defender's point unit to lose its die in combat. The Defender now has a much lower chance of rolling a high number to defend against the Attacker's tank. Note that by using this tactic, the Attacker's relatively weak infantry unit has now played a pivotal role in the combat. (The dice are shown as icons in the printed example.)
4.7.3 If, for whatever reason, the Defender's unit strength is represented by only a single die, then the Defender does not remove the die. Instead, the unit is penalised by having to subtract 1 from its die result.
4.7.4 The disadvantage of this tactic is that, if the Defender wins, then both the Attacker's point unit and the Attacker's supporting unit suffer the same combat result. For instance, if the result is an elimination then both the Attacker's point unit and the Attacker's supporting unit are eliminated.
4.8 Withdrawal from Combat. Please refer to Doctrine 13.
4.9 Air Combat & Air Superiority.
4.9.1 Determining Local Air Superiority. The first phase of a battle is to determine local air superiority. For all battles, local air superiority is determined before ground combat begins. Local air superiority is established when only air units of one side (either the Attacker or the Defender) remain on the Combat Board. There is no limit to number of rounds of air combat needed to establish local air superiority. Air combat continues indefinitely until either the Attacker or the Defender has no air units left on the Combat Board. The remaining air units now function as mobile artillery, in a fashion similar to ground artillery units, during ground combat.
4.9.2 Point Unit for Air Combat. Air combat is conducted in rounds between two point air units, similar to ground combat. The only difference is that the Attacker and the Defender get to choose which air unit will be the point unit each round. The Defender chooses his or her point air unit first, followed by the Attacker.
4.9.3 Air Combat Resolution. All air combat is conducted using the General Assault tactic (in other words, the standard combat resolution mechanic). No other tactic may be used.
4.9.4 No Fatigue. Neither the Attacker's air units nor the Defender's air units will suffer from fatigue. Each air unit can fight in as few or as many rounds as the player wishes, until local air superiority is established.
5. Doctrine: Direct Strikes
5.1 Strike Units.
5.1.1 Artillery units outside a contested sector and aircraft units inside a contested sector can be used to support ground units during a battle by conducting strikes. Both air and artillery units function the same way when doing so. For ease of reference, they are collectively termed strike units. All other units on the Combat Board are termed combat units.
5.1.2 Each strike unit can only strike once in each battle. Once it is used, it is fatigued and must be placed back on the Mapboard or otherwise set aside.
5.2 Strike Resolution Mechanic.
5.2.1 Strikes are conducted by simply rolling a purple 12-sided die and referring to the Direct Strike Chart on the Combat Board for the outcome. The aim is to roll as high as possible, as a high enough die result will cause the target to be either suppressed or eliminated. It is important to note that the Attack Strength or Defence Strength of the target has no effect on the outcome. Hence, Strikes are useful against stronger units.
5.3 Declaring Strikes.
5.3.1 Strikes are declared whenever a new pair of point units face off, but before combat is resolved. In other words, strikes can be declared whenever either the Attacker's point unit changes or the Defender's point unit changes. It is not necessary for both the Attacker's point unit and the Defender's point unit to change before strikes can be declared.
5.3.2 There must always be at least one pair of point units facing off on the combat axis before a strike can be declared and conducted. If one side has no more units left along the combat axis, then no more strikes can be conducted. Any unused strike unit is wasted.
5.3.3 Both the Attacker and Defender must declare strikes before combat between the new pair of point units is resolved and before any strike is resolved. Either side may declare first. Each player declares exactly which strike unit will be committed to a strike and which unit is the target of each strike. This decision is absolute and final. A player is not allowed to change this decision (such as adding or cancelling strikes) once the declaration has been made and the strike units committed. This means that a player cannot observe the result of a strike and cancel the remaining strikes or declare more strikes, until a new pair of point units face off.
Example: The Attacker has 3 strike units. After a couple of his ground units suffered defeats against the Defender's strong vehicle unit, the Attacker decides to use his strike unit. He can do so, since he is bringing up a new infantry unit to the point position, even though the Defender's point unit has not changed. The Attacker decides to use 2 of his strike units and declares accordingly. Their only possible target is the Defender's point unit, which is the strong vehicle unit. Once this declaration has been made, the Attacker cannot change his decision. The Attacker rolls for both his strikes, but both miss. He cannot declare new strikes even though he has 1 unused strike unit left. Both strike units are used up and he must now set them aside. Combat now resumes between his new infantry unit and the Defender's strong vehicle unit.
5.3.4 Each strike targets exactly one unit. The target of a strike must always be a point unit or a supporting unit. Hence, an Attacker's strike target is always the Defender's point unit, as that is the only legal choice. A Defender's strike target can be either the Attacker's point unit or the Attacker's supporting unit, if the Attacker is employing the Force Concentration tactic or the Flanking Manoeuvre tactic. No other units, including opposing artillery units or units behind the point unit along the combat axis, can be targeted.
5.4 Conducting Strikes.
5.4.1 After both the Attacker and the Defender have declared their strikes, they roll to resolve the strike against the chosen targets as per the Strike Resolution Mechanic described in Rule 5.2. The order of resolution does not matter as the results of the strikes are independent. However, by convention, the Attacker rolls first.
5.4.2 If there are multiple strikes against one target, the dice may be rolled together if the strike units have the same strike probabilities. If in doubt, just roll each strike separately.
5.4.3 The results of multiple strikes can only apply to the chosen target. Any additional results can never be transferred to another unit. These additional results are essentially wasted. Similarly, once the best result (in other words, eliminate) is achieved, any remaining declared strikes on that target cannot be cancelled and are also wasted. In effect, all the strikes actually occur simultaneously and the best result is applied.
Example: The Defender has 3 strike units. The Attacker has just decided to use the Flanking Manoeuvre tactic with his new point unit, which is a tank unit. He brings up a supporting infantry unit. The Defender decides to fire all 3 of his strike units at the Attacker's point tank unit, which he judges as a greater threat. Once this declaration has been made, the Defender cannot change his decision. The Defender fires and has extremely good rolls. Two of the strikes give an eliminate result and one strike gives a suppress result. The best result applies and so the Attacker's tank unit is eliminated. However, although the Defender has a leftover eliminate result, the target of all 3 strikes is the tank unit, as initially declared. Hence, this leftover result cannot be transferred to the Attacker's supporting unit or the Attacker's next unit in line or any other unit. This leftover result is wasted and discarded.
5.4.4 No Defence Bonus. Bonuses, such as defence bonuses related to water obstacles, and penalties do not apply to strike units unless specifically stated. Bonuses and penalties generally apply only to units along the combat axis.
5.4.5 If both the Defender's point unit survives and either the Attacker's point unit or the Attacker's supporting unit survives, then no new strikes can be declared and normal combat commences. Do note that if the Attacker's point unit is defeated, but the Attacker's supporting unit survives, then the Attacker's supporting unit becomes the point unit (although no new strikes can be declared) and must use the General Assault tactic until all its attacks are exhausted, in accordance with Rule 4.4.5. In all other instances, new units move to the point position (and supporting position, as necessary) and new strikes may then immediately be called, since a new pair of point units is now facing off.
Note on the printed grid (page D-15): the printed grid lists the follow-on actions for each combination of surviving and defeated point and supporting units (Defender point unit survives or is defeated, against Attacker point and supporting units survives or is defeated). Its cell text is not reliably recoverable from the text layer, so the prose of Rule 5.4.5 above is the transcribed rule.
6. Doctrine: Mapboard
6.1 Mapboard & Full Campaign Scenarios. The Mapboard is used for full campaign scenarios. Units are deployed and moved on the Mapboard with battles resolved on the Combat Board.
6.2 Sectors.
6.2.1 Sectors are spaces on the Mapboard. They are divided by lines, rivers, and straits.
6.2.2 Each sector has a name. A space that does not have a name is not a sector. For instance, a sea zone (see Rule 6.3) is not a sector. A small unnamed island is not a sector. It constitutes part of a nearby sector with the same colour and does not form a separate space.
6.2.3 Sector Stacking Limit for Ground Units. A sector may only have up to a maximum of 6 ground units from each side. Hence the total number of ground units in a sector is 12. Fixed artillery units are ground units and do contribute towards the stacking limit.
6.2.4 Sector Stacking Limit for Air Units. There is no stacking limit for air units.
6.3 Sea Zones & Water Obstacles.
6.3.1 Sea zones are spaces found on large bodies of water. They are coloured in grey and are used to link coastal sectors.
6.3.2 Sea zones are not sectors. They do not have any of the properties of sectors. Hence they do not affect range and cannot contain units.
6.3.3 Water obstacles are all bodies of water shown on the Mapboard, including sea zones. Examples are the rivers forming sector boundaries and the straits in the north and south of Singapore island that the various axes-of-attack cross.
6.3.4 Attacks across a water obstacle or a sea zone may confer a defensive bonus. These bonuses are indicated directly on the Mapboard.
6.4 Axes-of-Attack.
6.4.1 Axes-of-Attack are the large dark grey arrows pointing in from the edge of the Mapboard. They represent the directions of attack of the invading force.
6.4.2 An axis-of-attack is a special kind of off-map sector. They function in the same way as normal sectors, except for the following special properties:
- A unit from a normal sector cannot enter an axis-of-attack.
- A unit may move or attack from an axis-of-attack across a water obstacle into a normal sector. This also applies for units that normally cannot cross water.
- A unit attacking from an axis-of-attack may be suppressed or retreat back into that axis-of-attack.
- A unit starting from an axis-of-attack may move to another axis-of-attack. Distance does not matter. However, its movement ends in the destination axis-of-attack.
- An axis-of-attack has no stacking limit.
- Normally, a supply line cannot cross water. However, a supply line starting from an axis-of-attack may cross water as its first step. Subsequent steps cannot cross water as per normal.
6.4.3 An axis-of-attack is activated if there is at least one unit in it at the start of the game.
6.4.4 An axis-of-attack that is not activated at the start of the game cannot be moved into or otherwise used for the rest of the game. For all intents and purposes, such an unactivated axis-of-attack is non-existent. All the rules in Doctrines 6 to 16 refer to activated axes-of-attack only.
6.5 Map Symbols.
- Road - broad grey lines. Roads are used for on-road movement by ground units (6.5.1).
- Airfield - broad & short light grey lines. Aircraft units are based in airfields (6.5.2).
- Key Strategic Objective - compass-like gold stars. These are important for some victory conditions (6.5.3).
- Fixed Artillery Emplacement - black guns on a circle. These fixed defences are fortifications (6.5.4).
- Supply Point - black crates. These are the logistic centres from which units are supplied and are the starting points of supply lines (6.5.5).
- Fortified Defence Line - spiked lines. Spiked lines always form a part of the line separating two sectors. The spikes on a fortified line face only one direction, meaning that the fortifications face only one direction. Attacks crossing the fortified line against the spikes may result in a defensive bonus. These bonuses are indicated directly on the fortified line (6.5.6).
- Defence Bonus - a number in a circle represents a defence bonus. These bonuses are conferred on the ground combat units defending a sector (6.5.7).
6.6 Control.
6.6.1 Each sector must be controlled by exactly one army at all times, even if the armies are on the same side. For instance, a sector is either controlled by the British army or the Australian army, but not both together. No sector is neutral (in other words, controlled by no army). Control is represented by control markers (Japanese Army, Australian Army and British Army markers).
6.6.2 A sector containing ground units from opposing sides is a contested sector.
6.6.3 A sector cannot contain units from two armies of the same side. For instance, a sector cannot contain both a British unit and an Australian unit. This applies for both ground units and air units. However, a unit can pass through a sector containing units from a friendly army, as long as it does not stop in that sector. A unit can always stop in a sector controlled by another army, if the sector is empty.
6.6.4 If a sector is controlled by one army, but contains only ground units of one other army, its control changes immediately to the latter army. This applies even for armies on the same side.
Example: On the Australian army's turn, Australian ground units move to and stop in an empty sector currently controlled by the British army. The sector immediately changes control to the Australian army.
Example: On the Japanese army's turn, Japanese ground units defeat all the British ground units in a contested sector. The sector immediately changes control to the Japanese army.
6.6.5 Passing through an empty sector changes that sector's control only if the sector was controlled by the opposing side. If the armies are on the same side, passing through does not change control.
6.6.6 Aircraft units do not affect control and cannot capture any sectors. Only ground units can affect control and can capture sectors.
6.7 Defence Bonuses.
6.7.1 When an Attacker attacks a sector with inherent defence advantages, such as across a water obstacle or across a fortified line, the Defender may receive a defence bonus. This is represented on the Mapboard by a circle with a number inside. Unless otherwise stated, such a bonus always applies to the Defender.
6.7.2 A fortified line confers a defence bonus. If a fortified line does not span the entire boundary between two sectors, but only extends across a road entering the sector, then the defence bonus applies only if the Attacker attacks the sector via on-road movement.
6.7.3 A defence bonus is a modifier as explained in Rule 4.3.2. The defence bonus is added to the Defender's highest die result before the results are compared. A +½ defence bonus works in the same way as any other defence bonus and is simply added to the highest die result. The unit with the highest number wins.
Example: The Attacker's highest die result is 3. The Defender's highest die result is 5. The defence bonus is +1. Hence, the Defender's final die result is 5+1 = 6, which is higher than the Attacker's 3. The Defender wins by 3 and the Attacker's unit is eliminated.
Example: The Attacker's highest die result is 5. The Defender's highest die result is 5. The defence bonus is +½. Hence the Defender's final die result is 5+½ = 5½. The Defender wins by ½ and the Attacker's unit is suppressed.
6.7.4 If a sector is attacked from several directions each granting a different defence bonus, then it implies that some of the defences have been outflanked and the Defender always receives the lowest possible defence bonus.
Example: An attack is launched against Buloh sector from Axis-of-Attack B (defence bonus +1) and Mandai sector (defence bonus +½). The applicable defence bonus drops to +½.
Example: An attack is launched against Paya Lebar sector from Hougang sector across the Serangoon Defence Line. Some attacking units attack via on-road movement (defence bonus +½), while other attacking units attack via off-road movement (no defence bonus). The applicable defence bonus drops to 0 (no bonus).
7. Doctrine: Time
7.1 Definitions.
7.1.1 A turn is the period over which a single army (Japanese, Australian, British) acts.
7.1.2 A full turn is the period over which all armies in a Full Campaign Scenario act. The starting point of a full turn may vary.
Example: The period from the start of a Japanese player's turn to the start of the Japanese player's next turn is a full turn.
Example: The period from the end of the British player's turn to the end of the British player's next turn is a full turn.
7.1.3 A time period is a full day period or a full night period of a particular date, as tracked using the Supply & Reinforcement Order chart of a Full Campaign Scenario (see Rule 7.2.1). It is exactly the same length as a full turn.
7.2 Passage of Time.
7.2.1 During a Full Campaign Scenario, time is tracked using the calendar on the Supply & Reinforcement Order chart. At the start of the game, place a white supply token chip or some other marker on the first calendar square in the upper left corner. This marker is known as the time marker. When all the armies have had their turns, advance the time marker to the next calendar square.
8. Doctrine: Order of Play
Order of Play: Campaign (as printed on page D-23; the step numbers are as printed)
Setup
- All players deploy all units in accordance with the scenario's Deployment Order chart for each army.
- All players collect starting supplies & cards (if applicable) in accordance with the scenario's Deployment Order chart for each army.
- Place time marker on first time period of the scenario.
Full Turn
Each army takes its turn in the order shown in the upper right corner of the scenario's Supply & Reinforcement Order chart.
For army currently taking its turn:
- 6. Planning Stage - move units, declare attacks & commit artillery strikes.
-
- Execution Stage - fight battles (if any).
-
- Supply Stage - collect supplies, draw cards, collect reinforcements, deploy reinforcements.
-
- Victory Check - if the current army has fulfilled its victory conditions as set out in the army's Deployment Order chart for this scenario, then go to Step 10.
-
- Time Passage - if all armies have taken their turn for the current time period, then advance the time marker by one time period.
-
- Next army's turn - go back to Step 4 for the next army taking its turn.
Wrap Up
- 13. All armies check their level of victory to determine the winner of the campaign.
8.1 Brief Overview.
8.1.1 This Doctrine provides a general & simplified overview of the stages, phases & steps in a typical turn taken by an army during a Full Campaign Scenario. However, more detailed rules are found in Doctrines 9 to 16 (starting Page D-28) and clarify & modify the general overview shown in this Doctrine.
8.1.2 If this is the first time you are playing a Full Campaign Scenario, it is strongly recommended that you learn the game through the TRAINING SECTION (starting Page T-01) which consists of structured tutorials that teach the rules in order of increasing complexity, so that the game can be properly enjoyed.
8.1.3 The term army is used instead of player to prevent confusion, as one player may be controlling two or more armies that are on the same side.
8.2 Setup.
8.2.1 Units. All armies first place the units on the Mapboard in accordance with the instructions on the relevant Deployment Order chart for the chosen Full Campaign Scenario. The type & number of units to place are typically shown as icon silhouettes on the miniature mapboard on the Deployment Order chart.
8.2.2 Supplies (Optional). This step is optional and depends on whether you want to play the game with supplies. All armies collect the number of supplies shown on the back of their respective Deployment Order chart. The number is found in the box with a supply crates icon.
8.2.3 Cards (Optional). This step is optional and depends on whether you want to play the game with cards. All armies collect the number of cards indicated on either the Deployment Order chart or the Reference Cards that come with the cards. Please refer to Rule 15.2.2 for more details.
8.2.4 Time. Place a marker on the first calendar square, which is found in the upper left corner of the Supply & Reinforcement Order chart.
8.3 Planning Stage.
8.3.1 Phase 1 - Refuel Aircraft Units. Return all the aircraft units that are on missions back to a friendly airfield. Return all the aircraft units that are in the Aircraft Repair Box back to a friendly airfield. These units will take one full turn to refuel and so cannot be deployed on a mission this turn. If there are no friendly airfields for the aircraft units to land at, then the aircraft units are eliminated instead. Do note that if an army has an off-map airfield, which cannot be captured, then its aircraft units will always be able to land.
8.3.2 Phase 2 - Deploy Aircraft Units. Aircraft units that did not just land and did not just complete repairs may be deployed on a mission. Given the small size of the theatre of operations of the game, which is well within the operating range of all aircraft deployed in the theatre at that time, an aircraft unit may move to any sector on the Mapboard.
8.3.3 Phase 3 - Move Ground Units & Declare Attacks.
- 8.3.3.1 Move any ground units that you wish, as long as it is within their movement range. The movement range is indicated on the Movement Chart on the left side of the Mapboard. Each ground unit must choose either on-road or off-road movement and must stop when it enters a sector with at least 1 enemy ground unit. Moving ground units into an uncontested sector with at least 1 enemy ground unit is the equivalent of declaring an attack.
- 8.3.3.2 If you are playing the game with supplies, then pay 1 supply for each ground unit that moves into a sector with at least 1 enemy ground unit. Remember to check that each unit moving has a supply line back to a friendly supply point.
- 8.3.3.3 Do note that you must make all your movements and declare all your attacks before resolving any battles. Once combat for any sector starts, no further units can be moved.
8.3.4 Phase 4 - Declare Offensive Artillery Barrages.
- 8.3.4.1 Declare the artillery units that will be supporting the various contested sectors and sectors that just got attacked. Be clear which artillery unit is supporting which sector. Do note that an artillery unit that just moved, cannot fire.
- 8.3.4.2 If you are playing the game with supplies, then pay 1 supply for each artillery unit firing. Remember to check that each unit firing has a supply line back to a friendly supply point.
8.3.5 Phase 5 - Declare Defensive Artillery Barrages.
- 8.3.5.1 For any army that is defending a sector against the army now taking its turn, the defending army may declare the artillery units that will be supporting these contested sectors. Be clear which artillery unit is supporting which sector.
- 8.3.5.2 If you are playing the game with supplies, then pay 1 supply for each artillery unit firing. Remember to check that each unit firing has a supply line back to a friendly supply point.
8.4 Execution Stage.
8.4.1 Phase 6 - Change Sector Status. All uncontested sectors that have attacks declared on them in Step 3, now have their status changed simultaneously from uncontested sectors to contested sectors.
8.4.2 Phase 7 - Resolve Battles.
- 8.4.2.1 Combat is now resolved separately for each contested sector where the current army is the Attacker. Each such battle must take place and you cannot choose to skip any battle.
- 8.4.2.2 Transfer all the units in a contested sector, as well as all supporting artillery units on to the Combat Board for battle. The rules and mechanics of the battle are the same as for the Combat Board Scenario, as described in Doctrines 1 to 5. The effect of the combat result on each unit is described in Doctrine 12.
- 8.4.2.3 Remember that, in accordance with Rule 3.3.1.3, artillery units in a contested sector cannot strike, but must participate in combat like other ground units.
- 8.4.2.4 If a sector remains contested at the end of the battle (usually due to some of the Attacker's units being fatigued and remaining in the sector), then the battle is continued during the Attacker's next turn. The battle does not continue during the Defender's turn, although the Defender can move more troops in on his or her turn to reinforce.
Example: The Japanese army launched an attack on the British-controlled Kranji sector, but did not manage to capture it when the battle ended. When it is the British army's turn, it may reinforce Kranji sector, but combat does not continue. Combat resumes only when it is the Japanese army's turn again.
8.5 Supply Stage.
8.5.1 Phase 8 - Collect & Deploy Reinforcements. When all the battles have been resolved, collect new units as indicated on the Supply & Reinforcement Order chart. Place these new units in the sector or the axis-of-attack as indicated in the Special Rules of the Deployment Order chart.
8.5.2 Phase 9 - Collect Supplies (Optional). If you are playing the game with supplies, then collect the number of supply tokens as indicated in the calendar square of the current time period in the Supply & Reinforcement Order chart. Do note that the number of supplies to collect varies with each army. The number for each army is indicated in the sub-division of the calendar square that has the flag of the respective army in the background.
8.5.3 Phase 10 - Draw Cards (Optional).
- 8.5.3.1 If you are playing the game with cards, then draw the number of cards stipulated for the scenario that you are playing. In accordance with Rule 15.3.2, remember to play any Event Cards that are drawn. Generally, Event Cards are in effect for 1 full turn. Draw an additional card to replace each played Event Card.
- 8.5.3.2 For the Historic Scenario Impregnable Fortress, the number of cards to draw for each army is as follows:
- The Japanese army simply draws 1 card.
- The Australian army and the British army jointly draw 1 card at the end of the British army's turn. The players then decide which army gets to keep the card. Once a card has been assigned to an army, it cannot be transferred to another army, even if they are on the same side (in accordance with Rule 15.2.4).
8.5.4 Phase 11 - Discard Excess Cards (Optional).
- 8.5.4.1 If you are playing the game with cards, then you must now discard cards in excess of your maximum allowed card hand.
- 8.5.4.2 For the Historic Scenario Impregnable Fortress, the maximum hand of each army is as follows: Japanese Army, maximum 3 cards; Australian Army, maximum 2 cards; British Army, maximum 2 cards.
8.6 Playing Cards.
If you are playing the game with cards, then cards can be played at any time as follows (the printed table is summarised in the table below):
| When to Play | Phase to Play | Notes |
|---|---|---|
| Deployment | On your army's turn only. Play before any battle starts. | Usually targets a sector |
| Combat | When your army is a combatant of a battle. Play at the start of a battle. | Applies only to units involved in the battle & lasts for 1 battle only |
| Supply | On your army's turn only. Play after all battles have ended for your turn (although some sectors may remain contested). | |
| Event | On your army's turn only. Must be played immediately when drawn. | Player then draws another card as a replacement |
| Negation | When your army is the target of a card, or your opponent plays a card or takes an action that can be negated. Play whenever. | Negated card is discarded |
8.7 Ending a Turn.
8.7.1 Phase 12 - Check for Victory. Check to see if your army has fulfilled the victory conditions as set out in its Deployment Order chart. If it has, then the game ends. Please refer to Doctrine 16 for more details.
8.7.2 Phase 13 - Progress Time. When all the armies have had their turns, advance the time marker by one time period to the next calendar square on the Supply & Reinforcement Order chart.
8.7.3 Phase 14 - Next Army's Turn. It is now the turn of the next army, starting again from Phase 1.
8.8 Finishing a Campaign. Once an army has achieved victory, then a winner is determined based on a method that is pre-agreed between the players before the game started. The simplest method is that the army that first achieves victory wins. A more sophisticated method requires all players to check their level of victory based on their respective Deployment Order charts and the army with the highest level of victory wins. A variant requires that the potential winner hold on to the objective sectors for a full turn to confirm the victory. Please refer to Doctrine 16 for more details.
9. Doctrine: Ground Unit Movement
The rules in this Doctrine generally pertain to the movement of ground units during the Move Ground Units & Declare Attacks Phase of the Planning Stage (see Rule 8.3.3).
9.1 Off-Road & On-Road Movement.
9.1.1 Fixed artillery units cannot move.
9.1.2 Infantry units, vehicle units and field artillery units can move. They have two modes of movement - off-road movement & on-road movement. In each turn, a unit may only use one movement mode, not both.
9.1.3 The number of sectors allowed for either mode of movement for each unit type is indicated in the Movement Chart on the Mapboard. A unit may, of course, move fewer sectors than the maximum allowed.
9.1.4 For off-road movement, a ground unit may move into any adjacent sector, although some unit types cannot cross water (see Rule 9.2). Off-road movement is also known as normal movement.
9.1.5 For on-road movement, a ground unit must start in a sector with a road. It must stay on & more importantly, follow the road throughout its movement. It must end its movement on the road.
Example: A vehicle unit with 4 on-road movement starts in Pasir Ris sector. Driving along the road, it first moves into Hougang sector, then into Paya Lebar sector, then back into Hougang sector, before finishing its movement in Yio Chu Kang sector.
9.2 Crossing Water Obstacles (Rivers & Straits).
9.2.1 The ability of a unit type to cross water obstacles is indicated on the Movement Chart on the Mapboard.
9.2.2 For off-road movement, generally only infantry units may cross water obstacles. Any unit that crosses a water obstacle via off-road movement ends its movement immediately after crossing.
9.2.3 For on-road movement, all units may cross water obstacles. It is assumed that they drove across on the road that spans the water obstacle (in other words, they crossed the bridge). Their movement does not end after crossing and they may continue moving if they have movement left.
9.3 Starting & Ending Movement.
9.3.1 May Start from Any Sector. A ground unit may start its movement from any sector, including a contested sector. There are no special rules or penalties or disadvantages for moving out of a contested sector and units may move up to their full movement limit as per normal.
9.3.2 Must Stop in Enemy-Occupied Sector. A ground unit must end its movement when it enters a sector with at least 1 enemy ground unit. If this sector is currently uncontested, then the movement is called an attack and the sector becomes contested at the end of the Planning Stage, but before any battle starts. An army may attack multiple sectors in one turn.
9.3.3 May Pass Through Enemy-Controlled Empty Sector. A ground unit need not end its movement if it is moving through an enemy-controlled sector that is devoid of enemy ground units. The control of such a sector immediately switches to the army of the unit moving through.
9.3.4 Must Not Stop in Friendly-Occupied Sector. A ground unit cannot end its movement in a sector with units from a friendly army, but not from its own army. For instance, a British ground unit cannot end its movement in a sector containing Australian ground units.
9.3.5 Must Not Launch Attack from a Contested Sector. A ground unit can move from a contested sector into another contested sector. However, a ground unit can only move into an uncontested sector containing enemy units (essentially launching an attack) from an uncontested sector. An army cannot launch an attack from a contested sector.
9.3.6 Summary. There are a number of possibilities for movement in terms of the state of the starting sector and the ending sector, such as friendly-vs-enemy, contested-vs-uncontested. The printed summary table (page D-30) gives the definitive summary of the possible movements, with the origin sector (uncontested or contested, friendly or enemy controlled) down the side and the destination sector across the top; cells marked "[requires supplies]" note where a move costs supply. Its cell text is not reliably recoverable from the text layer, so the prose of Rules 9.3.1 to 9.3.5 above is the transcribed rule. It is not possible to start in an uncontested enemy-controlled sector. Any uncontested enemy-controlled sector with friendly units would be contested.
9.3.7 May Withdraw & Attack in the Same Turn. Following from above, it is perfectly legal for a unit to move out of a contested sector and, if its movement permits, attack another sector in the same turn. The sector attacked can be the sector that it just moved out of.
9.4 Axes-of-Attack.
9.4.1 In accordance with Rule 6.4.4, only activated axes-of-attack may be moved into or otherwise used. For all intents and purposes, an unactivated axis-of-attack is non-existent. Hence, all the rules below refer to activated axes-of-attack only.
9.4.2 A unit may move or attack from an axis-of-attack into a sector as per normal. No unit may attack an axis-of-attack.
9.4.3 A unit may move from an axis-of-attack to another already activated axis-of-attack. Distance does not matter. However, the unit must end its turn in the destination axis-of-attack.
9.4.4 A unit from a land-based axis-of-attack (A to F) cannot move to a sea-based axis-of-attack (G to I) and vice-versa.
9.4.5 A unit that normally cannot cross water (such as an artillery unit or vehicle unit) can move or attack from an axis-of-attack across a water obstacle into a normal sector. Once across, the non-water-crossing unit cannot cross back.
10. Doctrine: Air Unit Movement & Usage
The rules in this Doctrine generally pertain to the movement & use of air units during the Refuel Aircraft Units & Deploy Aircraft Units Phases of the Planning Stage (see Rules 8.3.1 & 8.3.2).
10.1 Refuelling.
10.1.1 An air unit must refuel every alternate turn. During an army's Planning Stage, an air unit that is not at an airfield must immediately move to and land at a friendly airfield. If there is no friendly airfield to land at, the air unit is eliminated. Do note that if an army has an off-map airfield, which cannot be captured, then its air units will always be able to land.
10.2 Movement.
10.2.1 During an army's Planning Stage, an air unit that did not just land and did not just complete repairs, may be deployed on a mission. Given the small size of the theatre of operations of the game, which is well within the operating range of all aircraft deployed in the theatre at that time, an air unit may move to any sector on the Mapboard.
10.2.2 It is legitimate to withhold the deployment of a ready air unit. Deploying an air unit is not mandatory and is entirely the prerogative of the army.
Example: The Japanese army has deployed all its air units on the first turn. The British army can decide not to deploy its single air unit in the same turn, so as to have air superiority on the next turn, while all the Japanese air units are refuelling.
10.2.3 The movement & use of aircraft generally does not require supplies, even when entering a contested sector. However, certain types of missions may require supplies. These will be noted in the rules governing these special missions.
10.3 Missions.
10.3.1 An air unit can only be on one mission every turn.
10.3.2 An air unit deployed to a sector is assumed to be on a standard mission of gaining local air superiority, followed by supporting its ground units through strikes. This has been incorporated into the order of play for a battle (see Doctrine 4) and a player is not required to declare the nature of this standard mission. This rule applies generally, and the type of air unit (whether a fighter or a bomber) does not matter.
10.3.3 However, an air unit may also be deployed for other missions (such as the dropping of propaganda leaflets). Such missions can only be activated through the use of a Situation Card (see Doctrine 15) and may or may not require the use of supplies. A player is required to declare such special missions to ensure that there is no confusion with air units on the standard mission.
10.3.4 Air Strikes. When used as a strike unit, an air unit has a range of 0 and so can only strike an opposing unit in its current sector. This assumes that it is in the air (in other words, deployed) and is not caught on the ground. Except for this difference, air units function as mobile artillery and are governed by the same direct strike rules as artillery units.
10.4 Air-to-Air Combat & Repairs.
10.4.1 An air unit that is suppressed in air-to-air combat during a battle goes immediately to the Aircraft Repair Box on the Mapboard. During its army's next Planning Stage, it cannot be immediately deployed, although it is technically at an airfield undergoing repairs. Instead, it is transferred from the Aircraft Repair Box to a friendly airfield (together with the other returning air units) for refuelling. This means that there is no unintended advantage for an air unit to be suppressed and returned to an airfield early. It must wait out one turn in the same way as its other returning fellow air units.
Example: The Japanese army deployed 4 fighter units to the Kranji sector. In the ensuing battle, one fighter unit is suppressed and goes to the Aircraft Repair Box. On the Japanese army's next turn, the 3 remaining fighter units return to the airfield to refuel. The suppressed unit also moves from the Aircraft Repair Box to the airfield. Then on the Japanese army's next turn, all 4 fighter units are ready for deployment again.
10.4.2 It is not possible to entirely evade interception. Once air units from opposing sides occupy the same sector, then air-to-air combat must occur for at least one round before the air units of one side can withdraw. A player will generally be able to observe which sector an opponent's air unit is in and either deploy an air unit to the same sector (ensuring at least one round of air combat) or to another sector to avoid air combat. Nevertheless, in the latter case, during the opponent's turn, the opponent will be able to deploy to his air unit's sector (again ensuring at least one round of air combat).
Example: The British army observes that the Japanese army has air units in Kranji sector only and deploys its lone fighter unit to Mandai sector where it has immediate local air superiority. During the Japanese army's turn, the Japanese army has 2 fighter units ready at its airfield and deploys them to Mandai sector to intercept the British fighter unit.
10.5 Withdrawal of Air Units from a Battle.
10.5.1 The withdrawal of air units and ground units happen independently and are not linked. The rules in this section pertain to withdrawal of air units from a battle. For the rules on the withdrawal of ground units, please refer to Doctrine 13.
10.5.2 An army (whether an Attacker or a Defender) may withdraw all its air units at any time during a battle. If there are opposing air units in the battle, then the withdrawal is allowed only after at least 1 round of air-to-air combat. The withdrawing army effectively yields local control of the skies to the opponent.
10.5.3 The withdrawing army must withdraw all its air units for that battle. An army may not make a partial withdrawal involving only some air units.
10.5.4 An air unit that has withdrawn goes immediately to the Aircraft Repair Box.
10.6 Airfields & Air Units on the Ground.
- 10.6.1 No Landing at an Enemy's Airfield. It is not permitted to land in an airfield controlled by an opponent, even if the sector is devoid of the opponent's units.
- 10.6.2 No Landing at an Ally's Airfield. It is not permitted to land in an airfield controlled by a friendly army, unless the sector is devoid of the friendly army's units. In such a case, control immediately switches to the landing air unit's army.
- 10.6.3 No Specific Attacks on Airfields. It is not permitted to specifically attack or destroy an airfield. However, the sector containing the airfield may be attacked normally using ground units.
- 10.6.4 No Air-Only Attacks on Airfields. It is not permitted to attack an air unit on the ground solely with another air unit. The attack must involve at least one ground unit as per normal rules for attacking a sector.
- 10.6.5 Grounded Air Units Cannot Defend. An air unit on the ground has no Defence Strength (as indicated by the absence of any air unit Defence Strength in the Defender's Unit Strength Chart on the Combat Board). Hence, an air unit on the ground cannot participate in defence.
- 10.6.6 Captured Air Units are Eliminated. If a sector containing only a Defender's grounded air units is captured, then all the Defender's grounded air units are immediately eliminated.
11. Doctrine: Artillery Range & Usage
The rules in this Doctrine generally pertain to the movement & use of artillery units during the Move Ground Units & Declare Attacks, Declare Offensive Artillery Barrages & Declare Defensive Artillery Barrages Phases of the Planning Stage (see Rules 8.3.3 to 8.3.5).
11.1 Firing Range.
11.1.1 Firing Range is also known as range. Units with a range of 1 or more can strike a sector that they are not currently in. Generally, only artillery units have a range of 1 or more. The range of each artillery unit is shown in the Firing Range Chart on the Mapboard. All other units can only attack or defend against opposing units in the same sector. They effectively have a range of 0.
11.1.2 Range is measured in sectors. When counting range, the sector that an artillery unit is currently in does not count. Instead range is counted starting from an immediate adjacent sector. The immediate adjacent sector is range 1 and so forth. Hence, an artillery unit with a range of 1 can fire into all its neighbouring sectors.
11.1.3 Sea zones are not sectors and do not affect range or range count.
11.1.4 An axis-of-attack is a sector. An artillery unit can fire out of (in other words, strike from) an axis-of-attack as per normal. However, since an axis-of-attack cannot be attacked, an artillery unit cannot fire into (in other words, strike at units inside) an axis-of-attack.
Example: An artillery unit on Axis-of-Attack B can fire into Tengah sector. An artillery unit on Axis-of-Attack F can fire into Pasir Ris sector. However, an artillery unit in Tengah sector cannot fire into Axis-of-Attack B.
11.2 Movement vs Strikes vs Combat.
11.2.1 During any single army's turn, an artillery unit may only carry out one action. It may:
- Move to another sector;
- Strike another sector; or
- Defend within its own sector.
It cannot do two actions, such as both move & strike, or both defend & strike.
Example: The Japanese army moves one of its artillery units. This unit cannot be used to support any attacks by the Japanese army via strikes, since it has moved. Immediately after the Japanese army's turn, the Australian army attacks a Japanese-controlled sector. Since this is no longer the Japanese army's turn, this artillery unit can now fire to defend the attacked sector.
11.2.2 An artillery unit may strike once during each army's turn. Hence, it is legal and possible for an artillery unit to strike multiple times within a time period.
Example: In the Historic Scenario Impregnable Fortress, a Japanese artillery unit can be used 3 times each time period (e.g. the Night of 10 February 1942) - once on their own turn (for Offense), once on the Australian turn (for Defence) and once on the British turn (for Defence). Since Australian & British units are on the same side and cannot attack each other, an Australian or British artillery unit can be used 2 times each time period - once on their own turn (for Offense) and once on the Japanese turn (for Defence). This reduces the book-keeping by players on which artillery unit has fired in a particular time period.
11.2.3 An artillery unit in a contested sector cannot strike, whether against enemy units in the same sector or in another sector further away. It must defend via combat in the same way as an infantry unit or a vehicle unit. It must continue to defend in this way until the sector is no longer contested or it moves out of the contested sector. It receives defence bonuses (if any) in the same way as any other ground unit (see Rule 6.7).
11.2.4 Conversely, an artillery unit firing into a contested sector must do so via strikes. Since it is not in a contested sector, it is never involved in combat and cannot attack, be attacked, be suppressed or be eliminated.
11.2.5 No Strikes without an Attack. A strike is always conducted as a part of a battle. A strike can only be declared when a new pair of point units face off (see Rule 5.3). If an army attempts to do a strike-units-only attack (in other words, order a risk-free bombardment of a sector), then when battle begins, it will not have any units along the combat axis. Since it does not have a point unit along the combat axis, this means no strikes can be declared or conducted. Further, because it has no units on the combat axis, it immediately loses the battle (see Rule A.2.4). Hence, a strike can never be conducted against an uncontested sector in the absence of any attacking ground units.
11.2.6 An army cannot use or control another army's artillery unit (or any other unit), even if they are both on the same side. Hence, it is not allowed for an Australian artillery unit to support a battle during the British army's turn and vice versa.
11.3 Attacking & Reinforcing with Artillery Units.
11.3.1 Artillery Units Cannot Attack. Although a field artillery unit can move, it cannot move into an uncontested enemy-occupied sector as part of an attack, since it has no Attack Strength (as indicated by the absence of its Attack Strength in the Attacker's Unit Strength Chart on the Combat Board). An artillery unit can only support an attack via a strike.
11.3.2 Artillery Units Can Reinforce. A field artillery unit can move into & reinforce a contested sector, where its army is the Defender, since it has Defence Strength (as indicated in the Defender's Unit Strength Chart on the Combat Board).
11.4 Fixed Artillery Units.
11.4.1 Control. Although a fixed artillery unit is immobile, it is still a ground unit. Hence, a sector with only a fixed artillery unit is not an empty sector. To capture such a sector, an attack needs to be launched as per normal attack rules.
Example: If the Australian army moves all units out of Pasir Laba sector, except for the immobile 6 Australian fortress gun, the Japanese army would still need to launch an attack (and pay the necessary supplies) to capture Pasir Laba sector.
11.4.2 Defending & Attacking. Since a fixed artillery unit is immobile and is also an artillery unit, it cannot be used to attack another sector (see Rule 11.3.1). However, it can defend against an attack on its sector in the same way as any other ground unit.
11.4.3 Capture & Combat Results. It is possible to capture a fixed artillery unit. A Defender's fixed artillery unit that is defending in the same way as any other ground unit and that is eliminated via combat is captured by the Attacker instead. If the Attacker successfully captures the sector, then the captured fixed artillery unit may be used by the Attacker on the turn after the battle concludes. If the Attacker does not capture the sector, then the captured fixed artillery unit is immediately eliminated. A fixed artillery unit that is eliminated via a strike or that is suppressed via either combat or a strike, is eliminated instead and permanently removed from play.
12. Doctrine: Combat Results
The rules in this Doctrine generally pertain to the Resolve Battles Phase of the Execution Stage (see Rules 8.4.2).
12.1 Combat Results Overview.
12.1.1 There are 5 combat results possible during combat resolution:
- Eliminated
- Suppressed
- Fatigued
- Withdrawn
- Captured (applicable to fixed artillery units only)
Their effects are described in detail below.
12.1.2 Combat results are only applicable to the battles of a Full Campaign Scenario. For a Combat Board Scenario, any unit that is removed from the combat axis is defeated and the winner is the player with units remaining on the combat axis (see Rule A.2.4).
12.2 Eliminated.
12.2.1 A unit is eliminated if it is defeated by a difference of 3 or more in combat (or due to the result of a strike). An eliminated unit is permanently removed from play.
12.2.2 Defender Fixed Artillery Units. A Defender's fixed artillery unit that is eliminated via combat is captured by the Attacker instead. They may be used by the Attacker on the turn after the battle concludes. A Defender's fixed artillery unit that is eliminated via a strike is still eliminated. Please refer to Rule 11.4.3 for more details.
12.3 Suppressed.
12.3.1 A unit is suppressed if it is defeated by a difference of less than 3 in combat (or due to the result of a strike).
12.3.1.1 Legal Sectors for Withdrawal. A suppressed unit must immediately move out of the contested sector into:
- An adjacent uncontested sector controlled by the unit's army.
- An adjacent uncontested sector controlled by a friendly army, if the sector is empty. Control of such a sector immediately switches to the unit's army.
12.3.1.2 Illegal Sectors for Withdrawal. A suppressed unit may not move into:
- A non-adjacent sector.
- A contested sector.
- An enemy-controlled sector, even if the sector is empty or contains only air units.
- An adjacent uncontested sector controlled by a friendly army, if the sector is not empty or even if it contains only air units.
12.3.1.3 If there is no legal sector to move to, then the suppressed unit is eliminated instead.
12.3.2 Each suppressed unit from the same battle may move to a different sector.
12.3.3 Being suppressed is not normal movement. Hence a unit's movement range does not come into play and a suppressed unit always moves a maximum of 1 sector (in other words, into an adjacent sector).
12.3.4 Defender's Fixed Artillery Units. A suppressed Defender's fixed artillery unit is eliminated instead and is permanently removed from play.
12.3.5 Defender's Ground Units. A suppressed Defender's ground unit may not withdraw across a water obstacle.
Example: Both Clementi sector and South West Islands sector are controlled by the British, although South West Islands sector is empty. Japanese units holding Tuas sector are attacked by British units from Clementi sector. These Japanese units cannot withdraw to the South West Islands sector for two reasons. First, retreating or suppressed units can only withdraw to a neighbouring uncontested friendly sector. However, South West Islands sector is currently controlled by the British. Second, the South West Islands sector is across water. No defending unit may withdraw across water.
12.3.6 Attacker's Ground Units.
- 12.3.6.1 A suppressed Attacker's ground unit may only withdraw to a sector from which the Attacker is attacking or reinforcing from in the current turn. The unit itself need not have attacked from that sector. It is sufficient that an attack was launched from that sector in the current turn.
Example: The Japanese army attack Kranji sector with 1 infantry unit from Axis-of-Attack C and 4 infantry units from Mandai sector. In the course of the battle, 3 Japanese infantry units are suppressed. All 3 suppressed Japanese ground units can withdraw back to Axis-of-Attack C, even though only 1 infantry unit attacked from there initially.
- 12.3.6.2 A suppressed Attacker's ground unit may withdraw across a water obstacle to return to a sector described in Rule 12.3.6.1 above. In other words, if no fresh Attacker's units attack a contested sector across a particular water obstacle in a specific turn, then no Attacker's unit can withdraw across that water obstacle that turn. This is regardless of whether any Attacker's units attacked across that water obstacle in a previous turn.
Example: In the first turn of the game, elements of the Japanese army attack Buloh sector from Axis-of-Attack B. They fail to capture it, but were not completely repulsed. Some fatigued units remain. In the course of the battle, suppressed Japanese units are allowed to withdraw back to Axis-of-Attack B, since some units attacked from there initially. In the second turn of the game, the battle continues in Buloh sector, although the Japanese army did not commit any new troops. In this turn, no suppressed Japanese unit may withdraw to Axis-of-Attack B, since no Japanese unit attacked from there this turn.
12.3.7 Air Units. A suppressed air unit is moved to the Aircraft Repair Box. If the air unit's army controls no airfield, then the suppressed air unit is eliminated instead. Please refer to Rule 10.4.1 for more details.
12.4 Fatigued.
- 12.4.1 Defender's Ground Units. A Defender's ground unit is never fatigued. It may defend indefinitely until defeated.
- 12.4.2 Attacker's Ground Units. An Attacker's ground unit is fatigued after it has made two attacks during combat. Fatigued units remain in the contested sector. They continue the battle in the Attacker's next turn without the need for the Attacker to pay additional supplies.
- 12.4.3 Artillery Units. An artillery unit that has completed its strike is immediately returned to its originating sector on the Mapboard.
- 12.4.4 Air Units. An air unit that has completed its strike remains in the contested sector on the Mapboard to defend it until it needs to refuel at the start of its army's next turn. Do note that as gaining local air superiority is part of combat resolution, there should either be only the Attacker's air units or the Defender's air units in a contested sector at the end of combat, but not both.
12.5 Withdrawn.
12.5.1 Both the Attacker and the Defender may voluntarily withdraw all ground units or all air units from a battle. All ground units must withdraw together and all air units must withdraw together. No partial withdrawal is allowed. The legal sectors to withdraw to are the same as those for suppressed units (see Rule 12.3.1). Please refer to Doctrine 13 for the full rules on ground unit withdrawal from a battle. Please refer to Rule 10.5 for the full rules on air unit withdrawal from a battle.
12.6 Captured.
12.6.1 Only fixed artillery units may be captured. Please refer to Rule 11.4.3 for the full rules on capturing a fixed artillery unit.
13. Doctrine: Withdrawal of Ground Units from a Battle
The rules in this Doctrine generally pertain to the Resolve Battles Phase of the Execution Stage (see Rules 8.4.2).
Order of Play: Withdrawal from Combat
- Declaration of withdrawal by withdrawing army.
- Complete resolution of air superiority.
- Complete resolution of declared strikes by withdrawing army.
- Resolve all unused strikes by staying army.
- Move withdrawing units out of sector.
- Change control of sector to staying army.
13.1 Withdrawal Basics.
13.1.1 The withdrawal of air units and ground units happen independently and are not linked. The rules in this section pertain to withdrawal of ground units from a battle. For the rules on the withdrawal of air units, please refer to Rule 10.5.
13.1.2 A Defender may withdraw all its ground units at any time during a battle and need not have fought any combat rounds. An Attacker may withdraw all its ground units only after at least 1 round of combat.
13.1.3 The withdrawing army must withdraw all its ground units. An army may not make a partial withdrawal involving only some ground units.
13.1.4 A withdrawn unit is similar to a suppressed unit. Rules 12.3.1 to 12.3.6 apply, with the substitution of "suppressed unit" with "withdrawn unit".
13.2 Order of Play.
13.2.1 Following the declaration of a withdrawal, local air superiority must be immediately determined, if this has not yet been done. This can be resolved via air-to-air combat as per normal, or the withdrawing army may choose to also withdraw all its air units in accordance with Rule 10.5. In any case, only air units of at most one army should remain on the Combat Board before continuing with the withdrawal.
13.2.2 The next step is the resolution of strikes by the withdrawing army and by the staying army. Please refer to Rule 13.3 for full details.
13.2.3 Once the strikes are all resolved, the withdrawing army may now move its withdrawn ground units out of the contested sector. Please refer to Rule 13.1.4 for full details on the legal sectors for withdrawal.
13.2.4 Following completion of withdrawal, control of the sector is immediately ceded to the staying army. This occurs even if, for whatever reason, the staying army has no ground units left at the end of the withdrawal (for instance, due to the last unit being eliminated by the declared strikes of withdrawing army).
13.3 Resolution of Strikes.
13.3.1 Withdrawing Army's Strikes Forfeited. The moment a withdrawal is declared, the withdrawing army can no longer declare any more strikes for that battle. However, the withdrawing army may roll for any declared strikes. Hence, in effect, only the staying army's point unit has a chance of being affected. The withdrawing army's unused strikes are forfeited. The withdrawing army's unused strike units are treated as though they have fired. No supplies are to be returned for any unused strikes.
13.3.2 Staying Army's Strikes Not Forfeited. Following the declaration of a withdrawal, the staying army may conduct strikes using all its remaining strike units (including aircraft units). This is the advantage of being the staying army. The staying army simply rolls a strike for each unused strike unit. The withdrawing army's units are eliminated in the order of their deployment on the combat axis. In other words, the withdrawing army's point unit, now acting as the rearguard, gets eliminated first and so forth down the line. Suppressed results are ignored.
13.3.3 Treatment of Strikes by Air Units. Aircraft units are strike units and operate in the same way as all other strike units during a withdrawal. There are no special rules governing aircraft units conducting strikes during a withdrawal.
14. Doctrine: Supply
14.1 Supply Management.
14.1.1 Representation. Supplies are represented by supply tokens and are used to fuel certain actions, primarily attacks and artillery barrages. A white supply token represents 1 supply and a grey supply token represents 10 supplies.
14.1.2 Collection. At the start of each Full Campaign Scenario, each army collects the number of supplies indicated in the Deployment Order chart (see Rule 8.2.2). At the end of each turn, each army collects the number of supplies indicated in the Supply & Reinforcement Order chart (see Rule 8.5.2). Do note that the number of supplies to collect varies from scenario to scenario, from time period to time period and from army to army.
14.1.3 Concealment. The number of supply tokens each army has should always be hidden behind the respective army's Fog-of-War Screen.
14.1.4 No Transfer. Supplies cannot be transferred between armies, even if they are on the same side.
14.2 Use of Supplies.
14.2.1 Supplies Needed. Supplies must be paid for the following actions:
- 1 supply is paid for each unit entering a sector with at least 1 enemy ground unit. This applies to both the Attacker and the Defender of a contested sector. In other words, this applies even if an army controls a contested sector and is merely reinforcing its position.
- 1 supply is paid for each artillery unit firing into a contested sector. This applies for both offensive and defensive artillery barrages.
Supplies may also be used to fuel other actions as described in a scenario's special rules or on a situation card.
14.2.2 Supplies Not Needed. For clarity, supplies need not be paid for the following actions:
- No supply is needed for air units. This applies even when an air unit conducts a strike.
- No supply is needed for a unit already in a contested sector to continue fighting in a new turn. This applies to the units of both the Attacker and the Defender of the contested sector.
- No supply is needed to attack and capture an unoccupied enemy-controlled sector. It is sufficient to move into or through the sector.
14.3 Supply Points & Supply Lines.
14.3.1 Every time a unit requires supply for its action, a check must be done to make sure that it is connected to a friendly supply point, represented by a black crate on the Mapboard. A unit with such a connection is known as being in supply. A unit that is not in supply cannot take actions that require supply.
14.3.2 A unit is in supply if there is a continuous chain of friendly sectors between the unit's sector and a supply point. This chain can be of unlimited length, can take circuitous routes and need not follow roads, but cannot cross water except via a road. This chain may be traced through a contested but friendly sector. The chain may terminate in a contested enemy-controlled sector.
14.3.3 A supply line originating from an axis-of-attack may be traced across water for its first step (in other words, the first normal sector that it enters). Subsequent sectors must follow the normal rules for tracing supply lines and cannot cross water as per normal. Please refer to Rule 6.4.2 for a list of all the special properties of an axis-of-attack.
14.3.4 A supply point can be connected to an unlimited number of units without affecting its effectiveness.
14.3.5 Timing of Checks. Supply line checks are done at the point when an action that requires supply is about to be taken (for instance, at the point of launching an attack or firing an artillery unit), typically during an army's Planning Stage. It is a check done at that instance and is not affected by factors such as whether the supply line is later cut or whether the originating supply point is later lost or which army's turn it is.
Example: Some Japanese units are on South West Islands sector. The British had just captured Tuas sector by launching an attack from Clementi sector. In other words, the British now control both Tuas sector and Clementi sector. These are the only two sectors adjacent to South West Islands sector. This means that it is not possible for the Japanese force to trace any supply line into the South West Islands sector at all during the Japanese turn. The Japanese units are now out of supply and cannot launch any attacks or take any actions that required supply (such as firing artillery from the sector). Further, both Tuas sector and Clementi sector contain British units and are not empty sectors. Clementi sector contains a fixed artillery unit (the 15" fortress gun). Hence, the Japanese units cannot simply move into Clementi sector and will need to launch an attack to capture Clementi sector. This effectively means that the Japanese force is now stuck on South West Islands until the situation changes.
14.3.6 When moving into an uncontested sector containing enemy ground units (in other words, launching an attack), the supply check is done at the originating sector (or staging sector) before movement starts. Therefore, an attacking unit only needs to be in supply in the staging sector that it is attacking from, not the sector that it is attacking into. In any case, since Rule 9.3.5 precludes a unit in a contested sector from directly moving into (in other words, launching an attack into) an uncontested sector containing enemy ground units, generally, the supply line can always be additionally extended from the uncontested & friendly staging sector to the attacked sector as well.
14.4 Losing Supply Points.
14.4.1 If an army loses control of a sector with a supply point, it must transfer supply tokens worth the total of the dice rolled, capped at half of its total supplies rounded down, to the capturing army.
Example: An army currently has 20 supplies. It rolls dice getting the results 5, 2 & 1. Adding these numbers, the total is 8. This is less than half of the army's total supplies, which is 10. Therefore, it passes 8 supplies worth of tokens to its opponent's army.
This rule applies regardless of whether the capturing army's capturing unit is itself in supply or not at the moment of capture. Following the capture, the capturing army's units are now connected to the newly captured supply point and hence are now in supply.
14.4.2 An army with no supply points still receives supplies as per normal at the end of its turn. However, in accordance with Rule 14.3.2, the army cannot use them as no supply line can be traced, because there is no originating supply point. Hence, the army cannot take any actions that require supplies, including launching an attack.
Example: If the Japanese army captures Tiong Bahru, Keppel and Queenstown sectors from the Commonwealth armies, the Commonwealth armies will still receive supplies but cannot use them until they re-capture at least one supply point. This may prove impossible if the re-capture requires the launching of an attack.
15. Doctrine: Situation Cards
15.1 Card Layout.
15.1.1 Situation Cards, also called cards, are an add-on to the game that is sold separately. They are designed to increase the variability and the replayability of the game. The first cards expansion for this game is used for the Historic Scenario Impregnable Fortress and Scenario 01 The Almost Naked Island.
15.1.2 Card Type. The type of the card is shown on the lower right corner of the card illustration. There are 5 different card types: Event, Deployment, Combat, Supply and Negation. Some cards have multiple card types.
15.1.3 Card Power. A summary of the function of each card is shown along the upper left edge of the card. This is only a convenient visual reference and does not present all the information related to a card. Players are advised to read the full text of the card for the specific functions and powers of a card and the requirements for its use.
15.1.4 Card Target. The target that a card can affect is shown along the bottom of the card. Typical targets include:
- Self - the army's own army.
- Friendly - an army on the same side as the army.
- Opponent - an army on the opposing side to the army.
- Strike Unit - a strike unit, such as an aircraft unit or an artillery unit.
- Combat Unit - a ground unit along the combat axis.
15.2 Card Basics.
15.2.1 Decks. The cards are divided into two decks, with one deck for each side.
15.2.2 Starting Hand. The player for each army draws a fixed number of cards before the start of the game. The number of cards to start with is indicated on either the Deployment Order chart of the relevant scenario or the Reference Cards that come with the cards. Note that an Event Card must be played immediately when it is drawn. Draw an additional card to replace each played Event Card.
15.2.2.1 In the Historic Scenario Impregnable Fortress and Scenario 01 The Almost Naked Island, the Commonwealth players collectively draw 2 cards at the start of the game. The players then decide which army keeps each of the newly drawn cards. It is permissible for one of the armies to start the game with no cards. After this decision has been made, as noted in Rule 15.2.4, these cards cannot be transferred.
15.2.3 Drawing Cards. Each army draws a fixed number of cards at the end of its turn. Typically, each army draws 1 card. Note that an Event Card must be played immediately when it is drawn. Draw an additional card to replace each played Event Card.
15.2.3.1 In the Historic Scenario Impregnable Fortress and Scenario 01 The Almost Naked Island, the Commonwealth players collectively draw 1 card at the end of the British army's turn. The players then decide which army keeps the newly drawn card. After this decision has been made, as noted in Rule 15.2.4, the card cannot be transferred.
15.2.4 Transfer of Cards. Cards cannot be transferred between armies, even if they are on the same side.
15.2.5 Hand Limit. Each army can only hold a certain maximum number of cards at the end of its turn. This limit is checked after the drawing of new cards. The army's player may decide which card to discard to bring his or her hand down to the maximum allowed. The excess cards are discarded immediately. Note that an Event Card must be played immediately when it is drawn and that it is illegal to discard an Event Card.
15.2.6 Summary for Historic Scenario Impregnable Fortress and Scenario 01 The Almost Naked Island.
- Japanese: starts with 2 cards; draws 1 card per turn at the end of the British turn; maximum hand 3 cards.
- Australian: starts with 2 cards split between the British & Australian armies; draws 1 card per turn, split between the British & Australian armies; maximum hand 2 cards.
- British: maximum hand 2 cards.
15.3 Card Usage.
15.3.1 Rules Precedence. As stated in Rule B.1, if the rules on a card contradict the general rules of the game, then always follow the rules on the card. The purpose of the cards is to create special rules and special situations for players to adapt to.
15.3.2 When to Play. Each card type has specific rules governing its use in the game, such as the specific phases of each turn that it can be played and so forth. This is as follows:
| When to Play | Phase to Play | Notes |
|---|---|---|
| On your army's turn only | Play before any battle starts | Usually targets a sector |
| When your army is a combatant of a battle | Play at the start of a battle | Applies only to units involved in the battle & lasts for 1 battle only |
| On your army's turn only | Play after all battles have ended for your turn (although some sectors may remain contested) | |
| On your army's turn only | Must be played immediately when drawn; player then draws another card as a replacement | |
| When your army is the target of a card | Play whenever opponent plays a card or takes an action that can be negated | Negated card is discarded |
Another way to determine when a card can be played is as follows. Essentially, only one type of card can be played in each phase of an army's turn. Please refer to Doctrine 8 for the Order of Play.
| Phase | Cards that may be played |
|---|---|
| Planning Stage | Deployment Cards may be played. Negation Cards may be played. |
| Execution Stage | Combat Cards may be played. Negation Cards may be played. |
| Supply Stage | Supply Cards may be played. Negation Cards may be played. |
| Supply Stage, Draw Cards Phase | Event Cards must be played. Negation Cards may be played. |
15.3.3 Stacking & Duplicate Effects. All bonuses, penalties and effects stack unless otherwise indicated. There is no limit to the number of cards that can be played at any one time. The only exception is that cards that are exactly the same cannot be played on the same target at the same time.
Example: For the first card expansion used for the Historic Scenario Impregnable Fortress, two Coastal Searchlight cards cannot be played during the same battle, as they are exactly the same card and affect the same battle. However, it is permissible to play both a Coastal Searchlight card and an Effective Machine Gun Placement card at the same time. It is also permissible to play a Coastal Searchlight card on one battle and another Coastal Searchlight card on another battle, although both battles are happening in the same turn.
16. Doctrine: Victory Conditions
16.1 Levels of Victory.
16.1.1 Each army in each scenario will have its own set of victory conditions. These victory conditions are set out in the respective army's Deployment Order chart.
16.1.2 Three different levels of victory are usually shown on the Deployment Order chart. The greatest victory is a Total Victory, followed by a Decisive Victory, followed by a plain Victory. Not achieving minimally a Victory results in a Defeat.
16.2 Winning.
16.2.1 There are a variety of ways to determine the winning conditions of a game, based on the victory conditions described above. The most important point is that the armies decide and agree on the final winning conditions before the game starts. Some suggestions follow, using Historic Scenario Impregnable Fortress as the reference scenario:
- Simple Win: The Japanese army wins if it achieves any level of victory before the end of its last turn on the Night of 18 February 1942. Otherwise, the British & Australian armies both win.
- Standard Difficulty Win: The army to first achieve a Victory, wins. There may be more than one winning army, as two armies may achieve a Victory simultaneously.
- High Difficulty Win: The armies agree on a level of victory to achieve (e.g. Total Victory). The first army to achieve that level of victory wins. There may be more than one winning army, as two armies may achieve the agreed level of victory simultaneously. Conversely, all three armies may lose if none of them had achieved the agreed level of victory by the end of the last turn.
- Ranked Win: The game stops when the Japanese army achieves a level of victory or by the end of the last turn. At that point, the army with the highest level of victory wins. Do note that under the Historic Scenario Impregnable Fortress, the victory conditions are designed such that there is only one situation where a clear winner cannot be determined. In all other cases, only one army will have the highest level of victory.
16.3 Capturing Objectives Required for Victory.
16.3.1 Only Control Needed for Victory. A sector containing an objective only needs to be friendly-controlled to count towards victory. Whether the sector is contested or unsupplied has no bearing. Hence, merely cutting-off a sector or contesting a sector does not deprive the objective's defender of a victory nor does it contribute to the attacker's victory in any way.
16.3.2 Time Lag after Capture of Objectives. The victory conditions may necessitate the capture of various objectives. Players have two options in terms of when the game ends and a winner is determined. Again the most important point is that the players decide and agree on the final winning conditions before the game starts.
- Immediate Win Option: The game is over immediately upon the capture of the last required objective.
- Full Turn Confirmation Option: The game is not over upon the capture of the last required objective. Instead, the potential winner has to hold onto all the objectives needed for victory for one full turn (in other words, until his next turn), before a win is declared. This affords all his or her opponents the fair opportunity of one turn with which to reclaim at least one of the objectives and reverse the win.
Example: In the Historic Scenario Impregnable Fortress, the Japanese army captures the final required objective on the Night of 16 February 1942 during its own turn. It is now the potential winner, but has to hold onto all objectives until the start of its next turn on the Day of 17 February 1942. The Australian army and the British army now each have one turn to try to dislodge the Japanese forces from at least one of the objectives to prevent a Japanese win.
Field Operations Manual
Doctrine by Field Commander Soh Guo Zhong. If you have just assumed command as a field commander, then do get familiar with the following basic tactics.
General
- Do not forget that you can cross rivers, and that enemy troops can cross them too!
- Using Force Concentration or Flanking Manoeuvre at the right time can help greatly in a battle.
- Use weak units for Flanking Manoeuvre. Use strong units for Force Concentration.
- Try to use your aircraft or artillery to suppress or eliminate enemy vehicles before engaging them in combat.
- Due to the stacking limit, remember to leave some space in a non-threatened sector behind the frontline. This allows suppressed units to retreat to these sectors. Don't forget that if a suppressed unit has no legal space to retreat to, it is eliminated.
- Remember to move your mobile field artillery away from the frontline sectors. You do not want to lose them unnecessarily.
- Situation Cards make all the difference.
Japanese
- Always watch your supply. Do not attack unnecessarily. Of course, don't be too thrifty when you need them, especially on your first couple of turns.
- If you are being surrounded by Commonwealth forces, try waiting for your light tank reinforcements to arrive, as the Commonwealth players are usually too weak to launch an attack.
- Do not neglect your aircraft units. They will assist you greatly in your attempts to breakthrough the enemy lines, especially since they need no supplies. Try to time your attacks with your air units' availability.
- Aim for the Strategic Objectives, as you only need to capture 2 of them to win.
- Remember, you have more than one way of entering the island.
- Try to disperse the Commonwealth forces by putting troops in sectors adjacent to your real target.
British & Australian
- Work together! It is of the utmost importance that the British and Australians work together if they want to stop the Japanese assault.
- Australians can try counter-attacking if supply allows, due to the relatively stronger unit attack strength compared to the British.
- Try to deploy behind rivers or fortified lines to give you an added defence bonus.
- Use artillery bombardment to weaken the enemy troops. However, remember to keep enough supplies to fend off the main Japanese assault that usually occurs late in the game.
- Wear the Japanese down. You do not need to wipe out all their units, but you can delay or prevent them from capturing the Strategic Objectives before the game ends.
- Defend your supply depots. Denying the Japanese your supply will impede the final Japanese assault.
- Try to cut off the Japanese supply lines, rendering them unable to attack.
Hall of Fame & Hall of Shame
A blank play-record sheet included with the game. The printed page explains the WorldsForge playtest origin of the sheet and lists sample entry headings (e.g. "Most Supply Tokens Hoarded at End of Game", "Fastest Victory by Japanese", "Most Suppressed Units Eliminated in One Turn due to Bad Stacking") to record your own memorable moments. The origin story is omitted here as flavour text.