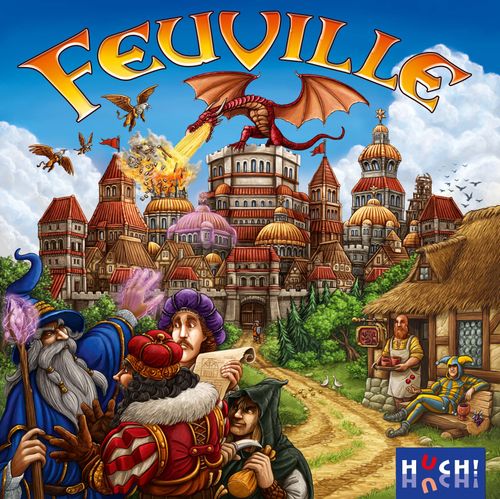
Feuville
Feuville Rulebook
Table of Contents
Table of Contents
Contents
- 1 Game board
- 90 Building tiles (Sky tiles, Tower tiles, Wall tiles)
- 30 Evaluation tiles "Royal Decree"
- 20 Grass tiles
- 18 Fairy Magic tiles
- 4 Starting tiles (with coat of arms)
- 4 Player boards
- 4 Player markers
- 2 Dice, 1 Grumpy gnome
- 1 Cup
Object of the game
Slip into the roles of the citizens of FEUVILLE, build the most prized townscapes and score with the Royal Decrees at the right time. The player who collects the most prestige points wins.
Set Up
Place the game board in the middle of the table. There should be 20 centimetres' space between each player and the game board. You will need this space to build your individual townscapes during the game. Sort the Building tiles according to Wall, Tower and Sky tiles.
The Sky tiles have three different backs: I, II and a third back. Sort out the 6 Sky tiles with the third back and place them face up in the corresponding row on the game board. Sort the remaining tiles according to the backs I and II, shuffle the individual stacks well and place them face down, stack I on top of stack II, then place the resulting stack of Sky tiles beside the game board.
Repeat this for the Tower tiles: Separate the backs I and II and make two stacks, placing them face down in front of you. Shuffle the individual stacks well and then place stack I on top of stack II. Place the resulting stack of Tower tiles face down beside the game board. Draw the top 6 Tower tiles and place them face up, from left to right, in the corresponding row on the game board.
Proceed with the Wall tiles, the same as for the Tower tiles and Sky tiles: Sort all the tiles according to their backs I and II, shuffle the individual stacks well and place them face down, stack I on top of stack II. Place the resulting stack of Wall tiles beside the game board. Draw the top 6 Wall tiles and place them face up, from left to right, in the corresponding row on the game board.
Shuffle all the Fairy Magic tiles face down and place them (still face down) at the top of the game board. Draw three Fairy Magic tiles and place them face up on the designated spaces.
Town Evaluation
Prepare the Royal Decrees: There is one Town Evaluation tile per player in the game. Return the remaining Town Evaluation tiles to the box. You don't need them in this game. Place the stack of Town Evaluation tiles face up on the corresponding space in the upper right section of the game board.
Shuffle the remaining Royal Decrees and place the stack face down beside the game board. Draw the top 7 tiles and return them to the box without looking at them. You don't need these in this game. Then draw the top 6 Royal Decrees and place them, from left to right, in the corresponding row on the game board.
Place the Grumpy Gnome figure on his space in the top right corner of the game board and have both the Grass tiles and the dice ready.
Now you must choose a starting player: Taking it in turns, each player rolls one die. The one with the highest number begins the game. In the case of a tie, those players must continue rolling their dice until the starting player has been found. The starting player takes the cup and places it before them (in the first game, you must fit the cup together from two individual pieces).
Each player now chooses a colour and takes, according to his player board, a Player marker, his Starting tile and the Grass tile with their Coat of Arms. Place the player board and the Grass tile with your Coat of Arms beside you and lay your Starting tiles before you. Make sure that there is sufficient space in front of you, since beginning with this Starting tile, each of you builds their own individual townscape during the game. Finally, each player places their Marker on the corresponding Starting square of the game board.
Game Procedure
A turn consists of the following steps:
- Roll both dice
- Choose your action
After you took your action, it's the next player's turn.
Roll both dice
When it's your turn, roll both dice and place them on the spaces of the corresponding persons.
The only exception: If you throw a double, you must place both dice on the Dragon spaces.
When a player throws a double, Dragomir the Dragon awakens in his cave on the mountain. Hissing wildly, he flies to Feuville to burn down everything that is not sufficiently protected. If both dice show the same number of pips, then a double has been thrown. The following throws are doubles: 1 1, 2 2, 3 3, 4 4, 5 5, or 6 6.
There is more information on Dragomir the Dragon at the end of this rule book.
Choose your action
Now, you have to decide how you want to use your throws. You make a separate decision for each die, you can either choose one of the Person's Actions OR use one of the Friendly Fairy's magic charms OR enlist help from the Grumpy Gnome.
For the persons, you can choose between three possible actions:
- Take a Building tile from this column OR
- Take a Royal Decree from this column OR
- Choose the Person's Skill and use it.
1. Taking a Building tile
Choose one of the Building tiles lying in the same column as your die (Wall, Tower or Sky), remove it from the display on the board and then either build it immediately into your townscape or place it on a free space on your player board.
A player board has spaces for a maximum of 2 Building tiles or 2 Royal Decrees or 1 Building tile and 1 Royal Decree. If you want to place a Building tile (or a Royal Decree) onto your player board and there are no more free spaces, you may remove one of the Building tiles or Royal Decrees (or a Royal Decree) already lying there and thus make space for the new tile. The old tile is withdrawn from the game.
Once a Building tile has been used for building, it may no longer be removed from the townscape or moved to a new position within the townscape. You may build with as many Building tiles (or score as many Royal Decrees) as you wish during your turn. It makes no difference whether you have taken them from the game board or from your own player board during your current turn. You may build with a tile from your player board, thus making space for a new one that you wish to place on the player board.
If there are no more Building tiles lying in one (or more) rows on the game board, you must replenish this row (or rows) immediately. The rows are always replenished from left to right. If a stack (Wall tiles, Tower tiles, Sky tiles) should be used up during the game, then this row can no longer be replenished. Play continues with the remaining tiles.
Laying rules for building FEUVILLE
- Columns must always be built from bottom to top. You cannot build "up in the air".
- A maximum of 3 Building tiles may be built on top of each other. Wall tiles always lie at the bottom; Tower tiles always lie in the middle and Sky tiles are always uppermost.
- There is no limit to the width of the building.
- There are no limits to the combinations: All Tower tiles can be combined with any Wall tiles. All Sky tiles can be combined with any Tower tiles.
- Burnt tiles are ruins. You cannot build on ruins (see Dragomir, the Dragon).
2. Receiving a Royal Decree
You choose the Royal Decree from the column on the board in which your die is lying and can either evaluate this immediately or put it onto a free space on your player board.
On your turn, you may evaluate as many Royal Decrees as you wish. It makes no difference whether, during your turn, you have taken these from the game board or whether they have come from your player board. You may also evaluate a Decree to make space on your player board for a new one. Only unburned Building tiles may be evaluated.
There are 3 types of Royal Decrees: Town districts, Status symbols and the Large-scale Town evaluations.
When you have evaluated Royal Decrees, place these on your player board. At the end of the game, the player with the least evaluated Royal Decrees receives additional points. After your turn, replenish the empty Royal Decree spaces.
Important for evaluation
On your turn, you may only evaluate Building tiles, which have already been built into your townscape and at the time of evaluation are not burnt. Building tiles, which are still lying on your player board, or Building tiles, which are burned, cannot be evaluated.
You may choose any type of Royal Decree more than once and evaluate it. For example, you may also carry out multiple evaluations with Mighty Griffins. Exception: You may take a Town Evaluation from the game board and carry it out once only!
Town districts and Large-scale Town Evaluations
Little Town District: You can score for a little Town District, if exactly 3 Building tiles lie on top of each other (1 complete column). When you evaluate a column, you receive 5 prestige points. Advance your Player marker 5 spaces along the scoring track. After the evaluation, you must place a Grass tile under the evaluated column. That shows that a Town District here has already been evaluated. If a Grass tile is already lying under the column, you cannot do any further evaluation for this Town District.
Large Town District: You can evaluate a large Town District, when you have erected 2 columns side by side; thus, when exactly 2 x 3 Building tiles are lying on top of and beside each other (1 complete double column). When you evaluate a large Town District, you receive 10 prestige points. Immediately advance your marker 10 spaces on the scoring track. After the evaluation, you must place a Grass tile under both evaluated columns. That shows that Town Districts here have already been evaluated. If a Grass tile is already lying under a column, you cannot do any further evaluation for this Town District.
Town Evaluation: You can carry out a Large-scale Town Evaluation, if you have a complete Townscape in your display. A complete Townscape comprises at least: 1 complete left corner tower, 1 complete right corner tower and 1 town gate between the two corner towers. Any number of Building tiles is allowed between the two towers (including corner towers which have been started but which have not been completed or further town gates). All (Wall and Tower) tiles lying in between are included in the evaluation.
Important: The town wall must be continuous and run from corner tower to corner tower without interruption. The row of towers may have gaps in it. The Sky is not included in the evaluation.
When you carry out a Town Evaluation, place one die (number of pips is irrelevant) on the corresponding space and take one Town Evaluation tile. You receive 2 prestige points for each Wall and Tower tile included.
After doing the Town Evaluation, you must place the Grass tile with your Coat of Arms under a column of your townscape to show that you have already evaluated your townscape. If Grass tiles are already lying under all the columns of your townscape, then you cannot carry out this evaluation. You may only carry out your Town Evaluation once in the game. Thus, you may only take the Royal Decree "Town Evaluation" from the game board once during the game! (See example of a Town Evaluation on page 23 of the rulebook: a display with 8 Wall and Tower tiles included in the townscape scores 8 tiles x 2 points = 16 prestige points.)
With the evaluations little Town District, large Town District or Town Evaluation, you must always have sufficient space below the corresponding columns for the required Grass tiles. Otherwise, you cannot carry out these evaluations! You may remove unused Royal Decrees from your player board to make space for new tiles. Unused tiles are withdrawn from the game.
Status symbols
- The Town Guard: Each town guard in your own display counts 1, 2 or 3 prestige points.
- The Golden Star: Each star in your own display counts 1, 2 or 3 prestige points.
- The Red Flag: Each flag in your own display counts 1, 2 or 3 prestige points.
- The Mighty Griffin: Each griffin in your own display counts 1, 2 or 3 prestige points.
When you evaluate the status symbols, you must first add together all the units of that status symbol. Multiply the sum by the number of points of the Royal Decree. The result is the number of prestige points that you gain. Advance your marker the corresponding number of spaces along the scoring track.
Example: You have chosen the Royal Decree "The Mighty Griffin (x3)". You currently have 5 Mighty Griffins in your own display. Thus, you receive 3 x 5 = 15 prestige points, and immediately advance this number along your scoring track.
Special evaluations
- Splendid View: This Royal Decree evaluates all status symbols in a 2 x 2 grid of your own display. Either 2 Wall tiles and the two overlying Tower tiles OR 2 Tower tiles and the 2 overlying Sky tiles are evaluated. Each status symbol (Town Guard, Golden Star, Red Flag and Mighty Griffin) in this 2 x 2 grid enhances the splendid view and scores 1 prestige point.
- At Your Own Discretion: The King allows you to decide which status symbol you wish to evaluate. Decide between the Town guard OR the Red Flag OR the Golden Star. Each unit of the chosen status symbol in your own display scores 3 prestige points.
3. Choosing and using a person's skill
If you are unable to or don't want to remove any Building tiles or Royal Decrees from the corresponding column on the game board, then you may also decide to use the skill of the corresponding person. Advance your die to this person's flag and then make use of their skill.
Persons in FEUVILLE
Travelling Entertainer (1): With a 1, the Travelling Entertainer wants to play with you a bit: Take the die lying near the travelling entertainer, roll it as often as you like and add up the pips. You may roll the die as often as you wish. You may also stop whenever you wish. Whatever you do, don't overstep the sum of 10! If so, you'll go empty-handed and only the other players receive points! If the sum of your die rolls is under 10, you may advance your marker the corresponding number of spaces along the scoring track. Your fellow players can cheer you along, since they receive the difference to 10 that you are missing as points.
Example: You roll a 4, then a 3 and then stop. Your sum is 7. Advance 7 spaces along the scoring track. Your fellow players receive the difference between the 7 that you rolled and 10. Thus, 10 – 7 = 3. All your fellow players advance 3 spaces.
If the sum is exactly 10, then you receive 10 points and all the others go empty-handed. If the sum of your die rolls is 11 or over, then you receive nothing and your fellow players, once again, receive the difference to 10.
Example: You roll 4 + 4 + 5 = 13 and get nothing! The others get the difference to 10. Thus, 13 – 10 = 3.
Thief (2): With a 2, the Thief is about in Feuville: He is stealing the good tiles from other people. No unbuilt Wall, Tower or Sky tiles or Royal Decrees are safe from him. If you choose the Thief, you may remove one tile (Building tile or Royal Decree, but no Fairy Magic!) from the player board of a fellow player and either use it immediately or place it on your own player board, if there's sufficient space. If a fellow player has a theft protection lying on a tile, then this tile is safe from the thief (see Fairy Magic tile: Theft Protection).
Publican (3): With a 3, the Publican is in the best of moods and makes a donation: If you use the Publican's skill, there are "Free tiles for all!". You are the first one to choose one of the Building tiles from the board (Wall, Tower or Sky). Then, play moving in a clockwise direction, your fellow players take turns in choosing. Each player may take a Building tile (Wall, Tower or Sky), but must use it immediately and may not place it on his player board. Unfortunately, fellow players who are unable to build with this tile immediately go empty-handed. And, because you were so kind and donated tiles for all, you may choose and take a second Building tile (Wall, Tower or Sky) at the end of the donation round. You may either use your Building tile immediately or place it on your player board. If a row is completely cleared during the donation round, then you must replenish it immediately. Only then, can you continue with the donation round.
Architect (4): With a 4, the architect becomes active: She likes being able to draw from unlimited sources, to make the town as magnificent as possible. If you use the architect's skills, you must first replenish the complete display of the Building tiles (Wall, Tower and Sky) on the game board. After that, you may choose any 1 Building tile (Wall, Tower and Sky) from the game board.
Town Mayor (5): With a 5, the town mayor enters the game: He has good connections with the King and can pick and choose the Royal Decrees. If you use the Town Mayor's skills, you may choose any one Royal Decree from the display on the game board. You can either evaluate it immediately or first place it on your player board (providing there is sufficient space there or you make space). After that, replenish the Royal Decrees (as known).
Magician (6): With a 6, there is powerful magic at work: Unfortunately, the Magician cannot protect you from the attacks of Dragomir the dragon, but with magic, he can restore the burnt down town districts. If you choose the magician's skills, you may turn up to two burnt down town districts (1 or 2 burnt columns) back onto their active sides again. Additionally, you may take one Fairy Magic tile from the open board display and use this immediately or place it on your own player board. If none of your town districts have been burnt down, you may still take one Fairy Magic tile from the open board display (see Fairy Magic tile).
Powerful Beings in FEUVILLE
The friendly Fairy – small but powerful!
After you have rolled the die, you can decide to enlist the help of the friendly Fairy. To do this, place one die (number of pips is irrelevant) on the corresponding Fairy space and choose one of the Fairy Magic tiles lying openly in the play area. You may either evaluate the magic tile immediately (prestige points) or place it on your player board and use it at a suitable time later.
Place used Fairy Magic tiles face down next to the game board and shuffle them each time with those already lying there face down. As soon as a Fairy Magic tile has been removed from the game board, replenish the empty space immediately.
A player board has spaces for a maximum of 2 Fairy Magic tiles. If you want to place a Fairy Magic tile onto your player board and there are no more free spaces, you may remove one of the Fairy Magic tiles already lying there and thus make space for the new tile. The old tile is discarded and put face down with the other charms.
If you decide on using a Fairy Magic tile on your turn and take a magic charm, you must immediately replenish the open display. Discard used magic charms and put them face down with the other charms. Then shuffle all the charms well. You may only ever use one die for the Friendly Fairy. Use the other die as described above, and place it with the corresponding person, from whom you can either take Building tiles or Royal Decrees or whose skill you may use.
The grumpy Gnome – the Master of Imitation
After you have rolled the die, you can use your throw to activate the Gnome. To do so, place both dice (number of pips is irrelevant) on the corresponding Gnome spaces. Take the Gnome and place him on the flag of one of the 6 persons. The Gnome immediately slips into the role of this person and imitates them perfectly.
Now, you can either choose one Building tile from this column OR remove the Royal Decree from the column OR use this person's skill. After your turn, you must return the Gnome to his space.
The Fairy Magic
Prestige points: You must evaluate this magic charm immediately. When you remove one of these Fairy Magic tiles from the board display, immediately advance your marker the corresponding number of spaces along the scoring track. Afterwards, discard the Fairy Magic tile.
Great Selection: You can use this magic charm as soon as a row of Building tiles (Wall, Tower or Sky) needs to be replenished OR if any player (you or a fellow player) uses the architect's skills. As soon as you have replenished at least one row, you can play out the magic charm and may take any Building tile (Wall, Tower or Sky). If more than one player should play out this magic charm, the charms are played out in the regular sequence of play. The active player, or the one sitting nearest to the active player, begins. If one (or more) player(s) should play out the charm while the active player is using the architect's skills, then the magic charm(s) is (are) played out first. Following that, and only then, it is the architect's turn and they may take one Building tile.
You may place this magic charm (face down) on your player board until you need to use it. After it has been used, discard the charm.
Theft Protection: You can use this magic charm to protect a Building tile (Wall, Tower or Sky) against theft. To do so, place this charm face up on an unused Building tile or on a Royal Decree on your player board. As long as this charm is lying there, this tile is protected against theft. As soon as you build with the protected tile or evaluate the Decree, the theft protection becomes invalid. You may not transfer the magic charm from one tile on your player board to another tile during the game.
Fire Protection: You have one single opportunity to protect your town against the fire of Dragomir the Dragon. As soon as any player (you or a fellow player) throws a double and you do not have sufficient fire protection, you may play out this magic charm. This time, your town is safe from Dragomir the Dragon. The dragon flies past your town. Until you need it, you may place this magic charm (face down) on your player board. Discard the charm once you have used it.
Dragomir the Dragon
When a player throws a double, Dragomir the Dragon awakens in his cave on the mountain. Hissing wildly, he flies to Feuville to burn down everything that is not sufficiently protected. If both dice show the same number of pips, then a double has been thrown. The following throws are doubles: 1 1, 2 2, 3 3, 4 4, 5 5, or 6 6. If you throw a double on your turn, you must place both dice on the Dragon spaces. Now, all players are affected by Dragomir's fiery attack.
All players count the number of columns in their townscape. Then, each player counts the number of clouds drifting across the town in their player's display. Ideally, the number of clouds is equal to or larger than the number of columns. In that case, the fire has no effect on your town. The mighty rain clouds prevent all fires, it rains and your town remains untouched (see Example A).
However, if there should be fewer clouds than columns in your display, your town doesn't have sufficient protection and some parts of your town burn down (see Example B). The columns burn down, until the number of clouds in your display matches the number of columns. Surplus columns must be turned on to their backs (the burnt side). This affects complete columns (Wall, Tower, Sky) or semi-finished columns where not all 3 tiles are overlying. You decide which columns burn down.
When you throw a double, you may roll the dice again and take your regular turn.
Example A: The town is protected. Nothing burns down when the dragon attacks.
Example B: Display with insufficient clouds. 2 columns burn down completely. The players themselves decide which columns burn down.
What if there's a fire?
At a suitable (unburnt) place in your town, build in a Sky tile with clouds. As soon as you have built in some Sky tiles and have more clouds than columns, you may turn back the corresponding number of columns, until the number of clouds matches the number of unburnt columns again.
Hint: You can protect your town by always integrating sufficient clouds and by never having more columns than clouds lying in your display. Alternatively, you can get fire protection from the friendly Fairy. This will give you once-only protection from Dragomir the Dragon.
Hint: Some Sky tiles depict several clouds. So with one Sky tile you can often protect more than one column at a time.
The Starting tiles are the oldest part of your town. They consist of massive rock and never burn down. That can be a great advantage at the beginning of the game, when you still only have a few Sky tiles.
Hint: Columns, which include clouds, cannot burn down. Turned over (i.e. burnt) Building tiles are ruins. You cannot build on ruins. Before you continue building, you must turn burnt Wall and Tower tiles back on to their unburnt side. Turned over (i.e. burnt) Building tiles are ruins and cannot be evaluated. Before you activate an evaluation of a Royal Decree for these parts of your town, you must turn the corresponding tiles back onto their unburnt side.
Player A has sufficient clouds to protect his town.
You may continue to build in the unburnt areas of your town or extend your town in width. You can evaluate Royal Decrees at any time. But the burnt tiles cannot be included in your score.
How can you turn back the upturned (burnt down) tiles again?
Throw a 6, choose the Magician's action and turn up to 2 burnt columns back onto their unburnt front side (and you may even take a Fairy Magic tile). Or you use both dice for the grumpy Gnome: use him to imitate the magician with his skill, turn up to 2 burnt columns back onto their unburnt side (and you may even take a Fairy Magic tile).
End of the Game
The end of the game sets in as soon as you can no longer replenish the Royal Decrees on the game board. Then continue that round to the end, so that all players have the same number of turns. If the starting player cannot reveal any more Royal Decrees and thus cannot close the gap, the game ends immediately.
At the end of the game, add up your evaluated Royal Decrees. Thanks to the mercy of the King, the player with the fewest Royal Decrees receives another 7 points, which he advances along his scoring track. Unbuilt Building tiles and non-evaluated Royal Decrees on the player board yield no points.
The player with the most prestige points wins the game and becomes an honorary citizen of Feuville!