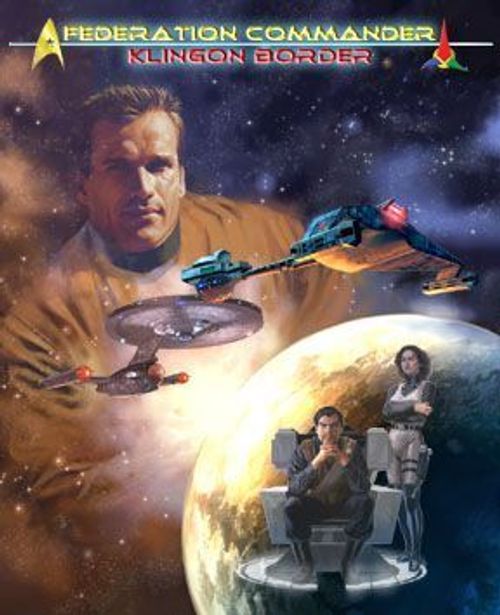
Federation Commander: Klingon Border
Federation Commander: Klingon Border Rulebook
Table of Contents
Table of Contents
- Chapter 1: Basic Rules
- Chapter 2: Movement
- Chapter 3: Combat
- Chapter 4: Weapons
- Chapter 5: Systems
- Chapter 6: Terrain
- Chapter 7: Ships
- Chapter 8: Scenarios
- Ship Diagrams and Counters (Component Note)
- Appendix: Tabletop (Miniatures) Rules
Chapter 1: Basic Rules
(1A) How the Game Is Organized
(1A1) Rules
The rules are divided into Chapters based on subject matter. Chapter 2 is about movement, while Chapter 3 is about combat and Chapter 4 is about weapons. Within each chapter, rules are outlined as in (3D2a) so players can quickly find any rule they want. The first (number) digit is the chapter, the second (letter) is the rule (about some specific weapon or topic), the third (number) is the "case" (a subdivision of the rule), and the fourth (lowercase letter) is the sub-case (the lowest and most specific level).
(1A2) Ships
Federation Commander: First Missions includes two different ships, the Federation heavy cruiser Constellation and the Klingon D7 battlecruiser Antagonist. Each is shown on a Ship card which defines the abilities and structure of the ship and provides key data needed during the game. These ship cards are on page 30 of this book and you should print a few copies of that page (one for each game). After your first few games, you might want to play the game using two or three ships on each side, and each ship in each game will need its own diagram. The diagrams are in color but will print well enough in black & white.
(1A3) Map
The map is printed on page 31, and you will need at least four (preferably six) copies of this page to form a "battle area". You could tape the panels together into a single sheet or you could leave them separate so that you can "leapfrog" unused sections ahead of moving ships in the battle turns into a running gunfight. (The map panels in Federation Commander: Klingon Border are mounted on heavy cardboard). The map is printed with hexagons (called "hexes" in these rules) to regularize the position and movement of the ships. All ships and other units and markers must be placed inside a hexagon. All distances are counted (in hexes) as the shortest path between the starting and ending hexagons. All hexes represent an area 10,000 kilometers across.
Note: Federation Commander: Klingon Border includes equipment for "hexless" combat which many veteran "wargamers" prefer (particularly in the UK). This book does not refer to these items since most new gamers will find hexes easier to work with. If you wish to use (or are already comfortable with) "hexless" combat games, see the rules and diagrams starting on page 32.
(1A4) Counters
Playing pieces in Federation Commander: Klingon Border are full-color die-cut "counters"; for Federation Commander: First Missions you can print out the paper counters provided on page 29. (You can glue them on cardboard so they don't move if anybody sneezes.) Markers (a sub-type of counters) include shuttlecraft, drones (missiles), energy tokens, and markers for the point that a ship last maneuvered (see the rules on movement for how those work).
In the upper left is the "class" designation, such as CA for heavy cruiser. In the lower left is the "unit" designation number (for example, the first of three heavy cruisers). In the upper right is the "empire designator" (F = Federation, K = Klingon).
(1C) Fleet Scale Rules
Federation Commander: Klingon Border comes in two scales, Fleet Scale (seen in First Missions) and Squadron Scale (where ships have twice as many boxes and pay twice as much for movement). First Missions is written entirely in Fleet Scale. When you get Federation Commander: Klingon Border and find Squadron Scale, just remember that we told you there is such a thing and that it works a little differently.
(1D) Energy Allocation
The concept of Energy Allocation is critical to the game system, and to starship combat tactics. Almost everything you do uses power, and your ship only has so much of it. If you run out of power before the end of the turn, your ship won't be able to do much to stop whatever the enemy does (to you!) during the later parts of the turn.
(1D1) Energy Points, Energy Tokens
For purposes of the game, power is defined for each ship by a number of points. For example, the Federation heavy cruiser has 19 such points of power (or Energy Tokens) available each turn. The 16 warp engine boxes, 2 impulse engine boxes, and 1 reactor box each produce one point of power. (Batteries may provide another two points of power saved from previous turns.) Note that battery boxes are shaded a darker blue on the ship diagrams to make battery power easy to find in a hurry.
When in command of a starship, you begin each turn by checking the Ship card (7A) to see if any of the power boxes have been disabled. If so, they do not produce energy until you repair them. Otherwise, you get one Energy Token for each point of power (i.e., for each undestroyed power box) that you have. [For all practical purposes, the terms "Energy Token" and "point of power" and "point of energy" mean exactly the same thing.] You might have some tokens left over from previous turns, representing your batteries, but we'll explain that at the end of the turn. During the turn, some of your power systems might be disabled by enemy weapons, but as they already produced their power at the start of the turn, this has no effect until the start of the next turn.
(1D2) Before the Turn...
As the turn begins, you have some decisions to make and must start spending the Energy Tokens you have.
First you must set your Baseline Speed. You can select either: 0, 8, 16, 24, or "stopped" (2C7). This is the number of hexes of movement you will move during the turn. You pay the energy cost for movement listed on your ship card, for example, one-half point per hex for the Federation heavy cruiser or the Klingon D7. You can increase your speed later (at a cost) or reduce it (when you want to), but it is important to select your starting speed at the start of each turn. Your speed on any given turn is not dependant on your previous speed.
As your ship moves during the Turn [see movement rules in Chapter 2], you don't have to expend power since you already paid for it. You can increase your speed by spending more energy tokens; this is explained in the rules on movement.
Most weapons are given power at the time they are fired (during the turn). This is explained in the weapons rules. However, certain weapons take more than one turn to arm. To arm such weapons (such as photon torpedoes, which take two turns to arm), you must spend power before the turn begins to Pre-Load (4C2) those weapons. For example, it costs two energy tokens to Pre-Load a photon torpedo. If you buy a Pre-Load on a given turn, you won't be able to fire that weapon on THAT turn, but will be able to fire it on the next turn IF you provide the remaining energy.
(1D3) During the Turn...
As you go through the eight impulses of the turn, you can spend Energy Tokens on all kinds of things.
If you want to fire a phaser, just pay one token (energy point) for a phaser-1 or a phaser-2, or a half-token (half-point) for a phaser-3. If you want to fire a disruptor, pay two energy tokens.
Certain advanced rules in Federation Commander Klingon Border also use power, including Tractor Beams, Transporters, High Energy Turns, Evasive Maneuvers, and others.
(1D4) At the End of the Turn
If you have Energy Tokens remaining at the end of the turn, count the number of un-disabled (i.e., working) Batteries you have. You may keep that many of the remaining tokens (carrying them over to the next turn). Any tokens in excess of what you can save in the batteries are lost and cannot be used.
(1D5) Alternatives to Energy Tokens
You can use many different methods to keep track of your energy. You can, for example, use pennies or glass beads or paper clips or poker chips or any other type of token. (Klingon Border provides die-cut tokens for this.) You can also keep your energy on scratch paper as a running (and steadily dwindling) total.
Another alternative is provided on each ship diagram, in that there is a column of numbers down the right side of the diagram. You can use a single token to record your current energy state by laying the Ship Diagram on the table and just moving the token up and down. Another alternative is to use a paper clip and have it slide up and down the row of numbers on the right side of the Ship Diagram, or use a Post-It arrow and keep repositioning it. All ships also have a fractional power track on the bottom to record any fractional powers of power. [Note, the ship cards in Klingon Border are laminated for use with wipe-off markers, something not practical in a PDF download.]
(1E) Sequence of Play
Each battle is fought as a series of turns. A given battle or scenario (Chapter 8) might have an unlimited number of turns, or might have a specific number of turns to accomplish a mission. Events during each turn take place in a specific order given below. You can skip steps, but you cannot return to an earlier step. Each turn consists of the following steps:
(1E1) Energy Allocation
See the rules on this subject (1D). In summary, count the amount of energy your ship has, and obtain energy tokens for each point. (During the first turn of a scenario, the ship has additional energy tokens equal to the number of batteries on the ship, representing power stored in the batteries.)
Pick and pay for your baseline speed (2B1b) secretly and simultaneously with other players. Pay for any weapon pre-loading, such as Photon Torpedoes (4C2). Pay for any Shield Regeneration (3C7) at the rate of two energy tokens for each shield box repaired.
(1E2) Impulse Procedure
The Turn is divided into eight Impulses. During each impulse, ships will move up to four times and may fire weapons. In Klingon Border, they may also conduct other activities.
Impulse #1
(1E2a) Speed Change Phase: Pay energy tokens if you want to increase your speed for this impulse in accordance with the rules on Movement (2B2); deceleration is paid in each sub-pulse.
(1E2b) Movement Phase: All ships are moved in accordance with the rules on Movement, the Order of Precedence (2A5), and their corresponding speed. Ships may be moving zero, one, two, or three hexes per Impulse. This step involves four Movement Sub-Pulses. During each sub-pulse, units will move but no other activity takes place.
(1E2c) Defensive Fire Phase: This is used in Klingon Border to defend against seeking weapons. Since there are no seeking weapons in use during your First Missions, we can skip this step.
(1E2d) Offensive Direct-Fire Phase: Ships can fire at each other in accordance with the combat rules (3A1). Any resulting damage is resolved; see Damage Allocation (3D). All fire is simultaneous so any weapon destroyed during this Phase can still be fired during this phase (assuming it was able to fire otherwise).
During this Phase, each player must resolve all of the fire of one ship before moving to the next ship. Also, the player controlling a given ship must engage his targets one at a time, declaring in each case all of the weapons being fired at that target before rolling the die for any of them. He may assign two or more weapons to fire at a single target, but if that target is destroyed by one weapon, any others still fire (using energy and causing nothing).
If a weapon is fired, mark that letter or number on the "weapons used" track on the Ship Diagram.
(1E2e) Other Functions Phase: This is used in Klingon Border to operate tractors, transporters, labs, and other items. Since these are not in use during your First Missions, we can skip this step.
(1E2f) Launch Phase: This is used in Klingon Border to launch seeking weapons. Since these are not in use during your First Missions, we can skip this step.
Impulse #2: Same as Impulse #1. Impulse #3: Same as Impulse #1. Impulse #4: Same as Impulse #1. Impulse #5: Same as Impulse #1. Impulse #6: Same as Impulse #1. Impulse #7: Same as Impulse #1. Impulse #8: Same as Impulse #1.
(1E3) End of Turn Procedure
(1E3a) Power Phase: At the end of the turn, ships may transfer any unexpended power to their batteries (up to the limits of the battery capacity); any excess unused power is lost.
(1E3b) Weapons Records: Erase any marked letters on the "weapons used" track so those weapons can be used again on the next turn. This procedure is used because each weapon can only be used once per turn.
(1E3c) Marine Combat Phase: See Federation Commander: Klingon Border.
(1E3d) Repair Phase: Determine the number of available repair points, and use them to repair damaged systems as per the rules (5G2). You may also transfer five boxes (3C3) from any one shield to any adjacent shield (but this can only replace disabled boxes, not increase the original strength of the shield).
(1E3e) Undocking: See Federation Commander: Klingon Border.
(1E4) Simultaneous Decision Rule
There are many points in the Sequence of Play at which a player may take an action (for example, fire a phaser or change speed). These decisions are made openly, and players may make a similar decision based on what other players did.
If any player said he had decided not to take the relevant action for that point in the Sequence of Play, and another player decided to take the specified action, players who previously declined the option could reverse their decision and accept it. A player having announced that he will take the option, however, cannot reverse that decision.
For example, during the Offensive Fire Step, two players in a tense battle each wonder if the other will fire now or wait for a better opportunity. Either player could announce he is firing, and the other player could then decide to fire at the same time. Either player could announce he is not firing, then reverse his decision if his opponent said he was firing. But if both (all) players announce they are not firing, the Sequence of Play (1E) moves on and neither player can go back to change their mind.
Components List
This PDF rulebook which includes a map panel, counters, and other items. The boxed game includes six mounted map panels, sixteen full color double-sided laminated ship cards, dice, reference cards (full color laminated), counters in two sizes (one inch and half-inch), charts for the tabletop rules, paperclips, and a wipe-off marker.
Playtesting
Battlegroup Alpha (prototype test): Phillip Kensington, Ralph Angers, Peter Belton, Carl Kreuger, Anthony Garza. Battlegroup Beta (prototype test): Robert Kelly, Sally Fox, Teddy Freize, Lance Heldon, Frederick Santini. Battle Group Amarillo: Steve Petrick, Ken Burnside, Mike Sparks. Battle Laboratory #1 (Colorado): Scott Moellmer, Andy Vancil, Craig McRae, Dan Hoffacker, Dave Miller, Ken Howell, Phoenix T'kar, Robert Knoke, Pat Moellmer, Jennifer Moellmer, Michael Moellmer, Seth Iniguez. Wessex Wargames Society: Kelvin Bampfield, Ian Gould, Mark Rowsell, John Drake, Mike Earwaker. Battlegroup Murfreesboro: Tony L Thomas, Mark Thomas, Joe Butler, Ken Thomas, Mike Curtis, Scott Ritenour, Merl DeWitt, Michael Novean. Boy Scout Troop 106 (Tennessee): Mark Thomas, B J Leonard, Chris Pegg, Robbie Hunt, Cody May, Grant Caldwell, Nick Brewer, Kyle Styer, Joe Flarety, Rob Wesley, Bryan Stringfield, Killian Deats, and Andrew Potts. Battlegroup Hamster: Mark D. Weber, Shannon C. Weber, Ian B. Weber. Battlegroup Texas: Mike West, Jeremy West, Jared West.
Publisher's Information
FEDERATION COMMANDER: KLINGON BORDER was created and published by:
AMARILLO DESIGN BUREAU, INC. P.O. Box 8759 Amarillo, TX 79114 Phone: 806-351-1950 Fax: 806-351-2585 Email (buy games): [email protected] Email (questions): [email protected] Email (support): [email protected] Web Site: www.starfleetgames.com
All mail correspondence requires a stamped self-addressed envelope or international reply coupon. Email is generally more efficient.
Designer's Notes
It all began at the Game Manufacturer's Association Trade Show in 2002. Retailer after retailer told us "your Star Fleet Battles game is the greatest space game of all time, but it is too complicated for the modern market and your production values are not what the modern customer expects to find in a first-class game". They recommended that we simply republish the earliest and smallest version of Star Fleet Battles, that being the venerable "pocket edition" of 1979. We felt that their idea for a new faster-playing space combat game was a good one, but that if we were going to do it, we should design an entirely new game using cleaner mechanics to portray the same space battles.
As the design of Federation Commander evolved over several years, we tried a number of different game engines and systems (Star Fleet Squadrons, Star Fleet Action, and others) until finally selecting the one you see here. We needed to keep the ability to move 20-30 hexes per turn because maneuver was always the heart of space combat tactics. Some of the earlier incarnations had a maximum speed of eight hexes, and ships lacked the speed to do anything other than head straight for the enemy and fire. By combining 32 movement pulses with only 8 firing opportunities, we found the best balance.
Other design elements came up over the years. The ship diagrams were simplified, done in color and with impressive graphics, and then laminated so that you could "play it right out of the box" every time without having to find a photo copier.
Everything had to be clearer, faster, and cleaner. We eliminated "housekeeping" energy and crew casualties, simplified the damage allocation rules, limited tractors to range 1, and got rid of no end of clutter and gritty rules.
Many of the known rules problems with Star Fleet Battles, such as retrograde, bricks, starcastling, and superstack, were eliminated in Federation Commander. The success of our design was proven when Star Fleet Battles players began trying to reverse engineer Federation Commander rules into the older game.
Copyright and Licensing
FEDERATION COMMANDER: FIRST MISSIONS and all contents thereof are copyright © 2006 Amarillo Design Bureau, Inc. All rights are reserved under the Pan-American, Berne, and International Copyright Conventions.
No material which is based on, for use with, incorporates elements of, or is derived from Federation Commander, Star Fleet Battles, Federation & Empire, Star Fleet Missions, Prime Directive, Star Fleet Battle Force, or any other part of the Star Fleet Universe can be published by any party without the advanced written permission of ADB, Inc. Any such publication would by definition be a "derivative work" requiring our consent.
The Star Fleet Universe is published under license from Franz Joseph Designs, authors of the Star Fleet Technical Manual.
Elements of the Star Fleet Universe are the property of Paramount Pictures Corporation and are used with their permission.
Chapter 2: Movement
(2A) General Movement Rules
(2A1) Baseline Speed
Starships move by expending power and will always have a Baseline Speed. Starships can vary their speed by expending different amounts of power each turn. The cruisers in First missions can spend either 0, 4, 8, or 12 Energy Tokens during Energy Allocation to produce a baseline speed of 0, 8, 16, or 24 respectively. Ships can then expend additional energy (half a point) during each Impulse to increase their speed by one hex for that Impulse only (2B2). Ships which have taken combat damage may not be able to move at their full speed in later turns. See (2C7) for "stopped".
(2A2) Hexes
The map is divided into hexagons which are known to gamers as "hexes". This has nothing to do with witchcraft. Each hex is 10,000 km across, and all speed is expressed in hexes per turn.
(2A3) Movement Procedure
Units move from hex to hex on the map board and cannot skip hexes. A unit moves a maximum of one hex per Movement Sub-Pulse (1E2b) and will probably not move during every Movement Sub-Pulse. Units may (within the limits of their Turn Mode and Speed) move anywhere on the map; movement is not plotted ahead of time.
(2A3a) Proportional Movement: The way the movement system works, if one ship is moving at speed 16, and another at speed 8, the faster ship will move twice as often as the slower ship. All of the ships are moving at the same time, but at different rates of speed. (In some other games, one player moves all of his ships after which another player moves all of his. This is not the case here.)
(2A3b) Direction: Hex #27 on the mapsheet is surrounded by six numbered arrows. These are used for various functions, such as determining direction.
(2A3c) Forward Movement: Units move in the direction they are facing [unless moving in Reverse, see (2C5)]. Units turn to face a new hex before actual movement, but the ship will always enter the hex it is facing, except as follows: movement in reverse [(2B1c) in which case the unit enters the hex opposite the direction it is facing], and sideslips (2C4).
(2A3d) Maximum Speed: The maximum allowable speed in the game is one hex per Movement Sub-Pulse. This requires a baseline speed of 24 plus the expenditure of one point per impulse for acceleration (2B2a), resulting in 32 hexes moved.
(2A3e) Stacking: Players are permitted to freely stack counters within a given hex. There is no limit as to the number of ships and other units that can occupy a hex. Each counter is still treated independently for all purposes. Each weapon fired (or moving) into a hex is directed at ONE (and ONLY one) counter within that hex. However, see rule (4A3) which limits the number of ships that can fire out of such a stack in any given direction.
(2A3f) Momentum: There is no momentum in the movement seen in Federation Commander, and ships do not coast. They must use power to maintain the warp bubbles used. (Coasting is, technically possible, at a speed of a couple of hundred turns per hex.)
(2A3g) Ramming: There is no provision in Federation Commander for ramming or colliding with another unit, because the warp fields will simply slide past each other.
(2A4) Facing
Each unit must always be within a single hex and must always be "faced" directly towards one of the six adjacent hexes.
A unit may be faced in any of six directions. These directions are designated by the letters "A" through "F." Note hex #62 on the mapsheet. Arranged around this hex are six letters "A" through "F." This is used to designate direction. Units moving in "direction A" (which might arbitrarily be called "north") move in the direction they would move in IF they were in hex #62 and were facing toward hex #61 (the hex with the "A" written in it); thus a unit in hex 0608 facing in direction A faces hex 0607, while a unit in 0207 facing in direction C faces hex 0308.
The terms "facing" and "heading" are used interchangeably in these rules.
(2A5) Order of Precedence
When two ships move at the same time, the slower ship moves first. If the speeds are equal, the unit with a better turn mode category moves last. If speed and turn mode category is the same, both players write down their movement for that sub-pulse only and expose these written orders simultaneously, then execute them simultaneously.
If two units have the same baseline speed, and one has accelerated during that impulse, it is faster (for that impulse) than a unit with the same baseline speed but slower than a unit with the next higher baseline speed. If one has decelerated (during that impulse), it is slower (for the remainder of that impulse) than a unit with the same baseline speed, but faster than a unit with a lower baseline speed.
(2A6) Performing Movement
Each unit will move one hex, and only one hex, during each Movement Sub-Pulse in which movement is called for by the IMPULSE CHART below:
| Baseline Speed | Pulse Speed | Sub-Pulse 1 | Sub-Pulse 2 | Sub-Pulse 3 | Sub-Pulse 4 |
|---|---|---|---|---|---|
| 0 | 0 | — | — | — | — |
| 8 | 1 | — | — | — | X |
| 16 | 2 | — | X | — | X |
| 24 | 3 | — | X | X | X |
| — |
If a player allocates energy for 16 hexes of movement, his ship will move one hex in each of 16 Movement Sub-Pulses (two in each Impulse, as per the Chart above, #2 and #4) during that turn. The movement cost of all ships is listed on their Ship Diagram.
If no units are scheduled to move, that Movement Sub-Pulse can be skipped. (In most Impulses on the Klingon Border, nobody will move in the first Sub-Pulse and it can simply be ignored.)
(2B) Energy Cost of Movement
(2B1) Basic Terms
(2B1a) Movement Points: Movement is expressed in movement points (also known as "movement factors" or "hexes of movement"). Movement points are purchased by expending energy. Each ship buys movement points at a specified rate, based on its size and efficiency. For the two ships in First Missions, movement always costs 1/2 energy point per hex moved (whether as acceleration or pre-paid baseline speed).
(2B1b) Baseline Speed: During the Energy Allocation Phase, the owner of each ship pays for its Baseline Speed, which could be 0, 8, 16, or 24. Both ships in First Missions have a movement cost of 1/2 and would pay 8 Energy Tokens for Baseline Speed 16. Note that a ship at "baseline speed zero" or that is "stopped" (2C7) pays no energy.
(2B1c) Reverse Movement: Ships can move in reverse, but this costs twice as much as forward movement. A ship that wanted to buy a Baseline Speed of eight in Reverse would pay for 16 movement points. The cost of Acceleration is also doubled. The cost of deceleration and braking energy is not doubled when moving in reverse.
(2B2) Changing Speeds
This section is rather complicated and players can ignore it for the first game or two and just run their ships at the same baseline speed for the entire turn.
(2B2a) Acceleration: Ships can increase their speed during any impulse by paying extra Energy Tokens. At the start of every Impulse, each ship has the option to pay Energy Tokens equal to one movement point to increase its speed for that one Impulse by one movement point. It could do this during any or all impulses. A ship cannot buy more than one extra movement point in any given Impulse. See (2C7a).
Example: A ship with a Baseline Speed of 16 (moving in two of the four Sub-Pulses of each Impulse) might in a given Impulse pay extra energy to move in a third Sub-Pulse (which would be sub-pulse #3 since a ship at speed 16 moves in sub-pulses #2 and #4).
A ship may buy an extra movement point during a given impulse and later pay energy to cancel other movement points (or even that one!).
Example: A ship with a Baseline Speed of 16 (moving in two of the four Sub-Pulses of each Impulse) and a move cost of 1/2, pays a half energy point during the third Impulse of the turn to speed up to "16+1" which would move in the same sub-pulses that speed 24 moves (i.e., the 2nd, 3rd, and 4th sub-pulse). It could then, during any of those sub-pulses, pay another half Energy Point to cancel one of those sub-pulses (even the 3rd sub-pulse, the one it just bought!).
(2B2b) Deceleration: A ship can slow down by using an Energy Token to buy a "deceleration point" (equal in cost to a movement point). A ship could cancel some, all, or none of the movement points of that Impulse (assuming that it had the energy tokens to pay for it). Unlike movement increases, which are paid only at the start of an impulse, decelerations are paid at the instant in a given sub-pulse when the ship would move. They do not change the ship to a different movement "level"; they cancel a specific sub-pulse.
Example: A Federation cruiser with a movement cost of 1/2, has paid 12 Energy Tokens for a baseline speed of 24. During Impulse #4 (when it would normally move in the 2nd, 3rd, and 4th sub-pulses), the ship wants to slow down in order to create a firing opportunity at the down shield of a Klingon cruiser. It moves during the 2nd sub-pulse, but when it is time to move for the 3rd and 4th sub-pulses, the ship pays 1/2 Energy Token (during each of those sub-pulses) to cancel the movement, maintaining his firing position on the Klingon ship.
Cancelled movement points DO count against the turn mode requirement (2C2) but NOT the sideslip requirement (2C4), so a ship could use deceleration to make a sharper or tighter turn (even if it took just as many Movement Sub-Pulses).
Example: A Federation cruiser with a movement cost of 1/2 has paid 12 Energy Tokens for a baseline speed of 24. During Impulse #4 (when it would normally move in the 2nd, 3rd, and 4th sub-pulses), the ship wants to make a very sharp turn without getting any closer to the Klingon ship in front of it (and getting its down #1 shield away from that battlecruiser before the next Offensive Fire Phase). The ship pays 1/2 Energy Point during each of the three movement sub-pulses, remaining in the same hex for the entire impulse. During the 3rd Sub-Pulse, the cruiser has completed its Turn Mode of 5, and changes direction by 60°, bringing an undamaged shield to face the D7.
(2C) Turning and Turn Modes
Each unit in the game must maneuver (i.e., turn) within the limits of its "turn mode". This "turn mode" is the factor that defines how quickly a given unit can turn (i.e., change facing).
Players will have to bear with one of the limitations of the English language in the overuse of the word "turn." It can be your turn to move on Turn #3, you may choose to make a left turn or perhaps a high energy turn, and if you are not careful, things may take a turn for the worse.
(2C1) Turning
The actual act of turning the unit by 60° is done at the start of a given Movement Sub-Pulse (immediately before moving into the next hex). A unit's turn mode regulates how often a 60° turn can be made.
(2C2) Turn Modes
A unit's turn mode is the minimum number of hexes which the unit must move straight ahead, with the same facing, before it can turn 60° (one hex side) right or left. After each 60° turn, the unit must again move the stated number of hexes straight ahead before it can turn again. Turn modes increase with speed, and less maneuverable units have higher turn modes.
Special markers are provided that say "TURN POINT" and can be used by players to mark the point that their ship turned, helping them remember the turn and determine when the ship can turn again.
(2C2a) Category: A unit may appear to have two different types of turn modes. Each unit is assigned a Turn Mode Category, also known as a Turn Mode Rating; for example the Federation CA has a Turn Mode Category of D. A ship with a Turn Mode Category of D would have a turn mode (in the proper sense, the required number of hexes moved) of 4 at a baseline speed of 16.
(2C2b) Assignment: Each ship is assigned a turn mode category on its Ship Diagram, and is provided with a Turn Mode for each baseline speed which applies to all turns while going that speed. All turn modes apply at their baseline speed regardless of energy spent to increase or decrease speed (2B2).
Turn Mode Categories
Klingon D7: B Federation CA: D
(2C3) Restrictions of Turn Modes
The hex entered on the impulse the turn was made counts as the first hex of straight-line movement for future turn mode purposes.
(2C3a) Carry over: Hexes moved since the last direction change carry over from game turn to game turn, and to turn you must satisfy your turn mode at your current speed. E.g., a Federation CA at baseline speed 8 on Turn #1 has a turn mode of two. If its last two hexes of movement were in Direction B, it counts those two hexes on Turn #2 when its Baseline speed of 16 requires a Turn mode of 4 (so it must move two more hexes in direction B to turn).
(2C3b) Starting From Speed Zero or Stopped: A unit which was "stopped" on the previous turn and is moving on this turn cannot turn before moving out of the hex because its turn and sideslip modes are at zero (2C3c). If the owning player wants to turn before movement, he could perform a High Energy Turn (2D2 in Klingon Border) before moving.
A ship with a baseline speed (2A1) of zero is still "moving". If it uses Energy Tokens to "accelerate" and move a hex during some of the impulses, it has a Turn Mode (2C2) and Sideslip Mode (2C4) of 1 and accumulates turn mode points and Sideslip Points.
(2C3c) Reset: Performing a High Energy Turn, reversing direction, or stopping (2C7) resets (i.e., reduces) the turn mode and sideslip mode count to zero. For example, a ship with a baseline speed of 16 which has moved four hexes in a straight line has satisfied its turn mode and can turn on the next Movement Sub-Pulse that it moves. However, if the ship now performs an Emergency Deceleration (2D3), the count (four) is reduced to zero.
(2C4) Sideslips
The restrictions of the hexgrid used in this game create limitations on the movement of units that do not correspond with reality. To correct this situation, ships may execute a "sideslip" maneuver. Basically, instead of moving straight ahead, the ship "slides" into one of the "ahead and to the side" hexes.
Special markers are provided that say "SLIP POINT" and can be used by players to mark the point that their ship sideslipped, helping them remember where it was and helping them determine when the ship can sideslip again. The Turn and Slip markers are numbered (in two sets of nine) and a given ship should use a turn counter and a slip counter with matching numbers. It isn't necessary for them to match the number of the ship (but it is convenient); if they do not, simply note the turn/slip marker numbers on the ship diagram.
(2C4a) Definition: A sideslip maneuver is executed during any Movement Sub-Pulse that the ship is scheduled to move. For purposes of sideslip maneuvers, all units at all speeds are assumed to have a "sideslip mode" of ONE. After satisfying the requirements of this slip mode (i.e., moving one hex in a straight line since the last sideslip), the ship may execute a sideslip maneuver. After executing a sideslip, the ships begins counting again to satisfy the requirements of a sideslip. After satisfying the normal turn mode, it may make a normal turn; after satisfying the sideslip mode of ONE, the unit may execute a sideslip. Turn modes and sideslip modes are recorded and satisfied independently of each other.
(2C4b) Procedure: When executing a sideslip maneuver, the unit is moved into one of the hexes forward and to the side, but retains its original facing.
EXAMPLE: A starship in hex 22 facing A has satisfied the requirements of either a turn or sideslip. If the owning player wanted to execute a turn on the next impulse when the ship is scheduled to move, it would be turned to face direction F and moved into hex 12. If the owning player wanted to execute a sideslip, the ship would (when next scheduled to move) enter hex 12 but retain its heading of "A."
(2C4c) Restrictions: For purposes of satisfying the sideslip requirement, the hex entered during the sideslip does not count. For purposes of satisfying the regular turn mode, the movement before, during, and after the sideslip counts as movement in the same direction. For purposes of satisfying the sideslip requirement, a regular 60° turn resets the sideslip mode to zero; the sideslip mode must resume at that point (but is satisfied by the movement of the ship into its new hex). A unit may not sideslip during the same Movement Sub-Pulse that it made a normal turn.
EXAMPLE: A ship is in hex 1119 facing A with both its turn mode and sideslip mode satisfied. It could:
Move straight ahead to 1118. Turn 60° right and enter 1218 facing B. Turn 60° left and enter 1018 facing F. Sideslip right into 1218 facing A. Sideslip left into 1018 facing A. It could NOT turn AND sideslip into 1219 facing B. It could NOT turn AND sideslip into 1019 facing F. It could enter 1219 or 1019 or 1120 by performing a High Energy Turn.
(2C4d) Combinations: A unit cannot combine a sideslip with a regular turn or high energy turn (2D2) on the same Movement Sub-Pulse.
Stopping or making a High Energy turn resets the Turn Mode Count and Sideslip Mode Count to zero.
Integrated Example: A Federation CA (heavy cruiser) is moving at speed 16 (e.g., a turn mode of 4). The ship is suddenly confronted with a threat directly ahead. It cannot turn in hex #1 because that hex is the third it has entered since its last 60° turn (i.e., its turn mode is unfulfilled). It can also be assumed that the ship entered hex #1 by a sideslip and has no power to decelerate.
The ship then moves ahead into hex #2, fulfilling its turn mode (and sideslip mode).
On the next Sub-pulse, it could enter hex #3 by a turn or a sideslip, but it elects to turn right instead as it wants to evade the approaching threat. The ship could move straight ahead from hex #3, but instead sideslips into hex #4 to keep as far as possible from the approaching threat.
Having neither its turn mode nor sideslip mode fulfilled, it has no choice but to enter hex #5. (It could have used a High Energy Turn, but for our purposes we can assume that, unaware of the unexpected threat, the captain had not kept five unused energy tokens to pay for such a maneuver in Squadron Scale.)
Having fulfilled its sideslip mode by the move into hex #5 (being directly ahead from #4), the ship can sideslip into hex #6. Note that without sideslips, the ship would be two hexes "north" of its present position, and that much closer to the enemy. Having now fulfilled its turn mode (which required four hexes of forward movement without a turn; the sideslips counted as forward movement), it can (and does) turn another 60° right to enter hex #7.
(2C5) Moving in Reverse
Ships normally move directly forward, turning 60° right or left as their turn mode permits. Ships may, however, also move backwards using exactly the same turning procedure. Movement in Reverse costs twice as much energy as moving forward.
(2C5a) No Combination: Ships may not mix forward and reverse movement during a single turn. The direction that a ship will be traveling (forward or reverse) must be noted during the Energy Allocation Phase. Direction can be changed only at this point.
(2C5b) Braking Power: Before a ship can reverse direction, however, it must pay a "braking energy" cost equal to four movement points. This cost is not paid if the ship was stopped (2C7) or moving in the opposite direction (2C5) at the end of the previous turn. (Tactical note: Perform an Emergency Deceleration on Impulse #8 if you are sure you want to reverse direction next turn.)
(2C6) Base Rotation
This is used in Federation Commander: Klingon Border and need not concern us here.
(2C7) Stopping vs Speed Zero
Speed Zero is a speed; "Stopped" is a condition. While at Speed Zero, you are still "moving". When your ship is stopped, you aren't moving at all.
(2C7a) Stopped: A ship can be "stopped" as a result of a breakdown (2D2d), emergency deceleration (2D3), having no power during Energy Allocation, when docked or landed (2D5), or you can declare your ship "stopped" during Energy Allocation. When "stopped" a ship can make tactical maneuvers (2D1), a high energy turn (2D2), or evasive maneuvers (2D4), but cannot use acceleration (2B2a). A "stopped" ship can resume movement only by declaring a speed in a future Energy Allocation Phase.
(2C7b) Speed Zero: A ship at speed zero can accelerate (2B2a), decelerate (2B2b), use evasive maneuvers (2D4), make a high energy turn (2D2), but cannot make tactical maneuvers (2D1). It has a turn mode of 1; see (2C3b).
(2D) Special Maneuvers
(2D1) Tactical Maneuvers
In some cases, a ship's captain may be unable or unwilling to move the ship out of the hex it occupies, but the captain may still want to retain the ability to turn his ship from side to side to respond to enemy operations (e.g., to turn a new shield toward an attack or to bring other weapons into firing arc). This is known as a tactical maneuver.
A ship which is "stopped" (2C7) may make a tactical maneuver once per turn. At the end of the fourth Movement Sub-Pulse, the ship can pay one Energy Token (regardless of its movement cost, except when moving in Fleet Scale in which case it is a half-token) and turn 60° in either direction. The ship could also make a High Energy Turn (2D2).
(2D2) High Energy Turns
This is used in Federation Commander: Klingon Border and need not concern us here.
(2D3) Emergency Deceleration
All ships may use emergency deceleration to bring themselves to a rapid stop (2C7a). This might be done to avoid running into an obstacle, or to allow the ship to move quickly to a key position and then stop once it has reached it.
(2D3a) Declaration: At the start of any impulse, before any of the Movement Sub-Pulses, any ship may declare Emergency Deceleration. The ship then cancels all further movement for the turn. During the remainder of the turn, the ship is under the limitations of being "stopped" (2C7a).
(2D3b) Benefit: Determine how many Energy Tokens were paid at the start of the turn for the unused movement. Divide this number by two (dropping any fractional amount). The balance of the energy may be used for Shield Reinforcement (and only that use) during the remainder of the current turn subject to the shield reinforcement limits of (3C5). If any remain unused at the end of the Turn, they are lost; they cannot be carried over to the next turn.
Example: A Federation Heavy Cruiser with a baseline speed of 16 paid 8 Energy Tokens for that baseline speed. The fact that it may (or may not) have paid extra tokens for faster (or slower) movement in previous Impulses is not relevant. The ship declared Emergency Deceleration at the start of Impulse #3, canceling the movement pre-paid for the next six impulses (#3 through #8). That amounts to 12 movement points (six energy tokens), so the ship gains three points of power for use as Shield Reinforcement subject to the battery limits.
(2D4) Evasive Maneuvering
(2D5) Docking, Landing
These rules are used in Federation Commander: Klingon Border and need not concern us here.
(2E) Disengagement
In some cases a starship captain may find himself in a situation that he (or rather his ship) cannot handle. In these cases, the only thing to do is to leave! Since "running away" is just not something the military does, the ship will "disengage".
(2E1) Methods of Disengagement
There are several methods by which ships can disengage.
(2E1a) Automatic: The scenario special rules might define that a certain action will amount to disengagement. This usually happens in monster scenarios where the monster has some objective other than your ship.
(2E1b) Separation: If your ship is 35 or more hexes from any enemy unit, you may simply declare that your ship has disengaged.
(2E1c) Leaving the Map: In some scenarios, the map is "fixed" and any unit which leaves the map has left the area of whatever was being fought over and is considered to have disengaged.
(2E2) Effect of Disengagement
The counter is removed from the map, any seeking weapons targeted on your ship (or that your ship was controlling) are also removed, and your part in the scenario is over.
Chapter 3: Combat
Combat is a means to an end, not an end in itself. It is ultimately a means to gain or maintain control of territory, or to reduce enemy forces as a means to that end. Combat involves damaging the enemy ships to the point that they withdraw (or, if they refuse to withdraw, are destroyed or captured).
While combat is usually the last choice in solving a problem (at least, for the Federation), it is sometimes unavoidable. Indeed, the Federation operates on the theory that combat is best avoided by being so good at combat that nobody attacks you! To this end, Star Fleet employs no end of training exercises and systems to keep all of its captains, ships, and crews on their toes and ready for everything. You can assume, in any combat scenario, that all non-combat means of resolving the issue have been exhausted. Even the Klingons will usually try non-combat methods of getting what they want first, if only because combat costs money (fuel, ammunition, repairs, casualty treatment, replacement training) and their empire is usually short on cash.
(3A) Combat Operations
Within the game, players will use weapons to cause damage to enemy ships or other enemy units. The impact of each weapon is rated in "damage points", each of which disables one box on the Ship Diagram of the enemy ship. This damage is allocated (3D) to various boxes on the enemy ship.
(3A1) Direct-Fire Weapons
These are weapons (such as phasers, photon torpedoes, and disruptors) which are resolved at the instant of firing. One player says "I am firing this weapon at that target", the range is determined (by counting hexes), a die is rolled and the result is cross-indexed on the appropriate weapons table (see Page 20), and the number of damage points is thus determined.
(3A2) Seeking Weapons
These weapons (drones, plasma torpedoes) are covered in Federation Commander: Klingon Border and need not concern you now.
(3A3) Friendly Fire
Players cannot fire at their own ships (or other manned units) unless those units have been captured or abandoned (3E).
(3A4) Volley Definition
A Volley consists of all of the damage resulting from all of the Direct-Fire Weapons fired by a single ship (or a single other unit) during a single Impulse at a single target (all of which must, by the rules below, strike the same shield).
(3A5) Range
Range is the distance between two units (usually the firing unit and the target). To determine the range, count the number of hexes from one unit to the other (including the hex of the target but not that of the firing unit) by the shortest path without skipping hexes. If both units are in the same hex, the range is zero.
(3B) Firing Arcs
All weapons are designated as to the arc in which they can engage targets. This is known as the firing arc. The available firing arcs for each weapon are printed on the Ship Diagram next to that weapon.
There are six firing arcs (each of 60°): LF = Left Forward, L = Left, LR = Left Rear, RF = Right Forward, R = Right, RR = Right Rear.
For example, the left phaser bank on the Federation Heavy Cruiser is designated LF+L, indicating that it can fire into the Left Forward and Left firing arcs. Each firing arc is a 60° section of the map bounded by two straight rows of hexes. These straight rows are simultaneously in two adjacent firing arcs; for example, the row of hexes extending directly forward of the ship is in both the Left Forward and Right Forward firing arc.
For purposes of shorthand notation, certain designations indicate a combined firing arc: FA = Forward Arc, LF+RF; FX = Forward Arc Expanded, L+LF+RF+R; RA = Rear Arc, LR+RR; RX = Rear Arc Expanded, L+LR+RR+R; LS = Left Side, LF+L+LR; RS = Right Side, RF+R+RR; 360° = All six firing arcs.
There are two other firing arcs, FH (Front Hemisphere) and RH (Rear Hemisphere) which cover 180° arcs forward (FH) or to the rear (RH) of the ship.
(3C) Shields
Shields are the primary protection of starships. They can: absorb tremendous punishment, be repaired after damage, and be reinforced when hit. Ships operate their shields automatically; players do not pay energy tokens for them. Shuttles do not have shields.
(3C1) Shield Numbers
Each ship is surrounded by six shields, with #1 to the front of the ship, #2 and #3 on the right (starboard) side, #4 to the rear, and #5 and #6 to the left (port) side. For example, if a starship was in hex 44 facing hex 43, the #1 shield would be facing hex 43 while the #4 shield would be facing 45.
(3C2) Individuality
Shields could be "down" (reduced to zero strength by damage) or "dropped" (voluntarily deactivated, usually to allow transporter use). Shields can be voluntarily dropped only in the Other Functions Phase (1E2e). When you drop a shield, write a "D" and the impulse number next to that shield on the ship diagram. The shield can be reactivated two impulses later (e.g., a shield dropped during the Other Functions Phase of Impulse #5 could be raised during the Other Functions Phase of Impulse #7).
Normally, a ship will operate in combat with all of its shields "up" or "active" and able to absorb damage. However, individual shields can be turned off to facilitate transporter operations in Klingon Border.
(3C3) Position
Shields are fixed in position, and each absorbs damage from the direction it faces. Shields cannot be rotated (other than by turning the entire ship, which is a valid tactic).
At the end of any turn, you can take up to five shield boxes from any one shield and use them to replace the same number of disabled boxes of either (not both) of the two adjacent shields. [Just erase damage marks on one shield and add them to the other.] This can only replace disabled boxes; it cannot increase the original strength of the shield, and can only be done once per turn for each ship. You cannot take shield boxes from one ship and give them to another ship.
(3C4) Damage to Shields
Each damage point causes one box of a shield to be marked as disabled. When every box of a shield is disabled, the shield is "down" and no longer blocks damage scored from that direction.
(3C5) Shield Reinforcement
Shields can be reinforced. Whenever a volley of damage strikes an active shield, the player who controls that ship has the option to use a number of his remaining Energy Tokens (up to the number of working batteries) to absorb some of the damage. Each Energy Token blocks one point of damage. Note that while batteries limit the amount of power used on any given volley, you can use that much power against every volley, even if you used it on a previous volley of the same or a different impulse.
(3C6) Which Shield Was Hit
It is important to determine which of the target's shields was struck by enemy fire. In the case of a Direct-Fire Weapon, draw an imaginary line from the center of the hex of the unit which fired the weapon to the center of the target hex. Whichever of the six hexsides (of the target hex) the line crosses defines which of the shields was struck (i.e., the one facing that hex side).
Example: Your ship, the USS Hood, is in hex 0706, facing in direction A, and is being fired upon by three Klingon cruisers. One of these is in hex 0603. A line from the center of 0603 to the center of 0706 crosses the hex side in front of the USS Hood, meaning that fire from this Klingon has hit the #1 shield (which faces that hex side). The third Klingon is in 1005, and a line from that hex to 0706 crosses the hex side to the right-front of the USS Hood, the arc covered by its #2 shield. The Klingon in 0804 is a special case.
(3C6c) Split Shield Boundaries: In cases where the line of fire strikes exactly on a corner (for example, a ship in hex 0804 firing on a ship in hex 0706), the owner of the target ship may select either of the two shields (#1 or #2) to take the damage. (All weapons fired that impulse by that attacker on that target will strike the same shield. Damage cannot be divided between the two shields.)
(3C6d) Same Hex: In the event that the firing ship and target ship are in the same hex, resolve the question of "which shield was hit" from the position occupied by the last ship to enter the hex on the sub-pulse before it entered that hex. (If both entered at the same time, judge them from these previous hexes.)
(3C7) Shield Regeneration
Shields can be regenerated. At the start of each turn, you can pay two Energy Tokens to regenerate (remove the disabled mark from) any one shield box on any one shield. You may do this for any number of shield boxes (up to the limit of Energy Tokens you have available). The shields are repaired immediately.
(3C8) Shield Burn Through
If any volley consists of at least ten points but does not penetrate a shield, score one of the points of this volley as internal damage rather than scoring it on the shields. Then score the other nine (or more) points on the shield (and reinforcement if any).
Example: A volley of 13 damage points is scored against the #1 shield of a Federation cruiser (which has 15 boxes in Squadron Scale). Except for Shield Burn Through, this would mean 13 boxes marked "disabled" and nothing further. The Federation cruiser might have used two Energy Tokens (he has two batteries) to reduce the number of disabled shield boxes to 11. Whether he does or not, this is still a volley of 10 or more points with no internal damage, resulting in one "burn through" point. So, instead of 13 shield boxes marked disabled, only 10 are, with two points of damage blocked by reinforcement and one point of internal damage. The Federation player marks one Transporter box disabled.
(3D) Damage Allocation
Once damage has struck the ship, it is first applied to the single facing shield. Each point of damage disables one box of that shield. (Mark the shield box with an X or any other mark to indicate this. Disabled shield boxes do not stop further damage.) If there are more points of damage than the strength of the shield, the remaining damage is scored on the inside of the ship, with one damage point disabling one box on the ship card. In Federation Commander: Klingon Border there is a simple procedure for this involving die rolls and a chart. For your First Missions, you will use an even faster system: the owner of the target ship simply marks the damage points on any non-shield box he wants to. Tough choices await! Will you preserve power to move or weapons to shoot?
(3E) How Ships Are Lost
The destruction of a starship in combat is actually a rather rare event as ships that take severe damage usually leave the area (and the other side, knowing that the tables may be reversed in the future, allows this to happen). Ships unable to leave the area are usually captured and the crews taken to some remote planet to wait out the war (or, in the case of "peacetime incidents", are sent home as soon as things settle down). Self-destruction to avoid capture is relatively rare (outside of fiction) since humanoid life is important to both sides and there are relatively few secrets of military technology that the enemy doesn't already know anyway. Dying for the honor of the flag is a romantic notion; staying alive to return to duty at some future point is the vastly more common outcome, even in the case of the Klingons.
The point of combat is usually to control the area, not destroy a particular ship. Even so, the loss of a ship does happen whenever all non-shield boxes of the ship are marked disabled at any point during the turn.
Capturing a ship and self-destruction are possible in Federation Commander: Klingon Border but need not concern you on your First Missions.
History of the Star Fleet Universe
The history of the Star Fleet Universe covers an extended period of time, the details of which are not particularly critical to players of Federation Commander. Players may, in their own minds, set their battles during times of tense peace or open warfare.
While the exact date that the humans contacted the Vulcans is not precisely known, it has been arbitrarily established as 2400 AD. The humans took to space with their usual passion, encountering many other races in nearby stars. Some of these, including the Vulcans, Andorians, Rigelians, and others, joined together in 2404 to form a loose alliance that later became the United Federation of Planets. The Federation launched its first starship in 2462 and formed Star Fleet in 2471. The Federation first encounted the Klingons (peacefully as it turned out) in 2485 (but had known about them from the Vulcans for many years). The Klingons had already fought a series of wars with their neighbors (including the Kzintis, whom they call "Tigermen") and didn't need another enemy. The Klingons quickly learned, however, that there were more threats to their Empire than just military ones, as the booming Federation economy threatened to engulf the Empire.
The Federation fought the Kzintis from 2488-2492 (with Klingon military advisors on Star Fleet ships!).
Relations with the Klingons soured in 2502 when the Federation arbitrarily declared their border to be 4750 parsecs from the center of the "primary member zone" (roughly the distance to the ceasefire line with the Romulans). This declaration took in a wide swath of territory which the Klingons regarded as their own (even if they had never formally declared or tried to negotiate a border). The Federation had regarded the Klingon frontier as a wide unclaimed region and felt that they were stabilizing the situation. This resulted in a brief Klingon-Federation "war" from 2510-2511, a conflict that the Federation considered to be a minor border skirmish.
The Federation were more concerned with the Kzintis, who had rejected the Federation border declaration of 2502 and still had major military forces in the region around Cygnus and Mantor. This resulted in a major Federation-Kzinti war from 2536-2542.
A brief Federation-Klingon "war" in 2556 ended with the Organian ceasefire. The Organians are much misunderstood; they brokered but did not enforce the ceasefire and their "astounding mental powers" could prevent conflict only in their own system, which became a neutral enclave where diplomats could negotiate away any further border tensions.
The General War, the largest conflict in the historical record, began in 2568 as a war between the Klingons, Kzintis, and others, and spread to the Federation with the Klingon Invasion of 2571 (and the Romulan Invasion of 2573). This conflict lasted until 2585, when the participants stopped fighting more due to economic exhaustion than any success in battle.
Chapter 4: Weapons
(4A) Direct-Fire Weapons
Direct-Fire Weapons (such as phasers, photon torpedoes, and disruptors) are those weapons which are resolved at the instant of firing. One player says "I am firing this weapon at that target", the range is determined (by counting hexes), a die is rolled and the result is cross-indexed on the appropriate weapons table, and the number of damage points is thus determined. There is no counter moving on the map to reflect a direct-fire weapon.
(4A1) When to Fire
Direct-Fire Weapons are fired in the Offensive Fire Phase (1E2d) of the Sequence of Play. All weapons fired in this Phase are simultaneous, so it is entirely possible for weapons on two opposing ships to destroy each other during the same Phase.
(4A2) Ship Diagrams
Each box on a Ship Diagram represents a single weapon or other system. Each weapon on a ship can be fired once per turn (exceptions: photon torpedoes can be fired every other turn). To be fired, a weapon must satisfy all of these requirements: it must be undamaged, it must be provided with the required power, and it must be able to fire into the arc facing the target.
(4A3) Blocked Targets
The presence of another unit in the hex of the firing ship, the target ship, or an intervening hex has no effect. Hexes are thousands of times larger than ships, and it's easy to shoot around them.
However, in larger battles, whenever more than three friendly (allied or same empire) ships are in the same hex, no more than three of them can fire out of the hex through any one hex side (or at any single target or targets in any single hex) during any given impulse due to warp field interactions. Any number of ships can fire into such a hex.
(4B) Phasers
Phasers are the most common and most numerous weapons that starships carry. Phasers fire "phased energy" (hence their name) which overwhelms and damages the systems of the target.
Because of their relatively low power demands and the lack of any shock when firing, they are mounted in several batteries around the ship (unlike heavy weapons), providing all-around firepower for both attack and defense. Phasers, because of their large numbers, often cause most of the damage in a starship duel. There is no need to keep track of "phaser ammunition" since these weapons are armed with electrical power from the engine power grid.
(4B1) General Rule
Each "Phaser" box on the Ship Diagram (often marked PH-1 or PH-2 or PH-3) represents one phaser. Each phaser/box can fire once (and only once) during any given turn, is disabled by a single point of damage, and is repaired by four repair points. Note that it is possible to fire a phaser on Impulse #8 of one turn and again on Impulse #1 of the next turn.
(4B2) Types of Phasers
There are four types of phasers in Federation Commander, as follows:
(4B2a) Phaser-1: The "standard" type used by the Federation, this costs one energy token to fire. It is marked PH-1 on the Ship Diagrams.
(4B2b) Phaser-2: A lower-technology weapon used by the Klingons, this still costs one energy token to fire but causes less damage. It is marked PH-2 on the Ship Diagrams. Phaser-2s are, in fact, phaser-1s with lower-quality fire control systems.
(4B2c) Phaser-3: Used as a short-range defense weapon (although it can be fired at any target), this phaser does relatively little damage and only at short range, but costs 1/2 of an energy token to fire. It is marked PH-3 on the Ship Diagrams.
(4B2d) Phaser-4: Used only on bases and not within the scope of First Missions.
(4B2e) Tables: Each of these phasers has its own Phaser Combat Table, all of which are seen on Page 20. A Phaser-1 or Phaser-2 could be fired as a Phaser-3 (to save power when the target isn't going to need a lot of killing, since this would cost the half-token of a phaser-3). Firing a phaser as a lower-class weapon still uses the one allowed firing of that weapon each turn. A Phaser-1 cannot fire as a Phaser-2.
(4B3) Firing Procedure
Phasers are fired during Offensive Fire Phase (1E2d) of the Sequence of Play. Use the following procedure.
(4B3a) Step 1: Determine the Range (3A5) to the Target.
(4B3b) Step 2: Select a phaser you wish to fire. The phaser must be able to fire in the direction of the target, that is, the target must be within the firing arc (3B) of the phaser and within range.
(4B3c) Step 3: Pay the cost of firing the phaser (one, or one-half energy tokens depending on what phaser type you are firing); see (4B2).
(4B3d) Step 4: Roll one six-sided die. Use the result of this die roll and the range to Cross-Index on the Table for the type of phaser you fired and determine the damage. The result is the number of Damage Points scored.
EXAMPLE: A Federation cruiser wants to fire a phaser-1 at a Klingon D7. It determines that the chosen phaser is within arc and not damaged. One energy token is paid, and the phaser is fired. Count the range (let us say five hexes for this example). Comparing the range to the die roll of "1" means that five damage points were scored.
(4C) Photon Torpedoes
These are the primary heavy weapon of the Federation. Photons are classed as "heavy weapons" because of the power usage and shock of firing. The heavily-reinforced launch tubes can only fire into the 120° arc generally ahead of the ship because of the required rigid mountings.
The torpedo is loaded from the ship's power sources in a launch tube with encapsulated antimatter, then fired at the enemy. When it strikes the target, the antimatter is released and causes an explosion. Because of the nature of the weapon, it causes the same amount of damage (eight points) at all ranges, while the corresponding Klingon weapon (the disruptor) is pure energy and has less effect at longer ranges.
Note: In some later versions of "trek", some Klingon ships used photon torpedoes. Players may freely experiment with this idea by simply using the photon rules for the disruptors on Klingon ships.
(4C1) General Rule
(4C1a) Ship Diagram: Each PHOT box on the Ship Diagram represents one photon torpedo launch tube. Each is armed and fired independently of the other; energy costs given are for each torpedo, not
(4C2) Arming Photon Torpedoes
Because of their huge power demands, it takes two turns to arm a photon torpedo. (Even if power was available, the system simply cannot accept all of the power during a single turn.) Each torpedo requires four points of power, two on one turn and two more on the second turn. (You cannot skip turns in the arming sequence.) Note that a player is not required to arm photon torpedoes (or any other weapon) and might well want to use the energy for other purposes.
(4C2a) Arming: Photon torpedoes can only be armed during Energy Allocation. During Energy Allocation of the first turn, you pay two Energy Tokens per photon you wish to load and mark the "P" (Pre-load) box on the Photon Arming track for that specific photon. During Energy Allocation of the Second Turn, you pay two additional Energy Tokens and mark the "L" (Loaded) box on the Photon Arming track for that specific photon. (If you do not pay the two Energy Tokens to complete the loading cycle, the Pre-Load mark is erased.) You can then fire the photon torpedo during any Direct-Fire Weapons phase of the turn.
Example: A Federation cruiser has two photon torpedoes. Having fired them during Turn #2, the Federation player wants to fire them again. During Energy Allocation of Turn #3, he pays four Energy Tokens and marks the "P" box for both photons on the Photon Arming track, which indicates that he has started arming both tubes. During Energy Allocation of Turn #4, he pays another four Energy Tokens to mark the "L" boxes on both torpedoes. He fires Torpedo A on Turn #4 (the target was only worth one torpedo or he would have fired both), and marks the "F" (fired) box.
At the end of that turn, the player erases all of the marks on the Torpedo A track, but he never had a chance to fire Torpedo B. During Energy Allocation of Turn #5, he pays one Energy Token to hold Torpedo B and two Energy Tokens to buy a Pre-Load mark for Torpedo A.
(4C2b) Holding: If you have not fired the torpedo by the end of the second arming turn, you will have to pay one Energy Token (in the Energy Allocation Phase of the subsequent turn) to "hold" the torpedo. You can do this for as many turns as you wish.
(4C2c) Pre-Game Arming: At the start of each scenario, the Federation player (or the player controlling any ship with a photon torpedo) has the option to have a Pre-Load mark for each photon torpedo on the ship, reflecting loading of that weapon on the previous turn. This would allow him to pay Energy Tokens on the first turn to complete the arming of photon torpedoes (otherwise he would have no photon torpedoes to fire on the first turn). Special scenario rules might prohibit this if the Federation ship did not have time or energy to pre-load the photons. If the player takes this option, he cannot count the batteries in determining his starting energy.
(4C1a) Ship Diagram (continued): other; energy costs given are for each torpedo, not the ship's entire arsenal. Each photon is disabled by a single point of damage, and is repaired by four repair points. There is only one kind of photon torpedo.
(4C1b) Firing Rate: Each photon tube can fire once (and only once) every second turn.
(4C1c) Ammunition: There is no need to keep track of "photon ammunition" since there are many "canisters" on board and these weapons are armed with electrical power from the engine power grid.
(4C3) Overloaded Photon Torpedoes
This is covered in Klingon Border and need not concern you on your First Missions.
(4C4) Firing Photon Torpedoes
Photon torpedoes are fired during the Direct-Fire Weapons Phase of the Sequence of Play. The player who owns the ship firing the torpedo uses the following procedure.
(4C4a) Step 1: He announces which torpedo he is firing (which must not be disabled), the target (which must be within range and firing arc). Other players can confirm this data (or show it not to be true) and point out any rule or condition which would prevent firing.
(4C4b) Step 2: The range (3A5) is calculated. If the target is out of range, the weapon cannot be fired.
(4C4c) Step 3: One die is rolled for each torpedo. Cross reference the adjusted result with the Range on the Photon Torpedo Chart to determine if the torpedo hit or missed. If it hit, score the appropriate damage (8 points) on the facing shield of the target unit. If this penetrates the shields, use (3D) to score the damage.
Example: Our Federation cruiser fired Torpedo B at a Klingon cruiser at range 12. The Klingon ship was within the firing arc and, as we have seen, the torpedo was properly armed and un-disabled. The Federation player rolled one die, which resulted in a "2". Consulting the Photon Torpedo Table, the player notes that at Range 12 any die roll of 1 or 2 would be a hit, so the torpedo has struck the target and caused 8 points of damage.
(4C5) Photon Arming Summary
Because of the unusual two-turn arming system for photon torpedoes, new players can be confused by the rules (which are designed to give players maximum flexibility). Here is a summary of the arming rules:
(4C5a) Pre-Load: Carried out during Energy Allocation, costs two energy tokens per photon, does not result in a photon able to be fired.
(4C5b) Loading: Carried out during Energy Allocation, and can only be done on the turn after Pre-Loading. If not done, the pre-load energy is lost. This costs two energy tokens per photon and results in a torpedo which can be fired during any impulse of the Loading Turn.
(4C5c) Holding: If the torpedo was not fired on the loading turn, the player must pay one Energy Token per photon to hold them during the next turn, during which it could be fired on any impulse. An armed photon can be held for any number of turns if energy is paid to hold it. If the holding energy is not paid, the torpedo is ejected into space and lost.
(4D) Disruptors
These are the primary heavy weapon of the Klingons and Kzintis. Disruptors are classed as "heavy weapons" because of the power usage and shock of firing. The heavily-reinforced weapon mounts can only fire into the 120° arc generally ahead of the ship because of the required rigid mountings. The disruptor is loaded from the ship's power sources, then a "bolt" of energy is "stripped" from the launcher and fired at the enemy.
(4D1) General Rule
(4D1a) Ship Diagram: Each DISR box on the Ship Diagram represents one disruptor mount, is disabled by one "Torpedo" hit, and is repaired by four repair points. Each is armed and fired independently of the other; energy costs given are for each disruptor, not the ship's entire arsenal. There is only one kind of disruptor. A disruptor could be fired on Impulse #8 of one turn and then fired again on Impulse #1 of the next turn.
(4D1b) Firing Rate: Each disruptor can fire once (and only once) per turn. It can fire every turn.
(4D1c) Ammunition: There is no need to keep track of "disruptor ammunition" since these weapons are armed directly from the engine power grid.
(4D2) Firing Disruptors
Disruptors are fired during the Direct-Fire Weapons Phase of the Sequence of Play. The player who owns the ship firing the disruptor uses the following procedure.
(4D2a) Step 1: He announces which disruptor he is firing (which must not be Disabled), the target (which must be within range and firing arc). Other players can confirm this data (or show it not to be true) and point out any rule or condition which would prevent firing.
(4D2b) Step 2: The player owning and firing the disruptor pays two Energy Tokens to fire it.
(4D2c) Step 3: The range is calculated (3A5). If the target is out of range, the weapon cannot be fired.
(4D2d) Step 4: One die is rolled for each disruptor. Cross-index the modified result to the range on the Disruptor Chart (on Page 20) to determine if the disruptor hit or missed. If it hit, score the appropriate damage (listed at the bottom of each column, based on range) on the facing shield of the target unit. If this penetrates the shields, use the (3D) Damage Allocation Procedure.
Example: A Klingon D7 wants to fire both of its disruptors at a Federation ship at range 12. The Klingon player pays the four energy tokens and rolls two dice, getting a "2" and a "4". He consults the Disruptor Chart on page 20. Under Range 12, he finds that 1-4 is listed as the "to hit" numbers, so both disruptors hit. The next row on that chart tells him that each scores 3 damage points.
(4E) Anti-Drones
Anti-drones are purely defensive weapons used by the Klingons and the Federation. They are in Federation Commander: Klingon Border. For purposes of your First Missions, simply treat the ADD boxes on the D7 as "free hits".
(4F) Seeking Weapons
Seeking Weapons are those that (unlike Direct-Fire Weapons which are just a die roll) are shown on the map by a counter and move toward their target until they reach it or the target (or the weapon) is destroyed. Seeking weapons will by definition not strike their target for one or more impulses after they are launched. Note that Direct Fire Weapons are "fired" while Seeking Weapons are "launched".
For your First Missions we will simply ignore seeking weapons. Treat any "drone" racks on the "ship card" as simply "free hits".
(4G) Drones
Also known as missiles, these are unmanned, self-propelled, and guided delivery vehicles carrying a thermonuclear warhead. They are in Federation Commander: Klingon Border; for your First Missions we need not worry about them.
(4H) Suicide Freighters
While used only in attacks on bases (since it could never even hope to hit a moving target), suicide freighters can be devastating due to the huge volume of explosives they can carry. These are in Federation Commander: Klingon Border and you need not worry about them on your First Missions.
(4J) Plasma Torpedoes
See Federation Commander: Romulan Border for the rules on this weapon. Until you obtain that product, you can sleep well, because once you see this weapon, you will have only nightmares.
Weapons Tables
Phaser-1 Range Table (Energy Cost to Fire = 1)
| Die Roll | 0 | 1 | 2 | 3 | 4 | 5 | 6-8 | 9-15 | 16-25 |
|---|---|---|---|---|---|---|---|---|---|
| 1 | 9 | 8 | 7 | 6 | 5 | 5 | 4 | 3 | 2 |
| 2 | 8 | 7 | 6 | 5 | 5 | 4 | 3 | 2 | 1 |
| 3 | 7 |
Phaser-2 Range Table (Energy Cost to Fire = 1)
| Die Roll | 0 | 1 | 2 | 3 | 4-8 | 9-15 | 16-25 |
|---|---|---|---|---|---|---|---|
| 1 | 6 | 5 | 5 | 4 | 3 | 2 | 1 |
| 2 | 6 | 5 | 4 | 4 | 2 | 1 | 1 |
| 3 | 6 | 4 | 4 | 4 | 1 | 1 | 0 |
Phaser-3 Range Table (Energy Cost to Fire = 1/2)
| Die Roll | 0 | 1 | 2 | 3 | 4-8 | 9-15 |
|---|---|---|---|---|---|---|
| 1 | 4 | 4 | 4 | 3 | 1 | 1 |
| 2 | 4 | 4 | 4 | 2 | 1 | 0 |
| 3 | 4 | 4 | 4 | 1 | 0 | 0 |
| 4 | 4 | 4 | 3 |
Photon Torpedo Table (Energy Cost to Fire = 2+2)
| Type | Range 0 | Range 1 | Range 2 | Range 3-4 | Range 5-8 | Range 9-12 | Range 13-25 |
|---|---|---|---|---|---|---|---|
| Standard — HIT | 1-6 | 1-6 | 1-5 | 1-4 | 1-3 | 1-2 | 1 |
| Standard — DAM | 8 | 8 | 8 | 8 | 8 | 8 | 8 |
Disruptor Table (Energy Cost to Fire = 2)
| Type | Range 0 | Range 1 | Range 2 | Range 3-4 | Range 5-8 | Range 9-15 | Range 16-25 |
|---|---|---|---|---|---|---|---|
| Standard — HIT | 1-6 | 1-5 | 1-5 | 1-4 | 1-4 | 1-4 | 1-3 |
| Standard — DAM | 5 | 5 | 4 | 4 | 3 | 3 | 2 |
Chapter 5: Systems
There are many systems and pieces of equipment on a starship which are not weapons or power systems, and these are described in this chapter.
(5A) Control Systems
These are the compartments that contain the command officers. Data from sensors goes to these places, and orders for the movement of the ship and the use of its weapons and other systems issue forth.
(5A1) Definition
Control systems include the Bridge (abbreviated BRDG on the Ship Diagrams), Emergency Bridge (EMER), Auxiliary Control (AUX), and on some ships the Flag Bridge (FLAG). The Bridge is the primary control space for the ship; the Emergency Bridge is the backup in case of problems. Auxiliary Control handles many routine functions (sort of the second brain in the hips of a dinosaur) but can take over for the Bridge if both it and the Emergency Bridge are disabled. The Flag Bridge is where the squadron or fleet commander manages the entire battle space, but it can take over for the Bridge if all other control systems are disabled.
(5A2) Penalties for Loss
If all of the control spaces on a ship are disabled, the following penalties apply:
(5A2a) Turn Mode: The ship's turn mode (the number of hexes it must travel, not the category) is increased by one hex at all speeds.
(5A2b) Weapons: When firing any direct-fire weapon, add one to the die roll for that weapon. Treat a natural 6 as a 6. No seeking weapons can be launched, but those already in flight continue to be controlled by the ship.
(5A2c) Other: Tractor beams and transporters cannot be used, except that transporters could be used in an emergency evacuation (5E7).
Example: A Federation Frigate (in Squadron Scale) has four control boxes: two bridge, one auxiliary control, and one emergency bridge. If all of these have been disabled in combat, the ship is under the penalties above until one of them is repaired.
(5B) Laboratories
Most starships have some laboratories on board. While these conduct various kinds of research (medical, physics, astronomy, tactical, etc.), each can be configured to conduct any kind of studies. This is defined in Federation Commander: Klingon Border and need not concern you on your First Missions.
(5C) Probes
Probes are tiny, unmanned, self-guiding space vessels packed with scientific instruments and used to obtain scientific and tactical information about things which are too dangerous for the ship to approach directly. They can also be used as weapons in special situations. This is defined in Federation Commander: Klingon Border and need not concern you on your First Missions.
(5D) Tractor Beams
Tractor beams are electro-gravitic force beams able to hold various objects. They can be used to hold objects at a distance or pull them closer. Tractor beams cannot pull pieces off of an enemy ship. This is covered in Federation Commander: Klingon Border and need not concern you on your First Missions.
(5E) Transporters
Transporters are used to move people, cargo, and other things between ships. They have their uses, and their limits, as are defined in Federation Commander: Klingon Border. These need not concern you on your First Missions.
(5F) Marine Boarding Parties
Marines have a vital role to play in space combat by conducting raids on enemy ships, and in rare cases can actually capture them. This is covered in Federation Commander: Klingon Border and need not concern you on your First Missions.
(5G) Repairs
All starships have engineers and crews assigned to the task of repairing damage during combat. Indeed, only about half of the crew is needed to actually run the ship in combat, with everyone else assigned to damage control parties dispersed around the ship.
(5G1) Damage Control Rating
All ships in the game have a damage control rating shown on their ship diagram, which is two for either cruiser. This rating is not reduced by damage to the ship during combat. There is, effectively, no limit on the number of repairs a ship can perform on itself (given enough time).
(5G2) Repair Points
Every turn, each ship generates a number of repair points equal to its Damage Control Rating. There is no energy cost for this.
(5G3) Repair Cost
Every box on a starship (or other unit) costs a certain number of points to repair, as follows:
- 4 points = All weapons (red boxes); phasers, photon torpedoes, disruptors, drone racks, anti-drone racks.
- 3 points = All power systems (blue boxes); warp engine boxes, impulse engine boxes, reactor boxes, battery boxes.
- 2 points = Most ship systems (yellow boxes); tractor, transporter, laboratory, probe launcher, shuttle.
- 2 points = Control systems (gold boxes); bridge, auxiliary control, flag bridge, emergency bridge.
- 1 point = Hull boxes, Cargo boxes (tan boxes).
Shields have their own repair system and cannot be repaired by these rules.
(5G4) Repair Procedure
During the Repair Phase of the turn, the owner of each ship determines how many repair points he has, and spends these as per the above list to repair disabled boxes. Note that the cost is per box, not per item, so a 15-box warp engine would take 45 repair points, not 3. Unused repair points cannot be carried over to the next turn. Points could be applied to start repair on a single box, with the repair points of the next turn used to finish (or at least work on) that box; this will require a written record. A player must complete the repairs of the box he started repairing before spending repair points on other boxes.
Example: A Federation Frigate (in Squadron Scale) has a Repair Rating of 2, producing two repair points per turn. At the end of the first turn, the player owning the ship uses them to repair two hull boxes damaged when Klingon disruptors penetrated the #2 shield. On the next turn, the Federation player uses his two points to start repairs on a photon torpedo, finishing this repair on the third turn (two points generated per turn, need four points to repair a weapon).
(5G5) Reloads
If a drone or anti-drone rack, or a probe launcher, is empty (all ammunition launched or fired), it can be fully reloaded using rules in Klingon Border. This need not concern you on your First Missions.
(5G6) Shuttle Repairs
Damage to shuttlecraft can be repaired using rules in Klingon Border. This need not concern you on your First Missions.
(5H) Shuttlecraft
Shuttlecraft are small spacecraft used to carry personnel and small amounts of cargo from one ship to another or from a ship to a planet or another location. Shuttles have more range than transporters, and sometimes it is more efficient for the ship to remain on course and let a shuttle carry some of the crew to a location where they will complete some task. Shuttles are not armed and are fairly vulnerable in combat, and as such are rarely used in combat conditions (but are the object of rescue in some scenarios). Shuttles are covered in Federation Commander: Klingon Border and you need not worry about them on your First Missions.
(5J) Hull Damage
These boxes refer to nonessential systems such as crew quarters, the mess hall, storage areas, and the bowling alley. After the battle is over, the repair crews will fix this damage, or you can repair these items during the battle to use them as "padding" for further damage.
Note that in Klingon Border hull damage is subdivided into forward and rear sections for by the damage allocation system, something that need not bother you on your First Missions.
(5K) Cargo
Certain ships (such as the Orion Pirate, the base, and the freighters in Klingon Border, and other ships in future products) have large cargo holds for hauling freight. These boxes are marked "Cargo" on the ship card. Cargo boxes are disabled on "Hull" hits; the owner of the ship may decide whether to take a "Hull" hit on a cargo box or on a hull box. As these units are not in First Missions, the concept of cargo does not need to concern you at this point. We just wanted you to know that it is covered in Klingon Border.
(5L) Orion Pirate Special Rules
The Orion Pirates (7E) have special operating conditions unique to their ... line of business. These are reflected by special rules in Federation Commander: Klingon Border and need not concern you on your First Missions. They can boost their engine power (which damages their engines), their hulls are coated with stealth materials, and they can mount a variety of weapons.
Chapter 6: Terrain
(6A) Planets
Planets are astronomical bodies that range from a few thousand to many tens of thousands of kilometers across. These are covered in Federation Commander: Klingon Border and need not concern you on your First Missions.
About Federation Commander and the Star Fleet Universe
Federation Commander is a game of the Star Fleet Universe, a branch of the trek genre based on The Original Series, which is considerably more vast, detailed, and consistent than the original material. We have many games within our universe, all using a consistent background and technology database. You will find the same ships and weapons in all of our games.
Our Home on the Web: Visit www.starfleetgames.com for information and discussions about all of our games, including this one. It can be a little intimidating at first as hundreds of gamers have been discussing our earlier products for years, but the BBS is a friendly place where players can interact with the designers and each other. One of the most fascinating parts is the new product development area, where new games are designed and tested before your very eyes, and you have the opportunity to influence these designs (including future Federation Commander products). Our web shopping cart includes all of our games and miniature starships, along with other items such as T-shirts and cloisonné pins.
Where It All Began: First published in 1979, Star Fleet Battles is easily the bestselling space combat game of all time. As it grew over the years (and continues to grow), Star Fleet Battles has become increasingly complex. If you find Federation Commander to lack the kind of gritty detail and intense engineering you crave, then check out Star Fleet Battles. Players of Federation Commander will have little difficulty getting into SFB since the concepts are similar (and the ships and weapons tables are nearly identical), but be warned that the universe is vast and there are a lot of things that starships can do in unusual circumstances. Star Fleet Battles is scheduled to continue releasing new products along side Federation Commander.
Play Federation Commander On-Line: Visit www.sfbonline.com and sign up to play Star Fleet Battles in an on-line real-time environment against live opponents. For a small subscription fee, you will be able to participate in individual games, tournaments, and special events. The managers of sfbonline.com are already working to bring Federation Commander to the on-line arena in the Spring of 2006.
Precision-Scale Starships: Our Starline-2400 series of pewter starships can be found in stores and on our web shopping cart, both in individual blister packs and in larger Boxes. (The Squadron Boxes are configured to match the ships in Federation Commander but the individual ships are the same as the Fleet Boxes.) Over a hundred ships are available from all of the Empires of the Star Fleet Universe.
Become a Ranger: The Star Fleet Rangers are the elite demonstration team of the Star Fleet Universe. Every weekend, somewhere in America and the rest of the world, Star Fleet Rangers are at their local game stores playing the games of the Star Fleet Universe. This "shows the flag" to the gaming audience, helps them find new opponents, and keeps the store owners happy. To get information on becoming a Ranger, go to www.starfleetgames.com and look for the Ranger listing under Player Resources.
The Strategic Side of the Universe: Federation Commander and Star Fleet Battles are tactical games, and as such are only one view of the Universe. Our strategic game, Federation & Empire, shows you the strategic side of things. Here you command not just a squadron, but an entire empire! You can collect taxes, select production priorities, order fleets into battle, and pay the repair bills at the end (preferably with money you got from captured territory). Look for information about Federation & Empire on our web site and in our catalog.
Playing a Role in the Universe: Board games such as SFB, F&E, and Federation Commander are only part of the fun to be had in the Star Fleet Universe. Through our Prime Directive role-playing books, you can get up close and personal with the enemy. You can walk on new worlds, meet interesting new civilizations, and carry home a few souvenirs. We offer Prime Directive roleplaying books for a number of existing rules systems (GURPS, D20, D6) and will be adding new systems as time goes by.
Dropping Your Card in the Hat: Star Fleet Battle Force is a fast-paced and exciting card game of the Star Fleet Universe. Ship cards have symbols defining their weapons, while weapon cards have the same symbols. If a card in your hand matches a ship in your fleet, you can use that card to wreck an enemy ship. Based on classic naval war type games (with many new rules tricks built in), this game is as fun as it is colorful. Each boxed card game is enough for six players and there are no booster packs to buy.
Keeping It All Together: Captain's Log is the official journal of the Star Fleet Universe. It includes new rules, advice, news, tactics, and ships for all of our games. Also included is exciting fiction, rich history, great art, and a few laughs. Look for the latest issue of Captain's Log in your local store.
Commander's Circle: Players of Federation Commander should consider signing up for the Commander's Circle, a free club with many benefits. Go to www.starfleetgames.com/fc and look for the Commander's Circle button, which takes you to the registration page. Those who sign up will be emailed a PDF with more scenarios for use with Federation Commander: Klingon Border and will have access to other files and benefits. This will be the first place to get word of upcoming Federation Commander products, including Booster Packs (extra copies of the SSDs), Klingon Attack, Romulan Border, Romulan Attack, and others already in development.
Chapter 7: Ships
(7A) Ship Diagrams
Each ship is represented by a "Ship Diagram", which is a collection of colored boxes representing the systems on the ship, printed over a grayscale illustration of the ship itself. One box is one damage point. Several connected boxes with a single heading are all the same kind of system but each is a separate damage point.
(7A1) Colors Used on the Ship Diagram
Generally speaking, shields are shown in purple, green is used for "ammunition" (marines, drones, drone racks, shuttlecraft, frame damage, probes), and the standard colors are used for the ship's components (red for weapons, blue for power, tan for hull and cargo, gold for command, yellow for other systems).
Note that Green (ammunition) and Purple (shields) boxes cannot be destroyed by the Damage Allocation System [excepting Frame Damage (3E1)].
(7A2) Elements of a Ship Diagram
In the upper left is the empire which built the ship and the class of ship. Under this is either "squadron scale" in red or "fleet scale" in blue; one is printed on each side of each card.
The "national symbol" of the owning race is proudly displayed on the card, usually in the upper right.
A line near the top shows the Damage Control (Repair) rating (5G2).
On the right side is the power track, which can be ignored if you are using tokens or scratch paper, or used with paperclips, tokens, or markers if you wish (1D5).
In the lower left are a column of colored boxes listing the cost for various movement speeds and functions.
At the lower edge you will find a fractional energy track (used when recording all energy via the tracks), and the copyright notice.
The ship cards in Klingon Border are somewhat more elaborate, including check-off boxes and other information to facilitate the use of systems (shuttles, drones, probes) not covered by First Missions.
(7A3) Shields
The shields are colored in two shades of purple in blocks of five so you can count them quickly. Any "leftover" points are white. This makes it faster for you to resolve damage. If you received 7 points of damage on a 14-point shield, just mark one entire group of five "disabled" and take the other two points out of the white boxes. The two different shades of purple are used interchangeably and artistically; there is no advantage to the dark or lighter purple shades. Purple is the favorite color of our business manager and she really likes that we used it for the shields.
(7A4) Weapons Used Tracks
Somewhere on the ship diagram is a row of light-pink boxes corresponding to the weapons. (Note that anti-drones and photons have separate, additional, groups of pink boxes.) These are used during any given turn to record if a weapon was used (since weapons can fire only once per turn). When you fire a weapon, mark the appropriate box; erase them at the end of the turn.
(7A5) Beware: Artist at Work
Many things are done for artistic impression. In some cases, shields may appear to be "inside" other shields, but this is just the way the boxes are arranged and does not mean that damage penetrating one shield is scored on a few boxes of another. Similarly, it doesn't matter if a shield is shown as one, two, or more rows or columns of boxes; it is the total number of unchecked boxes which matters.
Note that the various ammunition and record keeping boxes (shuttles, drone racks, etc.) might be anywhere on the ship diagram and could be inside or outside of the shields; this has no effect on how they work. Shuttle graphics that are inside a ship's shields are not protected by those shields.
While efforts were made to put each box somewhere near the physical location on the actual ship, this isn't an exact science since the boxes destroyed by enemy weapons are determined by the Damage Allocation Charts, not by their location. In many cases, warp engines are done in blocks of four or five to make it easier for players to count them.
Abbreviations Used on Ship Diagrams
360: fires in any direction (360°); AUX: auxiliary control; BTTY: battery; C HULL: center hull; C WARP: center warp engine; C: center hull, center warp engine; DRN: drone rack; EMER: emergency bridge; F HULL: forward hull; FA: forward 120° firing arc (LF+RF); FH: front hemisphere 180° firing arc; FX: Forward firing arc, expanded to 240°; IKV: Imperial Klingon Vessel; IMP: impulse engines; L WARP: left warp engine; L: left (warp engine), left 60° firing arc; LAB: laboratory; LF: left forward 60° firing arc; LR: left rear 60° firing arc; LS: left side 180° firing arc; PH: phaser; PHOT: photon torpedo; Photon Arming-L: all loading energy present; Photon Arming-P: pre-load energy; PRB: probe launcher; R HULL: rear hull; R WARP: right warp engine; R: rear hull, right (warp engine), or right 60° firing arc; RA: Rear 120° firing arc (RR+LR); REAC: power reactor; RF: right forward 60° firing arc; RH: rear hemisphere 180° firing arc; RR: right rear 60° firing arc; RS: right side 180° firing arc; RX: Rear Expanded 240° firing arc; SHTL: shuttlecraft bays; TRAC: tractor beams; TRAN: transporters; USS: United (Federation) Star Ship; WPN: weapon (variable types).
Abbreviations for Ship Classes: BC: Battlecruiser. CA: Literally, Cruiser-Armored, or Heavy Cruiser.
Klingon Border includes several more Klingon and Federation ships along with Orion Raiders, Tholian patrol ships, Kzinti warships, a base, and freighters.
(7B) Ships Used by All Empires
Freighters and bases are included in Federation Commander: Klingon Border.
(7C) United Federation of Planets
Known simply as "the Federation", this empire is the strongest and most economically aggressive. Without a few wars to slow them down, the Federation (due to its booming economy, the result of economic and cultural freedoms not seen in other Empires) would make enough profit to buy all the other empires (in a century or two). The Federation fights only defensive wars.
Federation Heavy Cruiser (CA): The workhorse of the Federation, and the most famous ship in science-fiction. This is more than just a combat ship, as it can conduct research, rescue, exploration, etc.
Ship names include: 1700 Constitution, 1701 Enterprise, 1702 Farragut, 1704 Yorktown, 1706 Exeter, 1707 Hood, 1708 Intrepid, 1709 Valiant, 1711 Potemkin, 1713 Monitor, 1714 Hornet, 1715 Merimac, 1716 Endeavor, 1717 Defiance, 1718 Excelsior, 1721 Wasp, 1722 El Dorado, 1723 Ari, 1724 Saratoga, 1725 Tori, 1726 Krieger.
(7D) Klingon Empire
The Klingons are a military dictatorship. With less territory than the Federation, the Klingons can only match Star Fleet's combat power by keeping their civilians on the brink of poverty. The Klingon government is corrupt and paranoid, and legions of secret police watch for any sign of disloyalty in the military.
Klingon D7 Battlecruiser: The quintessential opposing ship for the Federation, the D7 is designed as a combat ship; exploration and rescue are left to unarmed auxiliaries.
Names: 14-Anarchist, 22-Annihilation, 34-Antagonist, 24-Attacker, 20-Avenger, 10-Challenger, 23-Chieftain, 4-Conqueror, 26-Courageous, 6-Crusher, 30-Decimator, 27-Defiler, 31-Demolisher, 15-Devastator, 5-Devisor, 13-Killer, 1-Klodode, 41-Klothos, 33-Merciless, 16-Nemesis, 44-Pandemonium, 7-Pitiless, 32-Relentless, 28-Ruthless, 40-Princess Sangfroid, 19-Savage, 43-Soul of Vengeance, 8-Thunderchild, 42-Thunderer, 25-Vengeance, 45-Warhammer.
Chapter 8: Scenarios
A scenario is a "battle scene" in which historical (or typical) forces, missions, and situations are presented, and players are free to find their own solutions to the problems presented.
Each scenario in Klingon Border is presented in a standard format, with background, starting forces and positions, special rules, and mission objectives. The Victory Conditions are a way to evaluate how well you achieved the victory. Since most scenarios in Federation Commander play in less than an hour, players might wish to adopt the concept of playing each scenario twice in a single session (e.g., evening) exchanging sides between the two battles.
For your First Missions we need only concern ourselves with one scenario — the classic duel, but we do briefly outline a second, a convoy battle.
(8A) The Map
Fixed Map: The map does not change after it is initially set up. Any ship which moves off of the map has left the area, meaning he has lost the battle.
Floating Map: If a running battle heads for the edge of the map, the unused panels can be "leapfrogged" in front of the battle. Alternatively, if ships seem to all be moving in a general direction, just move every counter on the map a convenient number of hexes in the opposite direction.
Numbers: Note that each hex has a number. These are used in setting up scenarios to define places to put ships into their starting positions.
The panel on page 31 has letters in the six hexes surrounding hex 62. This is a "gaming rosette" used to indicate facing during scenario set up. A ship assigned to "Hex 35 facing D" would be placed in hex 35 facing in the same direction that a ship in hex 62 would be facing if it was facing the large D in hex 63, which means of course that the ship in hex 35 would be facing hex 36.
(8B2) Victory System
During the game, points are scored for causing damage to enemy ships as follows: For scoring internal damage = 10 points. Forcing a ship to disengage = 25 points. Crippling the enemy ship = 50 points. Destroying the enemy ship = 100 points.
Crippling is defined as causing internal damage equal to one-half of all boxes (not counting boxes repaired before the end of the scenario). The player with the most points wins. If there is a tie, the player with the fewest disabled boxes (not counting shields) wins.
(8D) The Duel
Two rival empires wish to control a given region of space, perhaps because there are vital resources here, or because the area provides access to other areas. The objective is to "maintain a presence" in the sector, establishing your claim to it (or at least your right to be in it). Such duels happen for any number of reasons. During wartime, one ship may be patrolling a sector to prevent the enemy from sending ships through it (while the enemy wants to open up a gap in the patrol screen in order to send raiding forces into your territory). In cases where borders are not set by bilateral treaties, just who controls a given area is determined by who can send (and keep) a ship on patrol there.
(8D1) Number of Players
Two, usually from two different empires but civil wars do happen in the Klingon Empire.
(8D2) Initial Set Up
Each player has one ship (or, if you wish, two or three ships). Start one ship in one corner of the map, and the other ship in the opposite corner. The scenario can be used with a "floating" or "fixed" map.
(8D3) Objective
Mission: Your mission is to force the other ship to leave this disputed area, that is, to move off of the map. You can destroy his ship if you have to.
Time Limit: This scenario has a limit of ten turns; by the start of the eleventh turn, both sides will have sent reinforcements to the scene, turning it either into a standoff or a larger battle. If the enemy arrives to find that you have already "won" control over the area and have more forces at hand, they are likely to withdraw (at least for now).
Victory: Score more points than the enemy!
(8D4) Special Rules
None for your First Missions.
In Federation Commander: Klingon Border some of the complications of a duel include civilians to rescue from a planet, the need to gain scientific information about an object or planet, space monsters, etc. The larger number of ships in Federation Commander: Klingon Border allows players to experiment with two smaller ships against one larger ship, battles with entire fleets of a dozen ships, and other situations.
(8E) The Iridima Convoy
Iridima is a small planet rich in Iridium, a rare metal used in the construction of starships. The Federation and Klingons both go to great lengths to control the Iridima market. To simulate a convoy battle, place four "freighters" on the map. Each moves at a speed of 16 in direction A (toward the Federation) and does not turn, accelerate, decelerate, or do anything else. Each is destroyed by 50 damage points. If two or more ships each move 60 hexes, the Federation wins. If not, the Klingons win.
Ship Diagrams and Counters (Component Note)
Pages 29 through 31 of the source PDF provide print-and-play components for First Missions: paper counters for the Federation heavy cruiser and Klingon D7 battlecruiser (in three copies each, plus matching Turn Point, Slip Point, and Energy tokens), full Ship Diagrams for both vessels showing their shield boxes, weapon boxes, power boxes, and system boxes in the layout described in (7A), and a four-panel hex map (with the numbered hexes and lettered "gaming rosette" referenced in (8A)) intended to be printed and taped together to form the battle area. The Ship Diagrams record each ship's Damage Control rating, Turn Mode Category (D7: B; Federation CA: D, per (2C2a)), per-speed Turn Mode and Speed Cost figures, Move Cost, and Acceleration/Deceleration costs directly on the card, alongside its shield, weapon, and system boxes.
Appendix: Tabletop (Miniatures) Rules
(1F) Tabletop Rules
Federation Commander can be played with the counters provided or with "miniature" spaceships (plastic or metal models a few inches long). The Starline 2400 miniatures are specially commissioned in 1/3788 scale for use with this game.
The tabletop rules are primarily intended to leave the rules from Federation Commander intact, but to adapt them to the use of miniatures. These miniatures can be used in one of two ways. The easiest is to use large hex maps (at least 1.25" hexes) to accommodate the miniatures. If you choose this system, you can dispense with the remainder of (1F) and simply play Federation Commander with the maps provided.
The alternative is to use a blank tabletop. (Floors are workable but care must be taken to avoid stepping on ships.) Such a surface does not have a hex grid. There are two major changes to be made, both of which result from discarding the hex field. Ship location, and hence movement, is based on a point (the center of the stand or counter) and a heading (the direction that the miniature ship is pointing), rather than on a hex and a facing. Shields and weapons firing arcs remain the same in relation to the ship (60° arcs), but are now based on the actual heading of the ship, and not the arbitrary hex grid.
(1F1) Starships
Each ship (or other unit) should be identified as an individual for reference to its respective Ship Diagram. This can be done by attaching a small piece of paper with a name or number, or by painting the specific name or number directly on the ship or the base/stand.
Mount each ship on its stand with a flat edge to the front and pointed corners to each side. The "heading" of the ship is considered to be straight ahead.
Use one of the round "shield and firing arc diagrams" placed under the stand or counter to help you determine the shield and firing arcs.
(1F2) Movement
For purposes of movement, the hex grid system is replaced by an unmarked surface, a series of turn gauges, and a ruler or measuring tape. Eliminating the hex grid immediately complicates movement, but the advantages of a "free" movement system may equal or even outweigh its disadvantages. This is a matter of personal taste (some players are "lost" without the regularity of hexes) and what you are used to.
Players will find an entirely new set of tactics are required. On a hex grid, some ships must "wiggle" a full 60° to bring all of their weapons to bear. With the "free" movement of miniatures, a turn of a few degrees may be enough. This is obviously more realistic, and obviously more trouble.
You will need several items of game equipment to use the miniatures movement system. These include a set of turn gauges (which are included; please cut them out carefully) and a ruler or measuring tape. You may also find use for a long straightedge or a few feet of string or thread.
You must decide what scale you will use for your miniatures gaming; that is, you must decide how many inches of your clear table will be equal to 10,000 kilometers (one hex of the boardgame). A scale equal to that of the miniatures (1/3788) is out of the question, since each hex would be over a mile and a half across. (Putting a 3-inch Federation CA in a 1.5-mile hex does give you some idea of the incredible scale of space combat.) To use the Starline 2400 miniatures, a minimum scale of 1" = 10,000 kilometers = 1 hex is necessary. Thus, to represent the area of the 5/8" hex boardgame map would take an area just about the size of a dinner table. Should the battle begin to "wander" off of the side of the table, move all ships the same distance in any safe direction.
A movement gauge (provided) is made from a simple straight piece of cardstock marked off at 1" intervals. To move, simply align the gauge line on the pointed side corners of the black miniatures stand base with one of the marks on the movement gauge or one of the turn gauges. Then, keeping the gauge in place, move the ship so that the gauge line aligns with the next mark on the gauge.
When turning, select the turn gauge equal to your turn mode at your current speed. Align one of the marks on its outer radius (the heavy black line) with the side of your ship (the side corner of the black plastic stand base), and then, holding the gauge in place, move the ship along the gauge so that this shield boundary line aligns with the next mark.
Note that the "turn mode" function in the boardgame is used to approximate circles of different sizes. Since miniatures use true circles, it is not necessary to move any "straight" increments between successive "turn" increments (although you may if you wish). You may use a larger turn gauge than required, but never a smaller one. When moving or turning, your "true" location is the exact center of the stand.
If you skip a movement impulse (2B2b), leave the ship where it is but rotate it so the cross-section line is parallel to the next turn increment line.
Turn gauges for the 1" scale are provided with in on page 34.
(1F3) Combat
To determine which weapons bear on the target, run a string or straightedge between the stand posts from the firing ship to the target ship, and observe which firing and shield arcs the line crosses. Remember to use the center of the base, not the weapon on the miniature. To determine range, measure the distance between the stand posts of each ship.
If using a tape measure, you will have to divide the inches by your scale to convert to increments. Round fractions of .500 up, and those of .499 down. Players may find it easier to make a special "range stick" marked directly in their increments or to find an old fashioned yardstick. Either method will give you the range in increments, which can be entered on the game's various combat charts directly.
Shuttles docking at their home ship and seeking-weapons reaching their targets must be able to actually reach the center of the target ship's stand or counter.
(1F4) Small Units
Shuttles, fighters, drones, plasma torpedoes, etc., operate using the same principles as ships.
Until miniatures for seeking-weapons and shuttles are made available, players will have to make do with substitutes, counters being suitable and immediately available.
(1F5) Terrain
Many players have shown great creativity in creating terrain for use with miniatures. Styrofoam balls can be used for planets, as could paper cutouts. Some players have found plastic toys which are a good match for some of the monsters.
(1F6) Starline 2400 Miniatures
Countless ages ago, Lou Zocchi created a series of plastic ships based on the Franz Joseph Technical Manual. Many years later, expert sculptor Richard Kerr began creating matching ships for other races of the Star Fleet Universe. Over time, many companies have produced miniatures which varied widely in price, quality, availability, scale, and authenticity.
The current Starline 2400 range includes well over 100 different ships for the Federation, Klingons, Romulans, Kzintis, Gorns, Tholians, Orions, and other races of the Star Fleet Universe. See www.starfleetgames.com/minis for more information about this range of pewter starships. We add new ships every few months.
Squadron Boxes #1-#3 are specifically designed to provide you with one of each ship in Klingon Border, and Border Box #1 has even more of them.