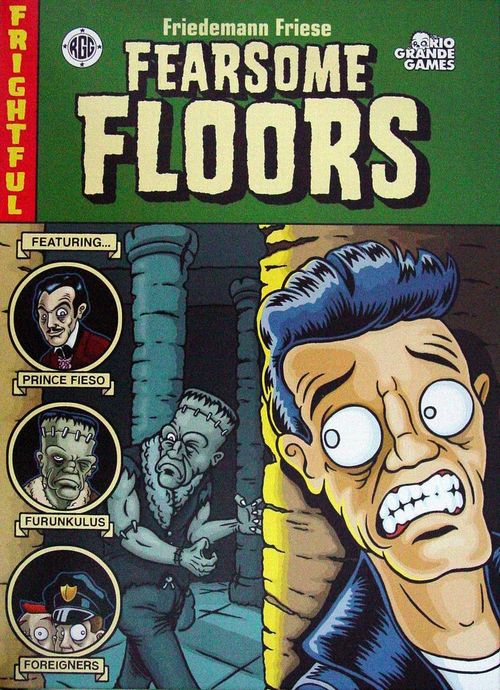
Fearsome Floors
Fearsome Floors Rulebook
Table of Contents
Table of Contents
- What Is Fearsome Floors About?
- Imprint
- Game Components
- Game Preparations
- How to Play
- Phase 1: The Figures Flee
- Blocks of Stone, Blood Pools, and Stuffed Bunnies
- Phase 2: The Monster Hunts
- The Two Stages of the Game
- End of the Game
- Notes for 2 Players
- Notes for 6 and 7 Players
- Advanced Flight – Build Your Own Dungeons and Basements
- The Effects of the Advanced Floor Tiles
- Summary of Floor Tile Effects
What Is Fearsome Floors About?
Try to move your figures through Prince Fieso's fortress without being captured by the monstrous Furunkulus.
In each round, first all player figures move, possibly hiding behind blocks of stone, sliding across pools of blood to get to the exit more quickly, or luring the monster to attack other figures so that you can scoot away safely.
After all player figures have moved, the monster makes its move automatically to capture any figures in sight.
If you are the first to move a certain number of your figures to the bus waiting at the exit, you win the game.
Imprint
The game Fearsome Floors has been published since 2003 by the board game company 2F-Spiele, Fedelhören 64, D-28203 Bremen, www.2f-spiele.de.
Publisher and author: Friedemann Friese Pictorial design and lettering: "Maura" Kalusky. Editing and realization: Henning Kröpke.
© Copyright 2F-Spiele, 2026. A product from 2F-Spiele.
Game Components
This copy of Fearsome Floors (Reanimated Version) contains:
- 1 double-sided folding game board (one side is the Dungeon, the other the Basement)
- 1 jail (Start) and 1 bus (goal)
- 21 double-sided floor tiles (11 blocks of stone, 4 stuffed bunnies, 4 teleporters, 2 blood pools):
- 3x block of stone (both sides)
- 2x block of stone & crystal
- 4x block of stone & "turn right"
- 2x block of stone & "turn 180°"
- 4x stuffed bunny (both sides)
- 2x teleporter (both sides)
- 2x blood pool (both sides)
- 25 figures created from wooden discs and 1 sticker sheet (2 stickers each per wooden disc):
- The Family (4x green)
- The Bikers (4x blue)
- The Students (4x red)
- The Friends (4x yellow)
- The Nerds (3x natural)
- The FBI (3x grey)
- The Pious (3x purple)
- 28 monster parts (4 bodies, 8 heads, 10 arms, 6 feet)
- 9 movement tiles
- 1 starting tile
Before the first game: Place both stickers of a figure on the front and back of a wooden disc of the same color. The sum of the numbers on both sides of a figure is always 7.
Game Preparations
Dungeon
1. Lay out the game board with the Dungeon side face up.
Place the jail next to the entrance as the starting point for all figures and the bus next to the exit as their goal.
Place the floor tiles on the spaces of the game board indicated below. Use only the 2 blood pools and 11 blocks of stone. Return the 4 teleporters and 4 stuffed bunnies to the game box. For now, you do not use the backsides of the blocks of stone.
2. Raise the monster.
Choose a body, head, arms, and feet from the monster parts and assemble them. Return the remaining monster parts to the game box.
Place the monster on the corner space at the exit with the front of the monster facing the mark found in a straight line on the opposite wall.
Or Basement
1. Lay out the game board with the Basement side face up.
Place the jail next to the entrance as the starting point for all figures and the bus next to the exit as their goal.
Place the floor tiles on the spaces of the game board indicated below. Use the 2 blood pools, 11 blocks of stone, and 4 stuffed bunnies. Return the 4 teleporters to the game box. For now, you do not use the backsides of the blocks of stone.
2. Raise the monster.
Choose a body, head, arms, and feet from the monster parts and assemble them. Return the remaining monster parts to the game box.
Place the monster on the indicated space with the front of the monster facing the mark in a straight line on the opposite wall.
For Both Maps
3. Prepare the stack of movement tiles for the monster.
With 2 to 5 players: Return the "3 hits" movement tile to the game box. Shuffle the remaining 8 movement tiles and place them in a face-down stack next the game board.
With 6 to 7 players: Return the movement tile with the value "5" to the game box. Shuffle the remaining 8 movement tiles and place them in a face-down stack next the game board.
4. Everybody chooses a team of figures that you will help to flee from the monster.
With 2 to 4 players: Play with 4 figures per team, choosing from the green, red, yellow, or blue teams. Place each figure with its white circle (showing values 1, 3, 4, and 5) face up.
With 5 to 7 players: Play with 3 figures per team, choosing from any of the 7 teams. Place each figure with its white circle (values 1, 4, and 5) face up. If you play the green, red, yellow, or blue team, return the figure with the white "3" to the box.
Place all figures on the matching colored cell of the jail at the entrance. Make sure that the sides with the white circles stay visible.
5. The player who looks the most like the monster takes the starting tile and turns it to the side with the white circle.
Now you are ready to start playing Fearsome Floors!
How to Play
You play Fearsome Floors in two stages, each consisting of 7 rounds.
If your figures are captured by the monster during the first stage, they are sent back to the jail. They've escaped with no more than a scare for now, and you can return them to the game next round.
During the second stage, the monster eats the captured figures, so you lose them and must return them to the game box.
Each round consists of two phases:
- The figures flee
- The monster hunts
The game ends as soon as one player moves all but one of their figures through the exit and onto the bus, rescuing them. If nobody manages to do this, the game ends at the end of the 14th round, with all figures still in the room being eaten. In this case, the player who has rescued the most figures wins.
Phase 1: The Figures Flee
Move your figures through Prince Fieso's fortress. Take care where the other figures run to and where the monster currently waits for you.
Your figures all have a black circle on one side and a white circle on the other side. All figures show the white circle at the beginning of the first round, as seen on the starting tile. The number in the circle shows the maximum number of spaces that you can move the respective figure.
Beginning with the player with the starting tile, choose one of your figures and move it up to the number of spaces indicated by the visible number on the figure:
- When you move one of your figures from the jail through the entrance, it moves with its first step onto the corner space at the entrance.
Example: The green figure moves 3 steps from the jail through the entrance, then you turn it over to the side with "4".
- You can move your figure to any space vertically or horizontally. It can move forwards and backwards, can change direction at any time, and can even choose to not move at all. Sometimes it can even make sense to remain in jail!
- You can move your figure through spaces occupied by other figures, but you need to count these occupied spaces toward the total number of spaces moved. Your figure cannot stop on an occupied space and cannot push other figures (not even from your own team).
- Your figures cannot enter or pass through the space occupied by the monster. They are not weary of life! Furthermore, they cannot run into the walls as they aren't stupid either!
- After moving, turn your figure over to its other side, even if it moved zero spaces. This way you can easily see by means of the black and white circles which figures have already moved and which still need to move. The new number is the maximum movement distance for the next turn.
- To leave the game board, the figure needs to move one step from the exit onto the bus.
The Bus
When your first figure enters the bus, place it on the lowest numbered empty seat. The lower your number, the better in case you need to break a tie, so try to rescue your first figure as quickly as possible.
With 2 to 4 players: When your second figure enters the bus, your figures jump the queue to the front. Stack both rescued figures and move them to the lowest numbered seat that has only a single figure, moving all single figures to one higher seat to close any gap caused by the jump.
Example: The red figure enters the bus. It takes seat "2" since a blue figure reached the bus earlier. If the red team rescues a second figure first, both red figures queue-jump to the front of the bus. Stack them on seat "1", and move the blue figure to seat "2".
Then, the next player in turn order moves one of their figures.
Exception for the first round: At the start of the game, move only 2 figures of your choice from the jail through the entrance. Turn over the figures that remain in jail. Beginning with the second round, you always move all of your figures.
Blocks of Stone, Blood Pools, and Stuffed Bunnies
Let's hide behind that block of stone … hey, why did you push that away?
Three types of floor tiles are in the Dungeon and Basement: blocks of stone, blood pools, and stuffed bunnies. The following rules are in effect:
Blocks of Stone
Your figures can hide from the monster behind these huge blocks of stone.
The figures are strong enough to push a single block of stone space by space in a straight line, but this is possible only if the space behind the block of stone is empty. Other blocks of stone or anything big – figures, the monster, or walls – prevent pushing.
Exception: When a figure pushes a block of stone onto the corner space at the entrance or exit, it slides through the doorway. Return it to the game box. You cannot thwart the flight of other figures.
Example: The green figure moves 4 spaces and pushes the block of stone 1 space. Then the blue figure is in the way, so the green figure needs to change direction. The green figure could have stopped anytime on that chosen path, or it could have not moved at all. Finally, flip it to its other side. It moves at most 3 spaces next round.
Example: The green figure wants to push the block of stone 1 space and moves 5 spaces past the two other figures. (It counts these spaces.) The green figure cannot stop on the spaces occupied by the other figures.
Blood Pools
Your figures can slide across the blood pools and move faster in this way.
Blood pools are flat and stay put. When a figure moves onto a blood pool, the figure slides with that step in a straight line to the space beyond the blood pool and can choose to continue its move from there. It cannot stop or change direction on the blood pool.
If a moveable block of stone is on the space beyond the blood pool, your figure pushes it one space according to the pushing rules. If the stone cannot be pushed or if the blood pool lies next to a wall, the figure stays on the blood pool on the last space before that obstacle. With its next step, the figure can slide in a different direction off the blood pool.
Because it is forbidden to end movement on the same space as another figure, your figure cannot move onto the blood pool with its last step if the space beyond the blood pool is already occupied by another figure.
If your figure pushes a block of stone onto the blood pool, it slides in a straight line across the blood pool as well. If the space beyond the blood pool is empty, it stops there; if that space is occupied, it remains on the prior space on the blood pool. If your figure slides after the block of stone, it can stop on the blood pool because of that "jam", then it can slide sideways off the blood pool with its next step. If somebody pushes that block of stone sideways away, your figure remains on the blood pool. Other figures can then slide through the space where your figure is located.
Example: The green figure moves 5 spaces and pushes the block of stone on the blood pool. The block of stone slides on the blood pool and stops in front of the blue figure, which blocks the sliding. The green figure cannot move 2 spaces up, then 3 spaces left as it would end its movement on the space occupied by the red figure.
Stuffed Bunnies
Your figures can hide behind them … but will that be a safe place?
Your figures follow the same rules for stuffed bunnies as for blocks of stone.
Example: The green figure moves 2 spaces and hides behind the stuffed bunny. It will know whether that is a great idea only when the monster starts hunting.
As a reminder, you can find all movement and pushing rules for floor tiles on the back of this rules booklet.
On your turn, you always move one of your figures. If it's your turn and you have already moved all of your figures because some of them are on the bus or have been eaten by the monster, you pass your turn for the remainder of the round.
This phase ends when all the player figures have moved and now show the opposite colored circle compared to the starting tile.
Phase 2: The Monster Hunts
The master monster Furunkulus does not like to share its fearsome floors with other people and starts to hunt for you troublemakers!
After all figures have moved, the monster takes its turn, moving automatically following these rules.
Reveal the topmost movement tile and see the distance that the monster will move.
Every step of the monster is divided into:
- Looking and …
- Moving 1 space
Repeat these two steps until the monster reaches the given distance of the movement tile or meets the tile's condition.
Important: After the last step, the monster looks a final time.
Looking …: The monster always looks in exactly 3 directions: straight ahead, to the left, and to the right. The monster never looks back or diagonally. If the monster sees a figure in only one of the 3 directions, it turns to face this figure. If it cannot see a figure, it keeps facing its current direction.
… and moving 1 space: Then the monster moves forward 1 space before it looks again.
The monster is not very clever and thus always makes the easiest decisions:
Several figures within sight: If the monster can see two or even three figures in different directions, it turns toward the closest figure, then moves 1 step. If several figures are at the same closest distance, the monster gets confused and keeps facing the same direction, then moves 1 space forward.
No X-ray vision: The monster cannot look through blocks of stone, stuffed bunnies, or the wall in the Basement.
Secret passages: If the monster would walk into a wall, it instantly moves to the other space with the same letter. In the Dungeon, it keeps facing the same direction. In the Basement, it looks in the opposite direction when passing through the short sides. If it walks into the dividing wall, it instantly passes through to the other side.
Blood pools: The monster looks over the blood pools. For blood pools, the monster follows the same rules as the figures. When it moves onto a blood pool, it slides with that step in a straight line to the space beyond the blood pool and continues its move from there. It cannot stop or change direction while sliding. Thus, it misses seeing any figures to the left and right of the blood pool. If the blood pool is in front of a wall, the monster slides into the wall and immediately moves to the other space with the same letter.
That hurts: If the monster moves onto a space occupied by a figure, it captures this figure. During the first stage of the game, it sends the figure back to jail with the current side still visible. (Don't accidentally flip the figure over!) Next round, you can move that figure once again. However, during the second stage, it eats the captured figures, so you must return them to the game box.
Monster strength: The monster can push any number of blocks of stone in front of itself. If your figures are hiding behind them, the monster pushes them step by step as well. If the monster pushes something onto a blood pool, it slides following the normal rules. If it pushes something against a wall, that something is crushed. Your figures count as captured, while crushed blocks of stone are returned to the game box.
It loves stuffed bunnies: The monster treats stuffed bunnies the same as figures, moving to the closest bunny or figure it sees – or being confused if they're at the same distance. If the monster moves onto a space with a stuffed bunny, it cuddles it mercilessly. Return it to the game box afterward.
The monster continues to move: If the monster has not moved its designated number of spaces, it looks again, then continues to move. Thus, it can capture several figures.
The Movement Tiles
For movement tiles with numbers, the monster moves the indicated number of spaces, then looks one final time.
For movement tiles showing "1 hit", "2 hits", and "3 hits", the monster moves space by space until it has captured 1, 2, or 3 figures before looking one final time. That said, if the monster has moved 20 spaces before reaching its hit count, it gets tired and stops moving, then looks one final time.
Important: Only figures count as hits! The monster indeed loves stuffed bunnies but does not count them as hits.
Exception for the first round: The first movement tile of the game cannot be a "hit." Place these tiles to the side and continue drawing tiles until you get one with a number. Reshuffle the "hit" tiles with the remaining stack to form a new face-down draw stack.
After moving the monster, flip the starting tile to the side showing the other colored circle, that is, the one all the figures are showing as well, then give it to the next player to the left. Continue the game with Phase 1: The figures flee.
Example of Monster Movement
During the first stage, you have revealed the movement tile with the "8." Thus, the monster will move 8 spaces.
First, the monster looks. Nobody is straight ahead or to the right, but it sees figure A to the left. (It cannot see figure B, as the monster never looks back.) The monster turns left and moves 1 space toward figure A.
Now it looks again, seeing figure G in addition to figure A. Since figure A is closer, the monster keeps facing the same direction and moves another space toward figure A.
Next, it spots figure C in addition to figure A – and figure C is closer, so the monster turns to the right and moves 1 space onto the blood pool. It slides to the space with figure C, capturing it and sending it back to jail. Since the monster was busy sliding, it did not notice figure H.
Now, it sees figures D and E. It cannot look through the block of stone and does not see figure F. It is confused as both D and E are the same distance away, so it moves 1 space straight ahead. The monster pushes forward the block of stone and figure F 1 space each.
The block of stone still obscures the sight of figure F, but the monster sees no one else, so it moves 1 space forward, pushing the block of stone again and crushing figure F. This counts as a capture, and figure F returns to jail.
The monster cannot see anybody and crushes the block of stone with its sixth step. Return the block of stone to the game box.
Now, the monster sees figure G and turns to the right. It moves 1 space and captures G, then it moves one final time for its 8th space. It takes a last look, sees figure B, and turns to the right.
If figure G had not be on that space, the monster would have walked into the wall. Thanks to the secret passage, it would have exited the other V on the opposite side of the Dungeon with its 7th move. It would then look, move, and look once again to finish its action.
Example of a "Hit" Movement Tile
During the second stage, you have revealed the "2 hits" movement tile. Thus, the monster will move until it has captured two figures.
First, the monster looks. Since figure A is hiding behind a block of stone, the monster sees only figure B, turns, and eats it with its first step.
While moving another space, it hits the dividing wall and instantly passes through to the other side.
Now, it sees both figure C and the stuffed bunny. The stuffed bunny is closer to the monster, so it keeps moving in the same direction until it reaches the stuffed bunny. The monster cuddles it mercilessly, and you return the stuffed bunny to the game box.
Sadly (for the green player), the stuffed bunny does not count as a hit, so the monster continues to look for figures. It sees figure D directly in front of itself, so it moves forward, capturing and eating figure D. Turns out that hiding behind the stuffed bunny was not so clever after all. The monster ends its hunt by looking once more. Nobody is in sight, so it remains looking in the direction of the wall.
If it had not captured a second figure, the monster would have stopped its movement after 20 spaces.
The Two Stages of the Game
The First Stage
You play 7 rounds during the first stage. Always reveal the top movement tile from the stack in Phase 2: The monster hunts. If only one tile is left in the stack, the first stage ends after the monster hunt.
The Second Stage
Shuffle all 8 movement tiles at the start of the second stage and place them again in a face-down stack. Start again with Phase 1: The figures flee and play another 7 rounds until only one tile is again left in the stack.
In rare cases, the game can end in the first stage. If that happens, the second stage is, of course, cancelled and Furunkulus quits work earlier than expected.
End of the Game
As soon as one player moves all but one of their figures through the exit to the bus, thus rescuing them, they win the game:
- With 2 to 4 players: Rescue 3 figures.
- With 5 to 7 players: Rescue 2 figures.
If you want, continue to play to determine 2nd place and so on.
If nobody can rescue enough figures, the game ends during the second stage when one of two things happen:
- As soon as the last figure on the board either reaches the bus or is captured by the monster and eaten.
- After 14 rounds, at which point all figures still on the game board are captured and eaten.
In either case, the player who has rescued the most figures wins. In case of a tie, the tied player whose figures occupy the lowest-numbered seat on the bus wins.
Notes for 2 Players
When playing with two, mind the following:
If you rescue 2 of your figures before your opponent gets even one onto the bus, this situation can backfire on you.
The other player can move 2 figures on the board after you finished your last movement. With experience, they can use these additional moves to lure the monster to where your final figures stand and really annoy you. In this way, a slow start can still turn into a victory in the end!
Notes for 6 and 7 Players
With 6 and 7 players, the game is much less predictable than with fewer players. With luck, you can rescue 2 of your figures during the first stage to win the game early.
Be mindful of the "3 hits" movement tile. It can allow the monster to walk a great distance on the game board and capture several figures that were initially far away.
Advanced Flight – Build Your Own Dungeons and Basements
After several games with blocks of stone, blood pools, and stuffed bunnies, try the advanced flight, which features teleporters, crystals, and turning stones.
Game Preparations
Choose a side of the game board to be face up, then place all floor tiles next to it, along with the starting tile. Place the monster on the matching starting space.
Beginning with the player who looks the most like the monster, players take turns placing one floor tile on empty spaces of the game board. You can choose which side goes face up.
Note the following exceptions:
- Nothing can be placed on the 3 spaces next to entrance and exit, that is, the corner space and the orthogonally adjacent spaces.
- The floor tiles must be placed exactly on the spaces and cannot overlap.
- No teleporter tile can be placed orthogonally adjacent to another teleporter tile.
If you place the last floor tile, the player to your left takes the starting tile. That player starts the first round of the game.
All familiar rules are in effect, with the following additions for the new floor tiles.
The Effects of the Advanced Floor Tiles
Crystal: Functions like a block of stone except that the monster can look through the crystal and see figures hiding behind it.
Turning stone: Figures treat turning stones as blocks of stone. If the monster stands in front of a turning stone, it looks to the left and right as usual (and cannot look through it). If it sees no figures, the turning stone is activated. The monster does not push it, but instead turns in its space as indicated on the turning stone, either to the right or 180° – then it moves 1 space.
Teleporter: Teleporters do not move and are flat, so the monster sees over them. Each teleporter has two identical tiles. Figures treat teleporters as walls. They cannot enter a space with a teleporter, and they cannot push anything onto a teleporter.
If the monster moves onto a teleporter, it instantly lands on the matching tile with its current step, facing in the direction of the arrow on that tile. Before it moves again, it will look left and right like normal, changing direction if needed.
If the monster pushes a floor tile onto a teleporter, the floor tile vanishes. Return the floor tile to the game box. If it pushes a figure onto the teleporter, that figure is captured.
As a reminder, you can find all movement and pushing rules for floor tiles on the back of this rules booklet.
Example of Advanced Monster Movement
During the second stage, you have revealed the movement tile with the "8." Thus, the monster will move 8 spaces.
First, the monster looks, seeing figure A over the teleporter to the left. The monster turns left and moves 1 space toward figure A. The "turn right" turning stone is not activated because the monster did not try to move onto that space.
It still sees only figure A and moves straight ahead another space.
Next, it sees figure E in addition to figure A. Because they're the same distance away, the monster is confused and continues to move straight ahead. It moves onto the teleporter and instantly lands on the matching tile to the right of figure D, facing toward the bottom of this image. The monster teleported instantly, not seeing figures A, B, and C.
Standing on the teleporter it sees figure D and turns to the right. It captures figure D with its next step and eats it.
Now, it does not see anybody and wants to move onto the space holding the "turn 180°" turning stone – but instead of pushing it, the monster turns 180° in its current space, then moves forward onto the teleporter with its fifth step. It instantly lands on the matching teleporter tile next to figure B, facing in the direction of figure C.
The monster sees figure A to the left and figure C straight ahead through the crystal. (It does not look back, so it misses seeing figure B.) Since figures A and C are the same distance away, the monster doesn't turn and moves in the direction of figure C, pushing both the crystal and figure C 1 space forward.
It does not see any other figures and pushes the crystal and figure C another space forward.
With its final step, the monster pushes both the crystal and figure C one more space. It then looks a final time and turns in the direction of figure E since that figure is closer to the monster than figure C. Thus, the monster ends its hunt directly in front of figure E.
Summary of Floor Tile Effects
The back of the rules booklet summarizes how every element interacts with figures, the monster, the monster's line of sight, and being pushed.
Block of stone: Figure – pushes it if the space behind is empty. Monster – pushes it! Line of sight for the monster – cannot look through. The monster pushes something onto this space – is pushed.
Blood pool: Figure – slides in a straight line to the space beyond the blood pool. Monster – slides in a straight line to the space beyond the blood pool. Line of sight – looks over it. The monster pushes something onto this space – anything pushed slides in a straight line to the space beyond the blood pool.
Stuffed bunny: Figure – pushes it if the space behind is empty. Monster – cuddles it! Place it in the box. Line of sight – cannot look through. The monster pushes something onto this space – is pushed.
Turning stone "turn right": Figure – pushes it if the space behind is empty. Monster – instead of pushing the stone and moving on the space, it turns to the right. Line of sight – cannot look through. The monster pushes something onto this space – is pushed.
Turning stone "turn 180°": Figure – pushes it if the space behind is empty. Monster – instead of pushing the stone and moving on the space, it turns 180°. Line of sight – cannot look through. The monster pushes something onto this space – is pushed.
Teleporter: Figure – cannot enter this space! Monster – instantly moves to the other tile, facing in the direction of the arrow. Line of sight – looks over it. The monster pushes something onto this space – figures count as captured; other items are returned to the box.
Crystal: Figure – pushes it if the space behind is empty. Monster – pushes it! Line of sight – looks through it. The monster pushes something onto this space – is pushed.
Wall: Figure – cannot enter; must move in another direction. Monster – instantly moves to the other space, facing away from the wall. Line of sight – cannot look through. The monster pushes something onto this space – figures count as captured; other items are returned to the box.
Figure: Figure – can move through the space, but cannot stop there. Monster – captures it! Line of sight – walks in the direction of the nearest figure. The monster pushes something onto this space – is pushed.
Monster: Figure – cannot enter this space! Line of sight – always looks straight ahead, to the left, and to the right. Never looks back!