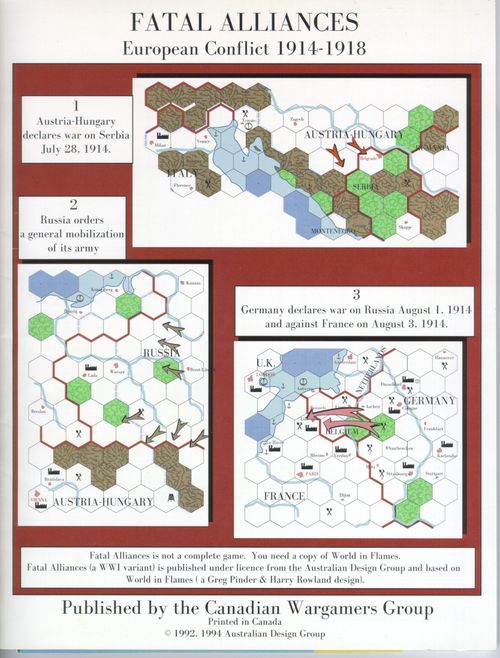
Fatal Alliances II: European Conflict 1914-1918
Fatal Alliances II: European Conflict 1914-1918 Rulebook
Table of Contents
Table of Contents
- 1. Introduction
- 2. Zones of Control
- 3. Stacking
- 4. Supply
- 5. Sequence of Play
- 6. Reinforcement Segment
- 7. Initiative Segment
- 8. Weather Segment
- 9. Resource Transportation Segment
- 10. Action Segment
- 10.5 The Naval Action
- 10.6 The Combined Action
- 10.7 The Land Action
- 11. End of Turn Segment
- 12. Surprise
- 14. Conquest
- 15. Control
- 17. Neutral Major Powers
- 18. Minor Countries
- 19. Co-operation
- 23. Optional Italian Entry
- 24. Lawrence of Arabia (Optional)
- 25. Optional Morale Rules
- 26. Scenarios
- Sections Not Present in the Scan
1. Introduction
Fatal Alliances is a WWI variant based upon the game World in Flames (designed by Greg Pinder and Harry Rowland). To play this variant, one must own or have access to a copy of World in Flames, preferably the 5th edition, as all deviations between Fatal Alliances and World in Flames are based on a comparison to the 5th edition. All World in Flames maps, charts, rules, concepts, references, etc. are used with the permission of the Australian Design Group. No part of Fatal Alliances or World in Flames may be reproduced in any way without the permission of the Australian Design Group.
Fatal Alliances is a strategic level simulation of the First World War. Two to five players manage the economies and conduct the military operations of one or more of the major nations involved in that conflict. The game uses some physical components from World in Flames including maps, various charts and tables, as well as utilizing the basic rules from that game. As one will see, many rules, concepts, and charts are a direct derivation of World in Flames (WiF).
Note: Fatal Alliances has been published as a complete rules set with important rules or those different from WiF highlighted with a sidebar. The layout of the rules is similar to WiF to ease learning and understanding. Where examples were deemed as not needed, a note is made to the effect of "as per WiF". However, if an example would add to understanding a concept or change as it affects Fatal Alliances, then it has been left in and/or elaborated on. Experienced WiF players need only read the sidebar sections of these rules or browse the "quick play rules". WiF rules which do not apply or are not used in Fatal Alliances are not referenced.
Fatal Alliances is played on the WiF map covering the European and African theatres, with revisions provided as part of this variant package. The Pacific theatre map is not required except for reference to the Terrain Effects Chart. The variant package includes a map inset for part of the European map and a listing of changes not necessarily covered by the inset (see 1.2). The inset overlay has to be trimmed a bit and then placed on top of the map. Charts and the quick play rules are included in the middle of this rulebook for easy removal. Feel free to photocopy any charts for your personal use.
Each land unit generally represents an army or corps. Each naval unit represents a task force of three to five capital ships and a variable number of smaller vessels. Each aircraft unit represents a variety of aircraft types and numbers. Each game turn is two months.
The numbers and types of military units provided in the game are intentional. Players should not add further units to the military counter mix. WiF counters need not be used in Fatal Alliances as the counters provided are all that are required.
The reverse side of each HS unit lists one or more dates or a "?". A bracketed date is the historical time that the unit arrived in the Construction Pool. An unbracketed date in black is the historical time at which the unit arrived on the map. A date printed in red or white is the date on which the unit was sunk or went out of service.
1.1 Playing Pieces
Most of the counters provided with the game represent military units. Others record the game turn in progress, the year, the present initiative status, the current impulse, or the status of hex control (1/2 hex markers).
Naval and aircraft (AC) units are distinguished by silhouettes. Land units are distinguished by symbols. Fatal Alliances uses the same unit descriptions as WiF. This means for example that a naval unit's numbers are positioned in the exact manner as they would be in WiF. There is no value in the anti-aircraft spot of the counter (lower left), as this is not applicable to World War I combat.
The combat units are printed in different colours to differentiate nationalities. All minor and some Commonwealth (CW) units are also identified by letters: A - Australian, C - Canadian, I - Indian, S - Serbian, B - Bulgarian, No - Norwegian, Ne - Netherlands, Be - Belgian, G - Greek, R - Rumanian, and M - Montenegrin.
Some nationalities include white printed units. This indicates a greater resistance to the ill effects of lack of supply (see 4.1).
1.2 The Maps
Fatal Alliances requires changes to the WiF European map. (Players do not have to permanently change their maps but be aware of the changes necessary to play Fatal Alliances).
Changes included on the map inset
- The borders and resources as they were in 1914 in Central Europe are displayed. The changes shown represent the major border differences between those of WWII and those of WWI.
Changes not included on Map Inset (but required)
- Change the names of the following cities: Istanbul to Constantinople, Oslo to Christiania, Stalingrad to Tsaritsyn, Tallinn to Reval, Dnepropetrovsk to Ekaterinoslav, Stalino to Yuzovka, Kalinin to Tver, Gorki to Niznhy Novgorod, Leningrad to St. Petersburg.
- Remove the following as capital cities: Ankara, Moscow, Warsaw, Helsinki, Tallinn, Riga, Kaunas, Prague, Budapest, Dublin. Add the following as capital cities: Constantinople and St. Petersburg.
- Remove all borders between USSR, Finland, Estonia, Latvia and Lithuania. They are all one country - Russia.
- Add the term OE (abbreviation for Ottoman Empire) in brackets behind the names of the following minor countries: Syria, Palestine, Trans-Jordan, and Iraq. Their hexes are treated as friendly Ottoman Empire territory. However, Ottoman reinforcements may not be placed in these cities (6.2) nor are they supply sources for anyone (4.3).
- Replace the name Turkey with Ottoman Empire.
- The hex two hexes west of Constantinople is part of Bulgaria.
- Replace the name Er Rif with Spanish Morocco.
- All oil resources have only a 1 resource value.
- Delete the oil resource next to Baghdad and the resource 3 hexes from Sevastopol. Add a resource in the hex southeast of Glasgow.
- Delete factories in Leningrad, Sevastopol, Stalingrad, Saratov, Taranto, and Canada. Add a factory in Glasgow.
- Remove the border in Ireland, remove the name Ireland, Ireland is part of the UK.
- Remove all off map land boxes except Canada and USA.
Players will notice that, as in many wargames, the land portions of each map are divided into hexagons (called hexes). Hexes are used to regulate unit location and movement. A coastal hex is a hex which contains both land and sea, the sea portion of which is printed in a lighter shade of blue than purely sea areas. Each hex has six sides called hexsides. Certain terrain features (e.g. rivers) conform to hexsides and affect combat, and sometimes movement, across that hexside. An all-sea hexside is a hexside which contains no land at all. A hex is adjacent to another when they share a common hexside.
Unlike other wargames, the hexes stop at the coastlines. Hexes at sea are replaced by hexdots. Each hexdot is located at the centre of what would otherwise be a hex. When moving from hexdot to hexdot (a movement used only by aircraft units), players should imagine that they are moving from hex to hex. The use of hexdots is partly aesthetic but also serves to show that the presence of land units is not permitted.
Seas are divided into areas by dark blue lines (called sea area borders). Each sea area is individually named (e.g. "NORTH SEA") and contains a sea-box which is used to regulate movement and combat at sea. Two sea areas are adjacent when they share a common sea area border or when they are directly connected by a blue communication line.
The map incorporates the main areas of conflict in World War I. However, other areas saw combat and as such movement and combat is allowed in these off-map areas. They are called off-map boxes. Each off-map box consists of:
(a) A sea area with its sea-box; and (b) next to the American East Coast only, Canada and US land areas.
Movement along blue communication lines is only permitted to naval units (and their cargos). Movement between Canada and the US is only permitted to land and aircraft units.
Terrain and its effects are summarised in the chart on the top right-hand corner of the WiF Pacific Map.
1.3 The Production Chart
The WiF Production Chart contains a Year Track on which is recorded the year in play, an Initiative Track recording the initiative status (see 7.0), an Impulse Track recording the impulse in play (see 10.2), a Construction Pool into which naval units part-way through construction are placed (see 11.6.2), and a Repair Pool where damaged naval units are placed (see 10.5.7.2). Add the years 1914 through to 1920.
The Production Chart also contains a Production Spiral. The production of new units is controlled by the Production Spiral. It is divided into six spiral arms, each attached to a particular two month period.
The game turn marker is moved on that portion of the spiral arm which is nearest to the centre of the spiral. This indicates which two month period (the "game turn") is currently in progress. When a new unit is produced it is placed the number of turns ahead on the track that it takes to produce (as indicated on the Unit Cost Chart). For example, if a tank is produced in the Jan/Feb turn it is placed on the Sep/Oct sector. That is when it would be received as a reinforcement.
1.4 How to Set Up the Game
The Fatal Alliances variant overlay should be placed on top of the WiF map. Any changes if not marked on the map should at least be noted. The Production Chart should be placed adjacent to the map.
The counters are now broken out. The game turn marker is placed on the appropriate month and year of the scenario to be played.
The remaining counters should be sorted by nationality into the following force pools: HQ; INF; MTN; TANKS; ART; CAV; TG (Territorial Guard); MIL (OE Militia units); LS; HS; TRS; SUB; FTR; BOMB; OBS; and ZEPP. The CW force pool contains several nationalities which are printed in the same background colour. The scenario may specify that certain units will initially be excluded from the force pools.
When a unit is destroyed during the game, it is removed from the map and returned to its force pool. It may then be rebuilt.
1.4.1 HS Units
Each Major Power has 2 HS force pools. One (the "secondary force pool") contains the units which are sunk before the start of the scenario and those with a "?" rather than a date on their reverse side. The other (the "primary force pool") contains the remaining units of that type. The primary force pool should be sorted into the order in which the units historically arrived in the Construction Pool. Destroyed HS units are returned to the secondary force pool.
1.4.2 Determining Sides
If there are more than 2 players, split into 2 teams. Each team (or player) secretly bids the number of game turns it thinks it would take to force all of the Central Powers (Germany, Austria-Hungary, and the Ottoman Empire) to accept an armistice from the Triple Entente (France, Russia, England, Serbia, Italy, and the US). The team with the lower bid plays the Triple Entente (TE). The other team plays the Central Powers (CPs). If the bids are tied, there is another round of bidding. If this too is tied, then a die roll determines which team plays which side.
The CPs can win a decisive victory if they force three TE major powers to accept an armistice or two major powers and Serbia. Otherwise, the game will go as many turns as the TE team bid, ending after the Victory Conditions Phase of that turn.
If you wish to determine level of victory you may play on until the CPs are defeated. If the game ends one turn after the bid then consider it a marginal CPs victory. If the game ends two turns after the bid then consider it a substantive CPs victory. If the TE takes more than two turns after the bid to force the CPs to accept an armistice then consider it a decisive CPs win. Similarly, if the TE take one turn less than bid, to force an armistice, consider it a substantive victory. Two or more turns less than the bid would be a decisive victory.
EXAMPLE: Historically the war finished in the Nov/Dec 1918 game turn, a total of 27 game turns (for the full game). If players feel that the game is biased in favour of the Triple Entente, they should bid less than 27 turns; if they feel it is biased in favour of the Central Powers they should bid greater than 27 turns.
1.4.3 Set Up
The various nationalities set up in the order specified by the scenario. Except where otherwise stated, all units should be chosen randomly. Units should be placed on the Production Spiral or into the Construction or Repair Pools, as directed by the scenario. In some scenarios certain units must be set up in specific hexes. Units specified to set up "anywhere" can set up in any territory they control on that map. All naval units must be set up in ports. Where an impermissible unit is chosen (e.g. a Canadian unit is chosen for set up in the UK off the start) it should be returned to the force pool and another unit picked. All units must conform to stacking limits when setting up (see 3.0).
When a country enters the war one unit (which can exert a ZOC into surrounding hexes) must be set up in the capital.
2. Zones of Control
Zones of Control (ZOCs) affect land movement (see 10.7.4.1), supply (see 4.1 and 4.4) and transport of resources (see 9.1).
HQs and TANK units exert a ZOC into their own hex. All other land units (except artillery (ART), see below) exert a ZOC into their own hex and all adjacent hexes.
ZOCs are not exerted across alpine, lake, or all-sea hexsides (including straits hexsides), or into the notional hexes represented by hexdots.
Naval, ART, and aircraft units exert no ZOCs, not even into the hex they occupy.
When countries suffer the effects of surprise, no ZOCs (from other countries) extend into that country's hexes for that impulse. Only units of the surprised country themselves have ZOCs. (This is quite important when Belgium is attacked for instance).
3. Stacking
Up to four land units may stack in a hex provided one unit is an artillery or tank unit. Only one artillery may be in a hex in any case.
A unit invading (see 10.7.4.5) has a stacking limit in addition to the defending units' limit.
Any number of land units being naval transported (see 10.5.3) may stack in a sea-box.
Any number of land and aircraft units may stack in Canada and the US. Up to two aircraft units may stack in a port hex. Up to three aircraft may stack in a city hex, regardless of the number of cities in that hex. Up to four aircraft units may stack in a hex with an HQ. No aircraft units may stack in a mountain or swamp hex. One aircraft unit may be stacked in any other hex. Where a hex has several applicable stacking limits (e.g. a HQ in a mountain hex), the highest stacking limit applies.
Aircraft units flying, escorting, or intercepting missions are not subject to any stacking limit.
Up to two naval units may stack together in a minor port. There is no limit to the number of naval units that may stack in a major port (exception: see 4.1) or in a sea-box. Both sides' naval units may occupy the same sea-box, even in the same section.
Stacking limits for naval, aircraft, and land units are independent. e.g. there may be any number of naval units, up to three aircraft units, and four land units stacked in an in-supply major port.
Units of nationalities which may not co-operate (see 19.1) may not stack together in the same hex, although they may stack in the same sea-box.
Stacking limits are only in effect at the end of each segment, phase and impulse of each game turn. If the limits are exceeded at any of these times, the opponent eliminates all excess units.
4. Supply
All units need supply to operate effectively. Supply for ports affects naval unit stacking and movement.
4.1 Effects of Lack of Supply
Land units which are out of supply may not land, invade or attack and, if they move at all (even by Naval Transport), are turned face-down at the end of that movement, even if then in supply. They still have a normal movement allowance and exert a ZOC. Face-down land units which are out of supply have a defense strength of one (1) except for face-down white print units which have a defense strength of three (3).
Supply has no effect on HQ support (see 10.7.6.5).
Aircraft units which are out of supply reduce their movement allowance by 2 movement points.
Naval units that commence the impulse in a port that is out of supply subtract 1 Movement Point.
A Naval unit may not enter a major port that is out of supply if that port currently contains 6 or more Naval units.
4.2 Supply Judgement
Supply for movement of all of the phasing player's units is judged at the commencement of the impulse.
Supply for each land combat is judged for the attacker both when declaring all attacks and at the moment of combat resolution. If at either time a land unit is not in supply, it may not attack. Supply is judged for defending units at the moment of combat resolution.
4.3 Supply Sources
A supply source is:
(a) any city in the unit's or port's home country (including Canada and the US). Warsaw and Lodz are not supply sources for Russian units. Only Ottoman cities in Turkey are supply sources for OE units. (b) any such city in the home country of a Major Power, or minor country, with which it may co-operate (see 19.1). (c) the capital city of any conquered minor country controlled by a Major Power the unit can co-operate with. (d) a co-operating HQ which can trace a path (of any length) to a city supply source.
Home country territory is the area inside the country's 1914 borders. Any city is only a supply source for a side if it was controlled by that side at all times from the start of the turn.
There is no limit to the number of units which may trace a supply path to the same supply source. Exception (important): No more units or ports may trace supply to an HQ in a desert hex than the HQ's face-up re-organisation value. The owning player chooses which units or ports are in supply at the commencement of each impulse.
4.4 Tracing a Supply Line
In order for a unit or port to be in supply, it must be able to trace a path of hexes no greater than two in length from the unit to a supply source.
The supply range is not altered by weather.
No hex of a supply path may be in an enemy ZOC unless it also contains a friendly land unit. The supply path may not be traced into enemy controlled hexes (see 15.0). A supply path may not be traced through neutral territory. The supply path may not be traced across an alpine, lake, or all-sea hexside (exception - see 4.4.1). A supply may be traced across a straits hexside.
Desert hexes count as two hexes for supply path purposes for non-Ottoman Empire units.
4.4.1 Tracing a Supply Path Overseas
Any part of a supply path may be traced overseas. The unit tracing supply must either occupy a coastal hex, trace the path via a port, trace to an HQ in a coastal hex, or trace to an HQ which traces via a port hex.
From the coastal hex or port, the supply path is traced via sea areas to a friendly controlled port which is a supply source itself or which can trace a supply path overland to a supply source. The sea portion of the supply path does not count against the maximum number of hexes permitted between the unit and the supply source.
There is no limit to the number of sea areas which may be crossed when tracing a supply path so long as they are consecutive and so long as none of them contains an enemy HS or LS, unless it also contains a friendly HS, LS, or TRS.
Supply may not be traced across sea boundaries that are prohibited to movement of surface naval units (HS, LS, or TRS) of that nationality (see 10.5.2.2). For example, CP units may not trace supply between the Western Mediterranean and the Bay of Biscay unless Gibraltar is CP controlled.
EXAMPLE:
(1) A German INF unit is next to Le Havre (adjacent to Paris on the west side) and is nowhere near an HQ. It traces a supply path to Le Havre (1st hex) and overseas via the North Sea to Bremen (2nd hex) which is a city and a supply source. If any sea areas (in this case only the North Sea) contained a Triple Entente HS or LS, this supply path could only be traced if they also contained a Central Powers' surface naval unit.
5. Sequence of Play
Fatal Alliances is played in a series of game turns. Each game turn involves a number of segments which occur in the following order:
- REINFORCEMENT SEGMENT
- INITIATIVE SEGMENT
- WEATHER SEGMENT
- RESOURCE TRANSPORTATION SEGMENT
- ACTION SEGMENT - Repeat 5.1 - 5.3 until the Action Segment ends.
5.1 First Side's Impulse - all Major Powers on the same side perform the following actions.
5.1.1 Declaration of War Phase - Each Major Power may now declare war on Major Powers and minor countries.
5.1.2 Action Phase - Each Major Power now chooses one of I-IV, performing the phases in the specified order:
(PASS ACTION - No activities allowed)
(I) NAVAL ACTION (a) Naval Movement Phase - move naval units one group at a time, resolving naval interdiction and interception as each group moves. (b) Naval Combat Phase
(II) COMBINED ACTION (a) A (limited) Naval Action as in (I) above (b) A Strategic Bombardment Phase (c) A (limited) Land Action as in (IV) below
(III) LAND ACTION (a) Aircraft Rebase Phase (b) Strategic Movement Phase (c) Land Movement Phase - in any order; move land units and land & invade with units from transports (d) Land Combat Phase (i) declare ground attacks (inc. all ground support & artillery) (ii) declare defensive HQ Support (iii) intercept air missions and resolve air combat and artillery (iv) resolve HQ Support (v) resolve ground attacks (e) Reorganisation Phase
5.2 End of Action Phase - Roll for the end of the Action Segment. If it does not end, advance the Impulse Marker one or more spaces on the Impulse Track (depending on the weather). If it ends, commence the End of Turn Segment.
5.3 Next Side's Impulse - If the Action Segment was not ended, repeat 5.1 and 5.2 above for the other side.
- END OF TURN SEGMENT 6.1 Convoy Attack Phase (11.3) 6.2 Blockade Table Resolution (11.4.5) 6.3 Neutral Major Powers Entry Phase (11.5) 6.4 Production Phase (11.6) 6.5 Return to Base Phase (11.7) 6.6 Morale Check Phase (11.8) 6.7 Final Reorganisation Phase (11.9)
6. Reinforcement Segment
6.1 Force Pool Additions
Some additions are made to the force pools in specified years. These additions are made at the start of the first game turn for that year.
6.2 Reinforcement Placement
In the Reinforcement Segment of each game turn, all units contained in the current sector of the Production Spiral appropriate to this game turn are now brought into play. The side with the initiative in the previous game turn places its units first.
Naval units face-down on the spiral are placed into the Construction Pool. All other units are placed onto the map. Major powers' units that cannot be placed onto the map are returned to the Production Spiral to arrive next game turn.
Units must be placed on a friendly controlled city hex in their home country. Naval units must be placed in a port city hex.
CW TG (territorial guard) units may only be placed in Kuwait or Egypt. Canadian units go in Canada whilst Australian and Indian units arrive in the Suez face-down. If Suez is controlled by the CPs these units are pre-designated by the CW to arrive in either England or Kuwait the next turn instead. OE units may only be placed in Turkish cities. Russian units may not be placed in Warsaw or Lodz.
A unit may be placed into enemy ZOCs or even in an isolated city.
7. Initiative Segment
7.1 Procedure
Each side rolls a die. The relevant column on the Initiative Track (see Production Chart) indicates whether the roll is modified by +1 for one side. The side with the higher modified die has the initiative for the game turn. If the dice rolls are tied, the side that did not have the initiative last turn has it this turn.
If the other side gets the initiative, you may elect to have both sides re-roll their dice if the initiative marker is in a column containing a boxed number for your side (if the initiative token is positioned in the centre column then either side could re-roll). If you decide to re-roll, the token is shifted one space in your opponent's favour after the re-roll. There cannot be a second re-roll.
The token is now positioned in the row in line with the word AXIS (CPs) or ALLIES (TE). This shows which side has the initiative this turn.
EXAMPLE: See WiF if needed.
7.2 Effect of Initiative
The player who has the initiative this game turn decides who will take the first impulse.
NOTE: In multi-player games we recommend that all players on a side agree whether that side will re-roll and which side will move first. If agreement is not possible, the French player has the final choice for the TE while the German player has the final choice for the CPs side.
8. Weather Segment
8.1 Procedure
Roll a die. Locate the result on the Weather Chart. If the result on the previous turn was asterisked, subtract one from the roll (treat a roll of 4 as a 3). The result determines the weather in each zone on the maps. Record the weather roll.
The weather zones are marked on the map. They are:
(a) The Arctic Zone (b) The Temperate Zone (c) The Mediterranean Zone
The Arctic Circle (marked on 5th edition maps) is considered as The Arctic Zone for all purposes.
Desert hexes are not affected by weather. Land units may move and attack into a desert hex as if it were clear weather, while aircraft units may fly normal operations into a desert hex.
8.2 Weather Effects
8.2.3 Land
In Mud and Severe Winter, all land units pay double terrain costs and HQs may not enter a hex in that zone (exceptions: by being transported by a TRS directly into a port - see 10.5.3; or by strategic movement - see 10.7.3; or if moving into a desert hex).
An HQ may only enter one hex in a zone experiencing winter and, if that hex requires more than one movement point, the HQ is turned face-down. If already face-down, the HQ may not enter that hex.
8.2.4 Air Missions
In Winter all aircraft tactical and Strategic Bombardment factors are halved if the target hex is in the affected zone. Halve total factors for Strategic Bombardment and Ground Support missions. One more Observer unit is required to be effective in Winter. e.g. 3 Observers in clear or mud weather would have an observation value of 2. In Winter, 4 observers would be required to have an observation value of 2.
Aircraft may rebase (see 10.7.2) in any weather.
8.2.5 Land Combat
In Winter all land attacks are reduced by one odds level on the Land Combat Results Tables (CRTs) if the defender's hex is in the affected zone. This means that the odds are reduced by 1 (e.g. 4-1 becomes 3-1 and 11-1 becomes 10-1).
In Severe Winter all land attacks are reduced by two odds levels.
An odds shift affects the odds before the CRT is chosen. HQs may not attack into a hex or land section experiencing Mud, or Severe Winter. They may provide HQ support regardless of weather.
8.2.6 Invasions
In Winter or Severe Winter, non-desert hexes in the affected zone may not be invaded (see 10.7.4.5).
8.2.8 Impulse Track Effects
The Weather Chart also contains a circled number. During the End of Action Phase of each of the second side's impulses, advance the Impulse Marker that number of boxes on the Impulse Track (see Production Chart).
NOTE: In Fatal Alliances the Impulse Marker always starts each turn in the 2nd impulse box (exception - on the Jul/Aug 1914 turn where it starts in the 4th impulse box).
9. Resource Transportation Segment
A resource point is useful only when transported to a factory. Each factory can only use as many points as that Major Power's production multiple.
9.1 Overland Resource Transportation
Overland transportation of resources involves tracing a path from the resource point, through friendly controlled hexes (see 15.0), to the factory.
Resources may be transported out of enemy ZOCs but not into one unless it also contains a friendly land unit.
Overland transport may occur both before and after overseas transport of resources by transporting to and from port hexes.
Only one resource point may be transported over each straits hexside.
9.2 Overseas Resource Transportation
Each resource point can be shipped overseas via one convoy pipeline. The same point may not be transported overseas, then overland, then overseas again.
Any number of resources may pass through one convoy pipeline in each turn. These resources need not all have come from the same source or have been shipped from the same port, nor need they all go to the same destination. Allies (even non-cooperating allies) may send resources through the same pipeline. Neutral Major Powers' resources may only be transported through their own pipelines. Note this adversely affects France on the 1st turn as the CW is neutral at the start.
Players must specify how many resources are to flow through each sea area of a convoy pipeline.
Overseas transportation starts at a port to which resources have been transported. That port must be in a sea area through which a convoy pipeline passes. Transportation continues via pipeline to the destination port. Up to 3 resources may be shipped into or out of a minor port. Any number of resources may be shipped into or out of a major port.
Resources may not be transported between sea areas if surface naval units of that side could not move between those sea areas (see 10.5.2.2).
Note: The CW and French resources available at the Suez are considered to be arriving via an off map sea CONV pipeline from India, and thus may not be transported overland from Suez then overseas again. These resources may not be captured and used by the CPs player(s), however they may be blocked from reaching Europe if the Suez Canal is not controlled on all 4 sides by the TE. The first CONV required to transport these would have to be set up in the Eastern Med.
Since there are no off map land boxes (other than Canada and the US) no resources may be shipped into Archangel or Murmansk.
9.3 Pipeline Placement
Convoy pipelines consist of a series of CONV markers (one per sea area) connecting one port to another. A pipeline may contain markers from various Major Powers of the same side, even if these Major Powers cannot co-operate (see 19.2).
Both sides re-position their CONV markers at this time (only), the side with the initiative going first.
A CONV marker must be placed in each sea area through which resources are to move. Each side may place no more than one CONV marker in each sea area (exception: neutral Major Powers must set up separate convoy pipelines).
A CONV marker cannot be placed into a sea area that a surface naval unit of that Major Power couldn't reach from a friendly controlled port in its home country, given unlimited movement points without regard to coaling rights. For example, an Austro-Hungarian CONV marker could not be placed into the Baltic Sea unless one of the CPs controls Gibraltar or the Suez Canal.
At the moment of placement, it must be possible to transport resources through that convoy pipeline. For instance, if the TE player suspects that Germany is about to declare war on Italy, that player may not set up a pipeline to Italy in anticipation of that event because resources may not be lent to a neutral country.
Unplaced CONV markers can be kept at the top of the map for use when required.
If there are insufficient CONV markers, a player may convert on-map TRS units into CONV markers by turning them face-down. A CONV marker may never be turned back into a TRS unit.
9.4 Lending Resources
At this time, players must state how many resource points each Major Power is lending to an allied Major Power.
Any Major Power may lend its resources to another on the same side unless either is currently neutral. A Major Power which lends resources may not borrow resources in the same turn.
Lent resources must be transported to the receiving Major Power.
If, by the Production Segment, resources have been lost due to capture, the Blockade, or Strategic Bombardment, the resources lost must not be those lent to an allied Major Power, unless they are the only ones that could have gone to that allied Major Power (e.g. because pipeline placement prevented others being sent).
9.5 Neutral Country Resources
Sweden must provide Germany with all its resources each turn. Germany must place a CONV marker in the Baltic Sea to transport these points.
Germany receives resources via the Blockade Table (BT) as long as The Netherlands has not been attacked by the CPs or Amsterdam is not in Allied hands. Otherwise only negative effects on the BT occur.
A minor country no longer provides resources on the turn that it comes to war with the recipient, retaining them for its own use.
A minor country does not provide resources while enemy controlled.
10. Action Segment
10.1 Action Segment Description
The Action Segment is a series of alternating impulses in which most of the game takes place. The side with the initiative chooses which side has the first impulse. Impulses then alternate between the sides until the Segment ends. After each impulse is over, a die is rolled to determine whether the Action Segment ends (see 10.8). If it doesn't, then the other side conducts an impulse.
10.2 Impulse Description
10.2.1 Declarations of War Phase
As the first activity in an impulse, one or more of the phasing Major Powers may declare war on any Major Power(s) on the other side and on any neutral minor countries.
10.2.1 Procedure
After all declarations of war have been made, dice are rolled for Neutral Major Power Entry, as necessary, and any forces of minor countries are set up (see 18.1).
A declaration of war on a Major Power constitutes a declaration of war on all non-neutral Major Powers on that side.
10.2.2 Types of Action
When a side conducts an impulse, each Major Power on that side must select one of the following actions. They need not all choose the same type of action.
(a) Pass Action (b) Naval Action (c) Combined Action (d) Land Action
The side must perform all actions permitted in a Naval Action first (see 10.5), then all Strategic Bombardments (see 10.6.1) and finally all actions permitted in a Land Action (see 10.7).
EXAMPLE: Austria-Hungary chooses a Land Action and Germany chooses a Combined Action. Germany may make two naval actions and naval combat may be fought. Then Germany may make any number of Strategic Bombardments. Finally, Austria-Hungary and Germany perform the actions allowed in Land Actions.
Each type of action only permits certain activities (as per WiF) and there are limits on how often some of them can be performed. If an activity is permitted, and no limit is specified, then it can be performed any number of times.
All minor countries controlled by a Major Power may only perform activities permitted by the action chosen for that Major Power. Activities performed by minor countries count against activity limits for its controlling Major Power. France controls all minor powers for the TE, with the exception of Serbia and Rumania which are controlled by Russia. Germany controls all minor countries for the CPs.
10.3 Air Missions
In each non-pass action, both sides may fly air missions. For all missions, the phasing side flies observers, bombers, and escorting fighters to target hexes; then the non-phasing side may fly fighters to intercept the phasing player's air missions.
The types of air mission allowed are:
- In a Naval Action - Nothing.
- In a Combined Action - all air missions, including Strategic Bombardment (see 10.6.1).
- In a Land Action - Observer (see 10.7.6.4.5) and Ground Support (see 10.7.6.4).
10.3.1 Aircraft Unit (AC) Movement
Aircraft units move from hex to hex in the same fashion as land units but may also move from hexdot to hexdot. Each aircraft unit has a movement allowance as follows:
- All Zeppelins: 8 (4*)
- All Observers: 4
- All Bombers: 5
- All Fighters: 3
- Zeppelins only have a range of 4 when using their observer value.
When aircraft units fly a mission, each aircraft unit moves to the target hex, provided that the unit does not exceed its movement allowance. Aircraft units ignore all enemy ZOCs and units when tracing this path. When flying over sea areas, aircraft units move from hexdot to hexdot as described in Rule 1.2.
Aircraft units which are out of supply reduce their movement allowance by 2 movement points.
10.3.2 Aircraft Mission Procedure
Only fighter aircraft may fly, intercept, or escort missions.
Aircraft fly missions in the order specified for each mission type in the Aircraft Mission Allocation rule (see 10.3.3).
If this leaves aircraft units of both sides in the same hex, an air-to-air combat may result (see 10.3.4).
Surviving bombers then resolve their missions (see Observer - 10.7.6.4.5, Strategic Bombardment - 10.6.1, Ground Support - 10.7.6.4).
In all air missions, after each aircraft unit has flown, intercepted or escorted an air mission, it is flown up to the limit of its movement allowance to any friendly controlled hex and is turned face-down.
10.3.3 Aircraft Mission Allocation
When performing Strategic Bombardment missions:
(a) The phasing player moves all desired bombers and escorting fighters to the target (factory) hexes. (b) After all missions are announced, the non-phasing player moves all desired (intercepting) fighters to the target.
When performing Observer missions:
(a) The phasing player moves all desired Observers and escorting fighters to the target hex. Each Observer is assigned to a particular artillery piece before air-air combat. (b) After all missions are announced, the non-phasing player moves all desired (intercepting) fighters to the target.
When performing Ground Support missions:
(a) The phasing player moves all desired bombers and escorting fighters to hexes with enemy land units under land attack. (b) After all missions are announced, the non-phasing player moves all desired (intercepting) fighters to the target.
10.3.4 Air-to-Air Combat
Air-to-air combats are fought in hexes containing at least one fighter of one side and an aircraft unit of the opposing side.
10.3.4.1 Aircraft Arrangement
Air-to-air combats are resolved one at a time.
For each combat, both players split their aircraft units into two groups: bombers/observers and fighters.
In air missions, aircraft allocation will have already split aircraft into bombers and fighters. Once allocated, these units may not change roles.
Both players then simultaneously arrange their fighters and bombers into a line from front to back within each group. [It is usually better to place the best air-to-air rated aircraft in the front of each group.] The front units in each group are the only units that can be adversely affected by combat, until destroyed or aborted, thus exposing the second unit to these results in the next round. After both players have lined up their units, air-to-air combat commences.
For each fighter which "shoots down" one or more enemy planes; at the end of the air battle the fighter (if it survives) gets promoted. All fighters start with a 1 air-to-air rating. To go to a 2 it has to shoot down a plane, to go to a 3 it has to shoot down two planes (in different turns).
The promotion is done at the end of all air combats during that impulse. The better plane is taken from the force pool while the weaker plane is returned to the force pool. If there are multiple promotions in an impulse it is up to the owning player as to what order they are done in.
10.3.4.2 Air-to-Air Combat Procedure
Air-to-air combat is fought in a series of rounds. They continue until both sides' bombers are cleared through to their targets, neither side has any fighters, or one side's units are all destroyed or aborted. If one side contains no fighters, all opposing bombers are immediately cleared through to the target.
At the start of each round, both players calculate their air-to-air strengths by taking the air-to-air rating of their front fighter and adding 1 for each other FTR (bombers' air-to-air ratings are ignored). If a player has no fighters, then his air-to-air strength is the air-to-air rating of the front bomber only. Fighters acting as bombers count only as bombers.
Each player's air-to-air combat value is his air-to-air strength less his opponent's.
Both players then roll 2 dice on the Air-to-Air CRT. The non-phasing player rolls first, and implements the results before the phasing player rolls. The phasing player then rolls, using the combat value worked out previously.
After each round of air-to-air combat either player may voluntarily abort all his fighters and bombers that are not yet cleared through to the target (the phasing player deciding first). This is treated as an 'A' result (see 10.3.4.3).
After the air-to-air combat rounds have finished, the cleared-through bombers attack their targets.
EXAMPLE: The phasing French player has 1 FTR (air-to-air rating of 3) and 2 OBSs. The German player has 2 FTRs (air-to-air ratings of 2 and 3). The German player has placed the 2-rated FTR first and the 3-rated FTR second. His air-to-air strength is 3. The German player is non-phasing so he rolls first on the 0 table and rolls a 4, yielding an 'AA' result and promptly chooses to abort the French FTR. The French player returns his FTR to base and rolls an 11 for his return fire, yielding an 'AX'. The German front FTR is therefore destroyed. After round one each player may elect to abort, though the German is unlikely to as his next roll will be on the +3 air-to-air table. In the second round, the German clears through a French OBS while the French clears through the German FTR (i.e. no effect). Since the next French OBS will make no difference to the attack, he voluntarily aborts. The French FTR which aborted back to base gets promoted to a 4 as it shot down a German plane.
10.3.4.3 Air-to-Air Combat Results
Results only ever affect the non-die-rolling side.
- An 'X' result destroys 1 enemy aircraft unit.
- An 'A' result aborts 1 enemy unit. This returns an aircraft unit to any friendly controlled hex within the limit of its movement allowance (see 10.3.1). Aborted aircraft units are turned face-down.
- A 'C' result clears 1 enemy bomber through to the target. It is removed from the line-up and placed on the target hex. If there are no enemy bombers, the result is ignored.
- A '-' result has no effect.
A result prefixed by an 'A' means that the player rolling the dice chooses whether his opponent's front fighter or front bomber is to satisfy an 'X' or 'A' result. He may choose any enemy bomber to be cleared through to the target, if that is the result.
A result prefixed by a 'D' means that the non-rolling player chooses whether his front fighter or front bomber will satisfy the 'X' or 'A' result or which of his bombers is cleared through.
10.3.5 Weather & Terrain Effects on Aircraft
Weather effects on A/C are explained in the weather rules (see 8.2.4).
Tactical factors are halved (rounding fractions up) if being used to Ground Support units in forest or swamp terrain. Halve total factors for Ground Support. Weather and terrain effects are cumulative - factors are halved as many times as necessary before being rounded up.
10.4 The Pass Action
A Major Power choosing a Pass Action may not perform any activities this impulse except declaring war. If every Major Power on a side chooses a Pass Action, the die roll to end the Segment is reduced by two. The first side in a turn may not pass.
10.5 The Naval Action
A Naval Action is conducted in the order shown in the Sequence of Play.
10.5.2 Naval Movement Phase
Naval movement allows naval units to move through sea areas, enter and leave ports, and to patrol sea areas.
For purposes of the Activities Limits Table, one "naval movement" is:
(a) the movement together of 1 group of surface naval units from a stack (with any units being transported) from 1 port to another port or to 1 sea-box section; (b) the movement of 1 group of SUBs from a stack from 1 port or sea-box section to another port or sea-box section; (c) the movement of 1 group of surface naval units (must be face-up) from a stack from 1 sea-box section to a lower numbered section in the same sea-box; or (d) the voluntary returning to base (see 11.7) of 1 group of surface naval units from a stack.
Apart from naval movement (d), units may only move in one impulse per game turn.
10.5.2.0.5 Special Aug 1914 Naval Impulse
For the Jul/Aug 1914 turn only, and before any other actions occur, the CPs player must move its German LS based at Syracuse, Italy. (Note: the Goeben was actually coaling at Messina when war was declared.) A ship may not normally base in or move to a neutral port or non-cooperating allied home country port; this rule is a specific exception. The TE player may attempt to interdict (see 10.5.4), with any available ships of a major power currently at war with Germany (i.e. France). This may result in Surface Naval Interception (see 10.5.5.2) and Naval Combat (10.5.7), all occurring prior to and in addition to normal Impulse Declaration and impulse actions.
Should this German LS succeed in moving to an Ottoman home country port by the end of the Jul/Aug 1914 game turn (i.e. after the Return to Base Phase), or if it is damaged or aborted, it must be immediately exchanged for an Ottoman LS at the appropriate location (either an Ottoman home country port or the Repair Pool). Should this occur, the Ottoman Entry chart is triggered (see Neutral Major Powers Table).
10.5.2.1 Naval Movement
Naval units may move either individually or in groups through a series of adjacent sea areas.
Units moving in a group must have started movement in the same port (or sea-box section). The group may drop off units in any sea area or port through which it passes (subject to naval movement limits in a Combined Action - see Activities Limits Table). Any units dropped off may not move any further.
EXAMPLE: See WiF if needed.
Units moving out of a port must first move into the surrounding sea area (e.g. naval units in Gibraltar must move directly into the Western Mediterranean, Barbary Coast or Bay of Biscay sea areas). Similarly, a naval unit must move into a port from the surrounding sea area.
A naval unit may not enter an out of supply major port if it contains 6 or more naval units.
Naval units may move directly to Kiel from the North Sea and vice versa. However, Kiel is a coastal hex only on the Baltic Sea, not the North Sea.
Similarly, naval units may move directly to Suez from the Eastern Mediterranean and vice versa. However, Suez is a coastal hex only on the Red Sea, not the Eastern Mediterranean.
Each naval unit has a movement allowance printed on the bottom-right corner of the counter. It costs a naval unit 1 movement point (MP) to enter a sea area from an adjacent sea area and 1 MP to enter a port from its surrounding sea area or vice versa (e.g. it costs 1 MP to move from Gibraltar to the Barbary Coast sea area and vice versa). It may not exceed its movement allowance.
Naval units that commence the impulse in a port that is out of supply, subtract 1 MP.
Naval units that commence the impulse in a port containing naval units of another Major Power (or of its controlled minors), subtract 1 MP.
A naval unit which ends its movement in a sea area is placed into that area's sea-box. It chooses a section of the sea box which has a search number less than or equal to the unit's unused movement allowance. A unit may only occupy one sea-box section at a time. Other units may occupy the same or different sections of the same sea-box.
A SUB is turned face-down when it has moved, to indicate that it may not move again this turn. Other naval units are turned face-down when they move to a port.
SUBs may only move if they are face-up. Apart from naval movement (d), other naval units may only move if they are face-up in a port.
10.5.2.2 Naval Movement Restrictions
Naval units (SUBs are excepted) may not move into a sea area if [OCR-damaged in source: "...if they oracountry allied to them, do not control a port bordering that sea zone" - the first clause could not be recovered from the scan text; read against the sea-zone rule it appears to restrict movement into a sea area unless that side controls a port bordering it]. Check against the printed page before relying on this sentence. This represents the fact that World War I era ships relied almost exclusively on coal for fuel. This restriction is ignored by US and CW in the Denmark Strait sea box (off Iceland).
Naval units may only move between Kiel and the North Sea if the 5 hexes adjacent to the Kiel Canal were controlled by that side at the start of the turn and at the moment of movement.
TE naval units may only move between the Baltic and North Seas if:
(a) both Oslo and Copenhagen were controlled at the start of the turn by the TE, or (b) the TE controlled the 5 hexes adjacent to the Kiel Canal at the start of the game turn and at the moment of movement.
CPs naval units may only move between the Baltic and North Seas if:
(a) the TE controlled neither Oslo nor Copenhagen at the start of the game turn, or (b) the CPs controlled the 5 hexes adjacent to the Kiel Canal at the start of the turn and at the moment of movement.
Surface naval units (SUBs are excepted) may only move between the North Sea and the Bay of Biscay if they are returning to base, or if that side controlled London at the start of the turn.
Surface naval units may only move between the Western Mediterranean and the Barbary Coast sea areas, or between the Western Mediterranean and the Bay of Biscay sea areas, if that side controlled Gibraltar at the start of the turn. SUBs may move between these areas even if Gibraltar is enemy controlled.
Naval units may only move between the Eastern Med. and the Black Sea if Constantinople was controlled by that side at the start of the turn.
Naval units may only move between the Eastern Mediterranean and the Red Sea, or between Suez and the Eastern Mediterranean, if the 4 hexes adjacent to the Suez Canal were controlled by that side at the start of the turn and at the moment of movement.
10.5.3 Naval Transport
TRS units may transport aircraft or land units when they move. The transport capacity of one TRS is either:
(a) 1 land unit, or (b) 1 aircraft unit.
The unit to be transported must be face-up (or be a face-down HQ). Units can commence the impulse in the same port as the TRS unit. They then move when the TRS makes a naval movement.
Alternatively, a TRS with unused transport capacity can end its move in a sea area and immediately embark face-up land or aircraft units (or face-down HQs) up to its transport capacity from any coastal hex in that sea area. The units are embarked before interdiction (see 10.5.4) and interception (see 10.5.5).
Transporting land or aircraft units in either of these ways does not count against limits on the use of land or aircraft units in an action.
Units being embarked while out of supply are immediately turned face-down. They may neither invade nor land (see 10.7.4.5) unless they are HQs, but are allowed to return to base with their TRS (see 11.7.1).
Units debark from TRSs in a Land Movement Phase (see 10.7.4), unless the TRS moves into a port (in which case they automatically debark at the end of the Naval Movement Phase).
Aircraft and land units transported directly into a port may move or fly in subsequent phases of that impulse.
10.5.4 Naval Interdiction
During the first impulse of each game turn, surface naval units entering a sea area can be interdicted. The non-phasing player may interdict with any HS or LS units occupying ports in that sea area.
Interdicting units may immediately move into that sea area and be placed into an eligible section of its sea-box (see 10.5.2.1).
Interdicting units do not activate interdiction by enemy units.
10.5.5 Naval Interception
As surface naval units move into a sea area, they may be intercepted by HS or LS units which are already in the sea area.
A unit or group which moves from a section of a sea-box into a lower numbered section of the sea-box may not be intercepted.
After the moving group enters the sea area and embarks land or aircraft units from coastal hexes (if any), the non-phasing player declares all interception attempts that will be made in that sea area. If any units in a sea-box attempt to intercept enemy units, then all of that side's units in the sea-box must attempt to intercept.
One die is rolled for all surface interception in the sea area. The attempt is successful if the roll is equal to or less than the search number of the sea-box section that the intercepting unit(s) occupy. If the attempt is successful, the interception is complete. Searches will be conducted in the Naval Combat Phase in the normal fashion (see 10.5.6.1). If the group is to continue moving, an interception combat is fought immediately. The moving group is placed into an eligible sea-box section (see 10.5.2).
Roll a die and compare it to the search number of each section of the sea-box which contains other units of the intercepted side. This determines whether any units of the moving side already in the sea area are included in the combat (see 10.5.5.1). Since units in the same section as the intercepted group might not be included, this is an exception to the rule requiring all units in a section to be attacked.
This die roll is compared to the surprise number of the highest numbered section of the sea-box occupied by any units of the intercepted side. This determines whether it has been 'surprised' (see 10.5.5.1).
After the first round of interception combat, the combat is resolved like any other naval combat (see 10.5.5). This can mean that the intercepted group is excluded while other units are included in a future round of combat.
The moving group may continue its movement when the enemy forces are wholly destroyed or aborted or if the search rolls produce no combat. If it does so, it must reduce its remaining movement allowance by the search number of the section of the sea-box into which it was placed for the combat. These units may be intercepted again in other sea areas.
If the moving units choose to end movement in that sea area, then naval combat may not occur in that sea area in the Naval Combat Phase unless other units of the phasing side end their movement there later in the impulse.
EXAMPLE: See WiF if needed.
10.5.6 Naval Combat Phase
After all naval movements have been completed, naval combats are resolved.
A naval combat can occur in each sea area in which both sides have surface naval units, if at least one of those units entered the sea-box this impulse and after the last surface naval interception combat, if any, in that area was resolved. Neutral units cannot activate a combat.
10.5.6.1 Search Procedure
If a combat can occur in a sea area, each side rolls a die and compares it to the search numbers of the sections of the sea-box occupied by its surface naval units.
If both sides roll higher than the search roll, there will be no naval combat in the sea area in that Phase.
If either side rolls less than or equal to the search number, then naval combat will occur, subject to surprise.
If a side's (modified) die roll equals or exceeds the surprise number in the highest numbered section its surface naval units occupy, it is surprised in that combat round.
If one side has been surprised, the other side has the option not to fight that naval combat.
If a combat does occur, include those units which occupy sections of the sea-box with search numbers equal to or higher than their side's (modified) die roll.
If one side has units included in the combat and the other doesn't, then the player with units included must pick at least one section containing enemy units for inclusion in the combat. All of the enemy units in the chosen section(s) are included. Choosing a section containing enemy units to be included in the combat does not of itself entitle friendly units in that section to be included.
EXAMPLE: See WiF if needed.
10.5.5.2 Surface Naval Interception
When a moving group is intercepted by surface naval units, the player announces whether the group will cease movement or not. If it ceases, the player with units included must pick at least one section containing enemy units for inclusion in the combat. All of the enemy units in the chosen section(s) are included. Choosing a section containing enemy units to be included in the combat does not of itself entitle friendly units in that section to be included.
EXAMPLE: See WiF if needed.
10.5.7 Surface Naval Combat
10.5.7.1 Procedure
Each side totals its units' surface combat factors and locates that total in the surface row of the Naval Combat Chart. Shift that column one to the left if that side is surprised and one to the right if the other side is surprised. If this shift would be to the left of the left-most column, that side does not fight. A shift to the right of the right-most column is resolved on that column.
Cross-index the column with the number of enemy surface naval units ('enemy naval units') included in the combat, counting each LS as half an 'enemy naval unit' (rounding fractions up).
The result gives two numbers in the form "X/Y", where X is the number of dice that player will roll and Y is the Surface Naval CRT on which he will roll them. The table number can be increased by 1 for each die roll forgone, at the player's option. The number of dice rolls can never be increased.
After each side has determined the number of dice rolls to make and the table to roll them on, implement the results simultaneously.
EXAMPLE: See WiF if needed.
10.5.7.2 Combat Results
The combat results are:
- X - A unit of that type is destroyed.
- D - A unit of that type is damaged and placed into the Repair Pool.
- A - A unit of that type is aborted. It must move to the nearest port (in number of sea areas that the unit could traverse - see 10.5.2.2) at which it may rebase (see 11.7.1). Where several ports are equally near, the owner chooses. The unit (and any cargo) is turned face-down.
Results such as "X/2" and "D/2" are half an "X" and "D" respectively. If an even number of "X/2" results or "D/2" results is recorded in the same round on the same type of unit, they become half as many X's or D's. An odd "X/2" becomes a "D" on that type of unit. Similarly, an odd "D/2" becomes an "A" on that unit type.
All "X" results are implemented first. Then all "D" results, followed by all "A" results.
EXAMPLE: See WiF if needed.
In surface combat, the affected units from each designated type are chosen randomly.
10.5.7.3 Conversion
If a particular unit of the appropriate type is not available to take a specified result, another unit type takes the result instead. This is termed a conversion. If HS or LS units are not available to take a conversion then the loss is converted to a TRS loss.
Odd "X/2" results and "D/2" results change into "D" and "A" results before any conversion is made. The conversion of the result against one naval unit type may leave no units of that type to absorb further results which would then lead to further conversions. SUBs may never be affected by conversions.
EXAMPLE: See WiF if needed.
10.5.9 Results on Transports
When a TRS is destroyed (only possible due to conversion), any cargo it is carrying is destroyed with it. When a TRS is damaged, it is removed to the Repair Pool but its cargo is placed on the Production Spiral as a reinforcement for the next game turn. If combat results require the loss of only some of the TRSs involved, the affected cargos are chosen randomly.
10.5.10 Multiple Naval Combat Rounds
After each round of naval combat, either or both sides may abort (the phasing player doing so first). If a side aborts, return all its surface naval units in that sea area to base, as in the Return to Base Phase (see 11.7).
If both sides remain, they roll search dice to see if a new naval combat round is initiated (see 10.5.6.1). This continues until one side aborts, is destroyed, or until the search rolls fail to initiate a new combat round.
10.6 The Combined Action
A Combined Action is conducted in the order shown in the Sequence of Play (see 5.0).
A Major Power conducting a Combined Impulse may only perform a limited number of naval movements, followed by an unlimited number of Strategic Bombardments followed by a limited number of land activities (see the Activities Limits Table).
10.6.1 Strategic Bombardment Phase
Strategic Bombardment missions allow aircraft to attack enemy morale and resources. The target hex must be a producing enemy factory hex.
After aircraft mission allocation (see 10.3.3) and air-to-air combat (see 10.3.4), the bombers which are cleared through attack the target hex.
Total the factors of all bombers cleared through against a target hex. Locate this value on the Strategic Bombardment Table and roll a die. The roll is increased by 1 if there was no interception by enemy FTRs.
The result can range from an increase or decrease in country morale to a loss of resources to no effect.
EXAMPLE: Two German zeppelins with 3 total Strategic Bombardment factors attack London. There is no interception. The die roll is a 6 which becomes a 7 because there was no interception. On the 3-4 column of the Strategic Bombardment Table, this produces a result of "1M". Thus, one morale is removed from British morale.
10.7 The Land Action
A Land Action is conducted in the order shown in the Sequence of Play.
10.7.2 Aircraft Rebase Phase
Only face-up aircraft units may rebase. In a Land Action, a Major Power may only re-base 1 aircraft unit. In a Combined Action, the number of rebases varies (see the Activities Limits Table).
A rebasing aircraft unit flies with twice its movement allowance to a friendly controlled hex but otherwise as an ordinary aircraft movement (see 10.3.1). It may not be intercepted.
It remains face-up after it has rebased to a new hex but it may not fly, intercept, or escort any mission during that impulse. It may fly, intercept, and escort air missions in a future impulse of that game turn.
In a Combined Action, in addition to the number of units which rebase and remain face-up (see Activities Limits Table), a Major Power may also rebase any number of other face-up aircraft units which are then turned face-down.
10.7.3 Strategic Movement Phase
Strategic Movement (SM) represents the movement of land and aircraft units by rail. One strategic move is the SM of one land or aircraft unit.
Major Powers choosing a Land Action may only make a limited number of strategic moves (see Activities Limits Table).
Major Powers choosing a Combined Action may only make 1 SM.
Major Powers choosing a Naval Action may not make any SMs.
Strategic movement does not count against the limits on land moves or the rebasing of aircraft units.
A unit must be face-up to strategically move. It must start the impulse in supply in a port or city hex and not in an enemy ZOC. It may then move through any number of friendly controlled hexes (regardless of movement allowance) to a friendly controlled port or city hex.
A unit strategically moving may not enter enemy ZOCs (even if occupied by friendly units), hexdots or cross all-sea (except for straits), lake, or alpine hexsides. Only one unit of a side may strategically move across each straits hexside in a game turn.
Units may not strategically move into, out of or through any hex in Africa (Morocco, Er Rif, Algeria, Tunisia, Libya, Egypt, Palestine, Trans-Jordan, Syria, and Arabia).
There is an exception to this rule: the OE player may only SM one unit per turn along the route defined from Jerusalem - Haifa (minor port) - Amman - Damascus - (through the mountains to) - Aleppo - Ankara or Erzerum, or Mosul (via Turkey) - Baghdad (via hexes to the west of the river).
A face-up HQ unit may move strategically even though the weather would otherwise prevent it from moving. After completing a strategic move, units are turned face-down.
10.7.4 Land Movement Phase
10.7.4.1 Procedure
A land unit may move in each impulse, subject to the action chosen.
Major Powers choosing a Land Action may make any number of land moves.
Major Powers choosing a Combined Action may only make a limited number of land moves (see Activities Limits Table).
Major Powers choosing a Naval Action may not make any land moves. They may only move their land units by naval transport (see 10.5.3).
One land move is the movement of one land unit in the Land Movement Phase.
Units may be moved individually or in stacks. Stacks may drop units off in any hex they enter but may never pick up other units.
A unit or stack of units moves from hex to contiguous hex. Each hex entered (and some hexsides) will cost a specific number of MPs (see Terrain Effects Chart). The number of MPs expended in an impulse cannot exceed a unit's movement allowance (exception: face-up land units with unused MPs may enter a non-prohibited hex costing more than their unused MPs but must stop there and be turned face-down).
The only face-down land units which may move are HQs which have not moved in the Strategic Movement Phase. Face-down HQs may not enter a hex that costs more movement points than the HQ possesses.
Units starting in an enemy ZOC may move directly to another but must then stop.
A unit which is out of supply at the start of the impulse may move but is turned face-down at the end of its movement.
10.7.4.3 Terrain
Land units may only move across an all-sea hexside if it is a straits hexside. No unit may strategically move across lake hexsides or across all-sea hexsides unless they are also straits hexsides.
Non-MTN land units may not cross an alpine hexside. MTN units may cross an alpine hexside at the cost of one additional MP, but may not trace supply lines across them. No unit may strategically move across alpine hexsides.
It only costs MTN units 1 MP to enter mountain and forest hexes.
See the Terrain Effects Chart (on the Pacific Map of WiF) for MP costs.
10.7.4.5 Invasions & Landings
Face-up land and aircraft units (and face-down HQs) being transported by TRS units in a sea area may land into any friendly controlled coastal hex or land section in that sea area, even if not a port hex. Units must end their movement in the hex they land in.
Where a TRS occupies the 3 section of a sea-box, a face-up INF or MTN unit it is transporting may invade any enemy-controlled hex in that sea area.
An invading unit is placed into the enemy controlled hex. Only 1 land unit may invade each hex.
Invasions are not permitted in a hex in a Weather Zone experiencing Winter or Severe Winter. HQs may not land into a hex experiencing Mud or Severe Winter.
Each land unit which lands or invades counts as a land move.
If a unit lands into a hex which requires it to spend more MPs than it has (e.g. landing into a swamp hex), then the unit is immediately turned face-down. Face-down HQs may not land into such a hex. After a unit successfully invades any hex, it is turned face-down after combat.
Landing and invading units are always in supply in the impulse they land.
Invading units must attack the defending units in their hex in the Land Combat Phase. They may attack in conjunction with land units that are not invading.
Invading units divide their combat factors by 3 (round fractions up) in addition to any other modifiers.
Invading units which don't retreat or destroy all enemy land units (including notional units) in that hex are destroyed.
Coastal hexes are considered to contain a notional defending unit with 1 combat factor whenever invaded. If land units are defending that hex, ignore the notional unit. It receives all terrain benefits provided to normal units (e.g. in a mountain hex its combat factor is doubled) and may receive HQ Support. Any combat result (other than '-') destroys the notional defending unit.
Invading units have no ZOC, even into the invaded hex, until it is empty of enemy (including notional) units. Successful invading units are flipped no matter what the result. For the rest of the impulse, the invading units only have a ZOC into that hex. Thereafter, they have a normal ZOC.
10.7.4.6 Militia Movement Restrictions
CW TG units may never leave but may attack out of the country in which they arrived as reinforcements.
Ottoman Empire MIL may not leave but may attack out of the Turkish part of the Ottoman Empire.
10.7.4.7 Other Land Unit Restrictions
Neutral country land units may not move.
If active (not neutral), units may enter any territory controlled by a Major Power or minor country with which they are at war or controlled by a non-neutral Major Power on the same side. However units may never enter territory:
(a) in a home country of a non-co-operating Major Power on the same side (exception: CW units may enter France and German units may enter Austria-Hungary) unless that territory is enemy controlled, and (b) Austro-Hungarian units may never enter Germany.
10.7.4.8 Enemy Units
Land units may only enter hexes occupied by enemy land units by invasion.
When any land unit (other than an artillery) occupies a hex containing only enemy aircraft, artillery, and/or naval units, all face-down aircraft units are destroyed. Face-up aircraft units must immediately re-base (see 10.7.2) and are then turned face-down. Naval units (including face-down units) must rebase as if suffering an 'A' combat result (see 10.5.7.2). After re-basing, they are turned face-down. Naval units unable to re-base (e.g. due to movement restrictions (see 10.5.2.2) or co-operation (see 19.2)) are destroyed. Artillery units are destroyed if an enemy unit enters its hex.
EXAMPLE: See WiF if needed.
10.7.6 Land Combat
10.7.6.1 General
One land attack is an attack by land units on a stack of enemy land units, regardless of how many units attack it.
If several Major Powers' land units attack a hex, then each of those Major Powers has made 1 land attack.
Any number of land attacks may be made in one Land Action. In a Combined Action, a Major Power may make a limited number of land attacks (see Activities Limits Table). No land attacks may be made in a Naval Action.
Only two (face-up land and/or face-down HQ) units and a TANK unit may attack from a hex. Units may only attack if they are adjacent to the defending hex. A face-down HQ may only attack if it has a movement allowance sufficient to enter the target hex.
Units in the same hex need not all attack and may attack different defending hexes as long as no more than two units attack out of a hex. Each attack may only be declared against one hex or stack occupied by enemy land units. Aircraft, artillery, and/or naval units on their own may not be attacked in land combat.
The defending stack defends with the combat factors of all the friendly land units in that stack.
10.7.6.2 Procedure
At the start of combat, the phasing side declares all attacks it wishes to make against enemy land units in hexes adjacent to friendly units (except where prohibited). Combat is voluntary (unless invading).
An attack is declared by indicating the defending hexes and the attacking units and allocating shore bombardment. At this time all artillery which shall bombard must be indicated as well as any offensive ground support, escorting fighters, and observers which shall fly.
At the moment that an attack is declared, the odds must be at least 1:2 (after weather effects - see 8.2.4). The odds may be altered subsequently by the allocation of HQ support, or by a change in the defender's supply status.
After all attacks are declared, HQ Support is announced (defensive support is only allowed, see 10.7.6.5).
Air-to-air combat is resolved. Artillery bombardment is resolved (see 10.7.6.4.5). HQ support is then determined.
All declared attacks are then resolved one by one (in any order the attacker chooses) on one of the Land Combat Results Table (CRT). The choice of CRT is left until the moment of combat resolution.
10.7.6.3 Shore Bombardment
Shore bombardment permits players to support a land attack with HS and LS units.
Face-up HS and LS may add their shore bombardment factors to a land attack against a coastal hex in their sea area. Defending units may never be assisted by shore bombardment.
The shore bombardment factor of each unit is modified by the Shore Bombardment Modifier of its sea-box section. Shore bombardment is not allowed from the '0' section.
EXAMPLE: Three HSs are in the 2 section of the sea-box. The HSs have shore bombardment factors of 2, 2, and 1. As the units are in the 2 section, the shore bombardment of each unit is reduced by 1 (the Shore Bombardment Modifier of the 1 section is '-1'). Therefore, the modified shore bombardment factors are 1, 1, and 0 respectively.
Units involved in shore bombardment are turned face-down, although they remain in the sea area and may take part in future naval combats.
The maximum number of modified shore bombardment factors added to a land attack may not exceed the sum of the attacking land units' combat factors (after modification for terrain and invasions).
10.7.6.4 Ground Support
Ground Support permits players to support a land attack (offensively only) with bombers.
After aircraft mission allocation (see 10.3.3) and air-to-air combat (see 10.3.4), the bombers which are cleared through will add their tactical factors to their side in the combat. The maximum number of tactical factors added to one side may not exceed the sum of its land units' combat factors (after modification for supply, terrain, and invasions).
10.7.6.4.5 Artillery Bombardment
Artillery units are designated as firing in the land attack declaration part of the Combat Phase and resolve fire after air-air combat but before HQ support is determined. Artillery units use 'ammo' depending on the rating of the artillery piece. A (3) rated artillery unit uses 3 ammo points, etc. The rating of the artillery piece is also the ability of that unit to flip over defending units. Artillery may only fire into adjacent hexes.
An artillery piece may not fire (even a partial charge) if there is not enough ammo available to fire. i.e. A (2) rated artillery unit may not fire if there is only one ammo point left.
A (3) rated artillery piece will flip over a defender on a roll of 1, 2, or 3 on one die. For each 2 observers or fraction thereof which clear through the air-air combat phase, the effectiveness of the artillery unit increases by one (exception: see 8.2.4). This does not mean more ammunition expenditure for the artillery unit.
Artillery units are only flipped over as a result of movement or having been subjected to successful bombardment themselves. They do not flip over each time they fire, they only expend ammo.
10.7.6.5 HQ Support
A defending HQ (only) can affect the odds in a land attack if it occupies or is adjacent to the hex under attack. It may not affect an adjacent hex if an attack has been declared against its own hex.
When land attacks are declared and after the attacker has declared all units involved in the attack, the defending side announces which HQs are providing HQ defence and for which stacks. Only one HQ can support each attacked hex.
After air-air combat and artillery bombardment have been resolved, HQ Support is resolved. Roll 1 die for the HQ unit. If the roll is less than or equal to the HQ's Reorganisation value, the odds in the affected combat are shifted 1 odds level in favour of the defender. For example, a 3-1 would become a 2-1, an 8-1 would become a 7-1.
HQs that roll (even if not successful) are turned face-down.
10.7.6.6 Terrain Effects
Terrain effects on combat are on the TEC (see WiF Pacific Map).
'DEFENDER DOUBLED' means that all defending land combat factors are doubled.
'ATTACKER HALVED' means that the sum of the combat factors of all land units attacking across such hexsides is halved (rounding fractions up).
'PROHIBITED' means combat across that hexside or into that hex is prohibited.
10.7.6.7 Combat Resolution
The attacker compares his combat factors (modified by terrain and invasions), including Ground Support and shore bombardment, to the defending factors (modified by terrain and supply).
When dividing combat factors, fractions are retained until the end of all divisions and then rounded up.
A ratio is determined, rounding off in favour of the defender to a whole number. For example, 19:5 rounds off to 3:1, not 4:1.
The odds are then modified for any effects of weather (see 8.2.5) and HQ Support. All modifications are cumulative.
One of the two Land CRTs is now chosen. All attacks require the use of the Assault Table unless the attacker has tanks or stosstroopen involved. If the attacker has one or more of these units involved the option is his to use the Infiltration Table. If the Infiltration Table is chosen the first loss must be taken from one of the units which allows the use of the Infiltration Table.
The attacker now rolls a die, adding 1 to the roll if at least one-half of the defending units is a face-down non-HQ land unit. If the attacker has less than 1:2 odds, subtract 1 from the combat die roll. If both these modifiers apply, they cancel out. The modified die roll is cross-referenced with the appropriate odds column.
The result is expressed as "X/Y". X is the number of attacking land units destroyed. Y is the number of defending land units destroyed.
10.7.6.8 Retreat after Combat
Where the result against units in a hex includes an 'R', all surviving defending land units (even if face-down) are retreated one hex.
Retreats are conducted by the attacker in all cases.
Units are retreated individually (and may be retreated into different hexes). A unit may retreat into any adjacent hex unless prohibited by terrain or ZOCs. A unit cannot retreat into a neutral country. HQs can retreat into Mud or Severe Winter hexes.
Retreat priorities are:
(a) Hex not in enemy ZOC and not causing over-stacking. (b) Hex not in enemy ZOC and causing over-stacking. (c) Friendly occupied hex in enemy ZOC and not causing over-stacking. (d) Friendly occupied hex in enemy ZOC and causing over-stacking.
If the unit cannot retreat at all by following the above priorities, then it is destroyed.
If (i) the retreat causes over-stacking (see 3.0) or (ii) leaves the unit in a hex against which an attack has been declared but not yet resolved (including such hexes containing invading units), then the unit continues to retreat according to the above priorities until stacking limits are adhered to. If this is not possible it is destroyed.
Units may not end their retreat in a hex containing friendly units with which they do not co-operate. They must continue retreating.
10.7.6.9 Shattered Defending Units
An 'S' means the defending units must lose 1/2 a hex (indicated by placing a 1/2 hex marker (1/2 hm) on top of the stack). If the stack already has a 1/2 hm on it, remove it and convert the result into an R.
In addition, the defender may ignore one loss when the X/Y result yields a Y of 2 or more, and convert it to an S (therefore a 1/2 hex result).
This option may not be chosen if an R result is achieved on the CRT or the hex previously had a 1/2 hm on it and an S result was achieved.
EXAMPLE: A hex has 3 defenders and a result of 1/2S is achieved against it. The defender must lose 1/2 the hex (place a marker on it) and lose 2 units. The defender may alternatively convert one of the losses to a 1/2 hex loss, combined with the S, it turns into an R with only 1 unit lost. The option to lose one less unit may not be chosen if a 1/2 hm was already on it as the S result automatically converts the result into an R.
As an option the attacker may ignore any 1/2 hex gain result and instead choose to remove one 1/2 hex marker from all attacking stacks which may have such a marker on them. The attacker may also remove these markers if the hex is gained anyway, through an R result or due to the fact that the hex is vacated of defending units.
After the defender states he shall convert one loss into a 1/2 hex loss, the attacker may forego this and instead remove 1/2 hex markers from any of its stacks instead. In the above example it would only really apply if the result was a 1/2 because then the defender would still be in the hex, as an R result allows the attacker to remove all 1/2 hex markers from the attacking stacks anyway.
10.7.6.10 Advance after Combat
When the defending hex is emptied by combat, the attacking side may advance into it any land units which attacked. A unit which advances into a hex that costs more MPs than its movement allowance is turned face-down after advancing. HQs may not advance into a hex which is experiencing Mud or Severe Winter. A face-down HQ may not advance if the hex costs more MPs than the HQ possesses.
10.7.6.11 Final Effects
After each combat (and advance), all participating attacking units are turned face-down unless the result was asterisked. Defending units are turned face-down if they retreated or a result calls for more losses to be taken by the defender (even if 1/2 a hex is lost to forgo a unit loss).
10.7.7 Reorganisation Phase
HQs can reorganise land units. Aircraft, naval, artillery, tank, and HQ units may not be reorganised until the end of the turn (see 11.9). Any number of HQs may reorganise units in a Land or Combined Action. Units may not be reorganised in a Naval Action.
An HQ reorganises units stacked with or adjacent to it by turning them face-up. It may reorganise as many units as its reorganisation value. Units separated from the HQ by an alpine or all-sea hexside (other than straits hexside) cannot be reorganised. Supply and enemy ZOCs have no effect on reorganisation.
After reorganising, the HQ is turned face-down. Face-down HQs have '0' reorganisation capacity.
10.8 End of Action Phase
Roll a die. The Action Segment ends if the die roll (reduced by 2 in a Pass Action) is less than or equal to the number in the Impulse Track box occupied by the Impulse Marker.
If the modified die roll is higher than the number, the Impulse Marker is advanced 1 box on the Impulse Track if the impulse was completed by the first side. It is advanced 2 or more boxes (depending on weather, see 8.2.8) if the impulse was completed by the second side. The other side then conducts an impulse.
If the Impulse Marker is already in the last box, it remains there and a new impulse commences.
If the Action Segment ends and one side had both the first and last impulses in the Segment, then the Initiative Marker is shifted one column in the other side's favour.
11. End of Turn Segment
After the Action Segment ends, the following Phases are conducted.
11.3 Convoy Attack Phase
A convoy attack may take place in each sea area through which a side is transporting resources (see 9.2) if the sea-box contains the other side's raiders or SUBs. Raiders are face-up HS or LS units.
Convoy attacks are never mandatory. However, the attacker must declare all sea areas being attacked, and the type of attack(s), before resolving any. There may only be one SUB attack and one Raider attack against each CONV in each sea area.
In each sea area, SUB attacks are resolved first, raider attacks second.
11.3.1 SUB Attacks
In each sea area, cross-index the number of attacking SUBs with the number of defending escorts on the Convoy Attack Table. Escorts are face-up HS or LS units.
Where escorts or SUBs occupy more than one section of the sea-box, the owning player decides which section will be used. The escorting player decides first. The number of escorts used for the calculation is all escorts in the selected or a higher section. The number of SUBs is all SUBs in the selected or a higher section.
Roll a die and cross-index it with the appropriate column. Reduce the roll by the search number of the escorts' chosen section and add the SUBs' search number.
If it is prior to May/June 1917 shift one column to the left. In addition, if unrestricted warfare has been declared shift another column to the left. If the column cannot go any further left, then add 1 to the die roll for each column that could not be shifted. This represents the inability of the TE to realise or come up with the convoy system until later in the war.
EXAMPLE: 1 SUB occupies the 0 section, 2 SUBs occupy the 1 section and 1 SUB occupies the 2 section. 2 escorts occupy the 2 section and 1 occupies the 0 section. The escorting player picks the '2' section and the attacking player picks the '1' section. Thus, there are 3 SUBs (excluding the SUB in the '0' section) and 2 escorts included in the attack. 3 SUBs vs 2 escorts is resolved on the second column from the left. A die is rolled - a 4 modified to a 3 ('+1' for the SUBs' 1 section and '-2' for the escorts' '2' section). This is a result of '-3X'. The escorting player loses 3 resources. The X result means that 1 SUB is destroyed.
If it was prior to May/June 1917 and unrestricted warfare was in effect the result would have been 'X5-'. This is due to a column shift left and 1 added to the die as there could not have been a second shift to the left.
11.3.2 Raider Attacks
Raider attacks are conducted exactly as for SUB attacks except that Raiders do not suffer adverse results nor receive any column shifts.
If both sides are conducting a Convoy attack in the same sea area, the same units can be both escorts and raiders.
EXAMPLE: See WiF if needed.
11.3.3 Combat Results
The numerical result is the number of resources lost. Any letter to the left of the number is the result affecting the CONV. Any letter to the right of the number is the result affecting a SUB. Raiders and escorts never suffer adverse results.
- X - A CONV or SUB is destroyed.
- D - A CONV or SUB is damaged and placed into the Repair Pool.
- A - A SUB is aborted. It must move to the nearest port (in number of sea areas that the unit could traverse - see 10.5.2.2) at which it may rebase (see 11.7.1). Where several ports are equally near, the owner chooses.
If there is no escort, 'X' and 'D' results on SUBs convert to 'A' results.
The number of resources passing through a convoy pipeline is specified by the controlling player in the Resource Transportation Segment (see 9.2). It may have been reduced during the turn by enemy occupation of resource hexes or by preventing a path of hexes free of enemy ZOCs being traced from the resource hex to a friendly controlled port.
No more resources than that depleted total may be lost due to convoy attack, even though the results on the Convoy Attack Table may exceed this. Attacks can be made against pipelines which (by now) have no resources, to damage or destroy the CONVs.
If resources are going to different destinations, the pipeline owner specifies which are lost.
If a CONV marker suffers a result from both SUB and raider attacks only the worst result applies. Both numerical results would still count.
If a side has 2 CONVs in one sea area (because one was neutral at the start of the turn) then the attacker must specify which SUBs and Raiders are attacking which CONVs before any attack is resolved. Each result is only applied against the target convoy pipeline.
After all attacks, remaining resources arrive at their destination, even if some sea areas in the convoy pipeline no longer contain CONVs.
11.4 Blockade Phase
The blockade in WWI was increasingly effective in squeezing German trade and ultimately morale (food riots). This is simulated with the Blockade Table. TE surface factors (from face-up ships) in ports which border the North Sea or in the North Sea itself, less face-up German surface factors (Germans in the North Sea count 1.5 per factor) yield a number which determines the column of the Blockade Table to roll on. The result will either give or take away resources and/or morale to Germany. Note the importance of The Netherlands (see 9.5).
11.5 Neutral Major Powers Entry Phase
Italy, the OE, the CW, and the US can begin a scenario as a neutral Major Power. Their entry is governed by certain actions (see Neutral Entry Chart). When their entry number reaches 0 they enter the war in the next impulse for their side. See optional Italian Entry (23.0).
11.6 Production Phase
Production allows each Major Power to repair its units in the Repair Pool and to produce units from its force pool or the Construction Pool, based on the factories and resources controlled by it.
11.6.2.1 Factories and Resources
Resources and factories are shown on the map (each country's total is recorded on the Factory and Resources Chart). There is no difference between resources and oil resources.
Each Major Power has a production limit equal to the lower of its production points and its resources. This limit is termed build points.
EXAMPLE: If Germany has 18 production points and 16 resources, then it has 16 build points.
Each Major Power may spend any or all of its build points (BPs) in each game turn. BPs cannot be saved from turn to turn if any unit was built or if a resource was lent from that country. Otherwise up to 3 BPs may be saved for minor countries and major powers.
Minor countries in Fatal Alliances do spend build points. Their resources may be used for their own units. Each minor country is assumed to have an internal factory ability of 1 while their capital is still friendly owned and resources may be shipped to it. If it is isolated but still friendly it is assumed to still produce 1/2 a BP per turn.
Each Major Power has production points equal to the number of its eligible factories times its production multiple (rounding fractions up). An eligible factory is any factory in a Major Power's home country, controlled by it at the start of both the Resource Transportation Segment and the Production Phase. Note: Dusseldorf and Moscow contain 2 factories in their hexes and the US has 9 factories in its land section.
Each Major Power can use the resources it controlled at the start of both the Resource Transportation Segment and the Production Phase, which have been transported to a factory this turn.
Strategic bombardment may have reduced BPs and resources (see 10.6.1). Convoy attacks may have prevented resources being transported to a factory (see 11.3).
11.6.2.2 Production Multiples
Germany, Austria-Hungary, France, the CW and, when not neutral, the US and Italy have a production multiple of 2. Russia and the Ottoman Empire have a production multiple of 1.5.
When neutral: the US has a production multiple of 0, Italy has a multiple of 1/3 and the Ottoman Empire has a multiple of 1.
11.6.2.3 Production Procedure
Each Major Power may now repair and produce units up to its BPs (see Unit Cost Chart).
A Major Power that has 3 or less BPs may always produce one free INF, MIL, or CAV so long as it does not save or has not saved any BPs and:
(a) that is the only unit it produces or (b) it did not lend any resources this game turn.
EXAMPLE: See WiF if needed.
Naval units count as being built regardless of whether they come from the force pools, the Repair Pool, or the Construction Pool.
The selection of land and aircraft units is made randomly within each type of unit. Players may not examine the units selected. Note: FTRs always start as a '1' when produced.
The selection of an HS from its force pool must be made from its primary force pool (see 1.4.1) and must be made in order of arrival in the Construction Pool (see 1.1).
The selection of an HS from the Construction Pool must be made in order of arrival on the map (see 1.1).
Once a primary force pool and the Construction Pool contain no units of a type, then they may be built from the secondary force pool. From now on, selection of that type of unit from the force pool and the Construction Pool is made randomly.
The selection of an LS, SUB, or TRS unit from its force pool or the Construction Pool is made randomly within each type of unit. Players should not examine face-down units selected randomly.
Players may choose any naval unit from the Repair Pool.
If units of a type are to be built and none are in the force pool (or no 1's in the case of FTRs), a player may remove any of those units from the map, Repair Pool, Production Spiral, and Construction Pool and then build them.
Players may make use of the Build Charts provided in the game to record units built each turn (and may photocopy them for that purpose).
11.6.2.4 Placing Units on the Production Spiral
When a new unit is produced, its symbol is located on the spiral arm commencing in the current game turn and the unit placed there.
EXAMPLE: An INF unit produced in May/June would arrive in September/October, as the INF takes two turns to produce.
SUBs, TRSs, and units built from the Construction and Repair Pools are placed face-up on the Spiral. All others are placed face-down.
11.6.2.5 Gearing Limits
In each game turn, a Major Power may build (and repair) no more units of a particular class than it built (and repaired) in the previous turn plus 1. This is a gearing limit. There is no gearing for artillery rounds.
The classes of units are:
(a) Aircraft units (OBS, ZEPP, BOMB, FTR) (b) Ships (HS, LS, TRS, as well as the repair of CONV markers) (c) Submarine units (SUB) (d) Infantry units (INF, MTN, MIL, TG, CAV, STOSS) (e) Artillery rounds (f) Special units (HQ, ART, TANK)
There is a limit to the number of infantry type units each country may build each turn:
- Germany 5; Austria-Hungary 3; Ottoman Empire 2*; Russia 4; France 3; CW 4; US 4; Italy 2.
- This goes to 2 while there are TE units in the Turkish part of the OE. (The CW limit goes to 2 at the start of 1916.)
Certain scenarios may specify initial gearing limits for the first turn of some scenarios (see Scenarios).
EXAMPLE: Germany produced 2 LSs in Jan/Feb as well as repairing 1 HS. In Mar/Apr it may produce and repair 0, 1, 2, 3 or 4 ships.
11.7 Return to Base Phase
All units in a sea-box (except SUBs) must now return to a base. The side with the initiative returns to base first and does so sea area by sea area.
Units must return to base in order, starting with those in the higher numbered sections of the sea-box.
11.7.1 Surface Naval Unit Rebasing
A surface naval unit returns to any port controlled by its nationality or by a nationality with which it may co-operate. If possible, the port must be within its movement allowance less the search number of the sea-box section it occupies.
Naval units unable to return to a port at which they can stack within their movement allowance must return to the nearest port (in sea areas) at which they can stack. If none exist, or movement restrictions (see 10.5.2.2) preclude movement, the unit is destroyed.
When returning to base, it is not necessary to move from the sea-box into the surrounding sea area first.
Surface naval units returning to port during the Return to Base Phase are not subject to Surface Naval Interception.
Surface naval units which voluntarily return to base during the Naval Movement Phase (see 10.5.2 (d)) are subject to interception by surface naval units in each sea area they enter while rebasing. If intercepted, they must be placed in the '0' sea-box section of that sea area and a normal interception combat must be fought immediately (as the rebasing ships are continuing their movement - see 10.5.5.2).
Ships must return to base immediately if they lose the only port left in that sea zone which allows them to coal, i.e. base in that sea zone.
11.7.2 SUB Rebasing
If a SUB is exceeding its range at this time (see 10.5.2.3), it must return to the nearest friendly controlled port. SUBs otherwise do not have to return to base.
11.8 Morale Check Phase
Any Major Powers which have a morale of 0 will sue for peace (see 14.1). Any minor countries which have lost all of their home country cities also surrender.
11.9 Final Reorganisation Phase
As the last action of each turn, all face-down units (except CONVs) are turned face-up.
SUBs in a sea area are moved into any section of that sea-box (subject to range limitations - see 10.5.2.3).
The Impulse Marker is returned to the second box on the Impulse Track and the Game Turn Marker is advanced a turn (altering the year marker if necessary).
Then the next game turn commences. This continues until the game ends and victory is determined.
12. Surprise
On the impulse in which war is declared on a neutral minor country, or a neutral Major Power:
(a) aircraft units of the surprised minor country or Major Power may fly, escort, or intercept any mission (and if forced to re-base are destroyed). Units of other Major Powers may not fly FTRs to support surprised minor countries and Major Powers. (b) land unit(s) of the Major Power(s) which declared war are not halved for attacks across rivers or canals against the surprised units. They still suffer the effects of invasions and attacks across straits hexsides. (c) no ZOCs from units which are at war with the attacking power extend into the country attacked except from its own units. (d) all attacks against naval units of a surprised minor country or Major Power obtain the benefits of combat surprise. (e) its HQs may not provide HQ support and its units may not receive HQ support.
14. Conquest
Minor countries are conquered if all cities in its country are enemy controlled during the Conquest Phase.
Major Powers can be conquered (made ready to accept an armistice) when they reach their morale threshold during the morale check phase. At the end of each turn, a check is made against each country's morale threshold. If the current morale is equal to or less than zero, that country has sued for peace and is considered subject to the effects of conquest if an enemy Major Power offers an armistice. Any or all Major Powers on a side may offer an armistice if that country has been involved in combat with the conquered Major Power.
An enemy Major Power should not offer an armistice if it wishes to gain further territory inside that Major Power. Once offered and accepted, an armistice is considered final for the rest of the game.
14.1 Effects of Conquest
When a Major Power is conquered all of its units in the force pools are removed from the game. Conquered minor countries keep one onboard unit for use by a friendly Major Power (the unit and Major Power is that side's choice). The minor country unit is treated as a unit of that Major Power except that once it is eliminated it can never be rebuilt.
One Major Power of a side must be designated as the conquering Major Power. That Major Power must have units inside the conquered Major Power's country. Conquered Major Powers must be garrisoned.
Just before a Major Power's force pools are removed a count of its 'infantry type' units must be made. The conquering Major Power must assign one-half (fractions rounded up) of its own infantry type units (closest to the conquered country) to garrison duty. The units do not have to be able to move to their garrison spot but are simply placed there. Afterwards, units have to be able to move to the spot.
These garrison units may move within territory of the conquered Major Power but may only leave if they are to be replaced by another friendly unit of that same Major Power or a Major Power of the same side with which it may co-operate.
If the garrison is not maintained, no resources are shipped to the conquering country from territory of the conquered Major Power. In addition, the conquering Major Power must take a morale hit per turn depending on the number of units the garrison falls short. If the garrison were to fall below the requirement by 2 units then this is considered to be as if two units were lost in combat that turn. It would require a further fall below the garrison of more than 2 units to add any additional morale penalties to the garrisoning power that turn. The penalty for having an insufficient garrison applies each turn it is below requirements.
After a minor country is conquered, control of hexes changes to the conquering power. After a Major Power is conquered, territory not currently friendly to either side is considered friendly to neither. Former Allies of the conquered Major Power may take control of hexes of its surrendered ally by moving through and capturing territory. Similarly the conquering Major Power may do the same. However the conquering power may never ship out resources above and beyond those achieved through the armistice, see below.
The Major Power which is conquered must cede all resources currently under control of the conquering power to that power. The resources are considered under control of that conquering power for the rest of the game and may be used for all purposes. In addition, any enemy territory controlled by the conquered Major Power, is returned.
15. Control
At the start of each game, a Major Power controls all hexes within its borders and territory in minor countries it controls.
Control changes when a land unit which has a ZOC enters a hex not controlled by that side, or when a Major Power or minor country is conquered (see 14.1).
Control does not change when a unit occupies a hex already controlled by that side.
When a minor country joins a side, control of all hexes and land sections in it passes to its controlling Major Power. When a Major Power conquers a minor country it gains control of all enemy controlled hexes in that country.
In all cases, control of hexes occupied by, or in the ZOC (if not occupied by a friendly land unit) of enemy land units, is not transferred to the conquering Major Power but to that enemy nationality instead.
EXAMPLE: Italy has just been conquered by Austria-Hungary and Germany. Italy has 5 land units left. The garrison requirement is three troops from Austria-Hungary and/or Germany. A French unit occupies Rome. France now controls Rome and all hexes adjacent to it. Austria-Hungary maintains control of hexes it has already taken from Italy (including 1 resource). All other previously Italian controlled hexes become neutral. Austria-Hungary or Germany may take additional hexes and resources not currently under control but may not ship more resources out of the country.
Naval and aircraft units, whether face-up or face-down, in territory which passes to enemy control, must re-base (see 10.7.4.8).
A Major Power may not transfer control of any territory to another Major Power of the same side.
17. Neutral Major Powers
A Major Power is neutral if it is currently not at war.
17.1 Restrictions
Neutral Major Power naval units (except those of the CW) may not move while it is neutral. Neutral Major Powers may not co-operate with any other nationality (see 19.1).
A neutral Major Power must retain at least one land unit in its capital.
In the impulse that war is declared on a neutral Major Power, the effects of surprise apply (see 12.0).
18. Minor Countries
Minor countries are those nations which are not Germany, Italy, Austria-Hungary, the Ottoman Empire, the CW, France, USA, and Russia. Most minor countries are neutral at the start. Control of those which are not, is specified in the scenario.
Minor country units may not co-operate with each other's units. Minor countries cannot enter or fly over any hex in a neutral minor country.
Minor countries cease to be neutral when they join a side. This occurs (a) when a Major Power declares war on them, they immediately join the other side.
When a minor country joins the TE side, it is controlled by the CW. When a minor country joins the CP side, it is controlled by Germany. Serbia and Rumania are controlled by Russia (and by the CW if Russia has surrendered).
Units may not enter or fly over any hex in a neutral minor country.
18.1 Minor Country Set Up
When a minor country joins a side its forces are set up immediately. Consult the scenario and choose the number and type of units from the appropriate force pools. They are set up anywhere within the country's borders, subject to stacking limits, with one unit set up in the capital.
Each minor country with an army has its own force pools.
Some minor countries have not been included in the game as there is no conceivable reason for them to be attacked. Having stated that, some players may want a 'what if'. Just refer to the WiF orders of battle and use those units to portray that minor country.
18.2 Use of Minor Country Units
Minor country units can move and fight only in their own country or those countries bordering it.
Montenegro and Serbia are considered one country for all purposes. All cities in both these countries must be taken for it to surrender.
19. Co-operation
19.1 Who Can Co-operate
Units of a Major Power may always co-operate with each other.
Units of a minor country may always co-operate with each other.
When not neutral:
(a) US and CW units may co-operate. (b) US and French units may co-operate. (c) CW and Italian units may co-operate. (d) US and Italian units may co-operate. (e) German and Austro-Hungarian units may co-operate from 1916 onwards, however Austro-Hungarian units may never enter Germany.
Minor country units may only co-operate with units of their controlling Major Power. They may not co-operate with each other's units.
No other units may co-operate.
19.2 Effects of Non Co-operation
Units which may not co-operate cannot:
(a) stack in the same hex, at any time when stacking limits apply; (b) transport each other; (c) take part in the same land combat (including by way of Ground Support missions, Shore Bombardment or HQ Support); (d) fly, escort, or intercept in the same air mission; (e) intercept enemy aircraft units flying missions against each other; (f) intercept enemy aircraft units flying a Strategic Bombardment mission against a hex controlled by each other's nation; (g) draw supply from a source controlled by each other's nation; (h) enter an unco-operative Major Power's home country (exception: CW units may enter France and German units may enter Austria-Hungary); and (i) reorganise each other.
Units which may not co-operate are not otherwise limited. In particular, they can:
(a) both occupy the same sea-box section; (b) take part in the same naval combat; (c) take part in the same convoy pipeline; (d) escort each other's pipelines; (e) lend resources to each other; (f) trace supply through territory controlled or occupied by each other; and (g) enter a minor country controlled by an unco-operative Major Power.
19.3 Effects of Co-operation
A Major Power's HQs can reorganise minor country units it can co-operate with. A minor country's HQ can only ever reorganise its own units. A Major Power HQ may never reorganise another Major Power's units.
Apart from reorganisation and naval movement from port (see 10.5.2.1), units which may co-operate treat themselves as the same nationality for all purposes.
23. Optional Italian Entry
Italy was hedging its bets in the autumn of 1914. It had a treaty with the Central Powers, yet was in negotiations with the Triple Entente. Italy sided with the Allies in large part because they were promised more spoils of victory (a large portion of the west coast of Austria-Hungary). To reflect this bidding nature and the inevitable entry of Italy, use the following:
Each side may ship resource points to Italy via convoy or a land route. For each resource (up to a maximum of 2 for the CPs and 4 for the TE) shipped to Italy that side has a 1/6 chance of advancing Italy towards entry to its side. These resources may be sourced from the CW, France, Germany, or Austria-Hungary and are declared in the Pipeline Placement Phase after having been written down secretly. The CW may send resources even if neutral.
Roll a die in the Neutral Major Power Entry Phase to see if Italian Entry is affected. Italian Entry is still governed by an automatic advance each turn in addition to any events which may sway it. However, the numbers for Italian Entry now start at 7 in the case of the TE, and 8 in the case of the CPs. Events which move Italian entry will only affect either the TE or the CPs.
Italy will enter on the side which it reaches a status of zero first. If tied, carry on until Italy advances toward one side but not the other. If Italy joins the CPs add two to each CP country morale, shift US Entry by 5 towards war. It will be tough but not impossible for the TE to win.
Example: It is the 2nd turn of the game and Italian entry is at 7 for the CPs and 6 for the TE. If the Austrians conquer Serbia, there is a +2 chance of Italian entry in favour of the CPs. The British have pledged 3 resources to Italy while Germany has declared 2 resources; a 2, a 4, and a 1 are rolled respectively for the above occurrences. Italian Entry would therefore advance 2 towards the CPs from 7 to 5 and then to 4 with the automatic adjustment. It would advance towards the TE from 6 to 5 with the automatic adjustment.
24. Lawrence of Arabia (Optional)
Lawrence of Arabia has been the subject of much adoration since his brazen exploits in the desert during World War I. In the context of a corps/army level game his effect is much less practical. His nuisance effect on supply lines can be recreated however.
Starting in 1916, the British may pay 1 BP to set up Lawrence (who takes one turn to build). He may be placed in any desert hex east of Egypt in the Reinforcement Phase. He may only move in desert hexes, with a speed of 3, counting as a British land move. He exerts a ZOC for blocking supply purposes and strategic movement only. In any case he may simply be overrun by the Ottoman player (even from a retreat). If overrun, the Ottoman player rolls a die: a 1-5 displaces Lawrence in any desert hex desired by Lawrence, a 6 destroys Lawrence but he may be rebuilt. Also, if Lawrence retreats through a ZOC he is destroyed on a 6.
25. Optional Morale Rules
Instead of an automatic morale boost per the Morale Limits Table (11.8), use the optional boost shown at the side of the table. Roll a die and keep the result secret. This will add an unknown element to a country's actual morale. Obviously it will require some trust. Subtract one from your roll if your country made less than two attacks (zero or one) for that stop point period.
26. Scenarios
26.0 Historical Campaign Game Scenario - 1914-1918+ Introduction
The players set up the units in accordance with the restrictions stated in 1.4. Each nationality sets up in the order shown below.
26.2.1 Background
The 1914 Campaign game commences at the Pipeline Placement Segment of the Jul/Aug 1914 game turn. The Initiative Marker is placed on the Central Powers +1 box on the Initiative Track. The Central Powers player has chosen to take the first impulse. The impulse marker starts in the 4th impulse box. The weather is clear in all weather zones (equivalent to rolling a 6 on the weather chart). Germany and Austria-Hungary are at war with Serbia, Russia, and France. All other countries are neutral. Territorial control is as shown on the map inset and explained in the section 1.2 of the rules.
26.2.2 Production
In the first Production Phase, for gearing purposes (see 11.6.2.5) all major powers may only build one of each type of unit except that Germany, Austria-Hungary, France, and Russia may each build three infantry units.
26.2.3 Set Up - All Countries
- Force Pool Removals: All Observers, Fighters, Bombers, Zeppelins, Tanks, Stosstroopen, and (reserve) INF specified.
- Force Pool Additions: 1915 - Observers and Fighters; 1916 - Zeppelins; 1917 - Bombers, Tanks, Stosstroopen.
All countries start with 'ammo' enabling them to fire each artillery piece once. Germany and France have enough to fire twice.
Ships set up according to dates on the back of the counter. The exception is the French "Courbet", which starts the game.
26.2.4 Neutral Minor Country Entry
The following are the historical entry dates and miscellaneous rules for combatants not listed on the Neutral Major Powers Chart. These countries join either the Central Powers (Bulgaria) or the Allies (Rumania), on their first impulse on the turn listed. All minor countries may enter earlier if attacked, in which case they join the opposite side to that attacking them.
- Bulgaria - (enters with 1 HQ, 3 INF) - Sep/Oct 1915
- Rumania - (enters with 1 HQ, 3 INF) - Sep/Oct 1916
- Greece - Neutral throughout but allows Allied entry into Salonika hexrow and parts north one turn after Bulgaria enters the war. The Central Powers may occupy and attack in this area after the Allies have occupied them. Greece's army mobilizes if attacked or either side enters a hex south of Salonika hexrow. In this case, Greece enters with 2 INF.
- Albania - has no army but allows Allied entry one impulse after Greece is entered.
- Netherlands, Belgium, Norway - each has 1 INF and joins the side which did not attack them.
26.2.5 Set Up by Nationality
1. Italy
- Force Pool Removals: 2 x 3-2's.
- Force Pool Additions: 1916 - 2 x 3-2's.
- a) Place on Production Chart: Sep/Oct - 1 INF; Construction Pool - 1 LS.
- b) Place on map: 3 INF, 1 MTN, 1 CAV, 1 HQ (Cadorna) on Austro-Hungarian border; Turin - 1 INF; Genoa - 1 INF; Rome - 1 INF; any home port - 1 CONV, 1 HS, 1 LS.
- Units may not move while neutral however the CONV may convoy resources to Italian factories.
2. Ottoman Empire
Syria, Palestine, Trans-Jordan, and Iraq is friendly territory (see 1.2).
- Force Pool Removals: 2 x 3-2's, 2 x 2-2's.
- Force Pool Additions: 1916 - 2 x 3-2's; 1917 - 2 x 2-2's.
- a) Place on map: on Russian border 3 INF, 1 HQ (Enver); outside Turkey 2 INF; in Constantinople 1 INF.
3. Serbia
- a) Place on Production Chart: Sep/Oct - 1 INF.
- b) Place on map: inside Serbia 3 INF, 1 HQ; and in Montenegro, place the Montenegrin INF.
4. Austria-Hungary (A/H)
- Force Pool Removals: 2 x 4-2's, 2 x 3-2's.
- Force Pool Additions: 1916 - 2 x 4-2's; 1917 - 2 x 3-2's.
- a) Place on Production Chart: Sep/Oct - 2 INF.
- b) Place on map: on Russian border 4 INF, 1 CAV, 1 HQ (Ermelli); on Serbian border 3 INF, 1 ART (1-1), 1 HQ (Conrad); mountains next to Venice 1 MTN.
- i) flipped over until reorganised by HQ or turn end: 1 INF in every city and 1 CAV in Budapest and Vienna.
- c) any home port: 1 HS, 1 LS.
5. Russia
- Force Pool Removals: 4 x 3-2's, HQ (Brusilov).
- Force Pool Additions: 1916 - 4 x 3-2's, HQ (Brusilov).
- a) Place on Production Chart: Sep/Oct 1914 - 2 INF; Jan/Feb 1915 - Face Up 1 HS (Baltic); May/June 1915 - Face Down 1 HS (Black Sea).
- b) Place on map: no units west of arctic/temperate weather line except those units set up in cities. Reminder: Reinforcements may not be placed in Warsaw or Lodz nor do those cities function as supply sources.
- on German border 2 INF, HQ (Jilinsky)
- on Ottoman border 3 INF, and HQ (Ivanov)
- on A/H border 10 INF, ART (1-1), and HQ (Alekseev)
- 1 CAV each in Baku, Maikop, Astrakan, Rostov, Odessa
- 12 INF in any other city (one per city) not listed above
- 1 INF, HQ (Nicholas) in Moscow
- c) Sevastopol - 1 LS.
6. CW
Kuwait and Egypt are controlled minor countries.
- Force Pool Removals: 2 x 5-2's, 2 x 6-2's (1 Aus, 1 Cdn); 2 x 4-2's (1 Ind), HQ (Allenby).
- Force Pool Additions: 1916 - 2 x 5-2's, 2 x 6-2's (1 Aus, 1 Cdn); 2 x 4-2's (1 Ind), HQ (Allenby). 1916 - Infantry gearing goes to two.
- a) Place on Production Chart: Construction Pool - 1 LS; Nov/Dec 1914 - HS face up; Mar/Apr 1915 - 1 HS and 1 LS face down; May/June 1915 - 1 HS face down, 1 HS face up.
- b) Place on map: Cairo and Kuwait - one TG each; London - one British 8 factor INF, HQ (French).
- i) flipped over until reorganised by HQ or turn end: 1 British INF in London.
- c) any home port: 6 CONV, 2 TRS, 7 HS, 9 LS.
7. France
- Force Pool Removals: 2 x 4-2's, 2 x 3-2's.
- Force Pool Additions: 1916 - 2 x 4-2's; 1917 - 2 x 3-2's.
- a) Place on Production Chart: Construction Pool - 1 HS; Sep/Oct 1914 - 1 LS face up, 2 INF.
- b) Place on map: in North Africa 2 INF; German border 1 CAV, 11 INF, 1 ART (2-1); Italian border 3 INF and HQ (Foch); Dijon 1 CAV and HQ (Nivelle); Paris HQ (Petain).
- i) flipped over until reorganised by HQ or turn end: 1 INF each in Lyon, Le Havre, Paris, Marseilles.
- c) any home port: 1 CONV, 1 TRS, 1 HS (Courbet), 2 LS.
- While Italy is neutral, France must leave a garrison of two units (INF and/or CAV) on the French/Italian border until a French city falls into German hands. For each city which falls, the garrison requirement is reduced by one unit.
8. Germany
- Force Pool Removals: 3 x 4-2's, 3 x 3-2's.
- Force Pool Additions: 1916 - 3 x 4-2's; 1917 - 3 x 3-2's.
- a) Place on Production Chart: Construction Pool - 1 LS; Sep/Oct 1914 - 3 INF; Nov/Dec 1914 - 1 HS face up; Jan/Feb 1915 - 1 LS face down; May/June 1915 - 1 HS face down.
- b) Place on map: on or adjacent to any German - French/Belgian border hexes: 2 CAV, 1 MTN, 14 INF, 2 ART (3-1, 1-1), 3 HQ (Eichhorn, Albrecht, Falkenhayn). Russian/German border 2 INF, 1 HQ (Hindenburg), 1 CAV.
- i) flipped over until reorganised by HQ or turn end: 1 INF each in Munich, Hamburg, Leipzig, Berlin, Karlsruhe, Dusseldorf, Frankfurt, Stuttgart, Bremen, Konigsberg, Breslau, Magdeburg.
- c) in Syracuse, Sicily - 1 LS (see 10.5.1).
- d) any home port - 1 CONV, 4 HS, 5 LS, 1 SUB.
9. USA
- a) Place on Production Chart: Construction Pool - 1 HS, 1 LS.
- b) Place on map: in USA - 3 HS, 2 LS, 1 TRS, 1 FTR.
- Should the US enter earlier or later than historical (Mar/Apr '17) then adjust the HSs received according to the dates on the back of the counters.
1.4.2 Victory Conditions (applies to all scenarios)
The Central Powers win if they outlast the turn bid for their demise or they force three Triple Entente Major Powers (or two and Serbia) to surrender. Otherwise the Triple Entente wins.
Sections Not Present in the Scan
The printed table of contents also lists "27. Developer Notes" and "28. Historical Background". Neither appears in the 22-page scan text, and the Design Credits (section 25 in the printed contents, a credits block, not rules) are omitted as attribution.